
 
     |
| My 88 Formula Interior Redesign (Page 6/87) |

|
Sourmug
|
NOV 14, 04:41 PM
|
|
| quote | Originally posted by Sofa King:
I'm tired
|
|
LOL, isn't sanding fun! 
|
|
|
|
Macs86GT
|
NOV 14, 05:17 PM
|
|
Looking good, but sanding is tiring work good cardio though if done manually 
|
|
|
|
katatak
|
NOV 15, 01:07 AM
|
|
Man I love progress. I can't believe how close it is to the concept. Pretty impressive! I am till having a little trouble understanding what the "plug" is for. I guess I'll have to wait to see how the puzzle comes together. I feel bad. I did not manage to get anything done on my interior today except for removing the driver sde door panel - whoppee! Nice work!
Pat
|
|
|
|
revin
|
NOV 15, 09:39 AM
|
|
| quote | Originally posted by Sofa King:
Hey Revin,
I took your advice and used both a roller and waxpaper with the fiberglass cloth. What a difference! There's little sanding to do. Thanks for the great info! |
|

man I bet that thing is getting heavy!
Just remember to switch hands when sanding or people will think you were hard at work on something else
|
|
|
|
sunofjustice
|
NOV 15, 10:37 AM
|
|
| quote | Originally posted by revin:
man I bet that thing is getting heavy!
Just remember to switch hands when sanding or people will think you were hard at work on something else |
|
LOL , text book funnnnnnny!
|
|
|
|
johnyrottin
|
NOV 15, 01:19 PM
|
|
|
Just curious...could you fiberglass in some metal to reinforce the hinge area?
|
|

|
Sofa King
|
NOV 15, 08:07 PM
|
|
Switch hands? I'm not that talented! I'd probably wind up falling down, rendering myself unconscience in some kind of compromising position... wait... what are we talking about?
To answer your question, you can fiberglass almost anything together. Unless I'm mistaken (smebody please correct me if I'm wrong), you pour a little resin on the area you want the piece to lay and let it dry. This is only temporary as you would then lay additional glass on top of the same piece (whether metal, plastic, wood, etc) helping it become more durable . The resin hardens and keeps anything / everything in place. With that said, depending on which hinge I use I'm going to glass the original hinge bolting areas (after cutting them out) to both pieces. Hopefully this add strength but also look good - hopefully. I'll be sure to get detailed images when I get to that point.
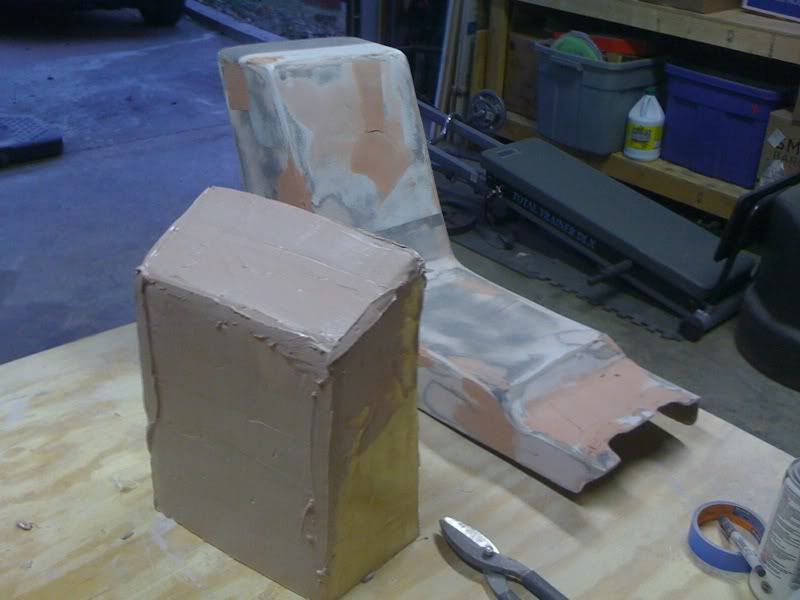
Here are some updates. I had to go back and fill some holes in the console. I want it to be absolutely perfect. I'm still unsure whether I am going to cover with material or paint it either with the Lunitec Paint System or the same color as the interior plus the white lid - either way the lid will be high gloss white. I also reinforced the "glove box" fiberglass piece with more glass.
Going over with more body filler
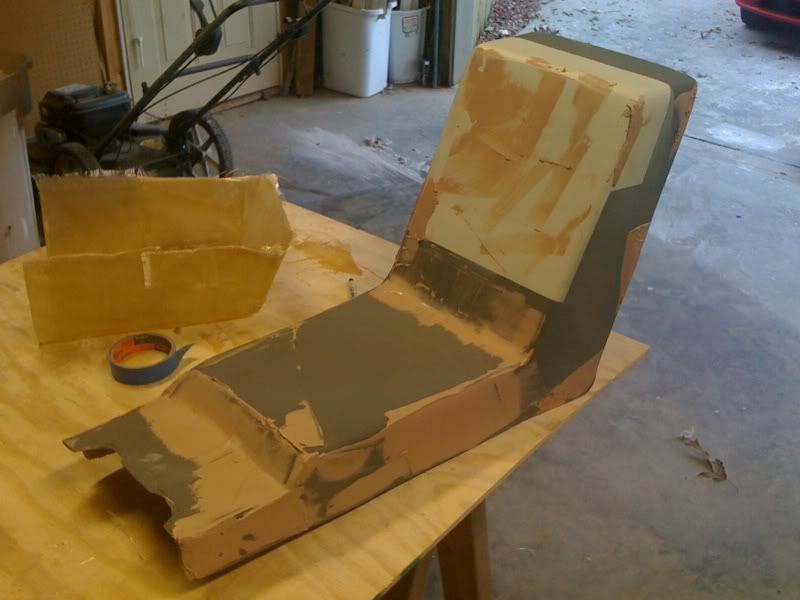
After the resin cured I sanded the top side of the "glovebox" and then covered it with body filler

More filler was added to help with the sanding process. When adding filler, be generous and let it dry for several hours. Again, I used 40 grit paper to take down the high points and the 80 grit to smooth out to a nice a smooth finish. Once I go final, I'll probably use a 150 or 250 grit
I went ahead and gave it a quick primer coat

The frustrating part about filling and sanding is that you always find areas you missed
Another area to redo
| quote | | I am till having a little trouble understanding what the "plug" is for. I guess I'll have to wait to see how the puzzle comes together. |
|
If you're confused... just imagine how i feel. Let me see if I can explain this - believe it or not, this helps me too... Imagine the lid has already been cut but is now attached and functional. If the lid was opened, there would be nothing there but a view of the cars computer and firewall. I could leave it like that but I would like to have a working "glove box" when the lid is opened. So, I am going to use the piece (glove box plug) I just made and temporarily place it back into where it was originally formed - behind the top of the console. Work with me because this gets confusing... Now, if you lift the lid, there would be a solid piece of fiberglass (glove box plug), where the hole used to be, that matches the same contours of the lid. However, this piece is counter sunk so the lid can still open and close. Make sense? With the "glove box" plug now in place I can sketch out how I want the inside of the glovebox to look. There will be lots more cutting and fabricating to do. But I do have an idea that might save me from doing a lot of work. More on that later. I hope this helps... If not, I owe ya a drink.
I also have to measure the depth of the box as to not interfere with the cars computer. I'm debating whether or not in making an access panel that can be removed if I ever needed to get to the computer.
Thats it for now. I'm getting really excited! I'm hoping the cup holder will be here tomorrow. I really want to begin fabricating the armrest.[This message has been edited by Sofa King (edited 11-15-2009).]
|
|
|
|
Sofa King
|
NOV 15, 08:12 PM
|
|
| quote | | man I bet that thing is getting heavy! |
|
yup! Good thing I have strong arms from all that "sanding and polishing"
|
|
|
|
Khw
|
NOV 15, 08:34 PM
|
|
| quote | Originally posted by katatak:
Man I love progress. I can't believe how close it is to the concept. Pretty impressive! I am till having a little trouble understanding what the "plug" is for. I guess I'll have to wait to see how the puzzle comes together. I feel bad. I did not manage to get anything done on my interior today except for removing the driver sde door panel - whoppee! Nice work!
Pat
|
|
My guess. The plug will be put in once the lid area is cut out. Then he will have a solid console to work with with a recess for the lid. The face of the plug will most likely be mostly cut away for the glove box portion to be built into. Really I don't think a solid plug was needed. He could have just done one that covered the sides, top and lower portion of where the lid will be cut, but a solid one was probably easier.
Either way the concept looks awesome and I prefer the concept model he is using for the construction. The one where the lid doesn't completely cover the top. It is actually really nest to see it coming together. 
|
|
|
|
Sofa King
|
NOV 15, 08:58 PM
|
|
| quote | The face of the plug will most likely be mostly cut away for the glove box portion to be built into. Really I don't think a solid plug was needed. He could have just done one that covered the sides, top and lower portion of where the lid will be cut, but a solid one was probably easier.
Either way the concept looks awesome and I prefer the concept model he is using for the construction. The one where the lid doesn't completely cover the top. It is actually really nest to see it coming together. |
|
Hi KHW,
Thanks for the compliments. I'm really happy with the way it's turning out. I've been really patient as I go. Like you, I like the lid that doesn't completely cover the top - there was a two fold reason. One, it just looked better - LOL. And the second, and MOST important, was that if the lid covered the entire top I might not have been able to open the lid without hitting the back of the firewall. So, I redesigned it and moved it forward.
The solid plug idea was, in my opinion, the better way to go. I could have created all the sides and top but that was too much work. Also, getting a plug of that area ensures a near perfect fit and saves the contours when the lid is open - make sense? Once I get the lid cut it should all begin to come together.
Again, thanks for the compliments. Its the compliments that keep me going. And I need cup holders.
|
|
|
|