|
| My Barn Find (Page 6/10) |

|
Toddster
|
MAR 01, 06:45 PM
|
|
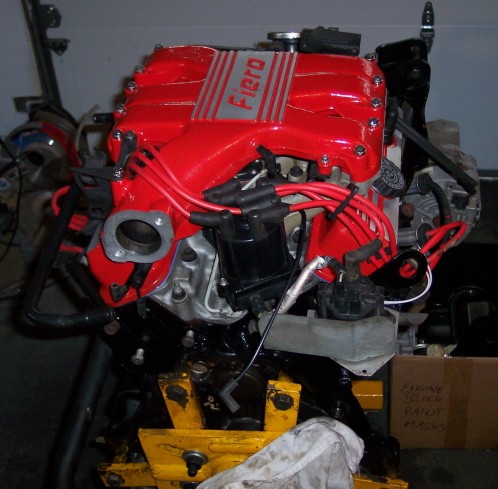
PAINT IT!
Not only does it look better but it will be easier to maintain, reduce rust, and all for the cost of one can of 500 degree engine paint.
No brianer.
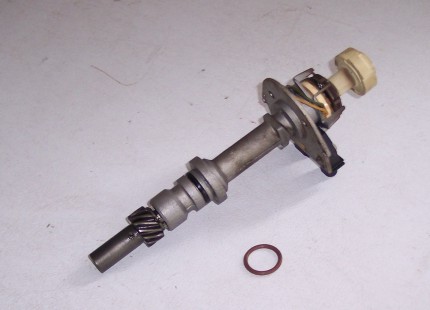
The next step is to put the distributor back in so I can replace the balancer and timing marker. The distributor was obviously replaced not long before I got the car because it had a "remanufacture" sticker on it and it was clean and turned freely. The only thing disappointing was the o-ring which looked "square" and brittle. So I swapped in a new one.
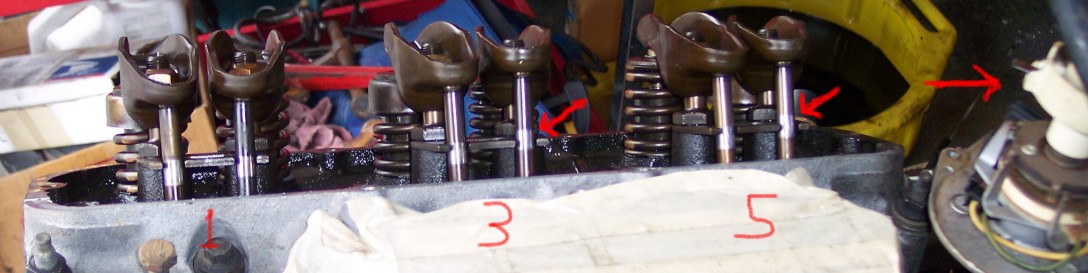
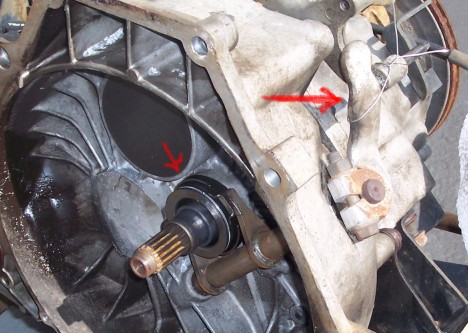
Now comes one of the most common ****-ups in auto mechanics, avoiding putting in the disty in 180* out of synch. We marked our new timing gear with the dots lined-up so we know we should be at TDC. But to make sure we take a look at the valves. Looking at the cylinders 1,3, & 5 we should see that the E and I valves for cyl #1 should be both closed. The intake for cyl #3 should be open, and the exhaust for cyl #5 should be open. As you can see in the picture below, they are. Hence, we are at TDC and not BDC. Now we install the distributor with the rotor pointing roughly towards cyl #1.
Now we can press on the balancer. First, just press it on by hand. Then set the timing mark in place and line up the mark on the balancer with Zero on the mark and use some thread locker to put the new 6mx100 screws in to hold it in place. We do this AFTER the disty goes in to avoid getting out of synch as we WILL end up turning the crank when we torque the center bolt of the crank shaft down to press on the balancer. Now torque down the bolt and press the balancer all the way on. BTW, a light coating of oil on the shaft will make it slide past the new seal easily.
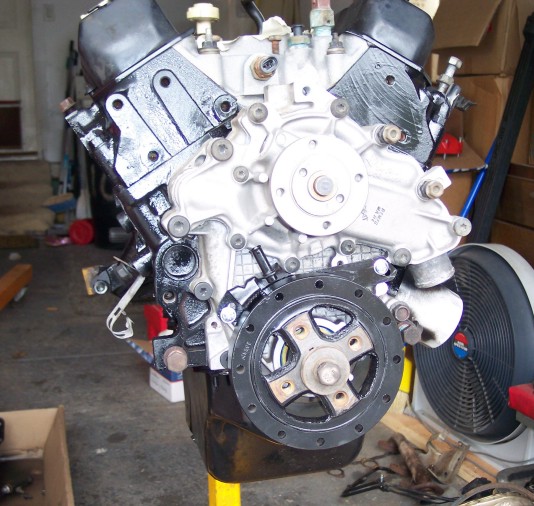
I painted the intake and valve covers and while letting them dry moved on to instaling some of the lower brackets and modifying a few things on the engine. Such as cutting off the ends of the TBI coolant line. This is a totally useless gimic that is in the way more than it does anything useful. I leave the center section so it will bolt back on and hold the MAP sensor in it's stock location.
Tomorrow I can finish the intake and valve covers and install them along with the rest of the engine components.[This message has been edited by Toddster (edited 11-14-2020).]
|
|
|
|
Toddster
|
MAR 02, 09:55 PM
|
|
|
|
|
Alibi
|
MAR 02, 10:40 PM
|
|
Thanks for the write-up with pictures! I'm going to be doing the same thing to a 100k mile block here in about 2 weeks so it really helps to get a preview of what I have to look forward to. Do you think there is any merit to pulling the heads to replace the head gaskets or does the cost of replacing the one-use head bolts not merit the bit of preventative maintenance?
I'd give you a plus but I have to be a member here for 30 days first 
|
|
|
|
Toddster
|
MAR 03, 01:35 PM
|
|
| quote | Originally posted by Alibi:
Thanks for the write-up with pictures! I'm going to be doing the same thing to a 100k mile block here in about 2 weeks so it really helps to get a preview of what I have to look forward to. Do you think there is any merit to pulling the heads to replace the head gaskets or does the cost of replacing the one-use head bolts not merit the bit of preventative maintenance?
I'd give you a plus but I have to be a member here for 30 days first |
|
Pulling the heads depends on what you find when you pull the valve covers. If you have bent push rods, broken springs, keepers, guides, etc. Then yes you need to pull the heads and fix them. But if they are in good shape and you still have good compression then you won't need to.
My philosophy is that if you need to pull the heads then you need to rebuild the entire engine. That is why I am just doing a minor rebuild. The long block is still good on this engine so I will get another 100K miles out of this one easily.
|
|
|
|
Alibi
|
MAR 04, 04:28 PM
|
|
Ok, thanks for the info. Looks like I'll skip the head gaskets then....the donor motor has around 100k and ran well (as I'm told) before it was pulled for a 3.4 swap. Every other gasket will be new as well as wear parts (timing set, WP, alt, etc) so I should be able to pull another 100k out of it.
I doubt I'll get mine as pretty as yours though 
I bought a complete gasket set since it was cheaper than buying the individual gaskets so it comes with head gaskets. I don't really want to toss perfectly good gaskets so I'll probably end up hanging them on a wall with the rest of my random car stuff (extra Buick grills, an Olds hubcap, a license plate, etc).[This message has been edited by Alibi (edited 03-04-2009).]
|
|
|
|
Toddster
|
MAR 11, 10:49 PM
|
|
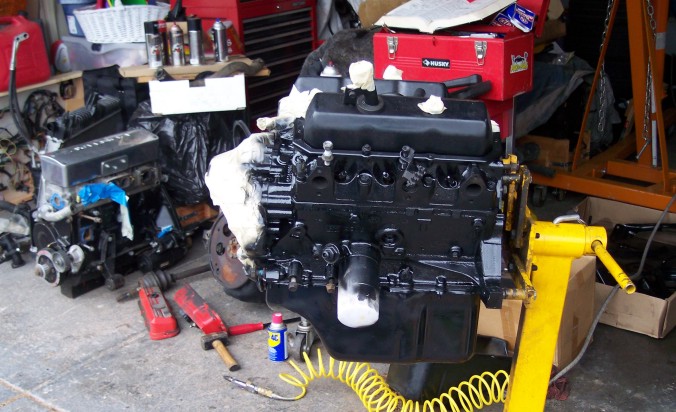
OK. Today we had great weather so I decided it was time to get bizzay!
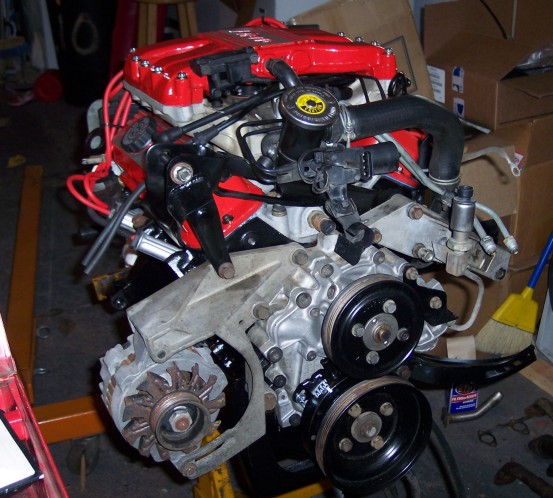
First, I took the engine off the stand and replaced the rear main seal (as long as I had the chance), then bolted on the resurfaced flywheel with red thread locker and 55 Lbs of torque. Next, the new clutch and pressure plate are installed. Again red locker and 25 lb torque. Not shown is the alignment tool. I put some grease on the splines and it is ready to hook-up.
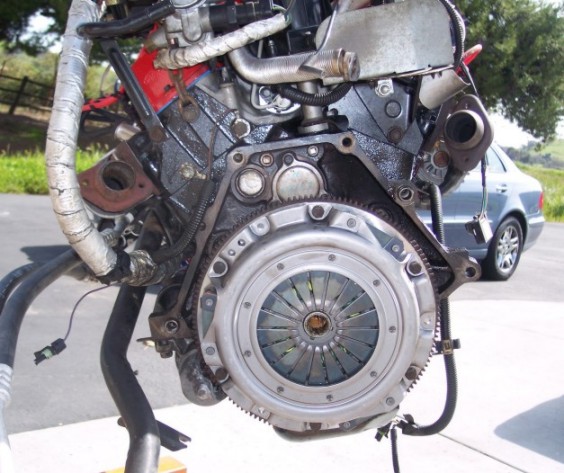
I finished the small details like cleaning and installing the wiring harness, a few heat shields, and the timing belt. Note that unlike the AC belt, which is new, the Alt belt wasn't in stock at the parts store. Screw it! I can replace it later, I wasn't going to let a belt hold-up an install.
Next I had to install the throw-out bearing and hold the clutch arm with some wire during installation. Matching a tranny and an engine requires some heaving and some grunting so strapping the clutch arm back is essential.
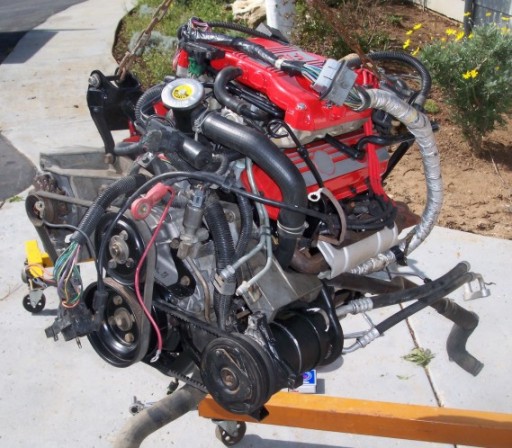
Before installing the engine I took the opportunity to paint the battery tray with some rustoleum, replace a few dried and cracked hoses, and tidy up the engine bay in general.
Then, using my removal procedure in reverse (see procedure here: http://www.fiero.nl/forum/Forum2/HTML/088599.html )
I put it all back in. Just a few hook-ups still to do but otherwise it is pretty close to being done!
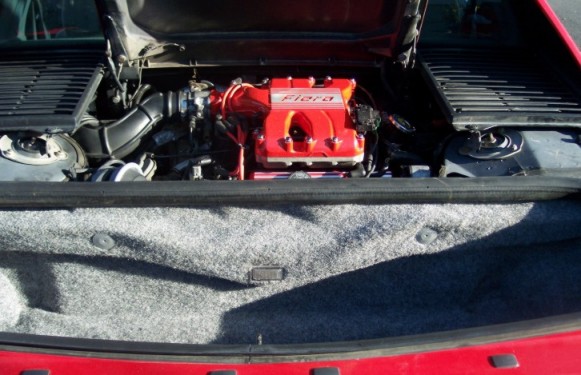
Yep, it's been a FULL day!  [This message has been edited by Toddster (edited 11-14-2020).]
|
|
|
|
mattwa
|
MAR 11, 11:28 PM
|
|
Very nice. Great job, wish i had the space and time to do that.
BTW, whats up with that red steering wheel?
|
|
|
|
Toddster
|
MAR 12, 11:36 AM
|
|
| quote | Originally posted by mattwa:
Very nice. Great job, wish i had the space and time to do that.
BTW, whats up with that red steering wheel? |
|
The guy I bought it from wanted a steering wheel with more grip (like the GT wheel) so he decided to wrap the stock Formula wheel in leather. I'll replace this with a nice clean GT wheel eventually but for now it is low priority to just getting it road worthy again.
I have a few other interiror and "comfort" mods to make. But for the time being I'll be roughing-it with crank windows, no trunk release, and a red steering wheel.
|
|
|
|
Englishrafe
|
MAR 12, 03:44 PM
|
|
I love this kind of grass roots restore/rebuild.
Makes a change from all the high tech high power restos we see in this forum (because totally impossible budget, time and regulations in France !)
The price you paid for the car makes me a bit green, but hey, everyone has to have à good deal sometime!
Regards,
Rafe
PS I paid 1700 euros for my '87 GT 5 speed in about the same condition as your's was: clutch trashed, seats ripped, body OK except cracked door panel, engine and gearbox good, chassis rust free....etc. I was happy with the buy.
|
|
|
|
Toddster
|
MAR 12, 04:42 PM
|
|
| quote | Originally posted by Englishrafe:
I love this kind of grass roots restore/rebuild.
Makes a change from all the high tech high power restos we see in this forum (because totally impossible budget, time and regulations in France !)
The price you paid for the car makes me a bit green, but hey, everyone has to have à good deal sometime!
Regards,
Rafe
PS I paid 1700 euros for my '87 GT 5 speed in about the same condition as your's was: clutch trashed, seats ripped, body OK except cracked door panel, engine and gearbox good, chassis rust free....etc. I was happy with the buy. |
|
I like all kinds of build threads but you are right, we need more threads about getting the most out of your Fiero for the least amount of green possible...especially in times like these!.
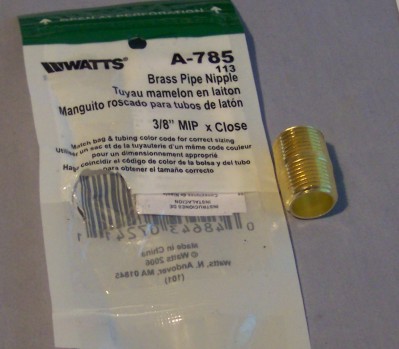
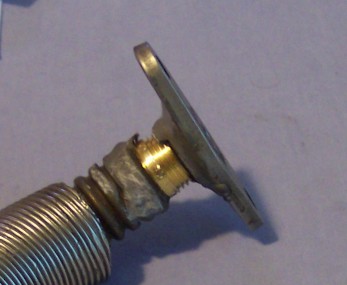
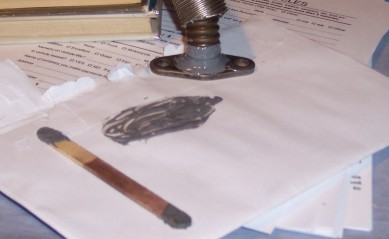
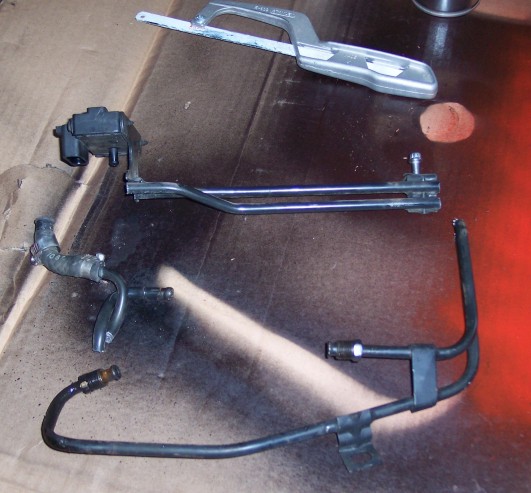
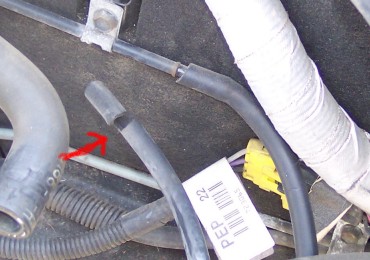
My brilliant little patch job for the EGR tube cost $1.91 at Home Depot.
A 3/8th Brass coupler is a perfect fit and won't contribute to electrolysis or succumb to the heat. It screws right in and is rock solid even without any adhesive. Still, I used a liberal amount of JB weld to seal it from vacuum leaks and the extra length will help relieve stress on the tube so it should last a good long time.[This message has been edited by Toddster (edited 11-14-2020).]
|
|
|
|