|
| Ferrari 288GTO build (Page 57/64) |

|
dobie1
|
MAY 09, 10:17 PM
|
|
|
|
|
zkhennings
|
MAY 10, 03:46 PM
|
|
|
Wow that came out great! Finally warm again!
|
|
|
|
shemdogg
|
MAY 10, 05:45 PM
|
|
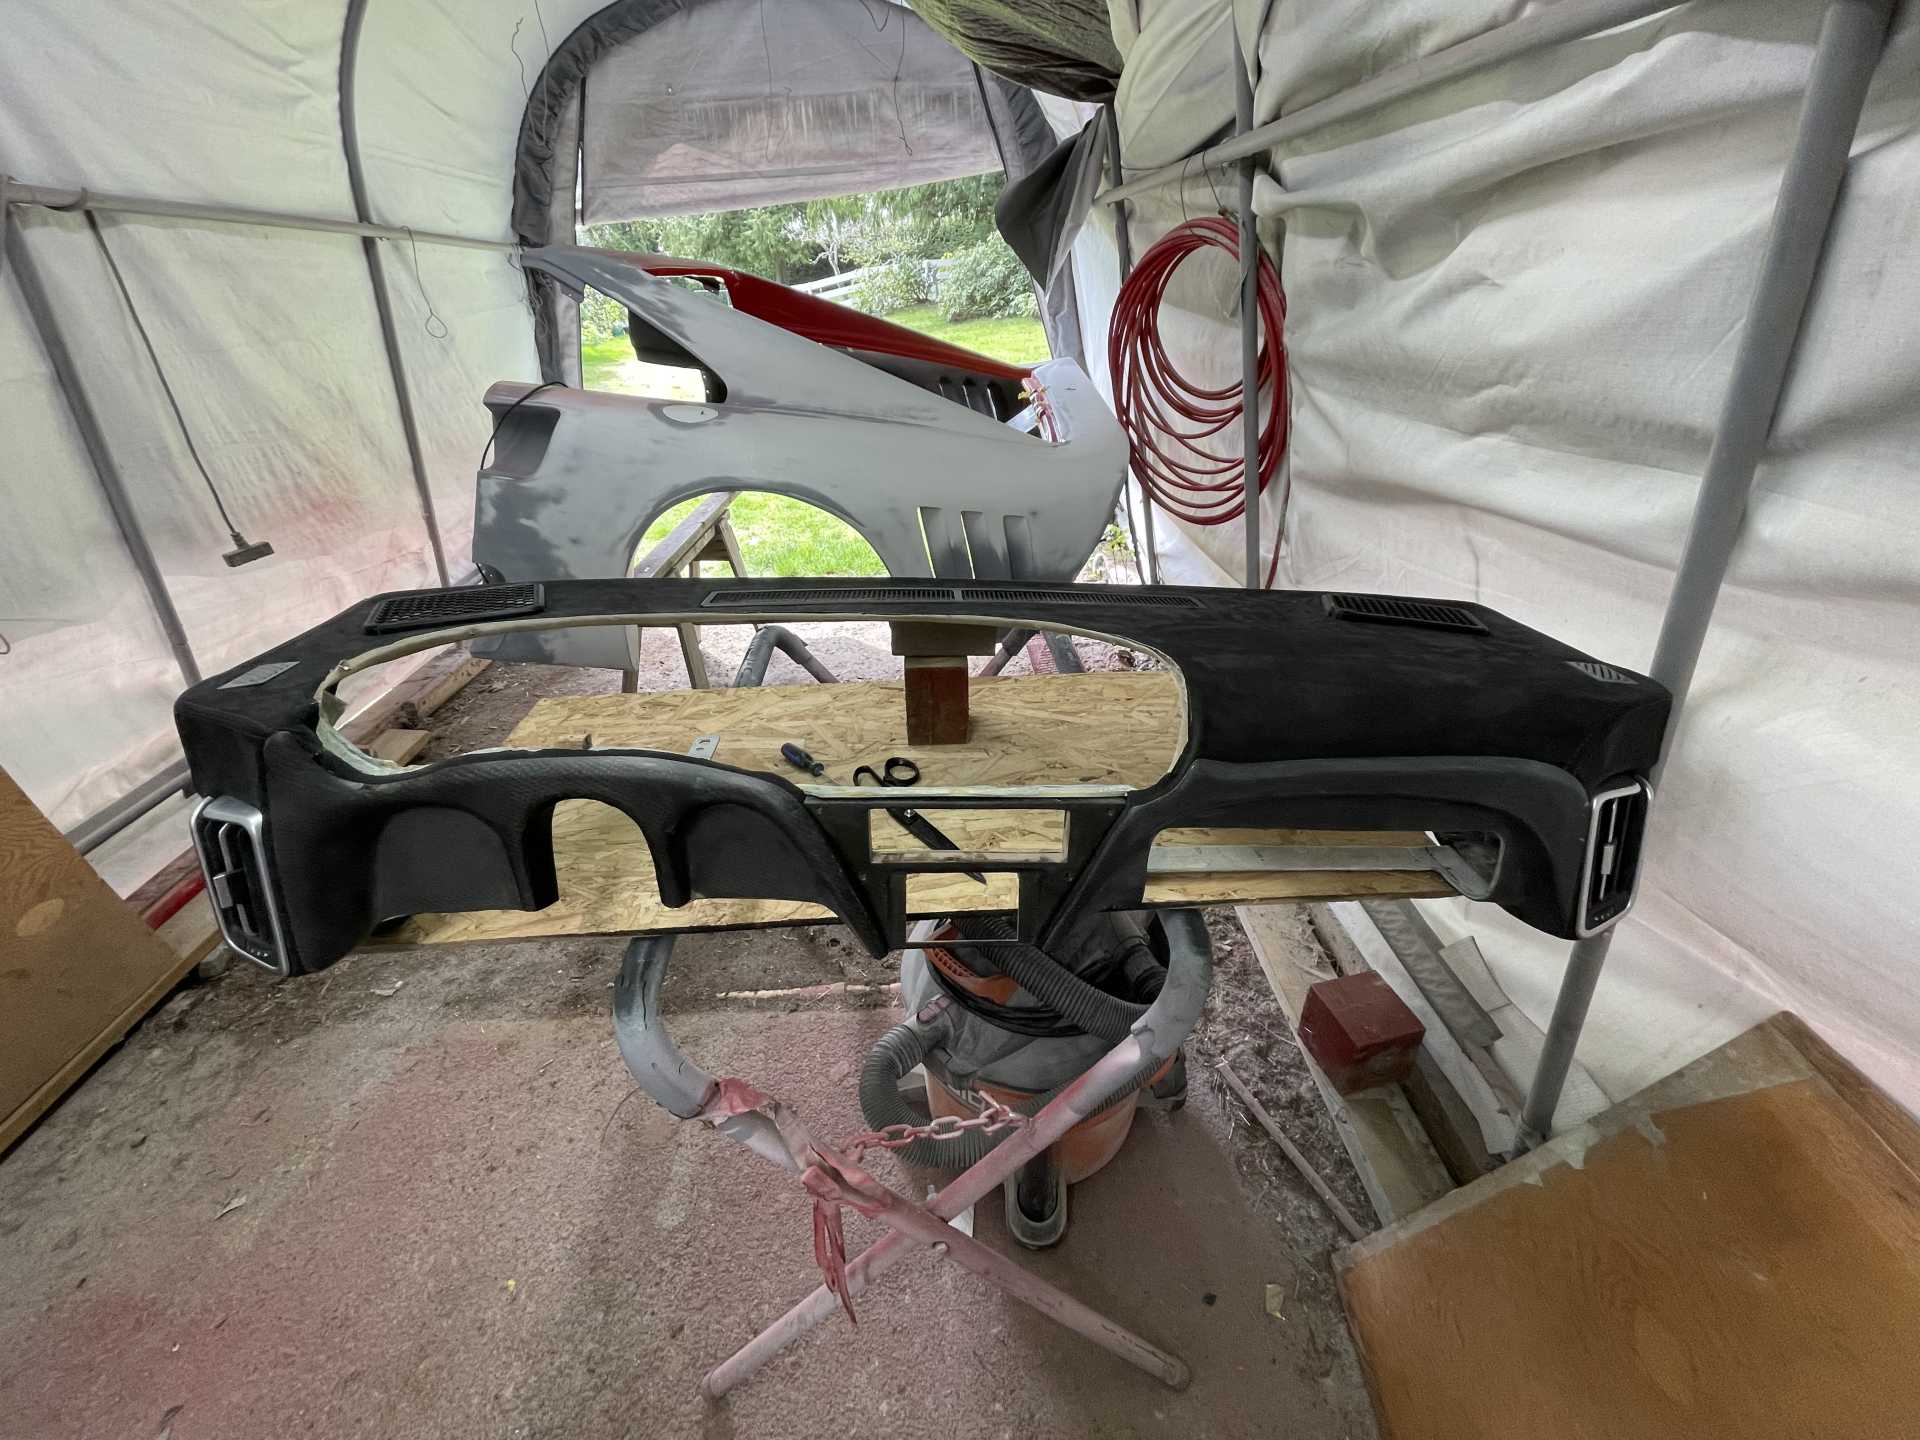
Nice work on the trunk, VEEEEEEEEEEEERRRRRYYY nice work on the dash wow that looks good. Almost there!
shem
|
|
|
|
dobie1
|
MAY 30, 01:05 AM
|
|
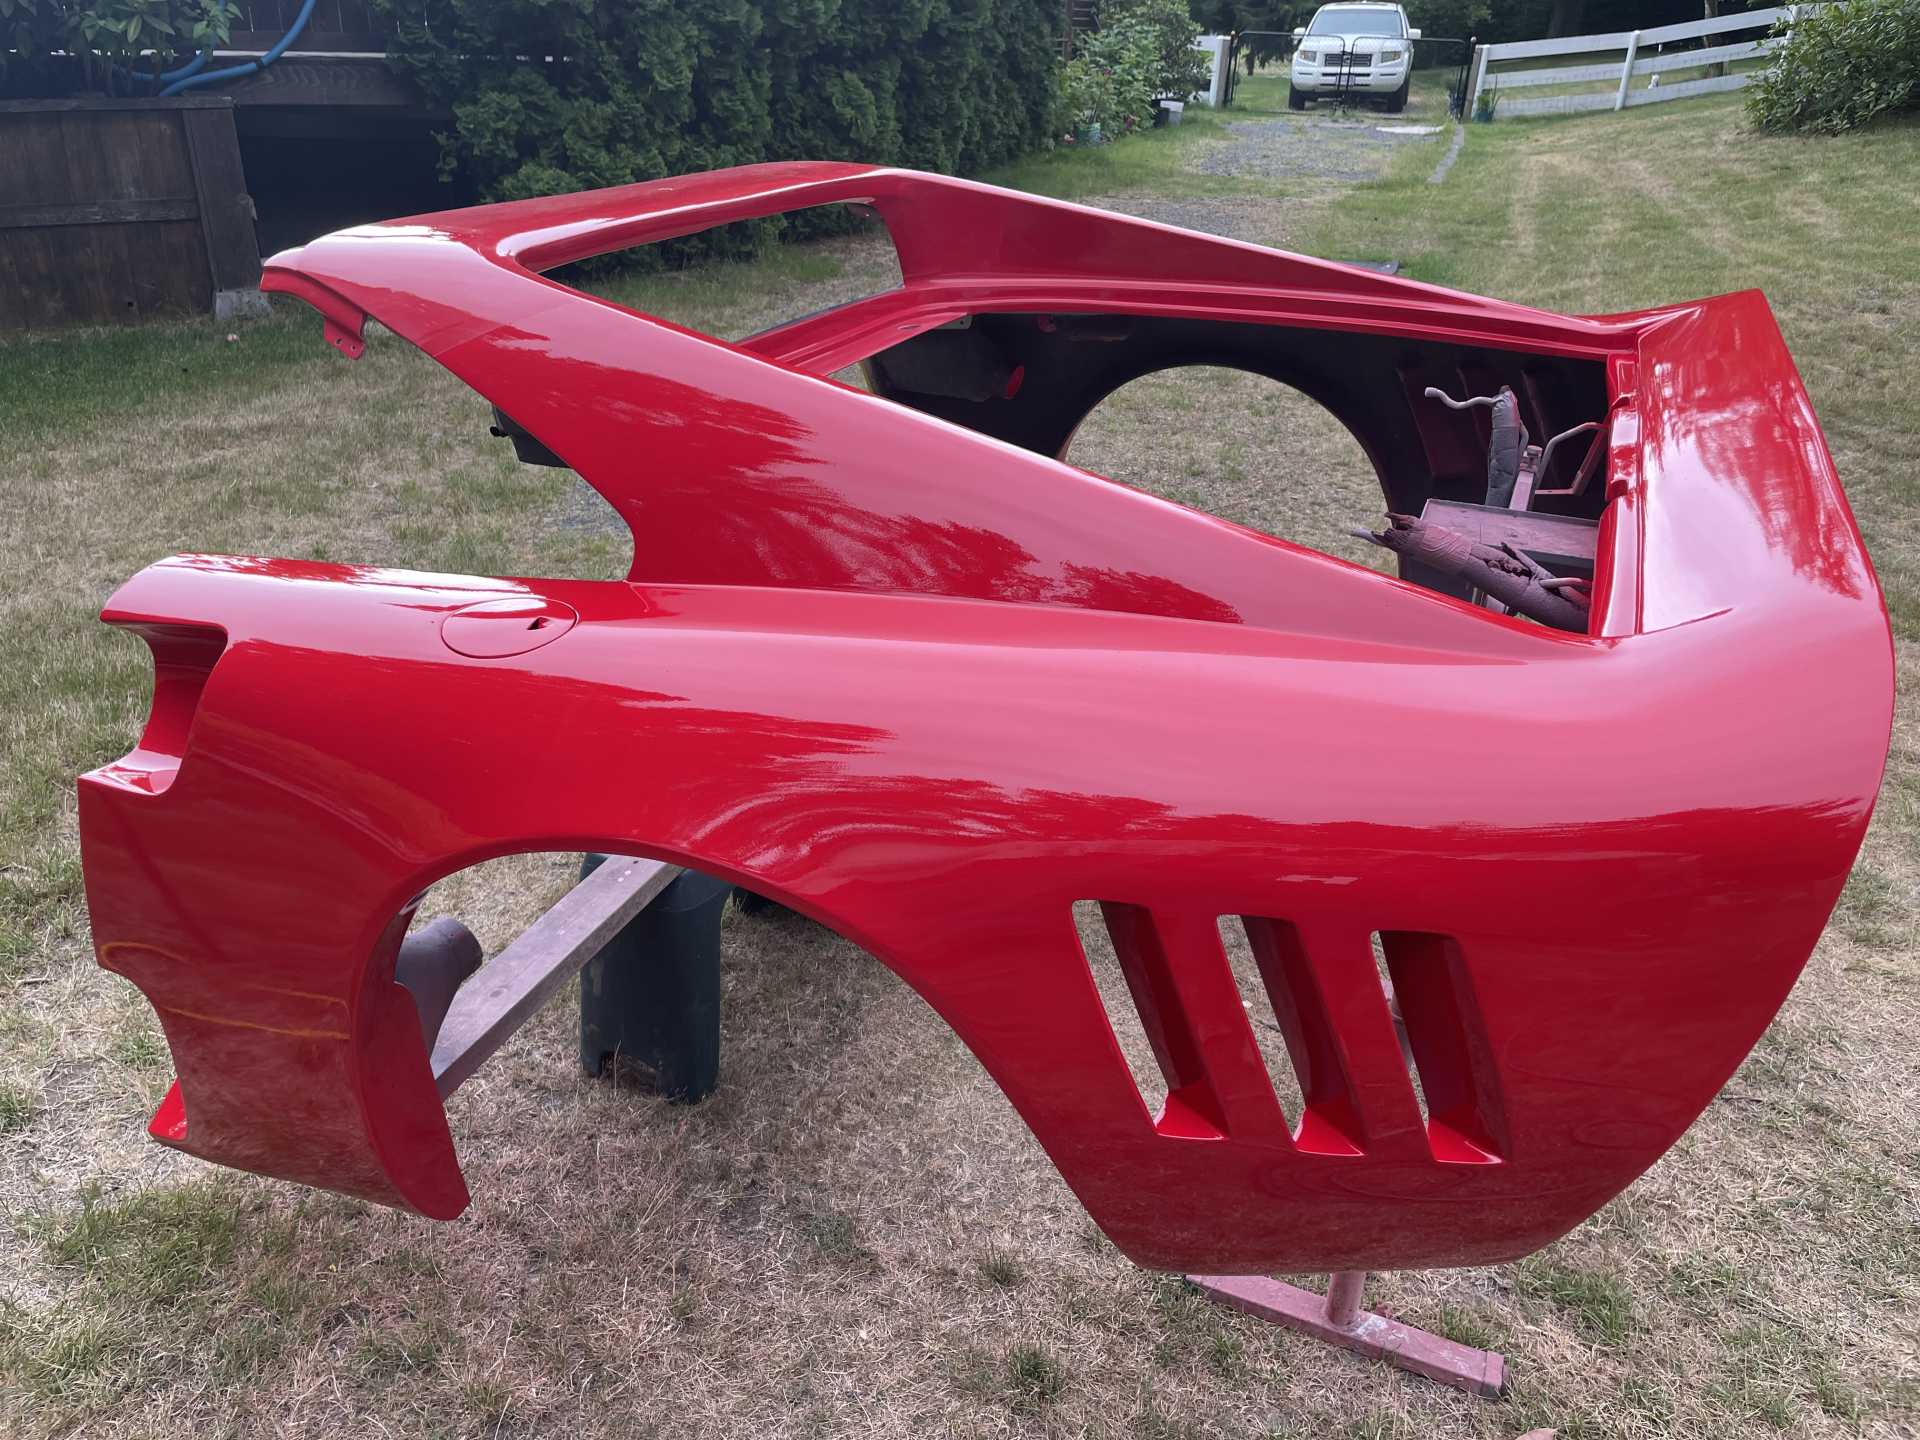
Thanks for the comments guys always appreciated!!
Lots of things happening on the car right now, in the push to get it somewhat finished and driving this summer.
I have been extremely fortunate to have two fellow car building buddies that are helping me to complete modifications that might not have been finished anytime soon….
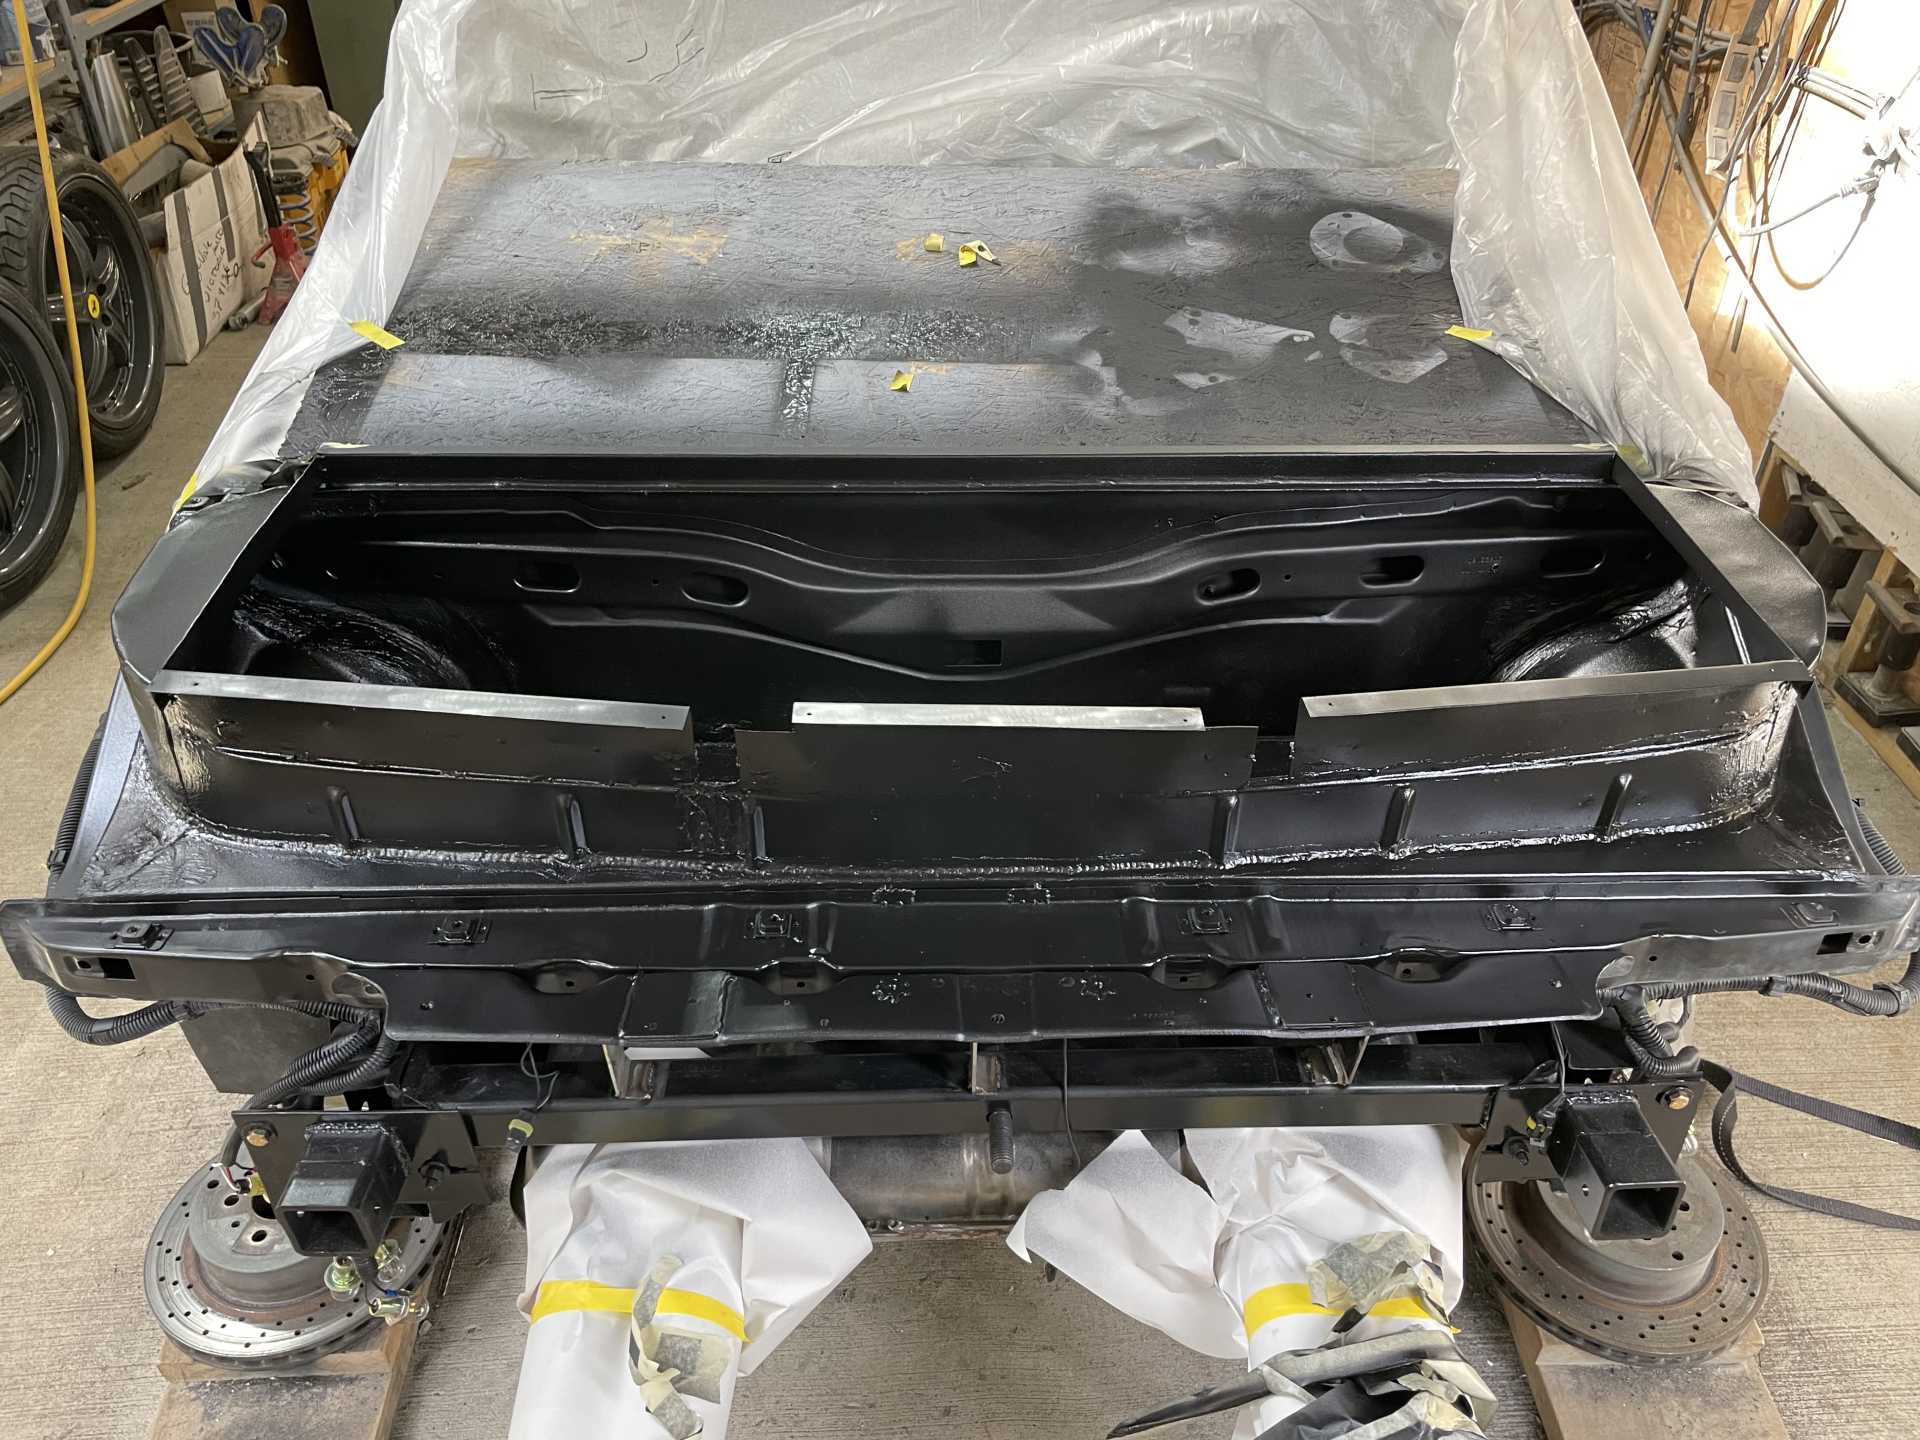
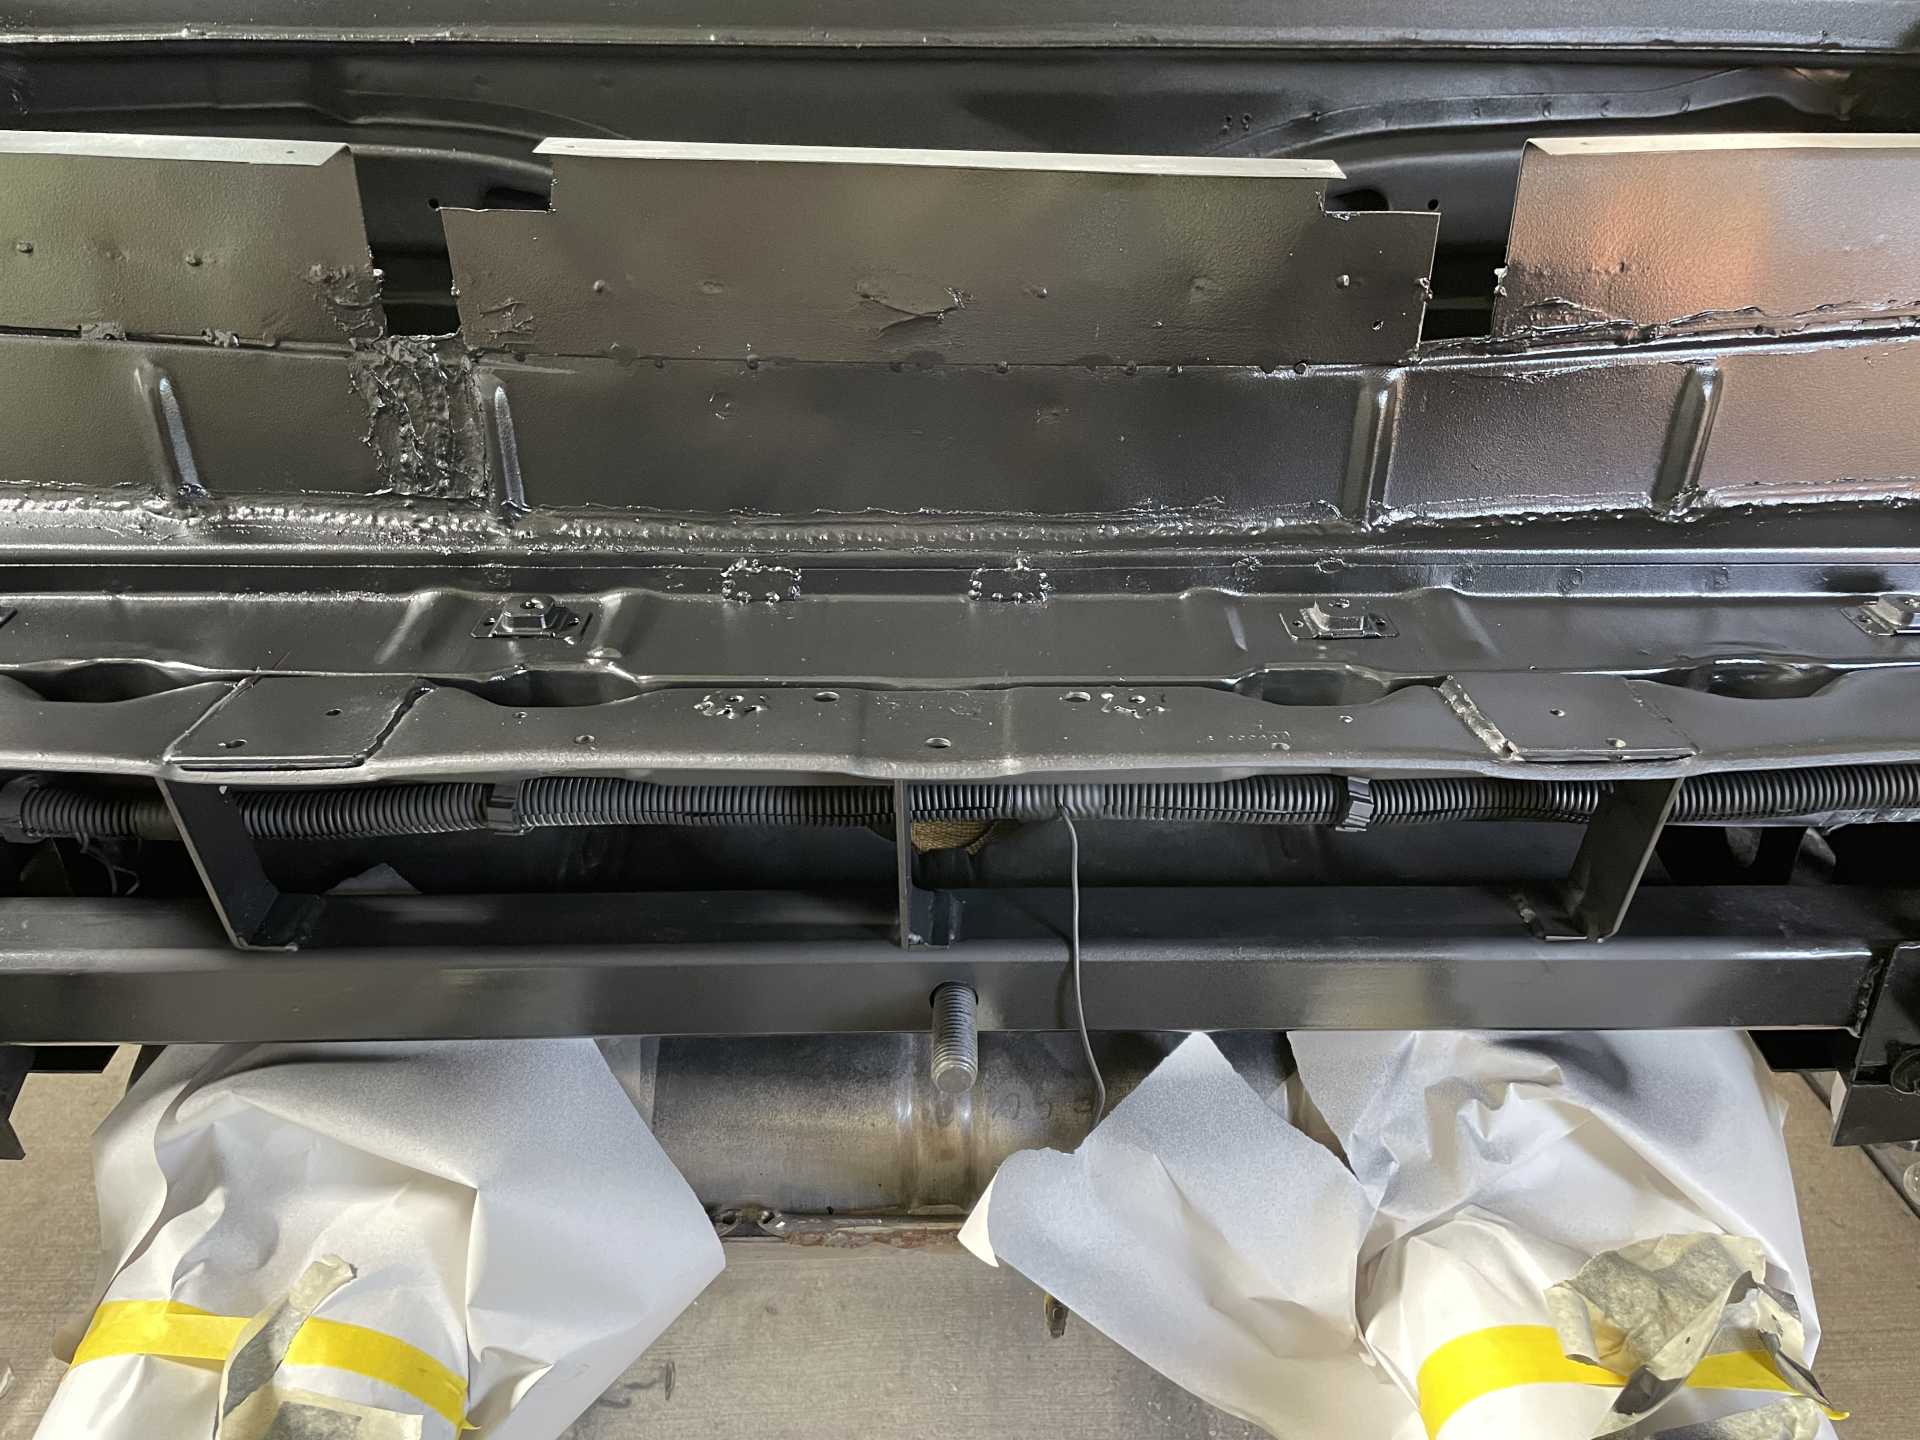
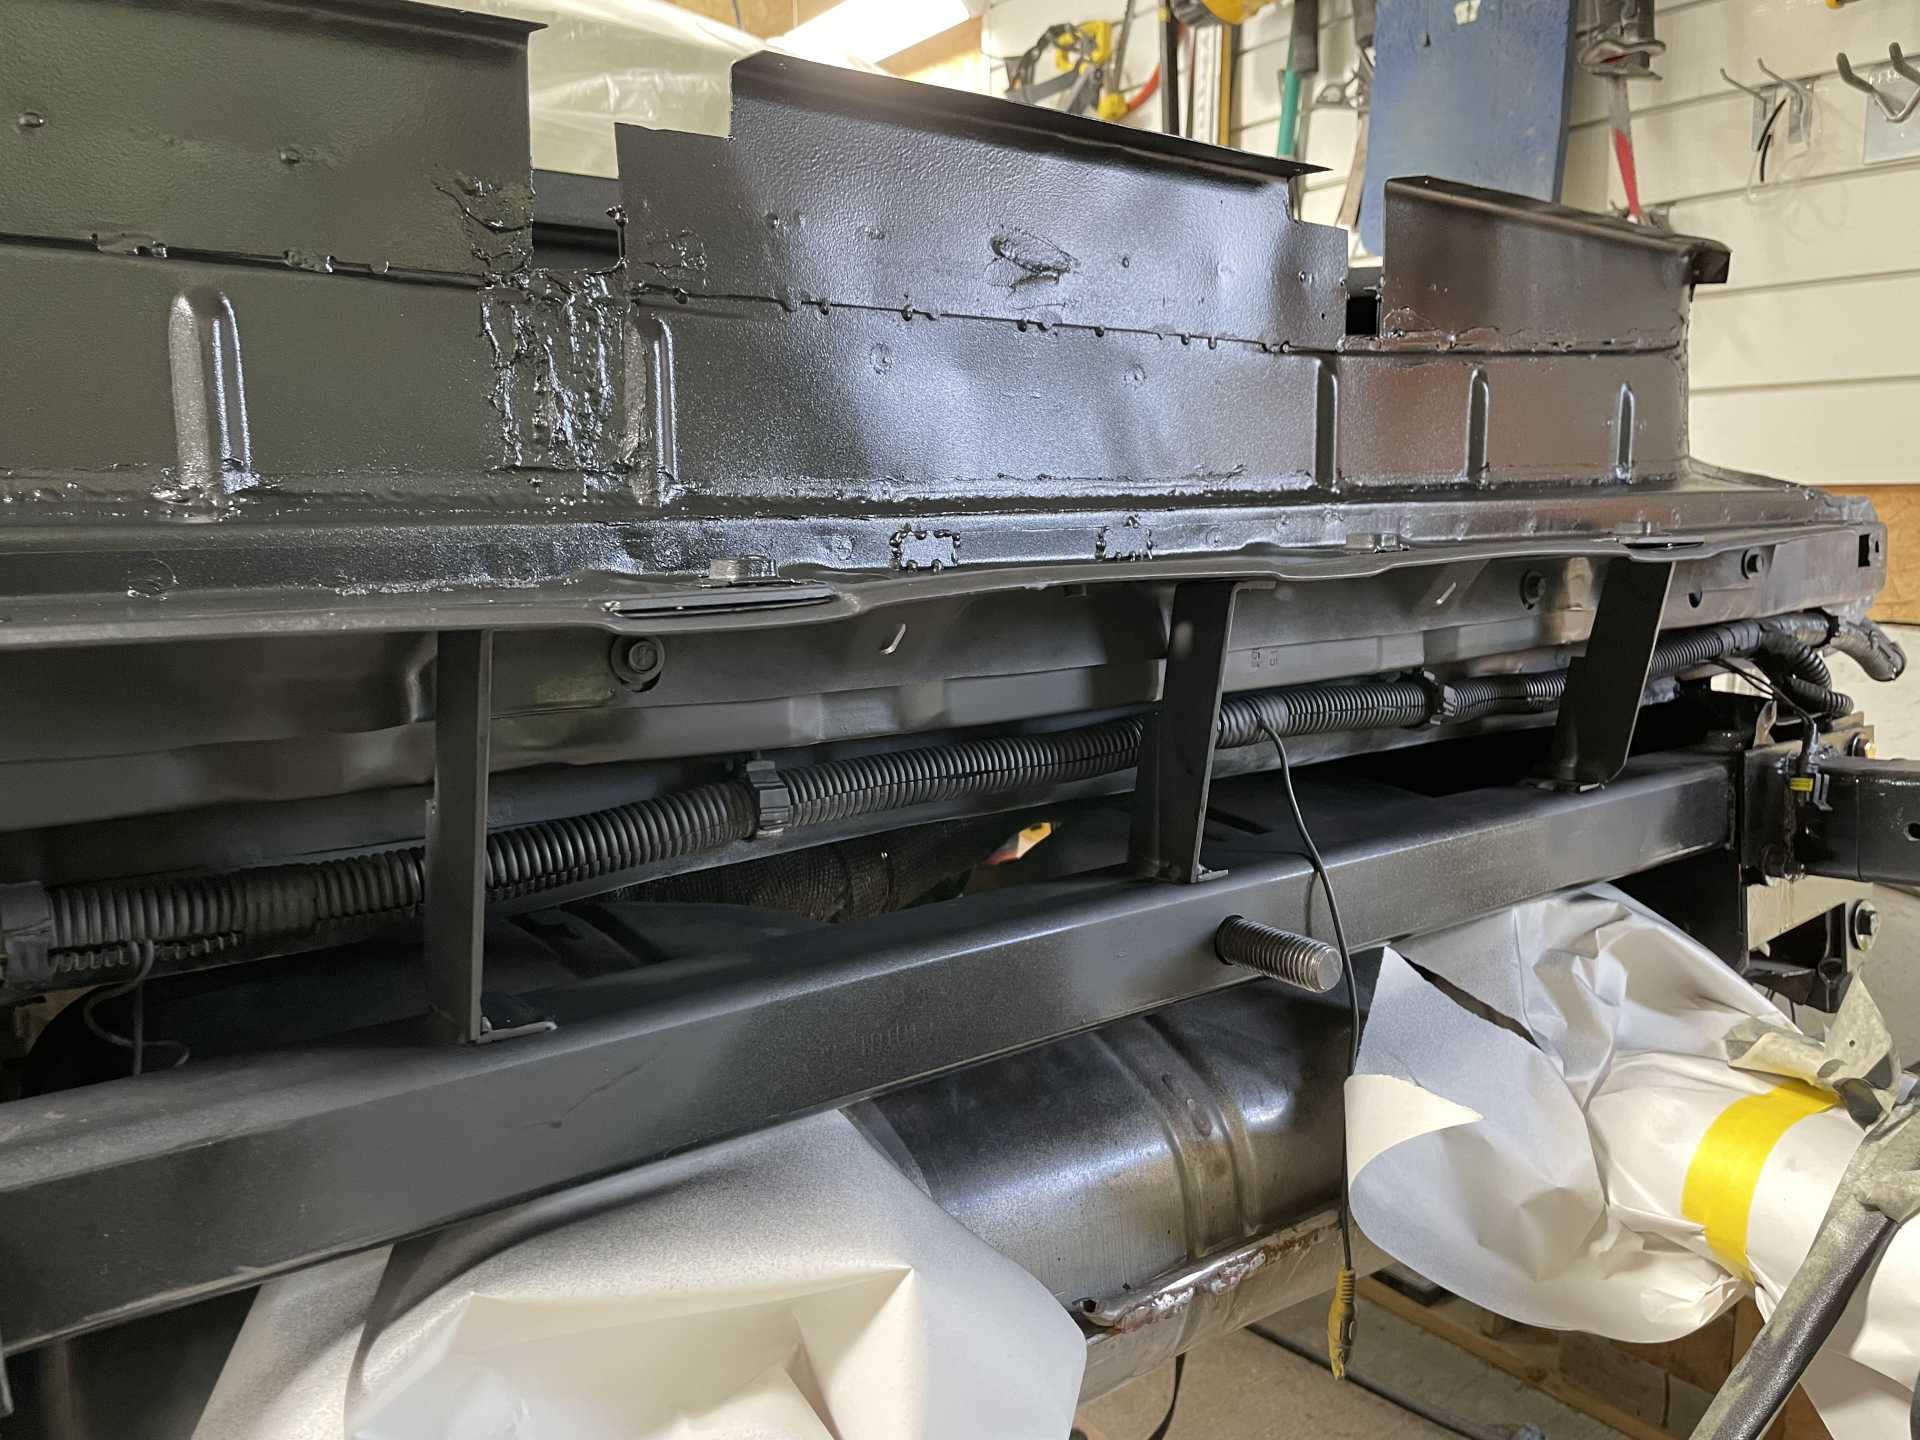
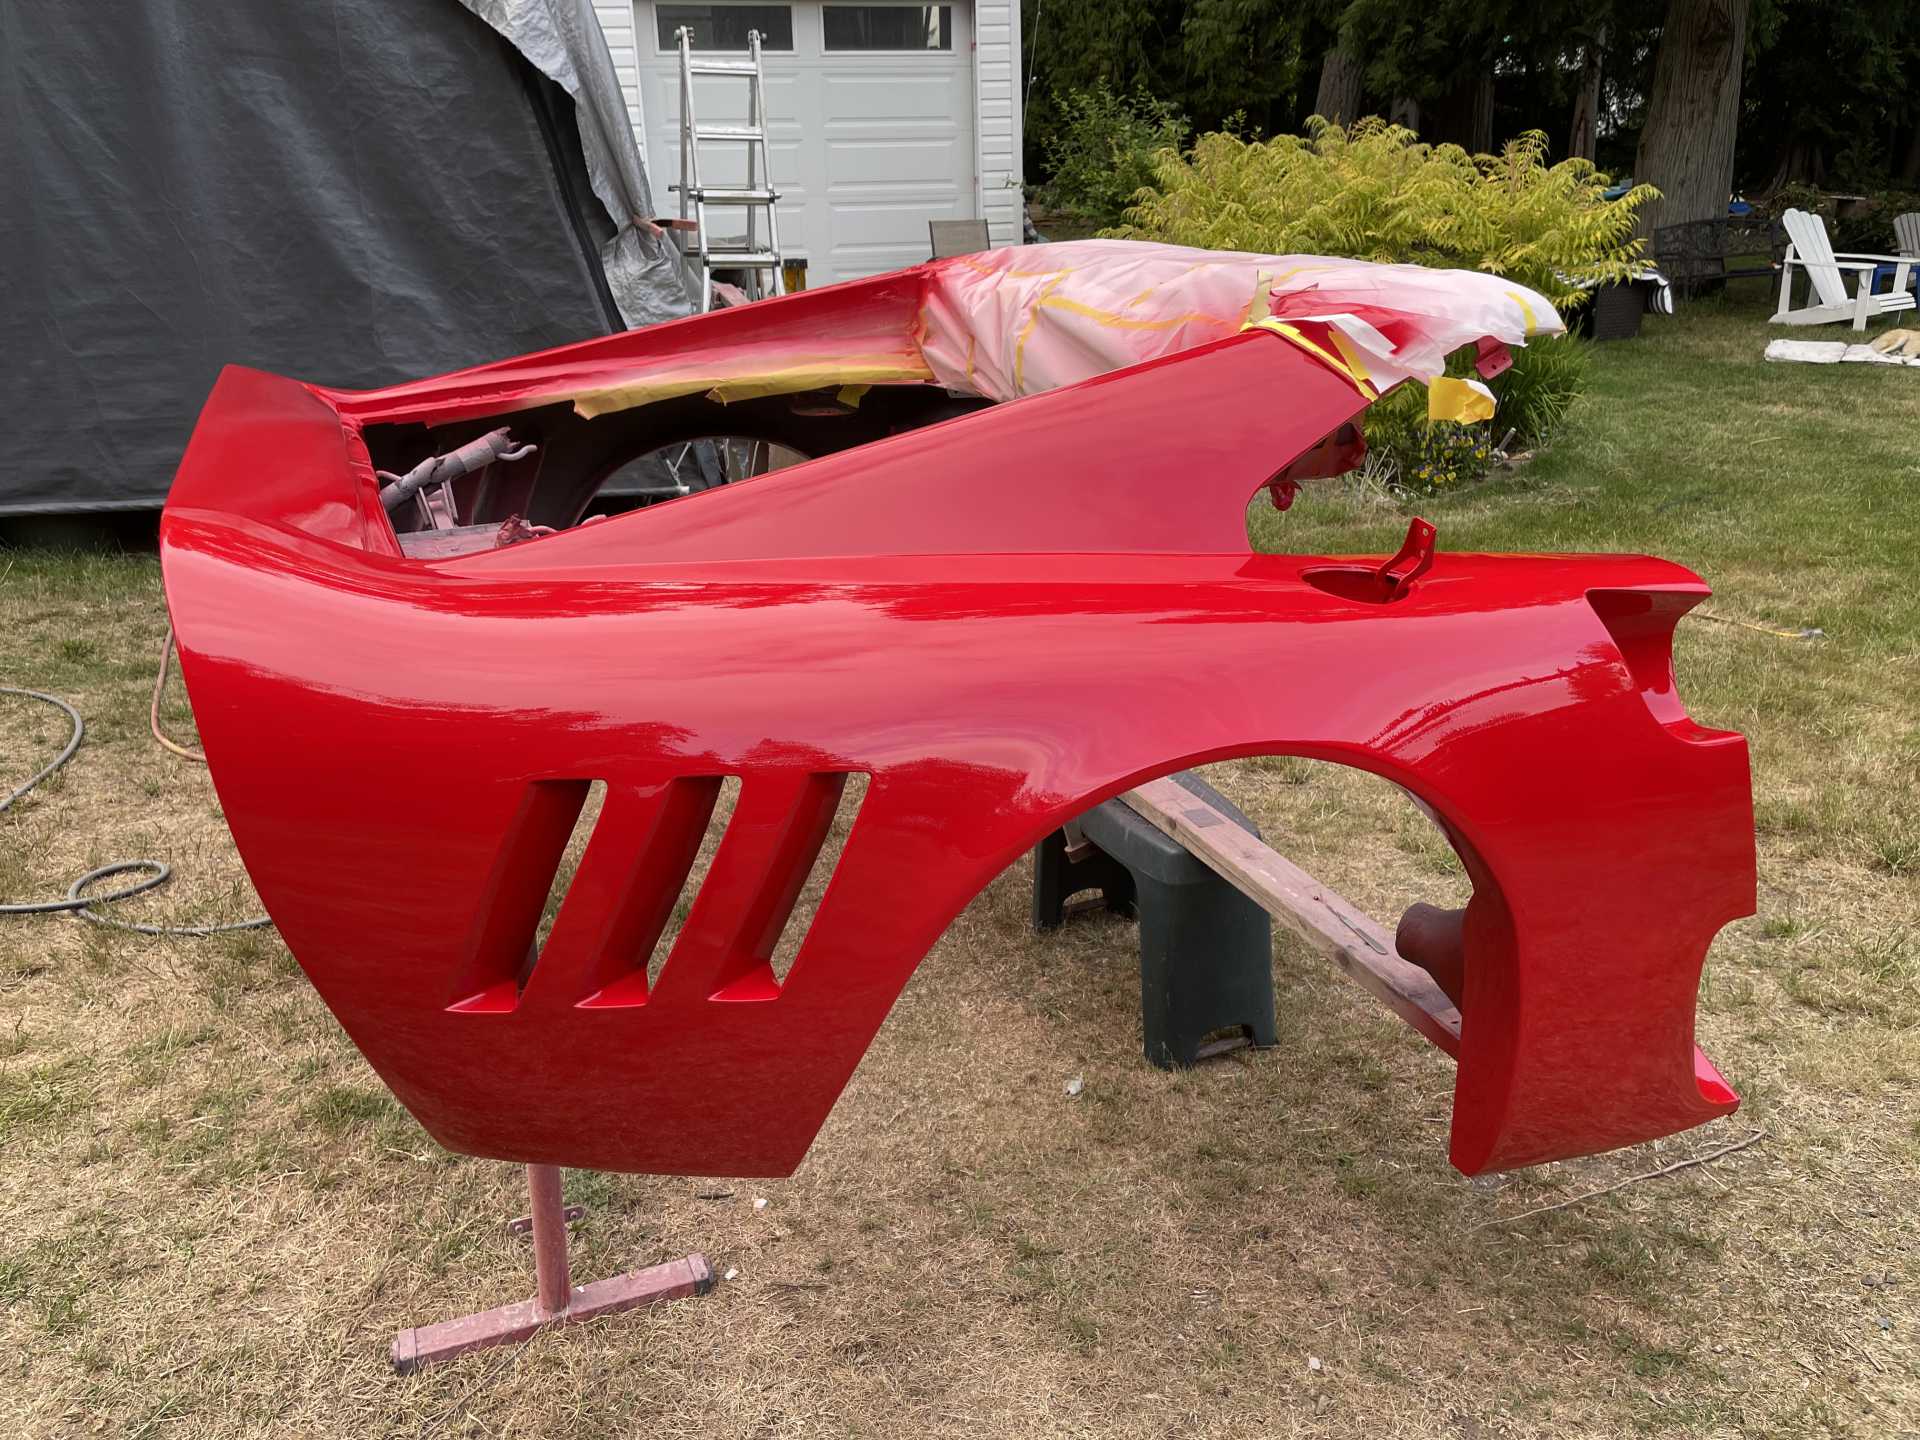
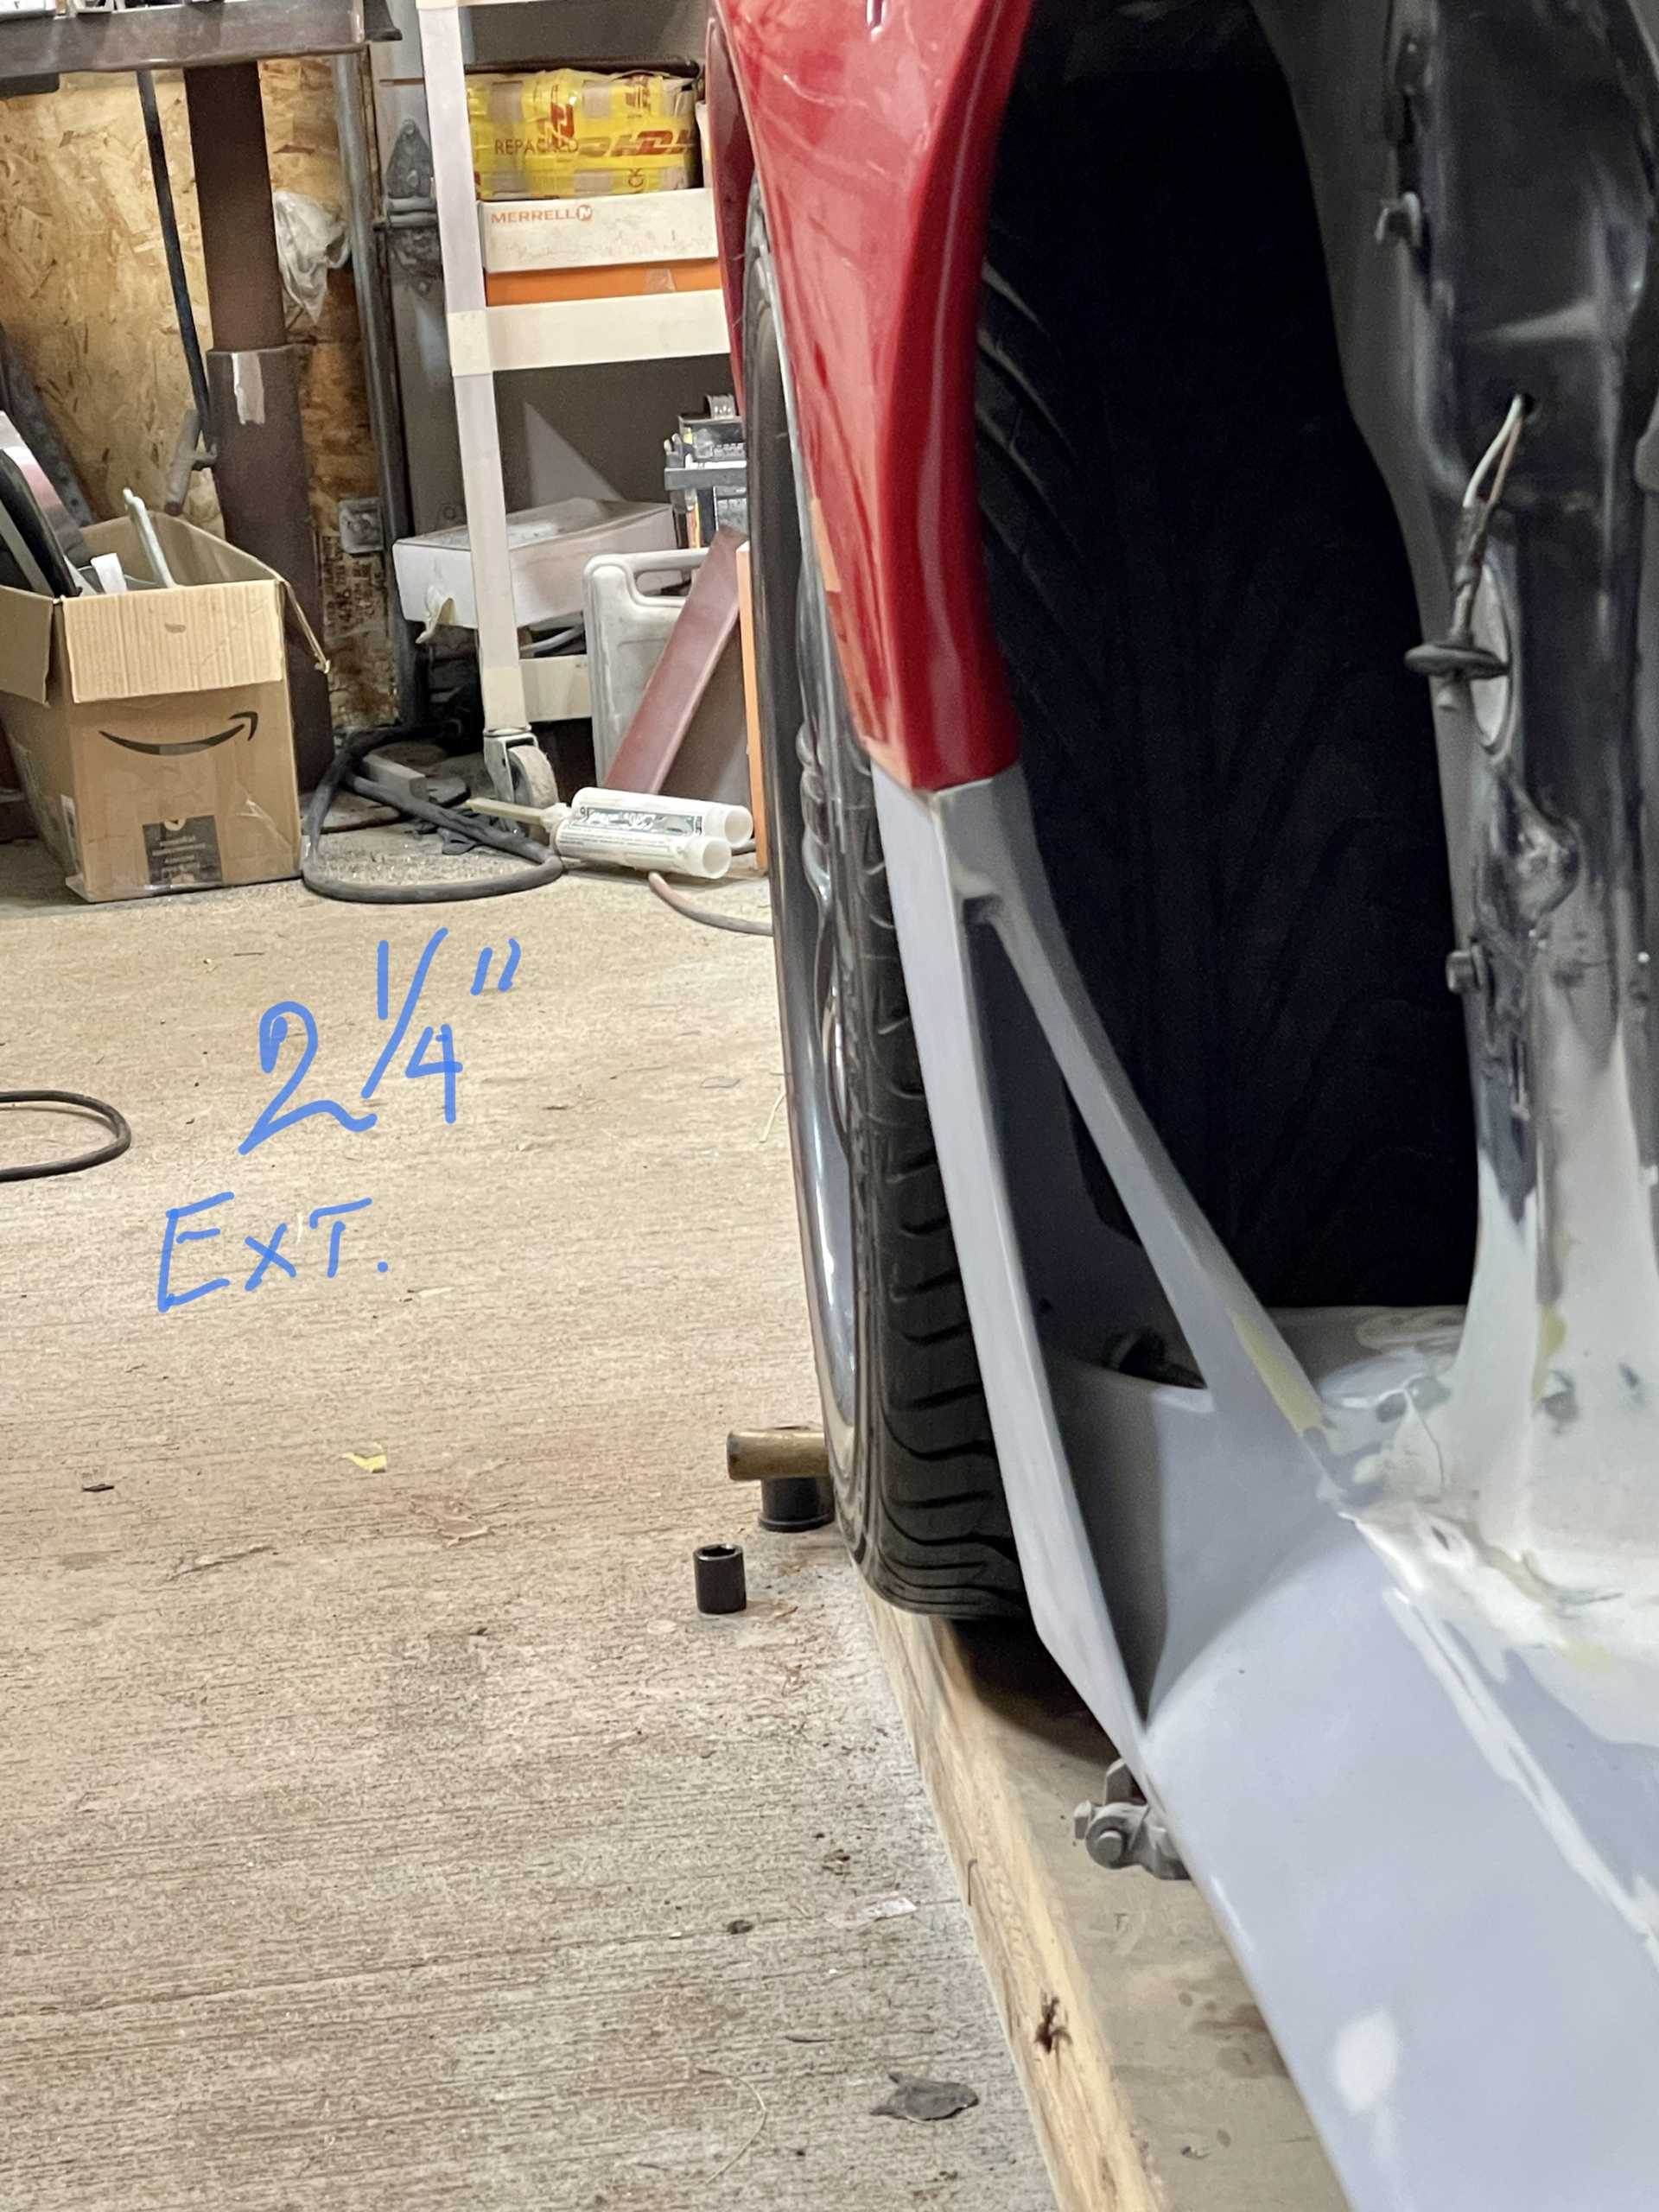
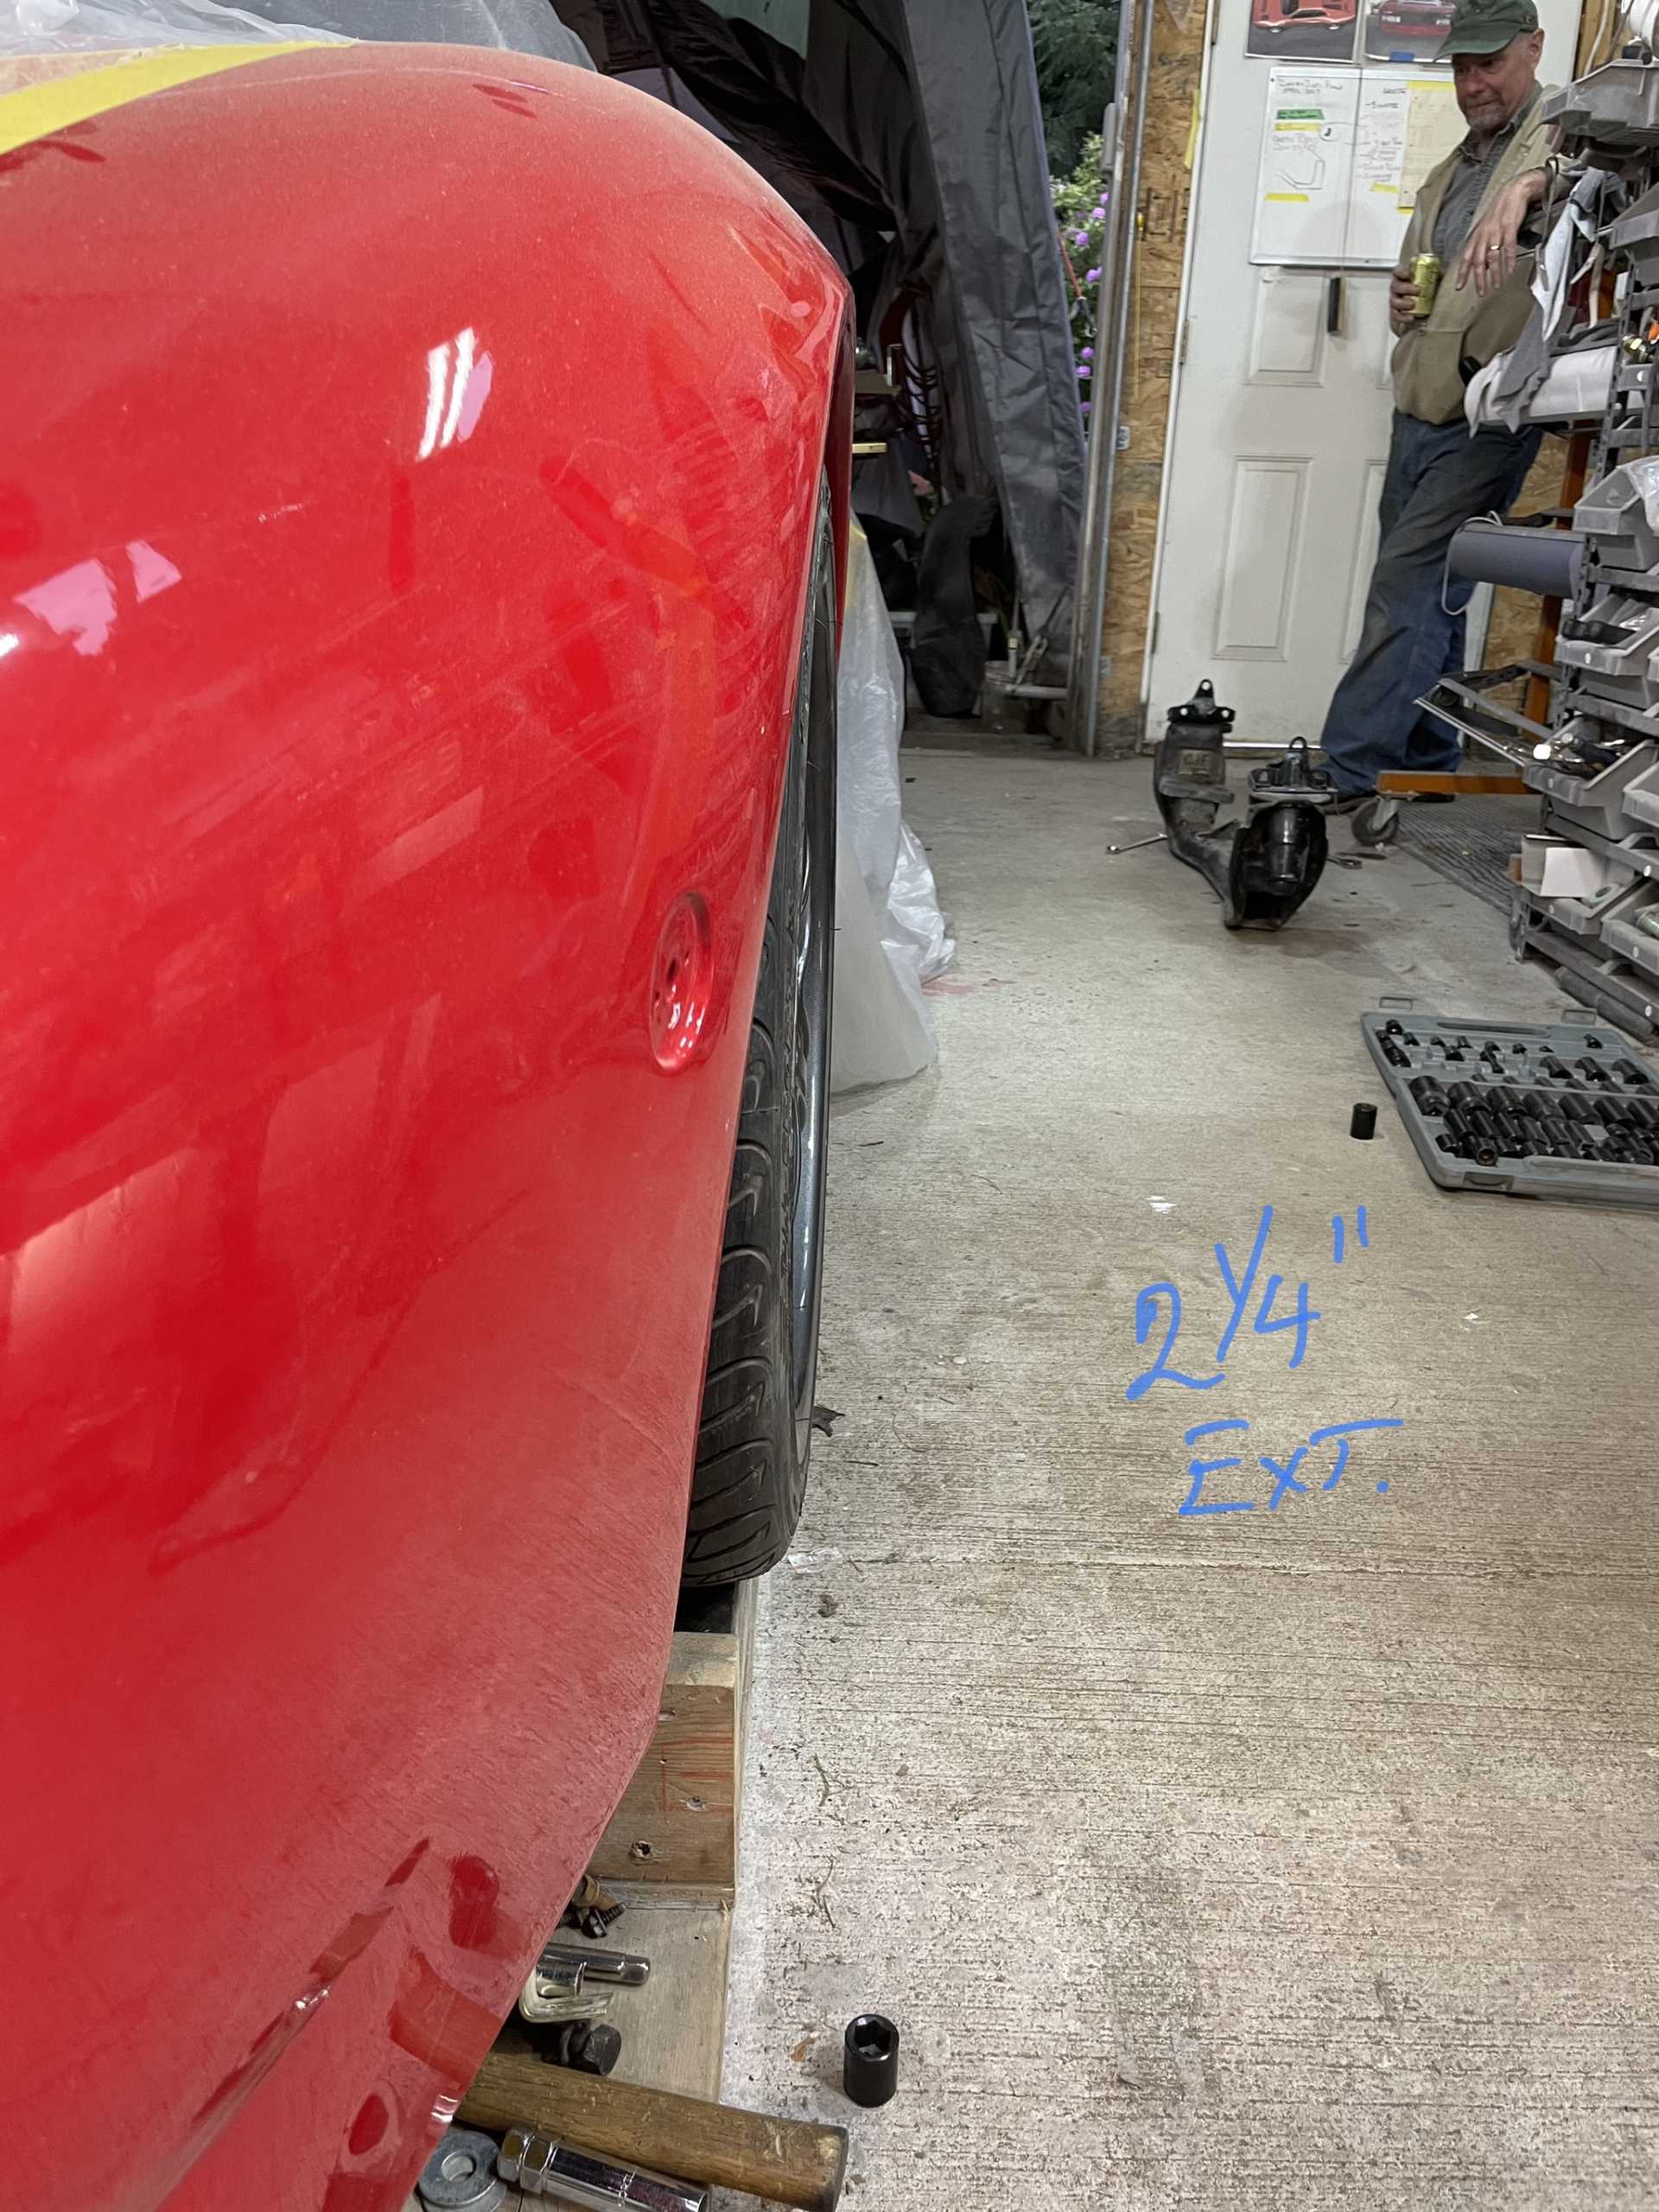
Don O. Recently sold his beautiful replica 308 , with a bit of freed up time has offered to widen the front cross member on my car. The stock wheel width needs to be widened 2 1/4” on each side. This will bring the wheels out to the wheel lip arch.
From what I’ve seen it’s a lot of work, first thing is to build a jig, this keeps everything straight and ensures all the frame and body mounting points are correct in the modified cross member.
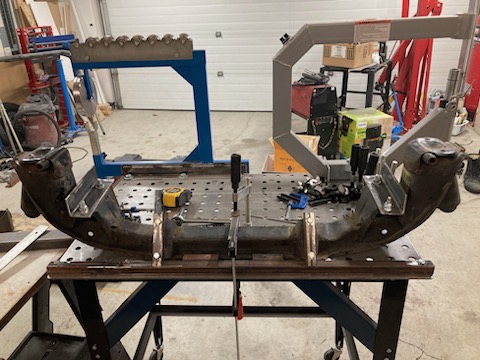
Then cut off the mounting brackets that will be relocation to the new mounting points in the cut cross member.
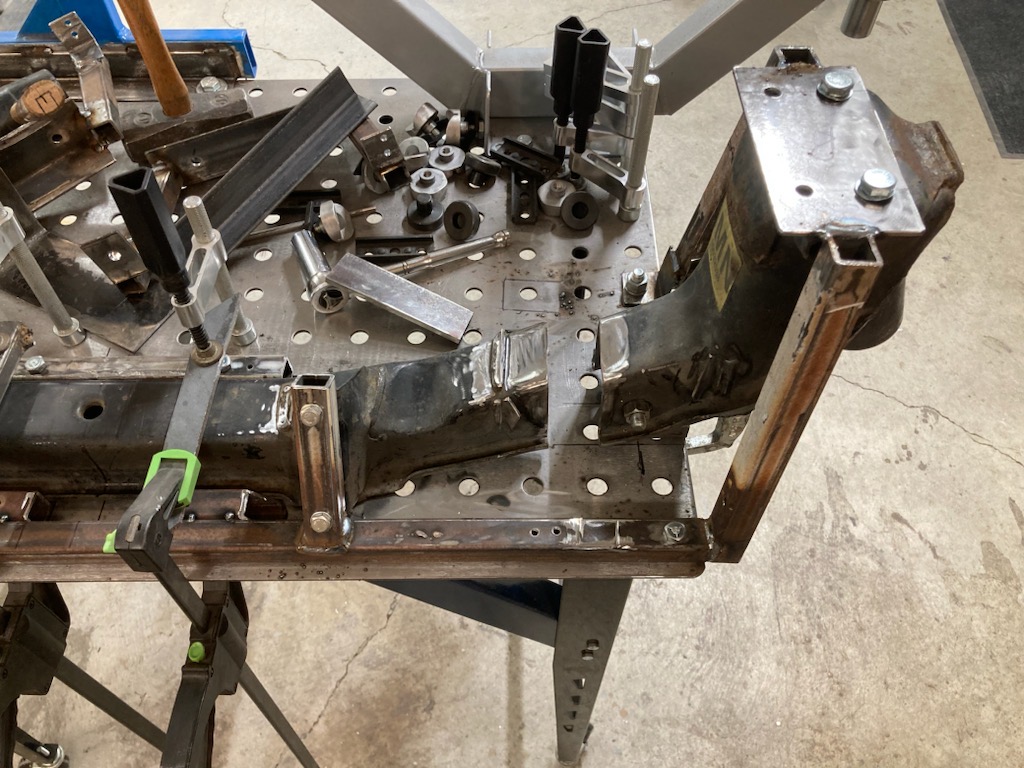
Tack weld the fill pieces in place
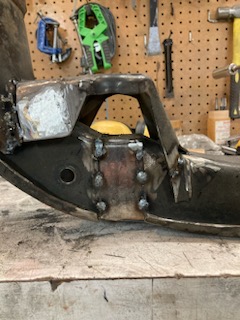
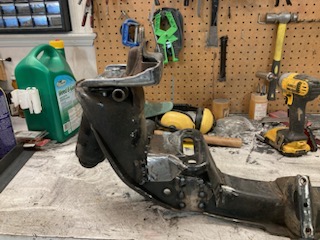
Everything was test fit into the car to ensure everything fit. We installed the upper and lower control arms and put the wheel on and judge for yourself!!!
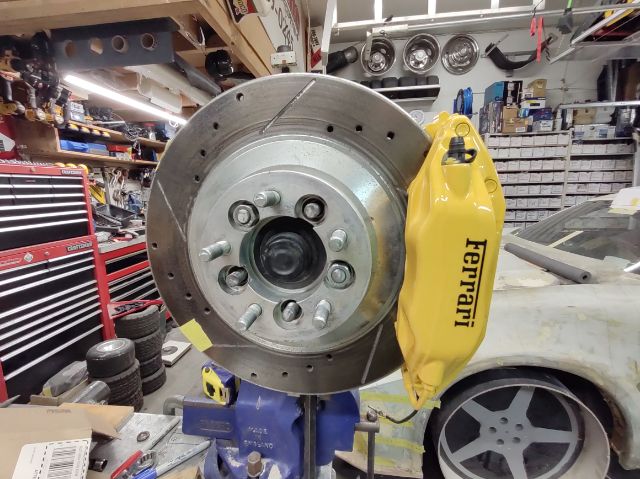
Phil the other buddy of mine is adapting the 6 piston Brembo front brakes that I have onto my car.
He also didn’t like the way my back Brembo brakes were mounted and is building new adapter plates for mounting.
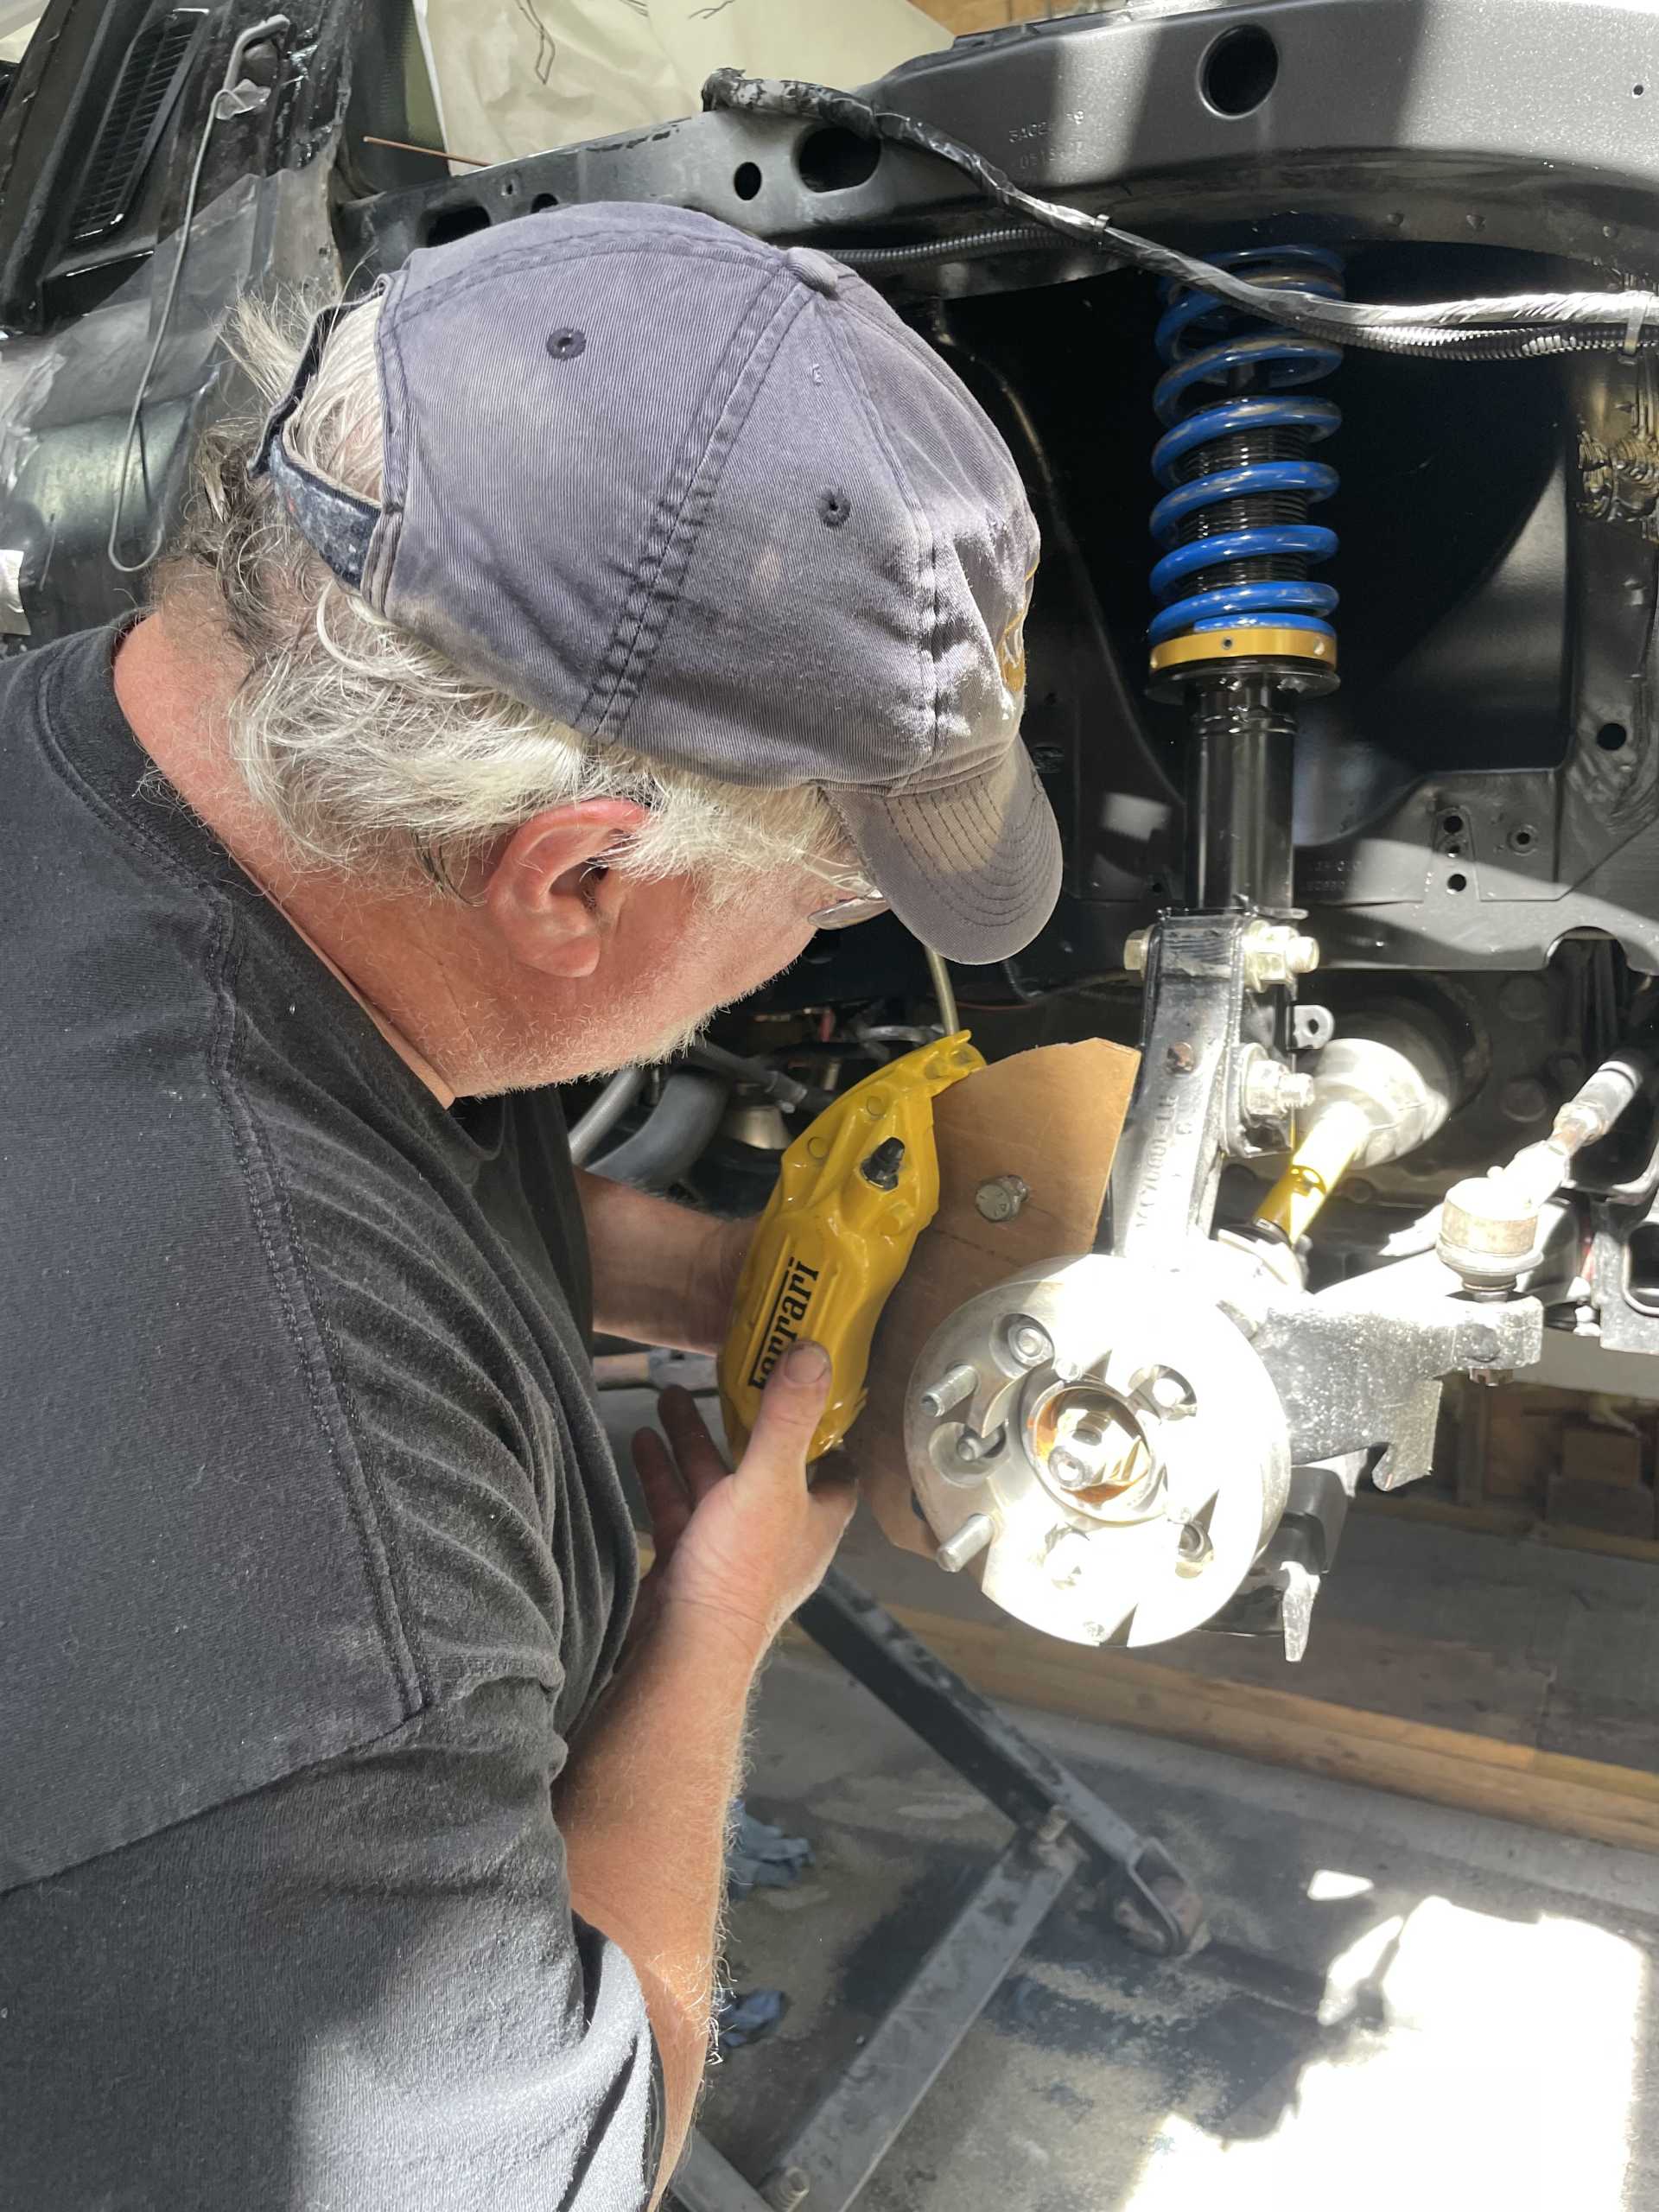
To say the least I’m really excited to get the front suspension and brakes completed.
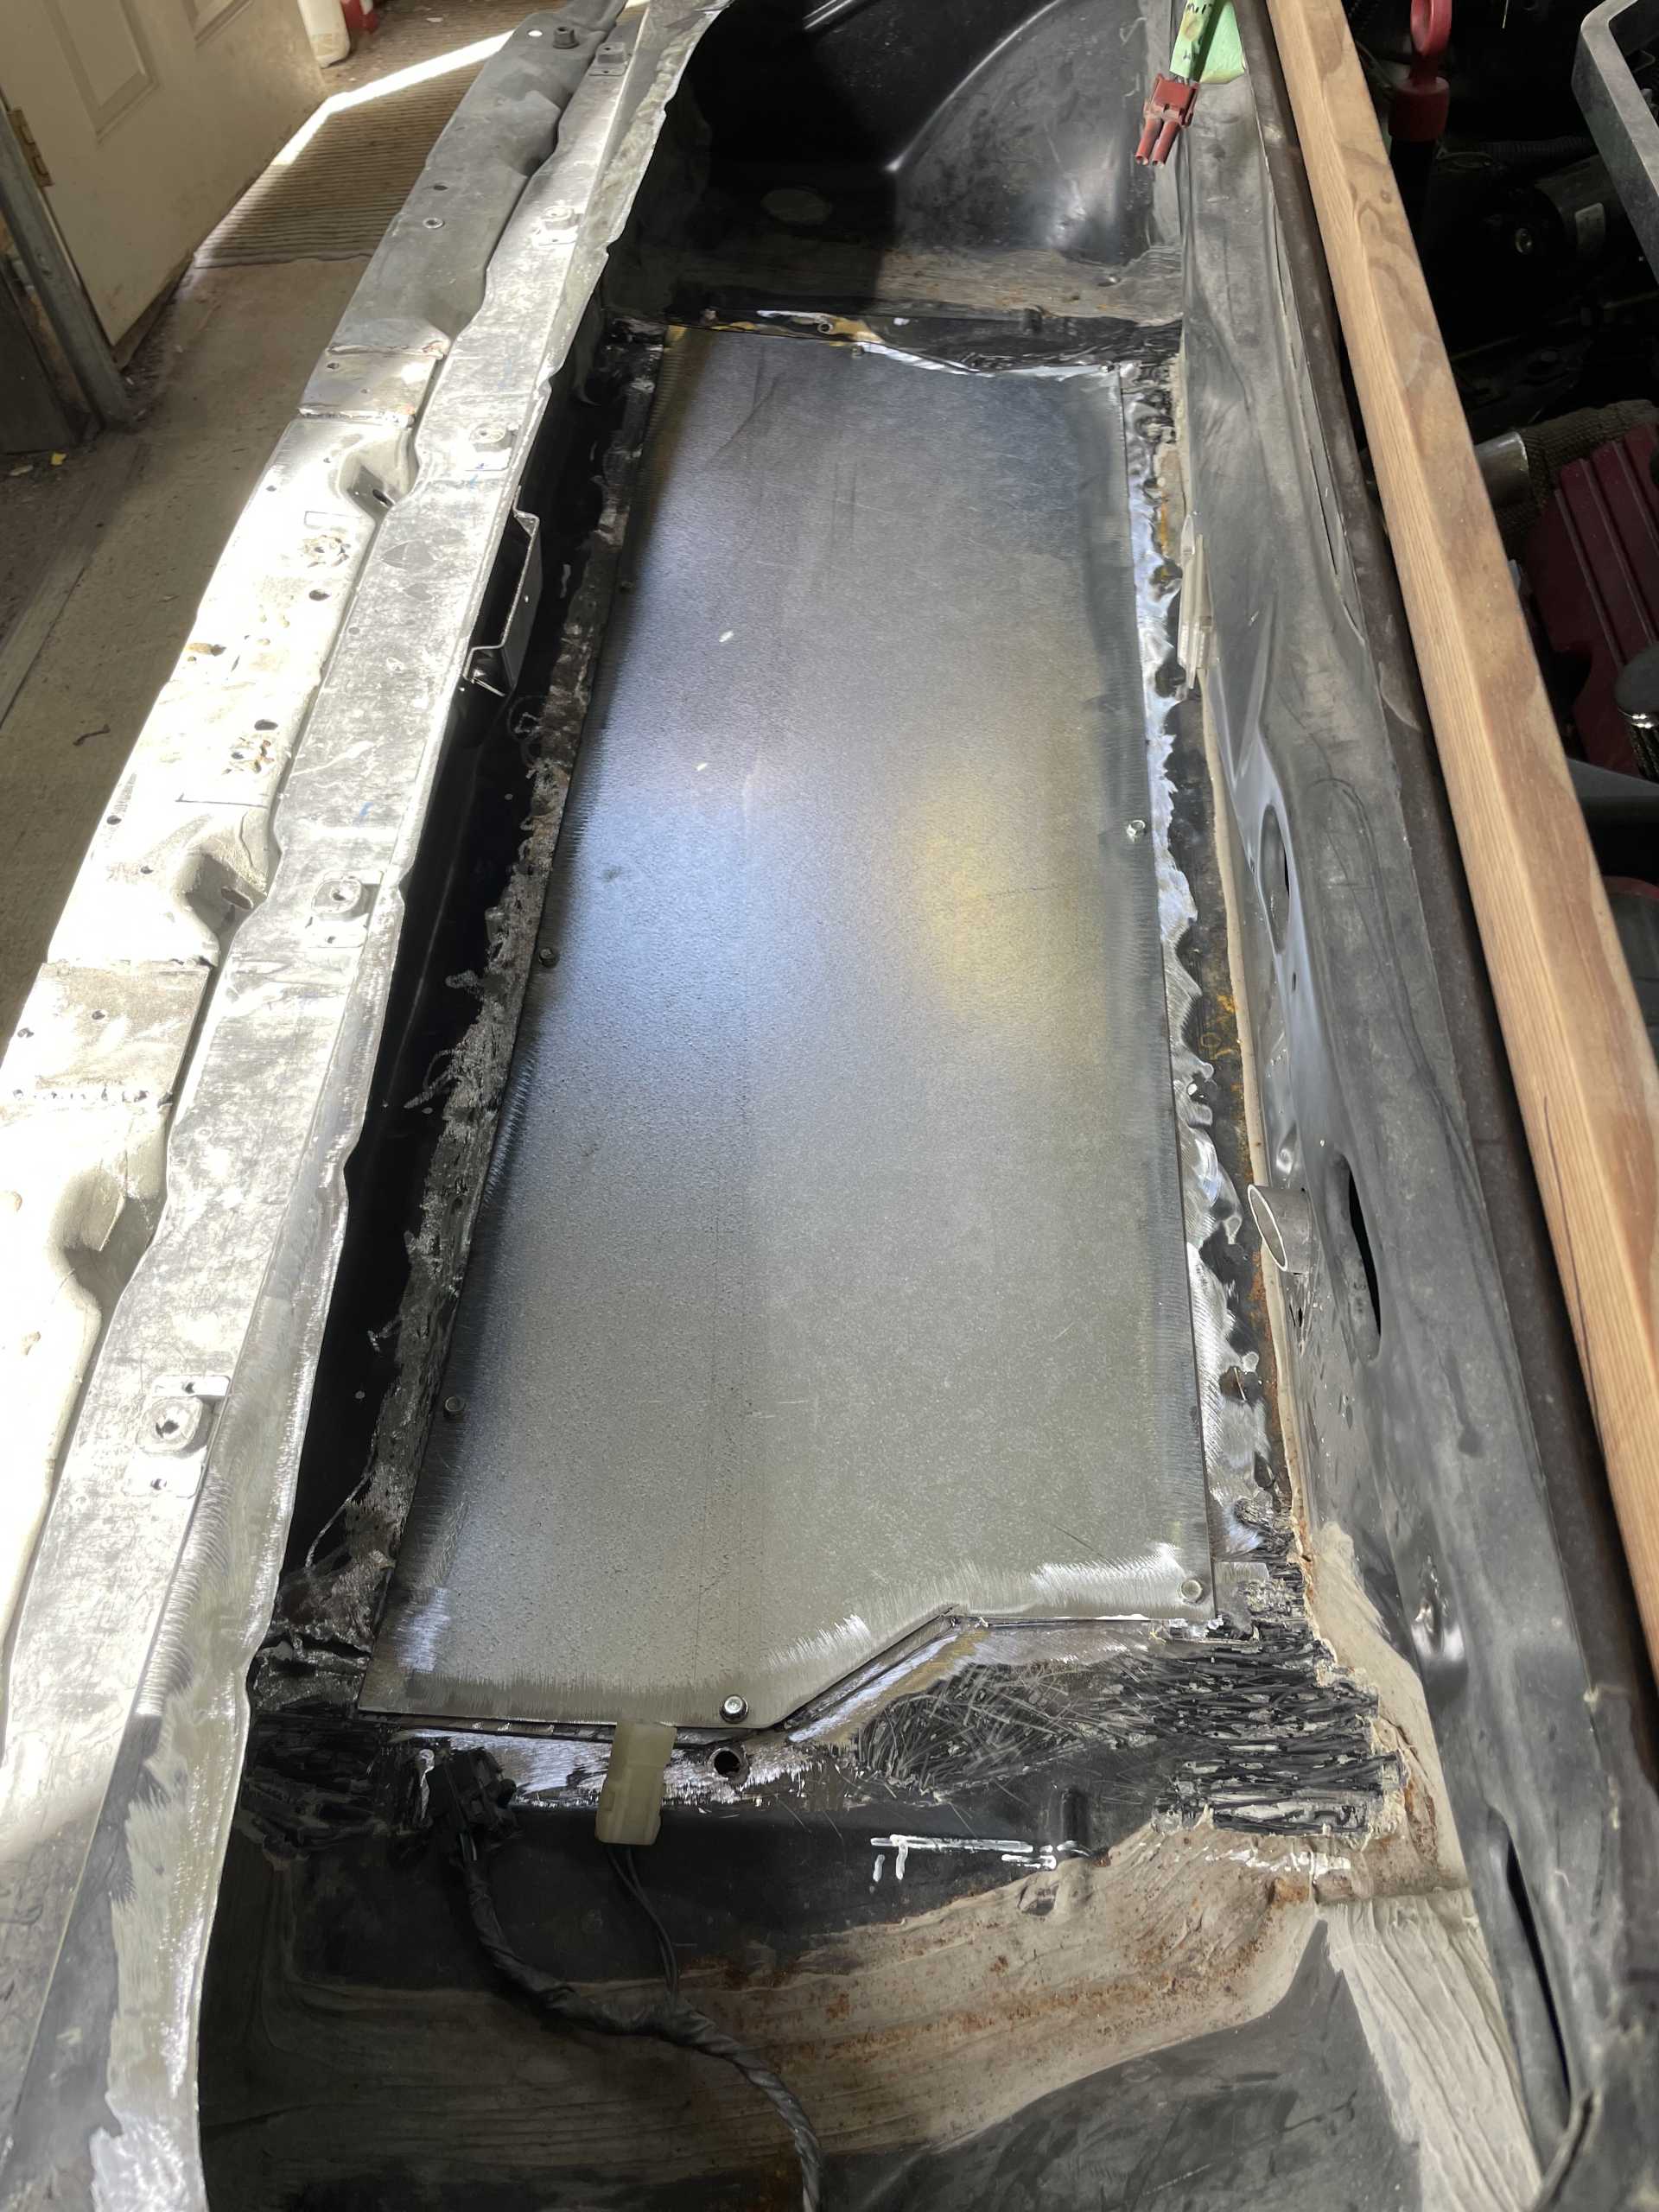
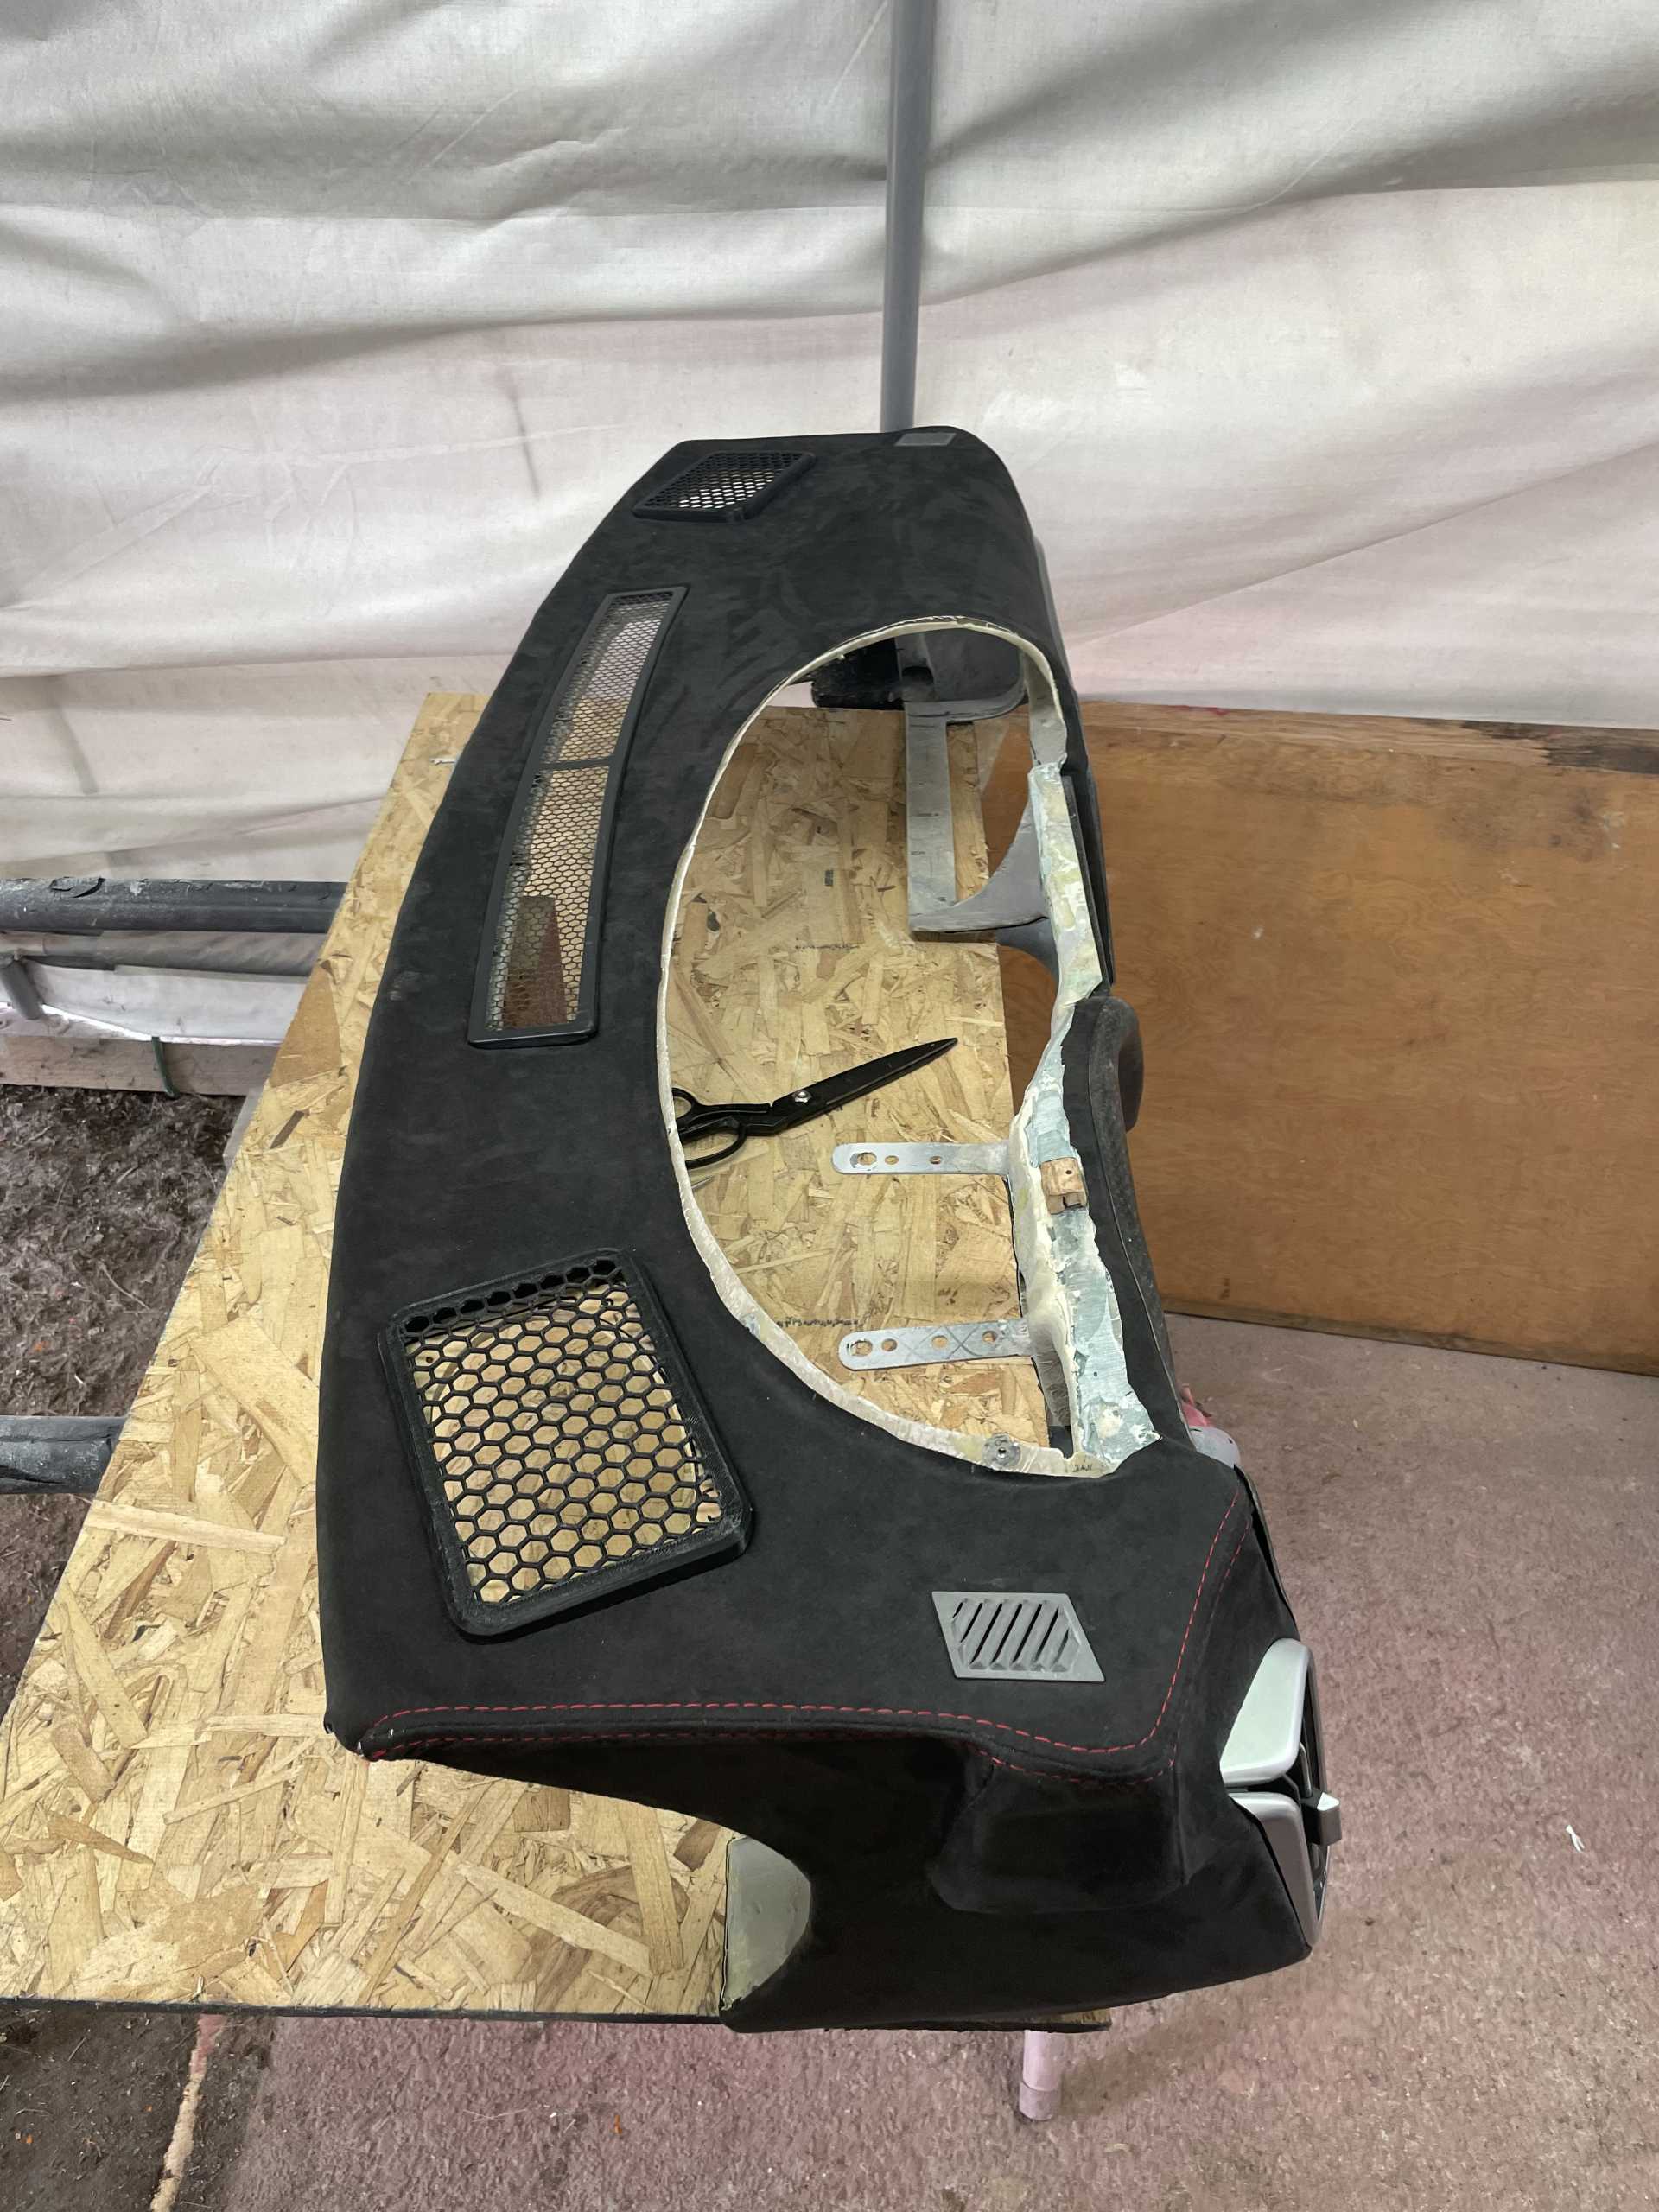
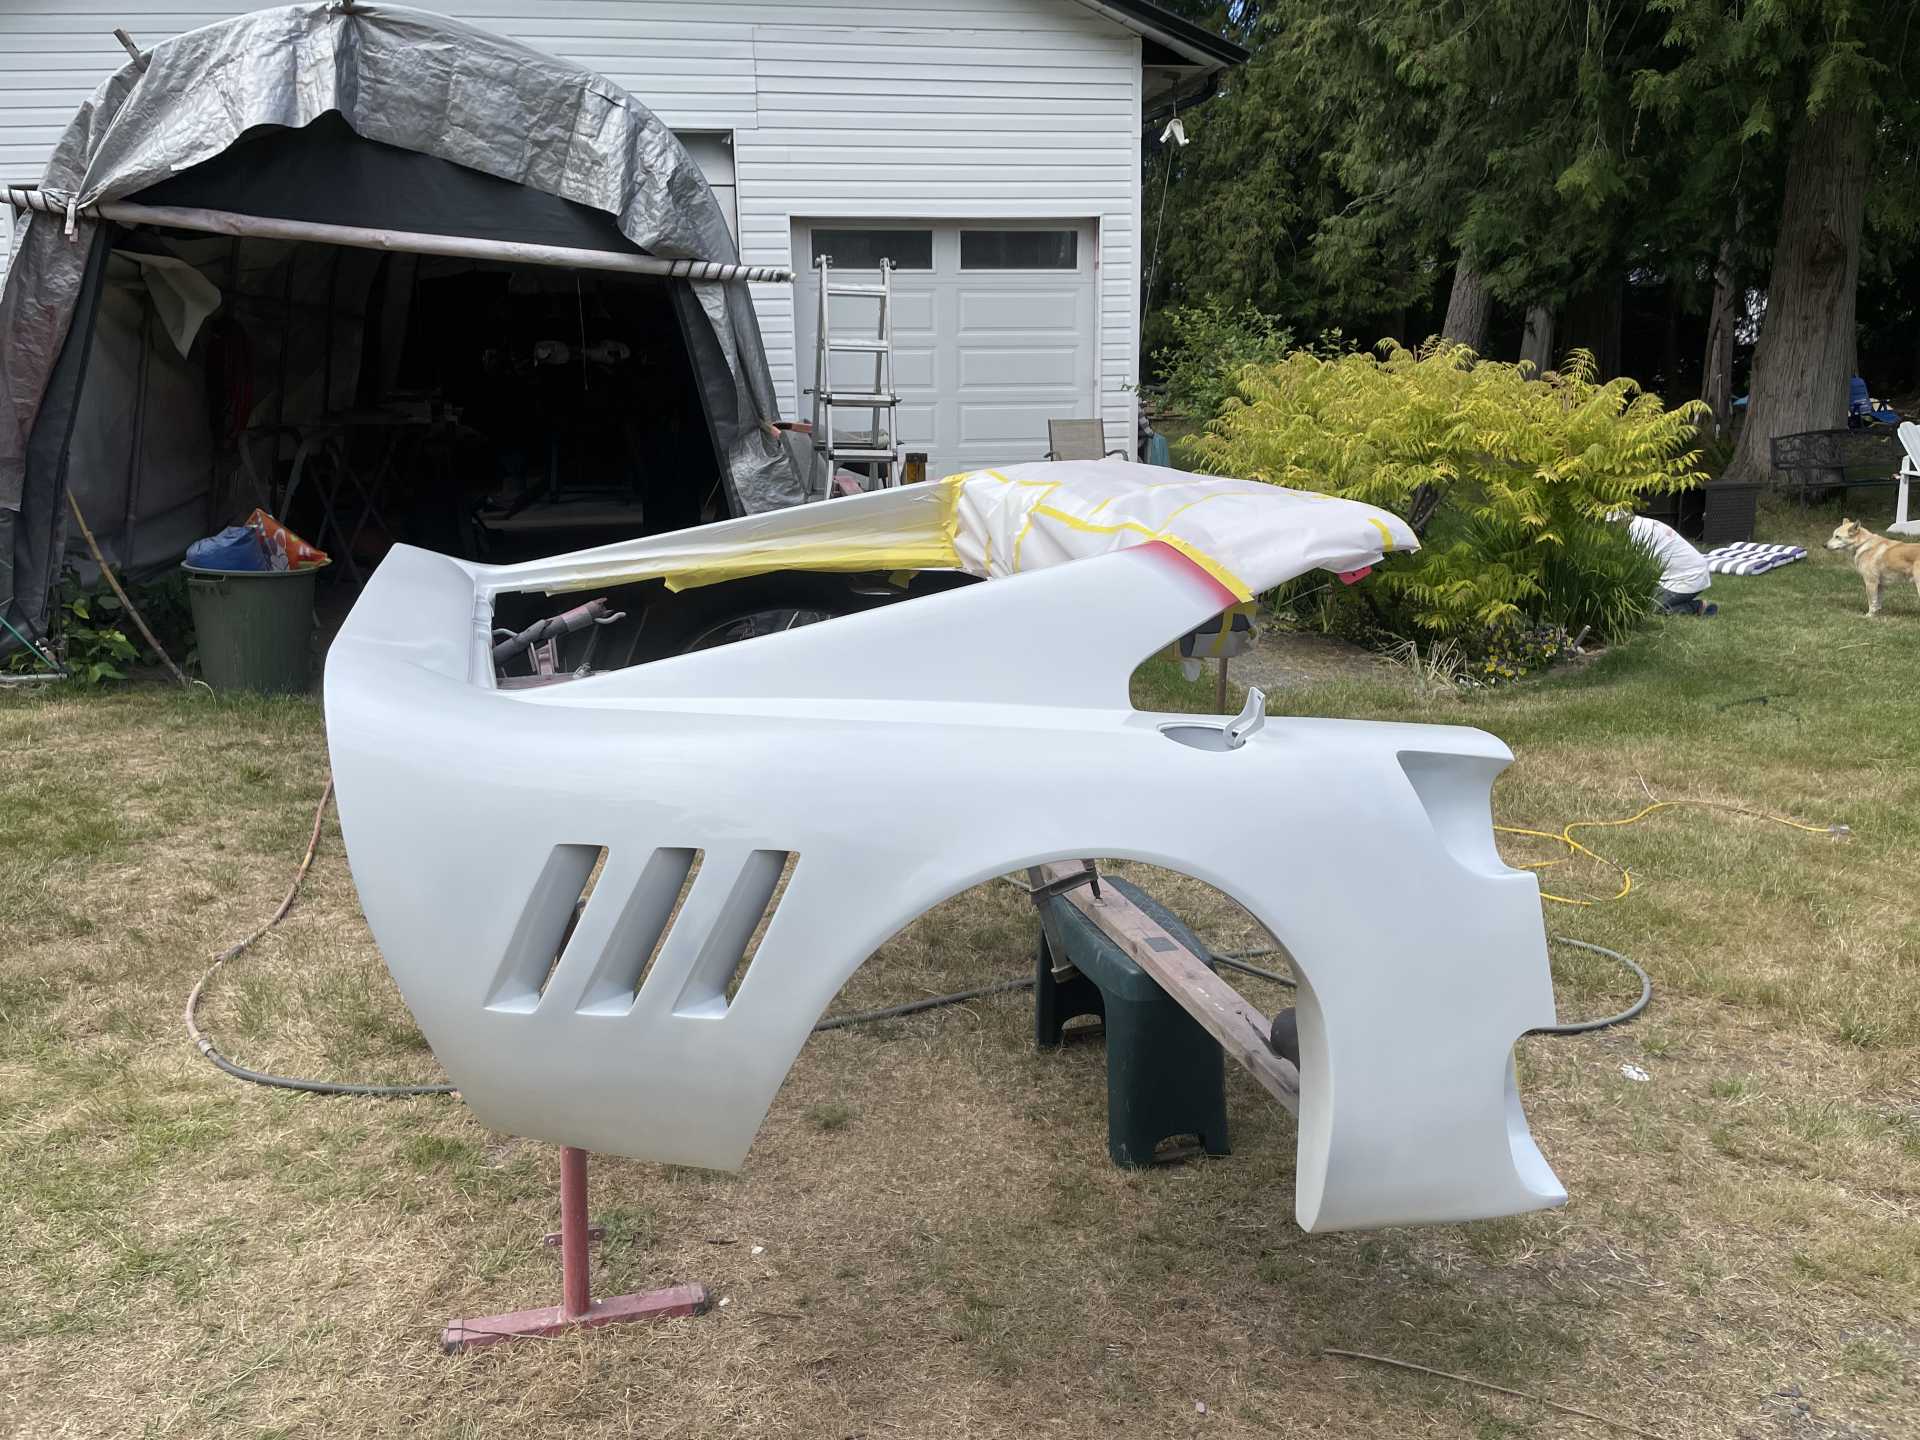
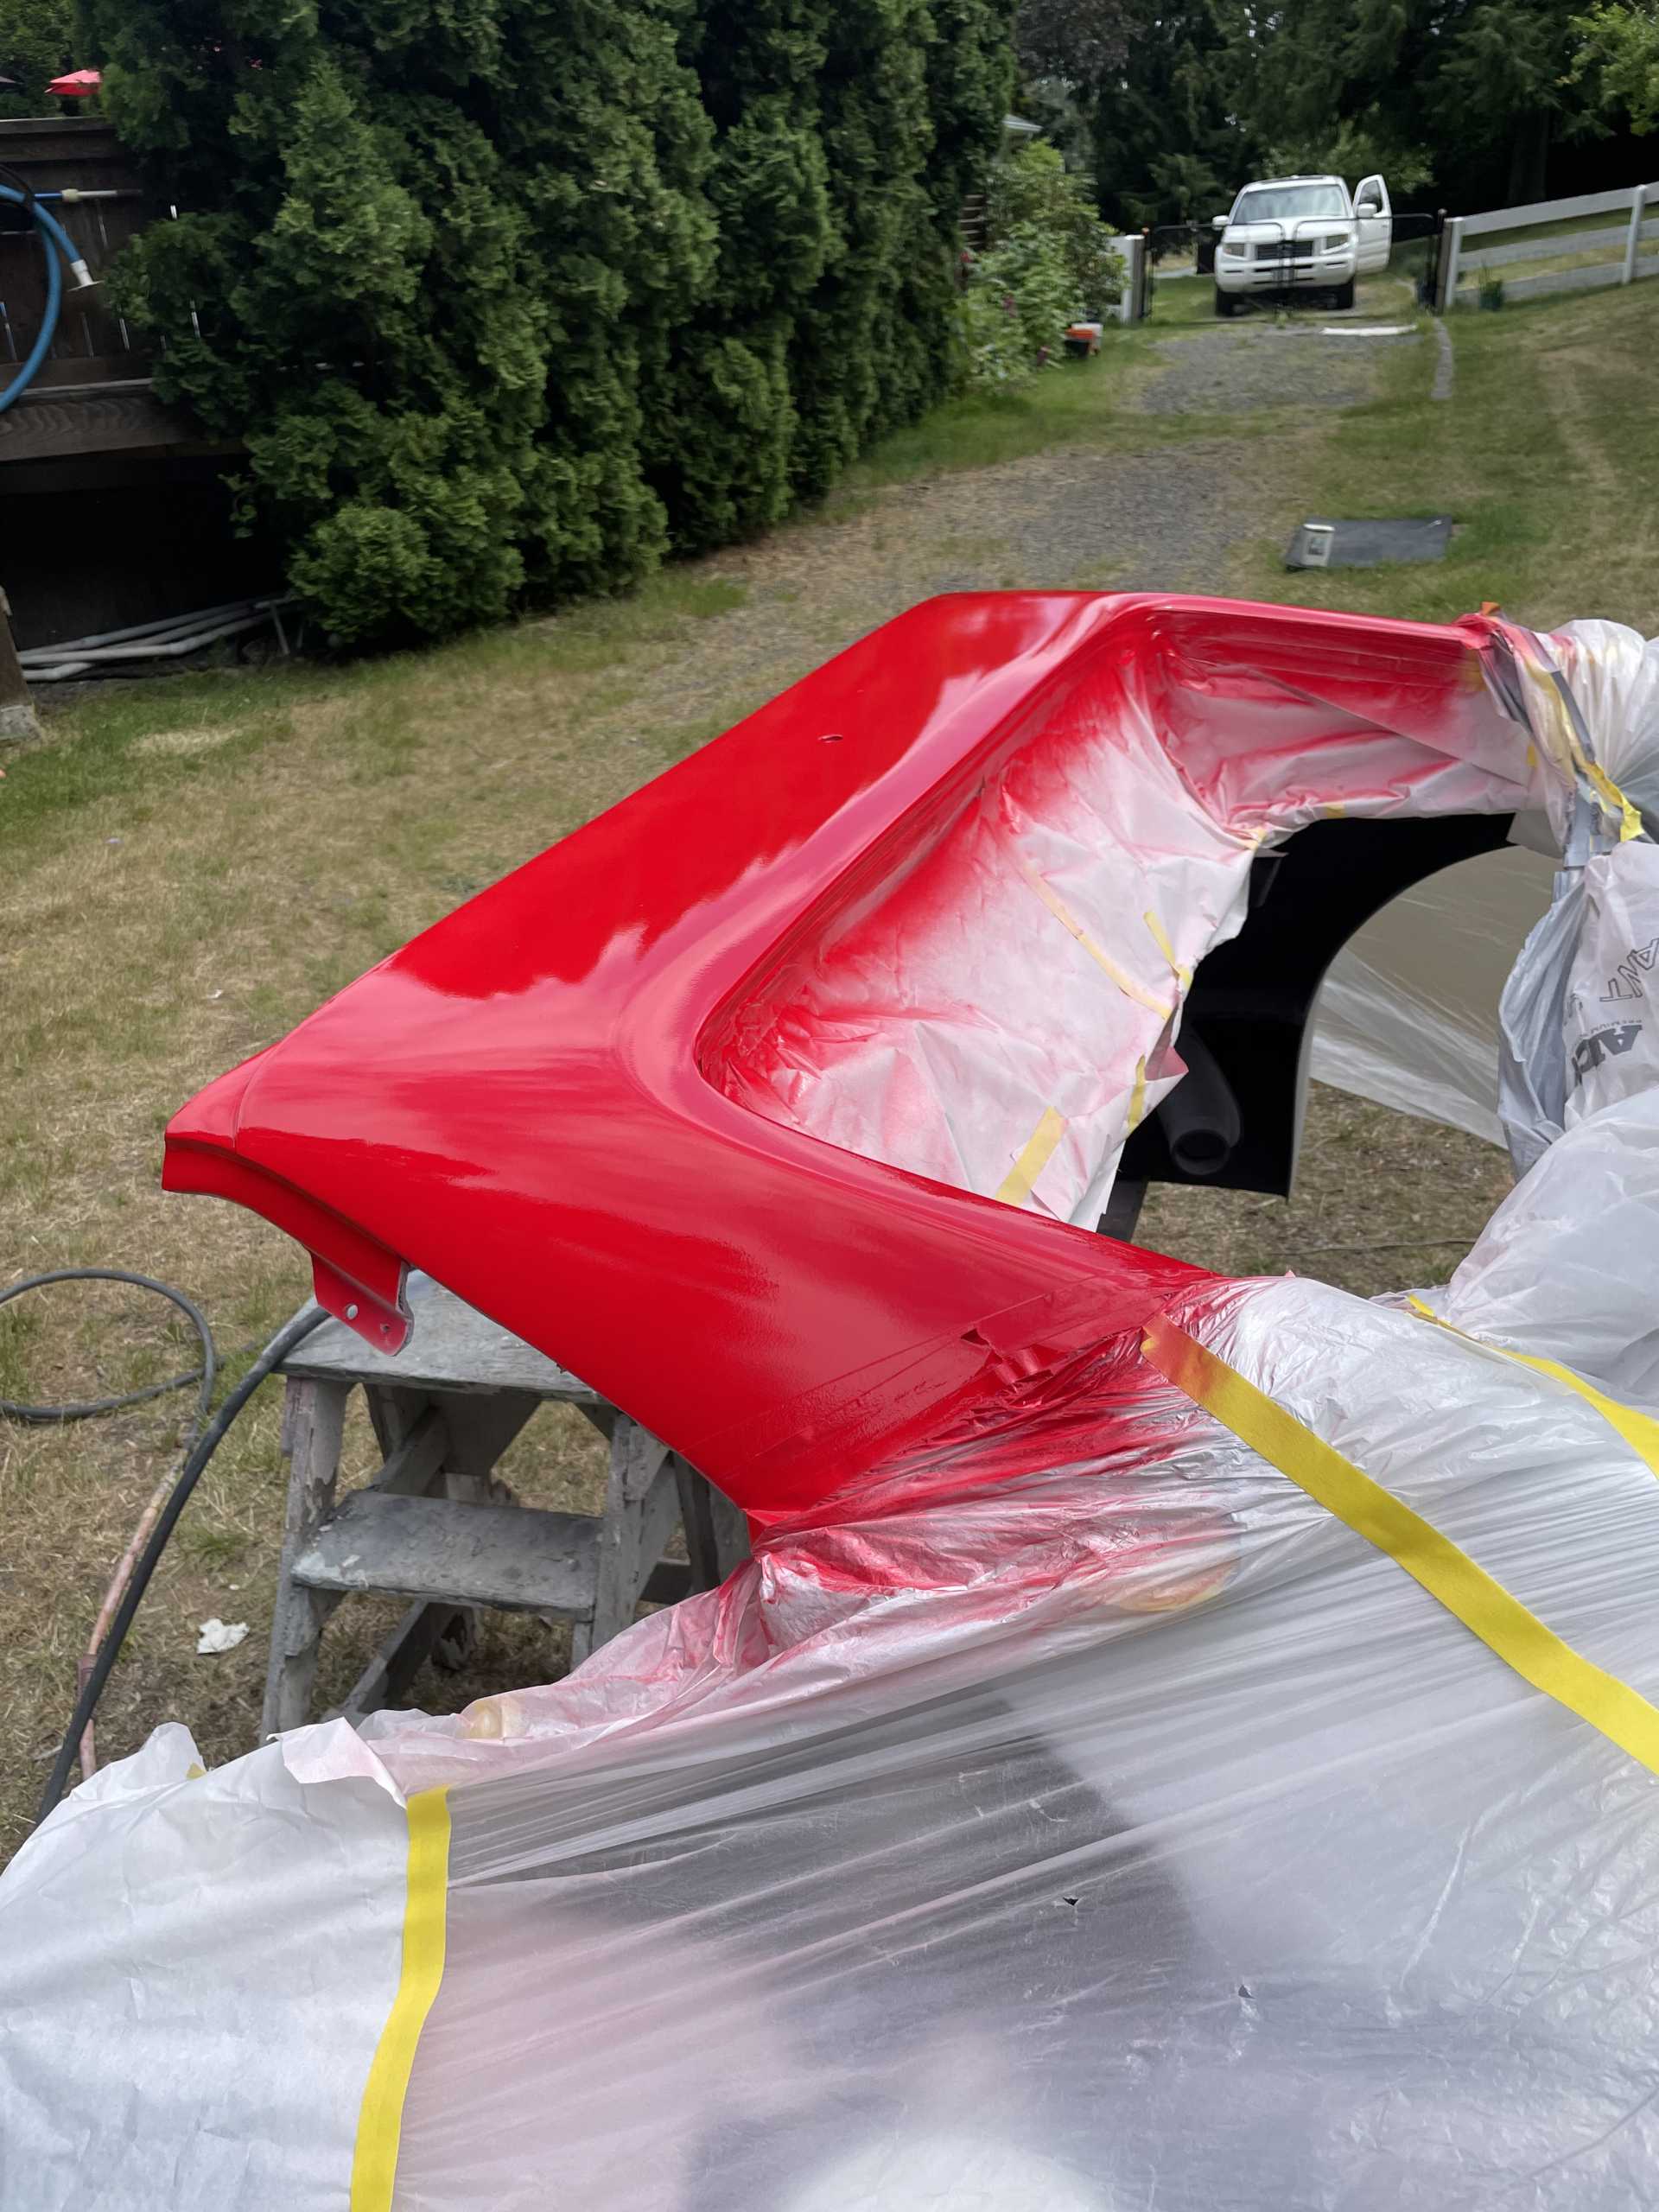
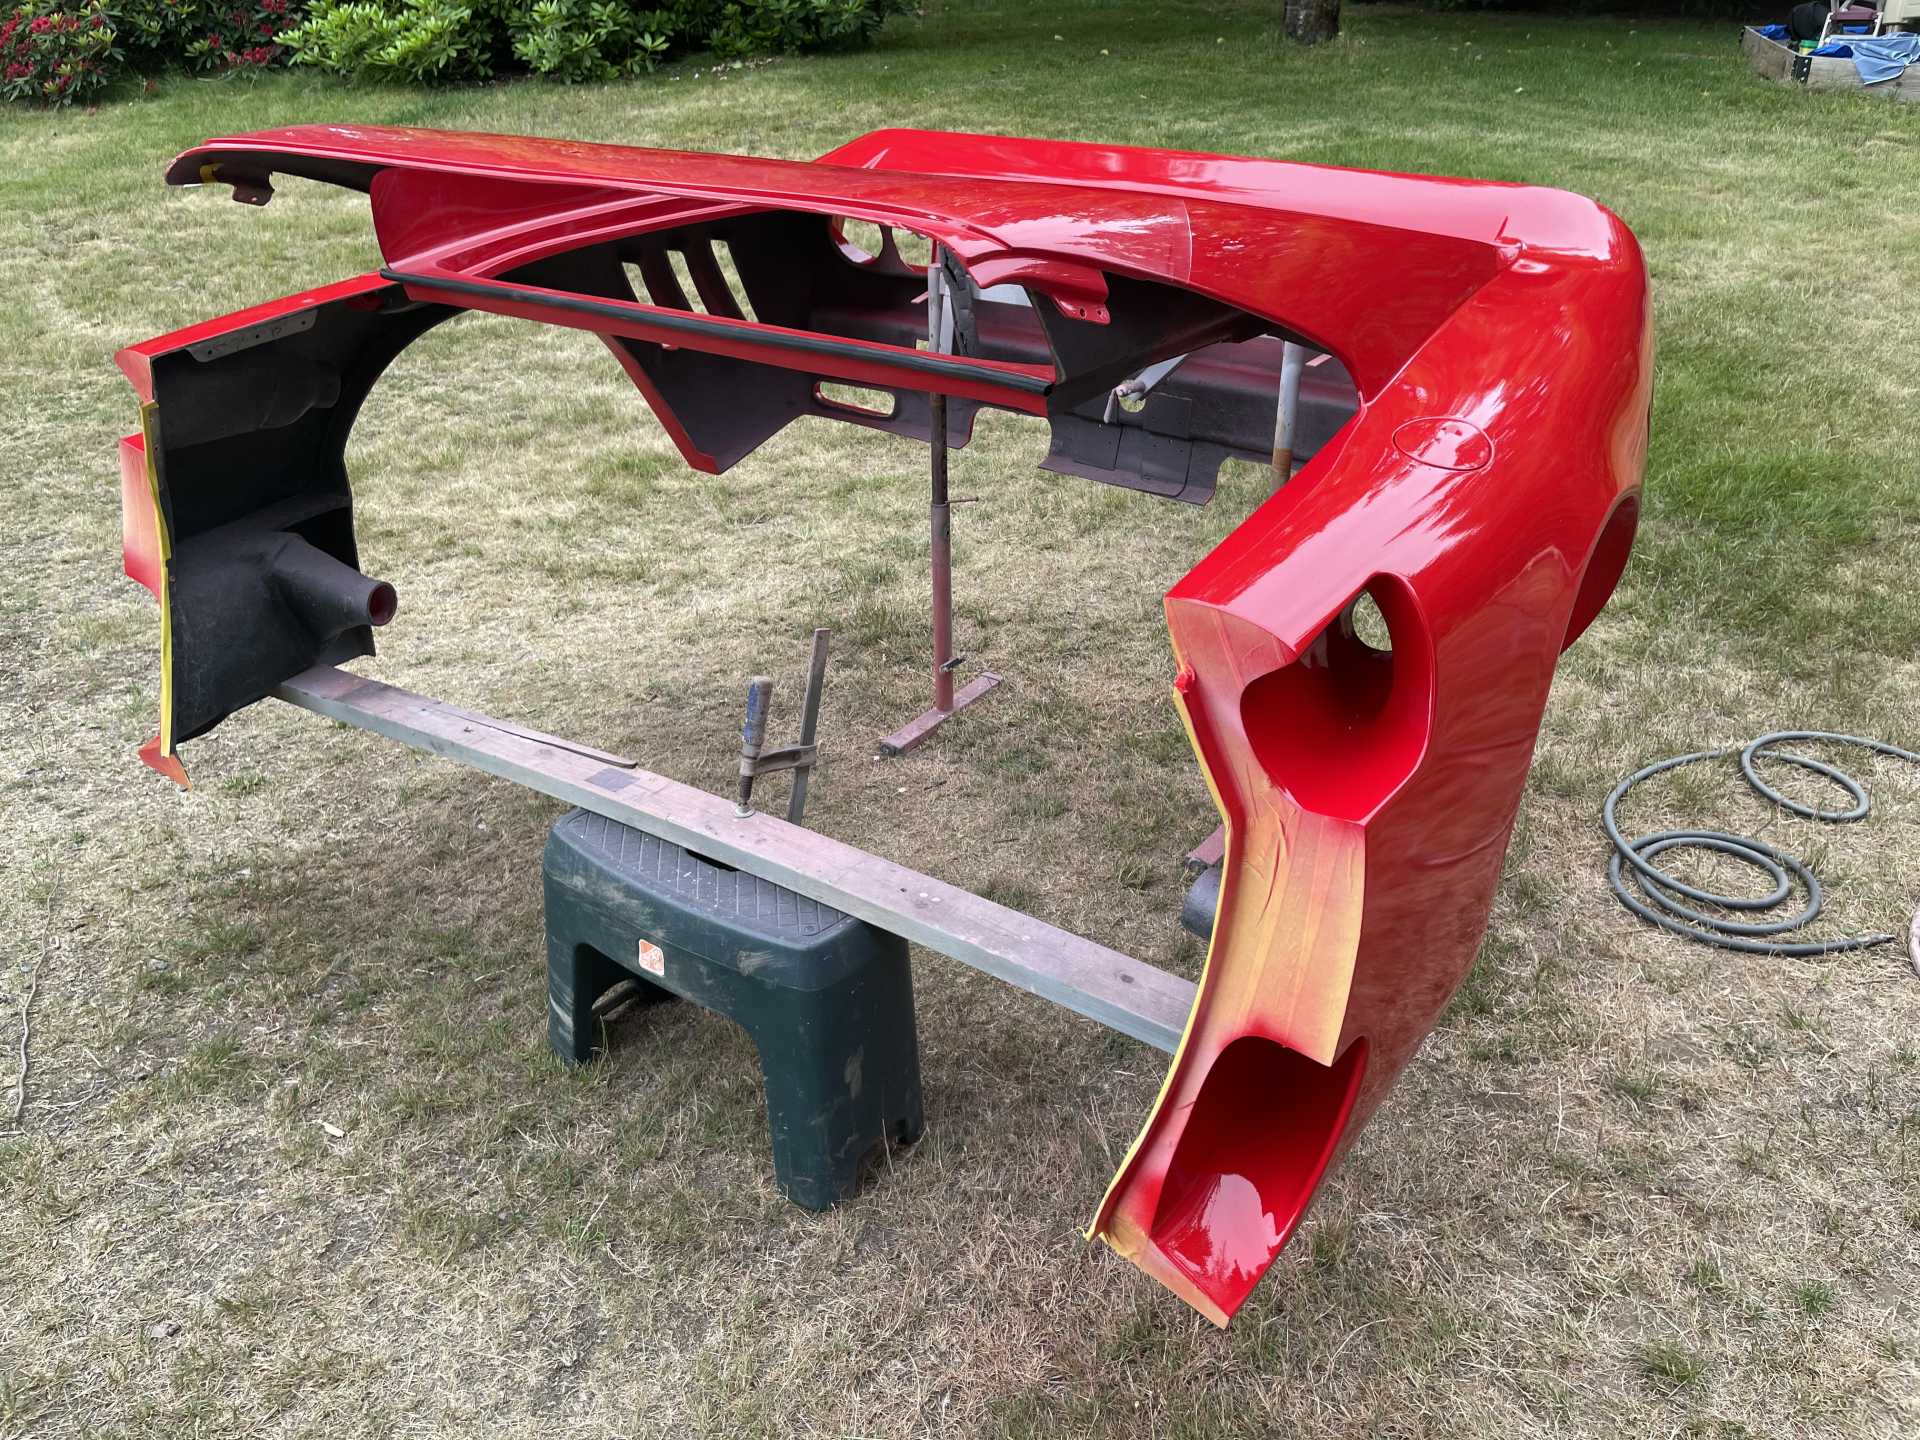
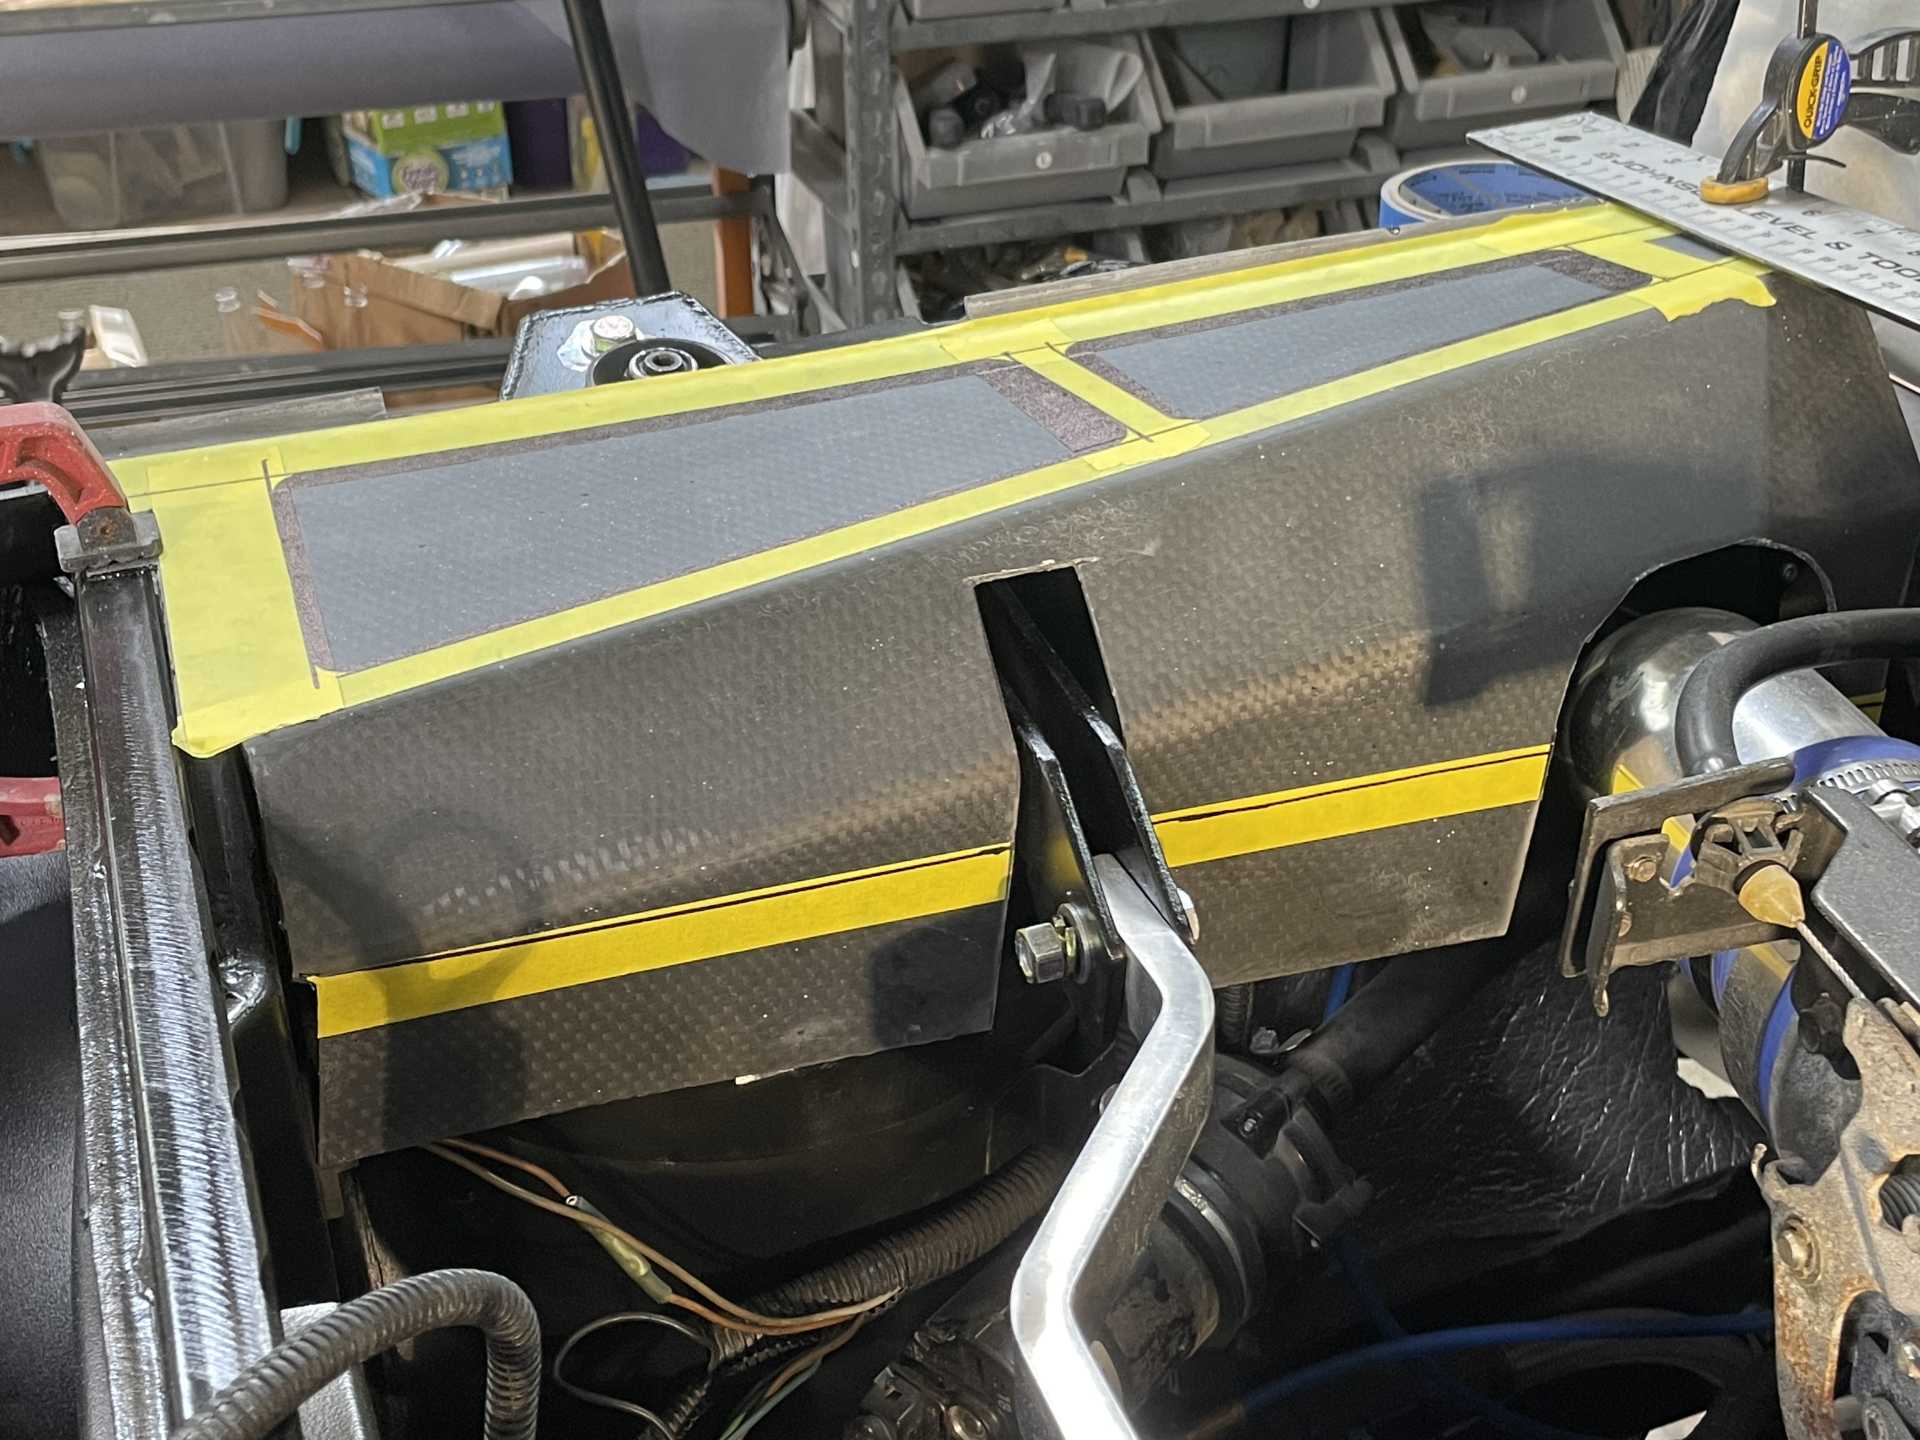
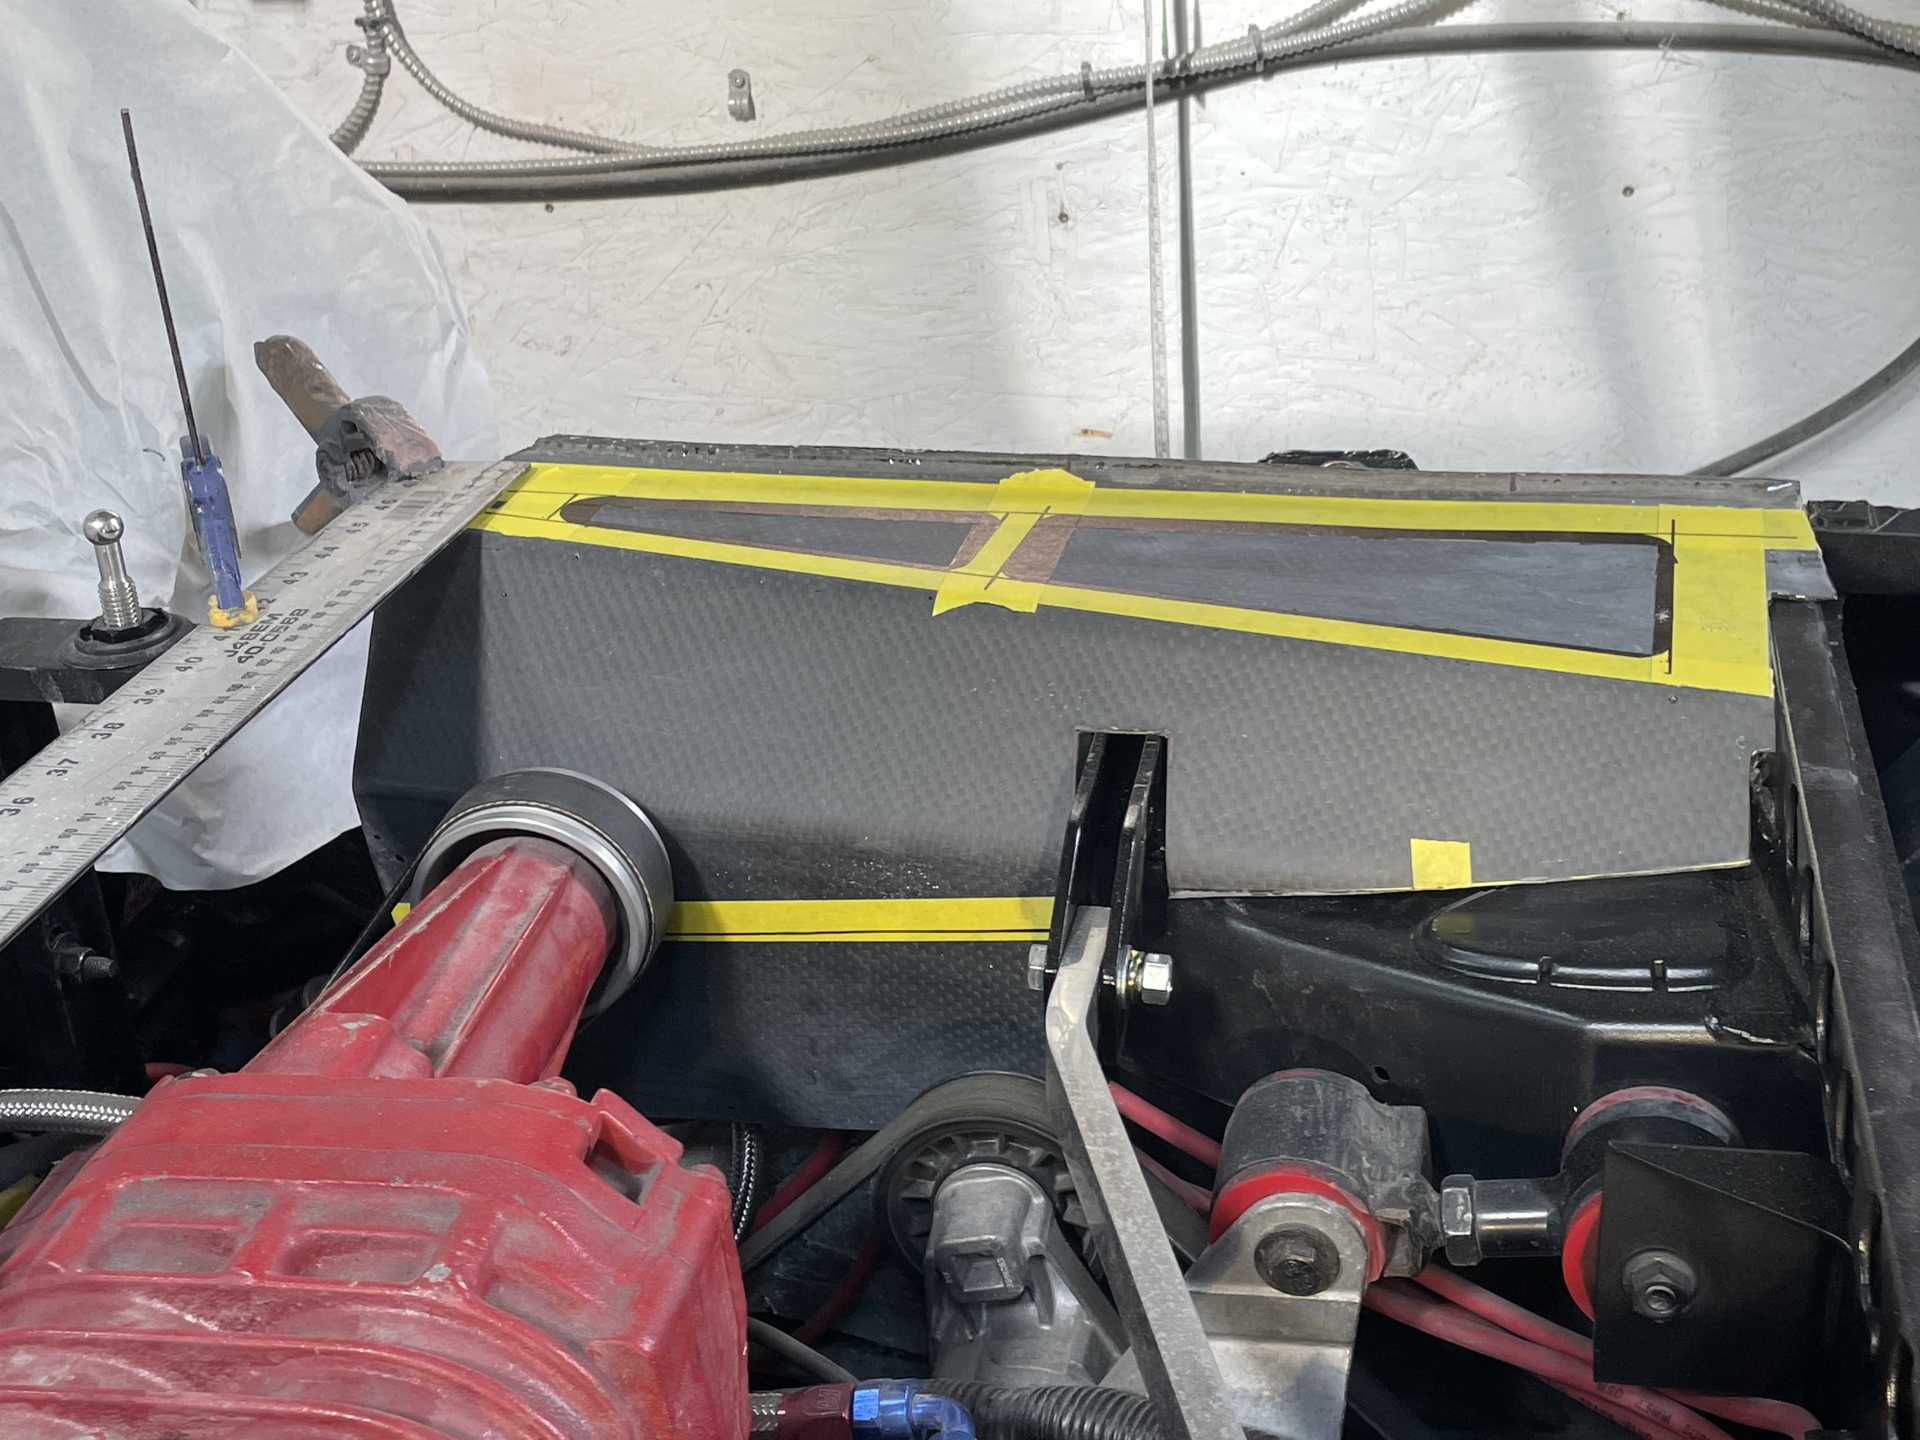
And then there is the Carbon Fiber engine compartment covers. I thought for those that are interested you might like the build process I used .
Keep in mind there are other ways to build them I’ve chosen this method but you could do an infusion or vacuum bag but due to the shape and sharp edges of the metal this worked best
For me.
I started with the cardboard templates I made earlier
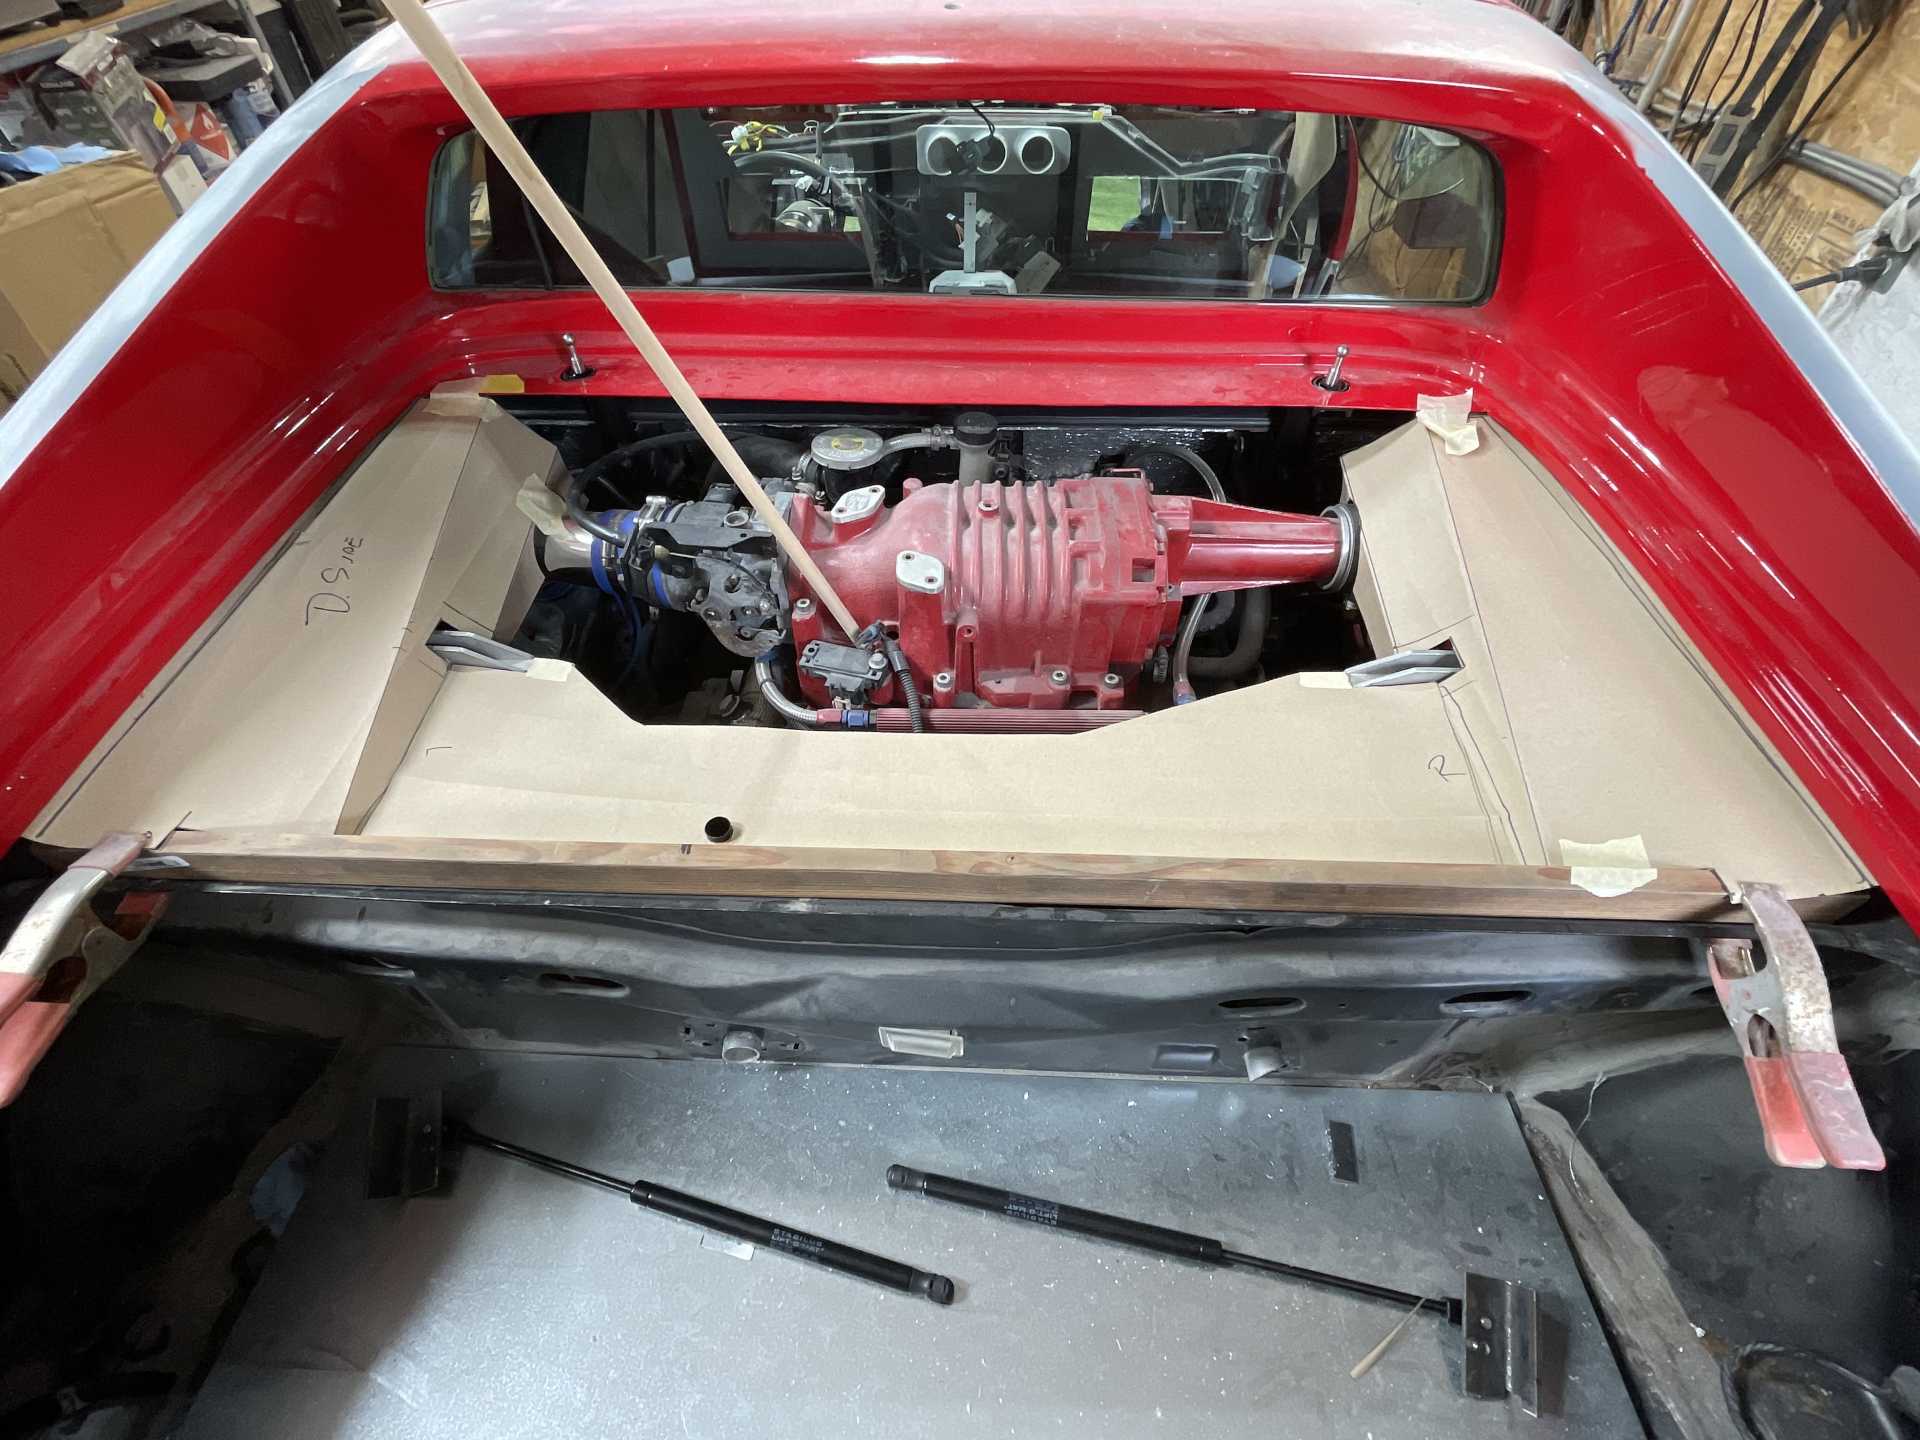
I took some 18ga metal and bent it to the shape of the cover, I then waxed it a couple times and then sprayed it with PVA mold release
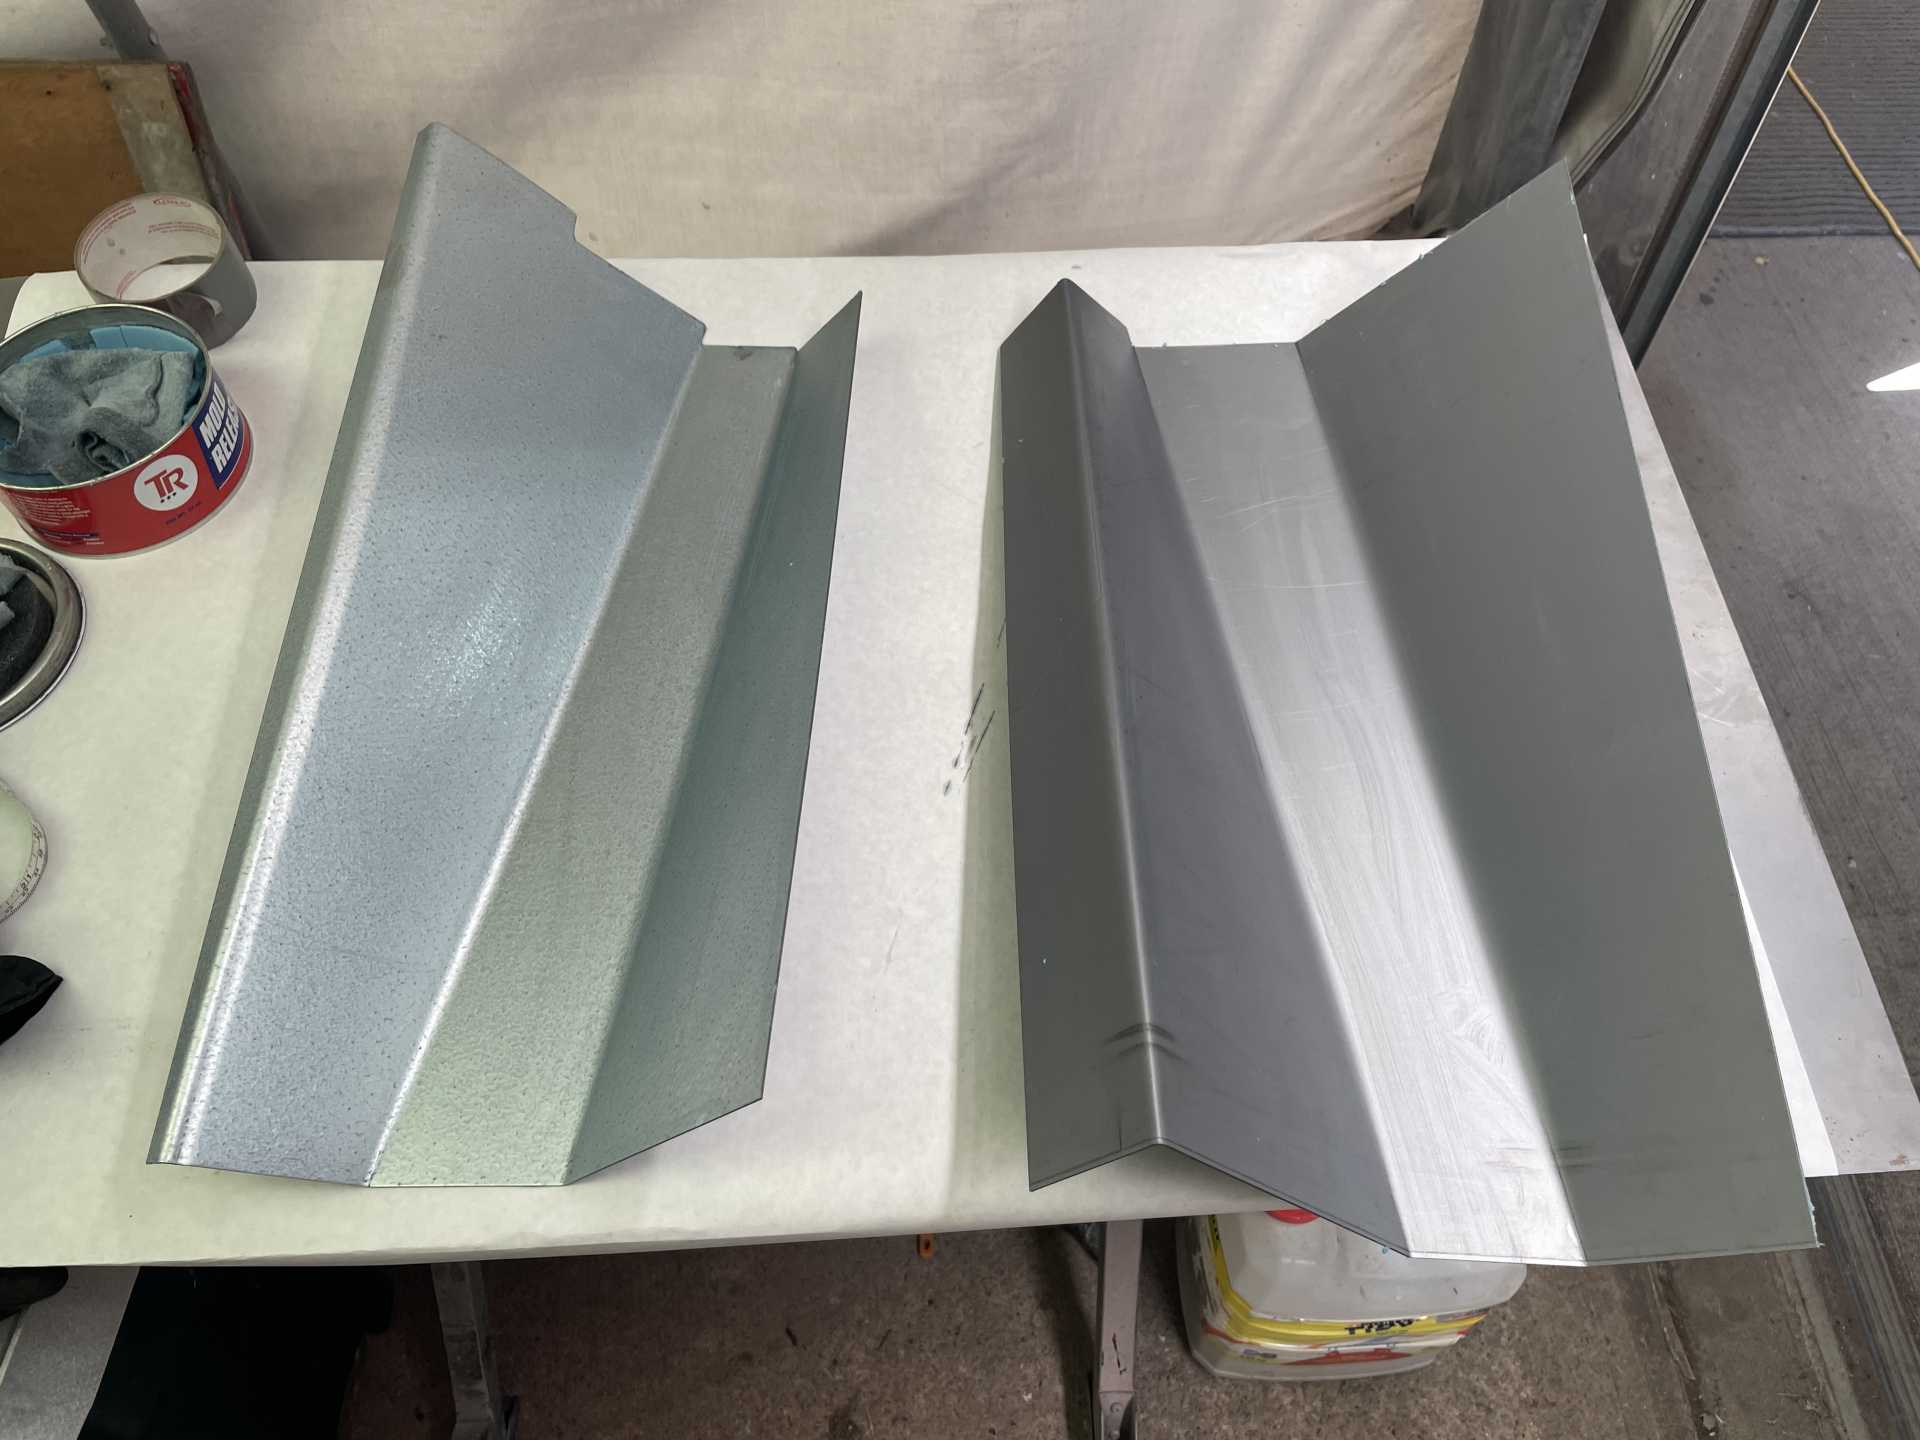
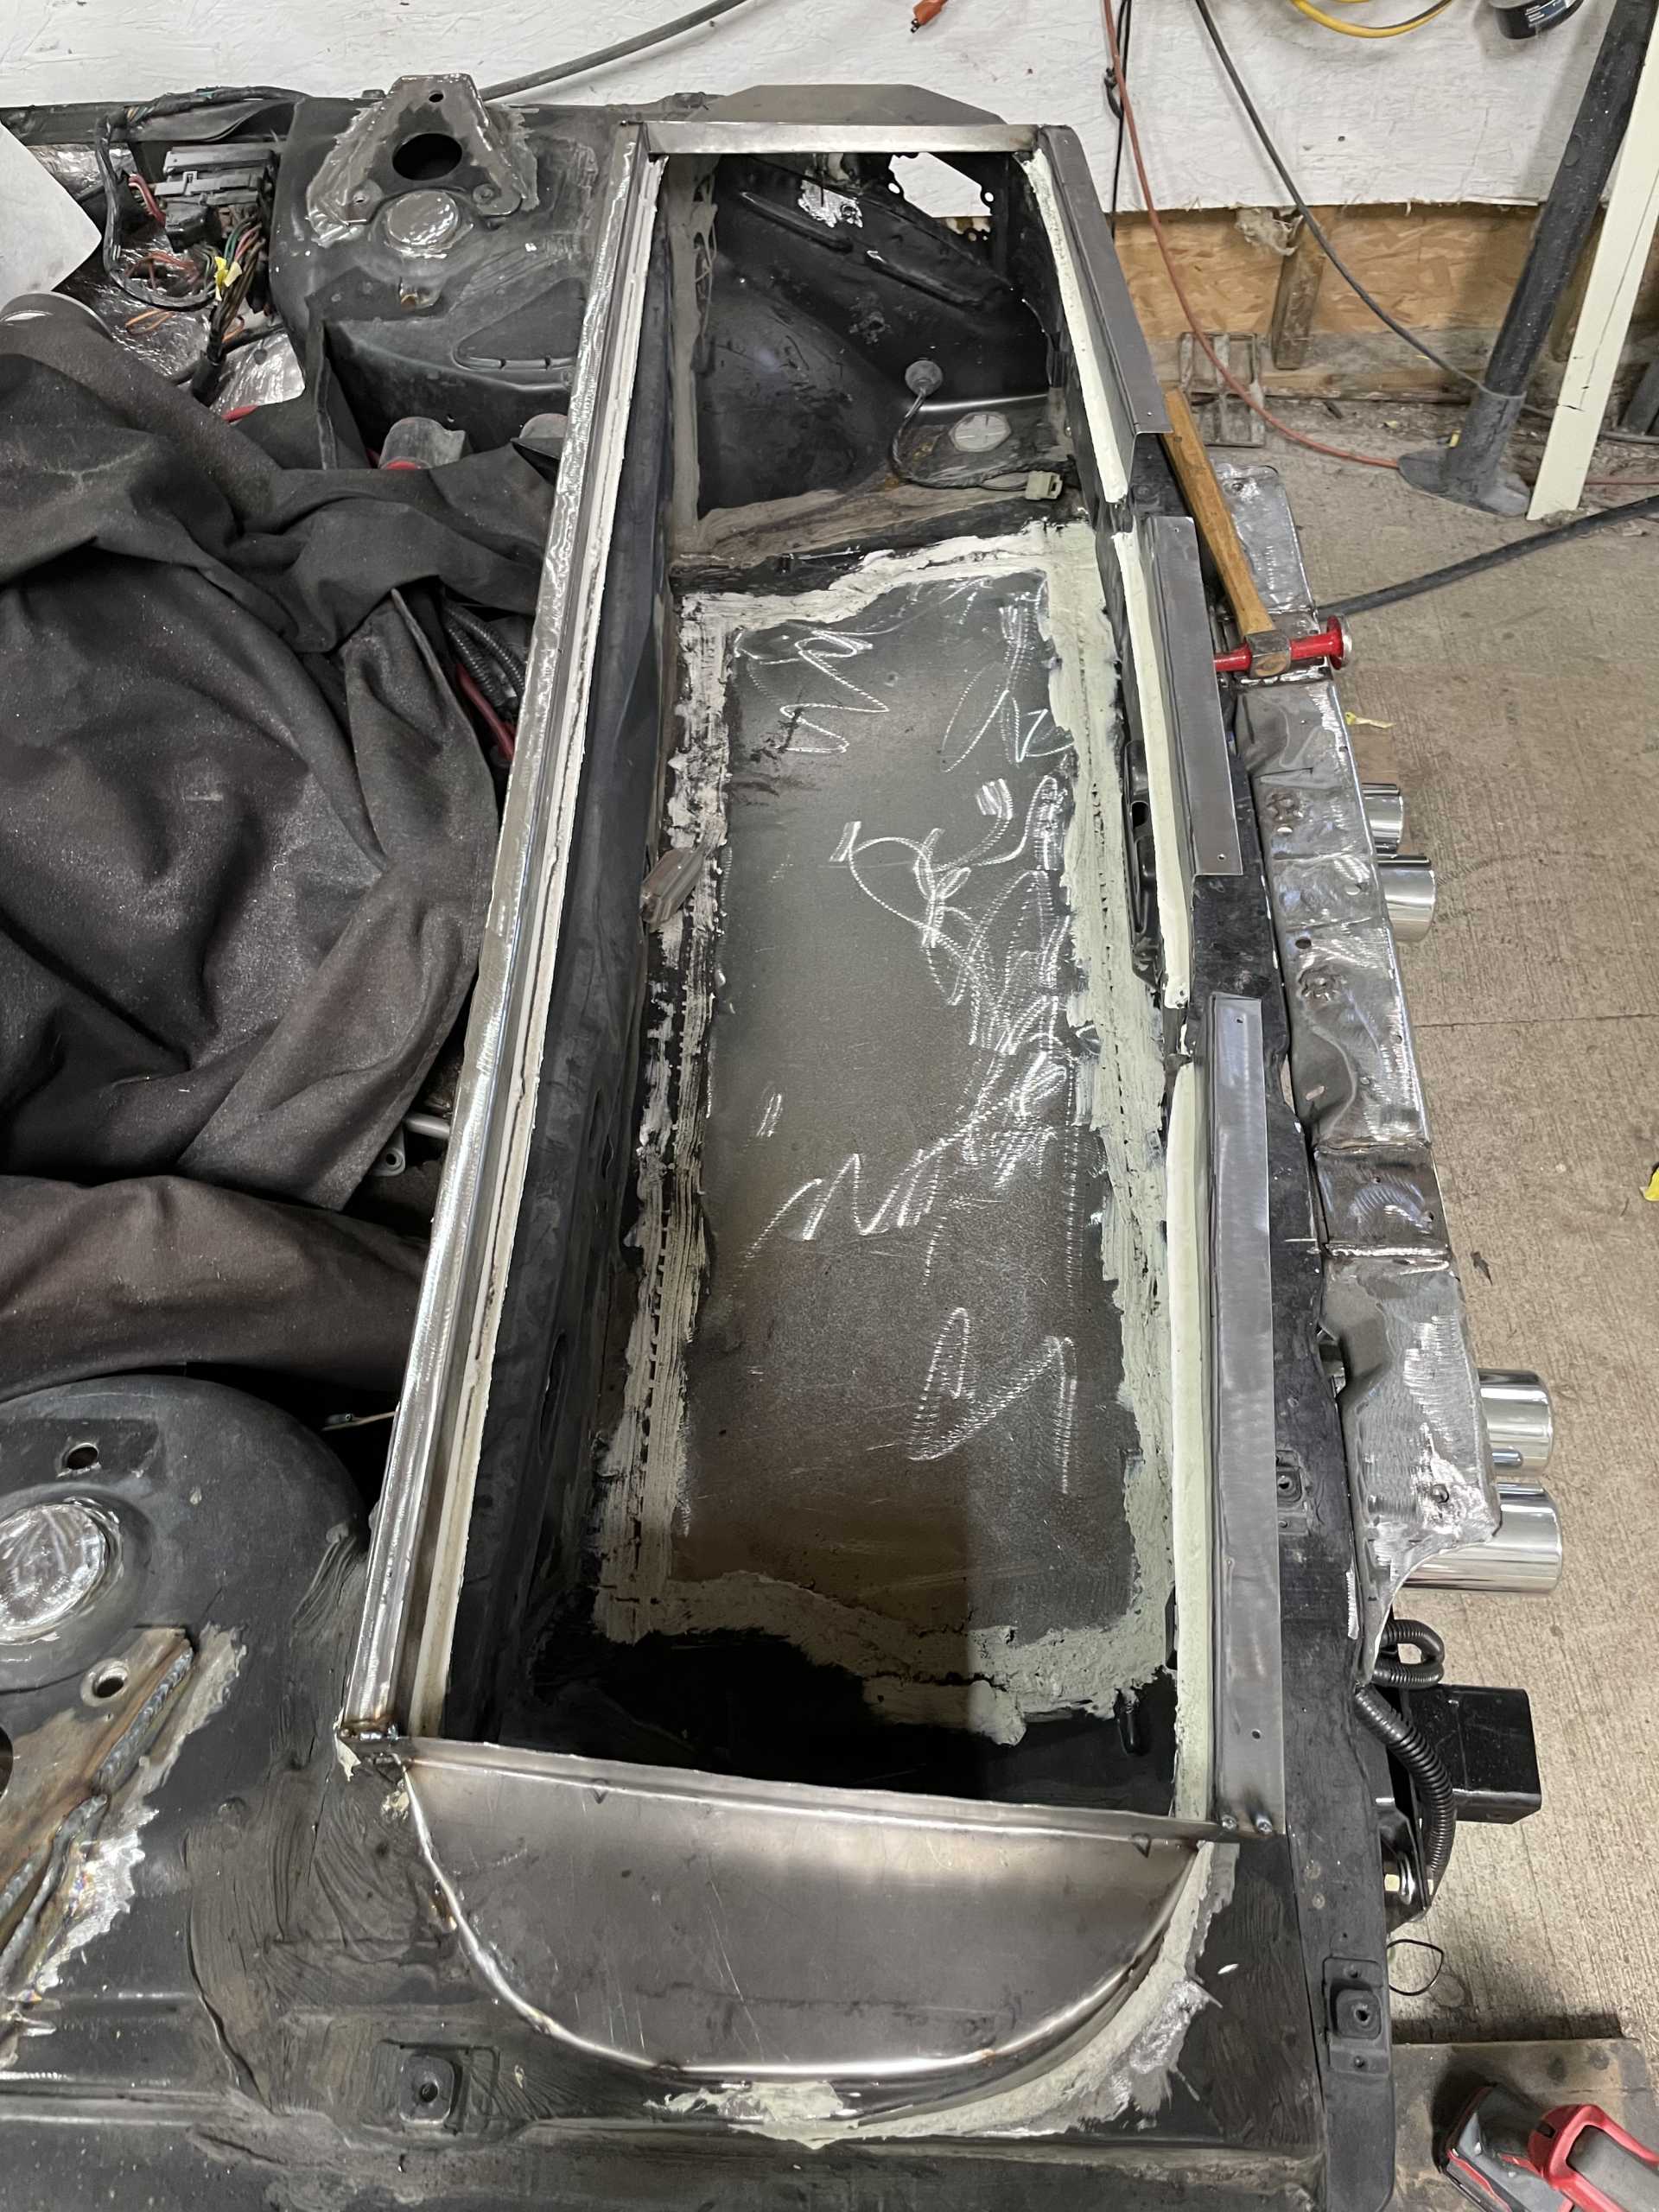
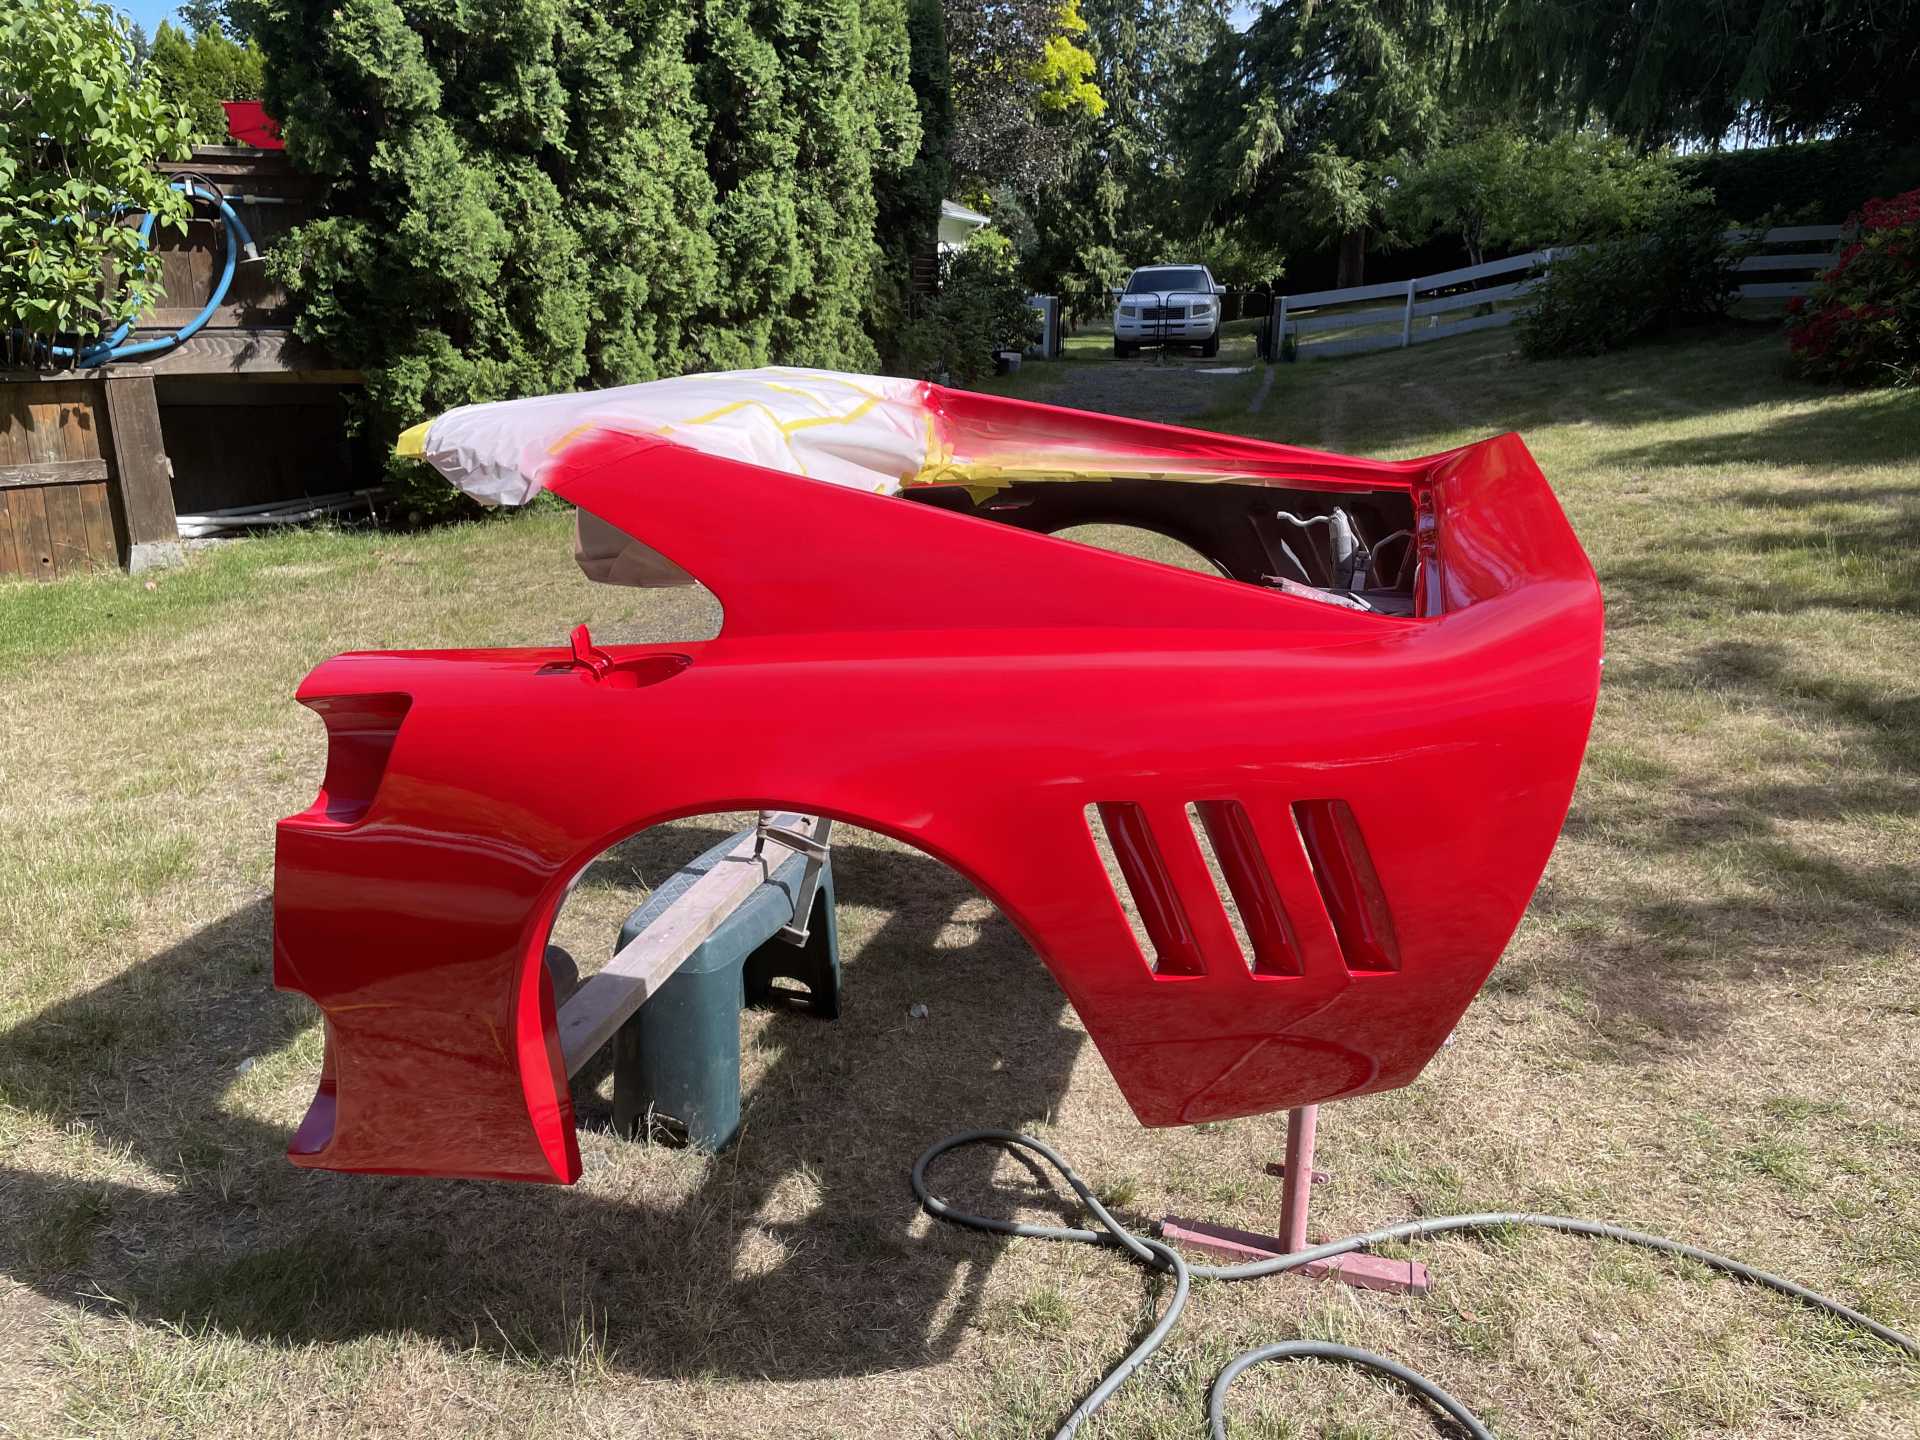
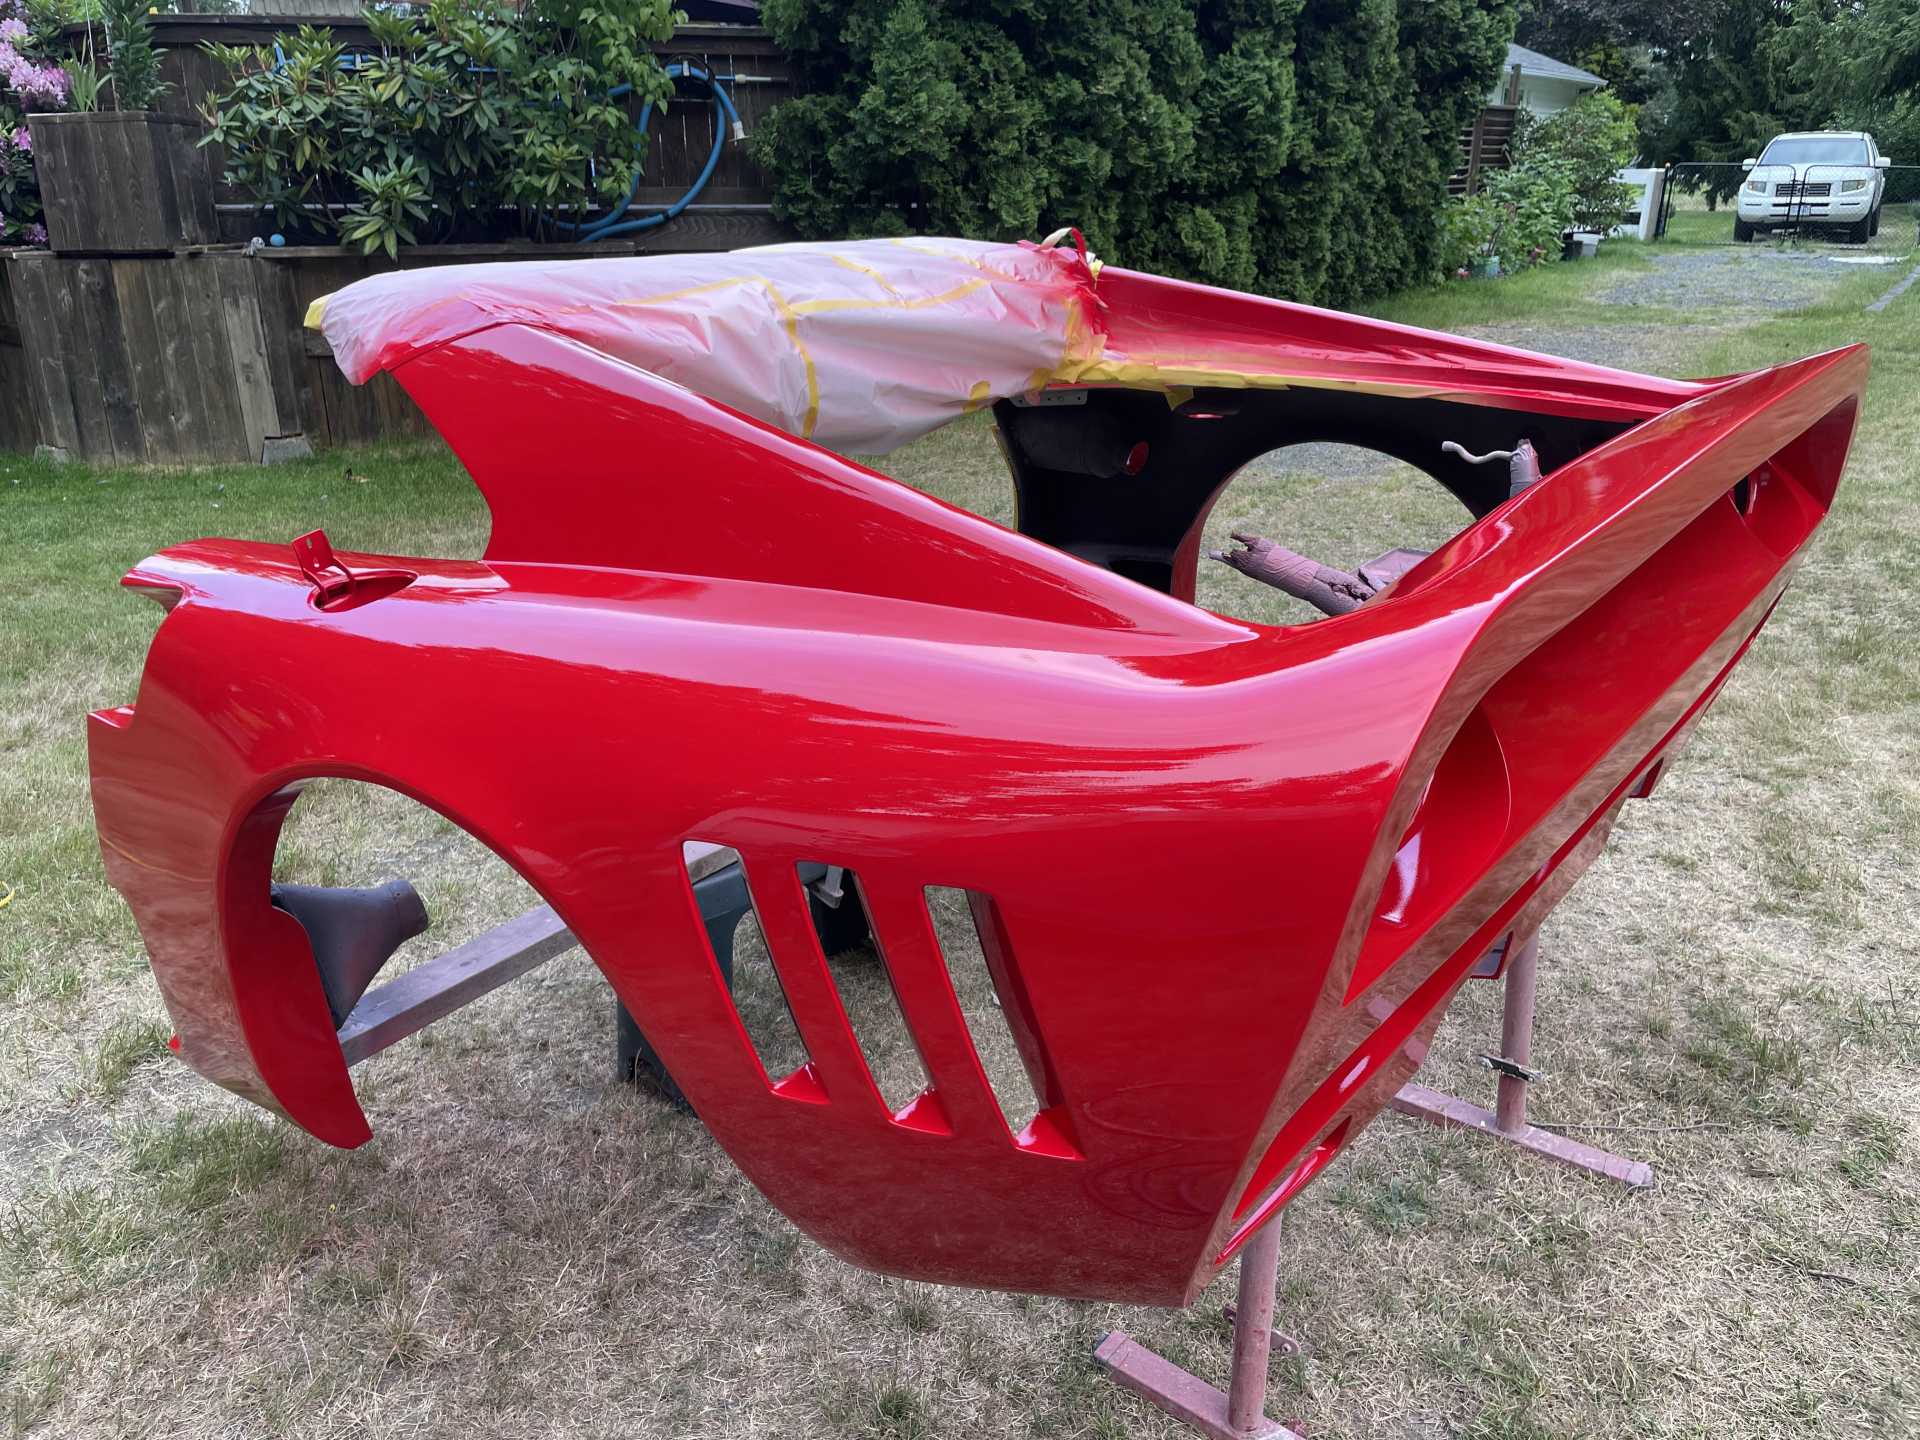
You can use a few different types of epoxy resin , I happen to have infusion resin , first coat the metal as best you can with the resin with an even coat . Then lay your first layer of cloth down.
Take a brush and really impregnate the cloth very important as this is the finish, add your next layer and brush it with resin then the third and last layer same process.
Once done to make sur the edges didn’t lift I added some strips along the edges and lightly clamped them so they don’t lift. Let cure overnight.
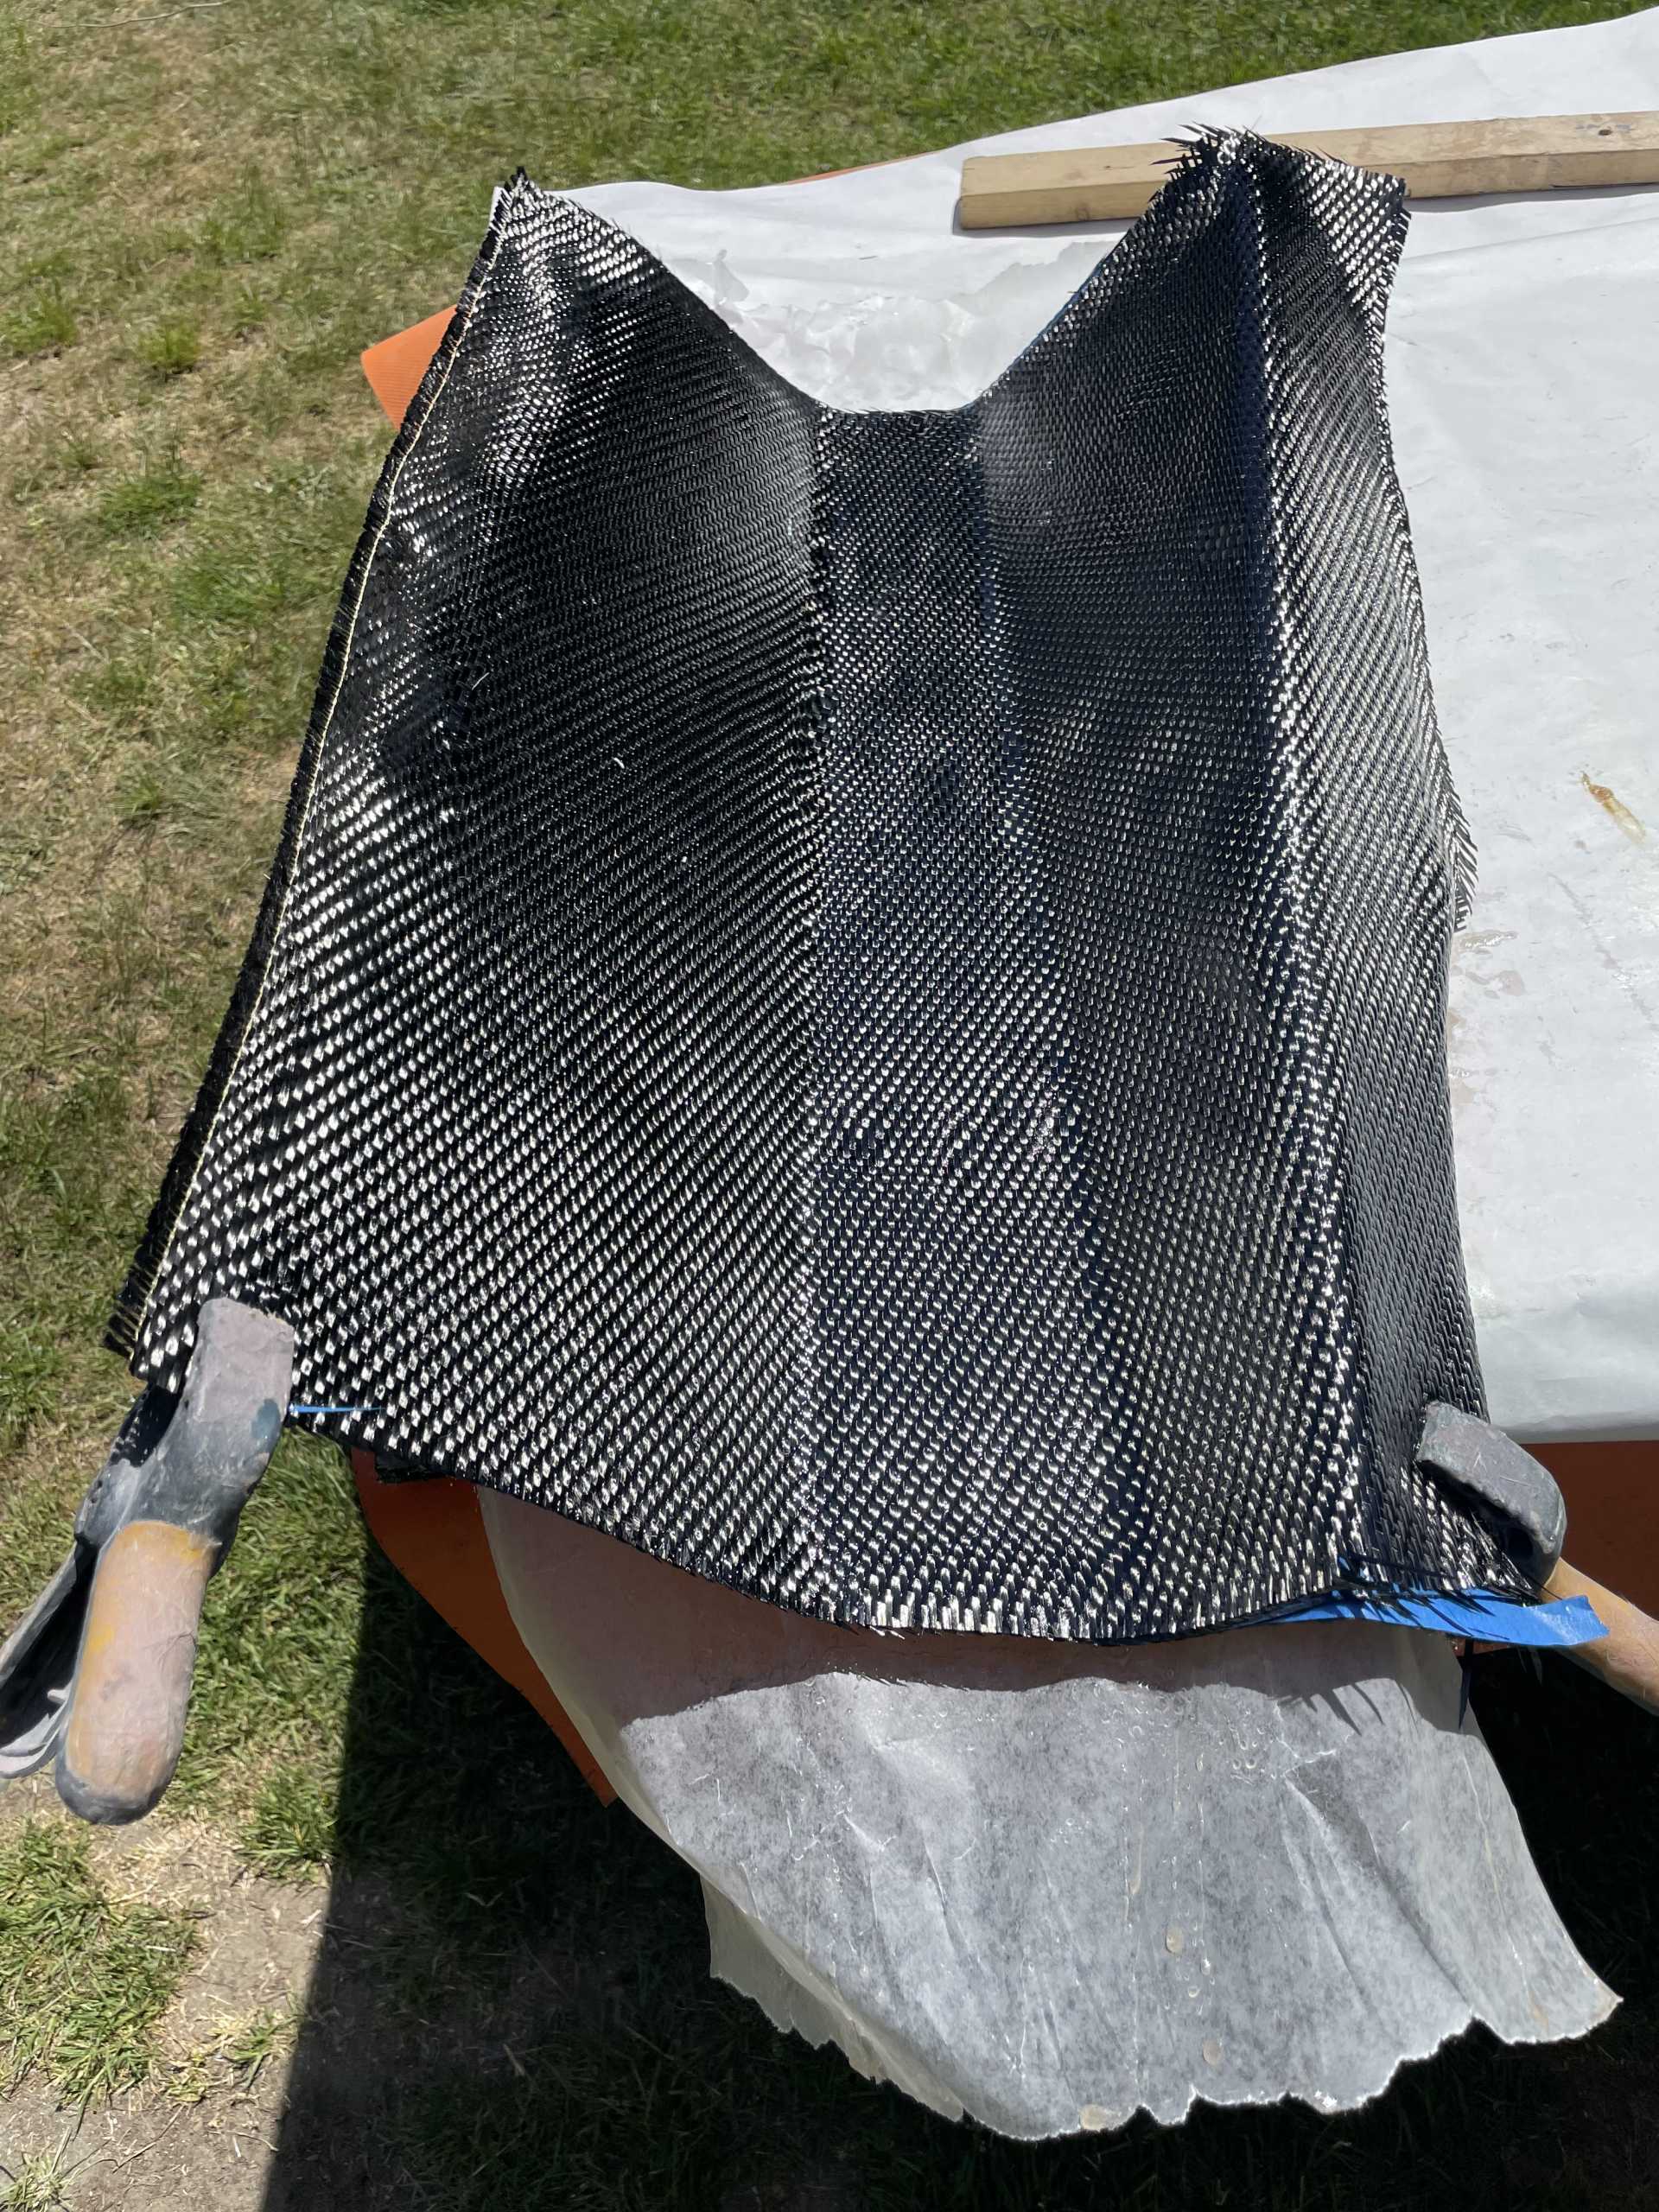
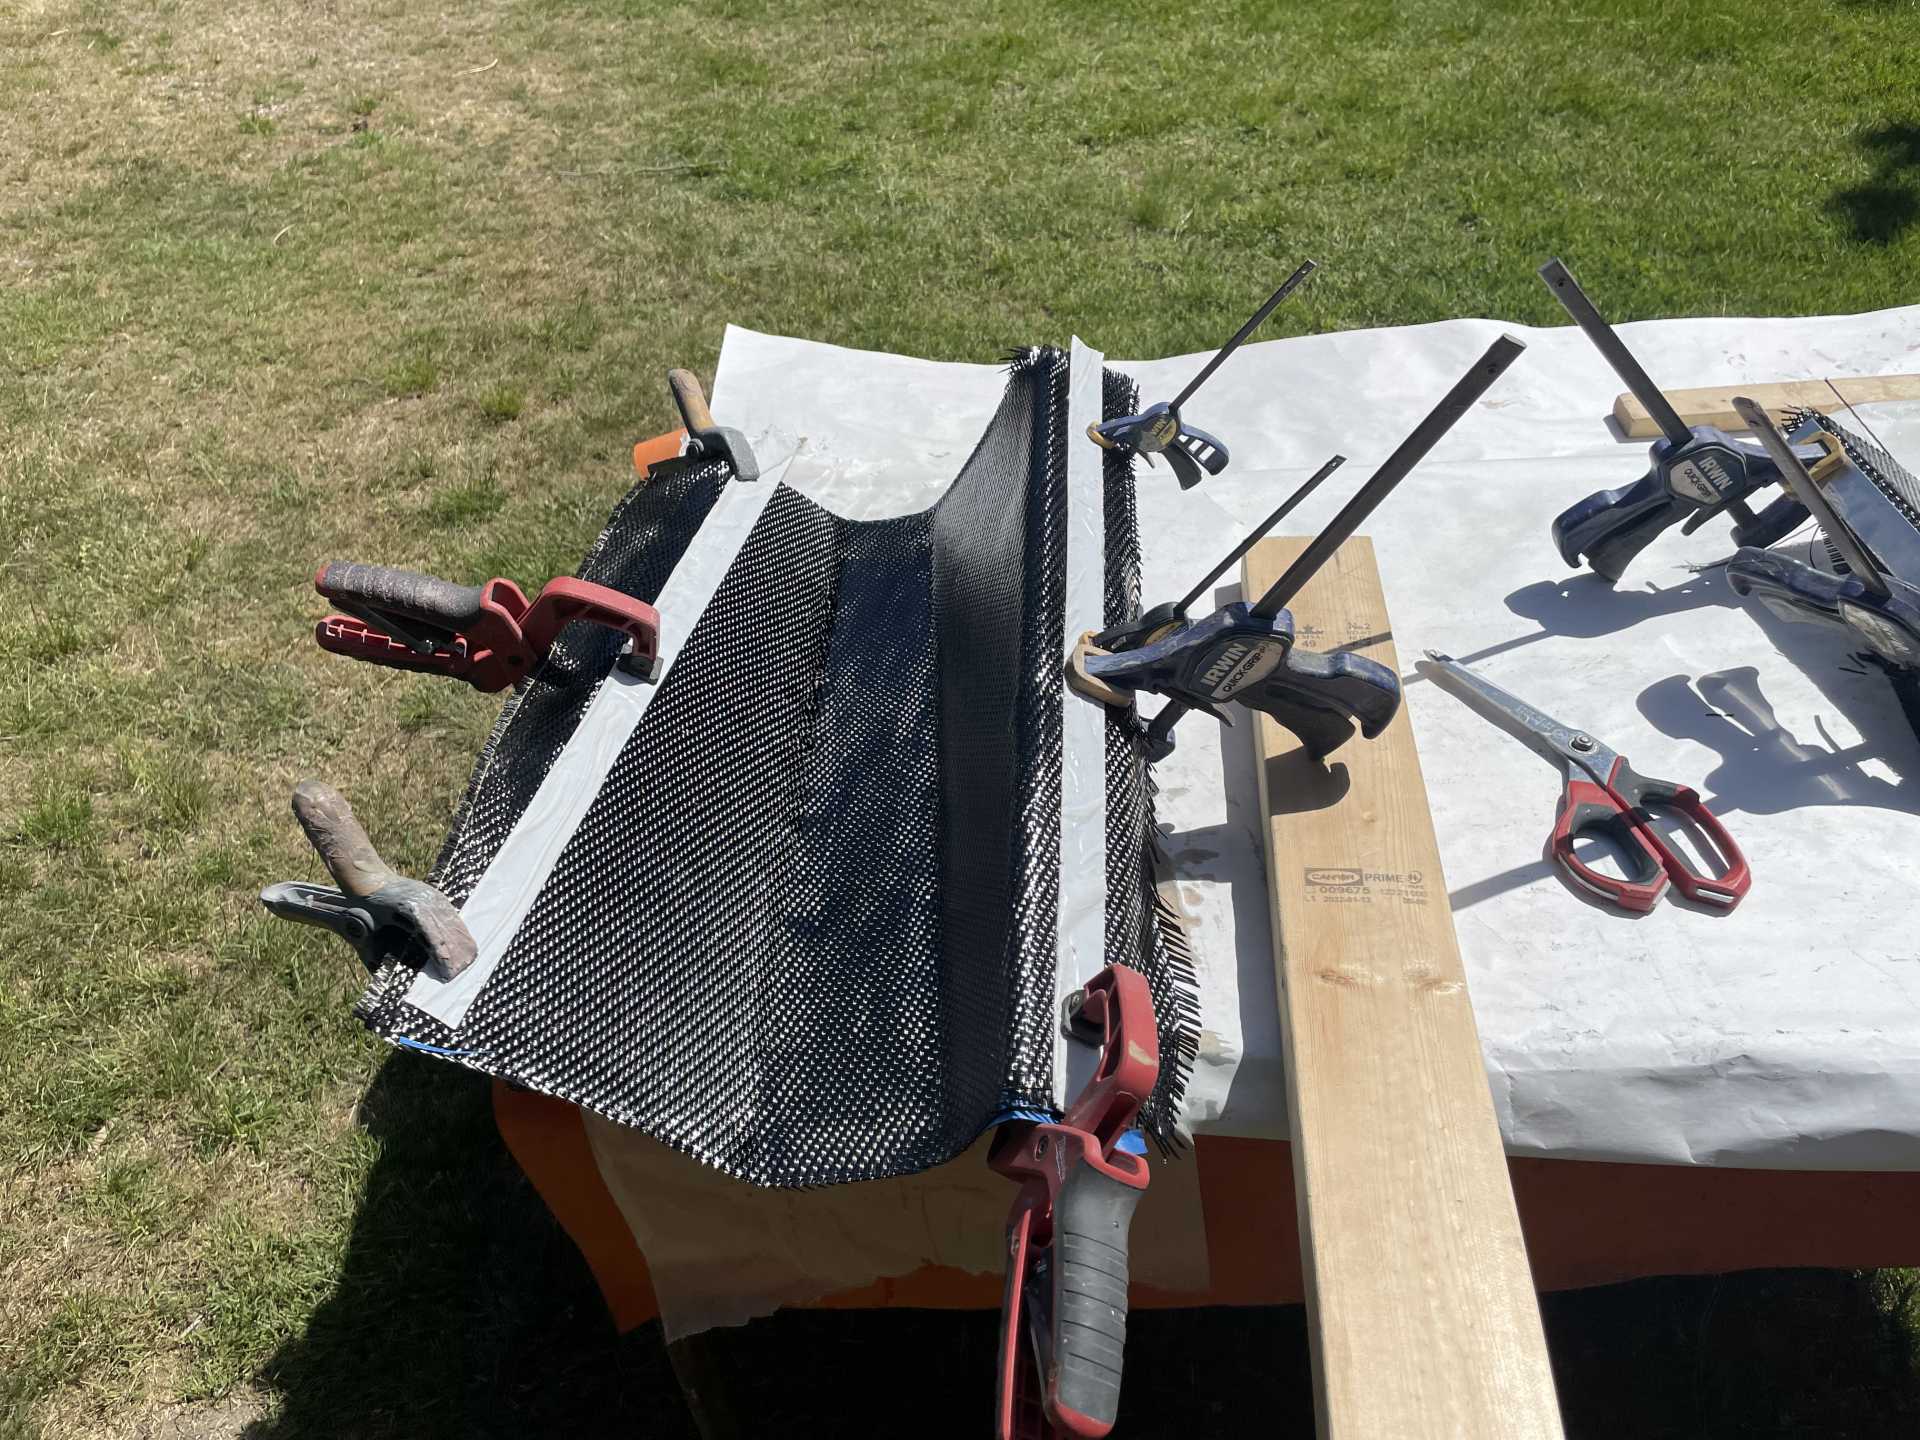
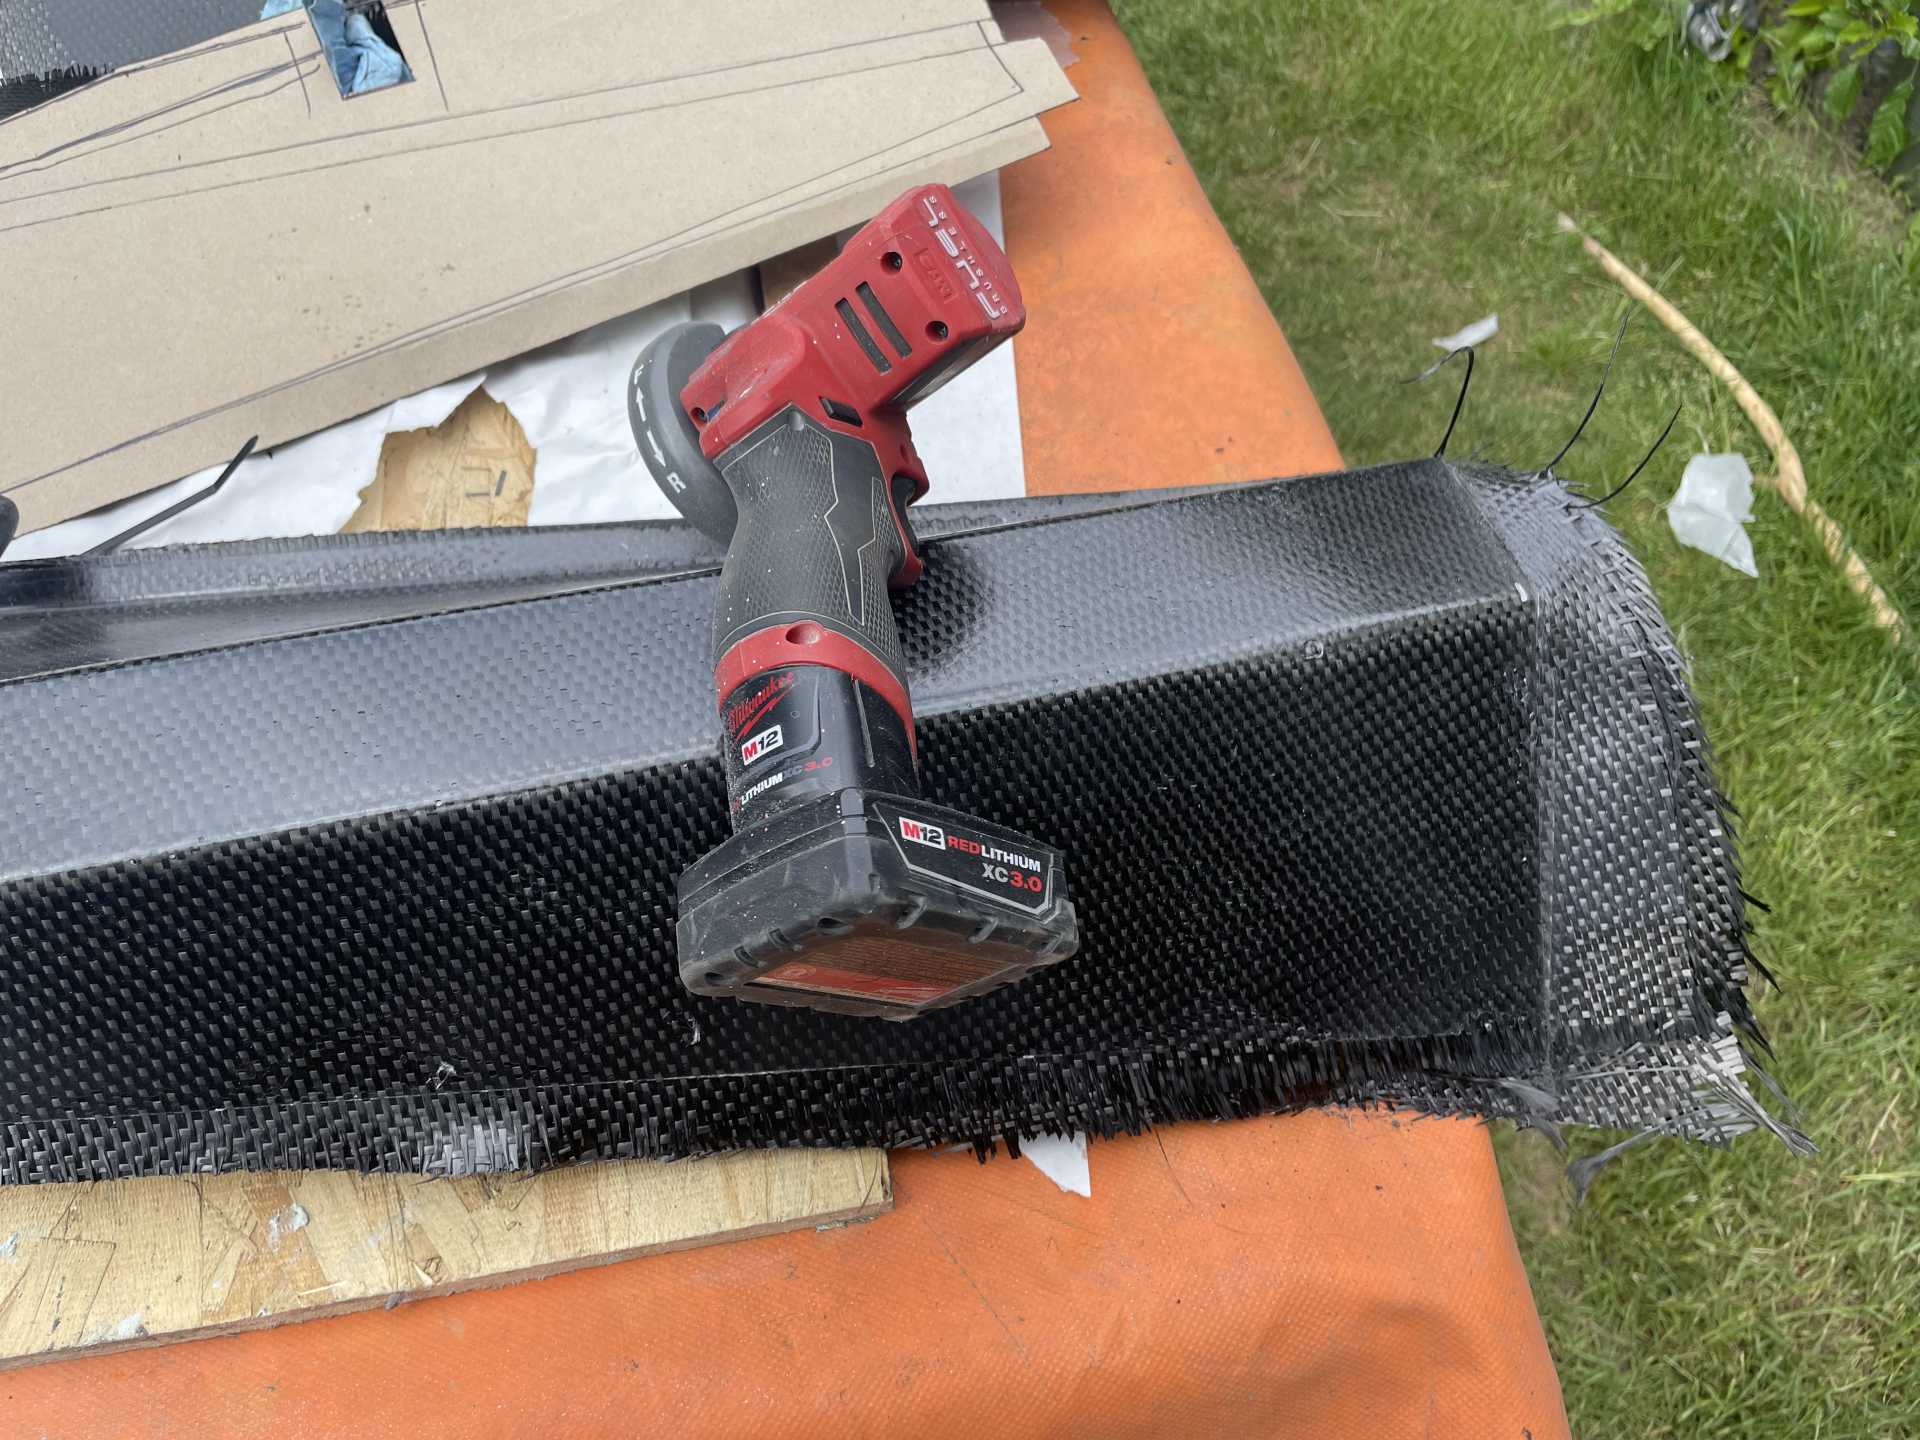
The next day I popped them off the form and trimmed them down to size and shape.
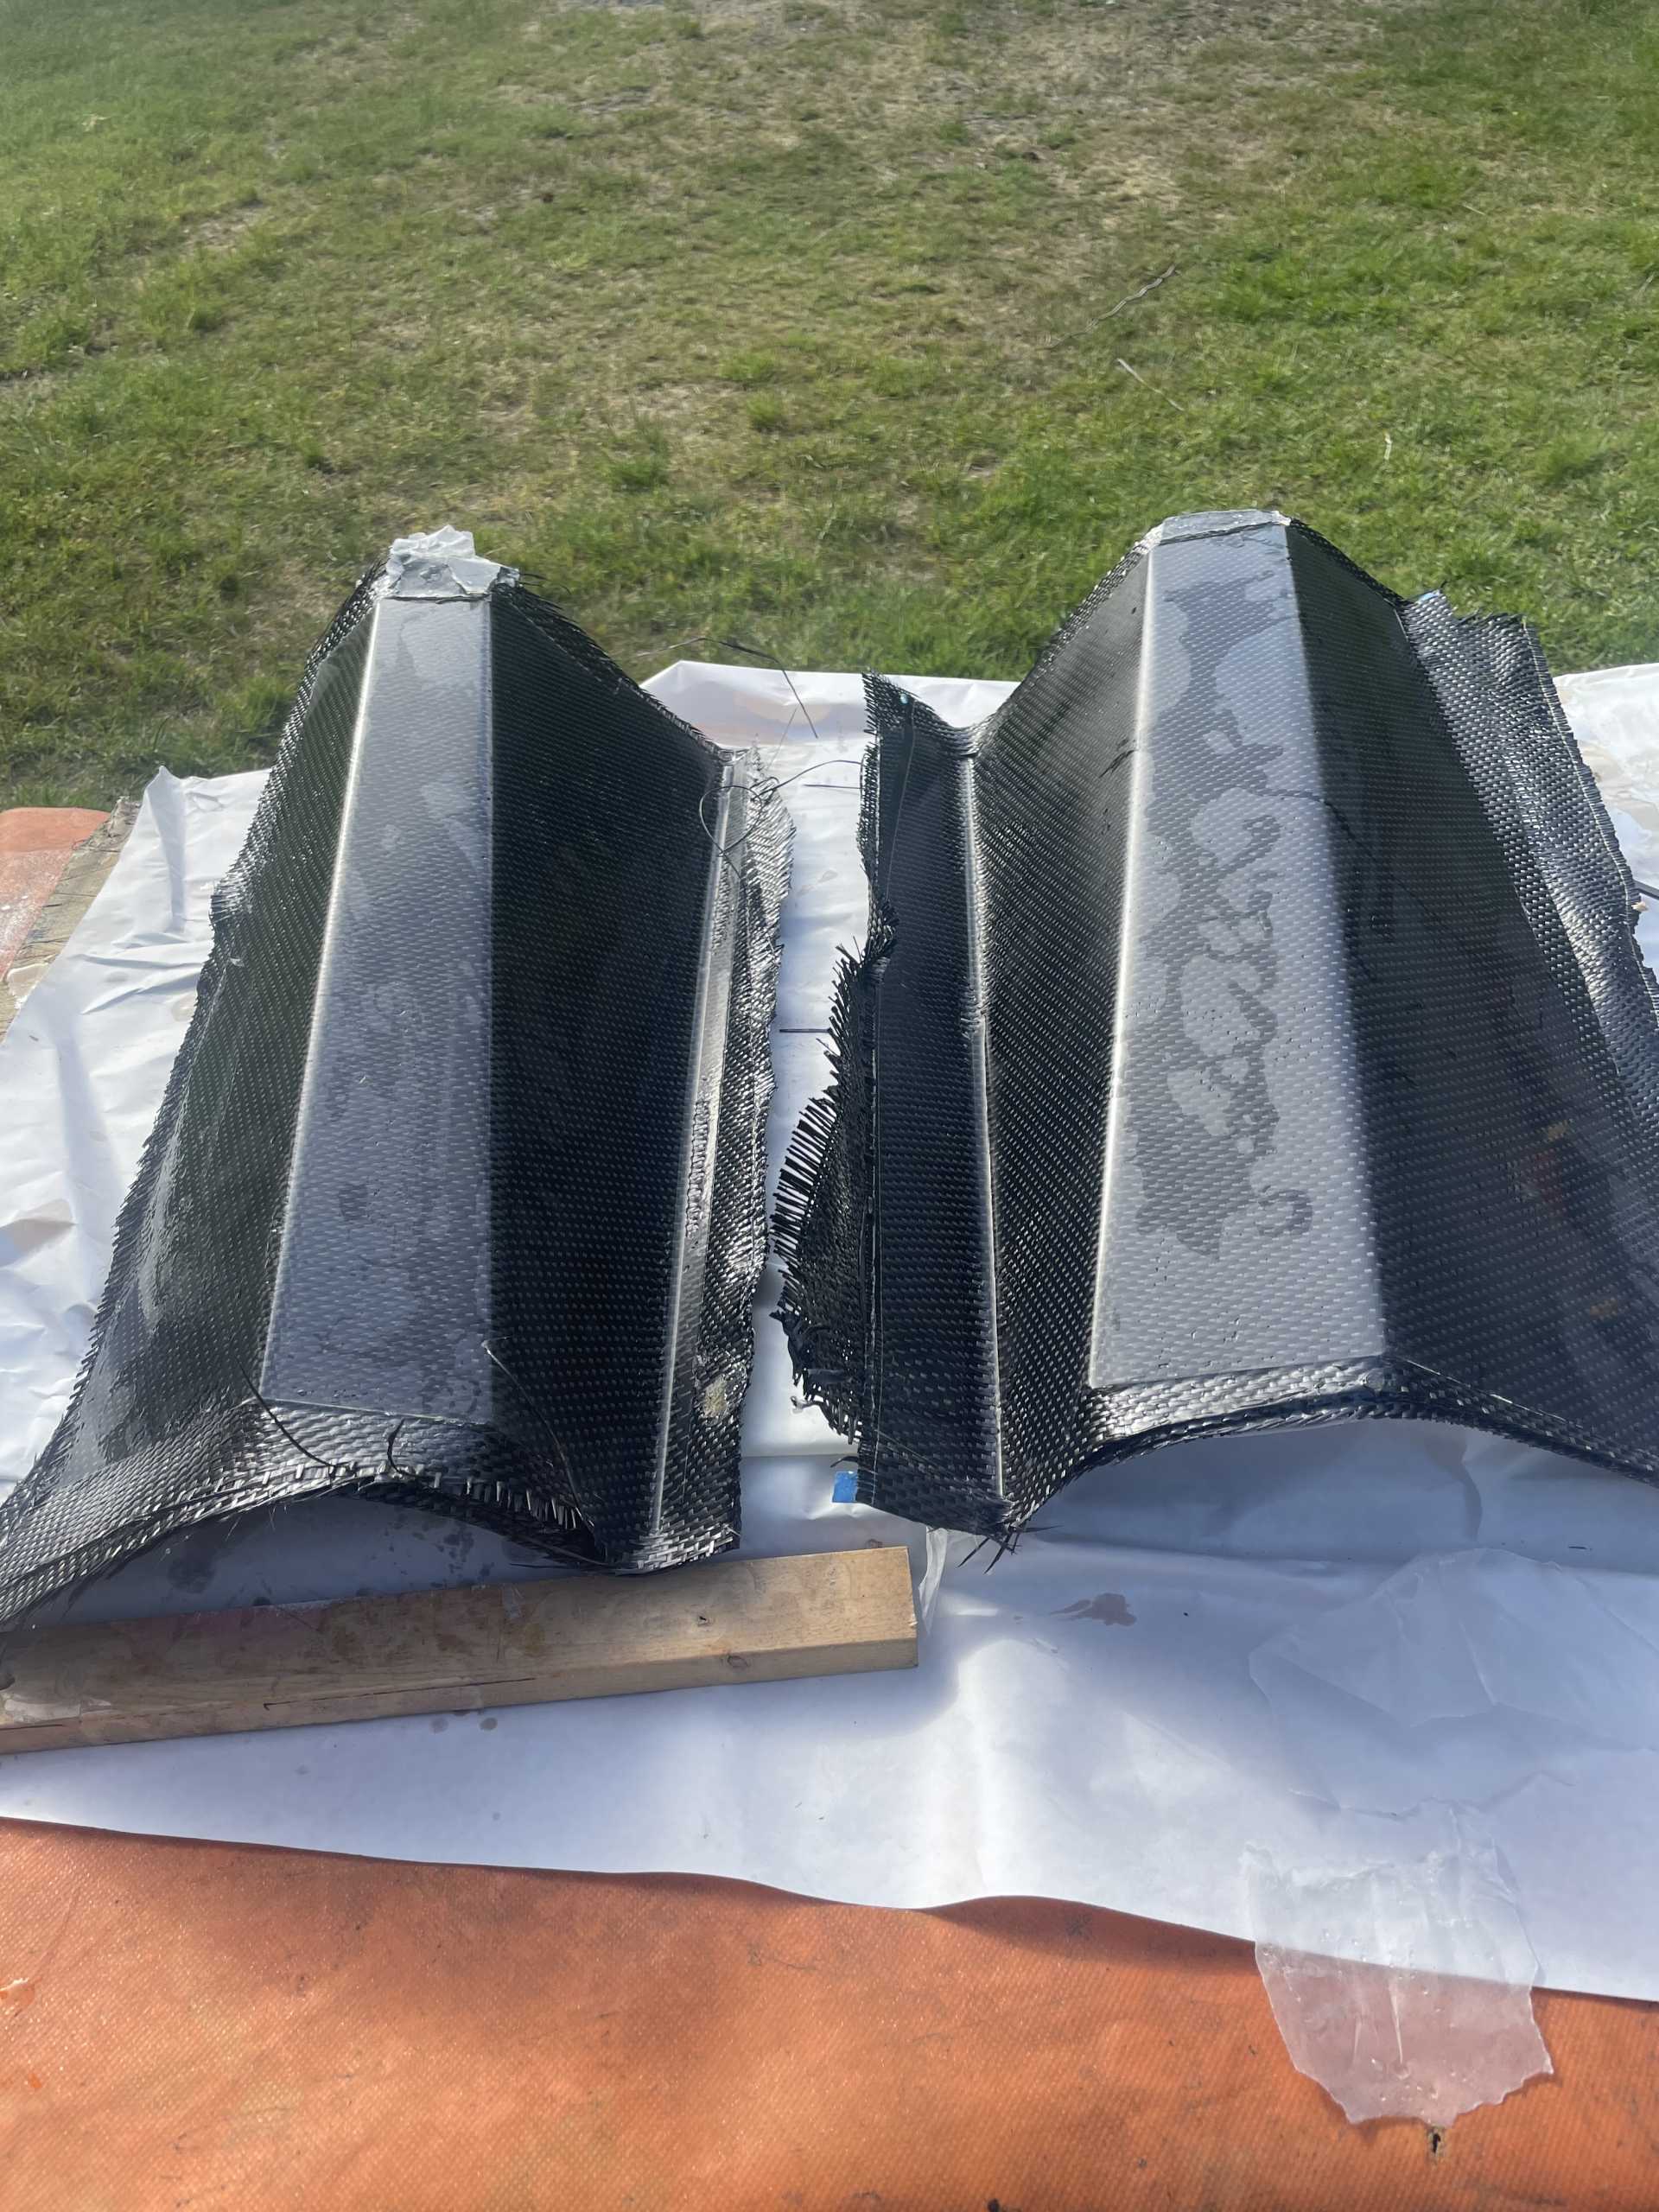
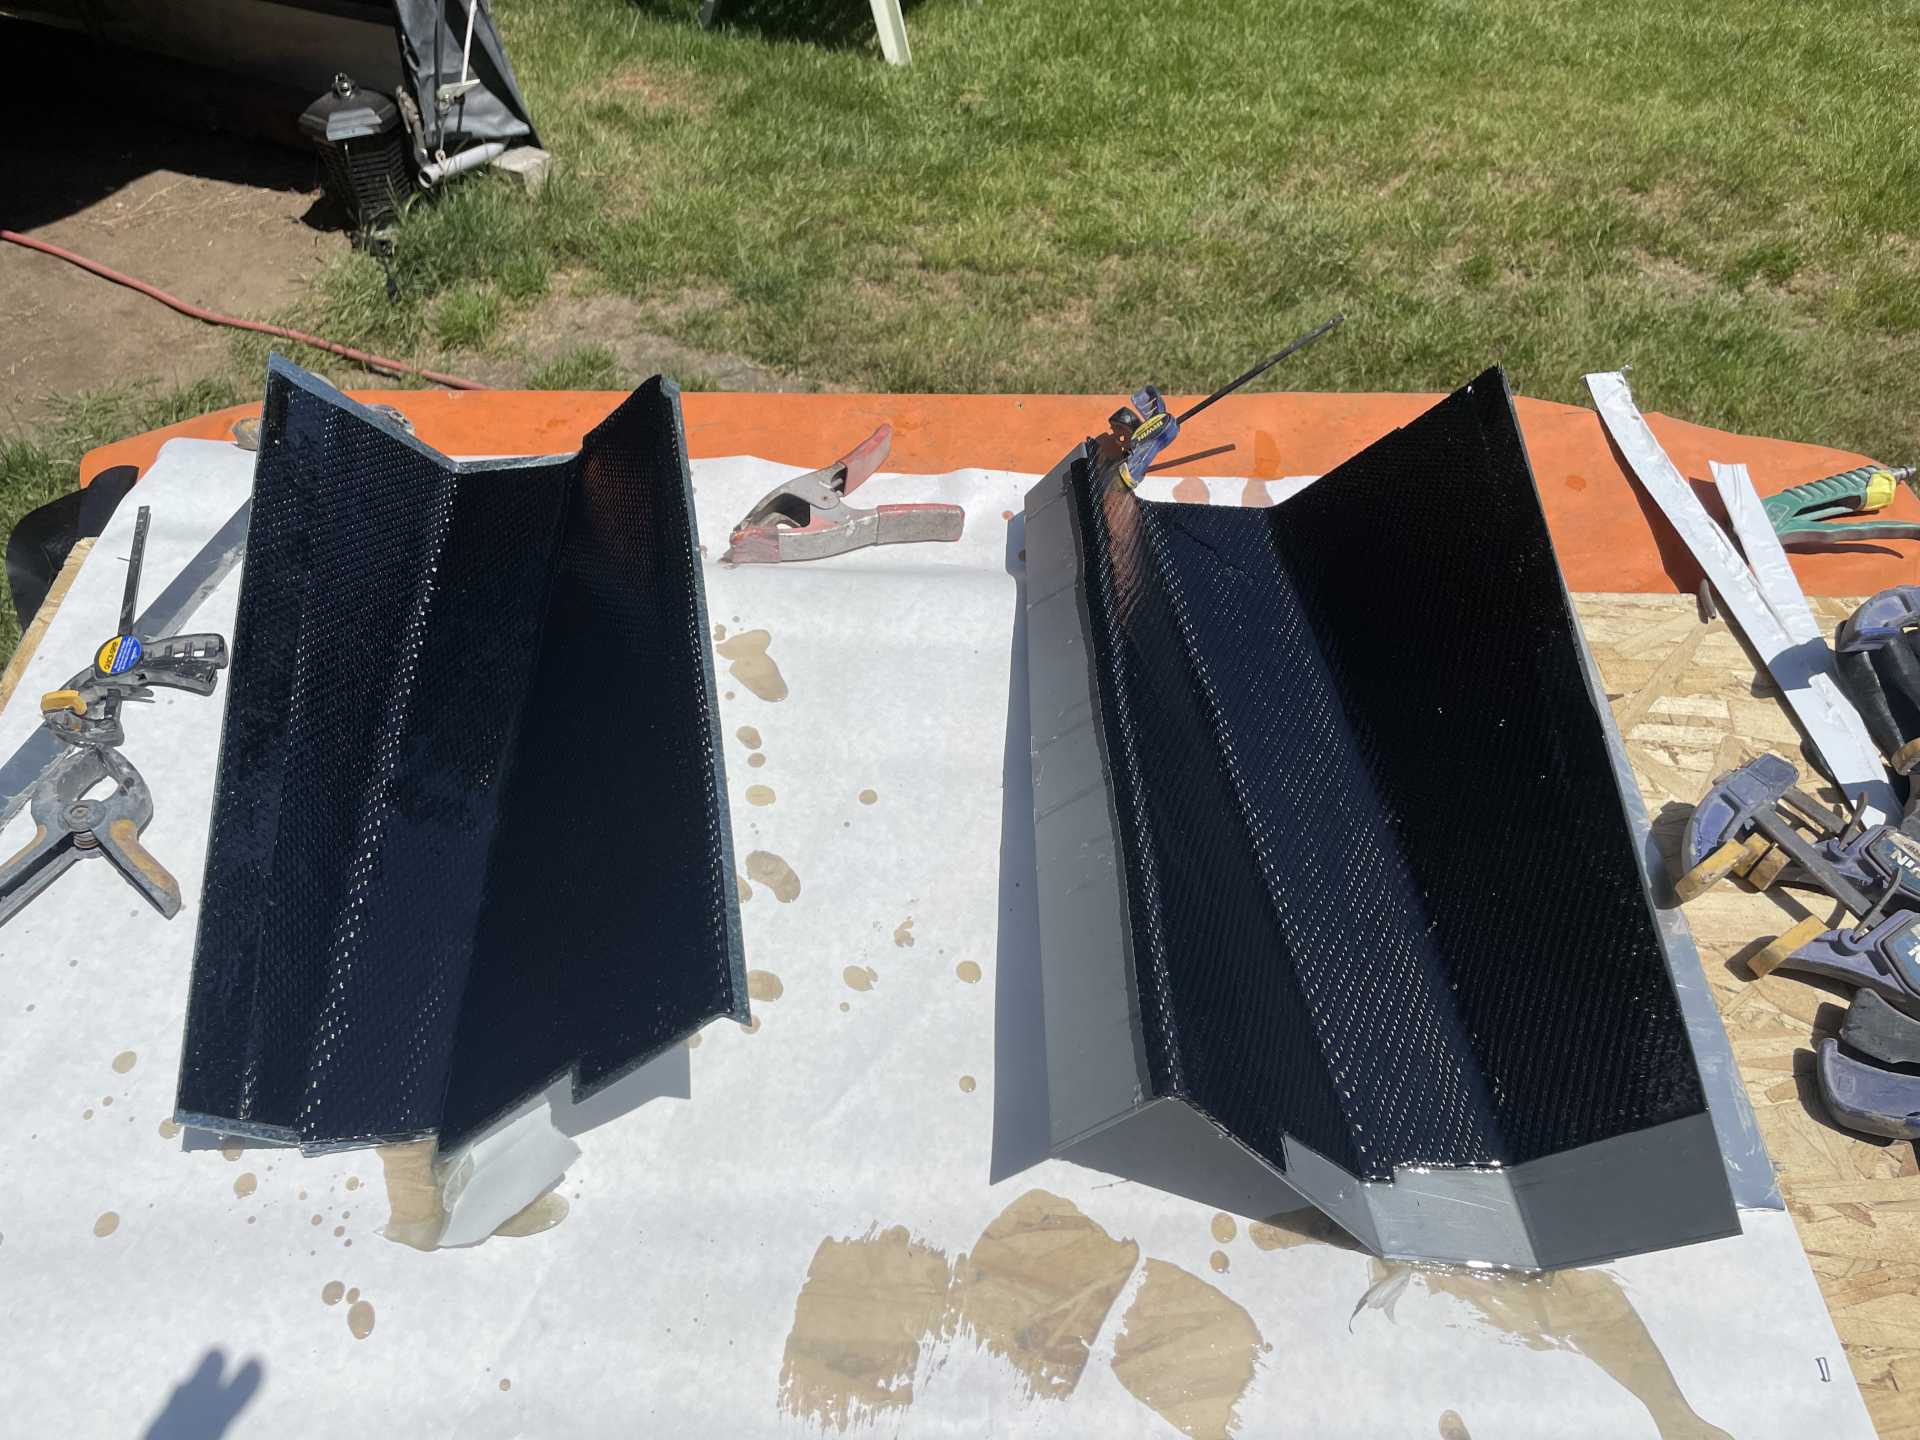
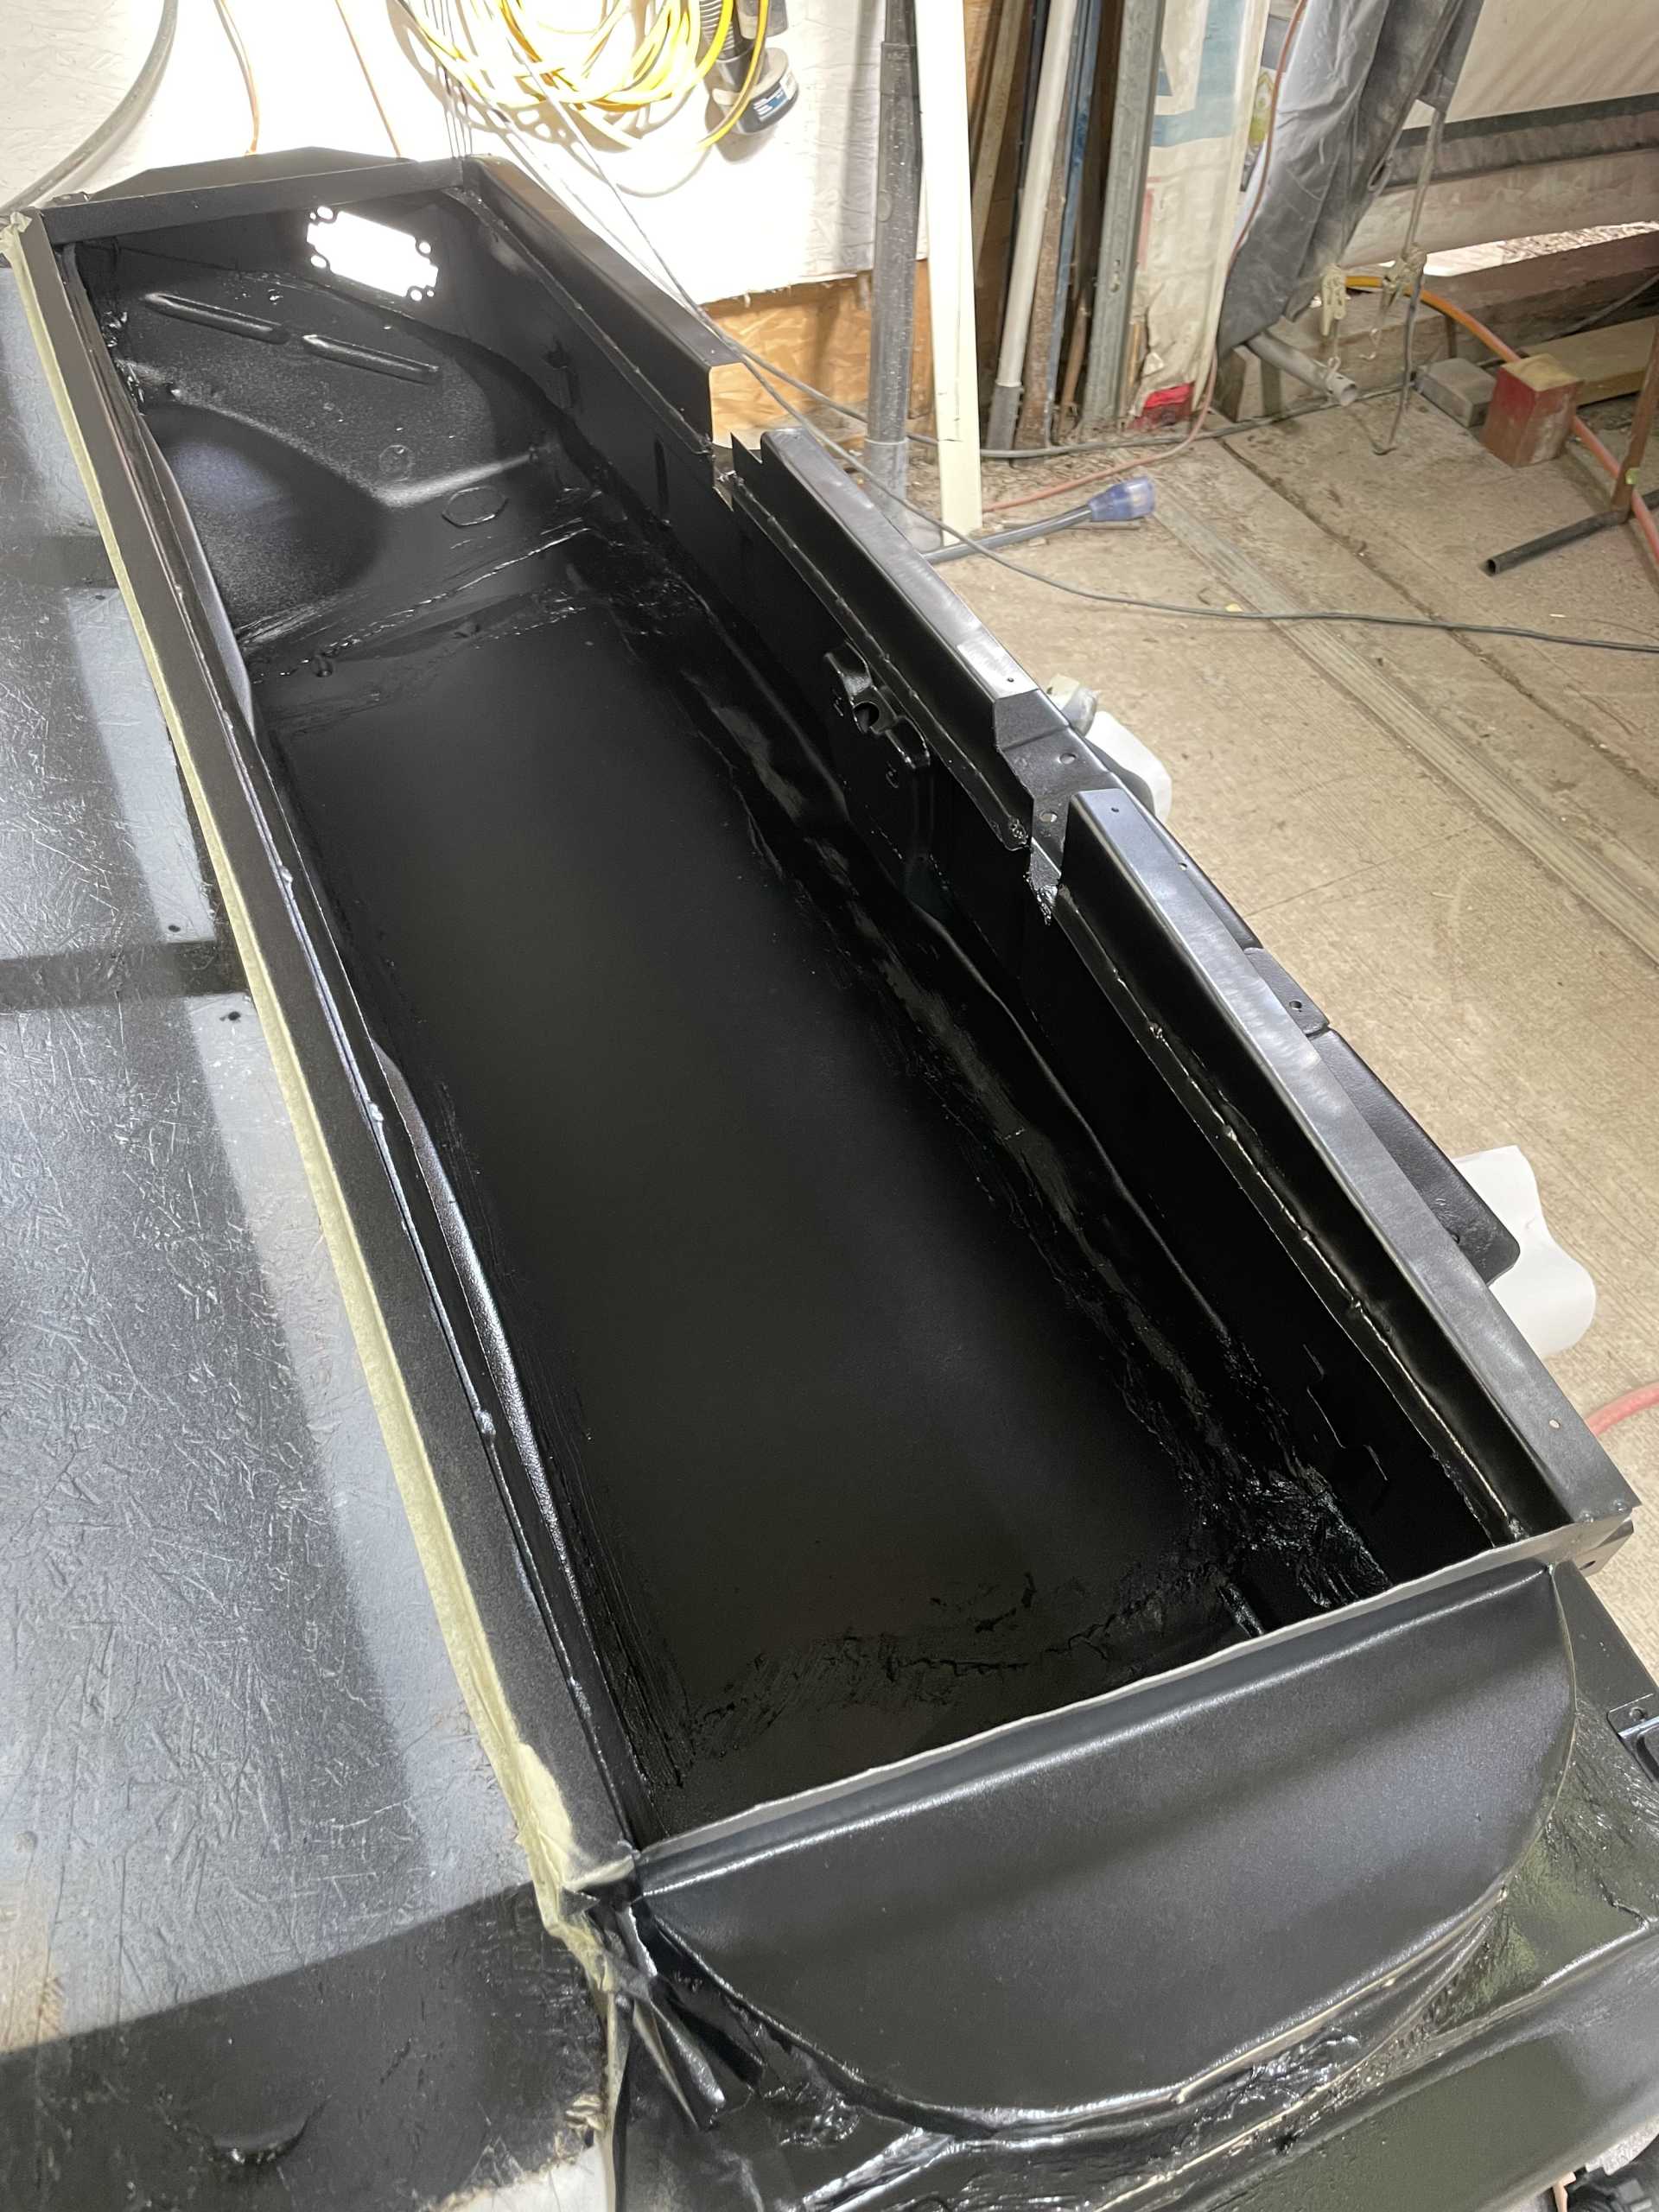
This little cutoff works wonders for trimming. Make sure you’re wearing a mask carbon fiber ‘dust is very hazardous to your lungs!!!
That’s it guys thanks for stopping by
Wayne
|
|

|
Fie Ro
|
MAY 30, 07:09 PM
|
|
Looking great!
A few tricks I use with carbon fiber: I first apply a few coats of resin and let it dry. Then adding the carbon fiber and resin. Less risk of pushing the cloth to far in and creating airpockets or pinholes. The thicker clear epoxy layer gives a "deeper" look to the carbon fiber but it is also easier to wetsand without fear of sanding into the carbon weave. After one layer of carbon fiber I just layup regular fiberglass cloth with a black tint added to the resin, saves a lot of carbon fiber that that I will never see. I found that a good finish (wetsanding, clearcoat and buffing) is worth it. I also found that epoxy resin is better because it doesn't shrink and warp like polyester resin.
Pinholes / airpockets you can fill with a little of the same resin and a small brush. After sanding smooth the "repair" is invisible !
|
|
|
|
dobie1
|
MAY 31, 09:12 PM
|
|
| quote | Originally posted by Fie Ro:
Looking great!
A few tricks I use with carbon fiber: I first apply a few coats of resin and let it dry. Then adding the carbon fiber and resin. Less risk of pushing the cloth to far in and creating airpockets or pinholes. The thicker clear epoxy layer gives a "deeper" look to the carbon fiber but it is also easier to wetsand without fear of sanding into the carbon weave. After one layer of carbon fiber I just layup regular fiberglass cloth with a black tint added to the resin, saves a lot of carbon fiber that that I will never see. I found that a good finish (wetsanding, clearcoat and buffing) is worth it. I also found that epoxy resin is better because it doesn't shrink and warp like polyester resin.
Pinholes / airpockets you can fill with a little of the same resin and a small brush. After sanding smooth the "repair" is invisible ! |
|
Thanks a great idea!!
I’ll try that on the flat third piece still to be built. It’s great to learn other techniques!!
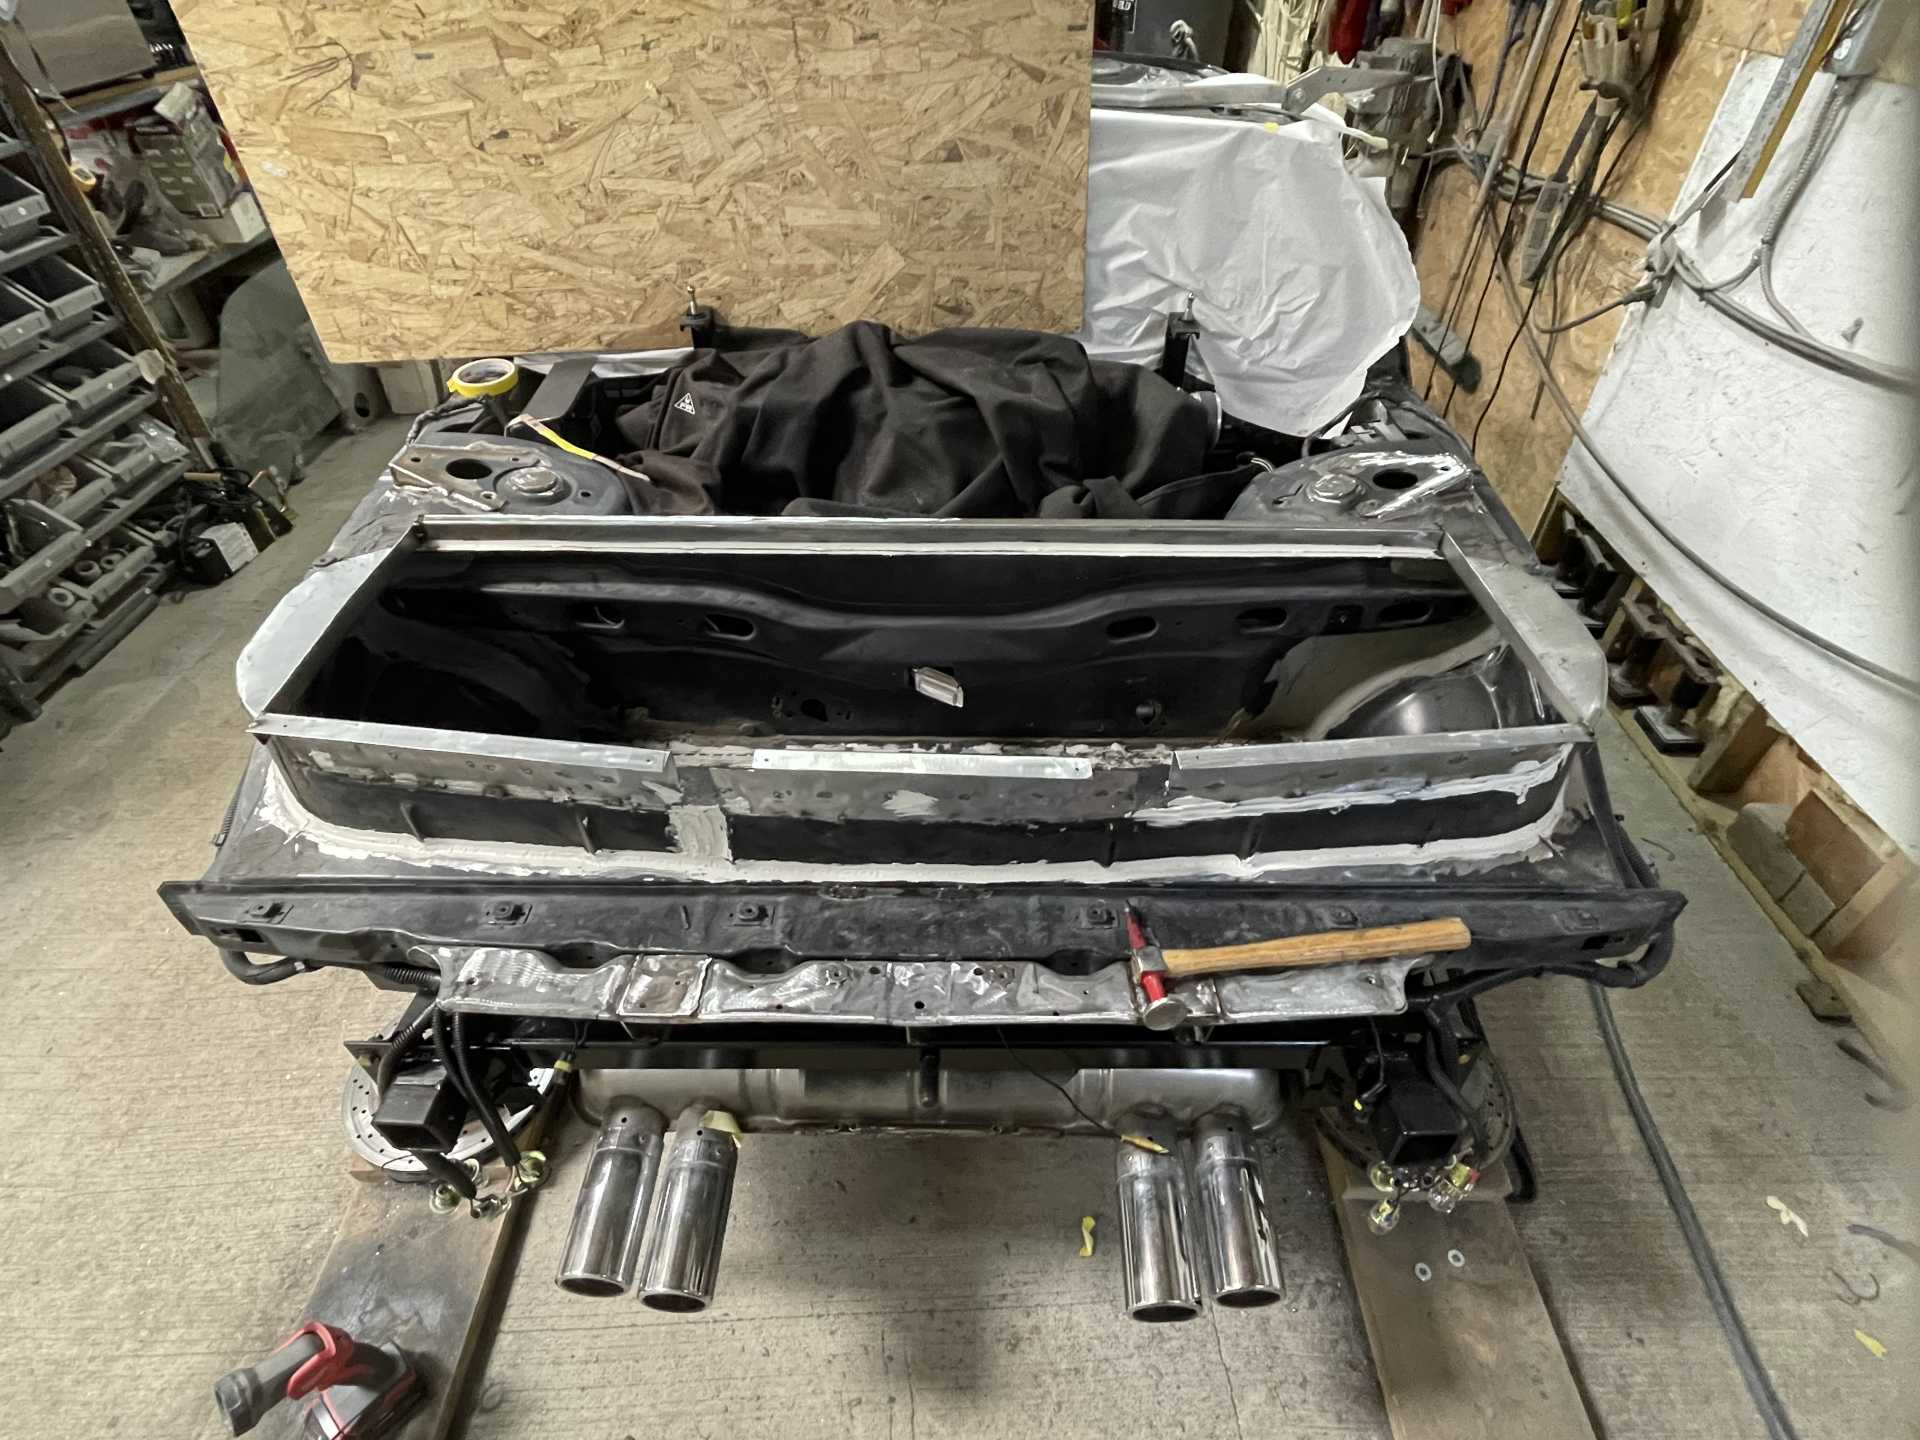
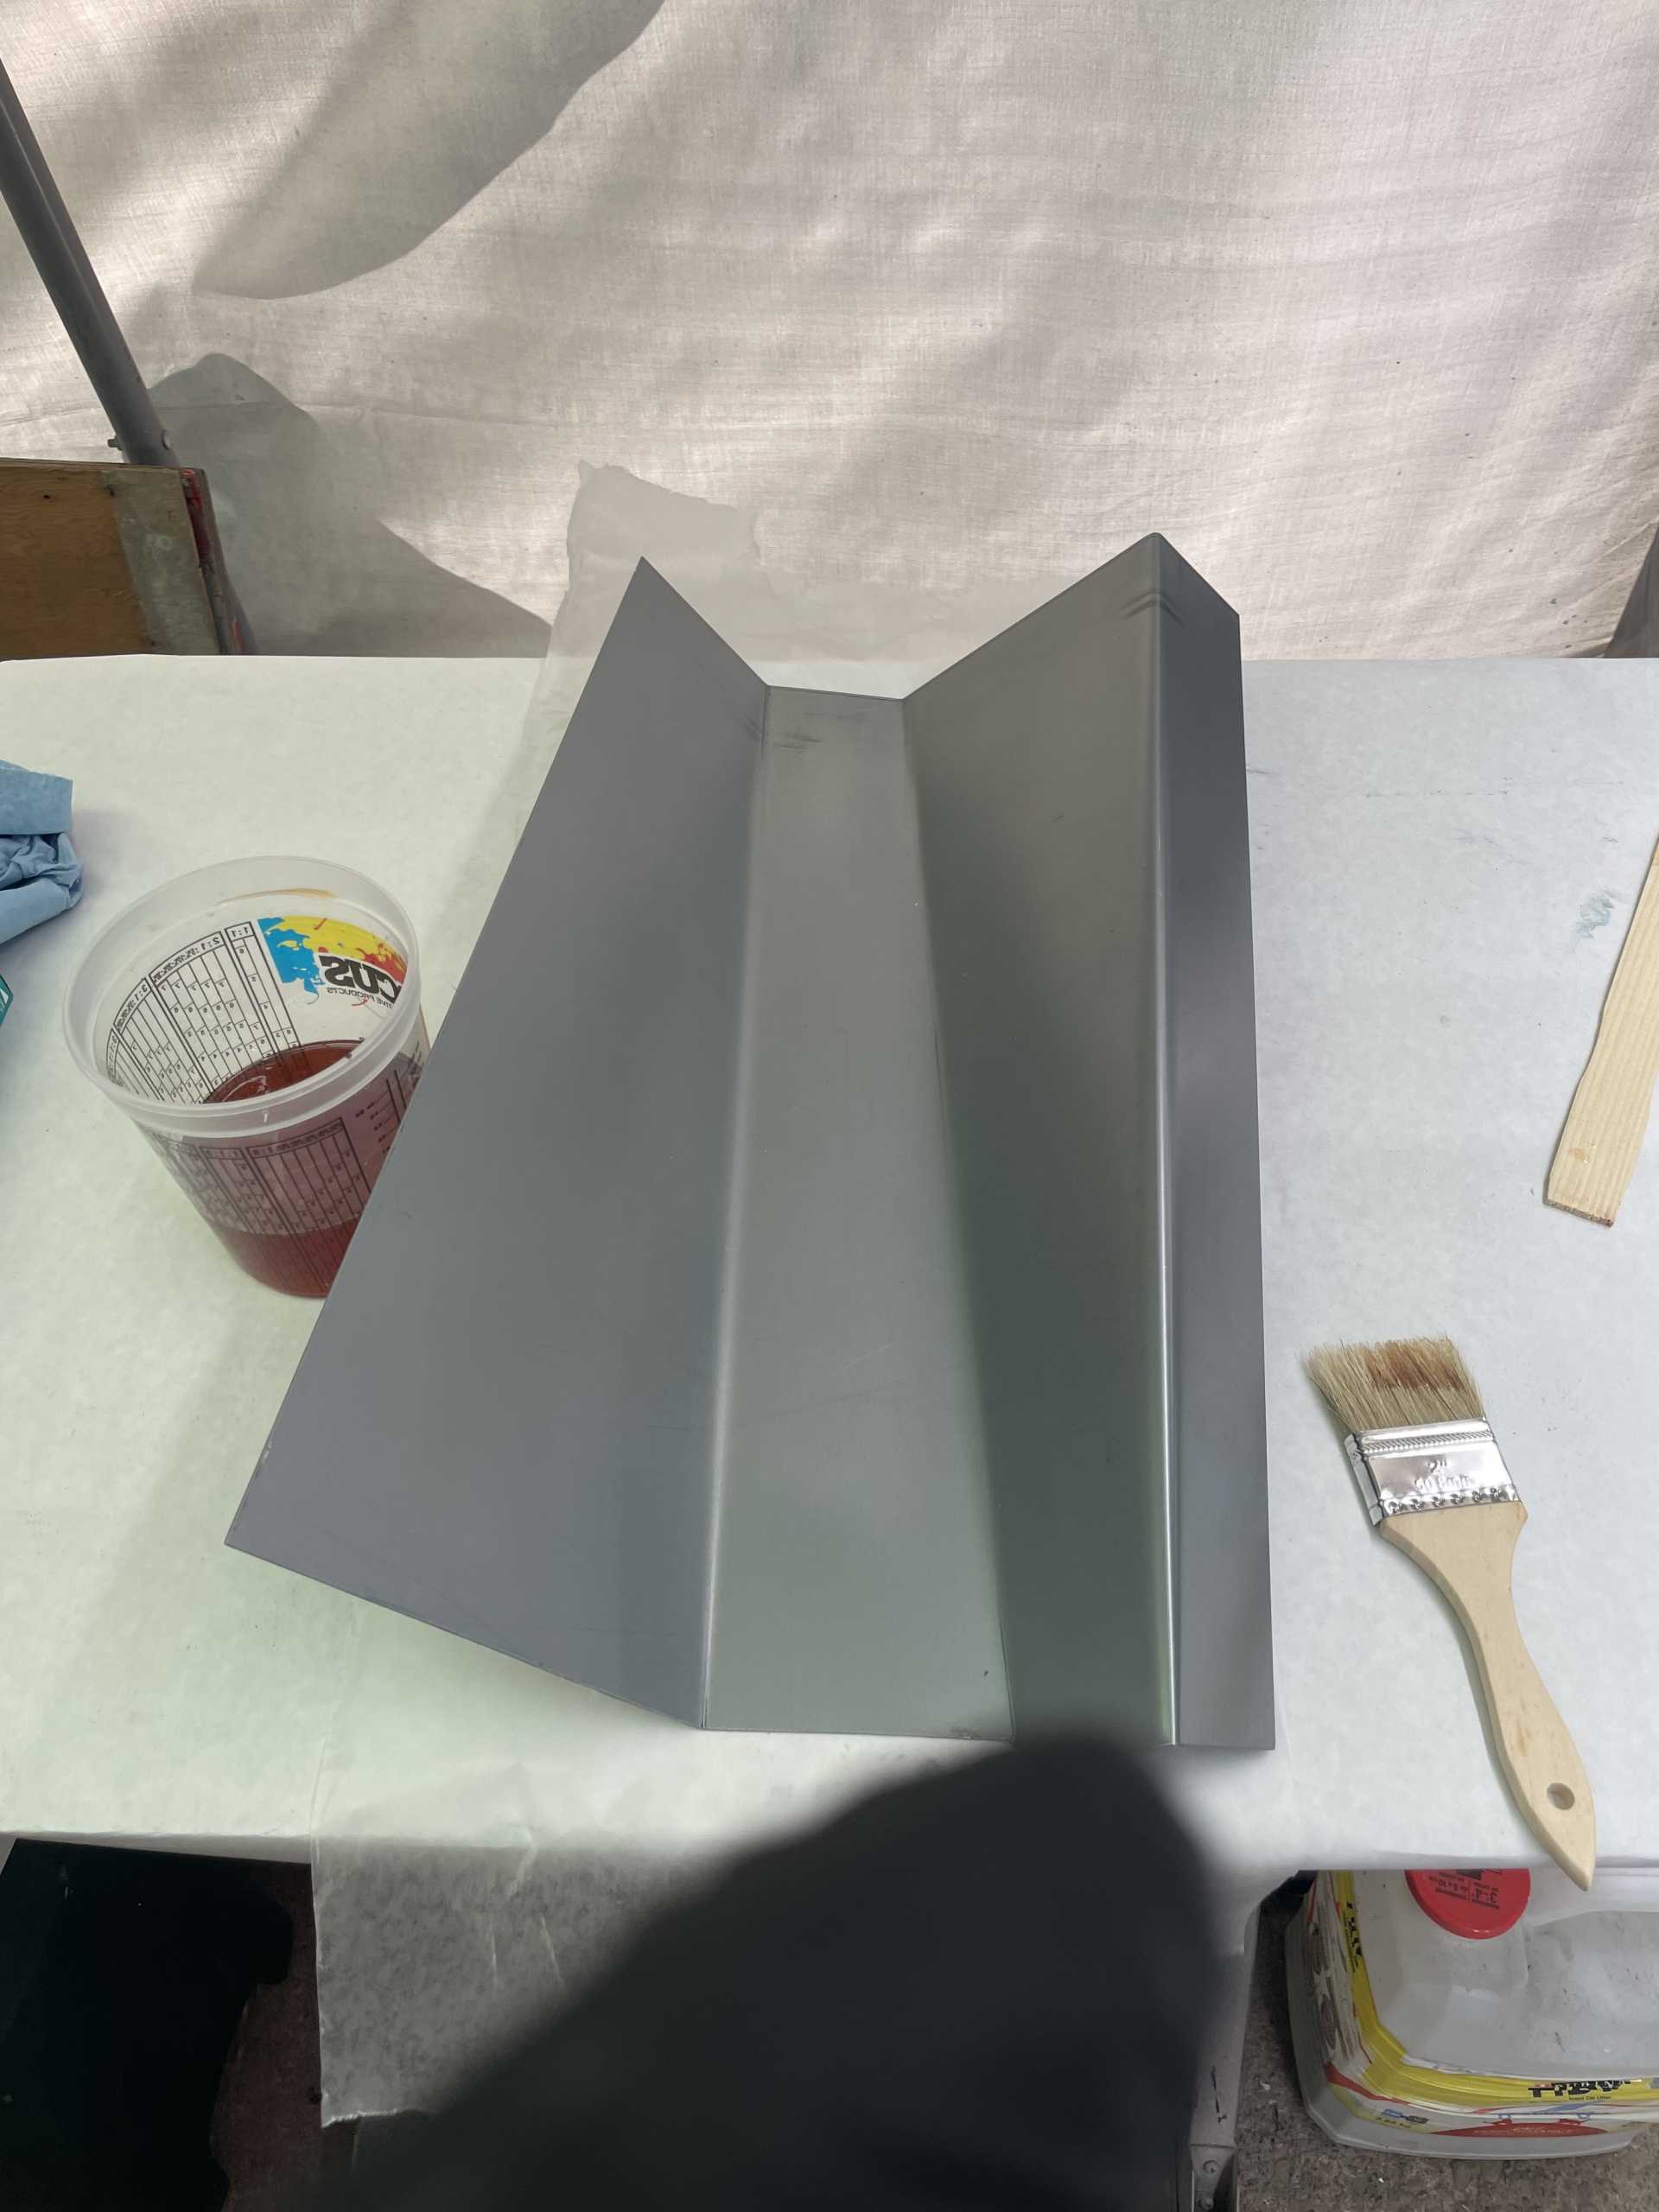
One question on putting the coats of resin down first , how do you do keep the resin from flowing down “sagging” my case the angles other than flat surfaces?
In this layup after I pull the part I let it cure 24 hours then give it a light sand and give it 2 more coats of resin that I sand flat and in most cases eliminates most all if any flaws.
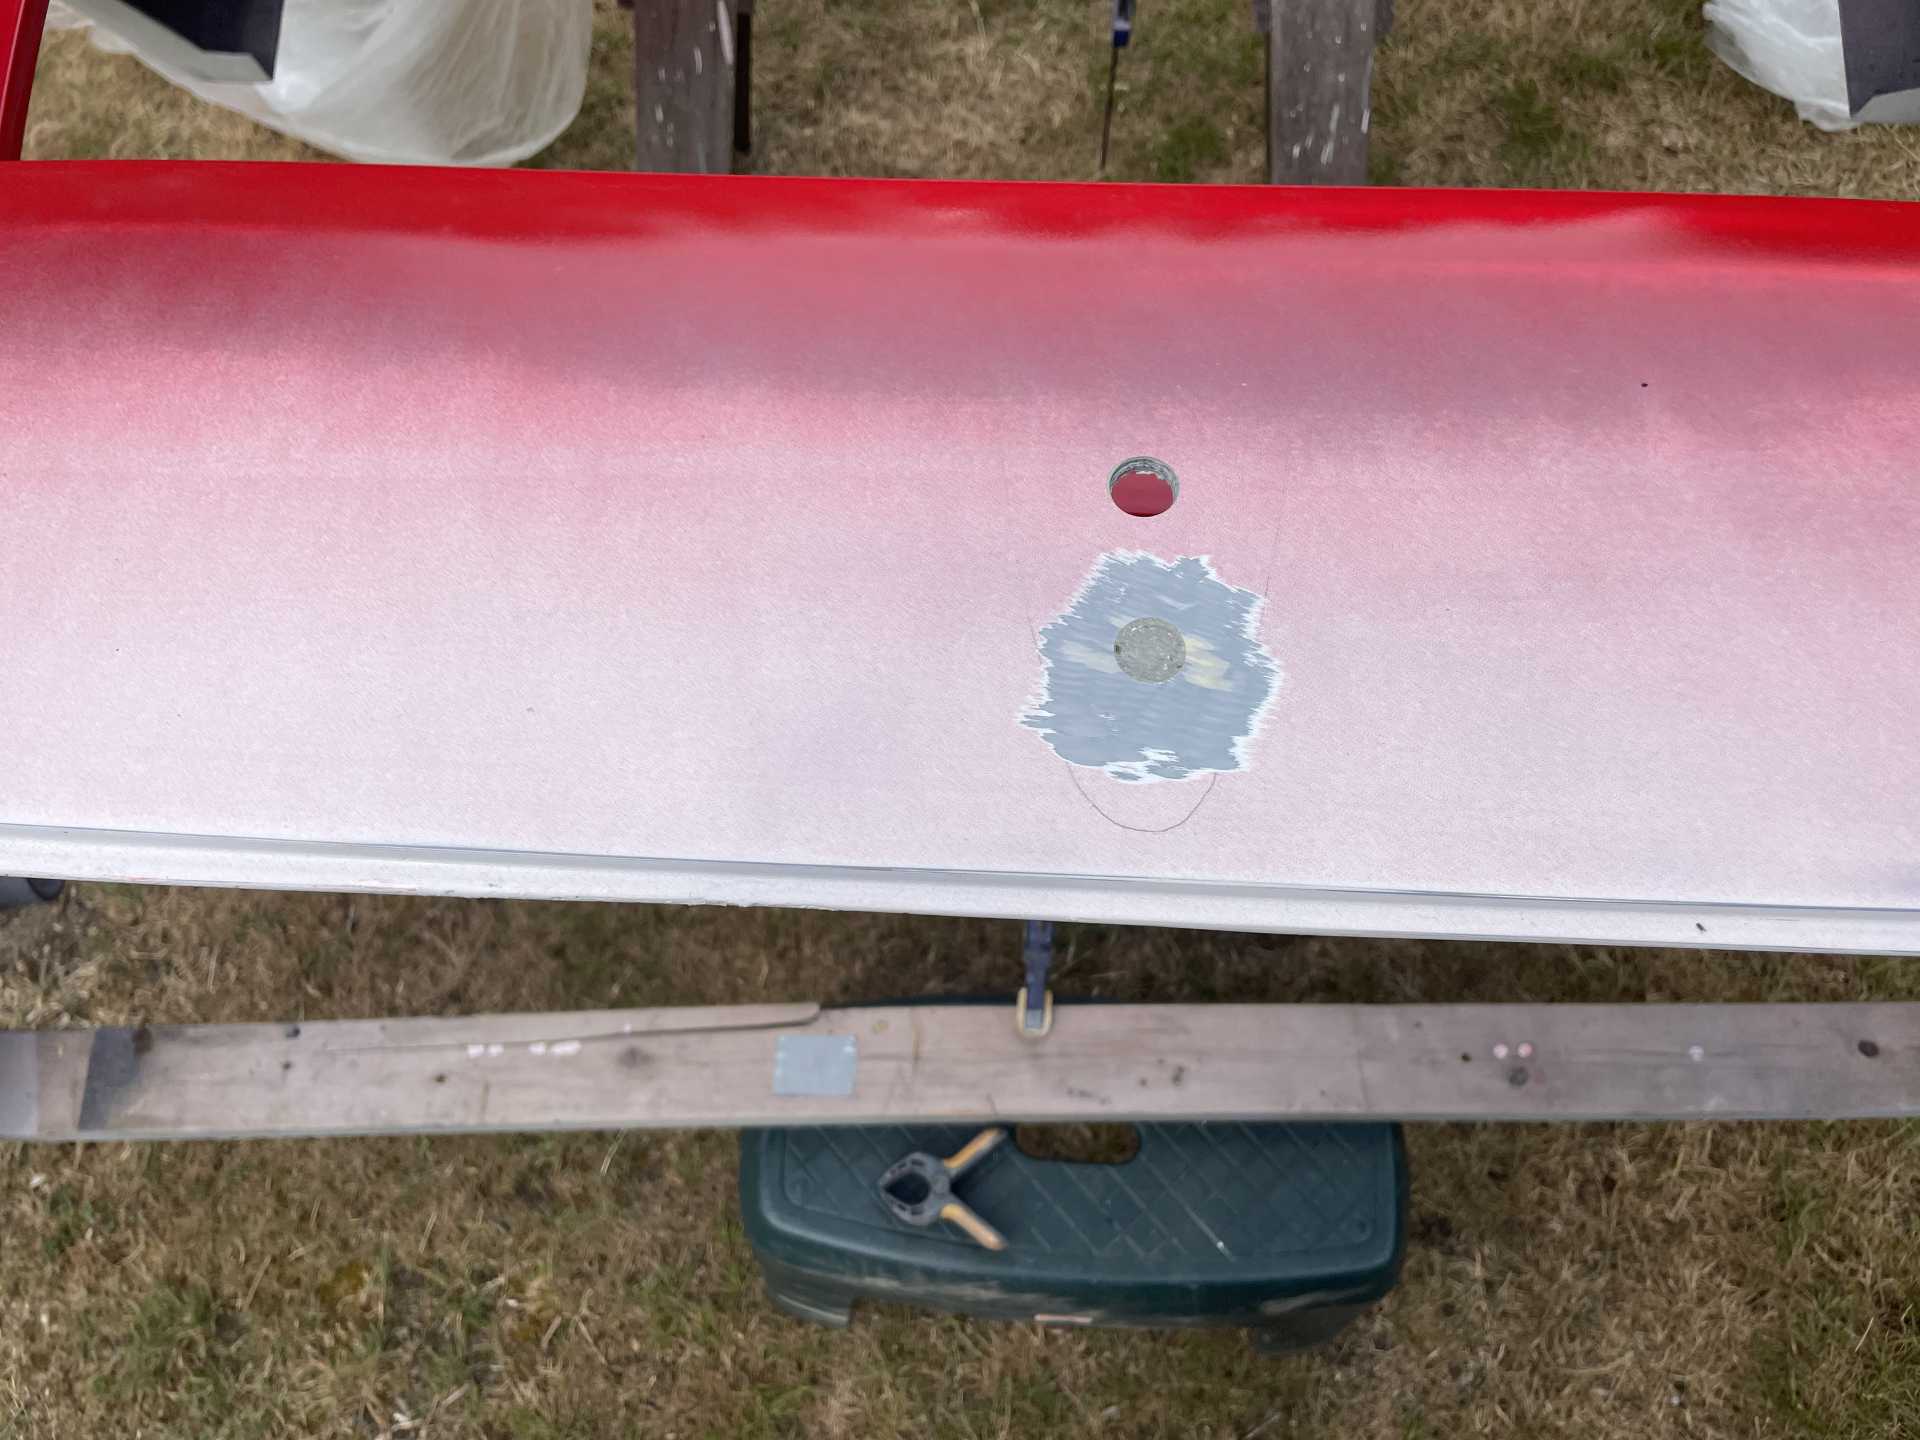
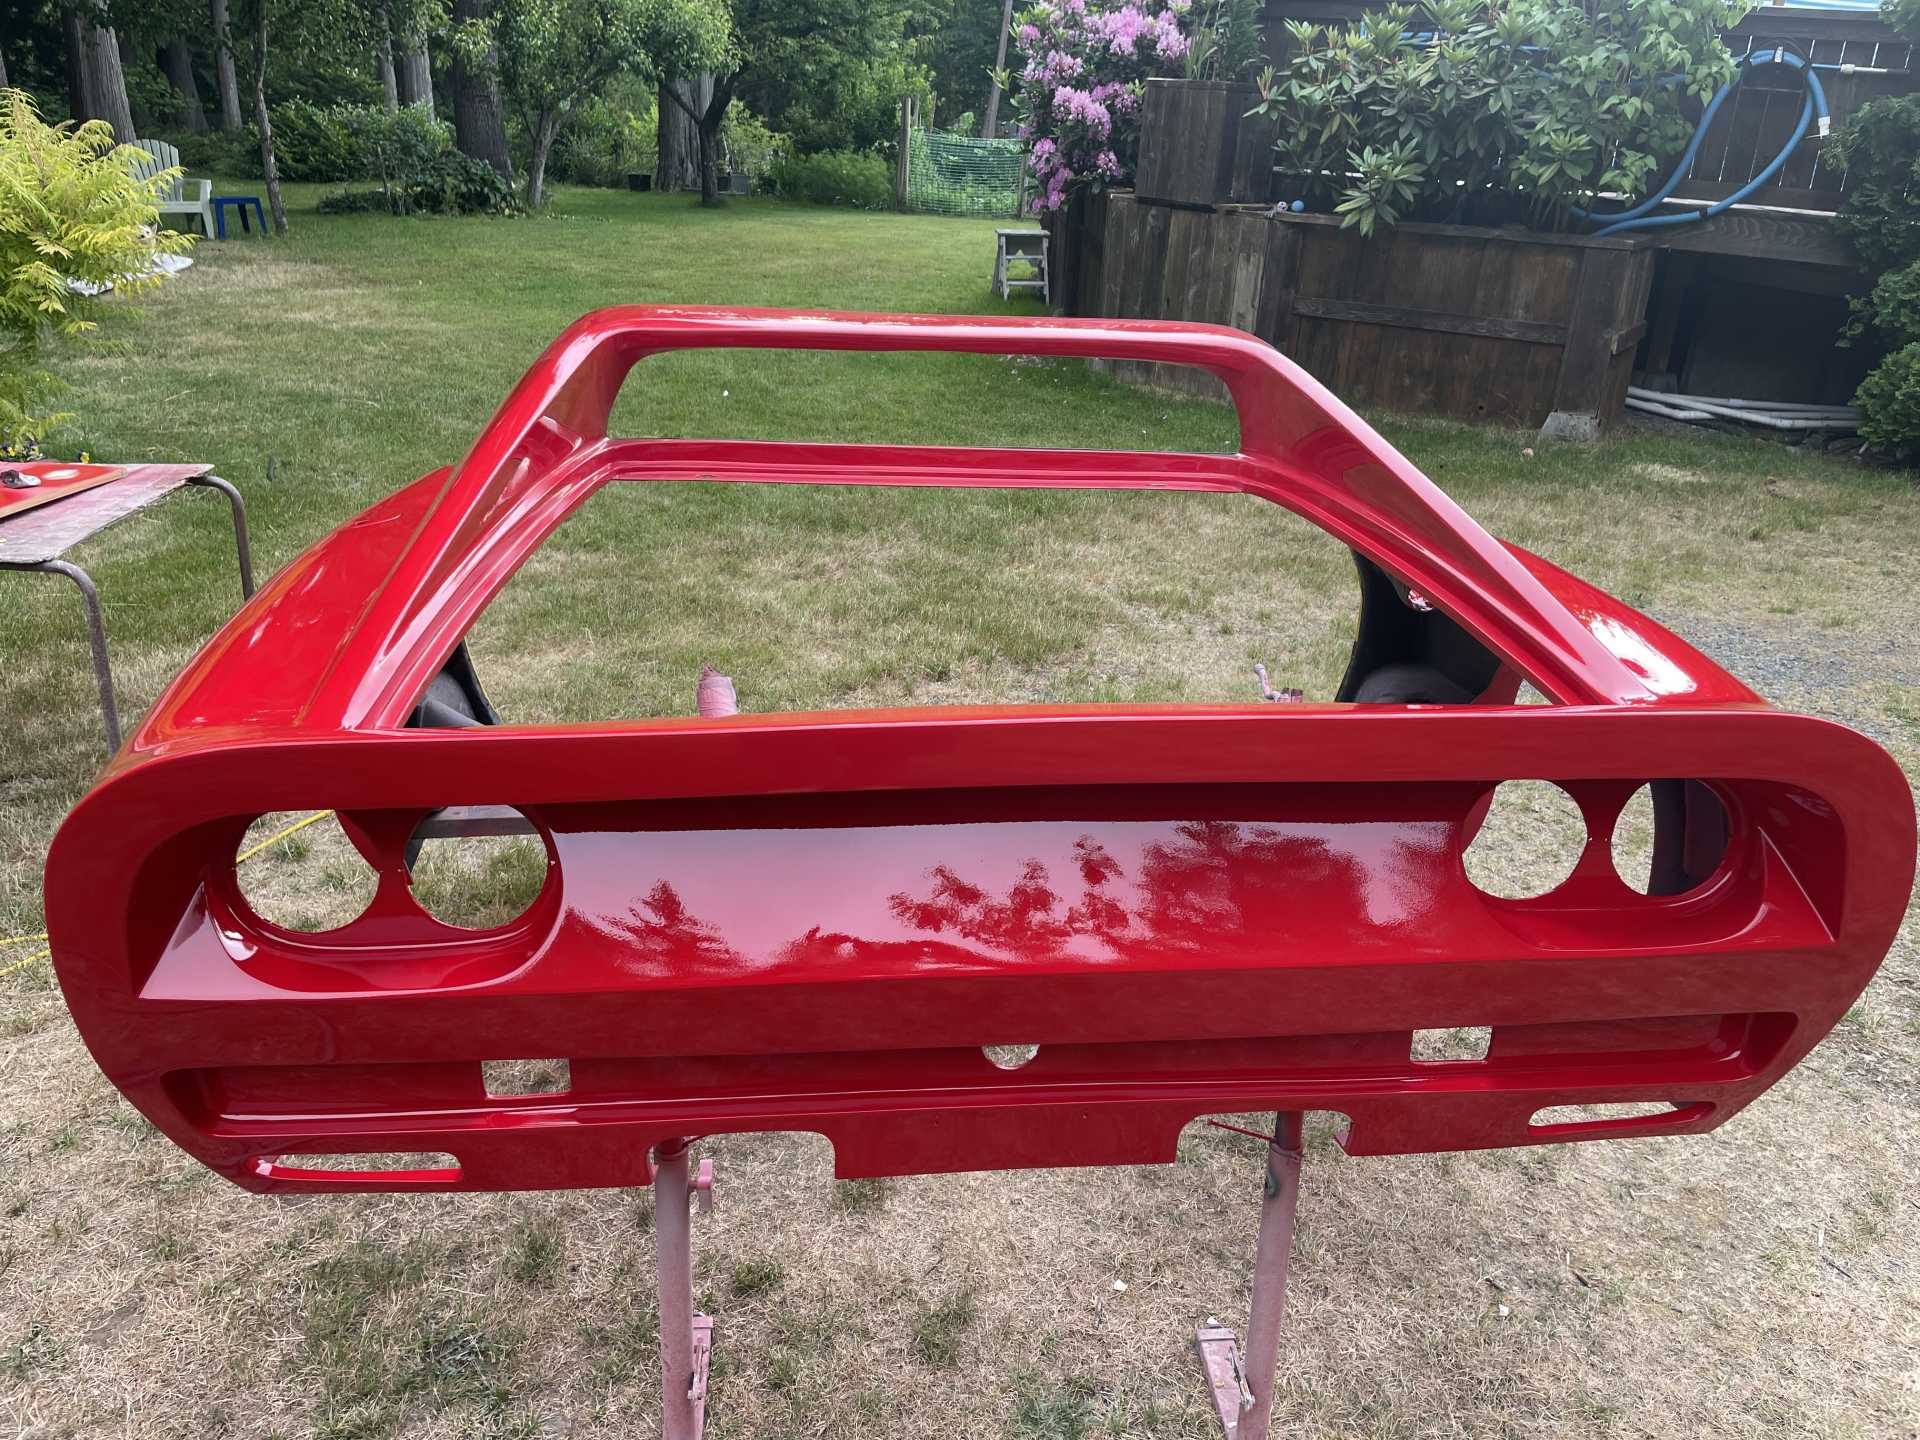
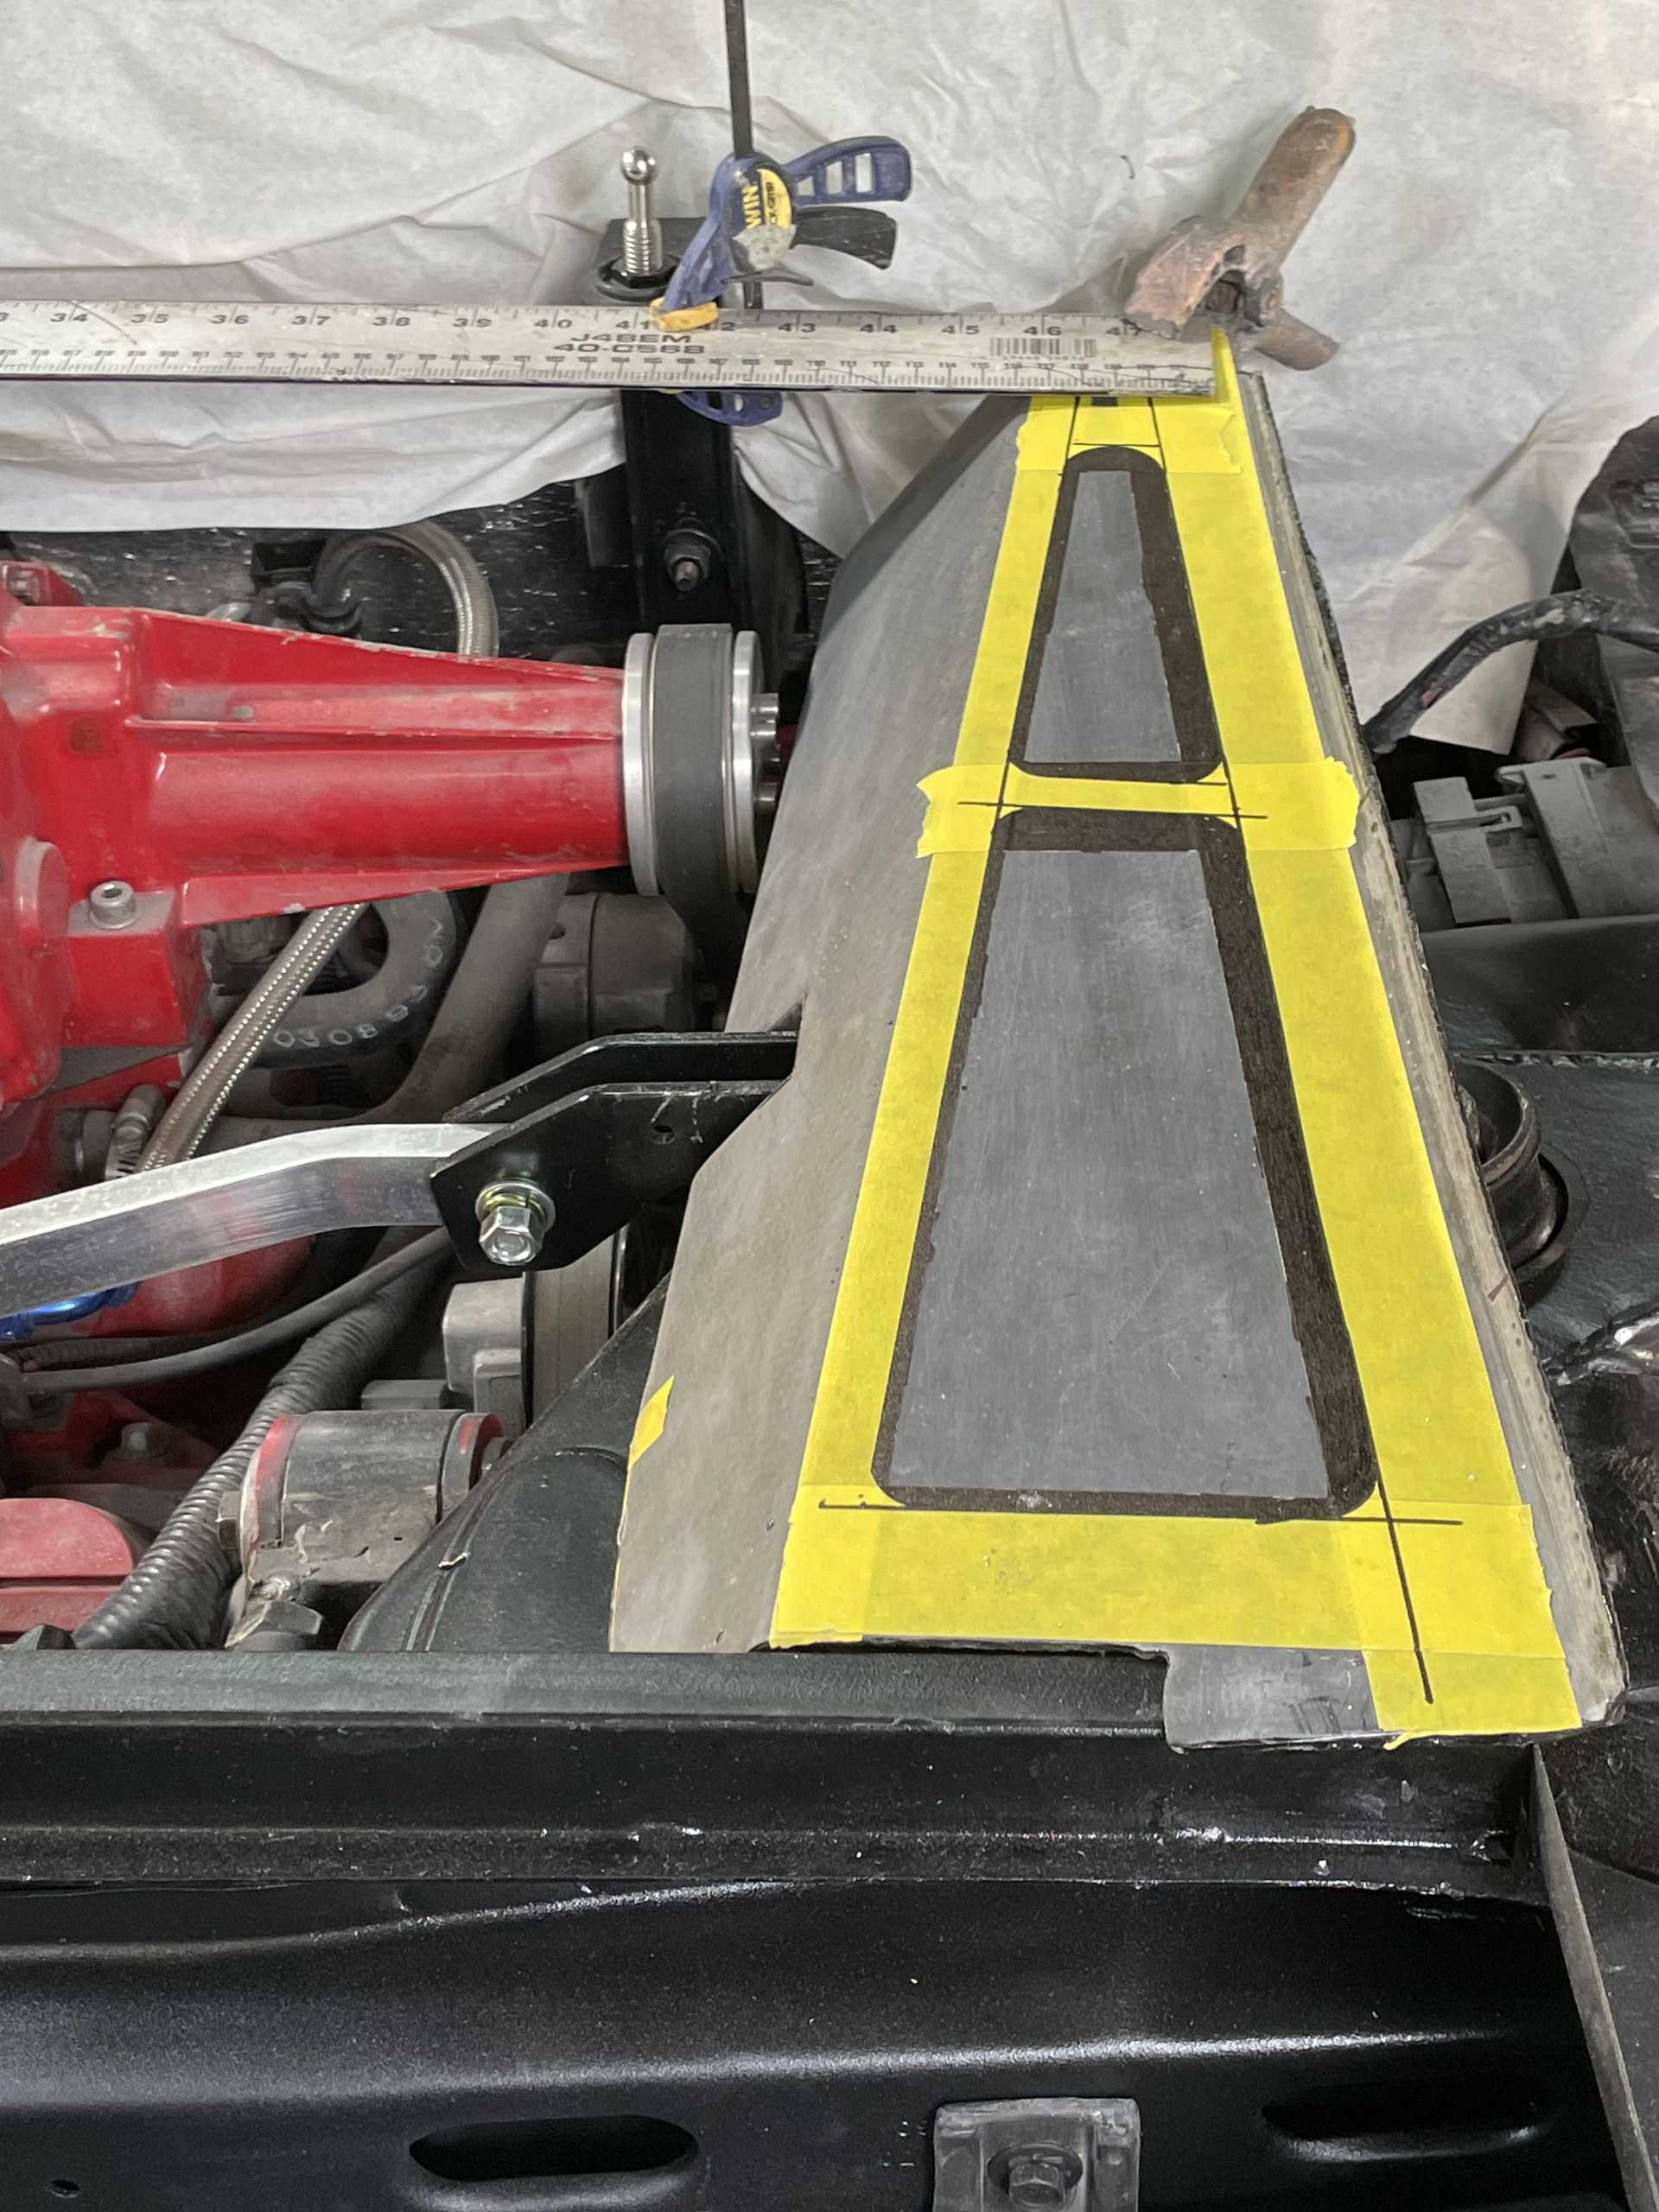
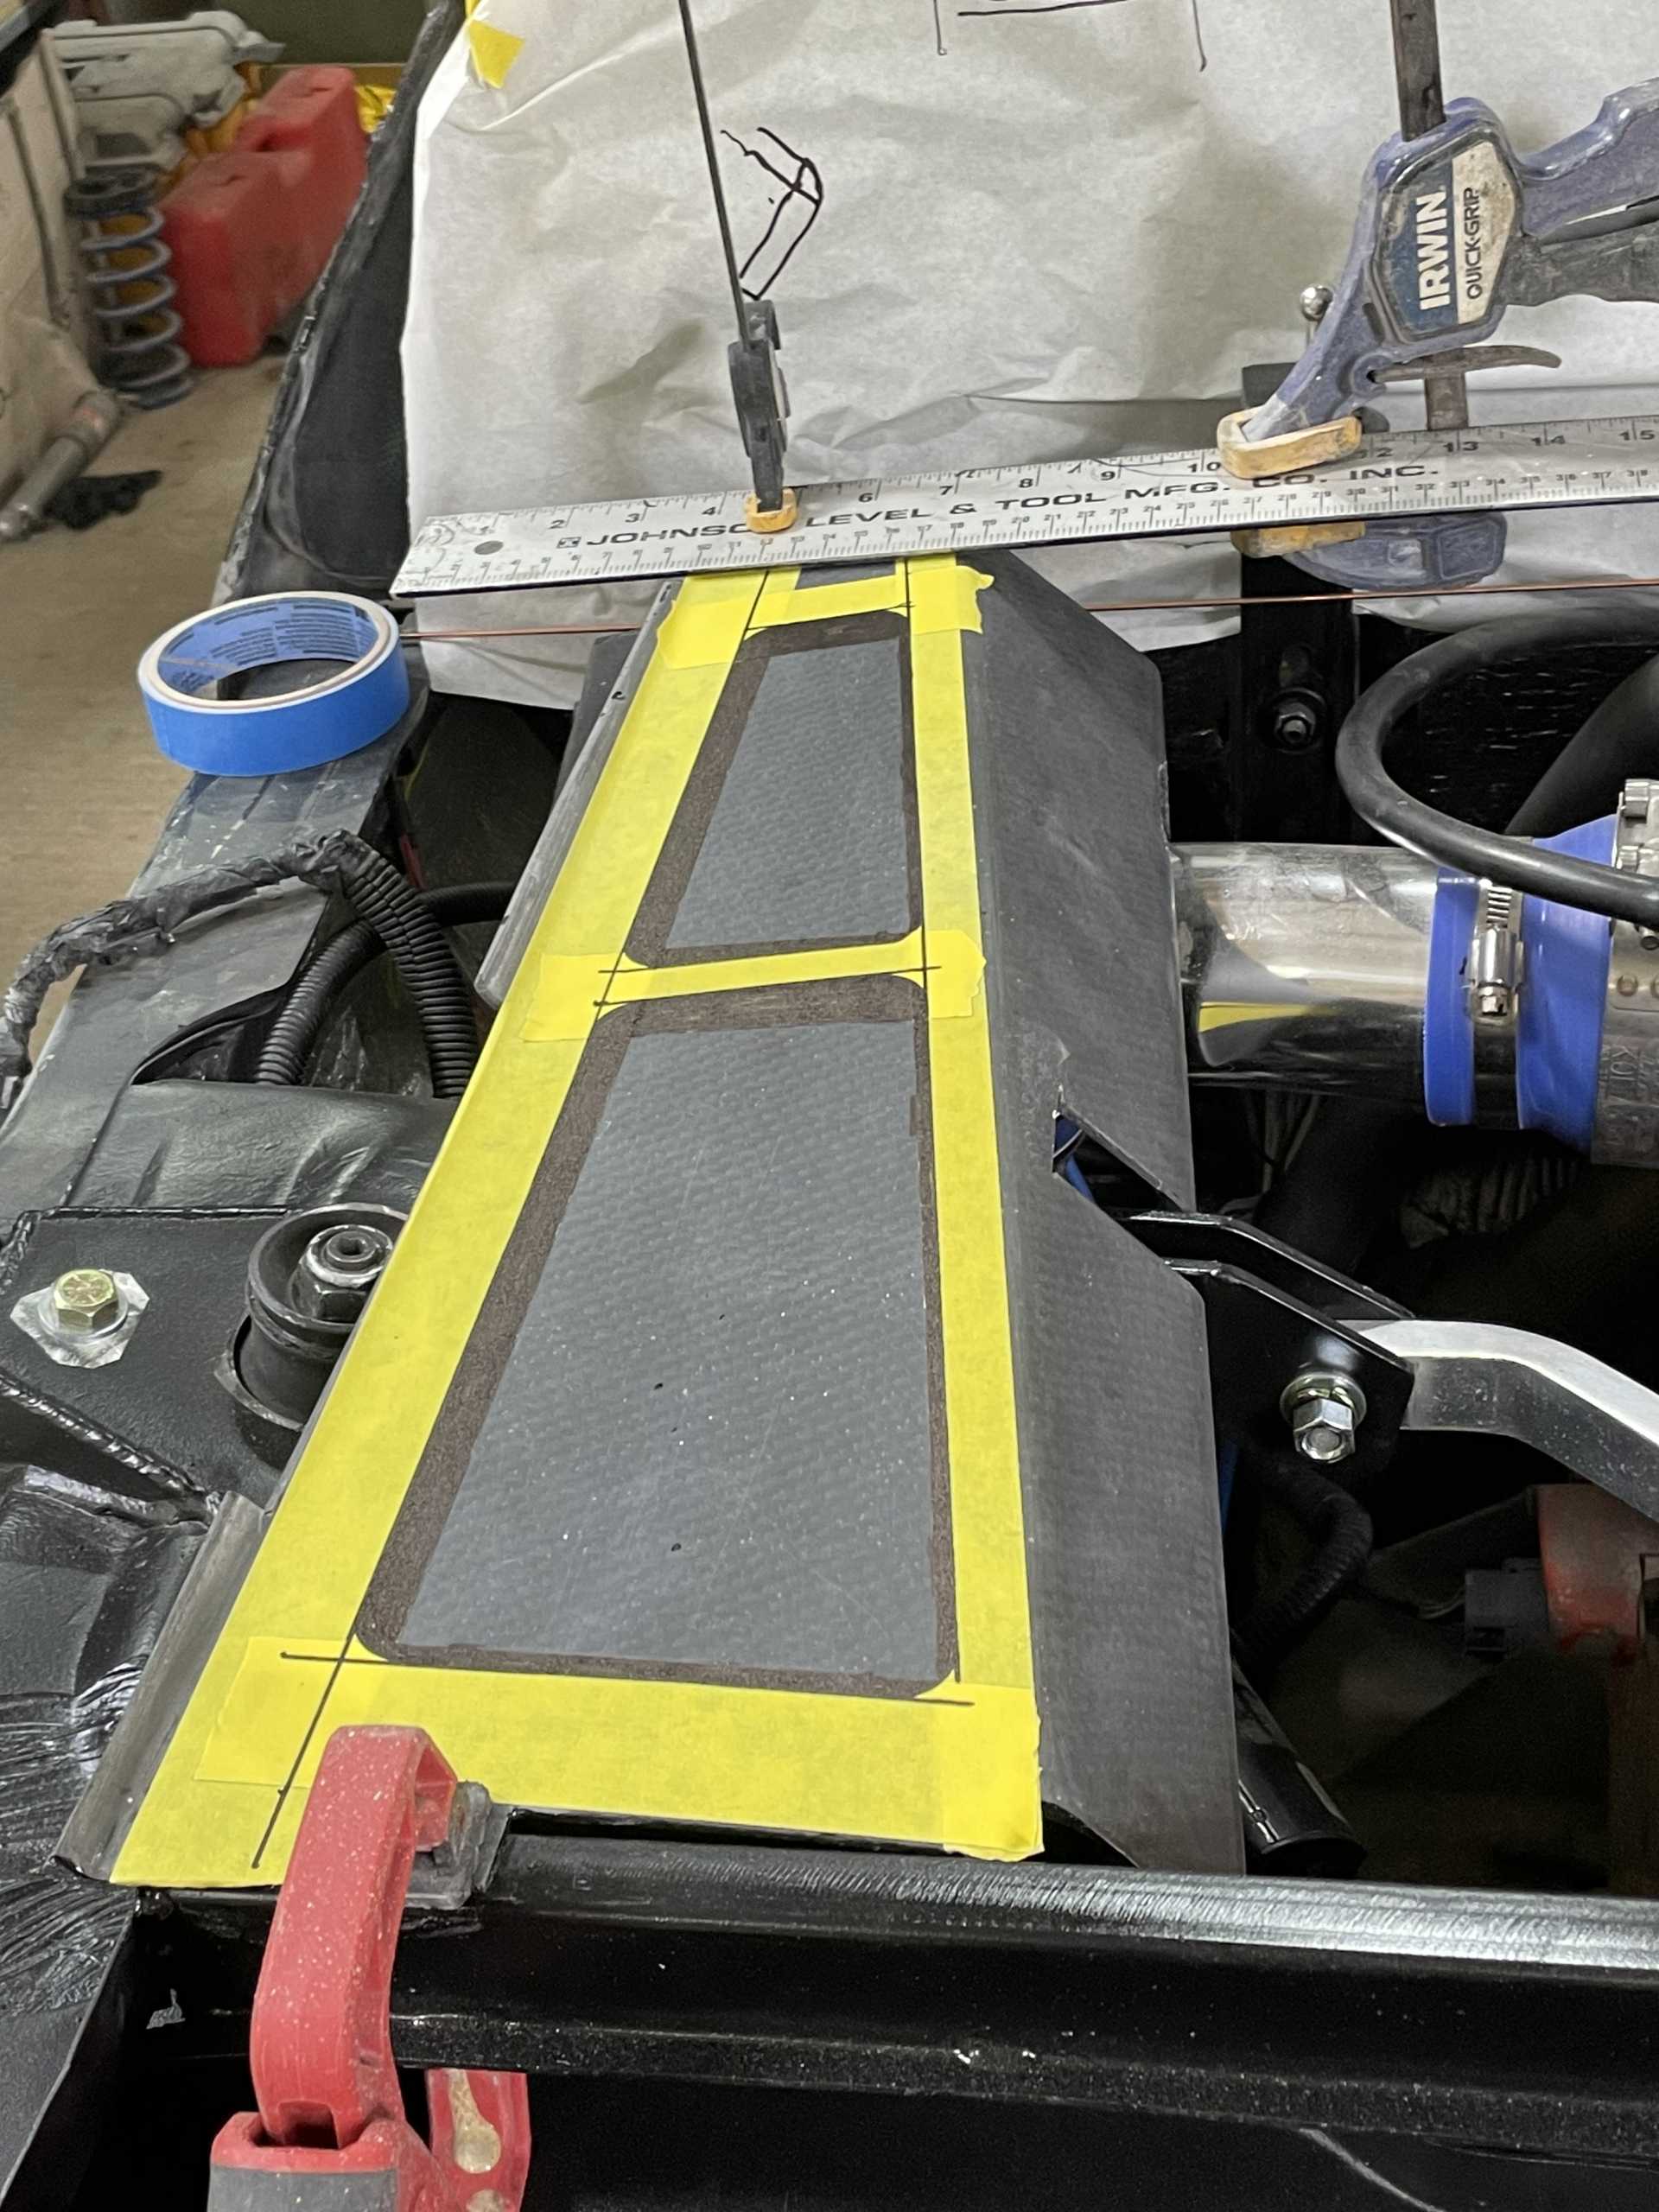
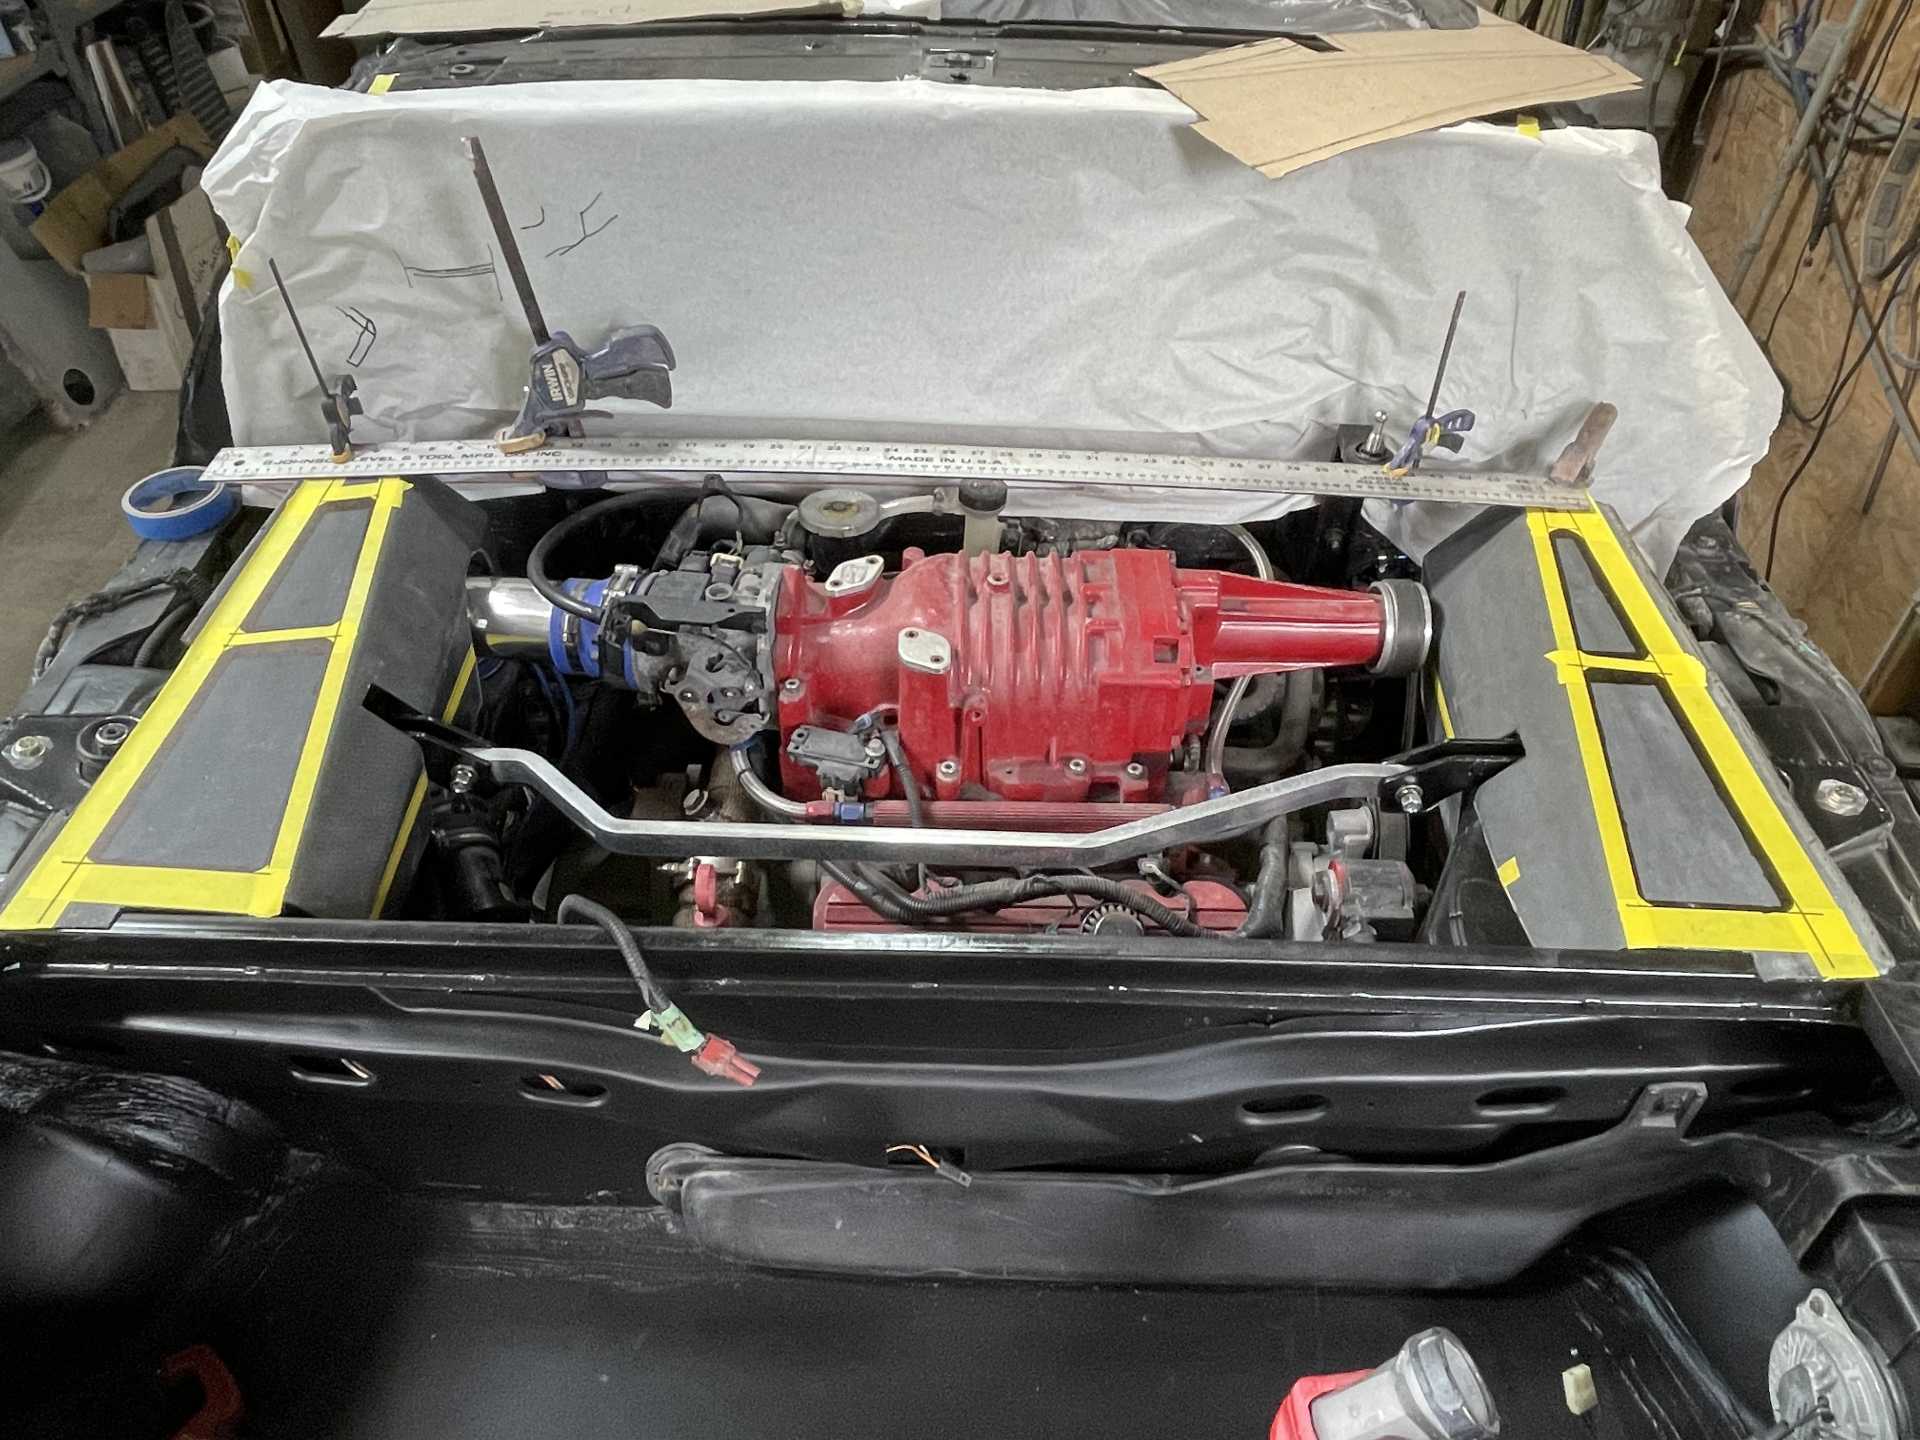
So today after sanding it flat I cut out the areas needed for installing it in place. As I’m planning on having vents in the top to allow the engine heat to escape easily.
The blackened area on top of the yellow tape shows the areas I’ll be cutting out.
Once that’s all finished I’ll polish the piece .
Enjoy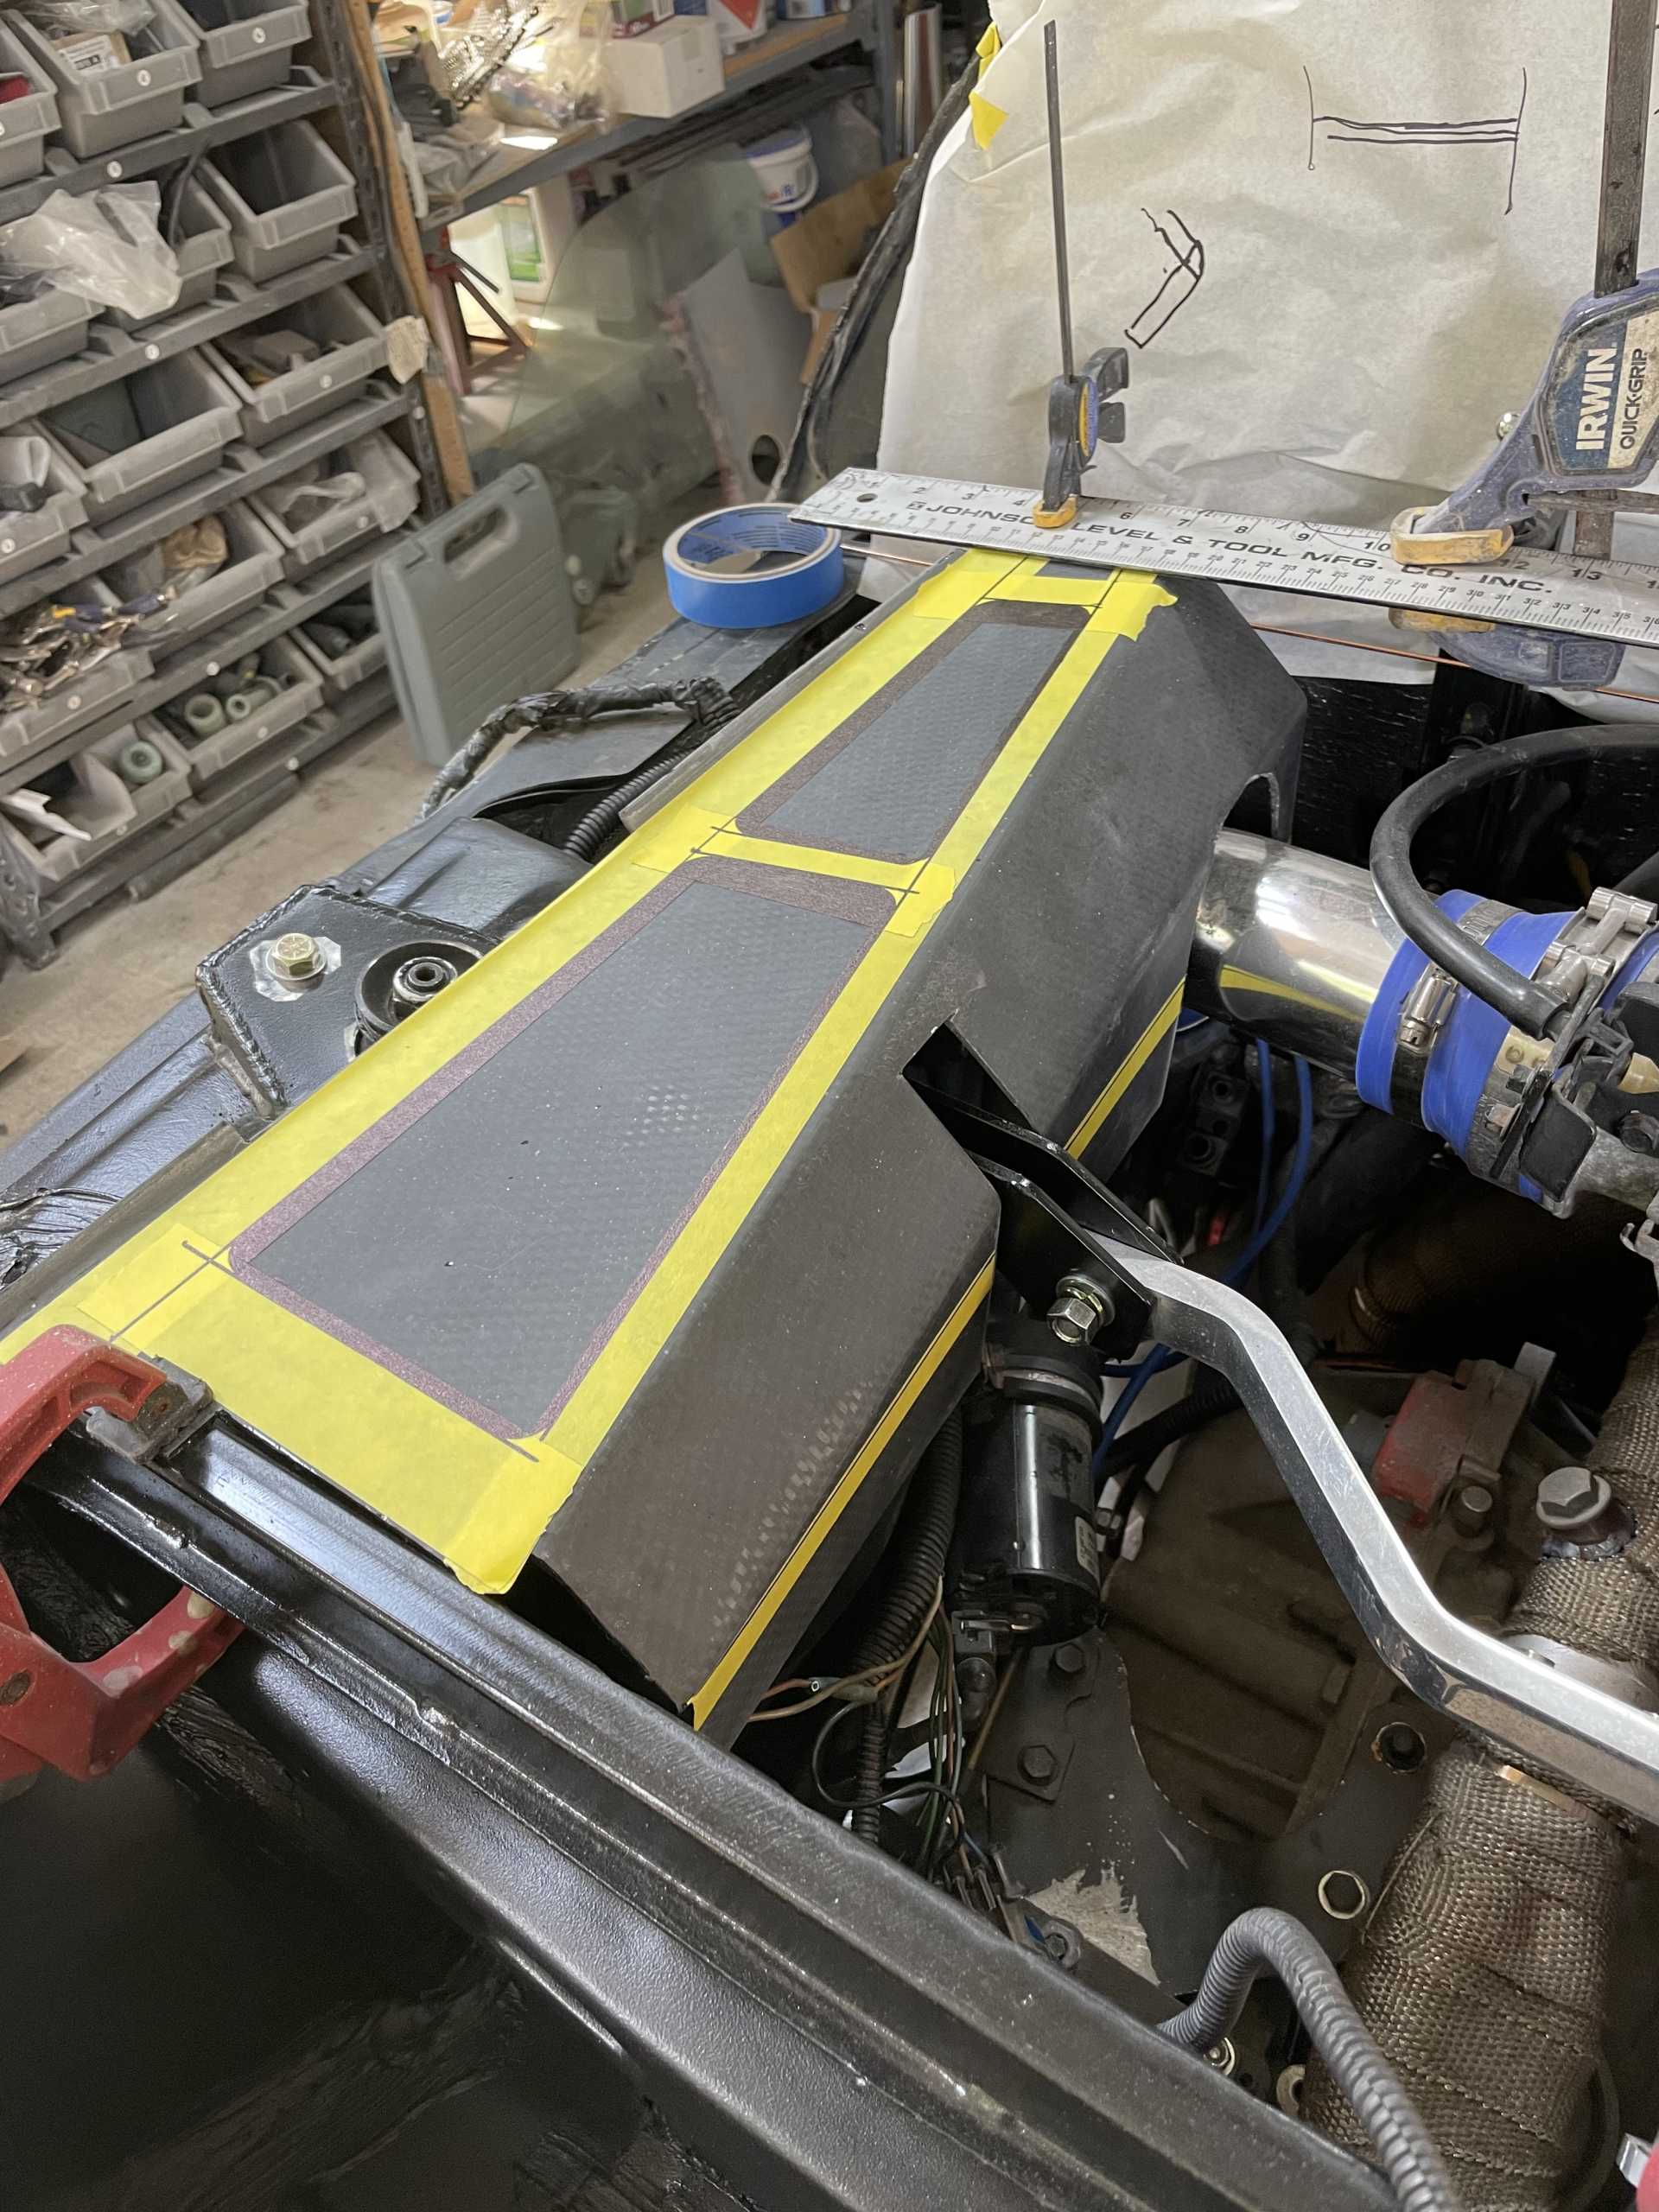
Wayne
|
|
|
|
Trinten
|
MAY 31, 09:49 PM
|
|
Man this thing is going to be so awesome when it's done!!
I hope to see it in person when it's finished, maybe you can bring it up to the show in Carlisle sometime!
|
|
|
|
dobie1
|
JUN 15, 11:35 PM
|
|
|
|
|
Sage
|
JUN 17, 08:21 AM
|
|
Incredible! 
Won't be long now......looking forward to the first pic of you: A. posing beside it completed and road ready....B. in the drivers seat ready to hit the road!
Phenomenal undertaking and excellent execution.
Awe inspiring.
Thanks for sharing the journey.
HAGO! 
|
|
|
|
dobie1
|
JUL 17, 12:06 AM
|
|
| quote | Originally posted by Sage:
Incredible!
Won't be long now......looking forward to the first pic of you: A. posing beside it completed and road ready....B. in the drivers seat ready to hit the road!
Phenomenal undertaking and excellent execution.
Awe inspiring.
Thanks for sharing the journey.
HAGO! |
|
Thank you so much Sage for the kind words!!
|
|
|