
 
     |
| F40 replica aka "operation turd polish" (Page 56/62) |

|
shemdogg
|
AUG 02, 12:49 AM
|
|
Hey Adam thanks for checking in and providing some ideas. I see where youre going and I did think about mounting the exhaust up there or even running the exhaust pipes back there vertically like the f40, even faux exhaust. Worried about the heat near the fiberglass, seen so many videos of supercars catching fire from the exhaust. Id have a hard time cutting up a brand new muffler for looks too. I like the placement of the tank and compressors, just one more thing to catch peoples eyes. They always ask but drift off before I give a response, busy looking at other details. I might start saying some thing crazy like" Oh thats the doughmaster system, but hey check out these trunk latches. They turn!" lol. I have the exhaust all planned out already. That 45 degree exhaust piece will come out from the back of the motor at a 45 degree angle southeast or west- towards whichever side the muff inlet is on, then to a 45, then to a 90 to a reducer to the muff inlet. The exhaust pipes already go into the 2 big tips. Ill have to cut the tips shorter and get reducers to whatever the exhaust pipe size is. Simple but its gonna be a lotta welding, im getting better at it tho. And I definitely wouldnt say I enjoy metal working, nor do I like sanding fiberglass for 5 years lol, but I climb whatever mountains life throws at me. Win or learn, im always in class.
Ordered my flywheel to crank hub bolts today. Read so many threads on this with no definitive "use this", so went my own route. Mcmaster carr grade 8 high strength mil spec bolts. Those seem to be the best of the bunch. Couldnt find a grade 9 or 10, fastenal was outta stock, so was grainger. Think I have a tunerlocked pcm and need another to program. For what the boneyards here charge for one $80, I found spots online thatll supply one for under $150. Think ill just go that route, initially I got quotes as high as $600- thats almost as much as hp tuners. The last issue is the clutch. Seen so many threads on this w conflicting info. Spec clutch, fiero clutch, s10 clutch, camaro, or cavalier. I have no idea, some say the pp hits the bellhousing. Some say you need a TO bearing spacer. The spec is the most recommended but pricey. Im not going to beat on this or mod the motor to 1000hp. Any idears lemme know pwetty pwease. Not moving back to san jose so once the clutch is in ill start digging in. Only thing im unsure of at this point is the rear motor mount but I got some idears, have to get the motor attached to the trans to see where the axles will live. The usual feel my way around in the dark approach lol
shem
|
|
|
|
shemdogg
|
AUG 12, 10:16 PM
|
|
Went at it the other day finally, pulled the car out, revved the motor for the last time, and shut it off. Started pulling everything, had it out in about 6 hours over 2 days. Things came apart pretty easy but doing it w one hand wasnt. Left hand still in a cast. I cut 60% of the cast off when I got home from the hospital. Its there to immobilize my thumb, so theres no reason it needs to extend to my elbow. Anywho...
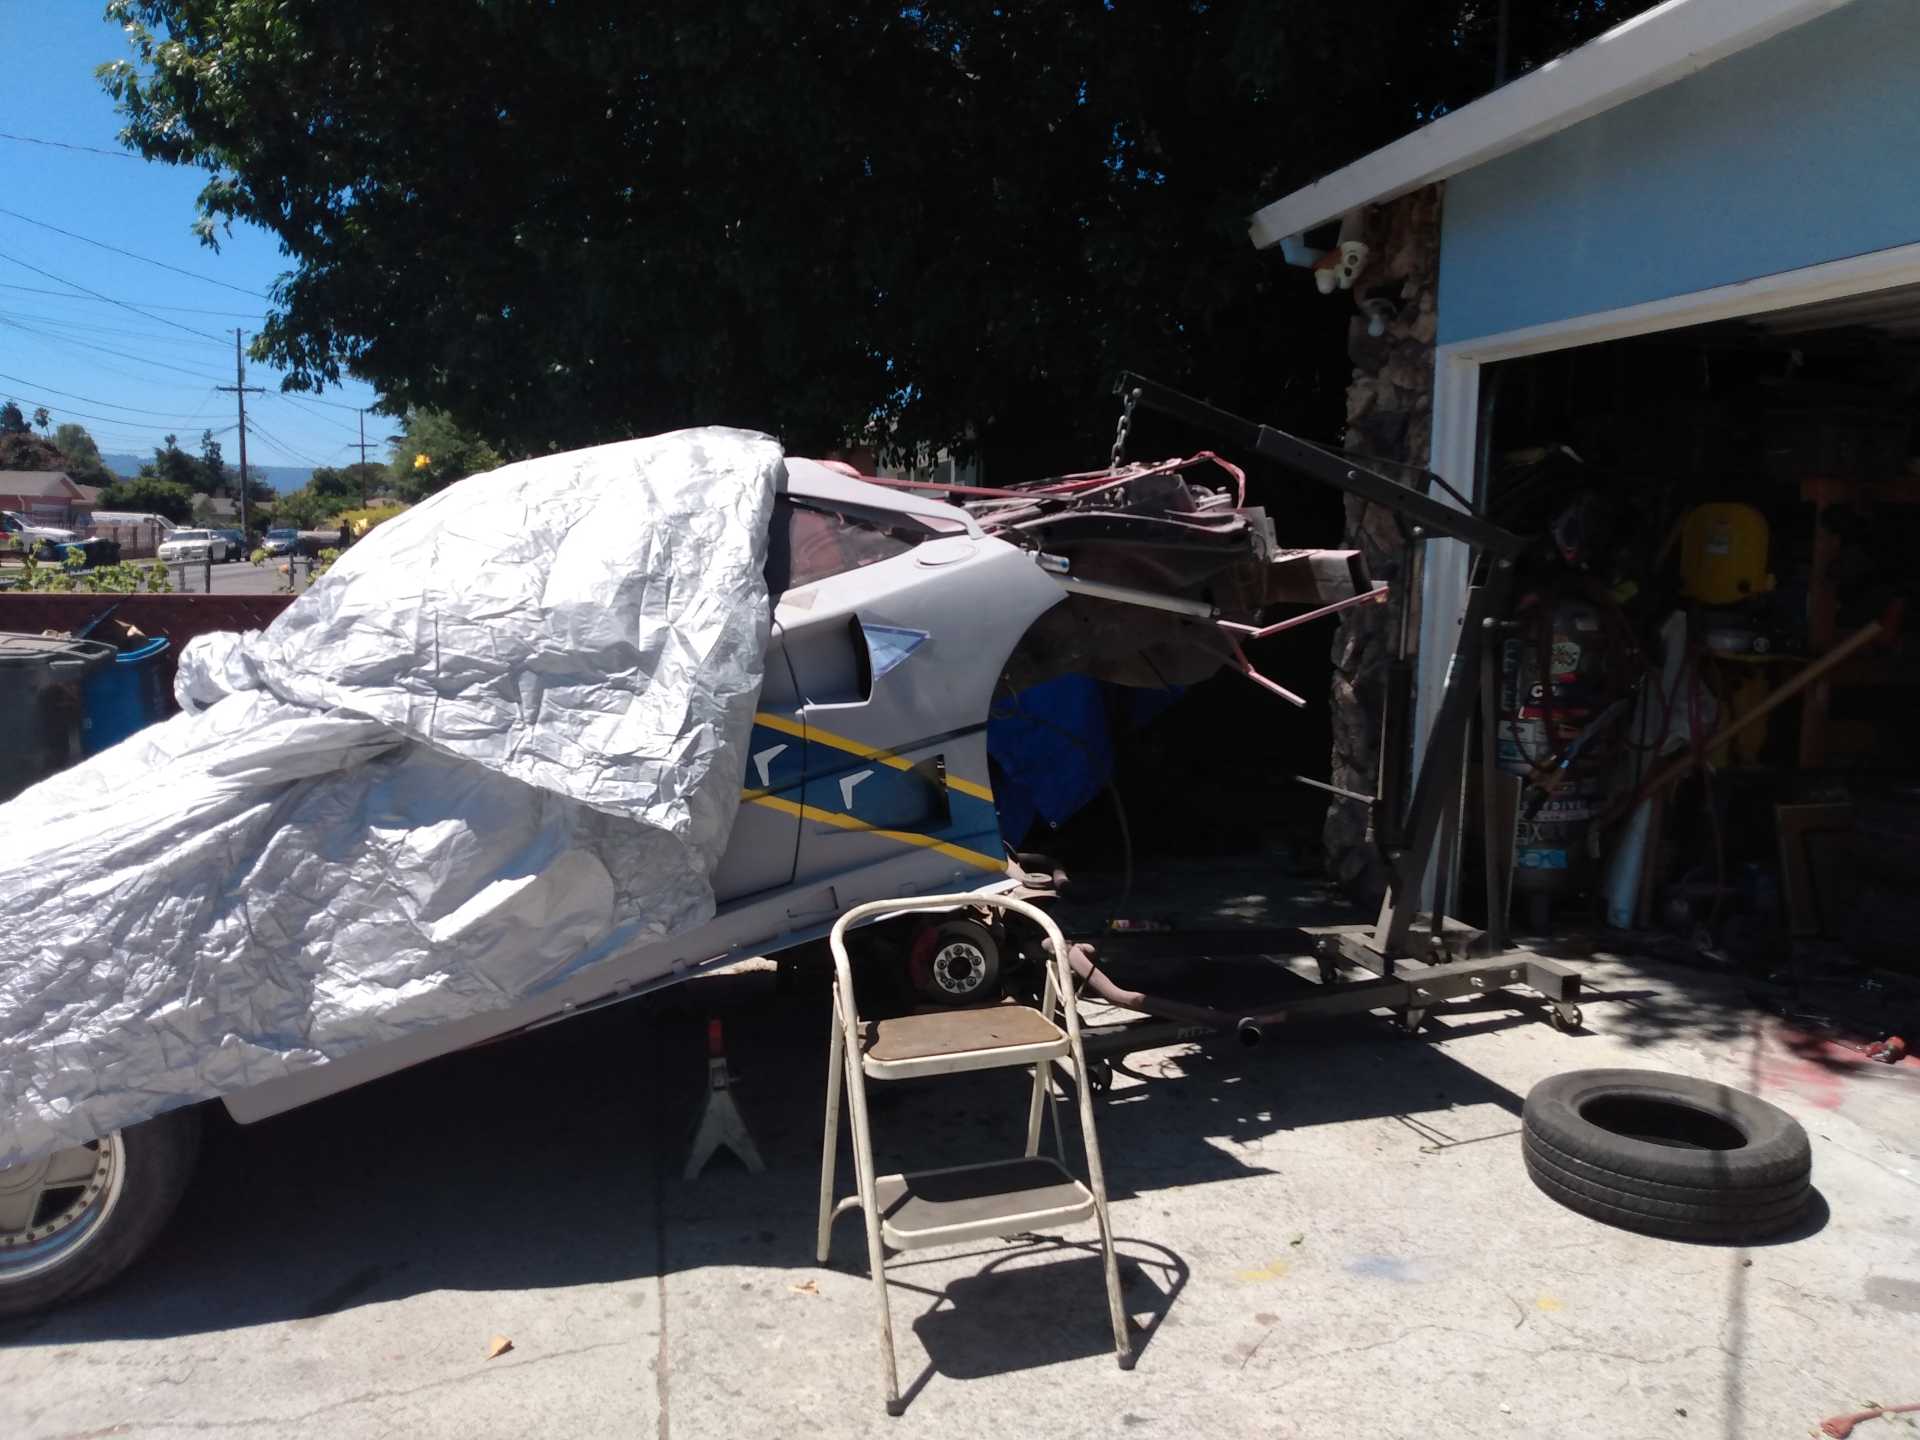
I shortened the lifting arm of the jack to the 1000lb setting cuz I was worried about the weight of the car while lifting. That made the legs of the crane touch my little jetski dolly so it wasnt able to move back any. I wound up pulling the right quarter panel off enuf to make room. Had the back of the cradle on this lil jetski dolly, and the front on the floor jack.
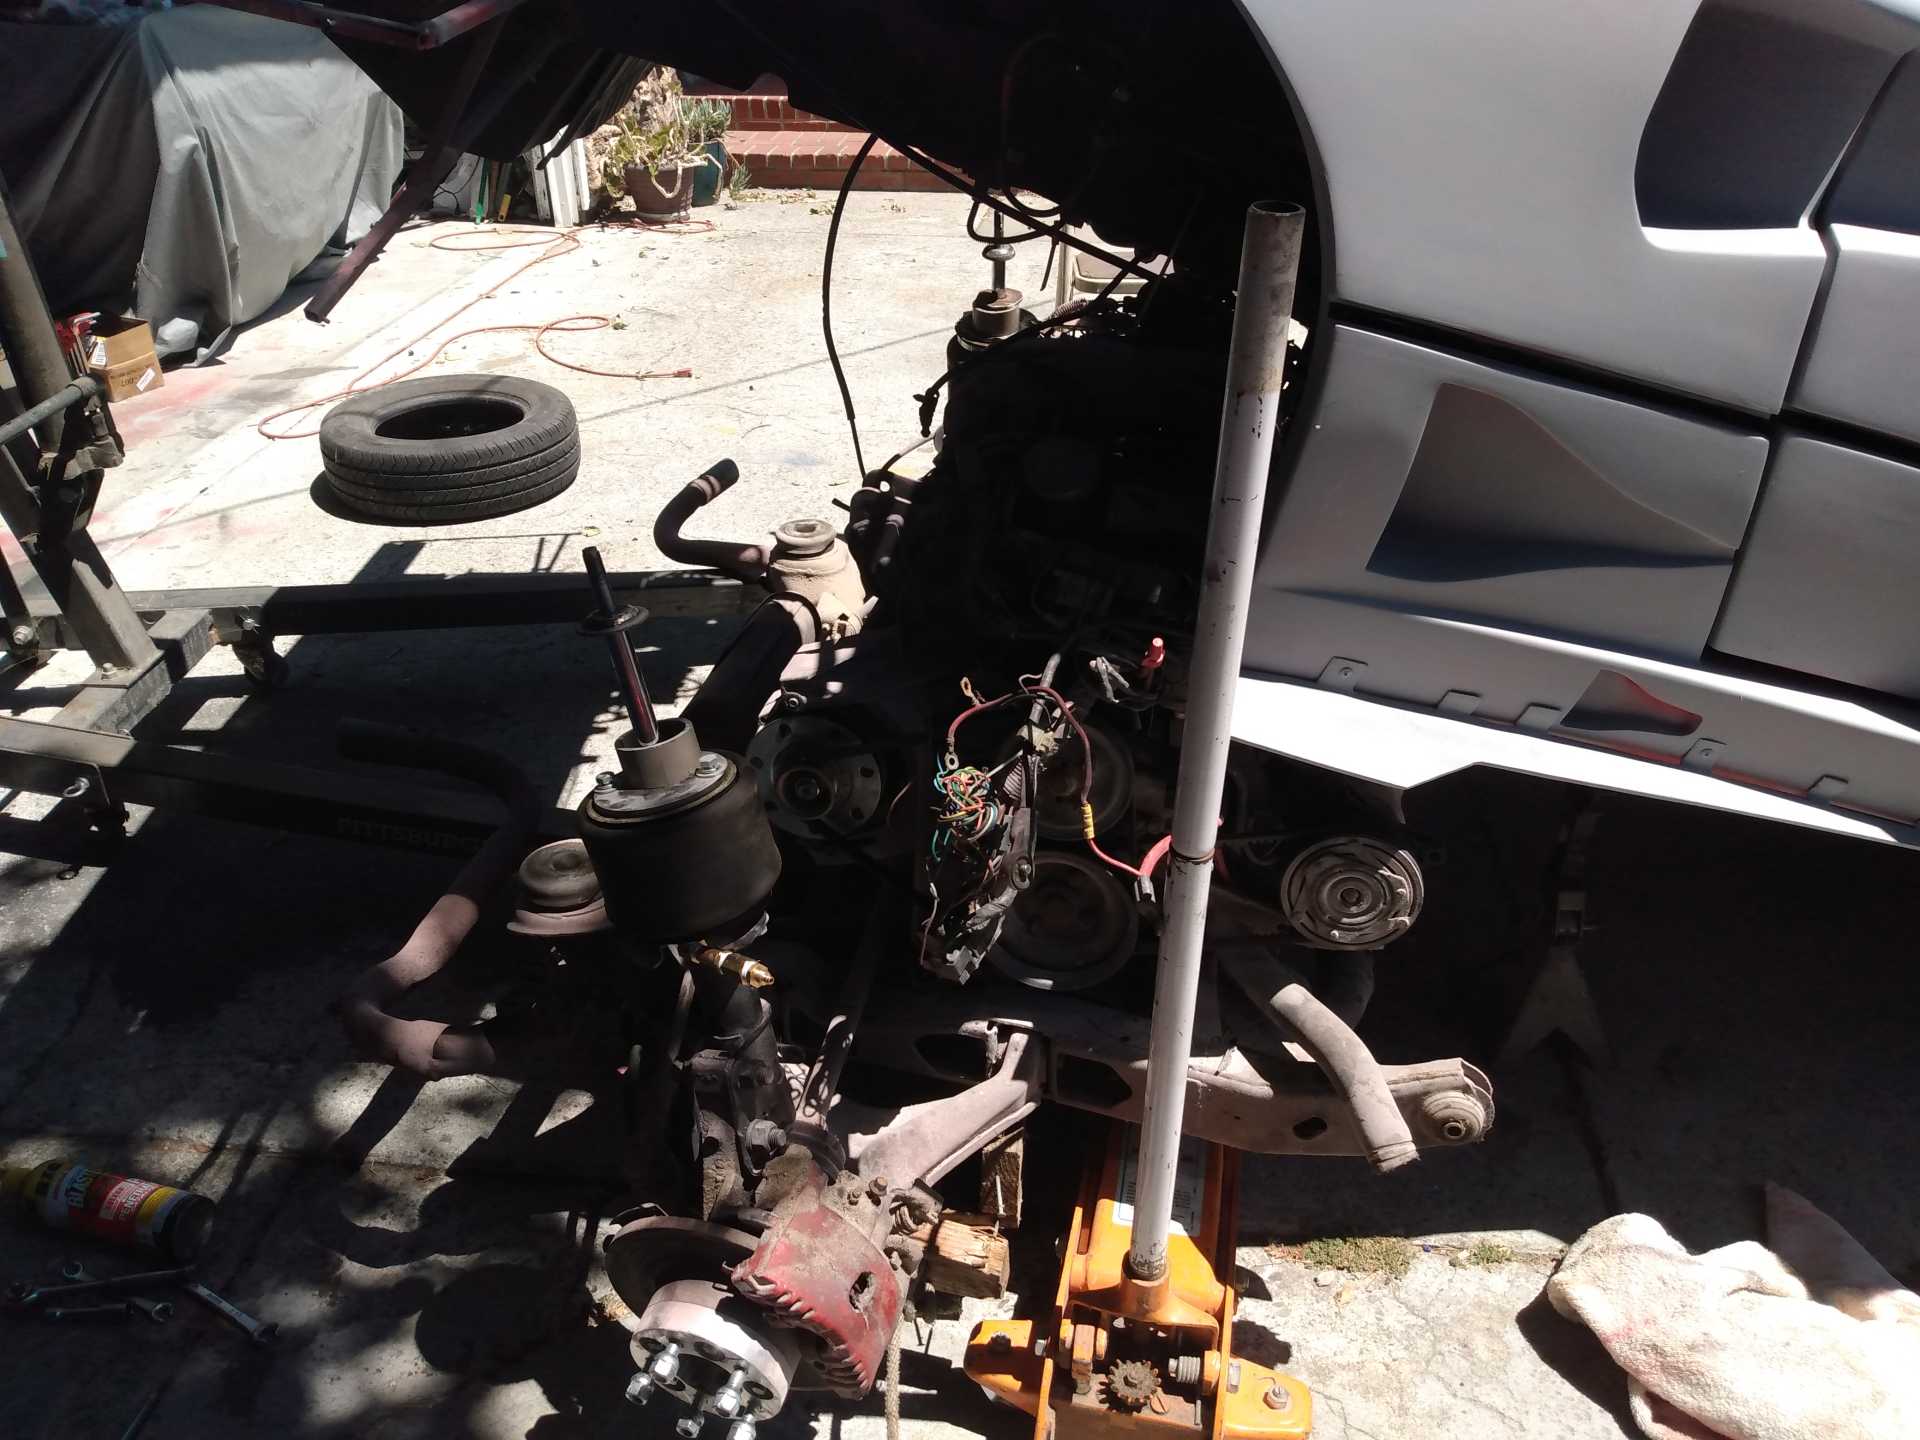
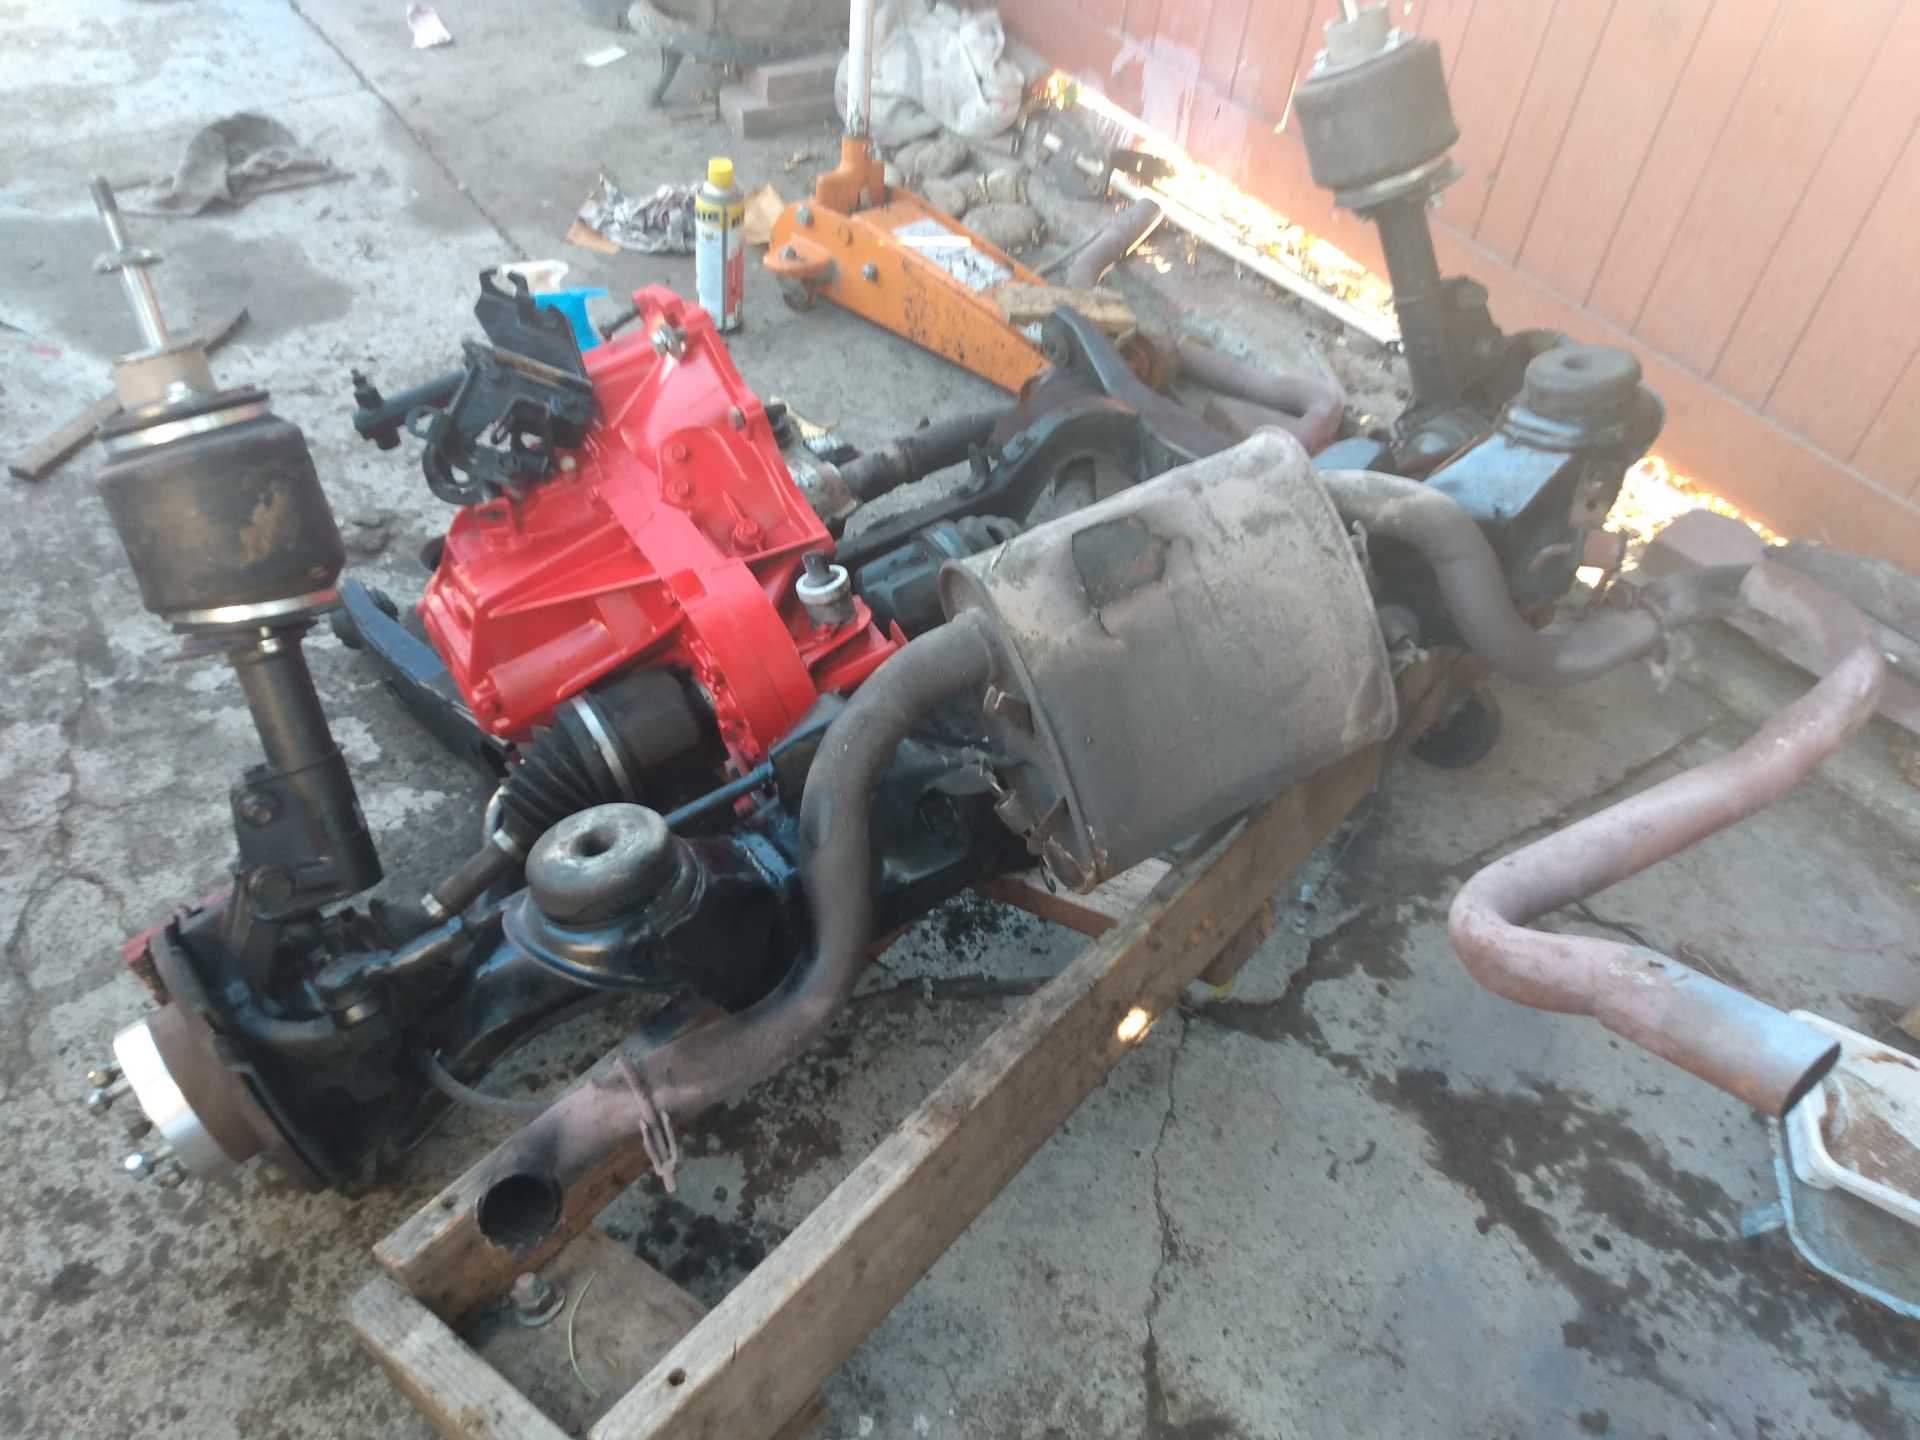
Then I didnt have the oomph w one arm to pull the whole thing outta the car. Outta nowhere one of my buddies shows up( one of the ones who thinks im crazy), and sees the back of the car way up in the air, and the whole engine sitting disconnected. The look of shock on his face was priceless, "john what are you doing man?" lmao it was so funny. He helped me pull the thing out. It was crazy dusty w tons and I mean tons of fiberglass dust everywhere and stuck to all the oily bits. Hit it w the powerwasher n it cleaned up pretty damn good.
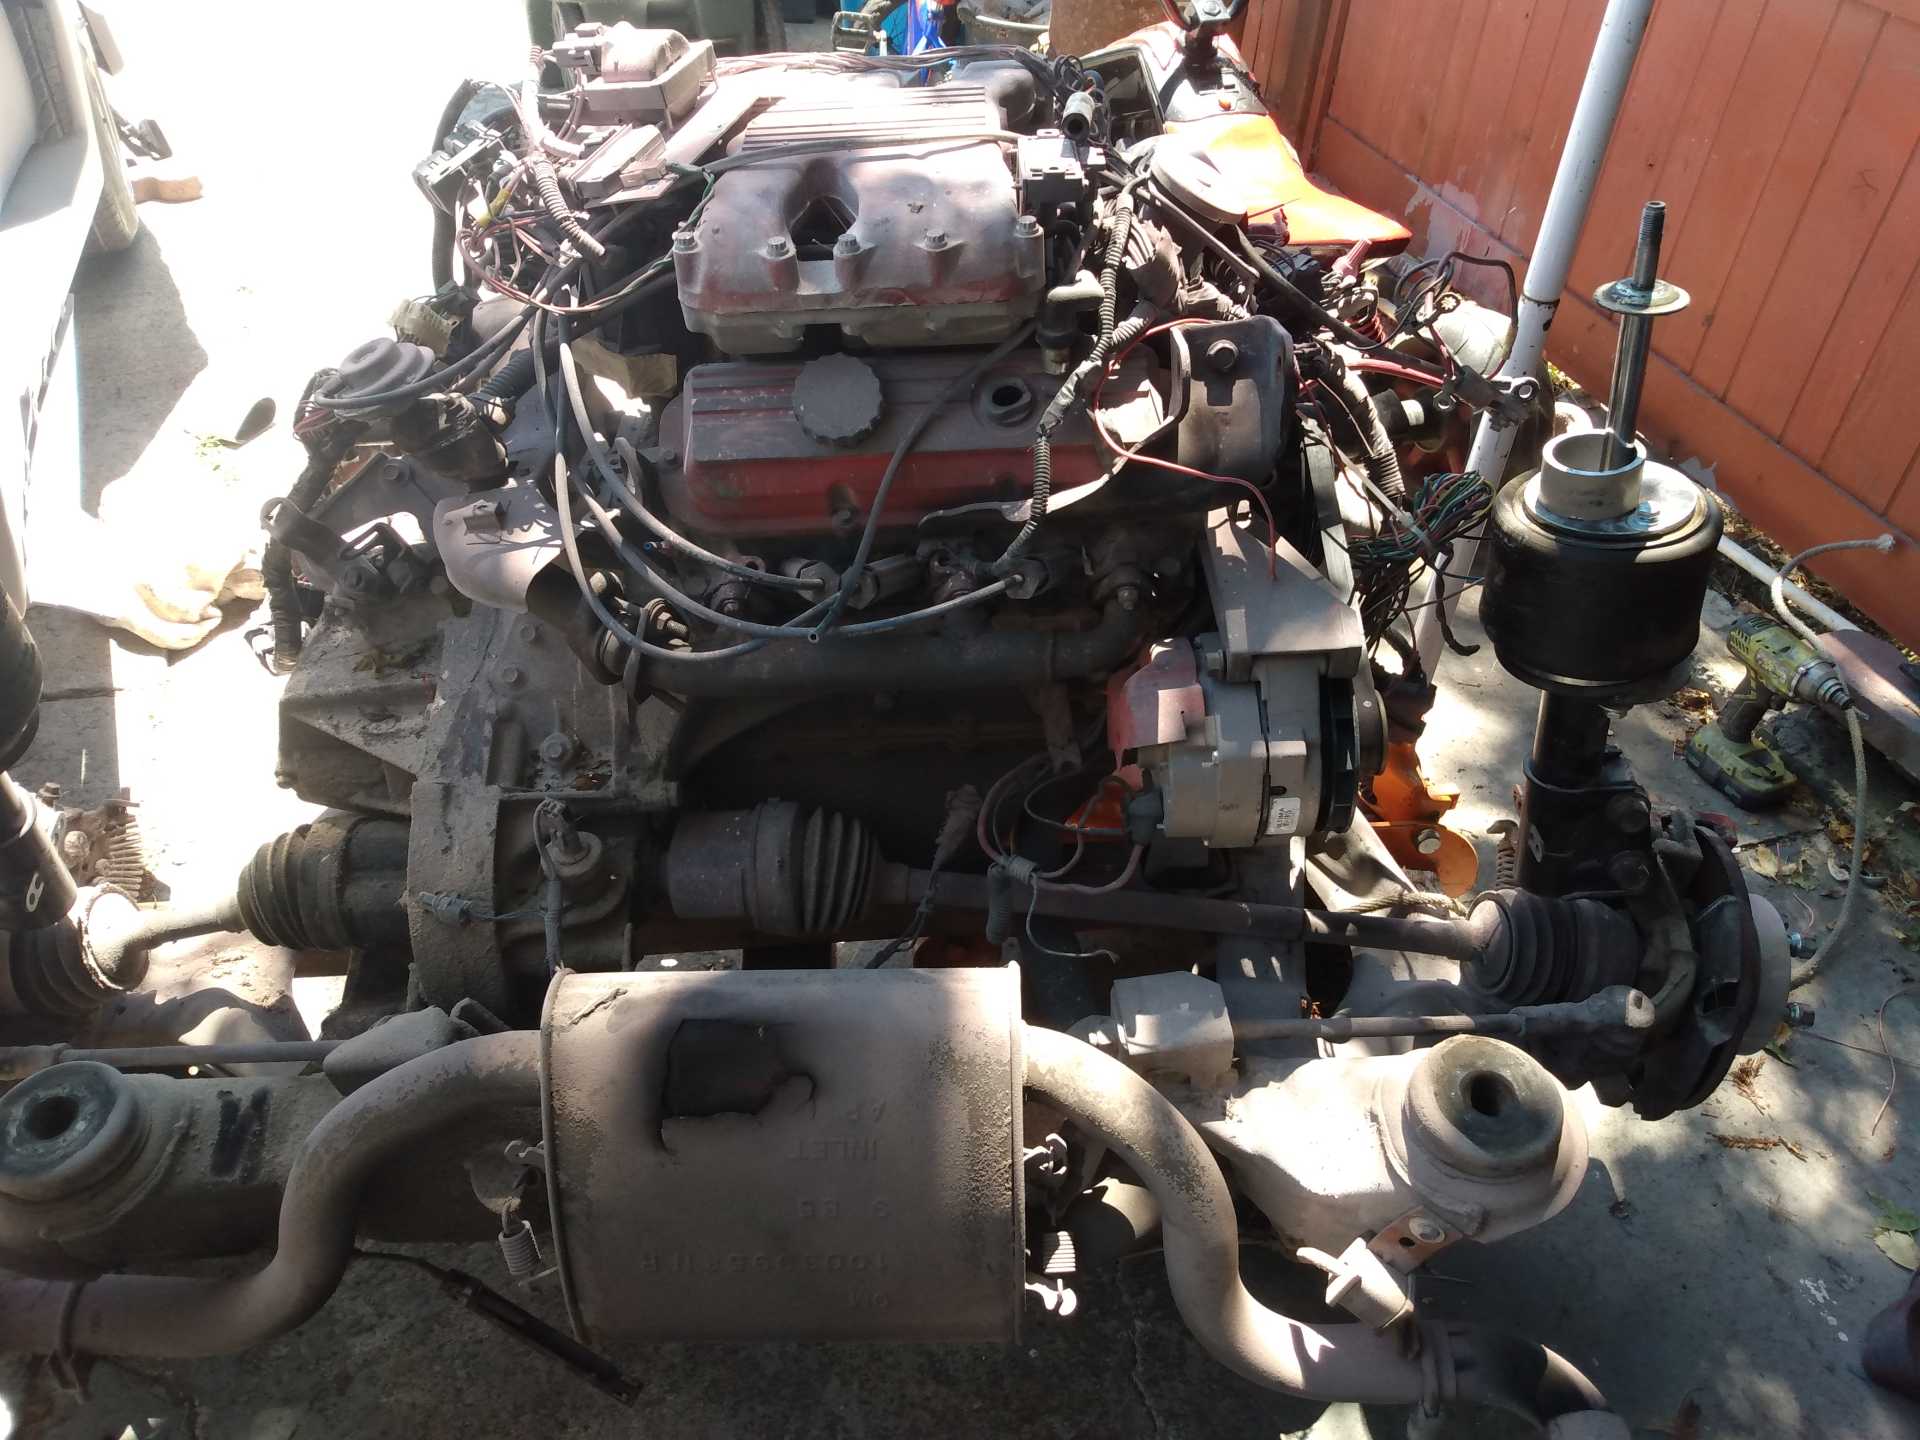
Still had about an hour to pick up the youngster from school, and I was already filthy, so I decided to pull the motor from the trans. Kept finding more and more bolts holding it on, it didnt wanna separate. I also noticed the trans was moving on the cradle, and also lifting away. Upon closer inspection-one trans mount totally mia, and the other has about 40% left and is barely hanging on. I never checked em as I rarely drove the car. When I bought it the dogbone wasnt connected and the bracket was bent so far back I didnt think they connected. This motor/trans has been bouncing around for a loooong time lol. Got the trans cleaned up really good and wanted to install the engine today. I put on the flywheel and clutch, then noticed the throwout bearing they sent me was different. Dag nab it jimb! I ordered a 5 speed kit, just saw fiero v6 in the ad and went for it lol. Looking again on ebay, there is no 4 spd kit. So I ordered one today from rock auto and got the trans mounts from fiero store coming soon.
My cousins mom passed away (cousins on the right lol) , the get together I saw one of my cousins from virginia, and she had her boyfriend with her. He was all alone w no one talking to him so we started chatting and he tells and shows me pics of his vintage landcruiser that was mint. Then asks what im working on and I showed him a pic of the car. His eyes lit up and he instantly tried to expand the picture on my phone, then took it outta my hands to get a better look. And what comes outta his mouth a second later, "thats an f-14 paint job!". I was blown away and asked how he knew. He said just retired from the marines and flew a buncha stuff, what I can remember was the f-18 hornet(my udder fave), cobras, and some attack chopper. He was so stoked to see that and I was feeling pretty good about it, still do 
Shem[This message has been edited by shemdogg (edited 08-12-2022).]
|
|
|
|
shemdogg
|
AUG 28, 01:07 AM
|
|
Whew that was a long 2 weeks. Ordered the trans mounts from the fiero store on a saturday, they were at my door 2pm monday. Ordered the TO bearing from rock auto at the same time. It took till last saturday to show up. N guess what? They sent me a 5spd bearing! %$#@^&*((!)&*&%*$^&&* Even tho the description says 4 spd, and shows the right picture, and shows a different part number than the 5spd bearings they sell.WTF! I planned so good getting all the parts together and reading every 3800 swap thread, I just knew Id have this thing in n out in a day or two tops lol. Ordered one from fiero store 5 mins after the wrong one showed. Just showed up yesterday afternoon. I was itchin to get it together even tho it was getting dark, I got the engine onto the trans. Mostly, something was hitting. WTF! Shift cable bracket is stopping the last 3/4" of distance between motor and trans. Bracket is hitting the crossover pipe.
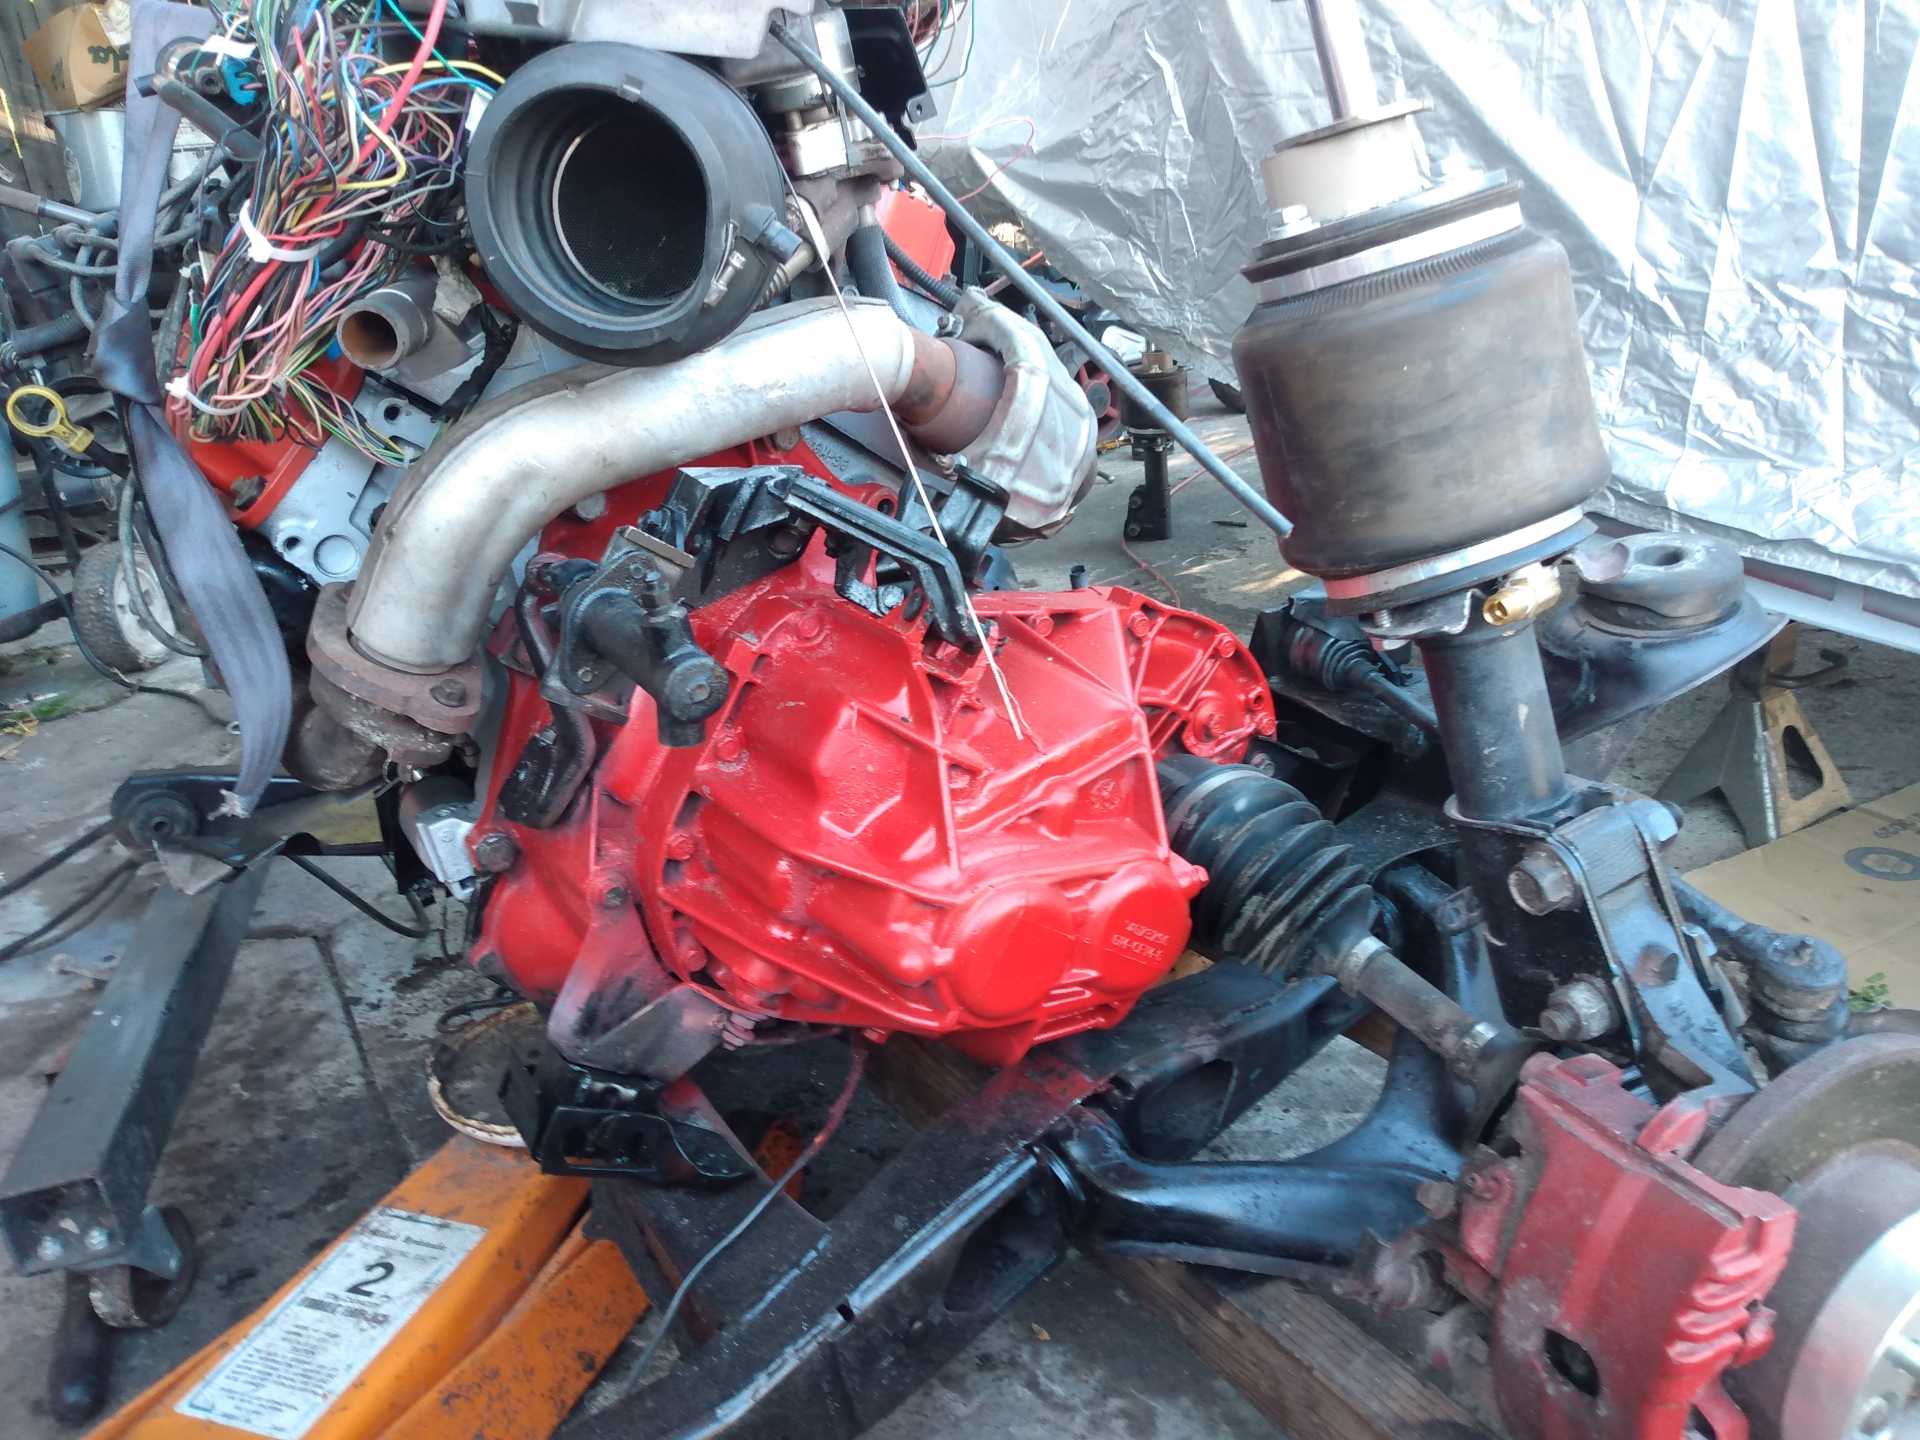
Called it a day. Got up this morning and cut it off w a sawzall, motor slid right on. Whats next, motor mounts. Huge bonus, the LS motor mount holes are 1/8" off on one side so it was quick n easy to get them bolted to the motor. Had a chunk of 5/16 angle I used for the rear mount. Still gotta box the cradle there. Ugly af but strong lol
Front mount was hitting the axle shaft, so I cut it off and made it sit closer to the bracket. Now it can go all the way forward without hitting.
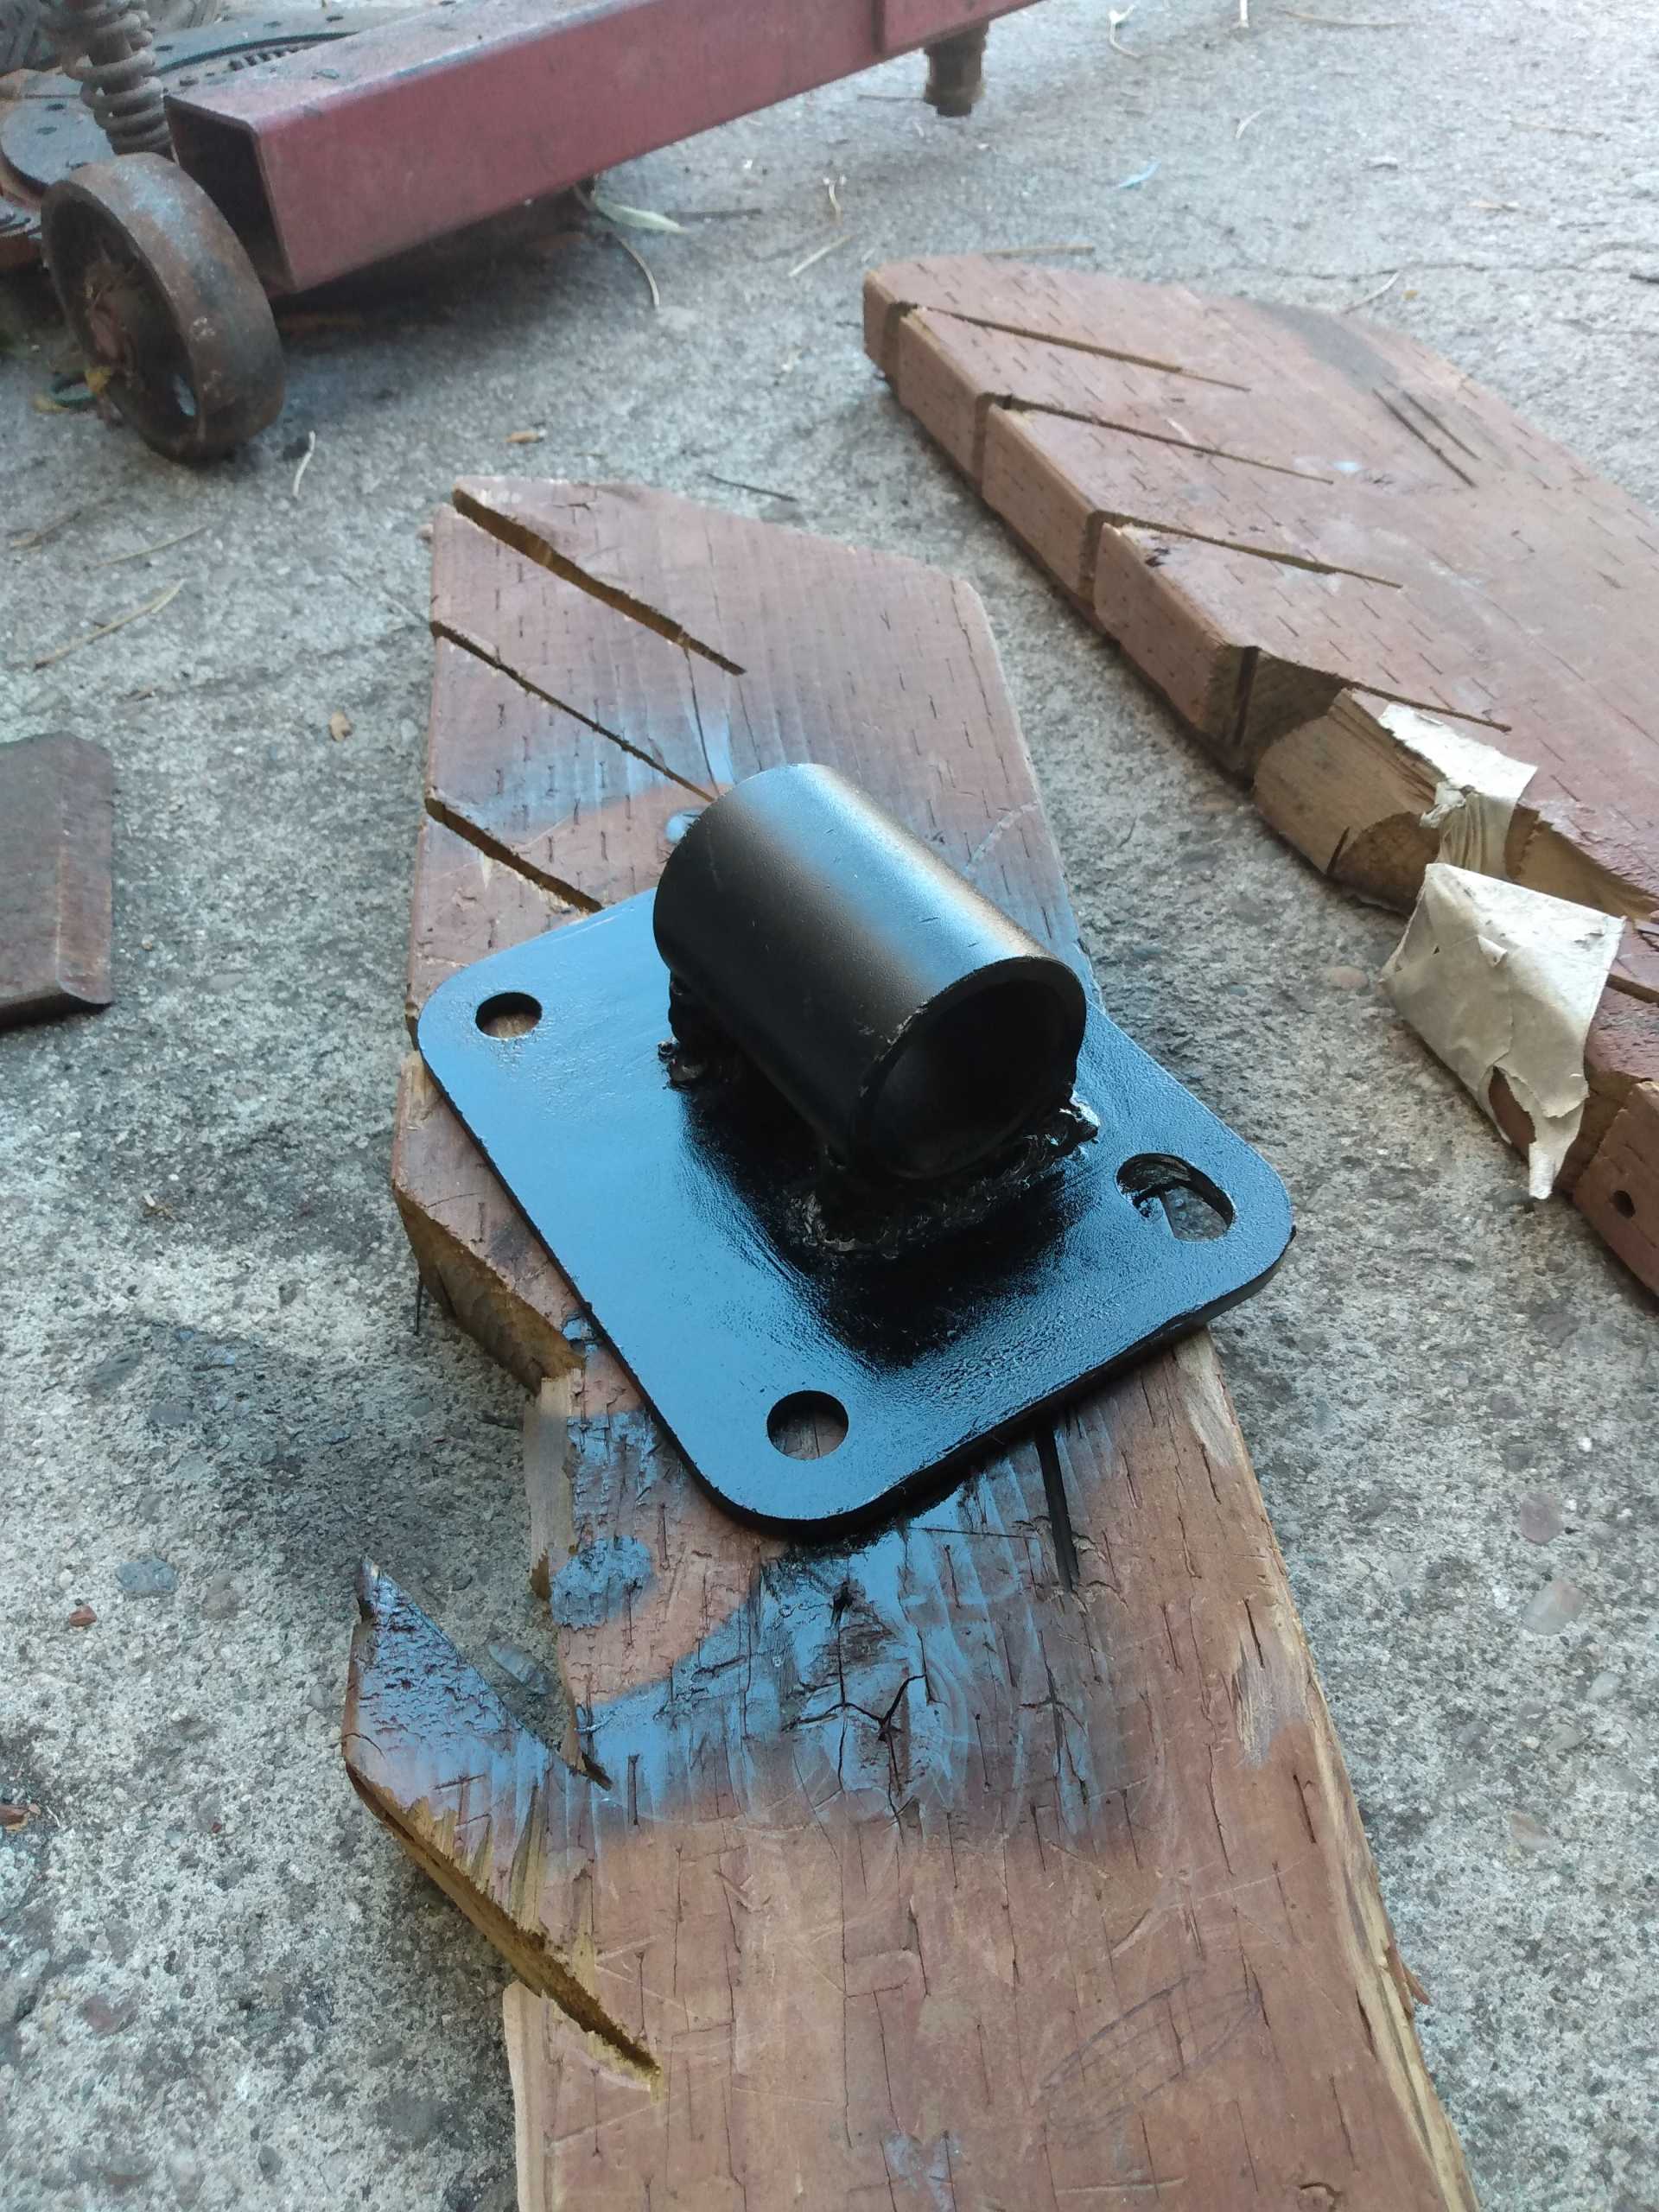
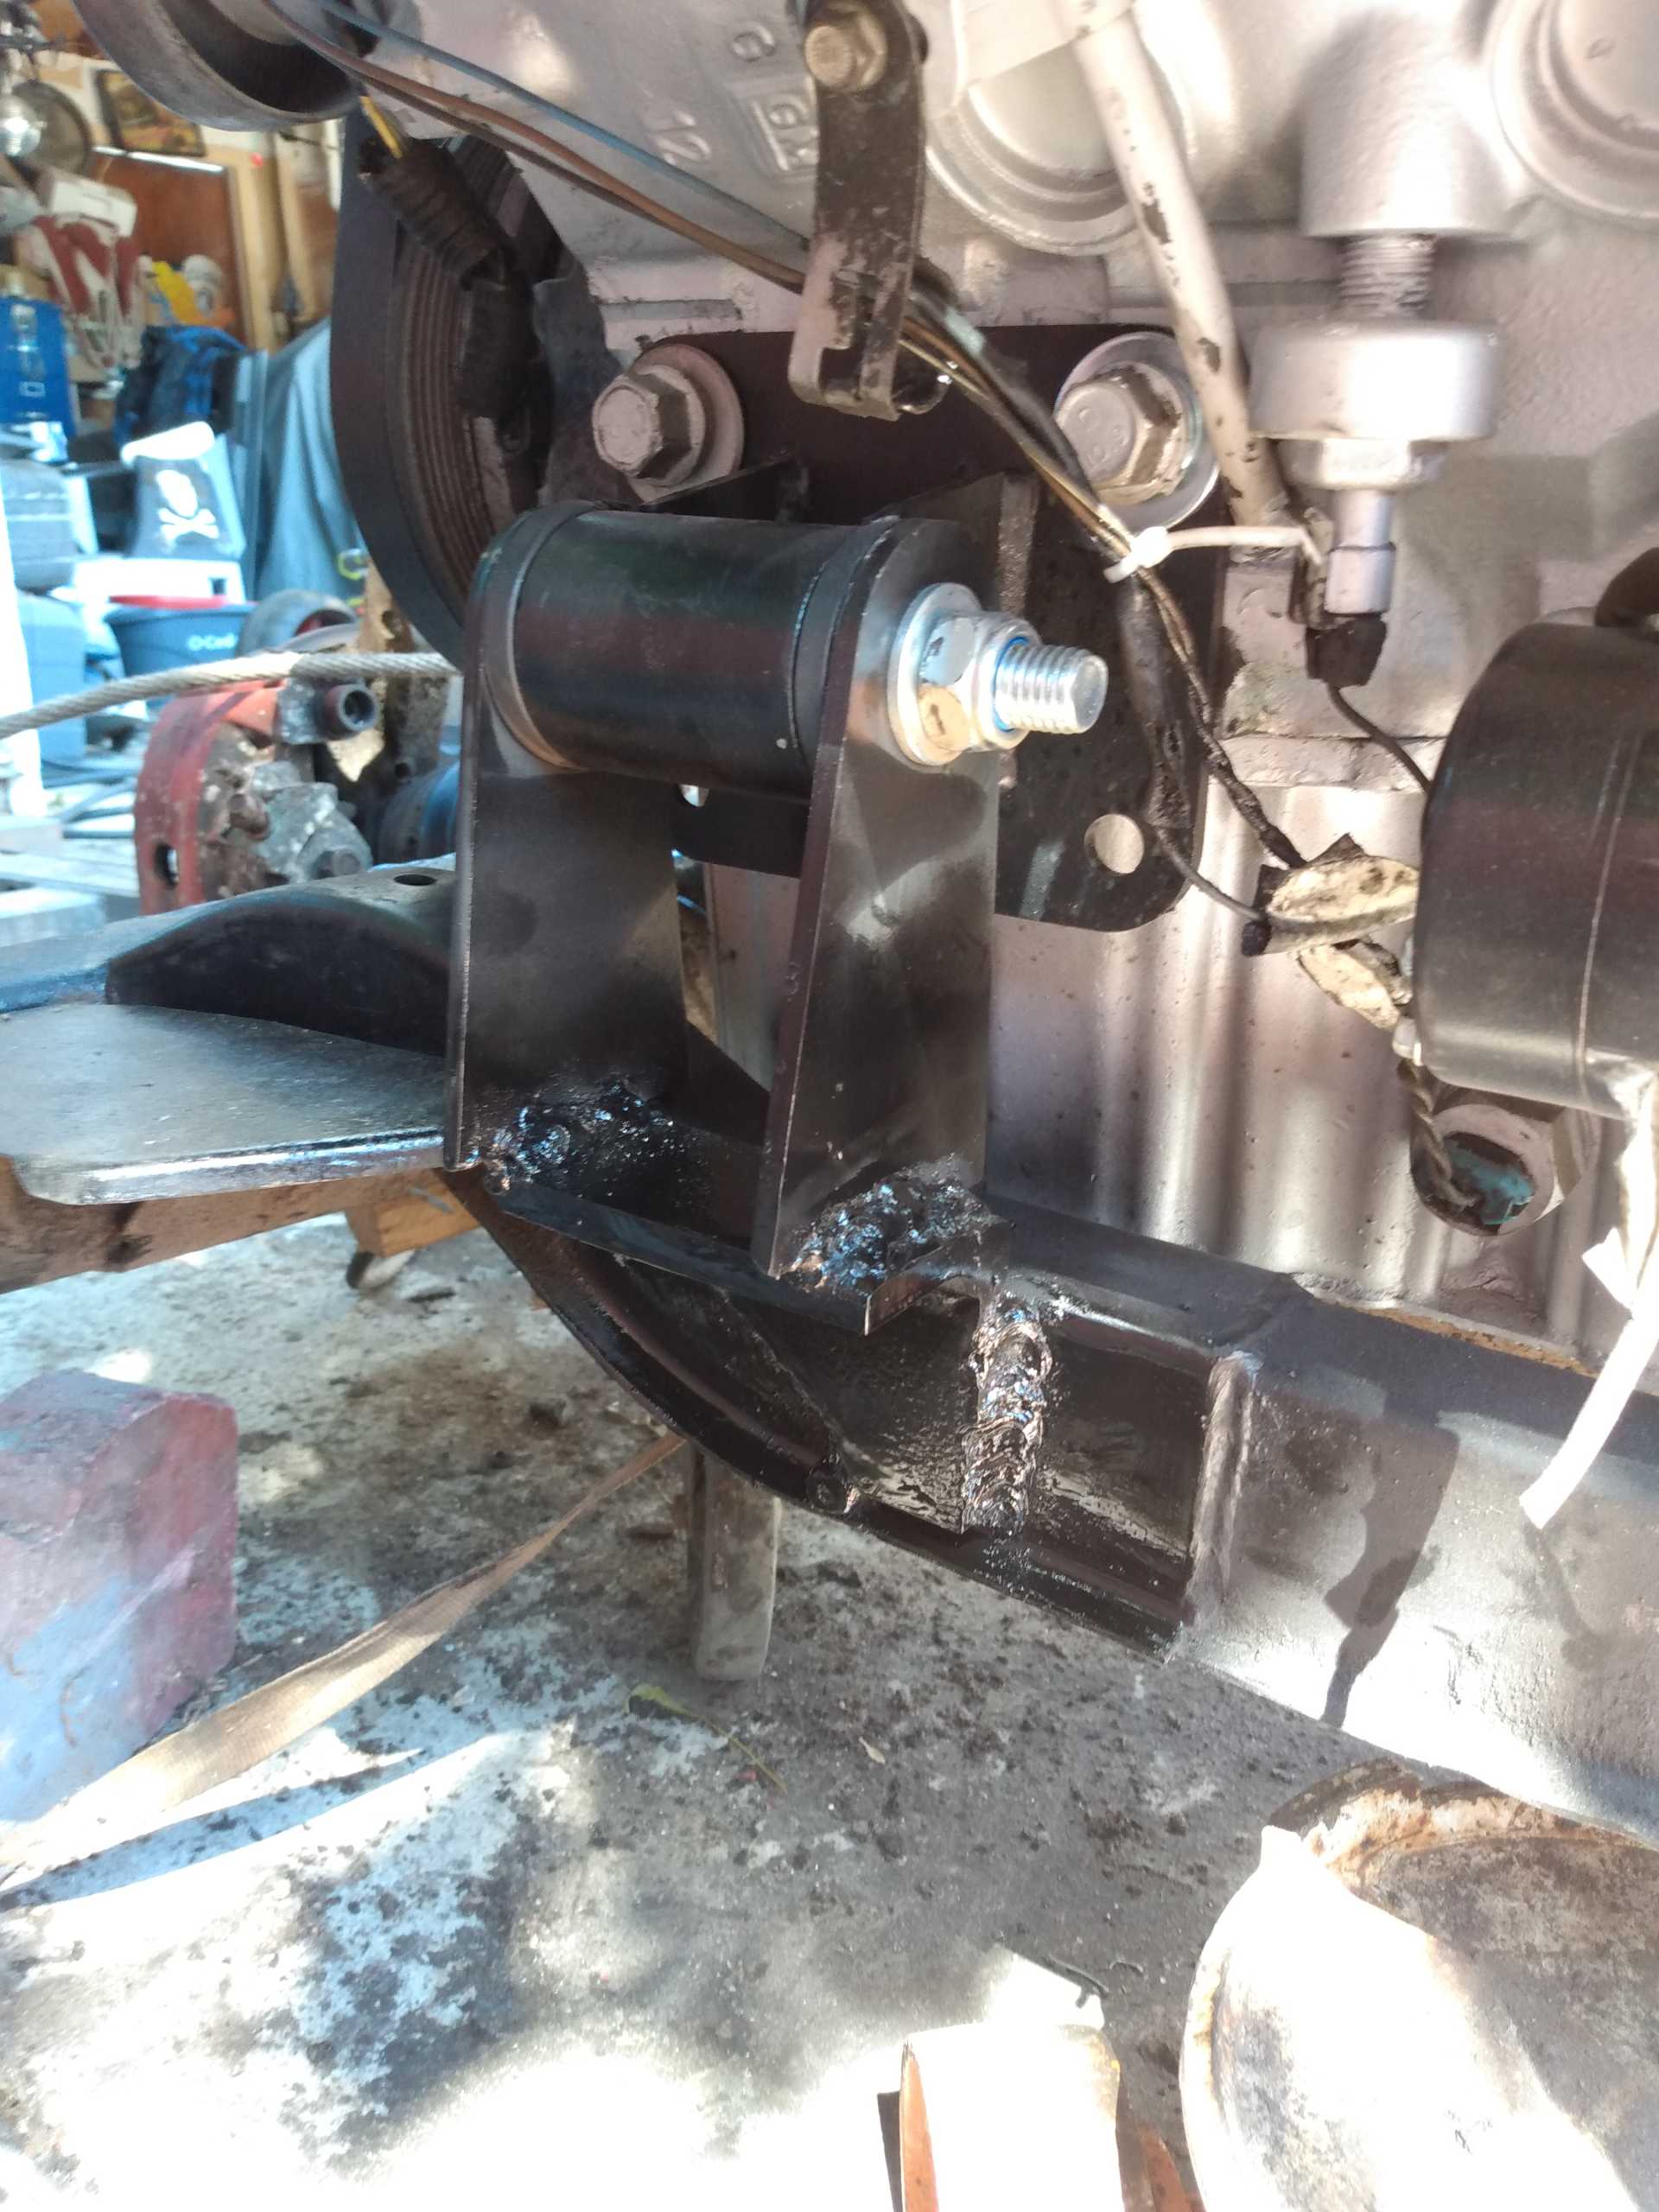
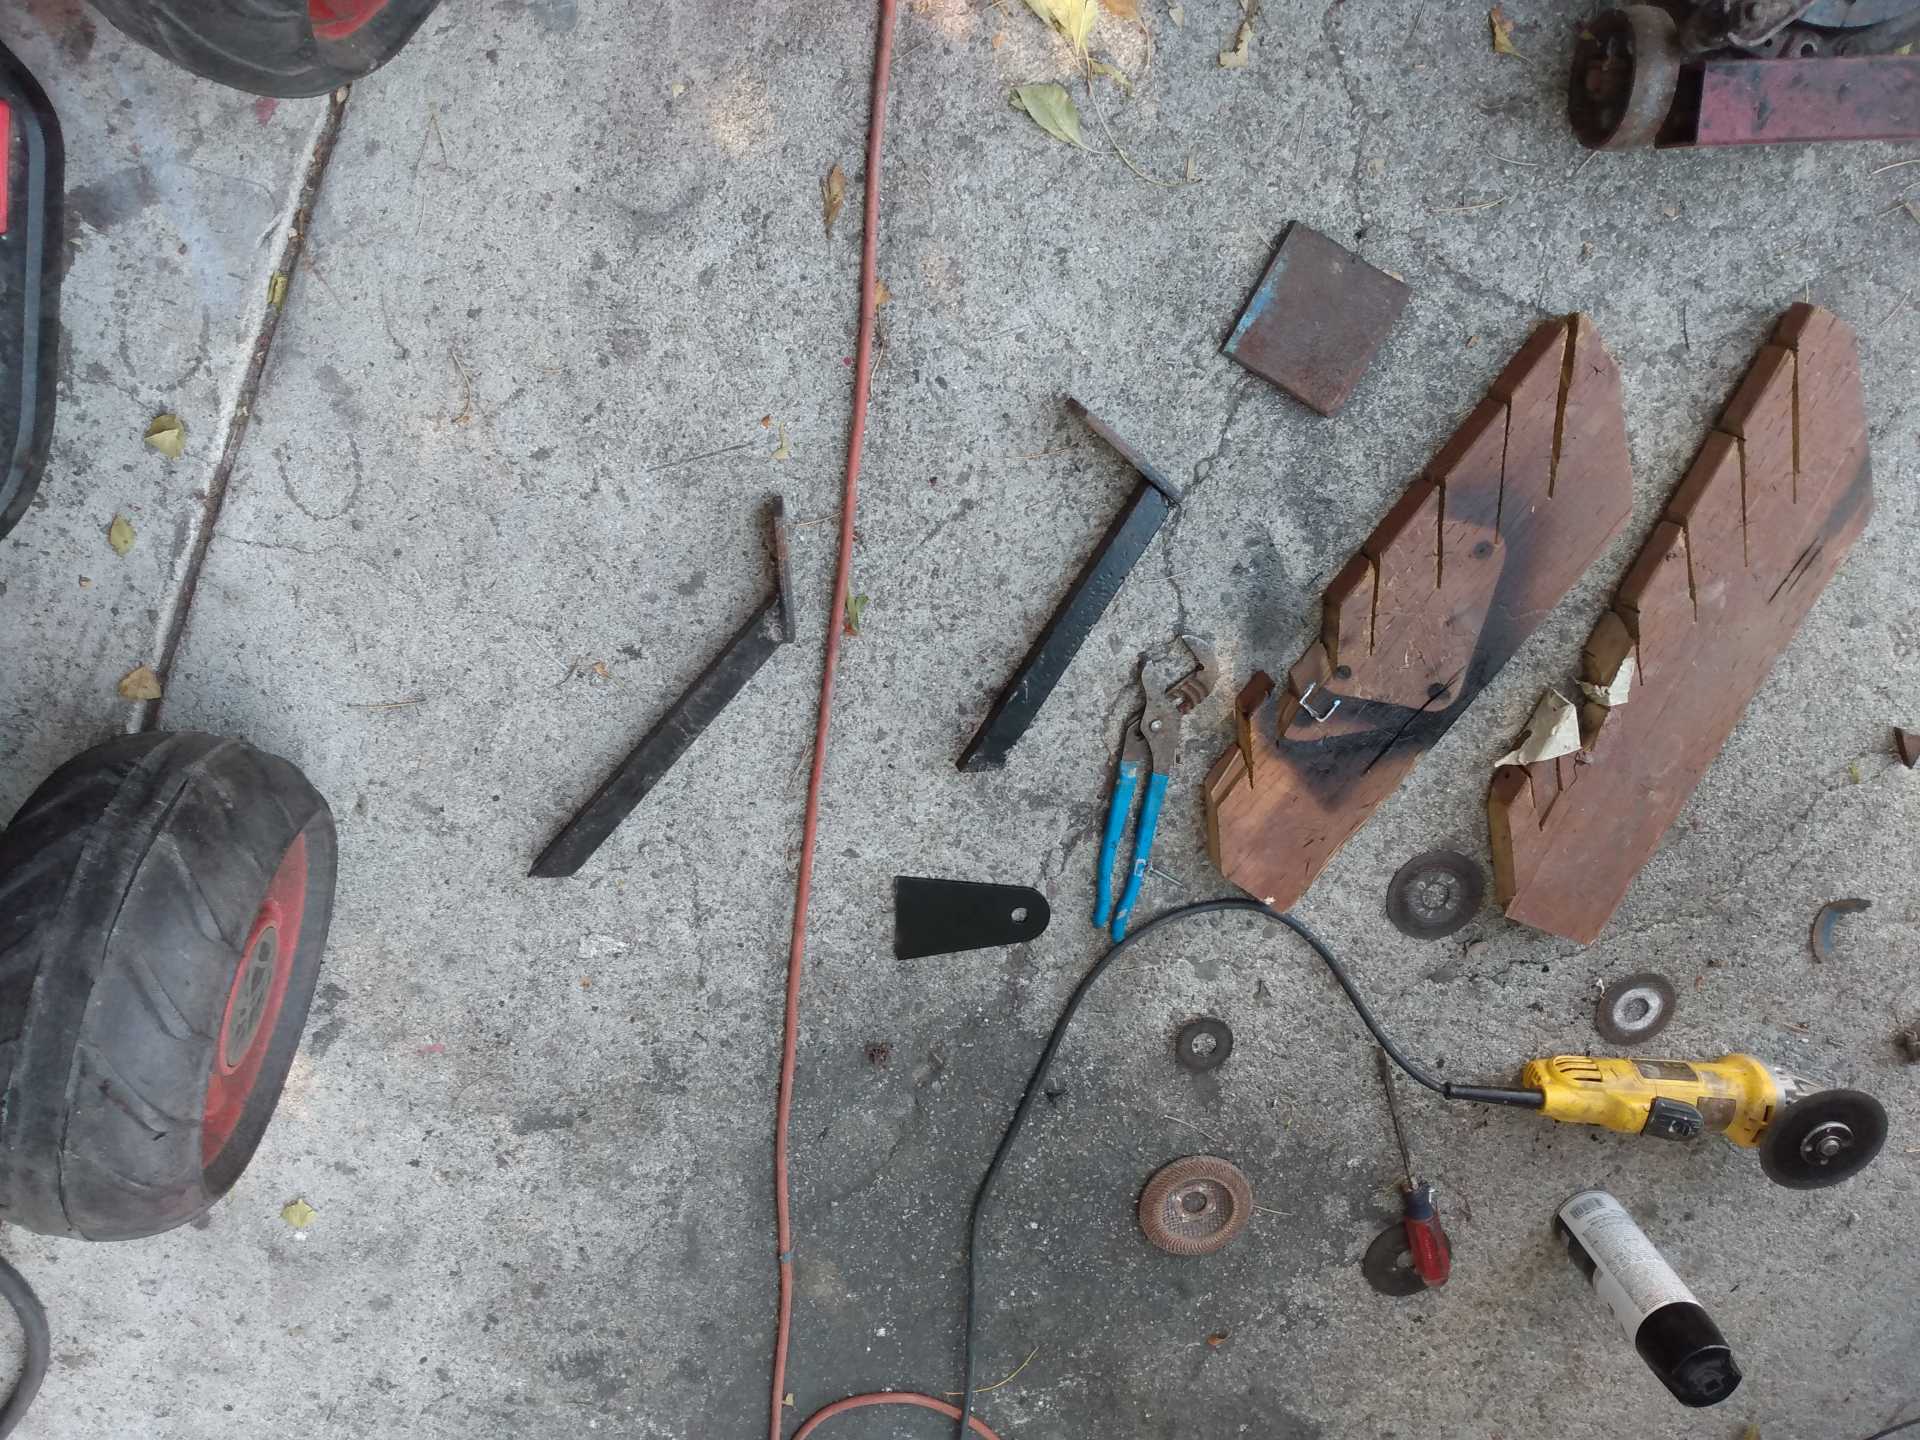
Then I found some supports for the rear bar of my toyotas lumber rack I saved when I narrowed it to the shape of the cab.
A short while later...
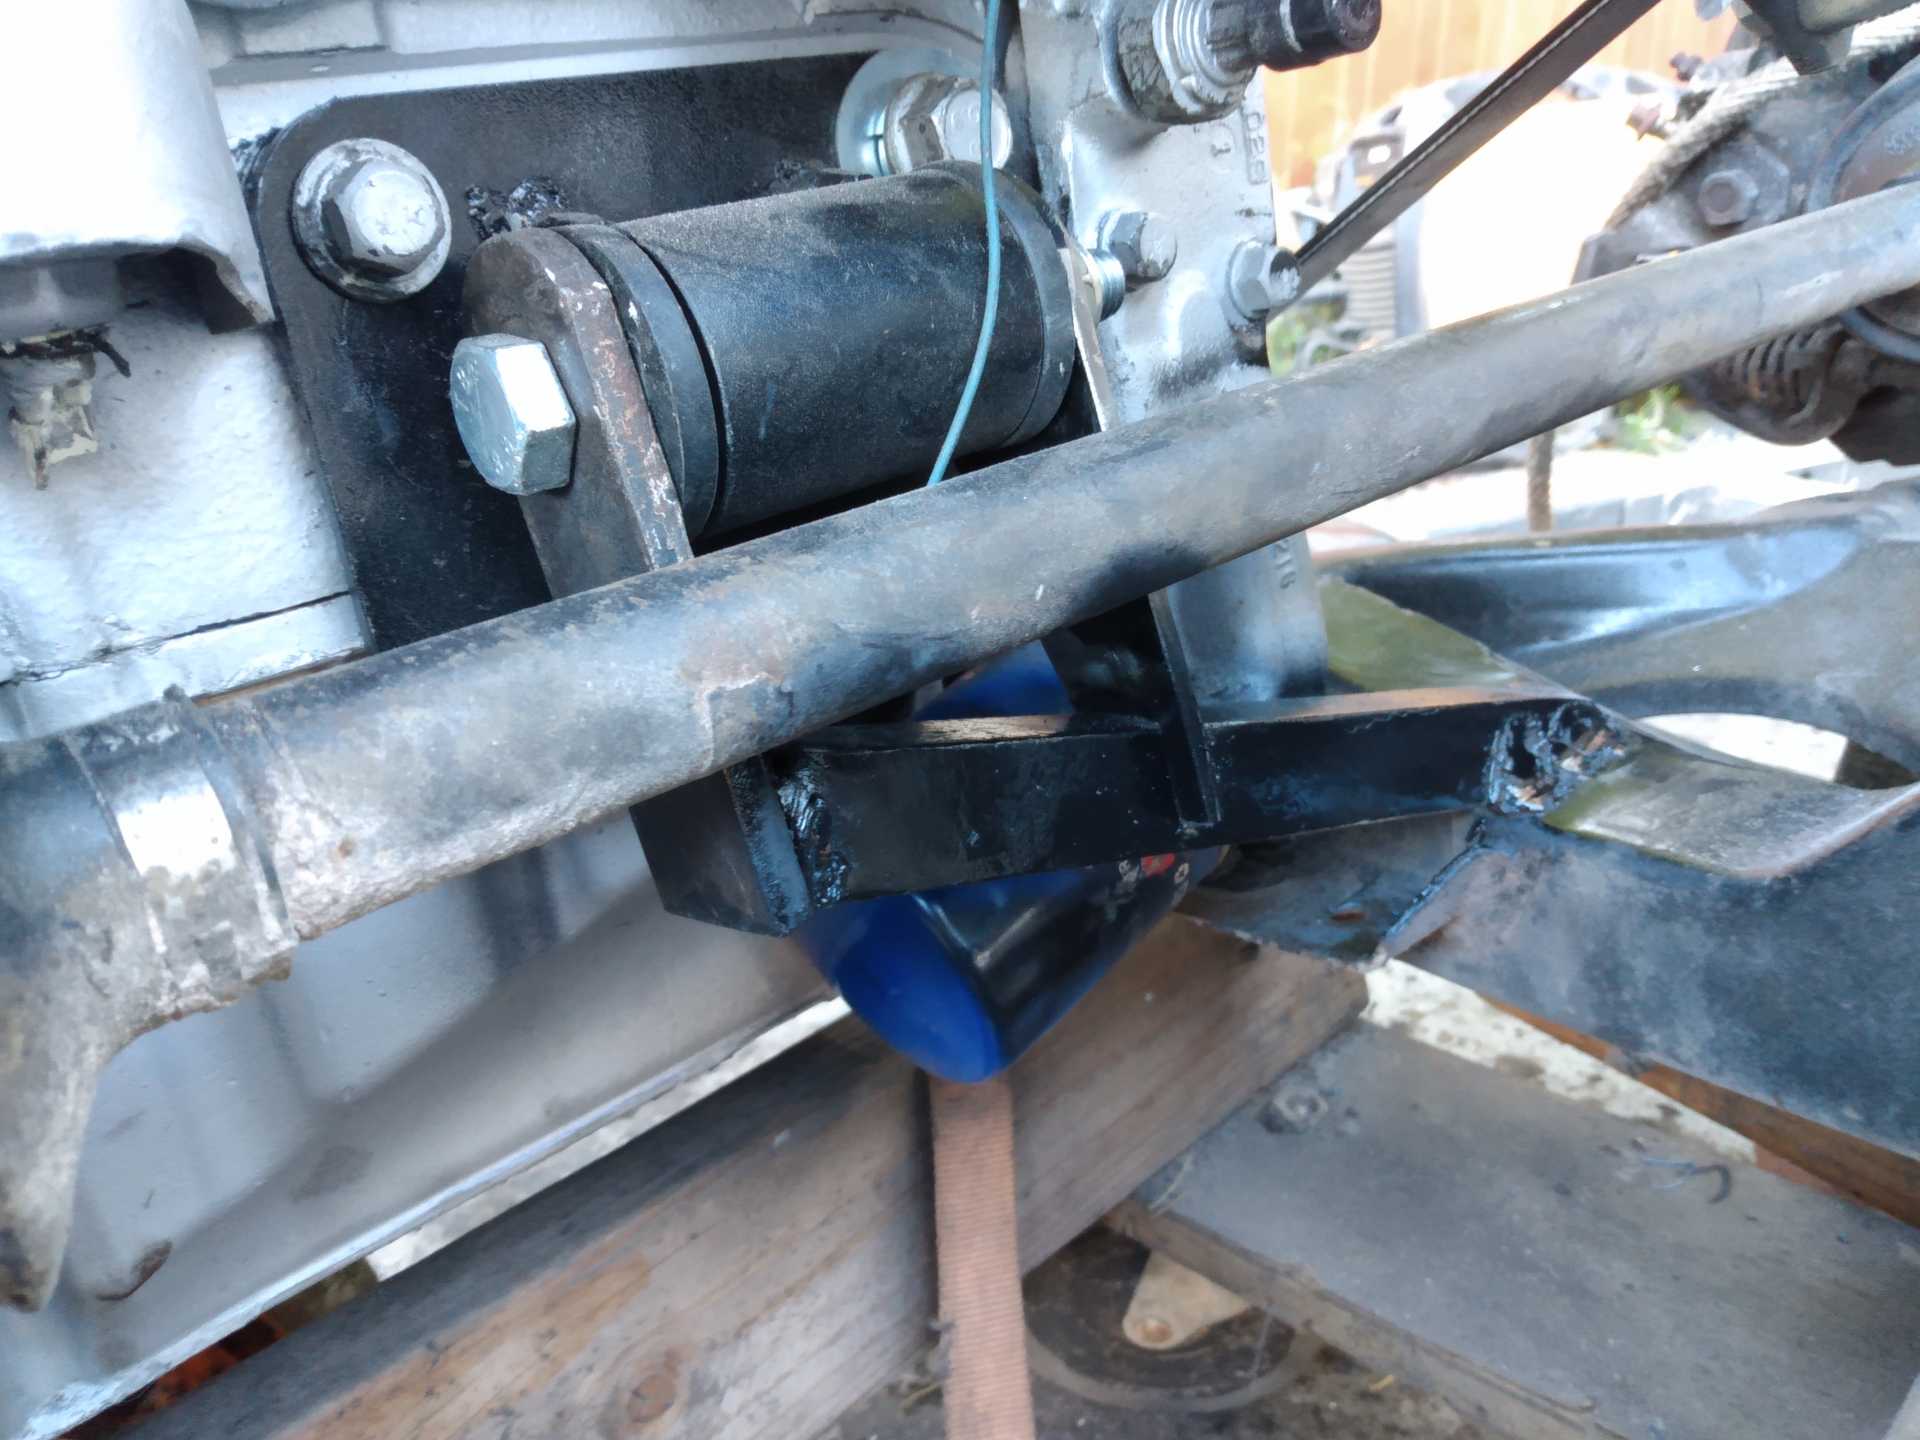
Still needs a gusset, but the cradles holding the engine. Crude but serves the purpose. Shoulda made em removeable lol.
Had a nightmare of a time getting it back under the car. Uneven driveway, POS jetski cart broke twice lol. Got it in after some serious effort. Even broke out the skateboard lol. Cast if off but im supposed to take it easy. I am, I waited 2 weeks for 1 part lol.
Got the front cradle bolts in, wanted to get the rears in but the evap can is in the way of the motor coming up. Always something man! It was getting really dark so I called it a day. Very happy w todays progress. My lower back is killin me tho! Get the thing bolted up and start plumbing is next. Onto the next hurdle! Hopefully tomorrow but I may be painting my buddys truck.
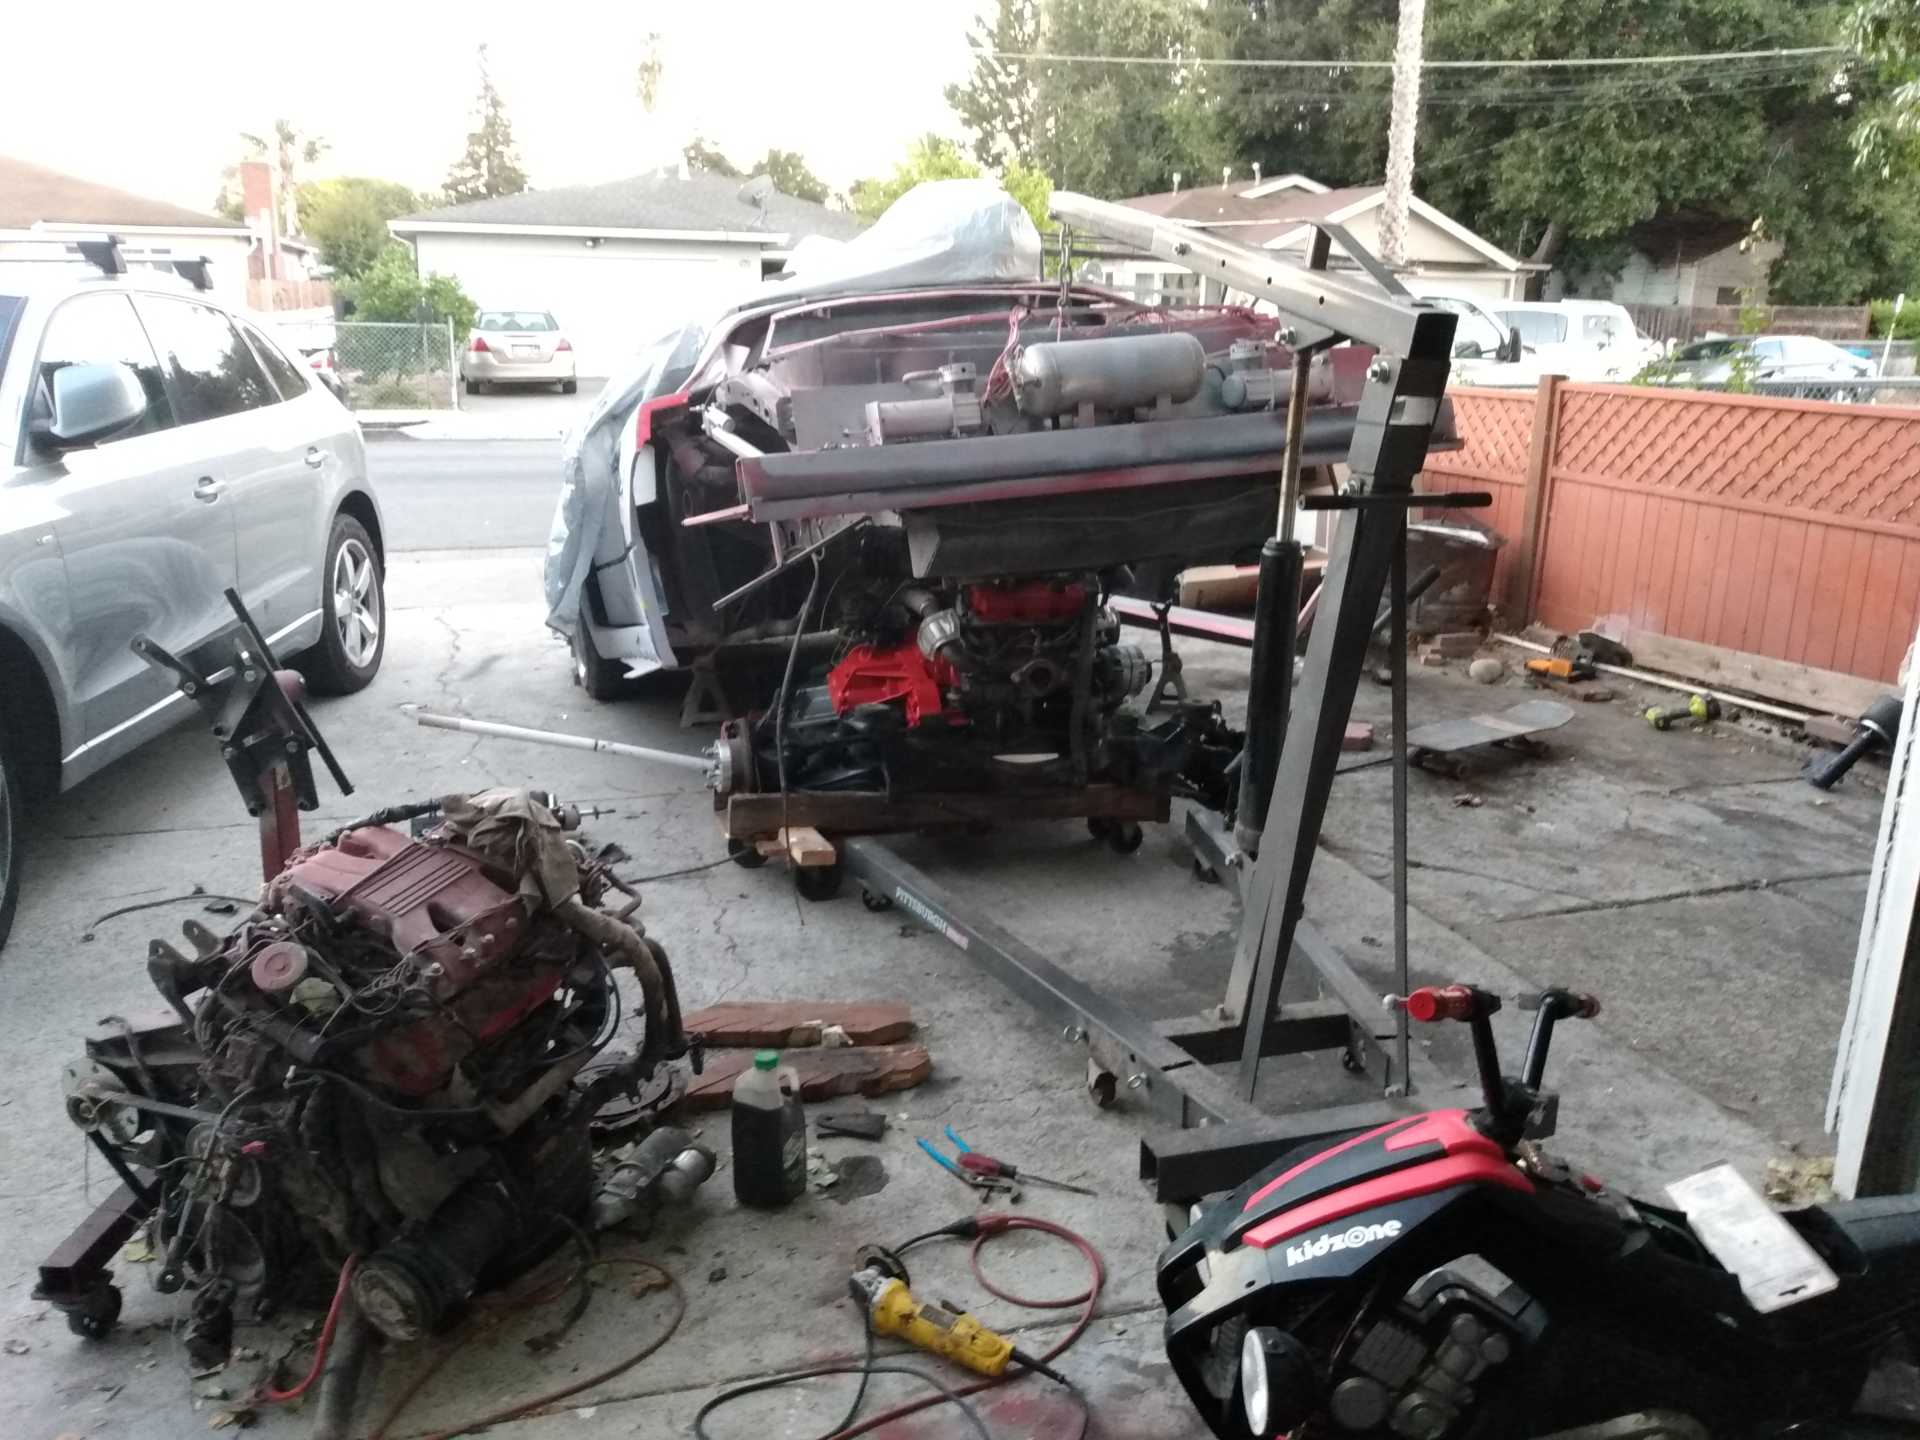
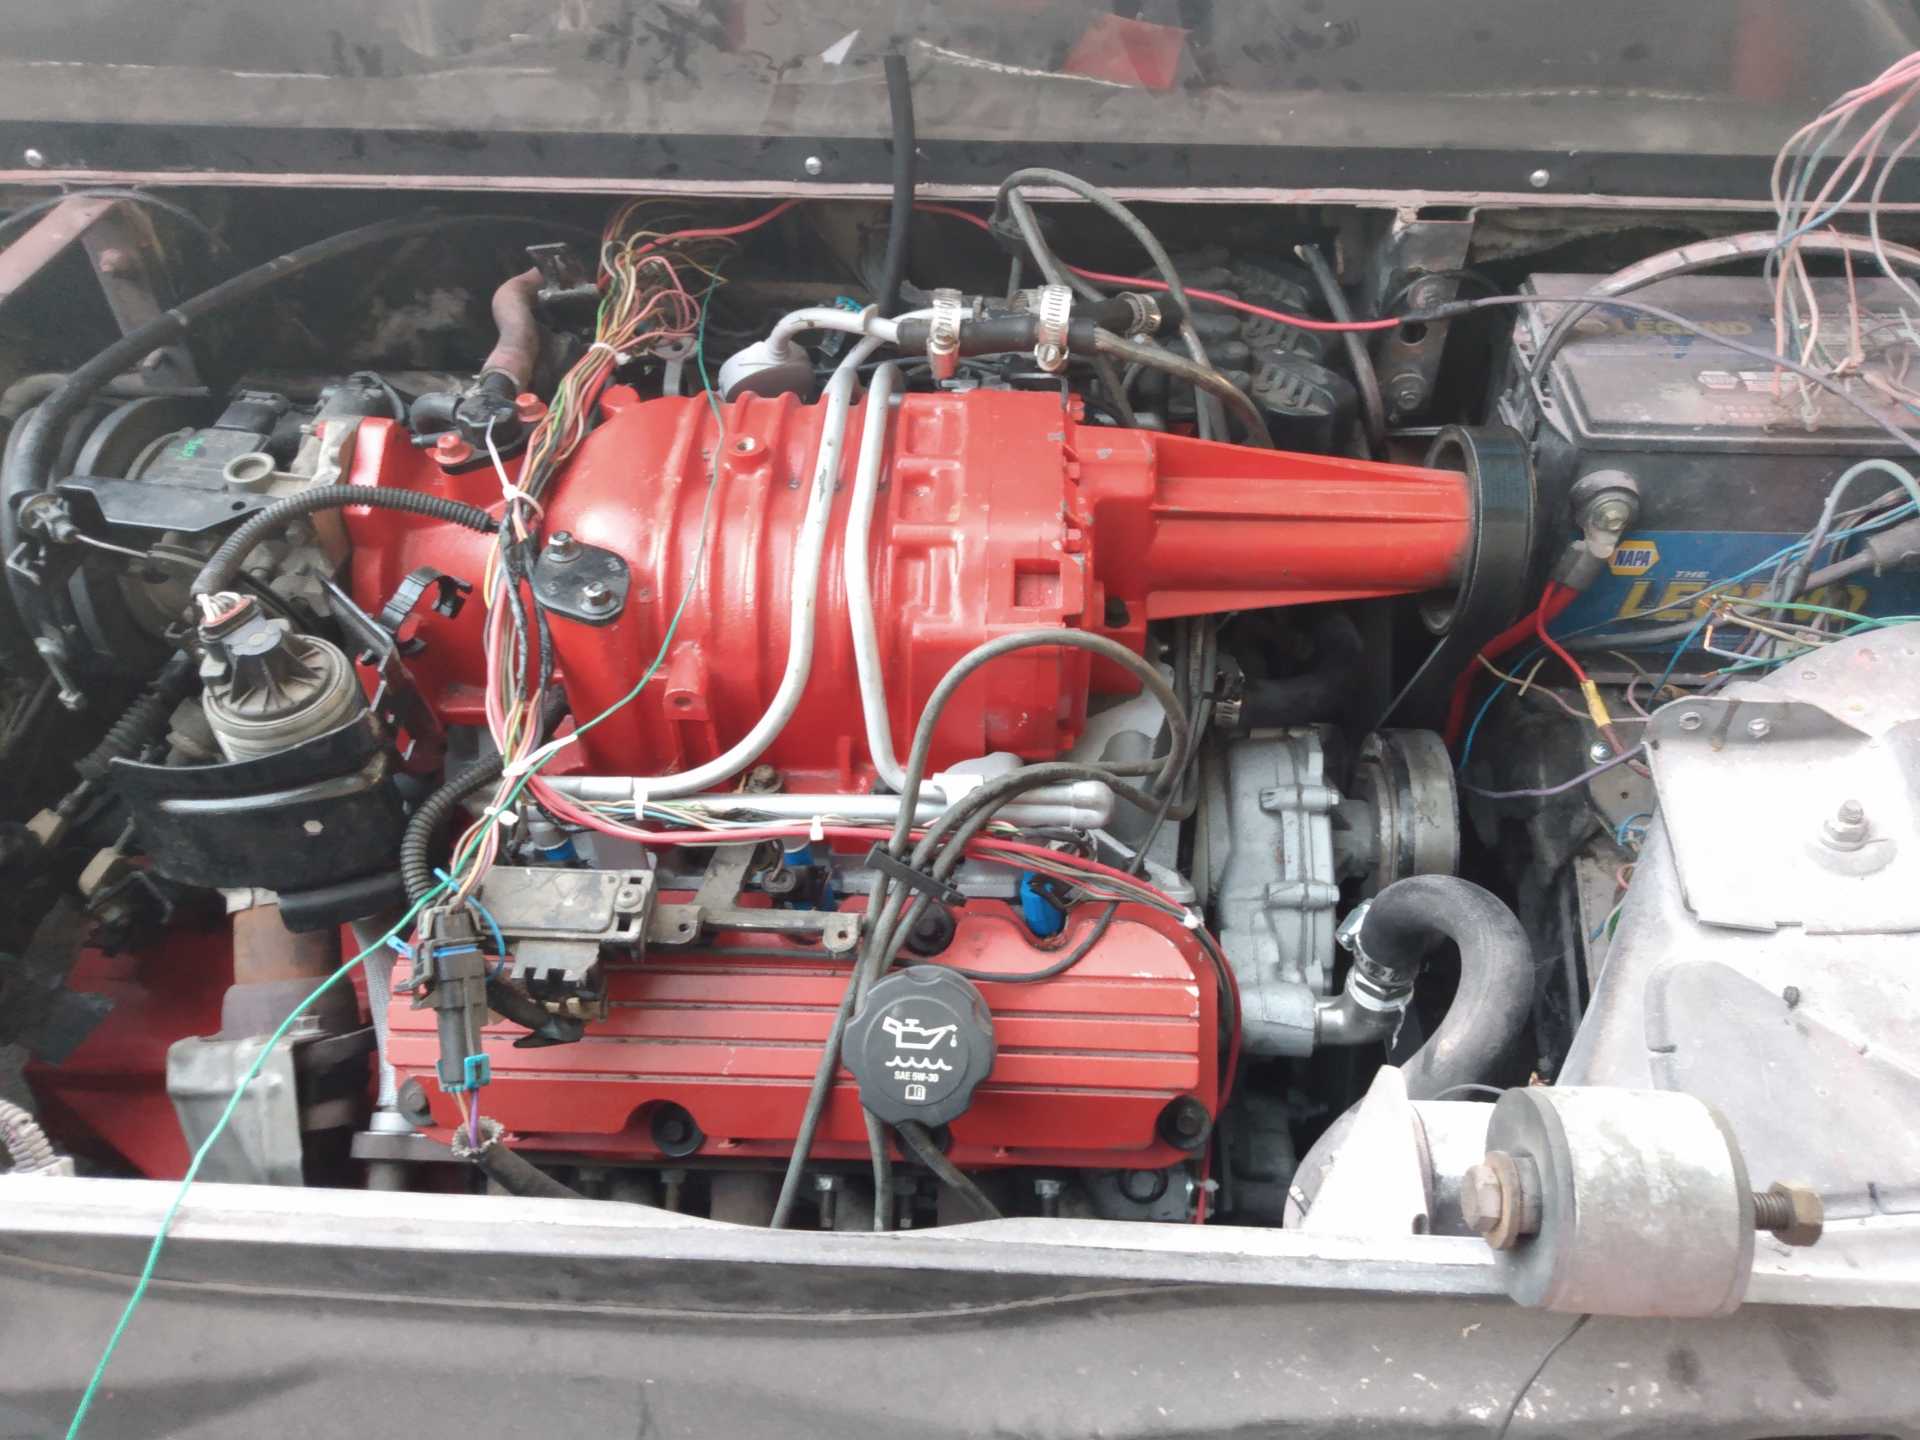
Almost forgot, I took the obligatory engine bay pic! yay! LMAO almost forgot to post it
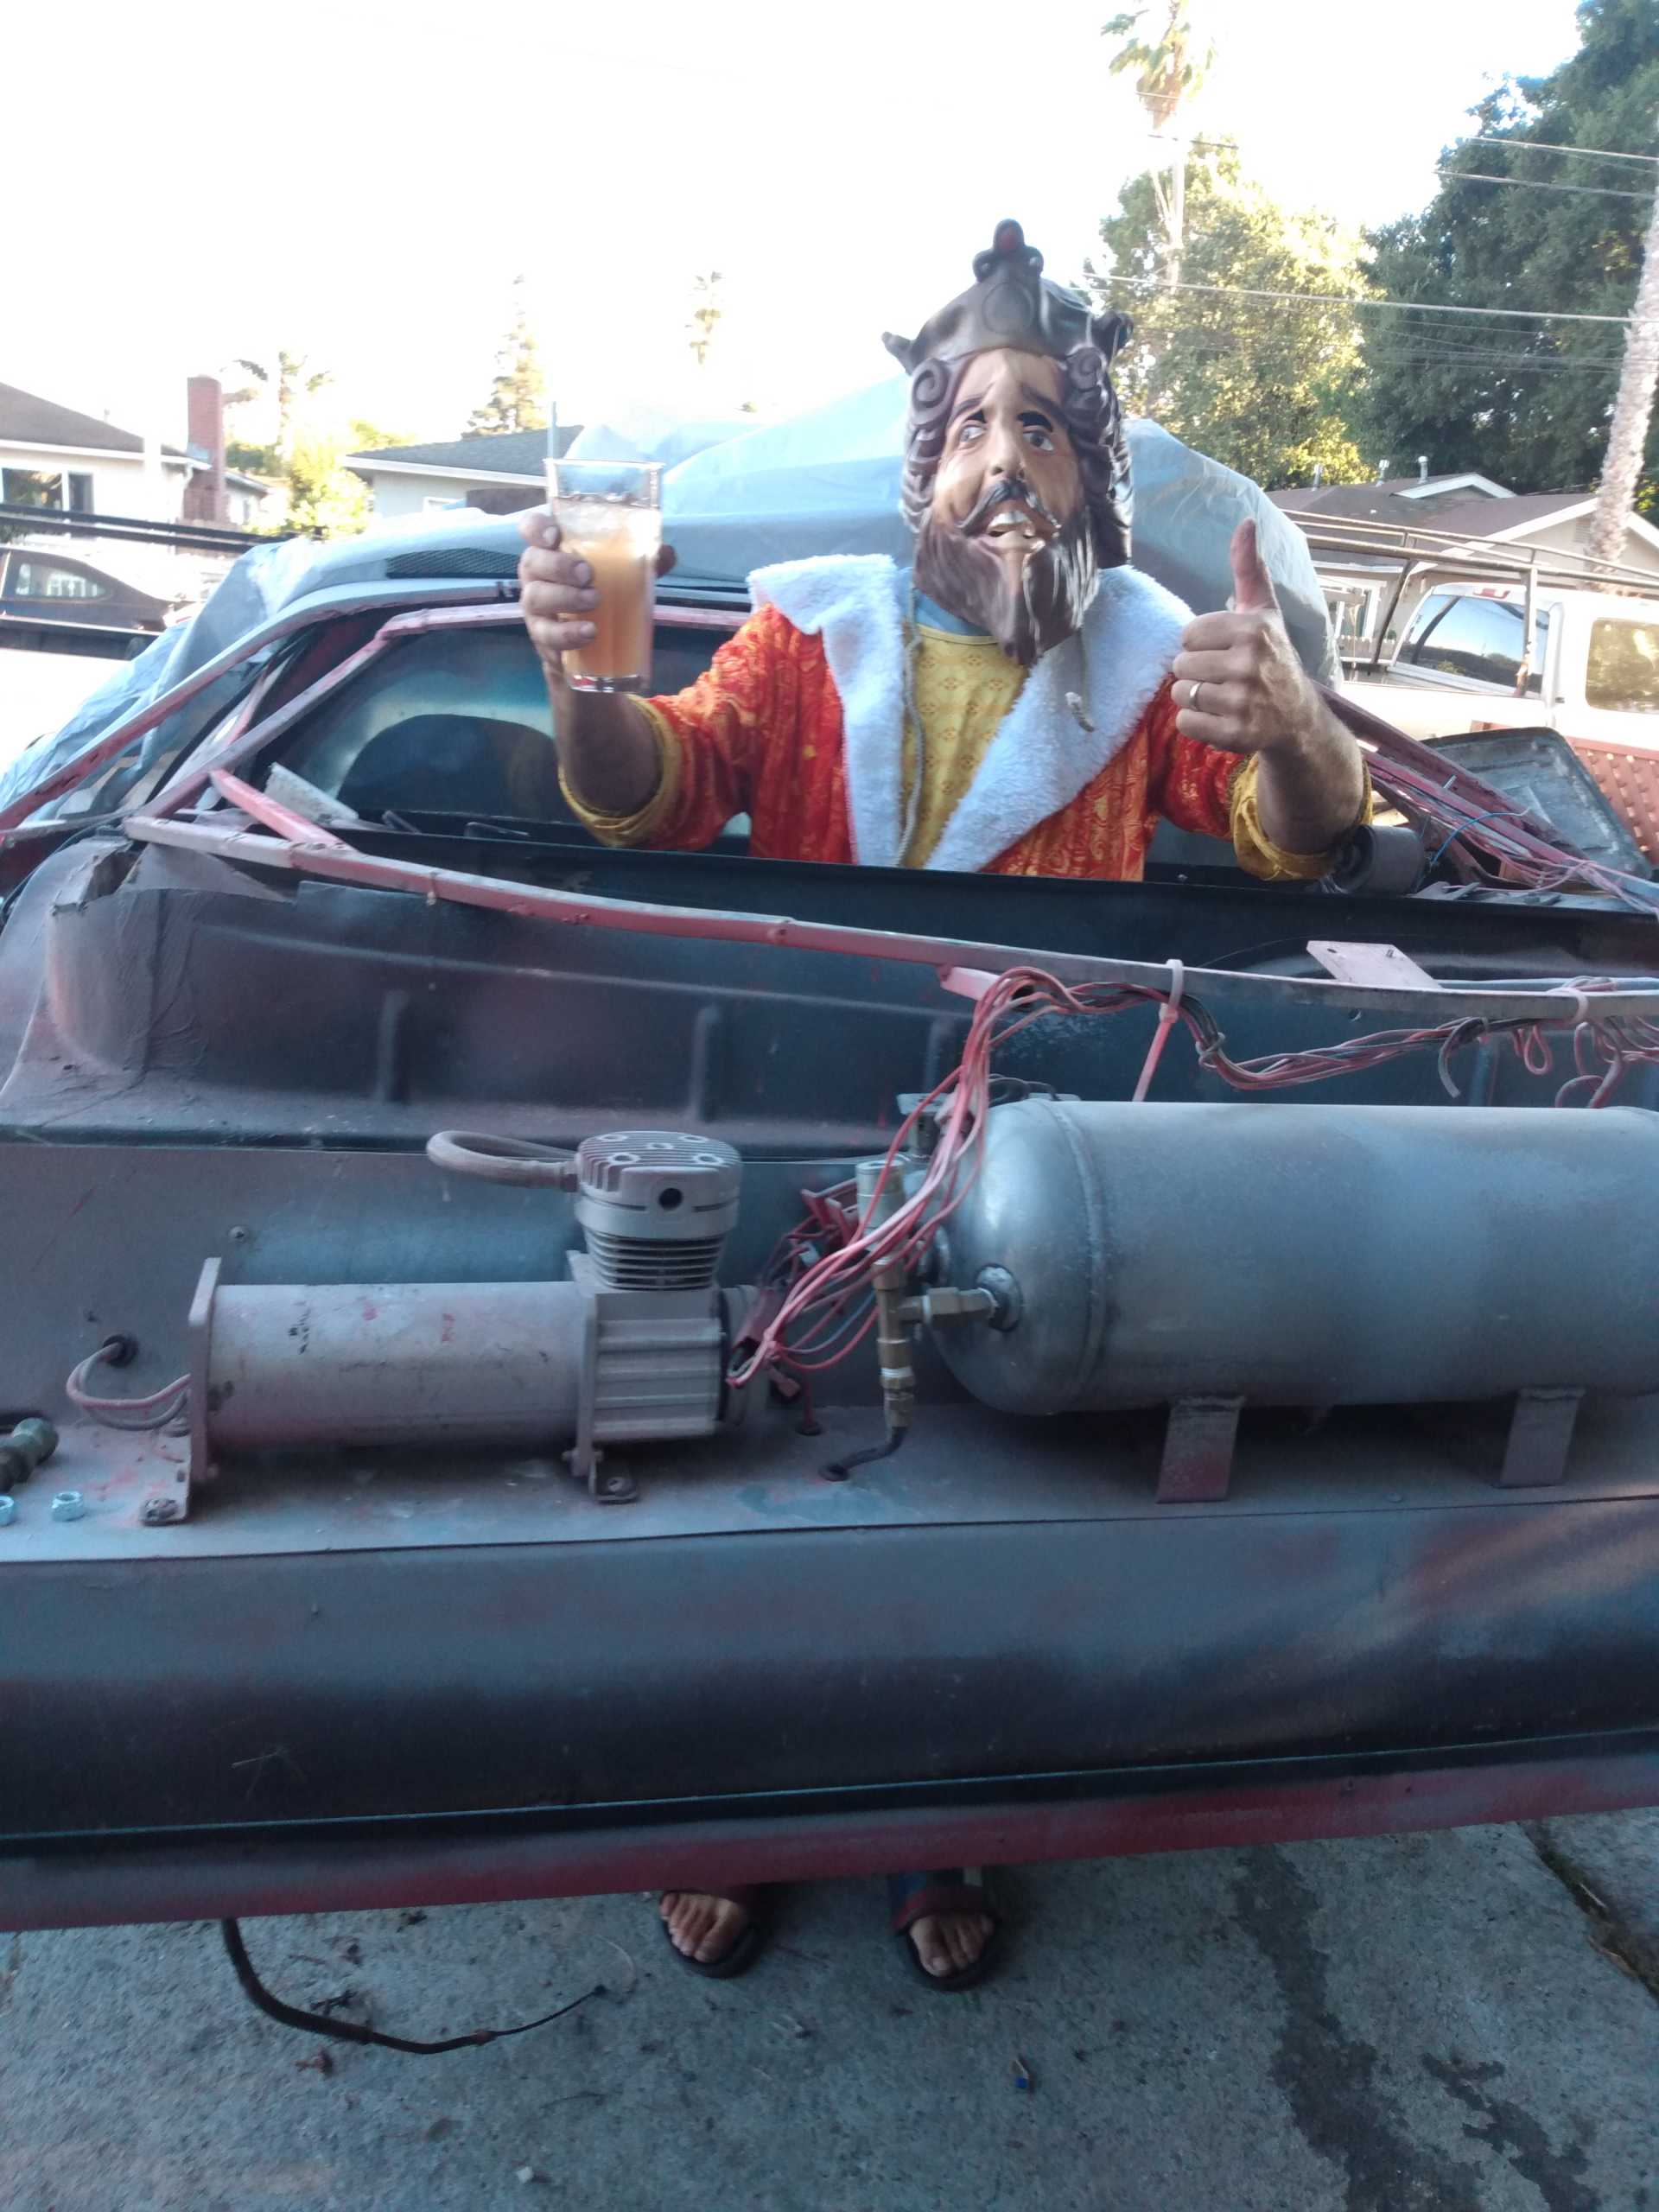
Even remembered to make a cocktail! Been ages! Havent used that costume in decades. Id wear it at the lake and ride the wetbike around and scare people lol.
shem
|
|
|
|
shemdogg
|
SEP 06, 11:16 PM
|
|
Holy chit it runs lol!
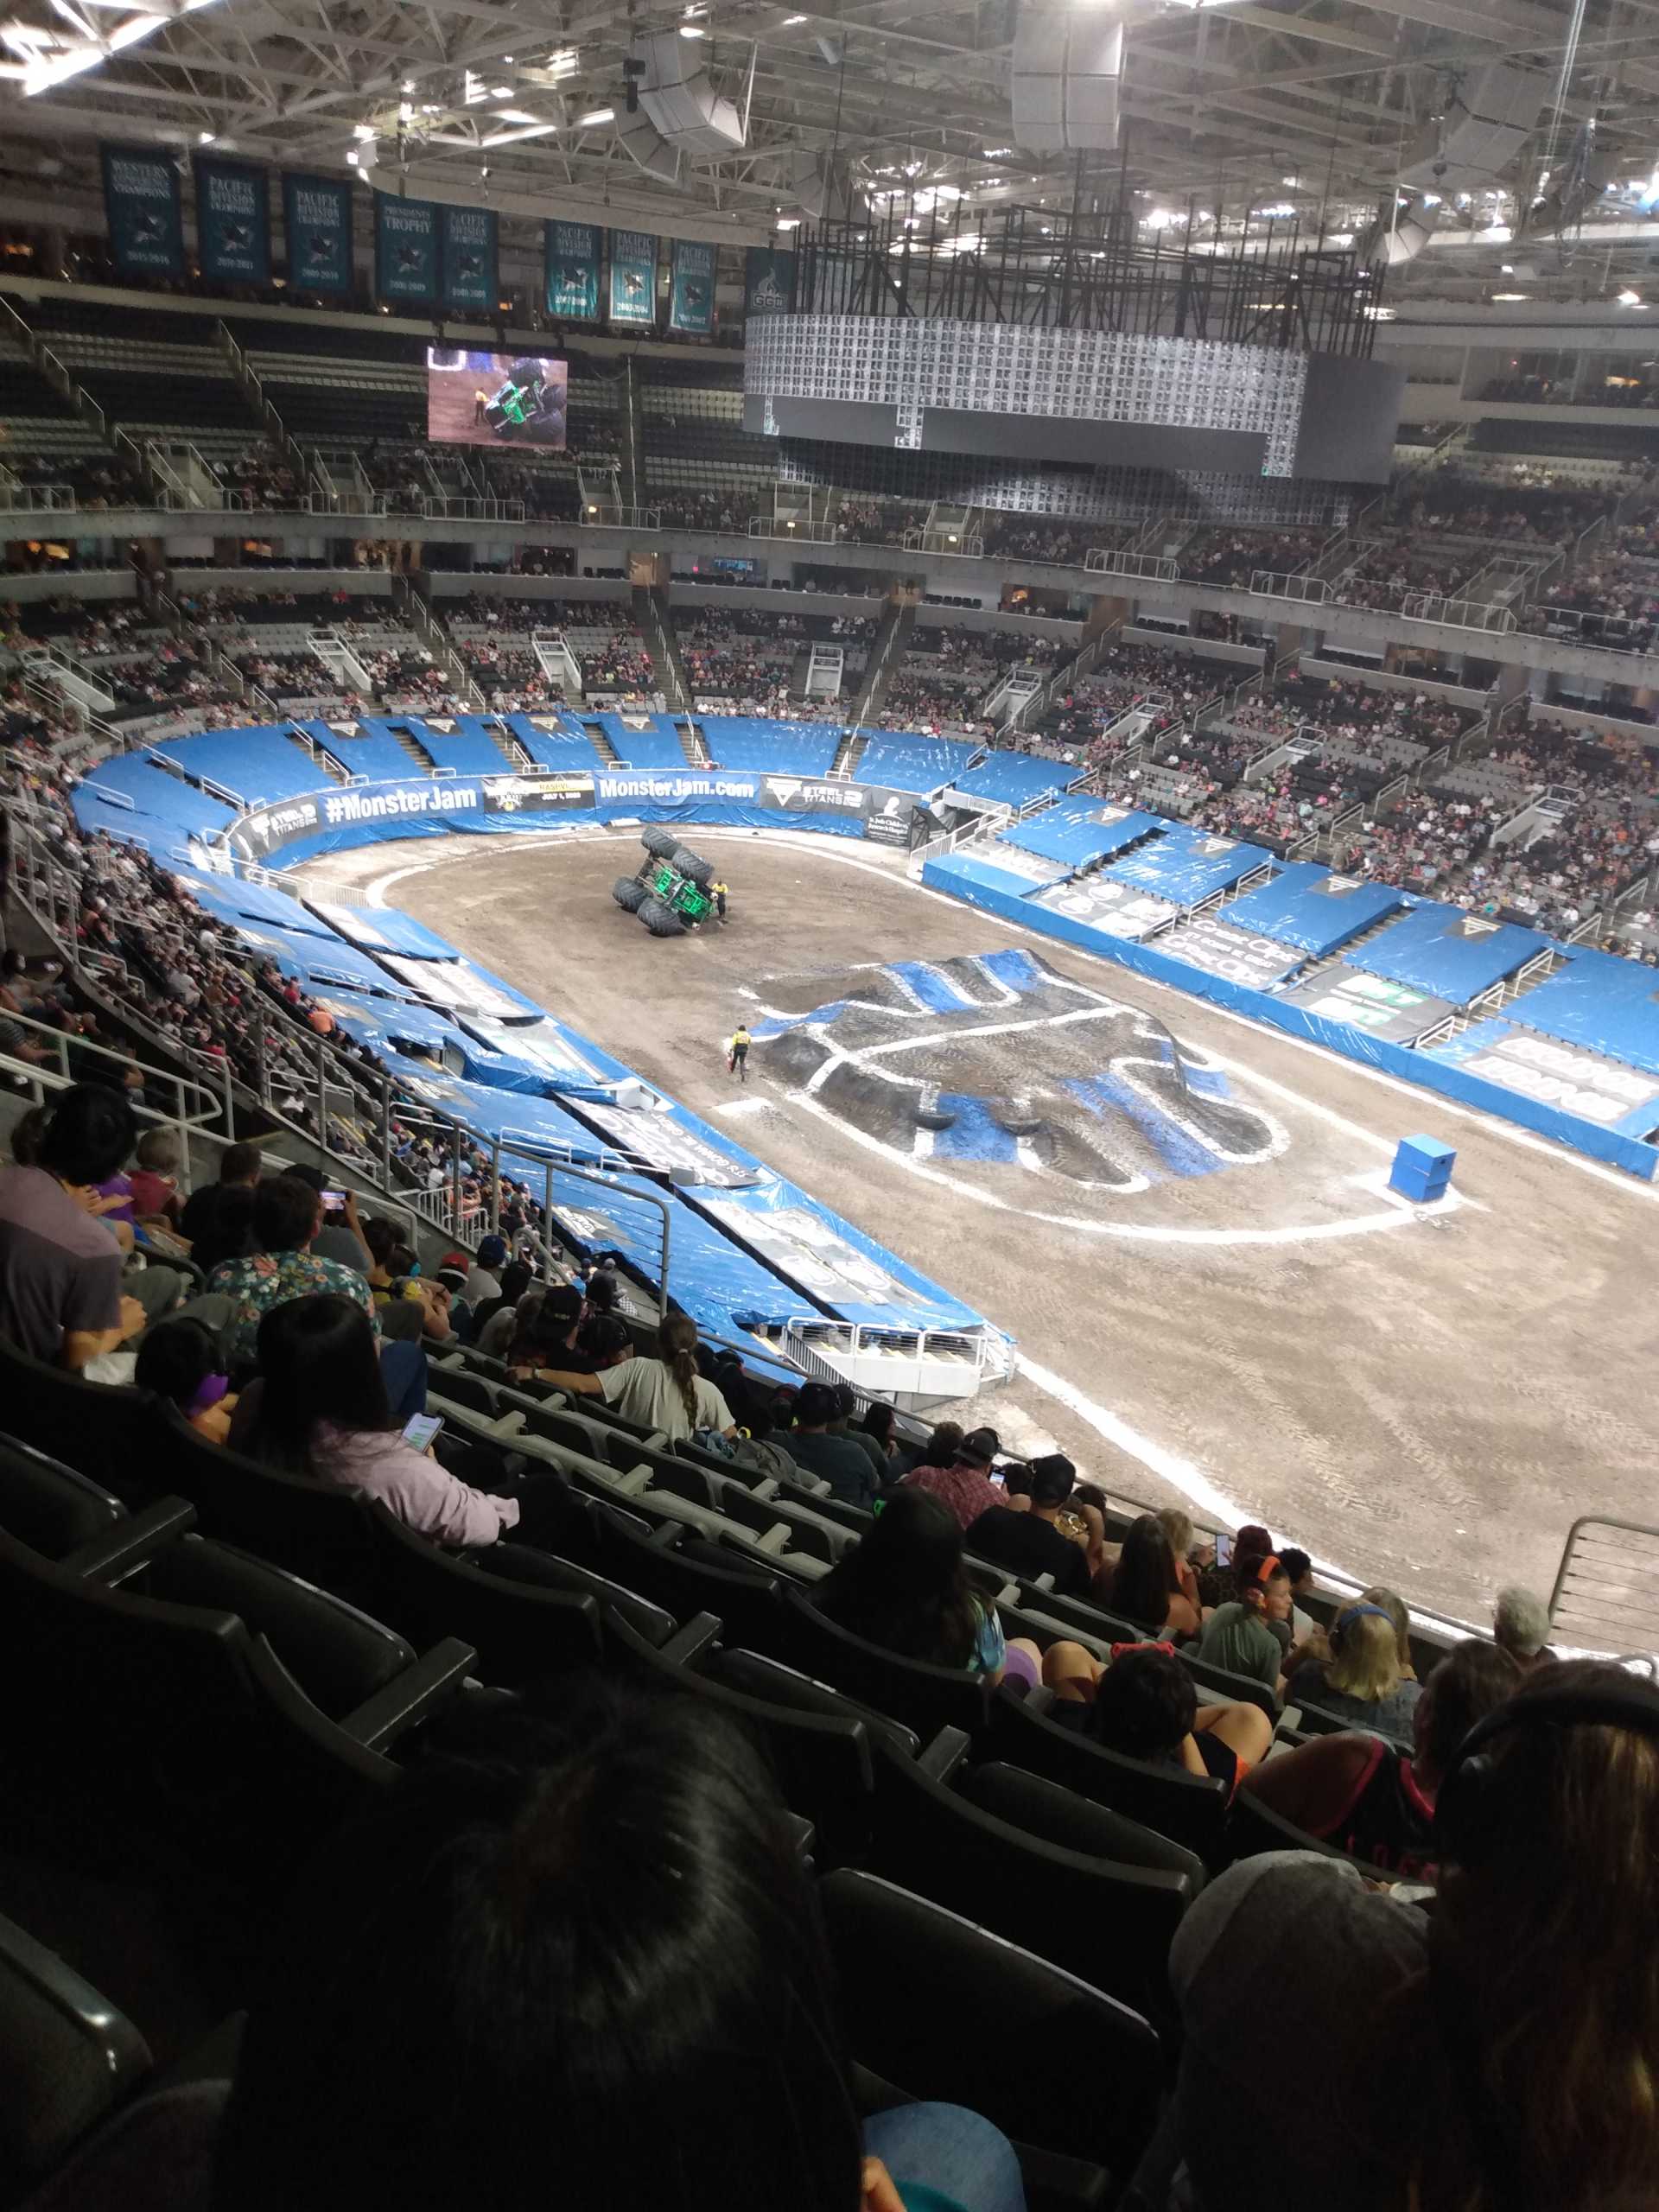
Monster jam was in town, got tickets and pit passes. It was kind of a joke the stadium was waaay to small for the trucks. $18 for a cup of beer! Glad I dont like beer, everyone had a great time. It was cool to see the trucks up close,
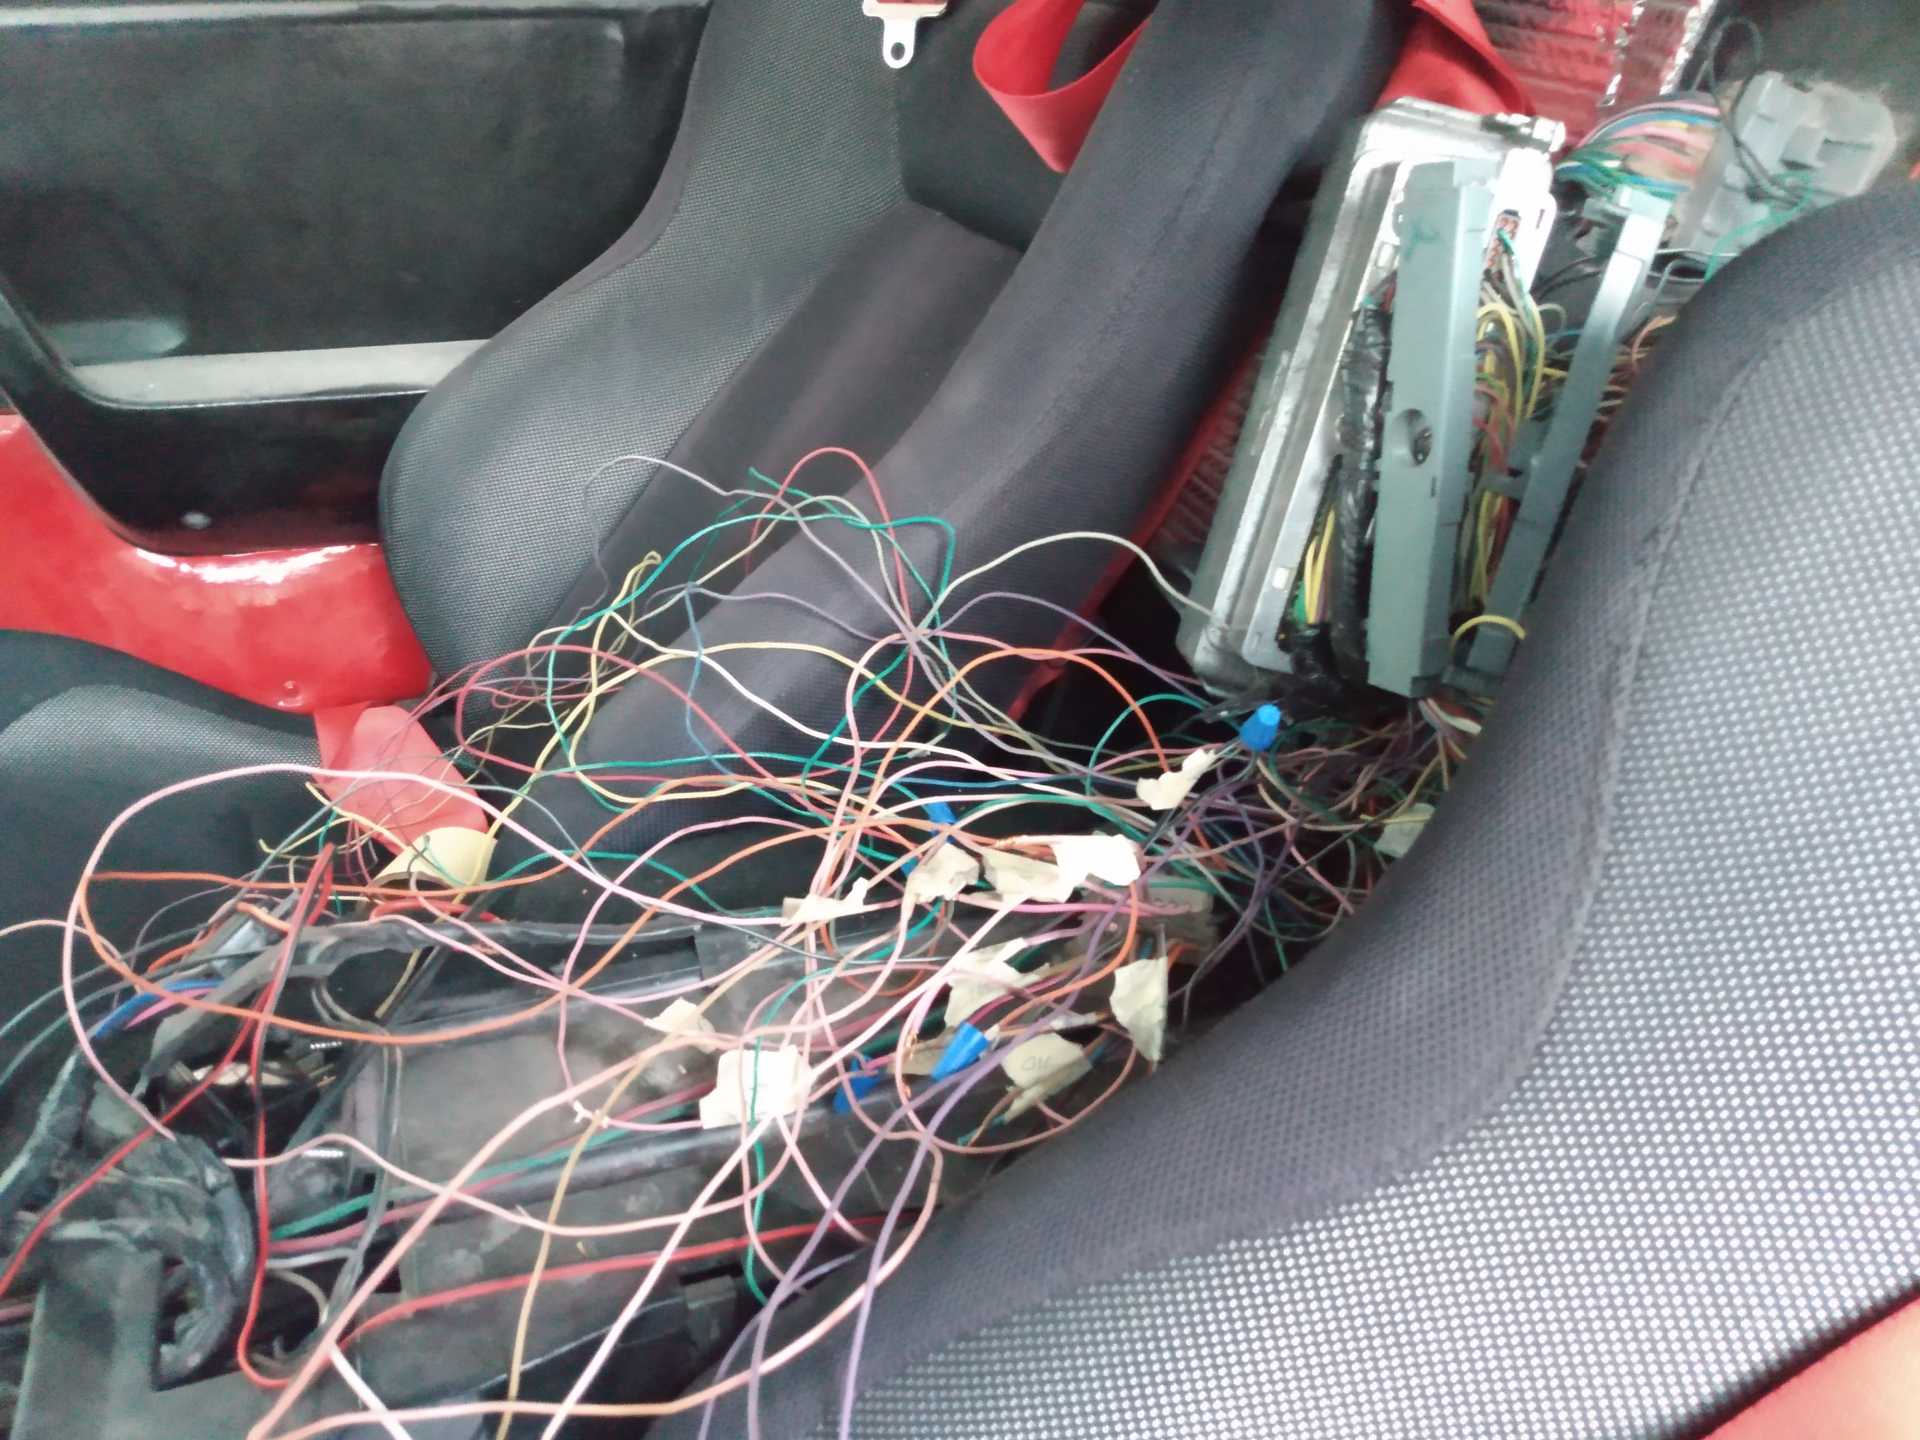
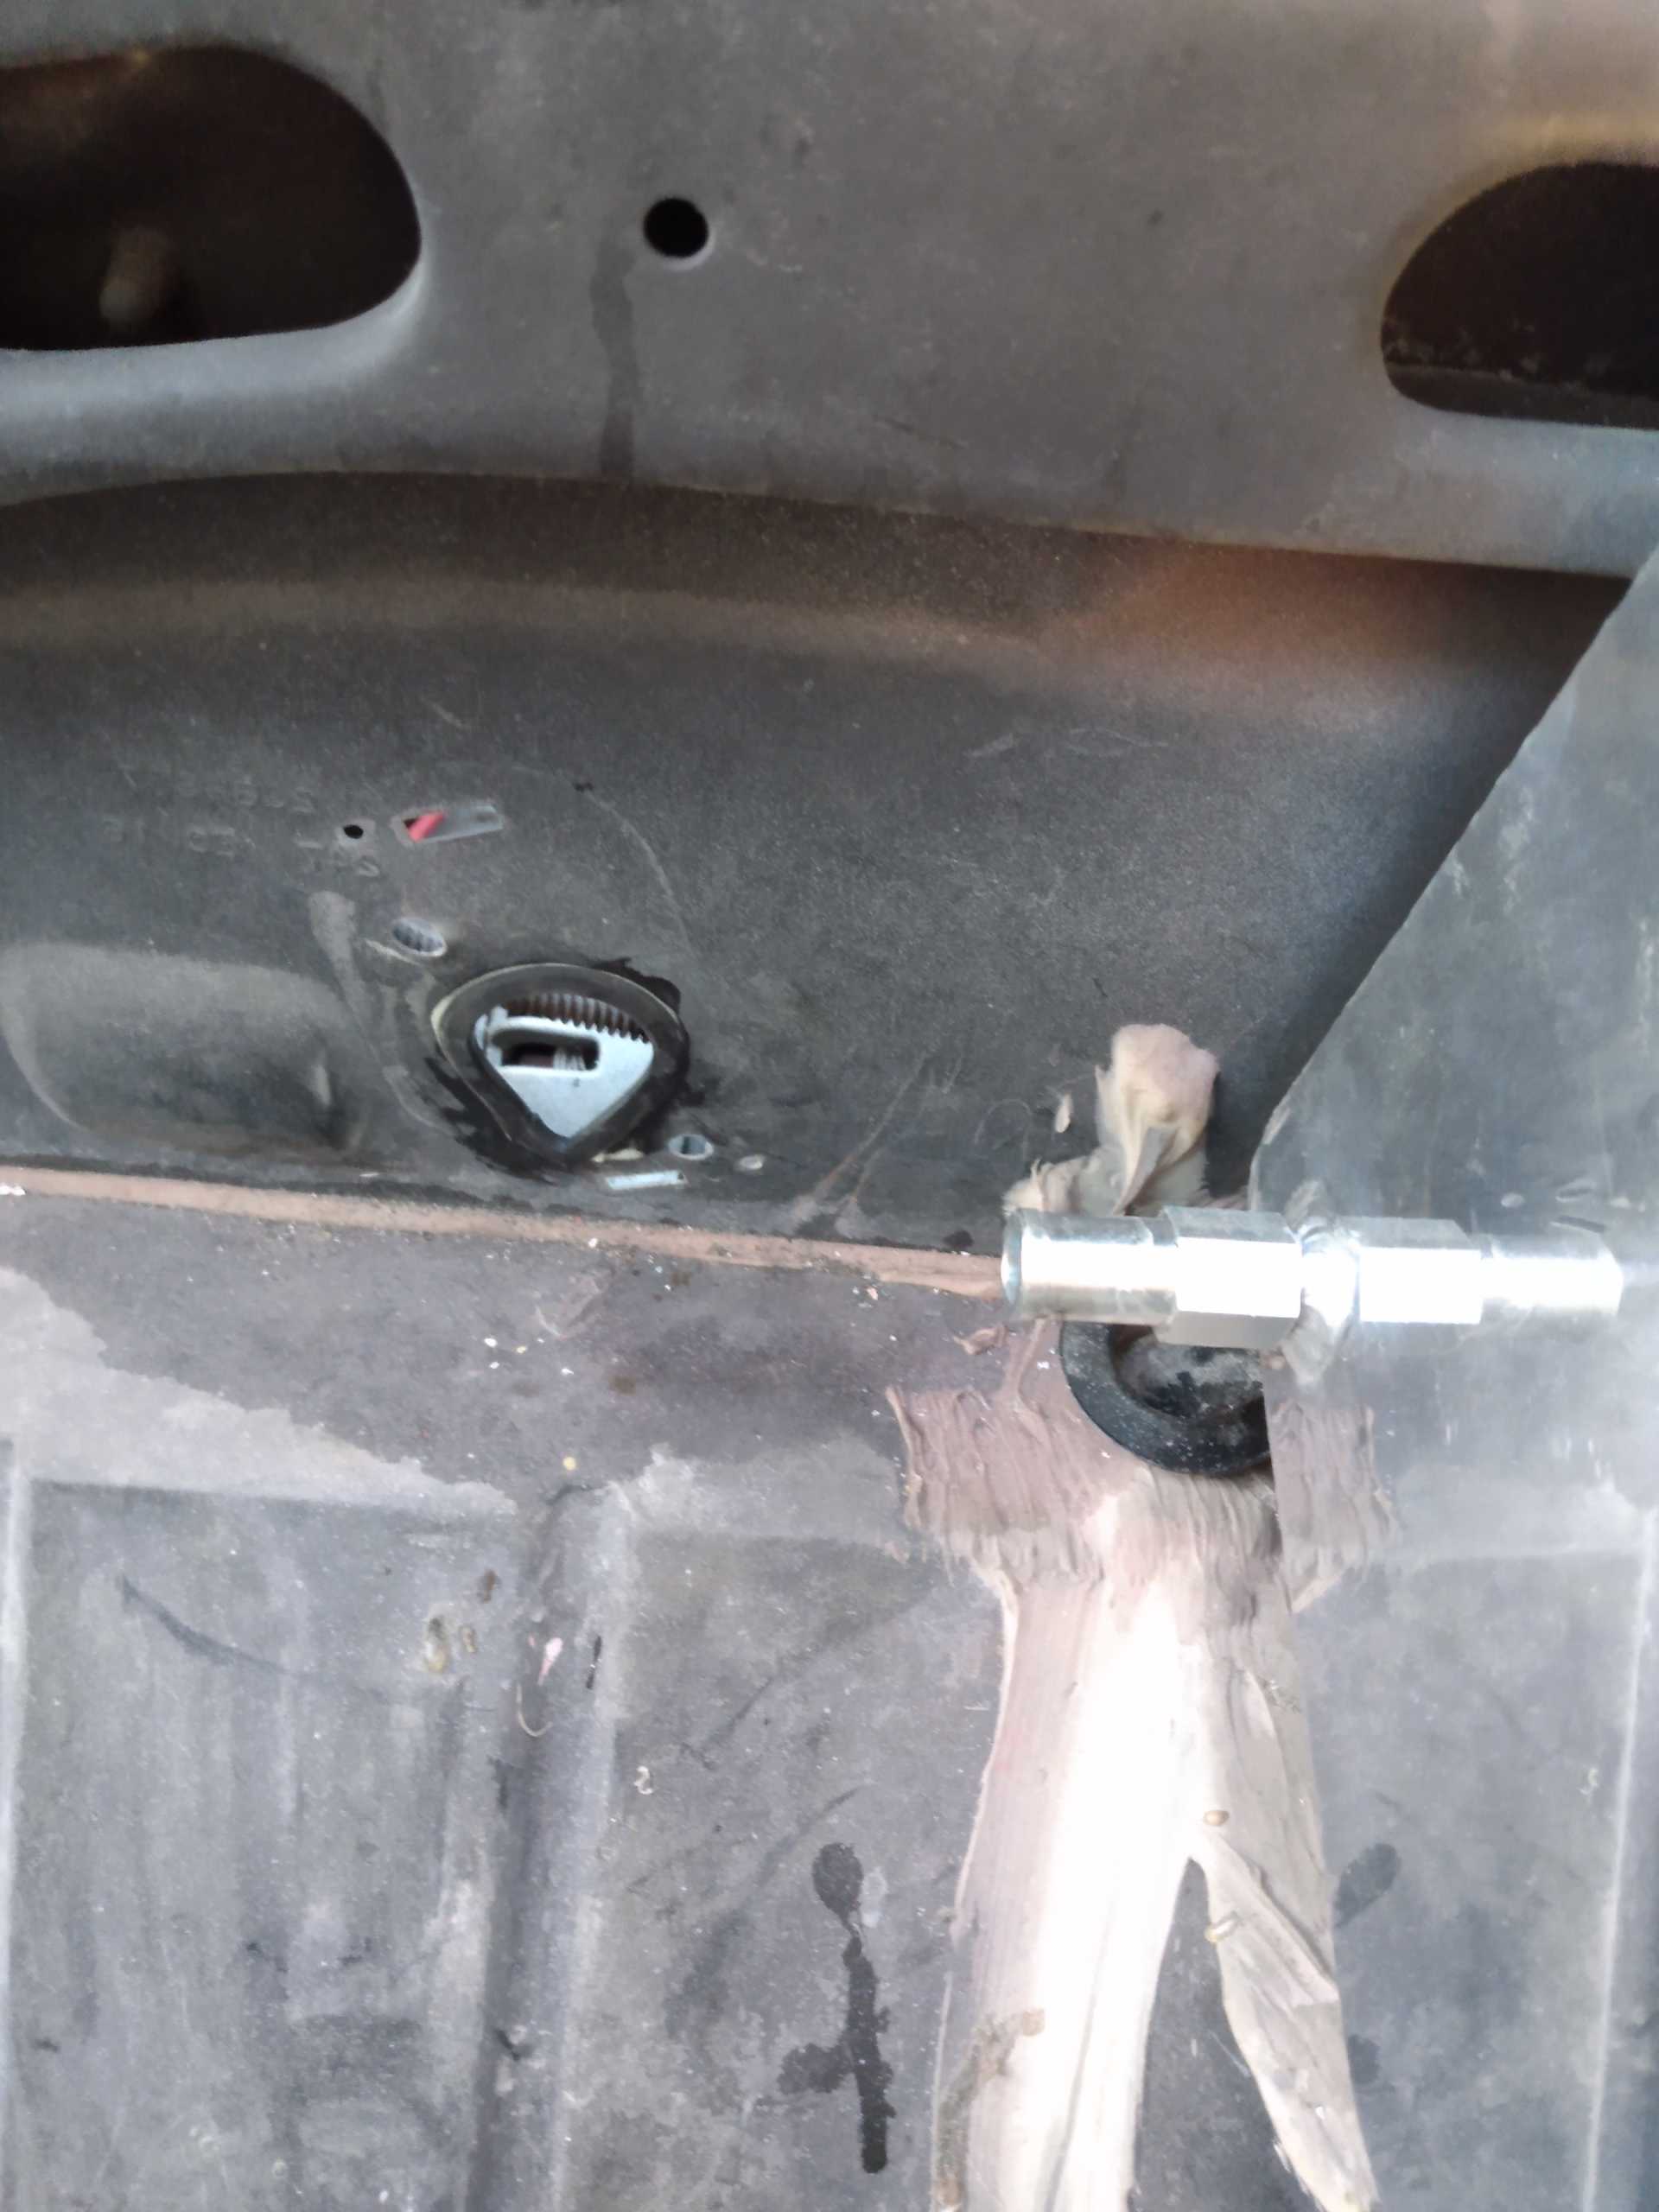
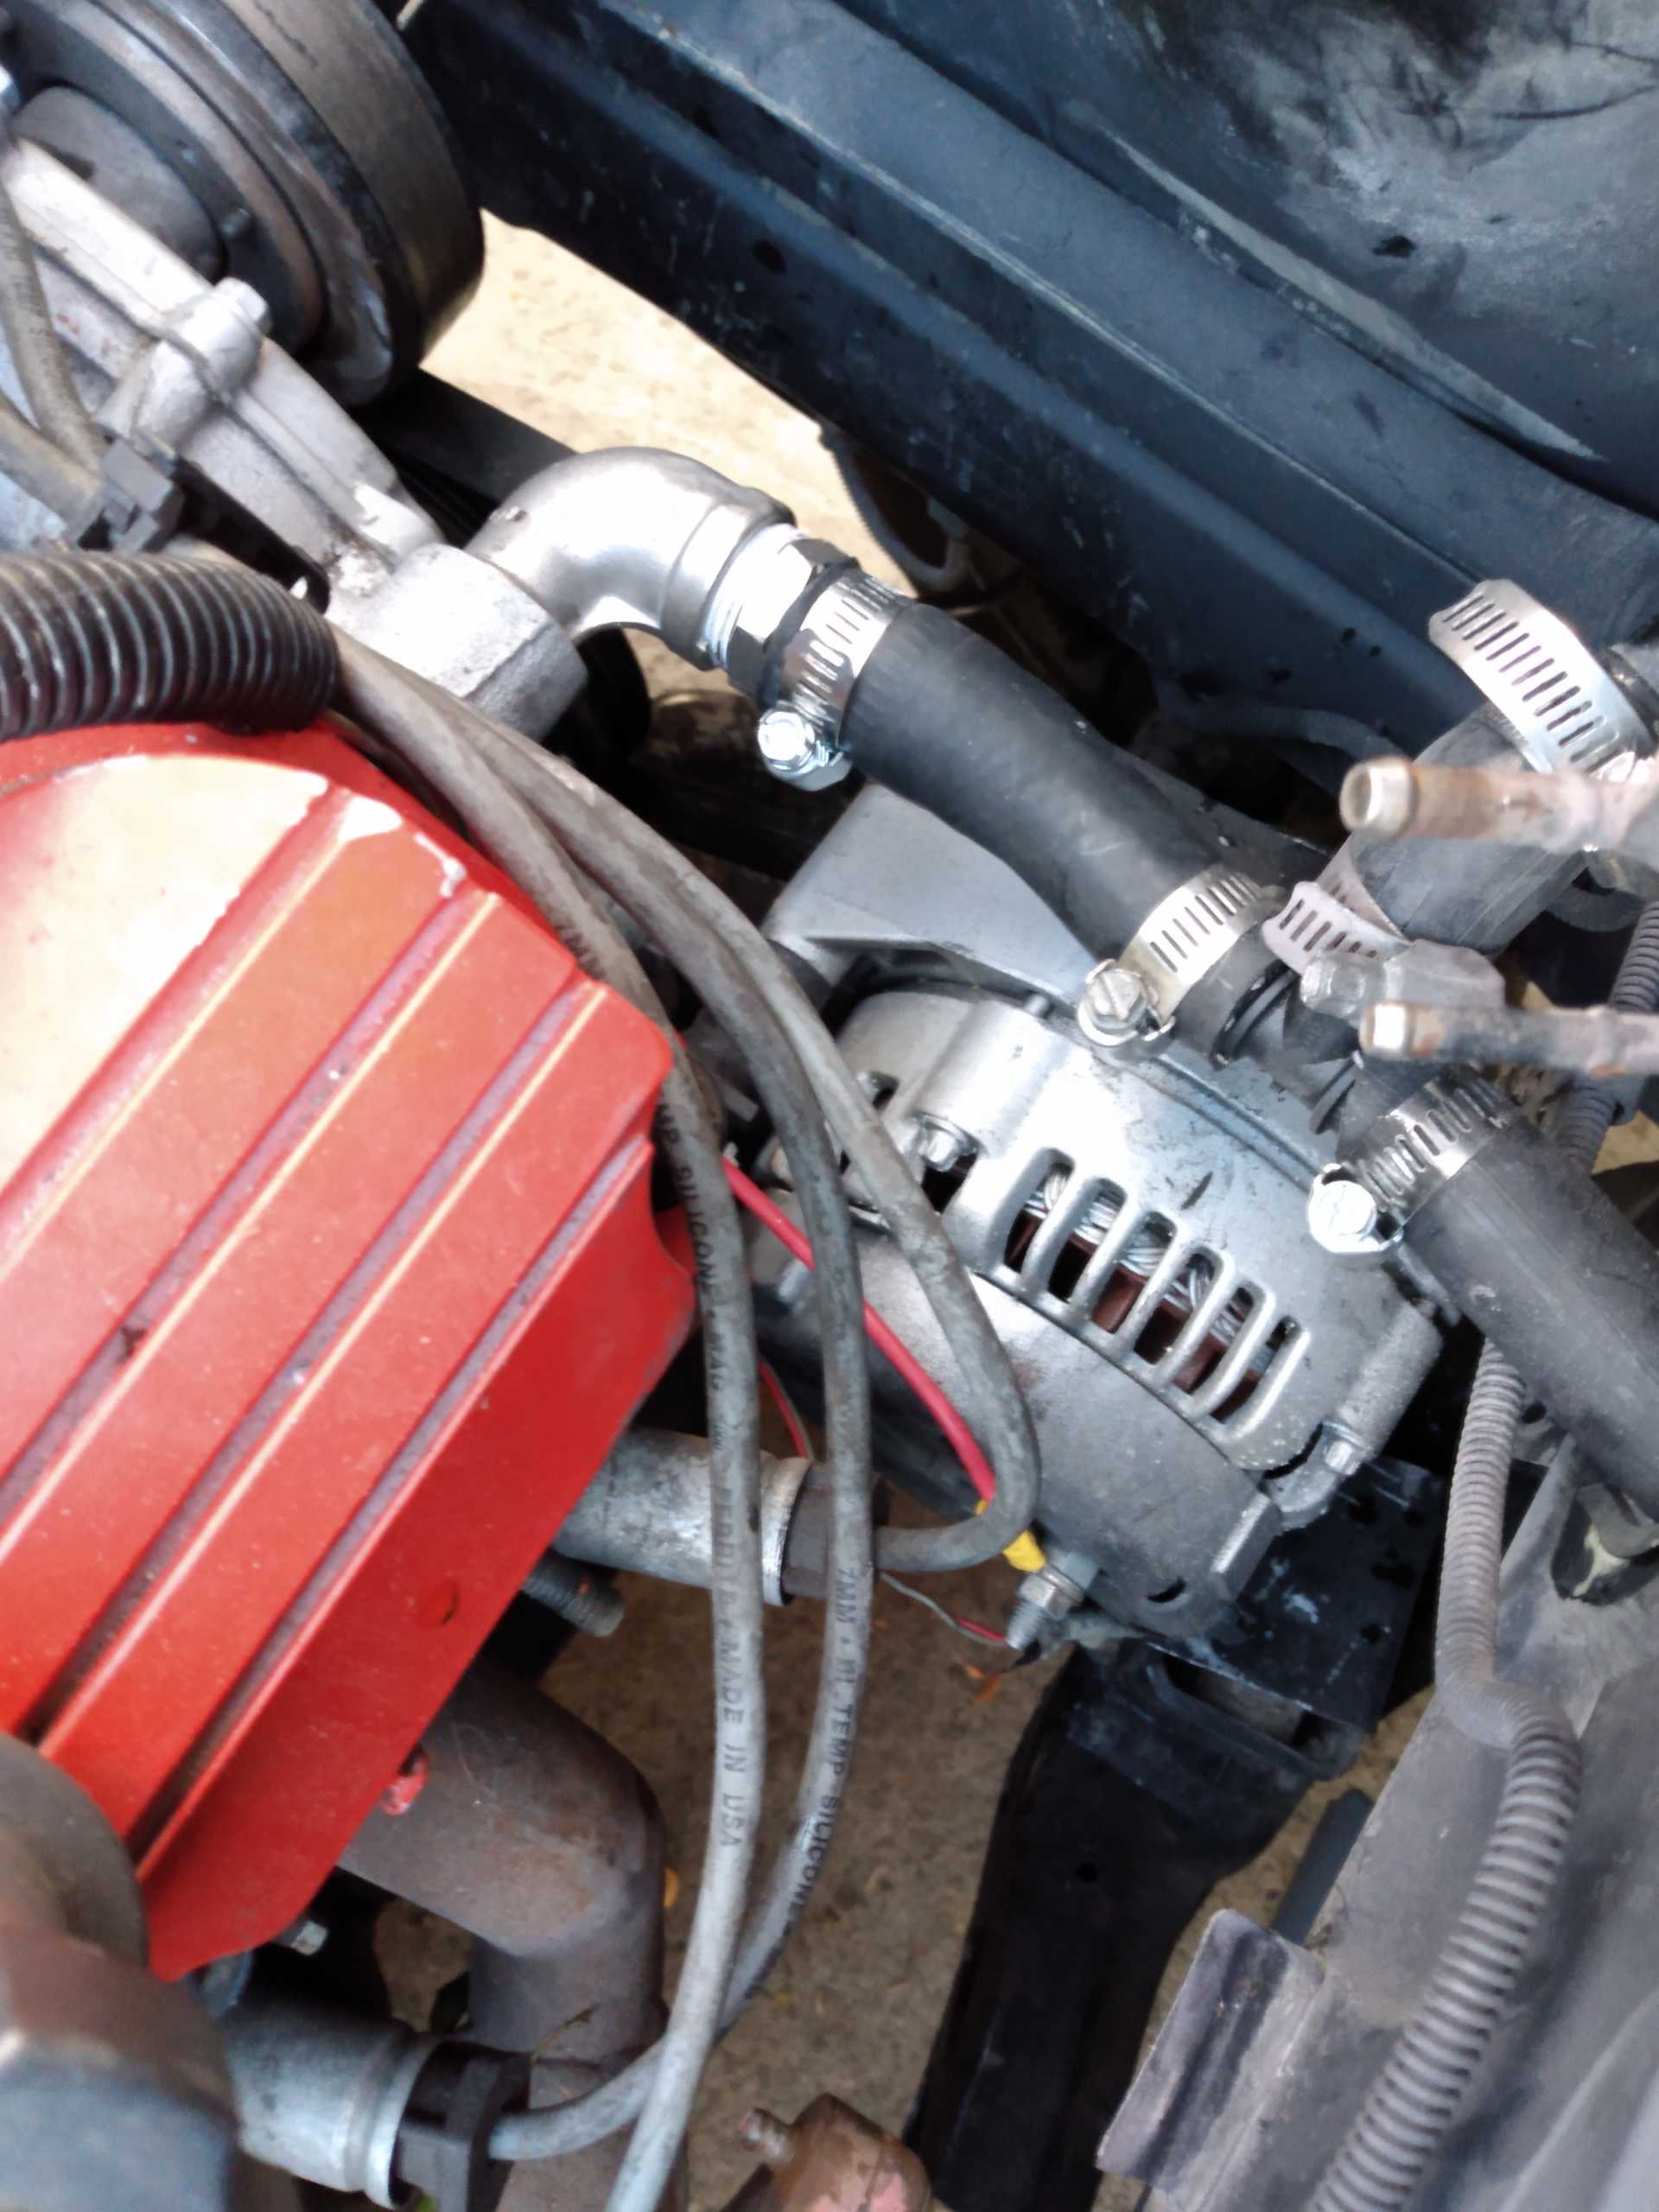
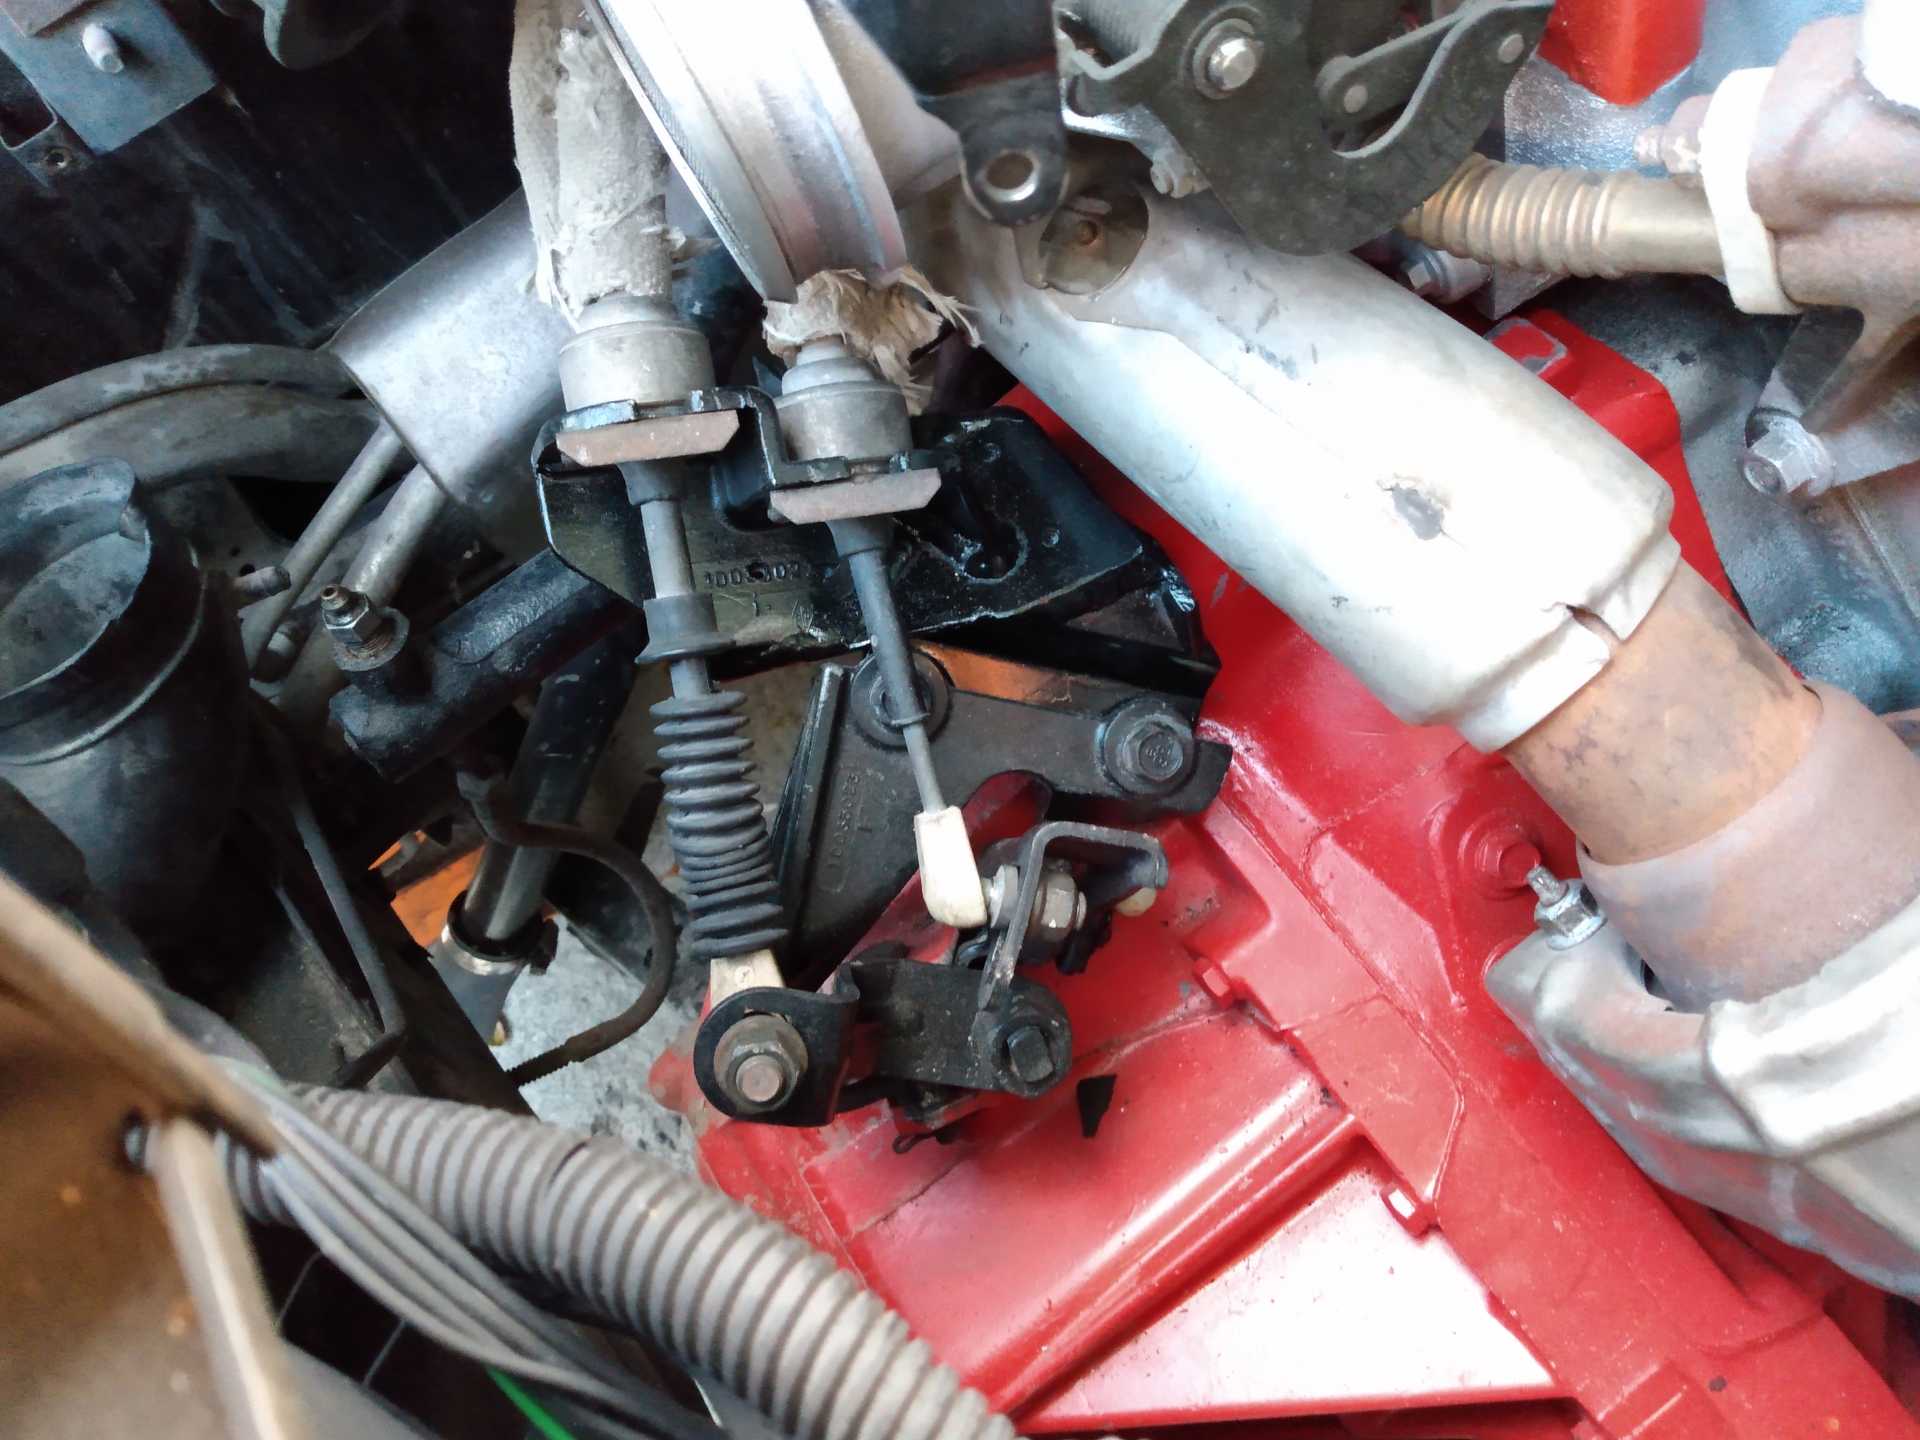
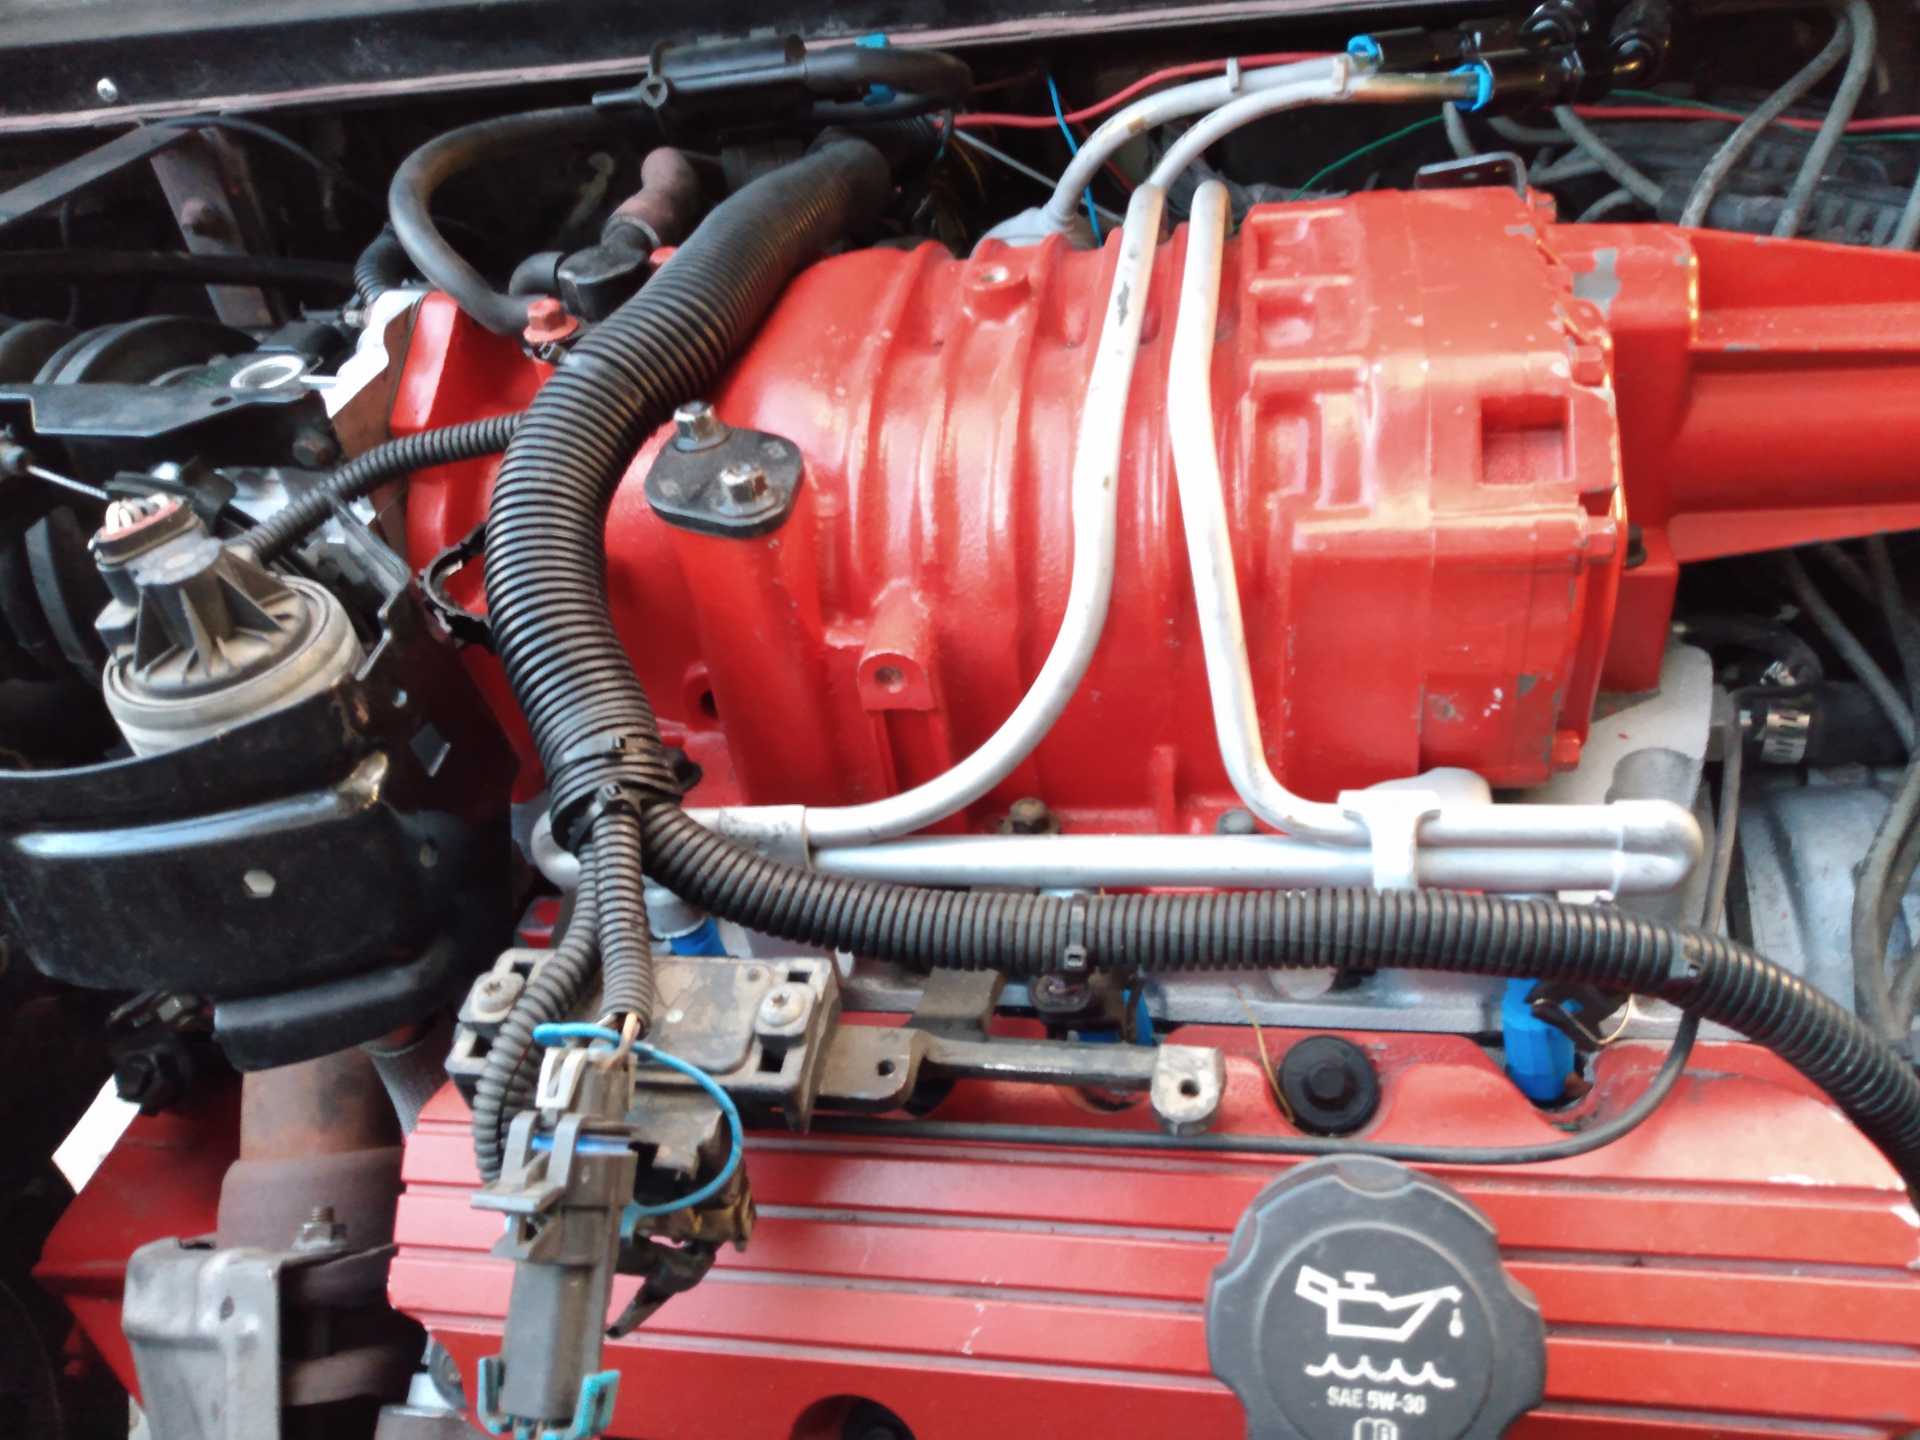
Been poking at it here n nyah, bouncing from one area to the next. Rigged up the fuel and coolant lines(fuel lines leave much to be desired but good enuf for testing), and started on the wiring connections. Went thru the lists posted on here for wiring swaps and wired what I could. Since the TO bearing fiasco, all my markings on the wires faded. So Im having to go back thru one by one and play the whos who game. Fuel systems not leaking, and everything pcm related was wired up according to the charts. Still some of the gauge wires to hook up. I have wire nuts on the connections for now till I get everything dialed in. Still gotta wire in the fuel pump relay. I read in some thread that vats will only let the motor run for a second or two before killing the ignition. Well that was good enuf for me, so for chits n giggles I jumped the fuel pump and turned the key. BWWWAAOOORBLUH! Fired up on the first crank, scared the hell outta me so I instanly turned it off and let the moment sink in. That was about a solid 2 seconds before I was back in the car and let it run, It only runs for about 1.5-2 seconds before vats kills it. But I was very happy. Ecm is going out for programming tomorrow, should have it back in a week. Thatll gimme time to clean up a few things. Ordered mosta my exhaust stuff today, flexi braid coupling, some reducers, and the muff. And I gotta get on the shifter bracket job. Heres some picks of handy homely homeboys homemade hackery

shem
|
|
|
|
dobie1
|
SEP 06, 11:35 PM
|
|
You’re in for a pile of hair pulling and frustration Shem.
If I can give you any advice it’s get a Power Probe ECM 3000 a great tool for tracing those wires.
It’s always great when you turn that key and it comes to life good luck on the conversion.
Wayne
|
|
|
|
shemdogg
|
SEP 27, 10:58 PM
|
|
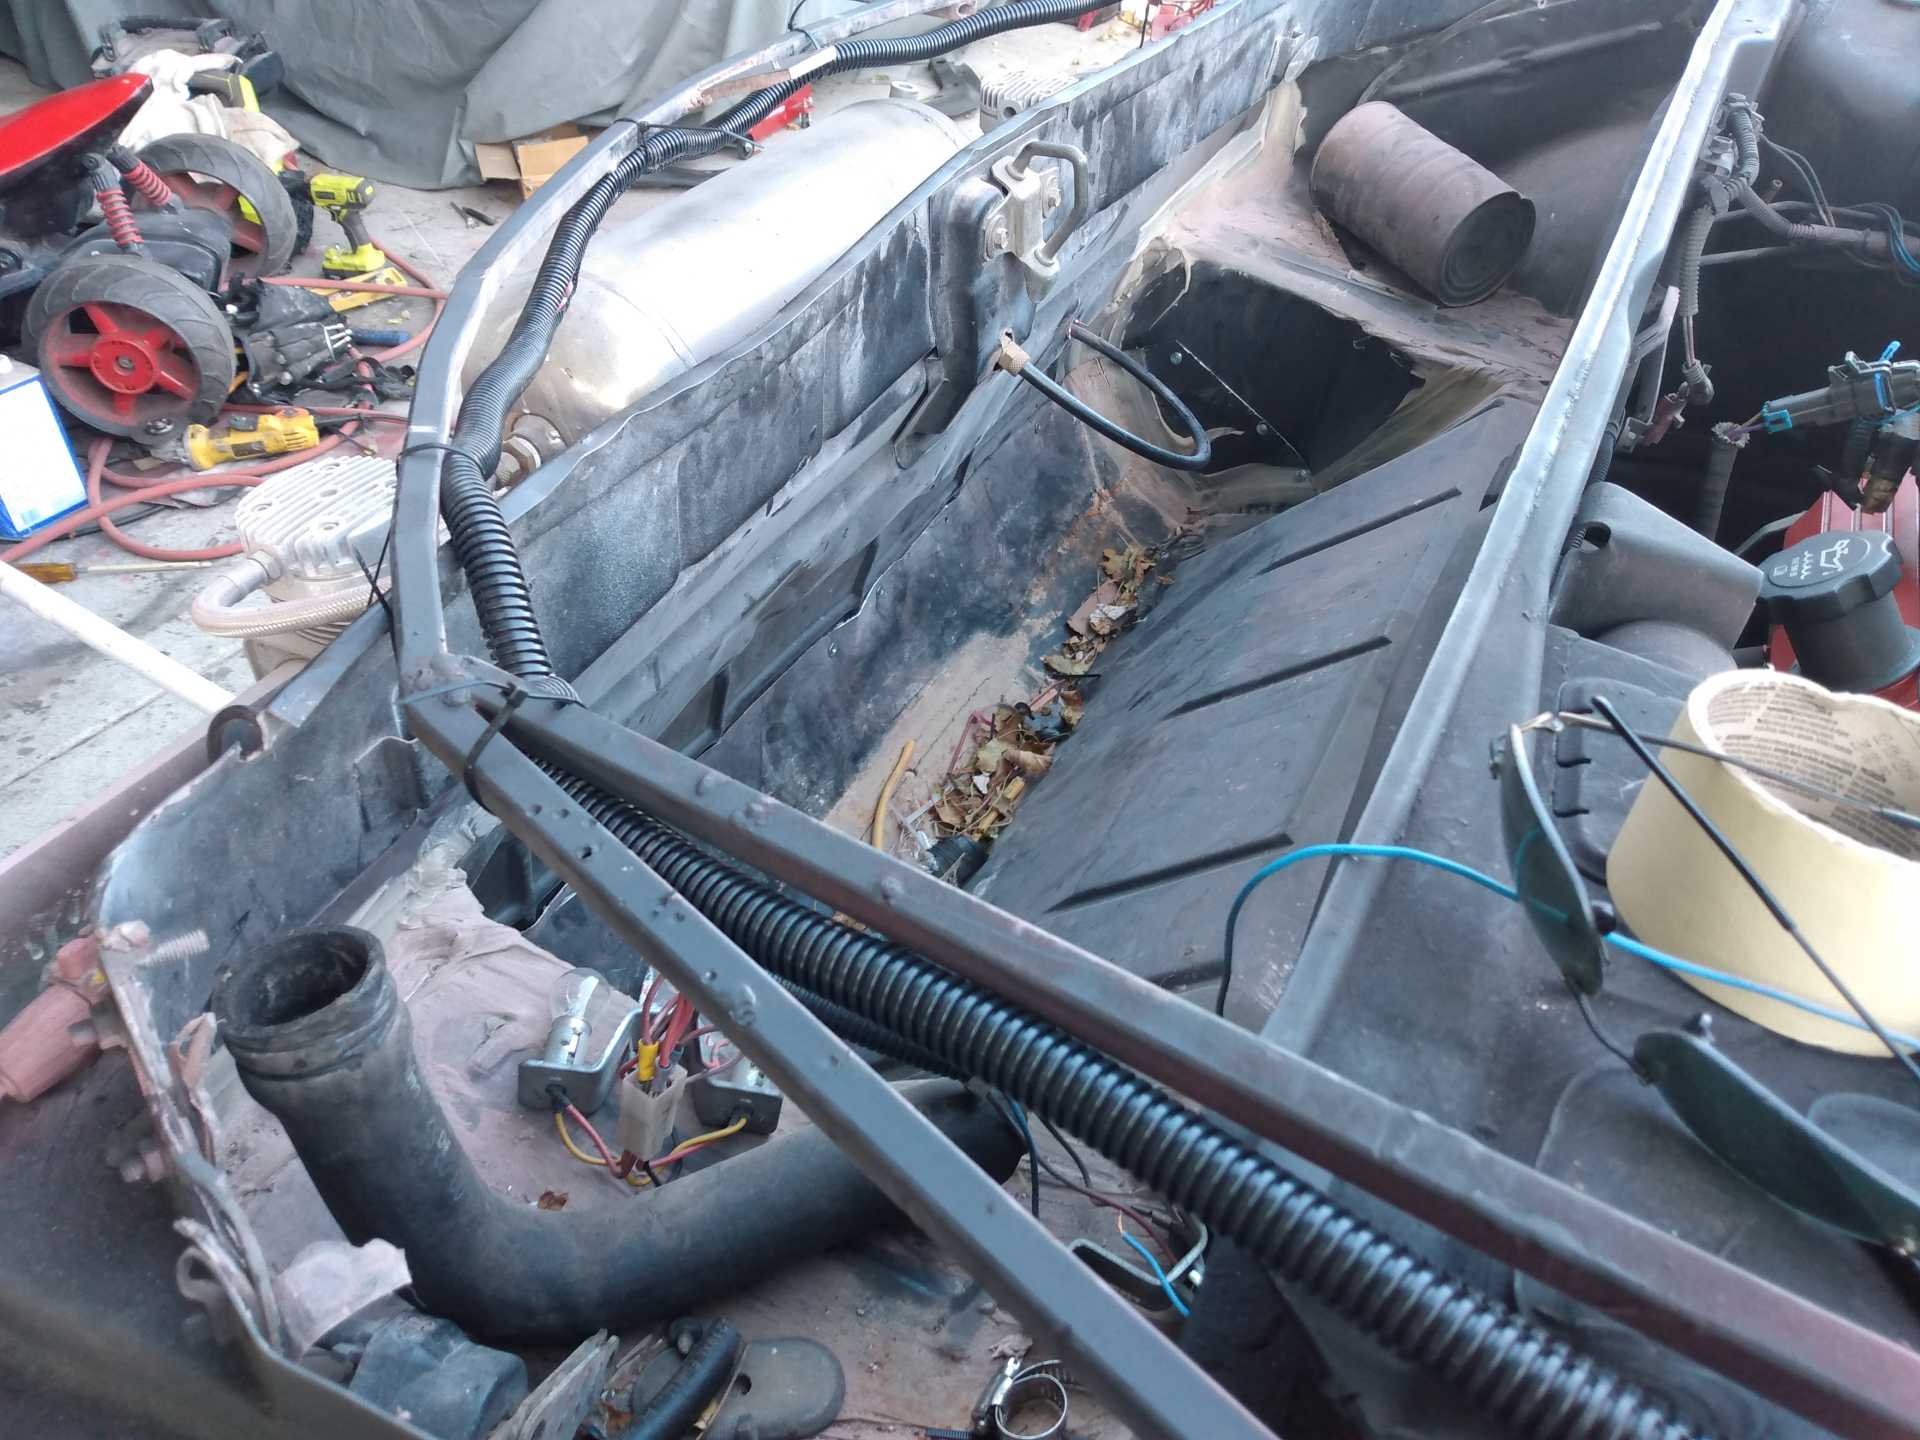
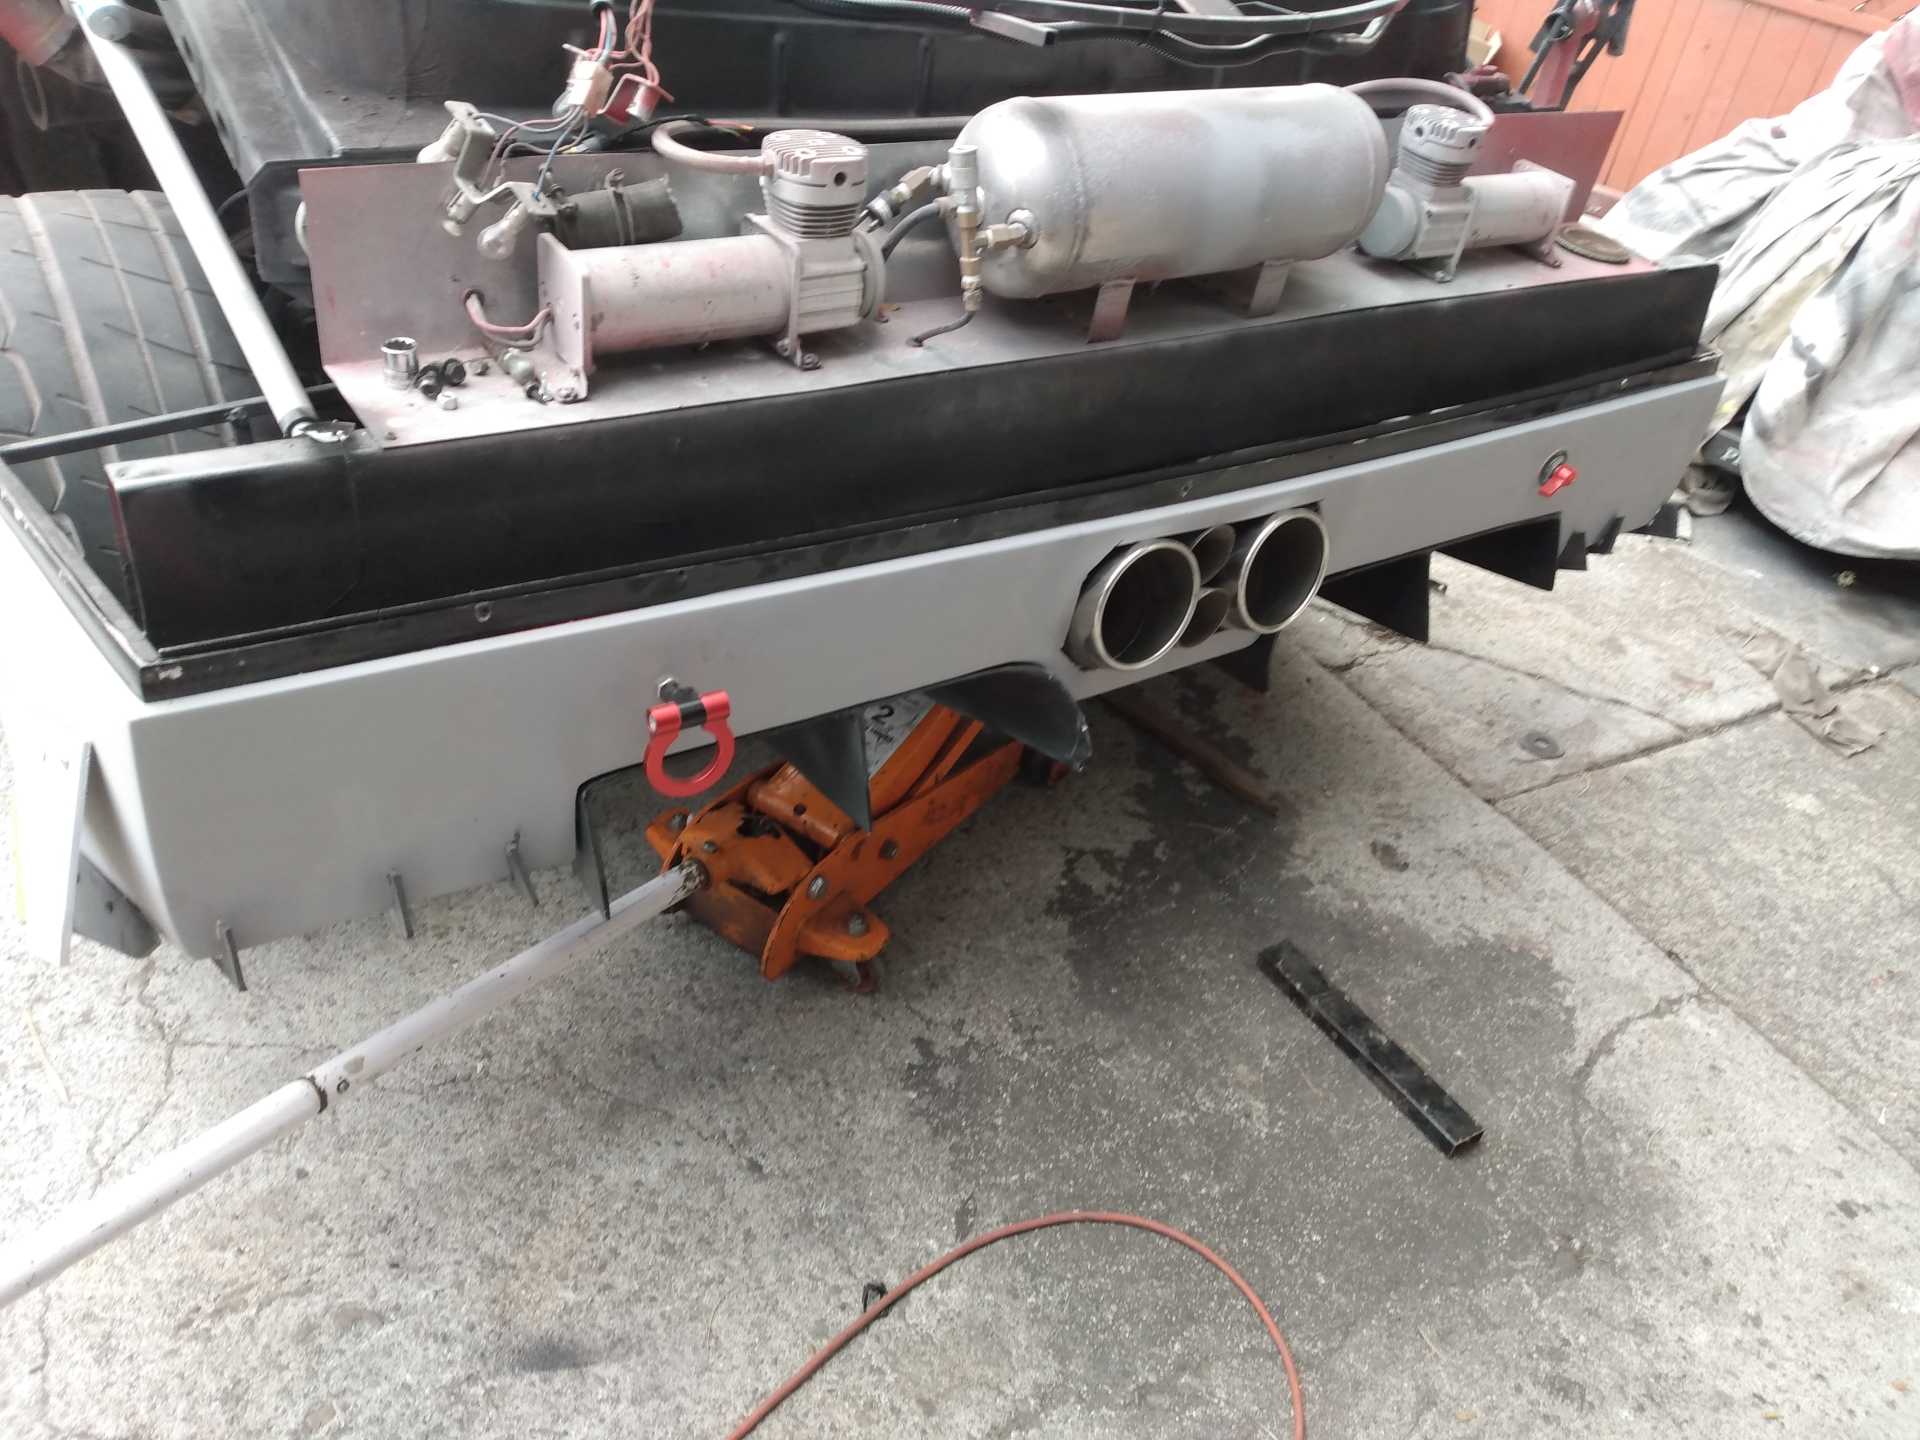
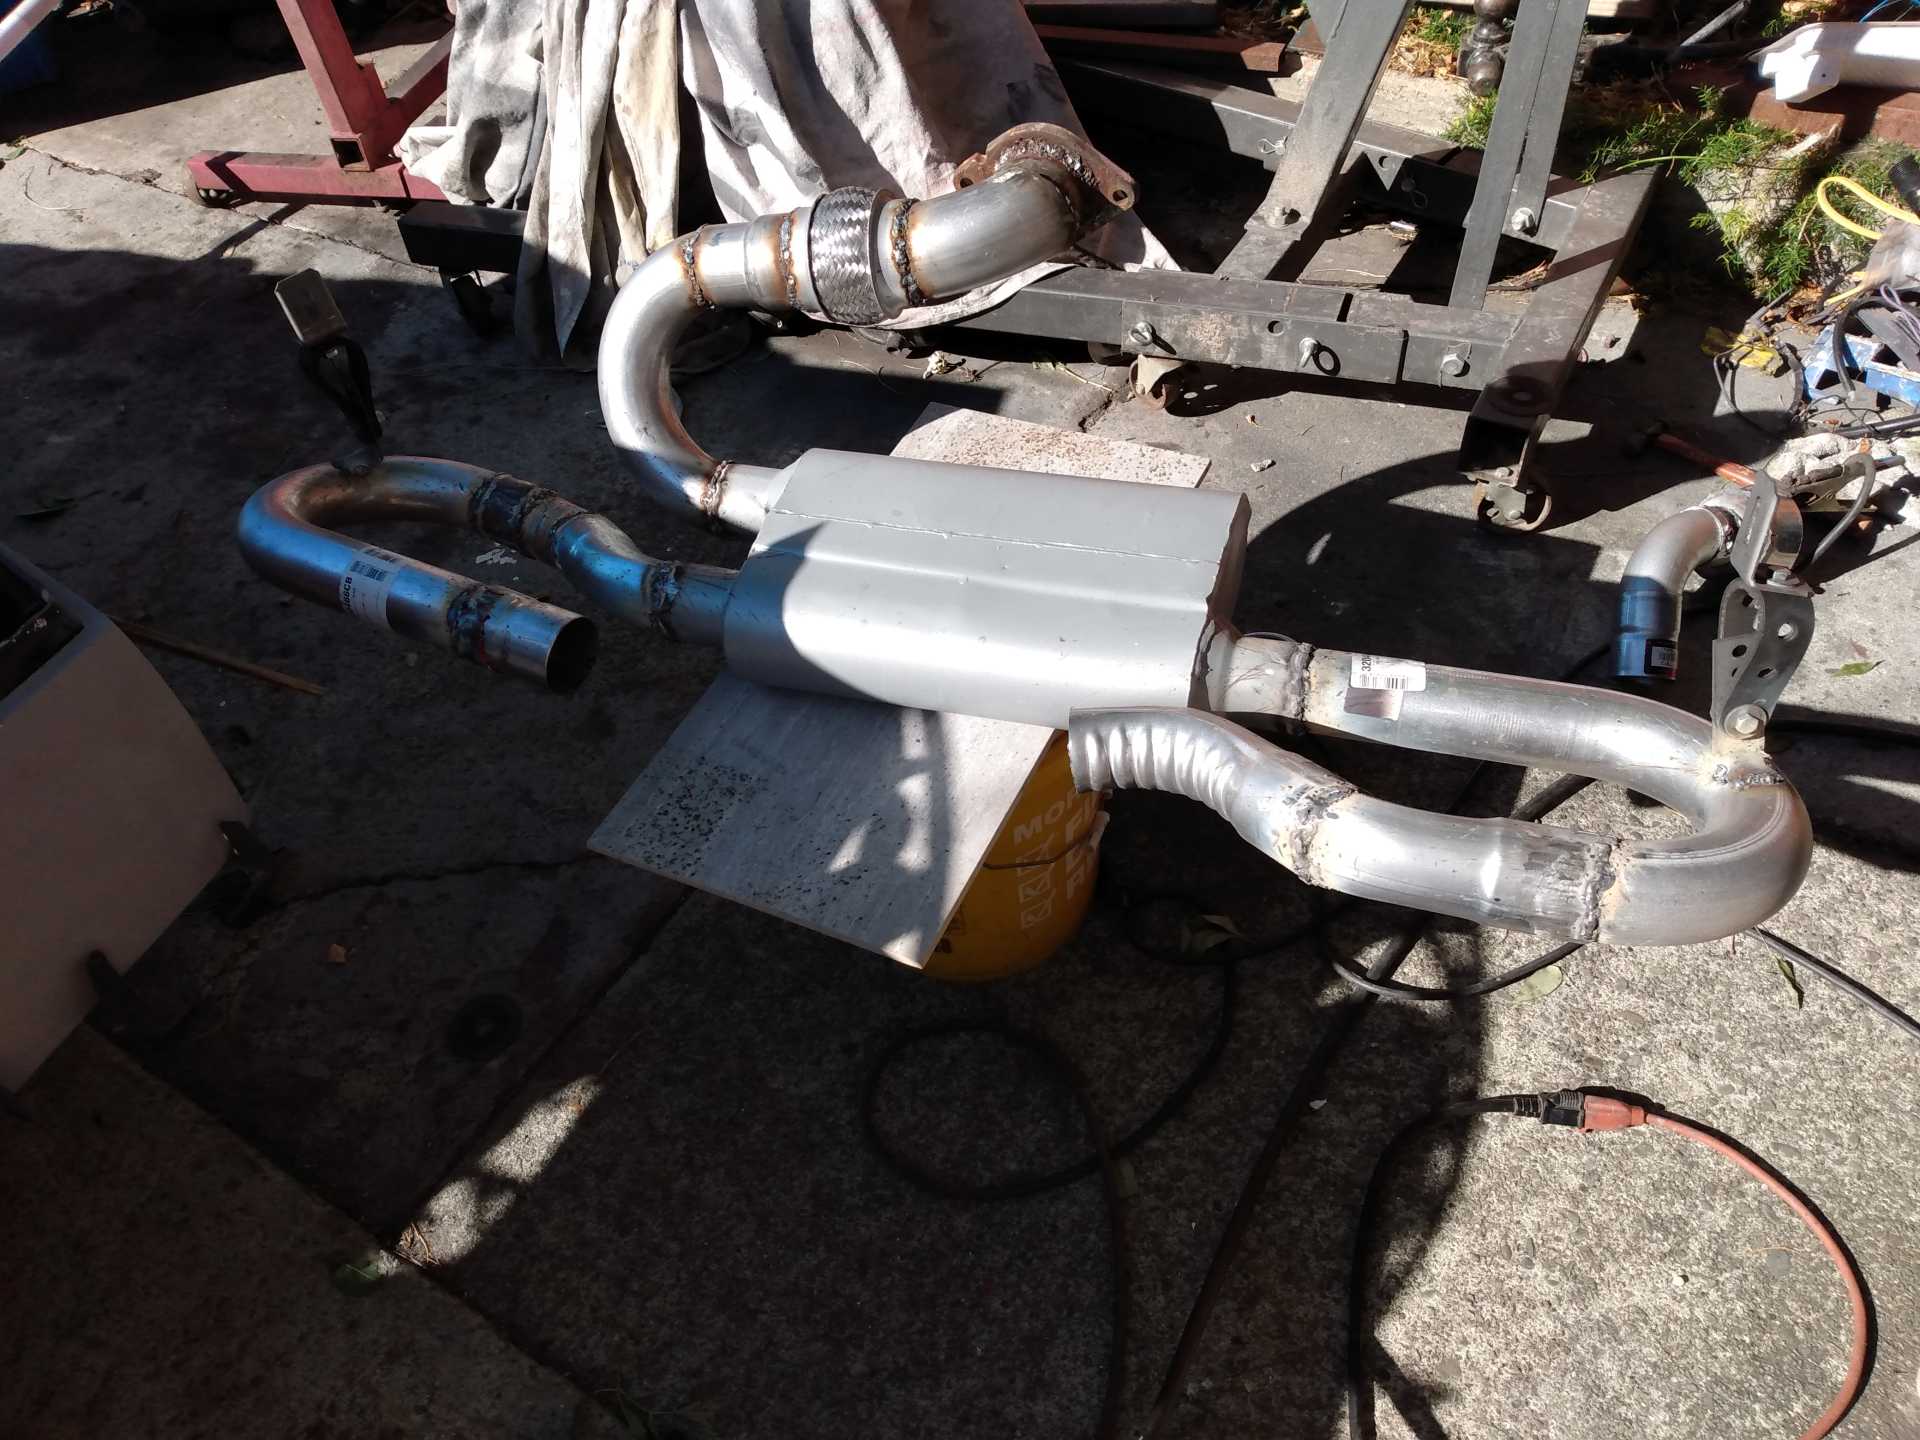
Wayne buddy that motors running before I can let off the key, starts instantly every time. I was crazy happy to not hear any noise from the inside of the motor. I checked everything as best I could when I pulled the oil pan and lower intake. That mess of wires in the picture above is all auto trans wiring. I didnt touch the factory wiring from the motor to pcm, just deleted the extra accessory and trans wires, all I had to hook up was 4 power wires and a ground. 2 wires for the obd 2 sensor and gauge wires and thats it. Definitely hair pulling and frustration tho, waiting on parts lol. Havent really touched it much since the last post because of that. Ordered some 6an fuel lines and quick disconnects, and the fuel line kit disappeared. Had to order another one, got the fuel line adapters to start the 6an lines from the fuel filter and tank. Wiring is almost done, need to run the vss and coolant gauge. Motor has a 2 pin sensor and I need a 3 so I went and got one. Then I see its 30-70$ for a pigtail wtf lol. Went digging around all the wiring harness leftovers, found the plug I need- score! Shifter brackets made up and works, just needs to be welded up. Got all my goodies for the exhaust ( or so i thought) so I went at it last saturday. Had that ss 3" elbow I planned to use, 3" flex braid, 3 to 2" adapter, 4 180 bends in 2.5", 2 4 to 2.5" reducers, and the muff. Man that there is a tight area to do plumbing. There was no way to mount the muffler unless I got some tighter u bends or left half the muff hanging below the cradle. Neither was happening so I looked at cutting the trunk. I know many cut the bottom out and make a plate to retain some trunk. I really like the trunk, super against cutting it out. Had an idea, went for it. Theres a seam in the middle across of the back of the trunk, I cut that whole line, then continues around the sides, and theres a small angled area I continued cut into also. I pushed the sides of the lower area in a wee bit, and rotated the whole bottom of the trunk into the upper area by hand the metals so thin. Fits like a friggin glove wow. So I really only lost about 3-4 inches of trunk depth, and was able to mount the muff at an angle and be well above the cradle.
That was good so I boogered it all together.
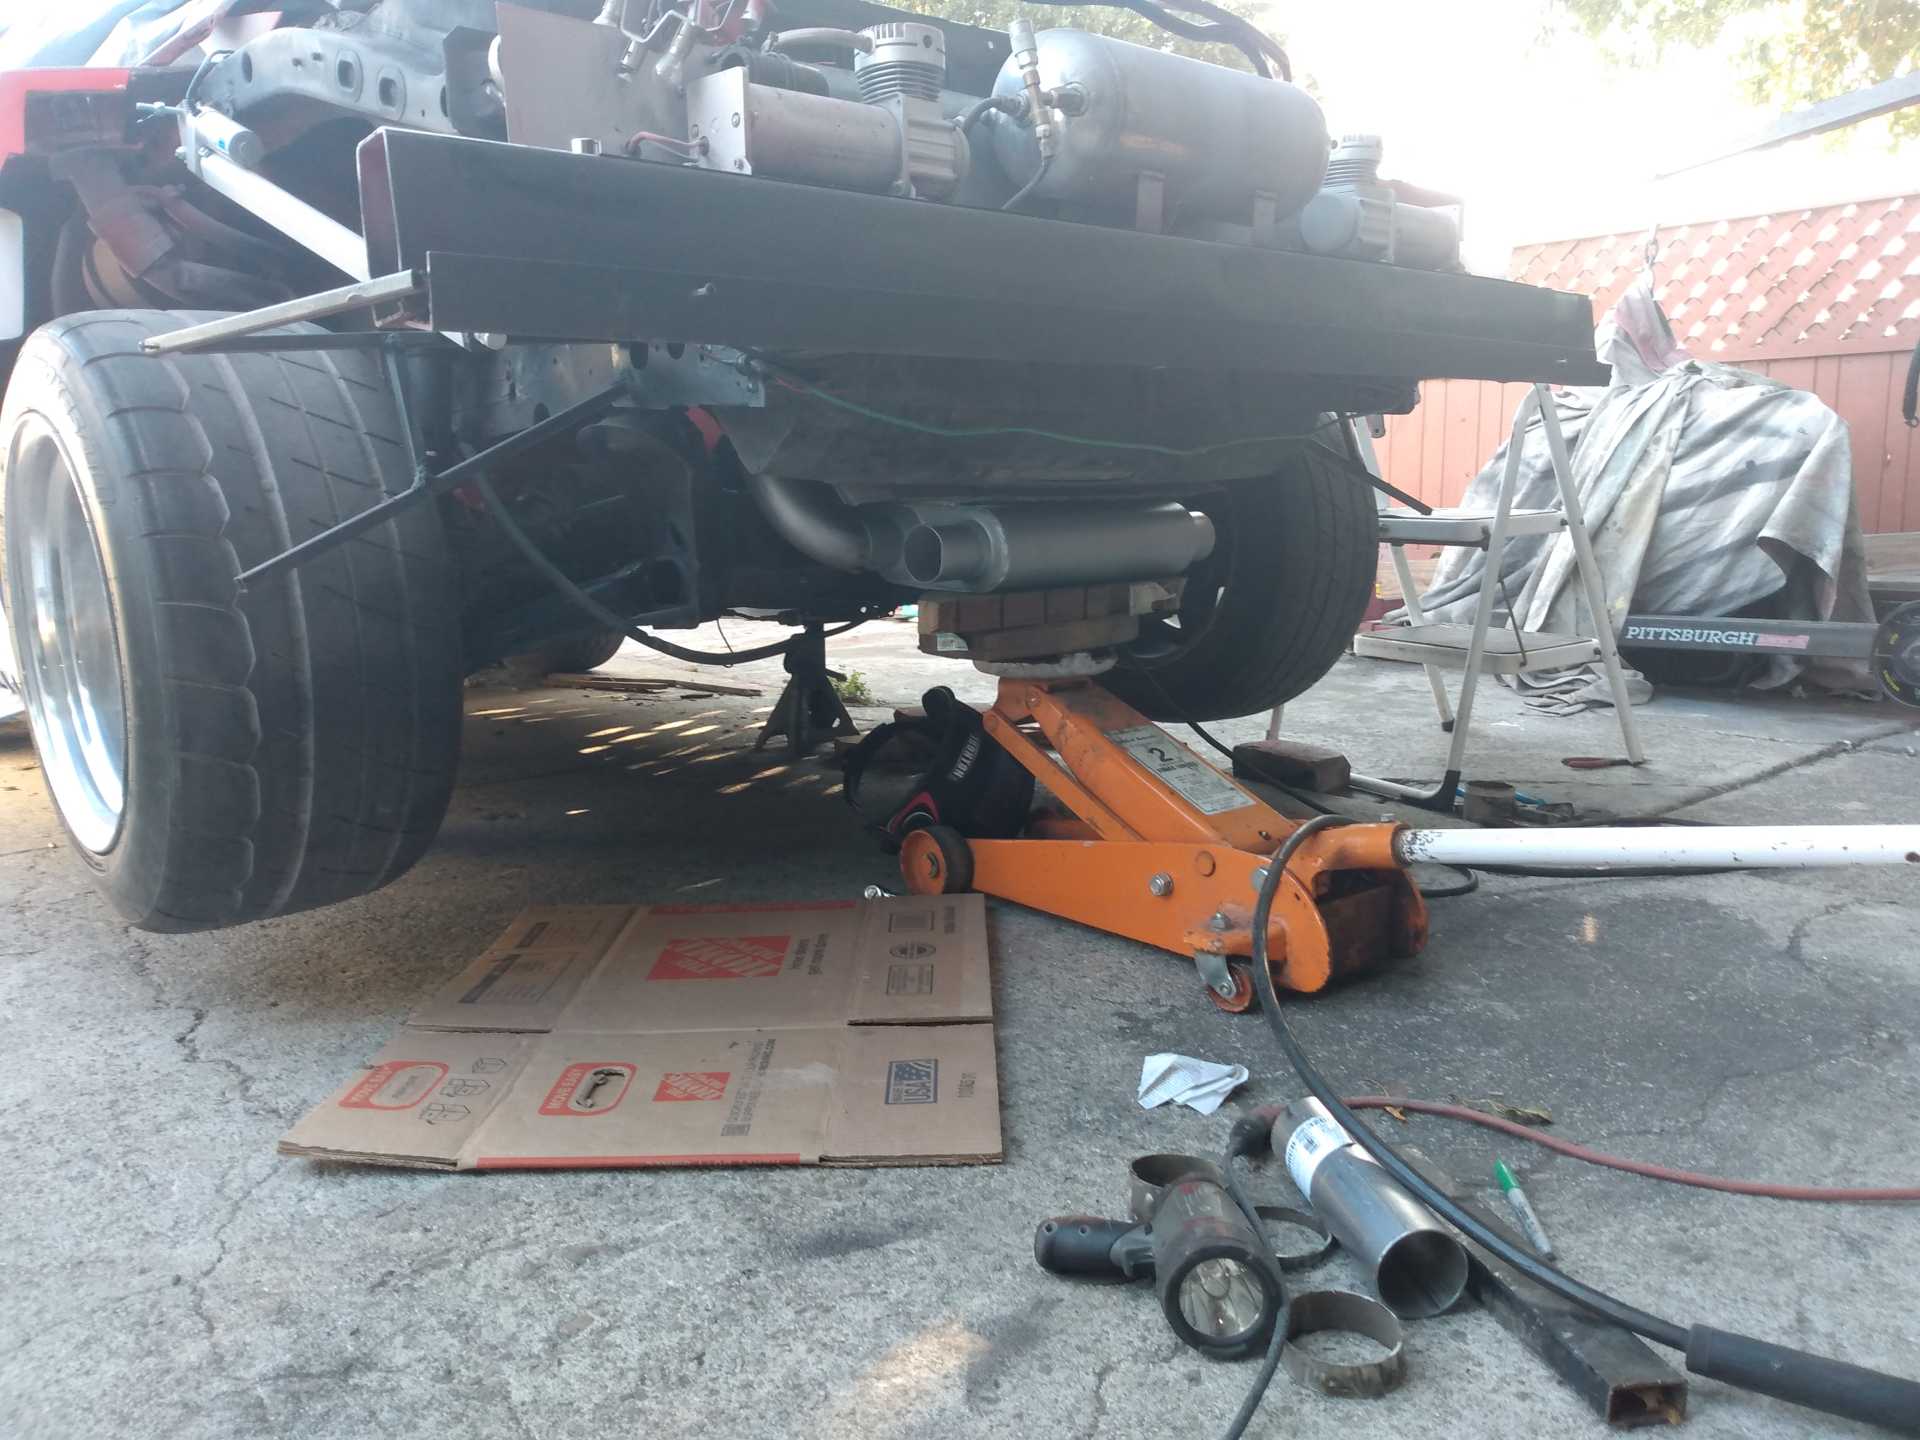
Next I was hoping to just 180 to 90 from the muff to my center exhaust but those tips are touching the muffler when flush w the bumper, waaaay too long. Also the 180 bends coming straight outta the muff didnt leave me more than 3" to the bumper exit. I went to autozone and kragen and bought 4 45 bends to snake the 180s away from the bumper, but the 45s made everything too wide. So they too got cut up. Heres the driver side routing tacked up
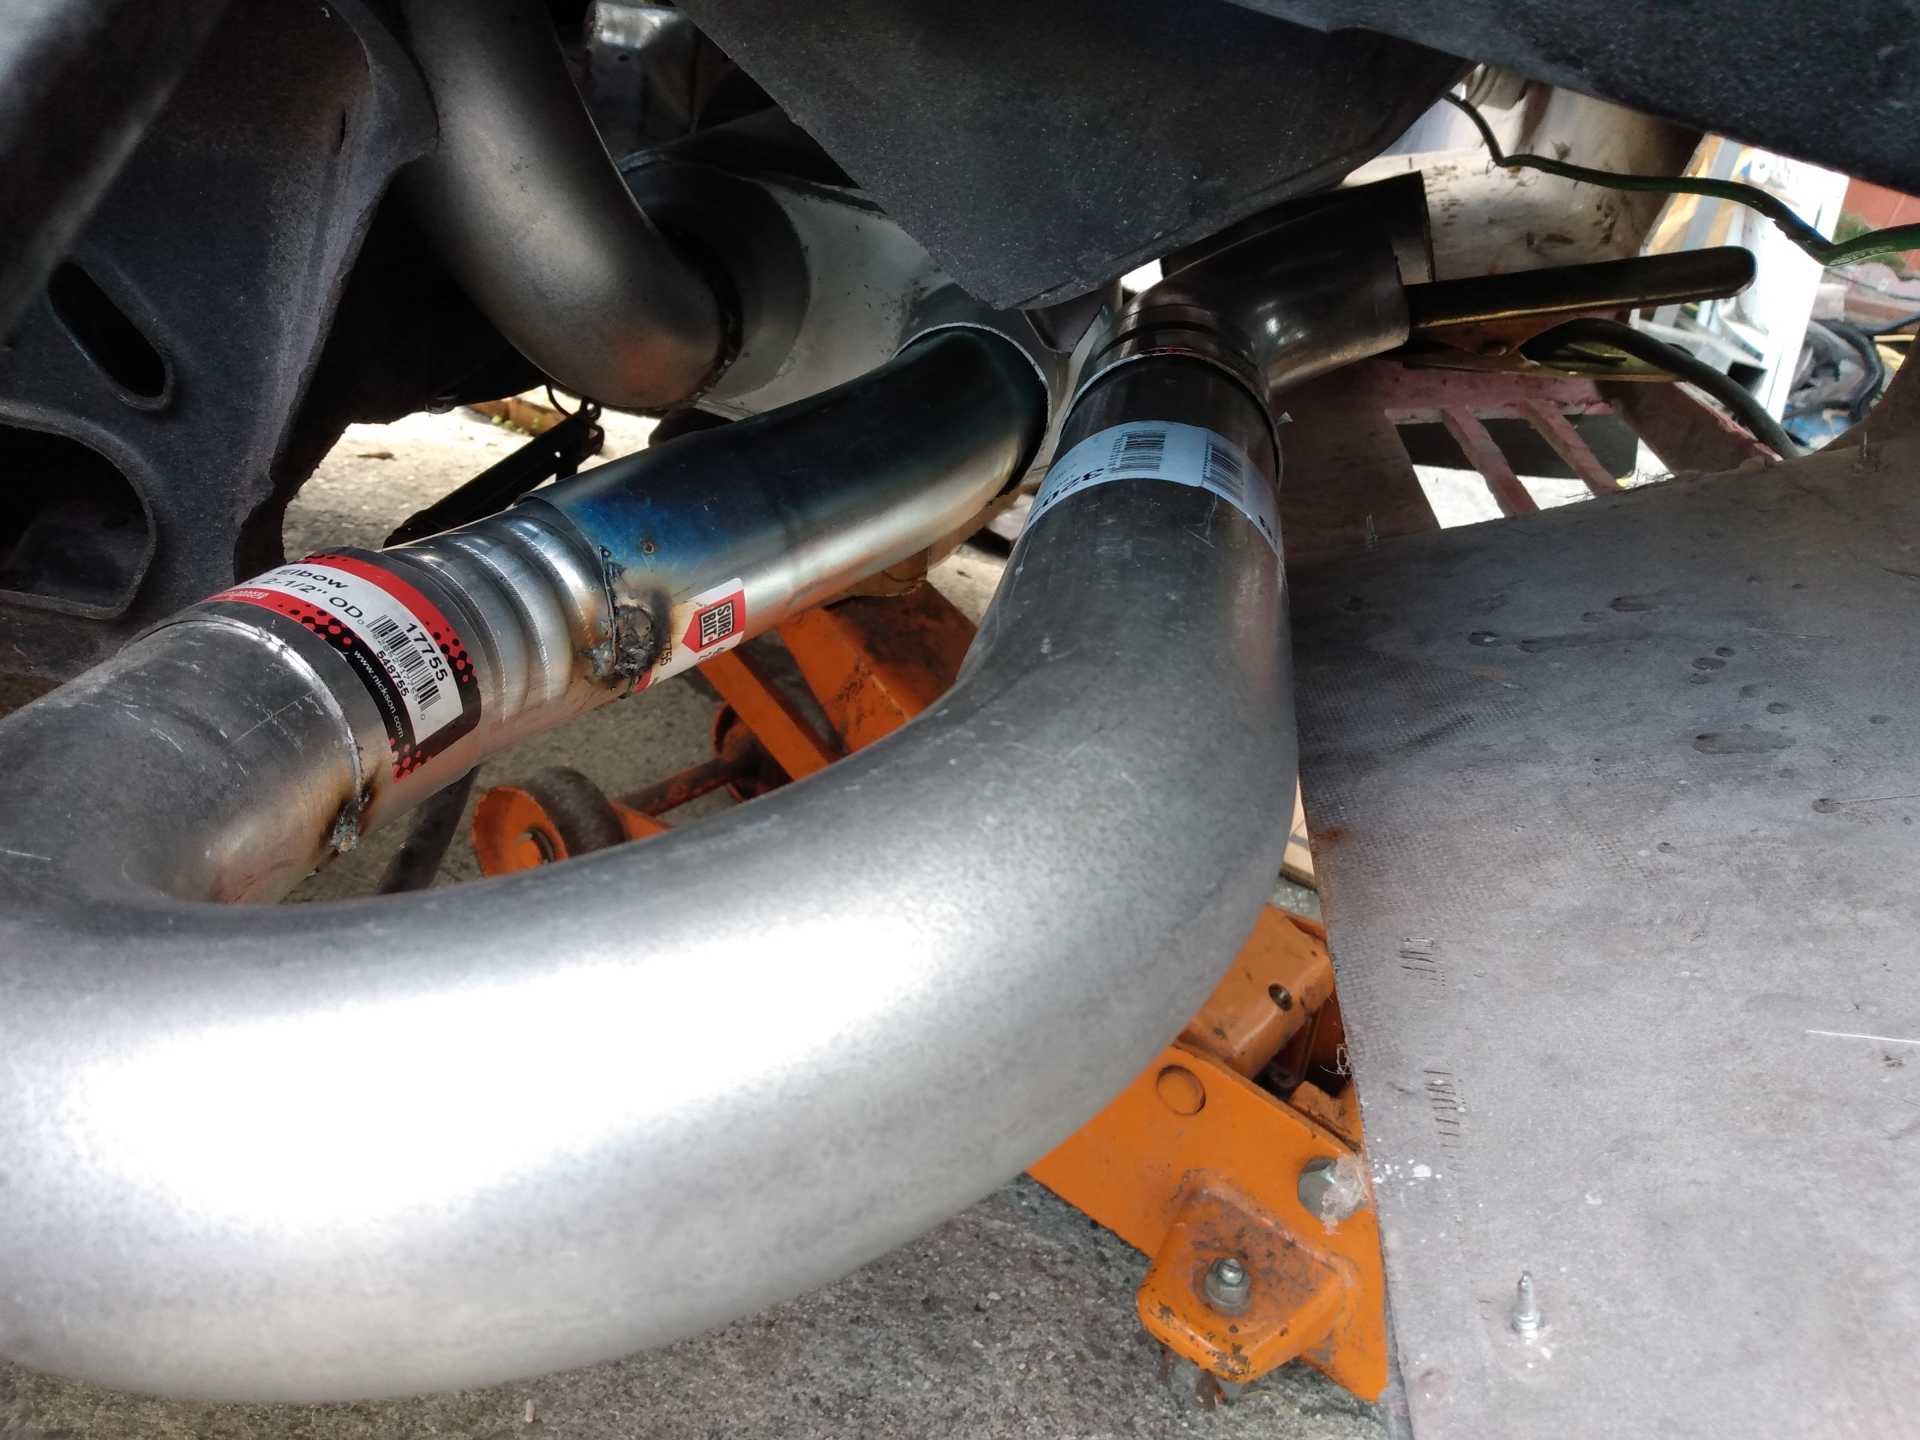
The muff is offset to the passenger side so I had to rout it in reverse of the udder side
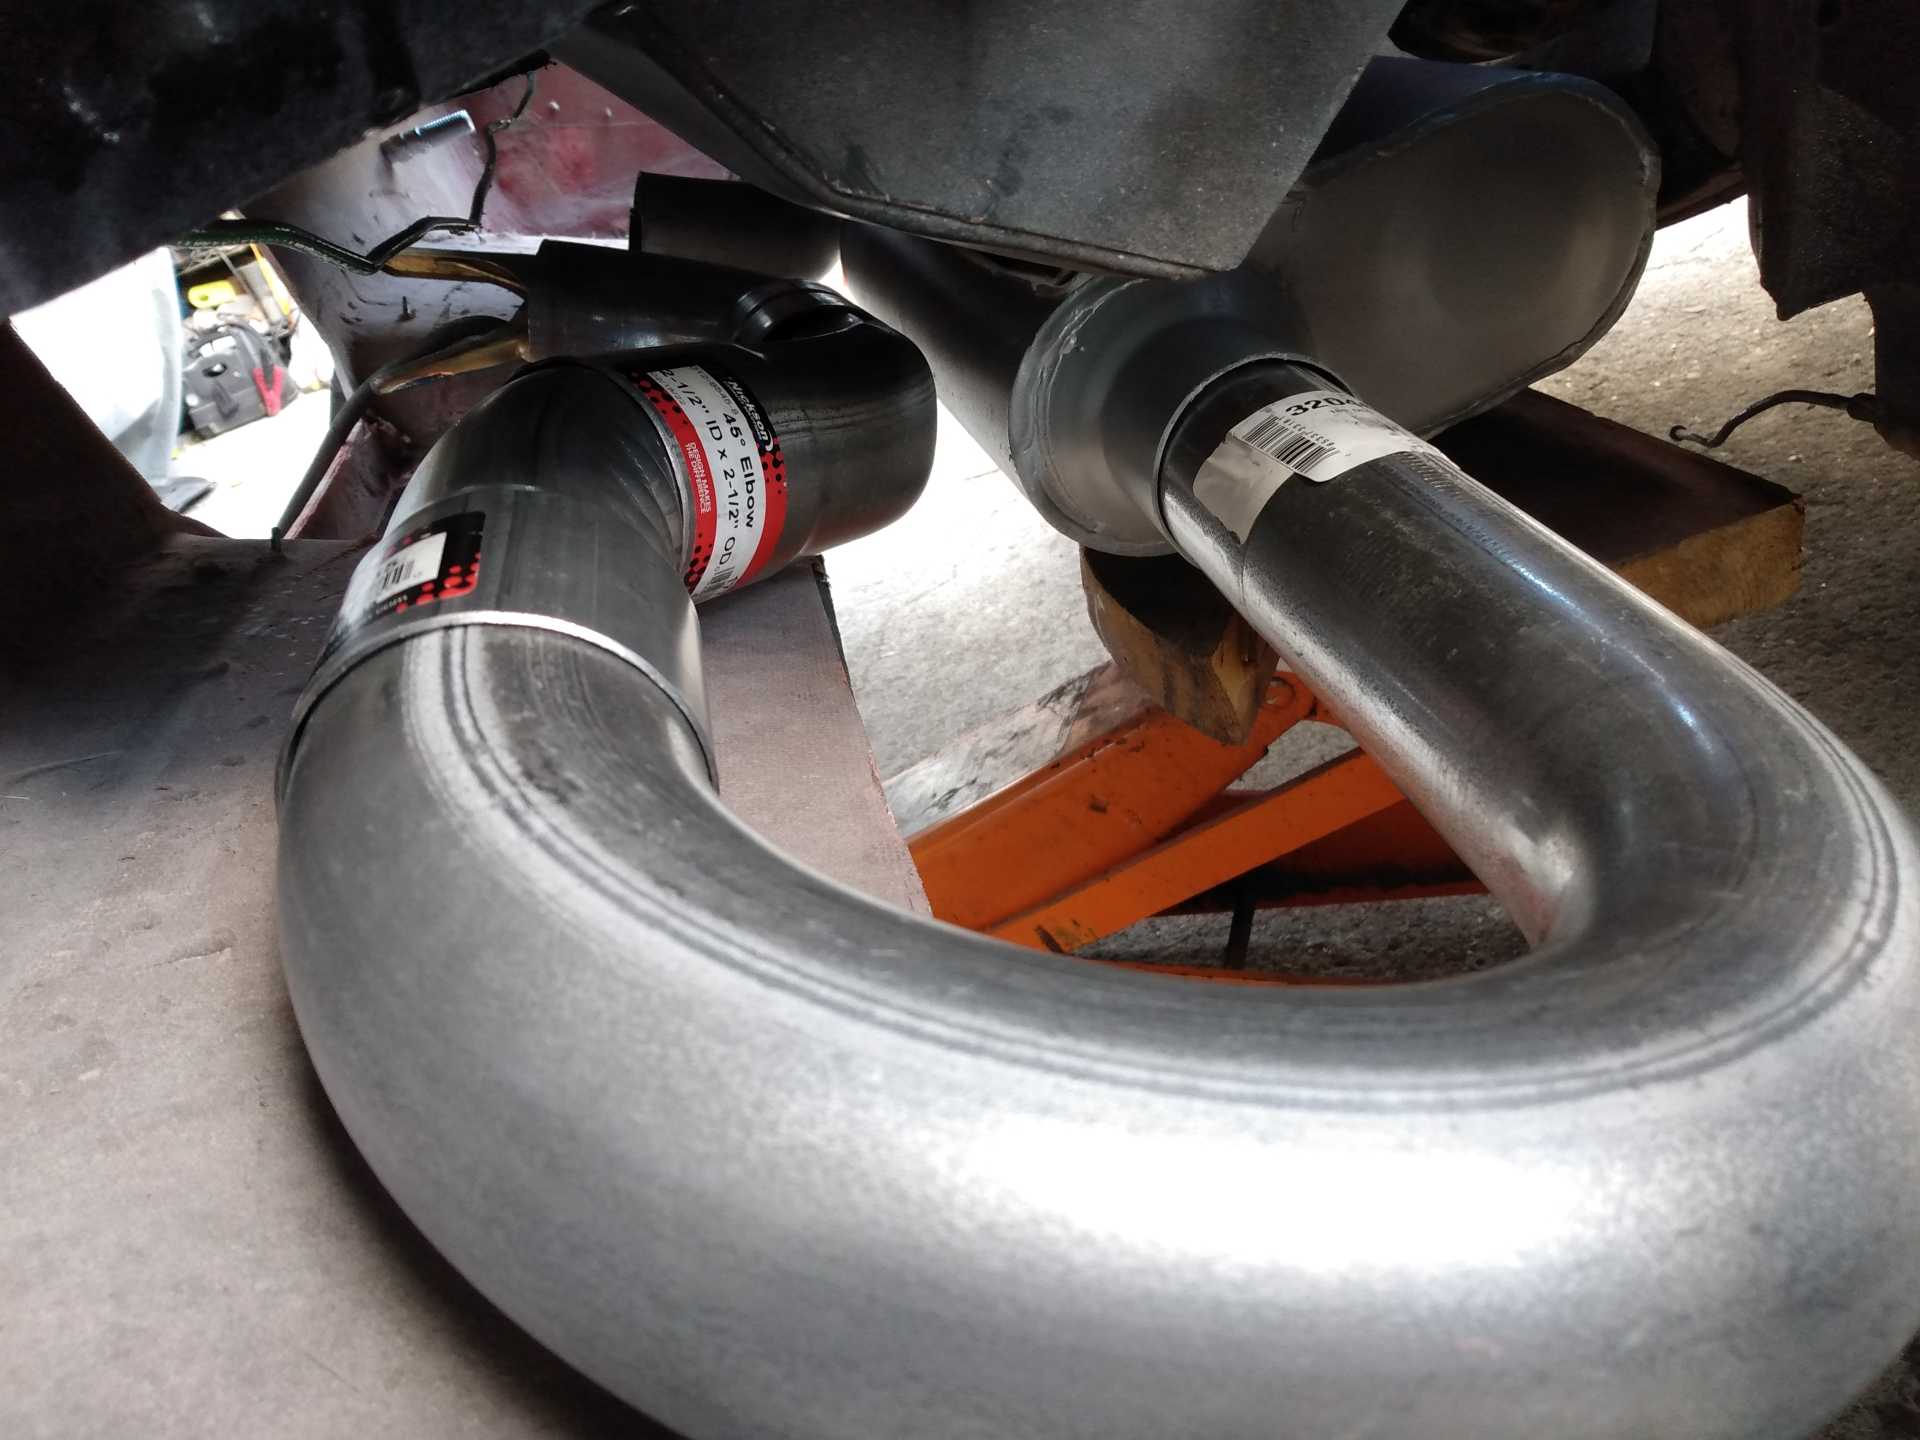
Got everything as far away from the body and close to muff and tacked it. Now I had about 6" to cram a 18" tip, 1 reducer, 1 coupling, and 1 90 into lol. I cut the tips and made them adjustable depth, and cut 1 stop coupling into 2 slip couplings and trimmed down the male end of the reducer to half its length
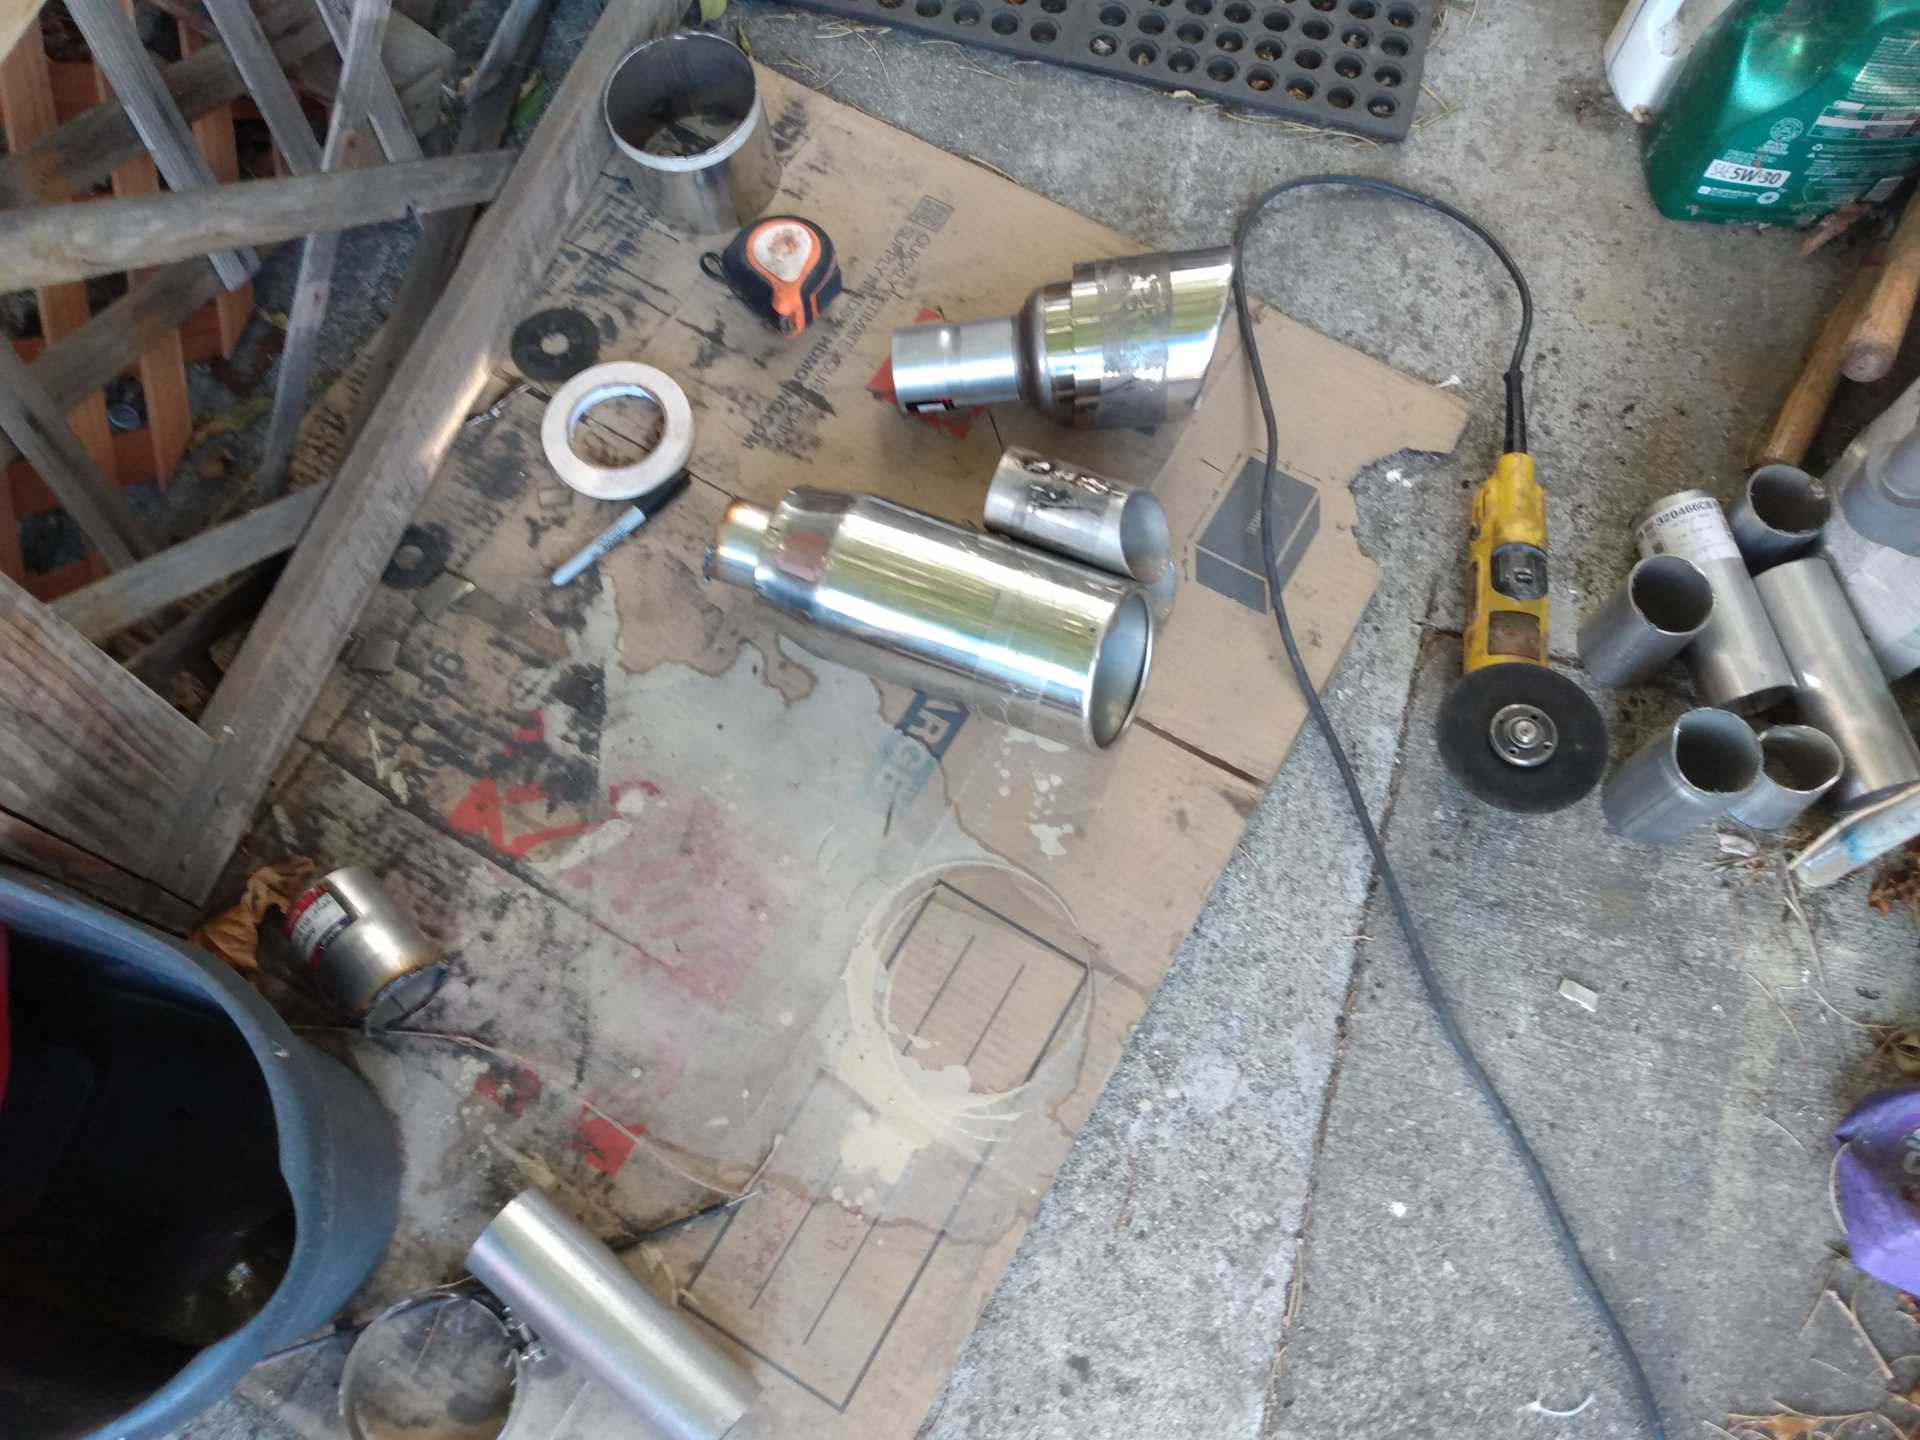
Adjusted everything and tacked together, the tips/90 will be held onto the exhaust with clamps.
Then pulled it back out for final welding, ran outta mig wire and hadta switch to flux. Yuck thats some nasty stuff, yes I switched polarity
New computers here, mosta the fuel line stuffs here, cupla more wires (vss and temp), and should be wrapping it up. Found the crank sensor plug was damaged so a new pigtails en route. Ill get to it one o these days
shem
|
|
|
|
Easy8
|
SEP 28, 09:13 AM
|
|
|
Just a note for you, I run a custom exhaust that runs under my trunk. (It's cut) the issue is the heat build up in the trunk. When I started working with it the trunk floor was 190 degrees. I had to wrap the muffler and put a heat shield in as well. With as close as you have it you are going to have issues. Easier to deal with it now if you ask me. Still loving the transformation of this car. Get her done and take it to the 40th show.
|
|
|
|
zkhennings
|
SEP 29, 10:30 AM
|
|
|
Nice work and nice idea with the trunk, I was planning to chop the bottom few inches off my trunk just because I do not like seeing the trunk below the rear bumper (85 base model styling) but I may copy your idea and get the extra room for exhaust!
|
|
|
|
ace5514
|
SEP 29, 01:42 PM
|
|
Great looking exhaust, does that allow you to NOT have to cut the trunk?
Ace
|
|
|
|
shemdogg
|
NOV 20, 11:26 PM
|
|
Holy crap its been 2 more months lol
Whatup Fierofam?!
Easy8- I planned on wrapping the exhaust, even have the wrap for it! Just wanted to heat cycle the exhaust a few times to check for leaks. Def going to make some heat shields.
Zkhennings and ace5514- Yes i did cut the trunk and it came out way better than expected. Heres how to do "shemdoggs trunk mod" Cut the seam holding the top and bottom halves together when looking at it from the rear all the way across, and cut the sides level so only the forward facing side is still connected. Then cut about 1.25" lower from the long rear cut along the seam, this time make the side cuts at an angle upwards to meet the end of the top cut( cut to zero). Then the lower half will easily roate into the top half as much as you like. The rear and side seams will be almost perfect. Sheet metal screws and whatever goop the factory used there will seal it all up. I did it in 15 mins on my first try, it was super easy, but I didnt have all the "fiero" stuff in the way. So pulling the tailligh assy and the rear bumper may be needed, I dunno. I open my trunk hatch and everythings exposed.
So I said I wasnt gonna make another post till this thing ran and drove. I havent touched it in ages lol. last time I threw a few hours at it was 10/16. The parts acquisition process turned out to be a nightmare and a half. Thats where all the time went. Pretty much every single package had an issue, and took forever to arrive. Parts disappear halfway to me, parts are marked as delivered and are not, parts are shipped early and sit sit at the DC till the estimated delivery date. Ordered fuel fitting from florida, florida gets hit by a hurricane. No joke I just dont even care anymore lol. Then work came in like a tsunami, a monster job and lots of medium sized jobs. Then it rains yay! Damn cars been sitting outside so long the car cover is literally in shreds. Theres a feral cat living in it too lol. Anywho all the stuffs have showed and today was the day it drove back into the garage under its own power. Where do I start? How about where I left off...
Cuz welded the shift bracket for me. I had a chunk of 3/16 I used to slide the cable holders over and marked the positions w screws so it didnt move while welding. Jeez that was ages ago

So then there was that pesky issue of having a coolant fill point above the motor. I got a coolant expansion tank and some o dat rubber edging I had on the old back window. Gorilla glued it into that thar opening to run my tubing thru
Fabbed a quick mounting bracket, hung the tank
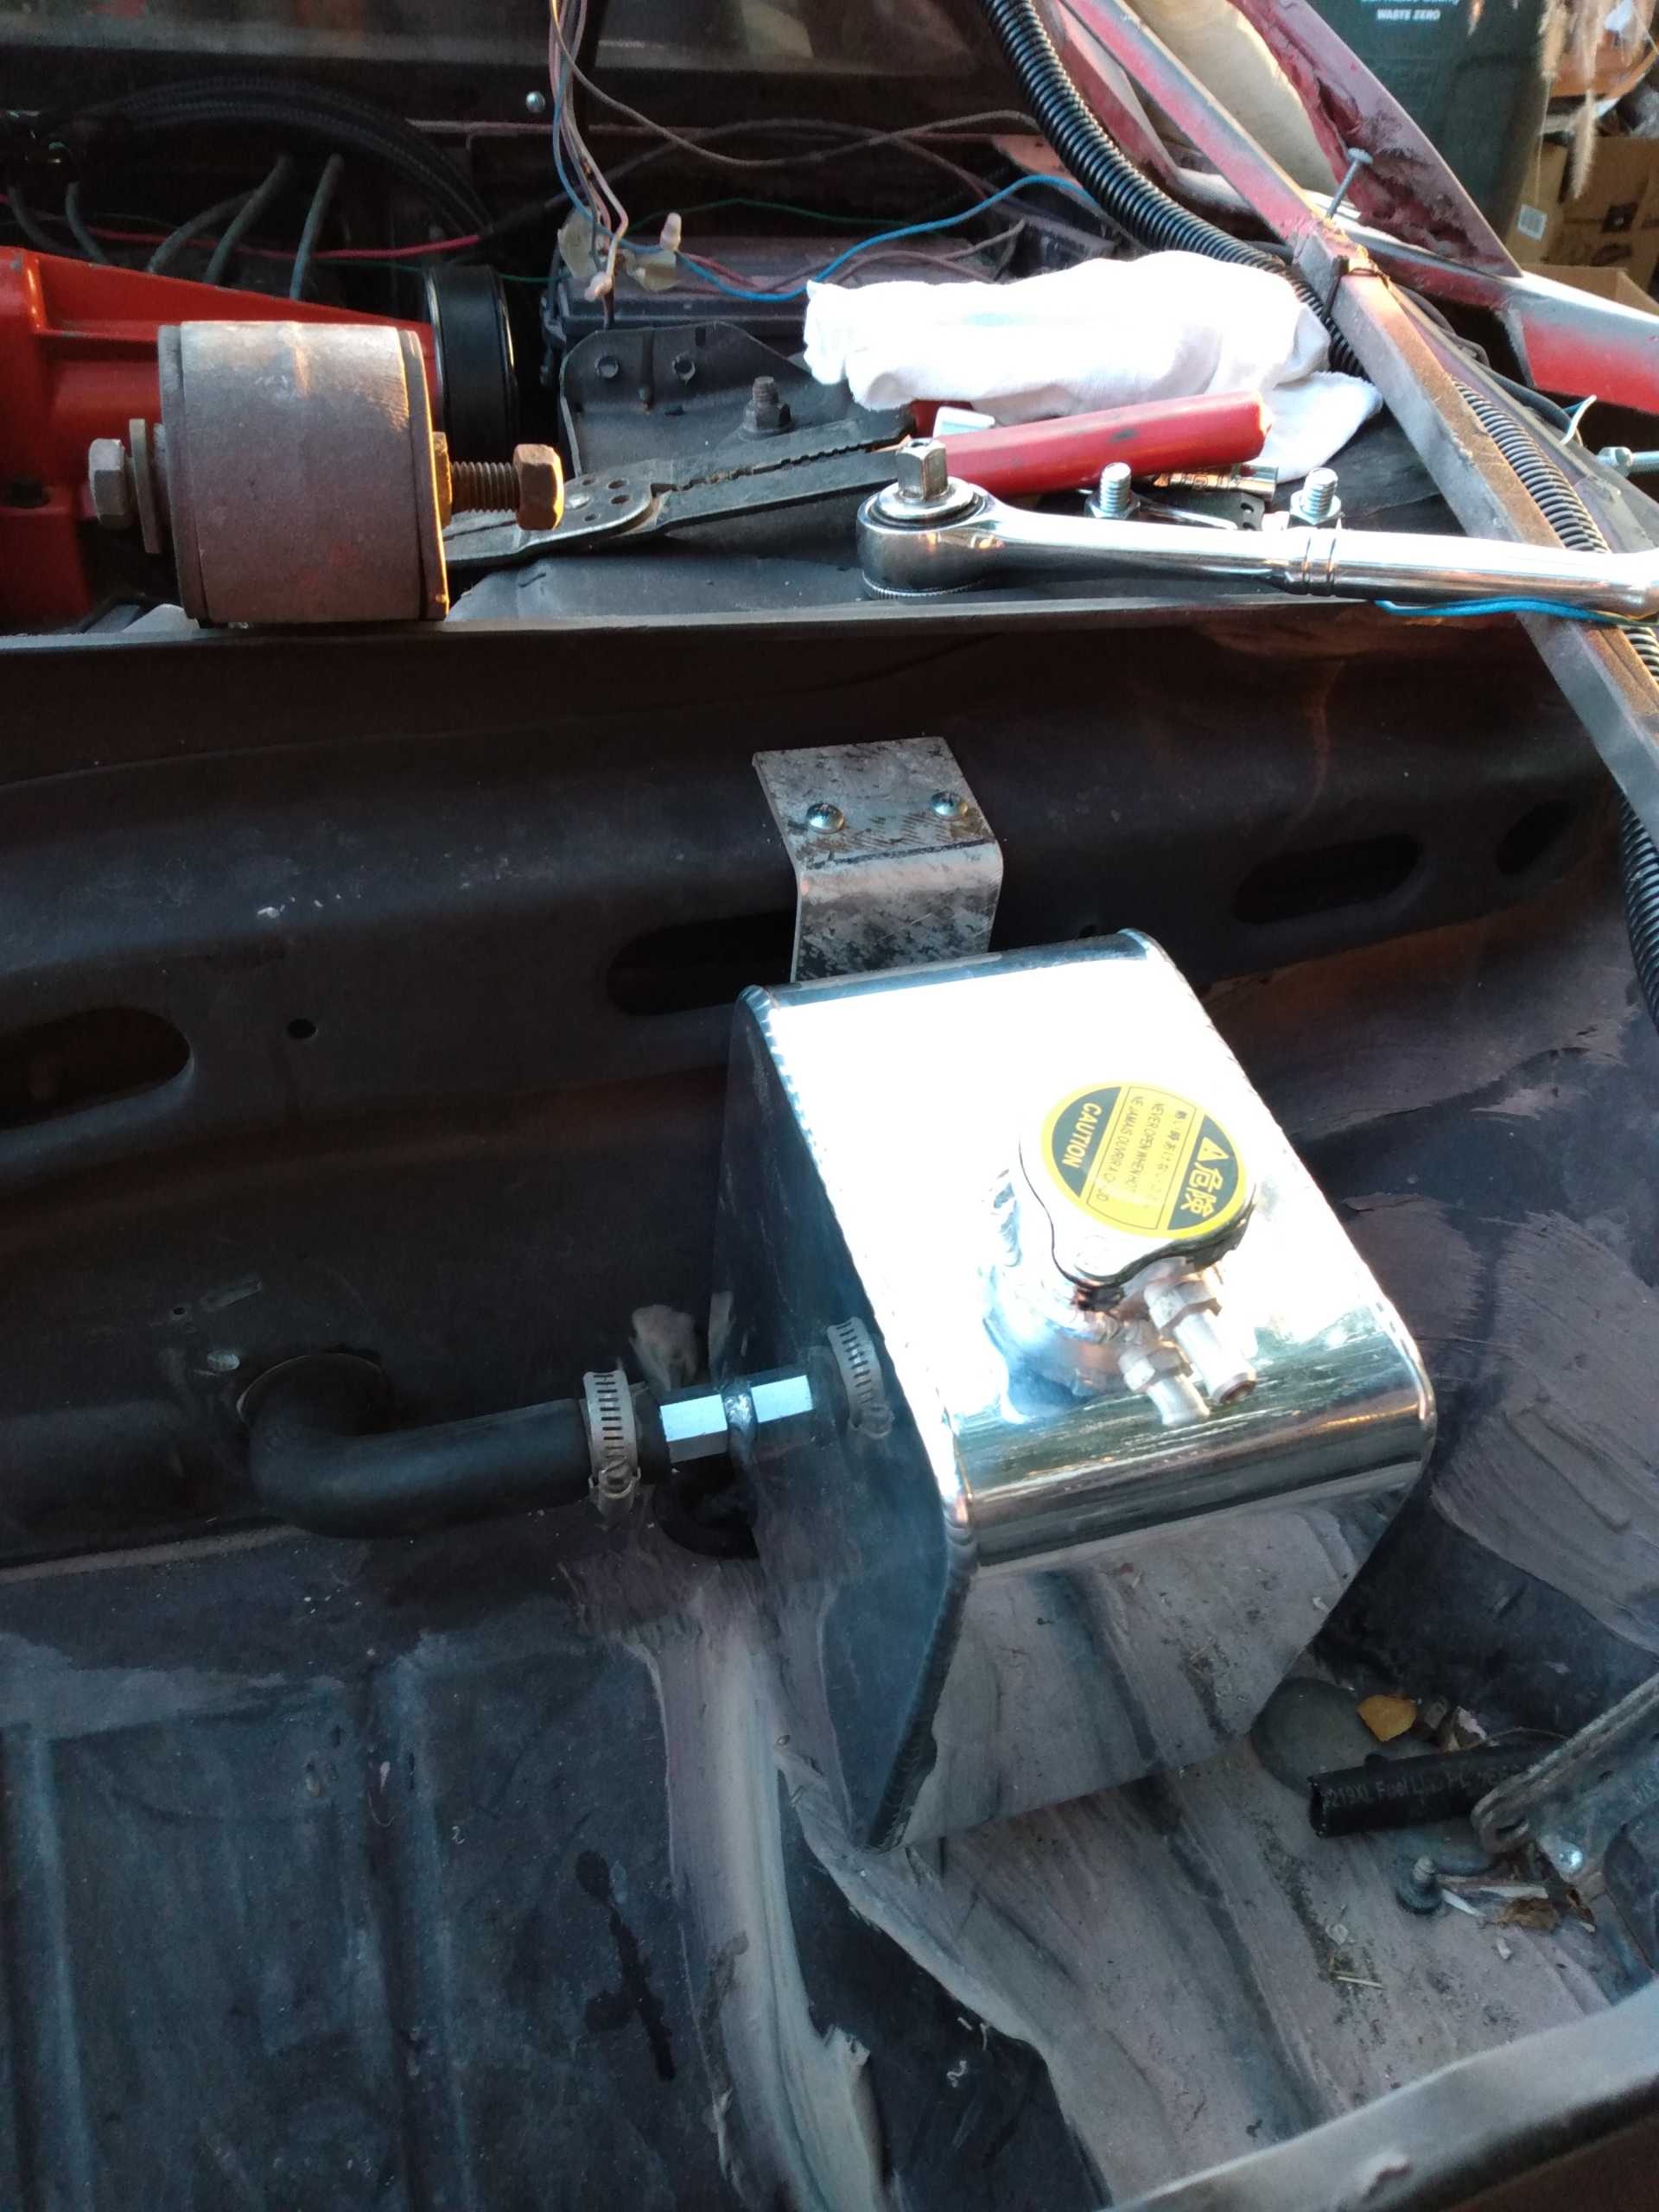
And bought stock in a hose clamp company
Heres the shifter cables n bracket set up. Need to do some mods for the select cable but works. Kinda
Bought a whole buncha wire looming and wound up using the factory loom, did sumatha motor
Had so much down time I put the kit car wheels on the toyota for shits n giggles, thatmade an opening so I started moving things around in the garage and made meselfs a workbench! Awesome I needed it so bad lol
Painted my buddys truck, at least the first time. He masked the emblems off so bad theres gaps lol
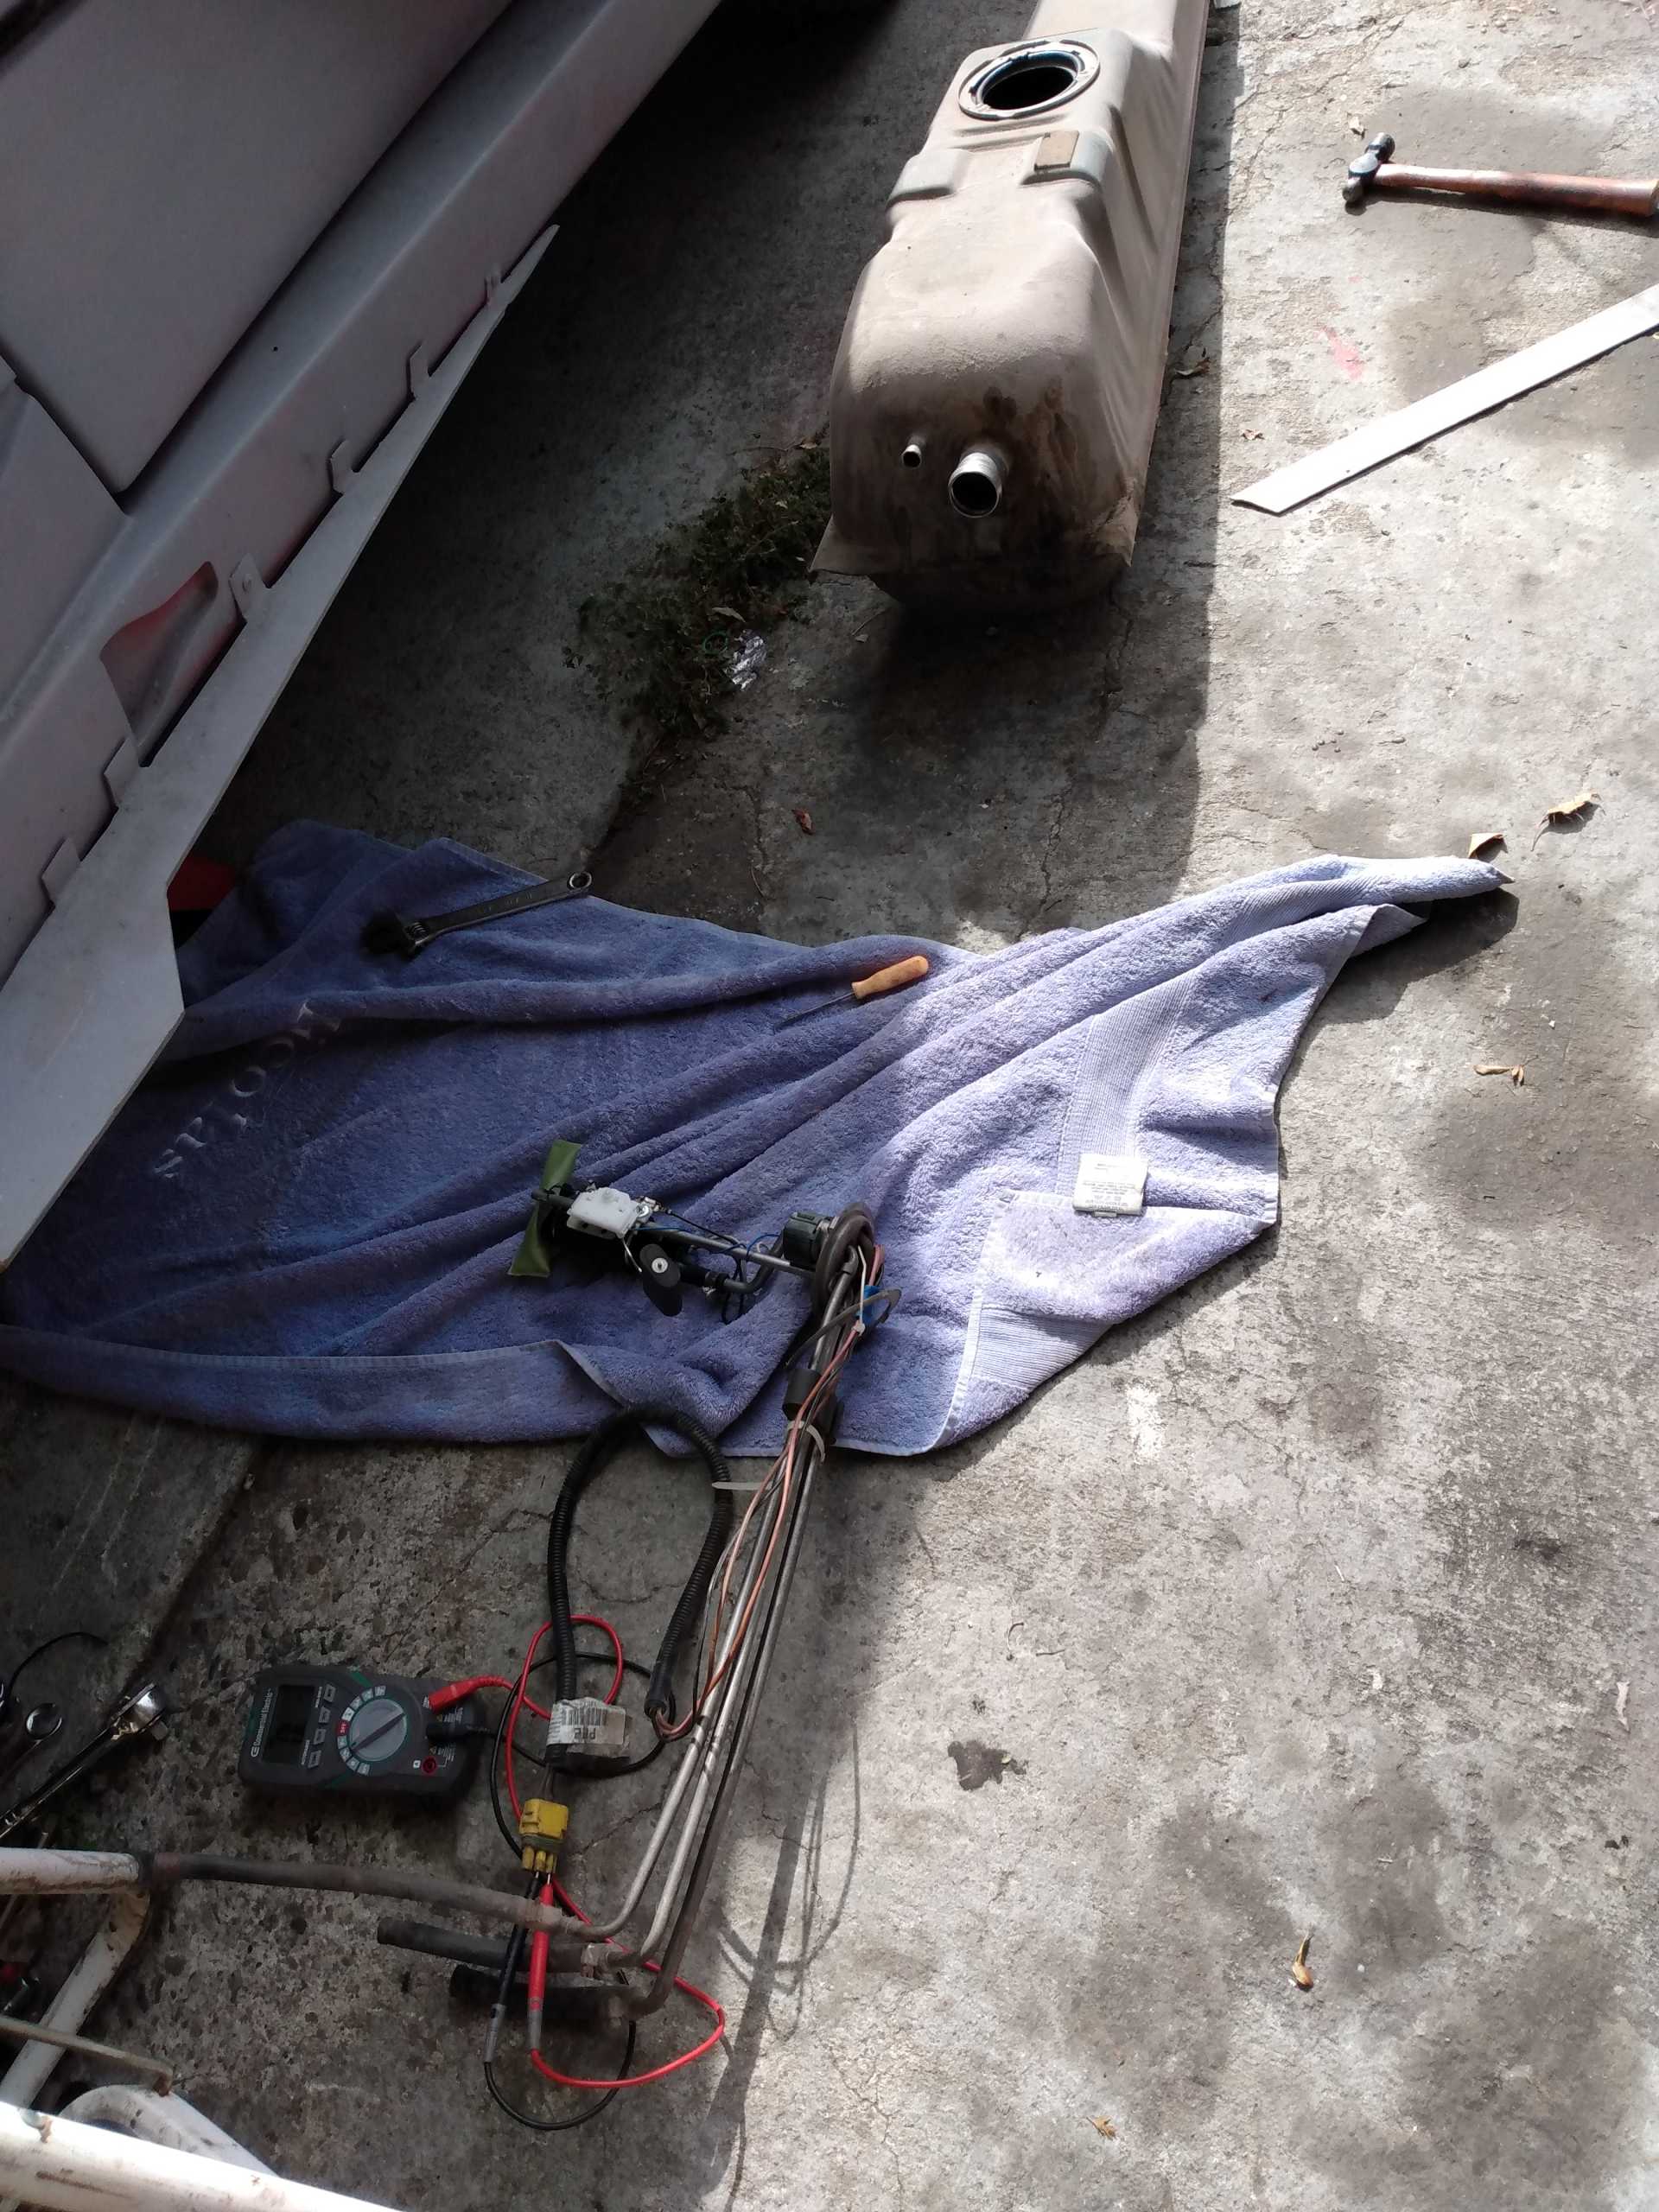
First pcm was a bust, injectors wouldnt fire. In the down time I took apart the fuel system to change it to the braided lines. Wound up needed tons of fittings so lotsa downtime there before it got finished. Got the new pump, fuel filter, and all the trimmins to convert to 6an style. Wile I had the tank down I wanted to see why my float was stuck, and when I pulled it- it wasnt stuck. Looks like the arm was loose and the connector arm wasnt making good contact w the circular coil thingie, so I bent some metal around to not let it swing out and stay in contact. Verified it w the ohmage before reinstalling. Filled it up w gas, still doent work. Dag nabit jimb! Fuel pump does tho and doesnt leak yay
Got a new pcm and its firing the injectors, motor runs for more than 2 seconds now. Idles around 900rpm but only running it for 10-15 seconds a few times. When I got it running w the new pcm, my oil gauge pegged to the right. So I dunno If I got oil pressure Finally gave up on the gauge, threw 2 extra quarts in it. Pulled the oil filter, it was full, I didnt fill it. Still getting no pressure on the gauge. Jacked the drivers side waaaay the hell up and left the car for a few days. Cranked, no oil pressure. I have the rear valve cover off and expect to see the oil launching from my pushrods. Went to home depot and got an air compressor gauge and piped it into the sensor port expecting it to not work or just not read pressure. In 1.5 seconds I had 60 psi cranking. Fired it up, 70psi running, no oil coming out the rockers. Shut it down. Super worried the oils not up top but read many threads on the same issue, car had to be driven for oil to get up there, makes no sense to me. 70psi is a lot. Got the brakes bled, clutch bleeding fought me till I found I had a bolt missing from the slave bracket. Bled it again and it was good. Put the back hatch on and hooked up the actuators, fixed their wiring, and installed the hatch cover. Put all the parts back on, started it up and backed it into the garage. Runs good. Loud Af tho! Neighbor across the street came over after I fired it up for testing a few times after I finished the exhaust. "Yo when you gonna put that exhaust system on johnny?" I dont think the exhaust made any difference soundwise versus open manifolds. It just sounds like the noise is just directed out the back. Still a good size list of details top go thru, cooling system isnt fully connected, 2nd and 4th gear are unreachable at the moment, brakes are spongy, stock heater hose too close to the front exhaust manifold, a whole buncha stuff. But, I got my driveway spot back and thats whats important! I wouldnt call it a success, but it is together.
So whadja spend altogether?
Motor/harness/pcm $300
Amigo to go under the car and get the resta the bolts I didnt pull, cut the exhaust, pull the motor $100
Gasket set $140
Flywheel $290
Mounts $40
Fuel lines/ fittings $90
Pcm programming $125
Fuel pump $60
Starter $60
Belts/plugs/oil $60
Exhaust $220
Trans mounts $40
TO bearing $70
Clutch $100
Hoses/clamps $60
Injectors $40
Coolant sensor $20
Total $1760
Not too shabby pricewise but took waaaaaaaaaaaaaaaaaaaaaaaaaaaaaaaaaaaay too long, even the wife said something. My fist motor "swap" was in the 66 mustang I put a newer 5.0efi into. The motor fit right into the stock motor mounts, I made a custom trans support, the original driveshaft fit, I got a swap harness and radiator. Spun the oil pump w my drill and it was done in a few hours. This one brought my average down considerably.
Happy holidays folks!
Shem
|
|
|
|