|
| LS4 / F40 swap - fieroguru (Page 55/216) |

|
Rickady88GT
|
NOV 30, 12:18 AM
|
|
| quote | Originally posted by fieroguru:
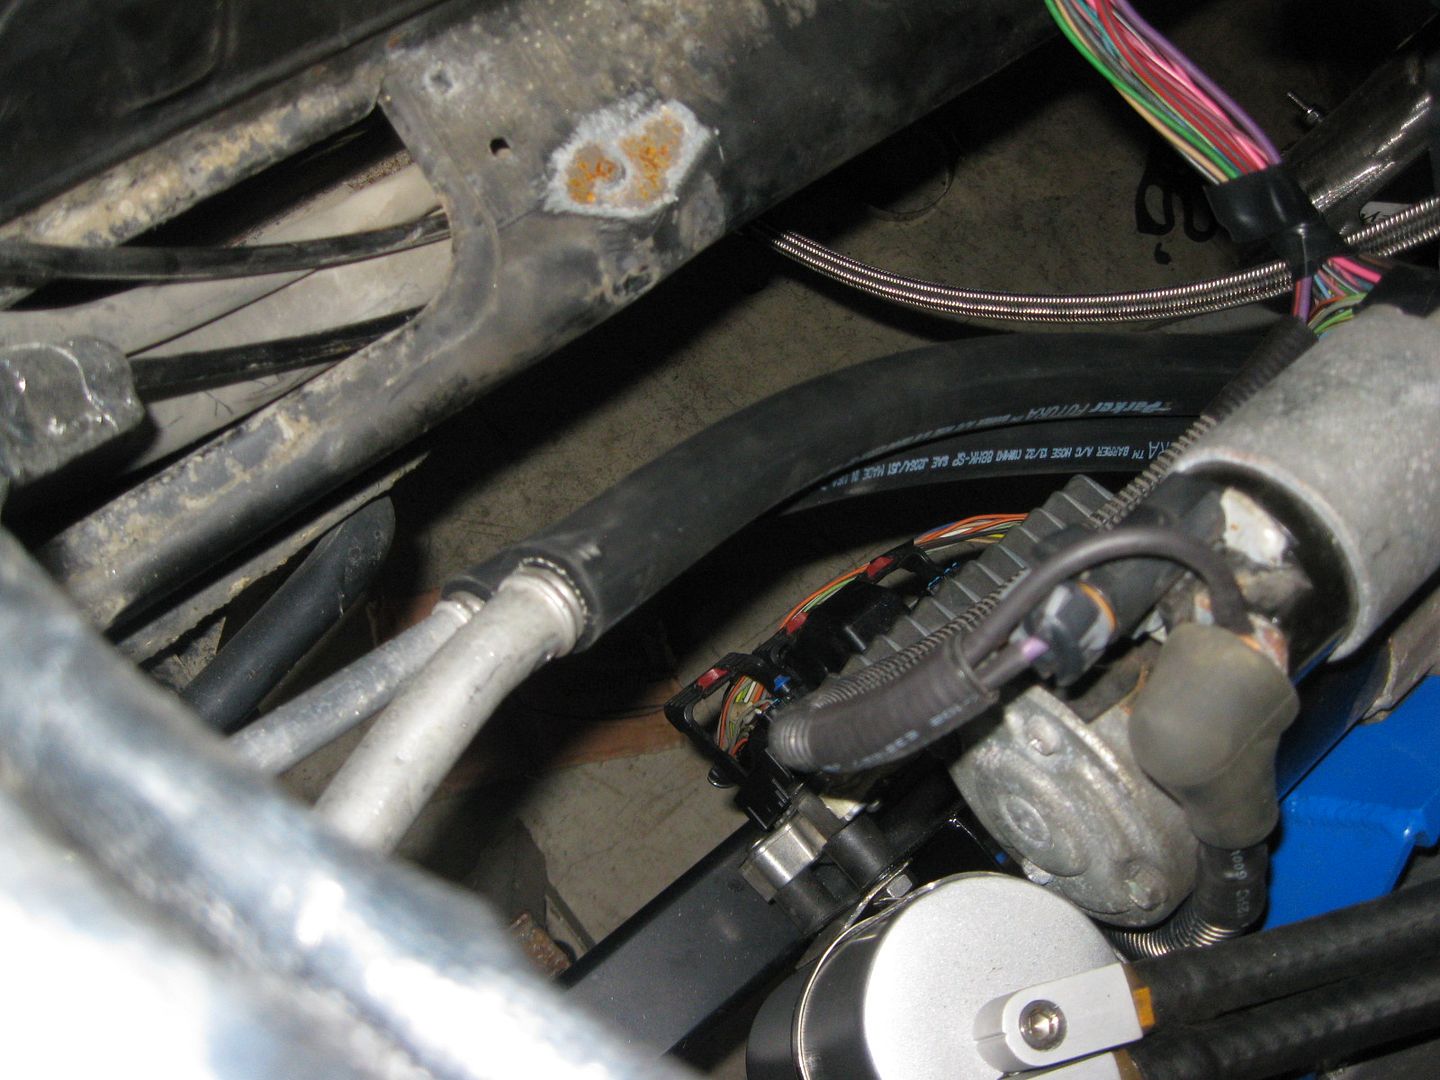
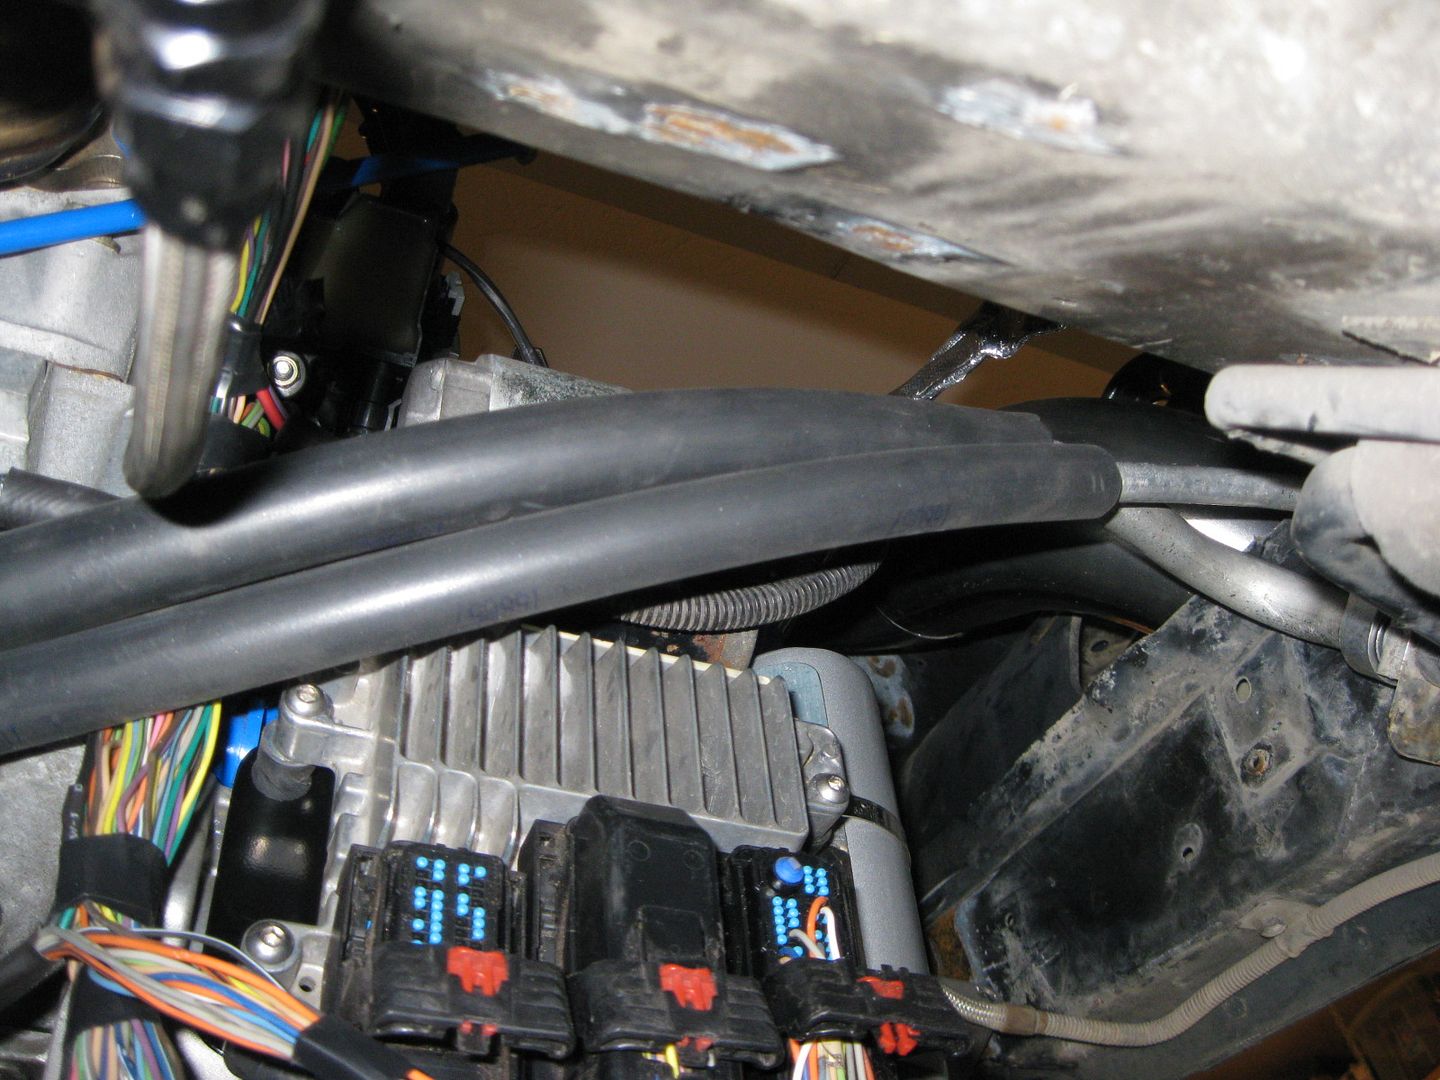
Been working on the AC lines...
I used a cut off wheel to remove the oem crimped hose clamps from the LS4 compressor end as well as the Fiero chassis aluminum hose ends. Then It was a matter of cutting the new A/C barrier hose to the proper length. Here are some pictures of the test fit:

While searching for the ferrules for the ends I came across several types for the OEM bead lock (the ferrule is locked between two beads on the fitting) fittings. Most of them required a larrger hole in the ferrule so you could push the ferrule past the beads and use a c-clip to retain it. I am sure those would work, but I also found some that had the larger hole offset:
http://www.mobileacproducts.com/ferrules.asp
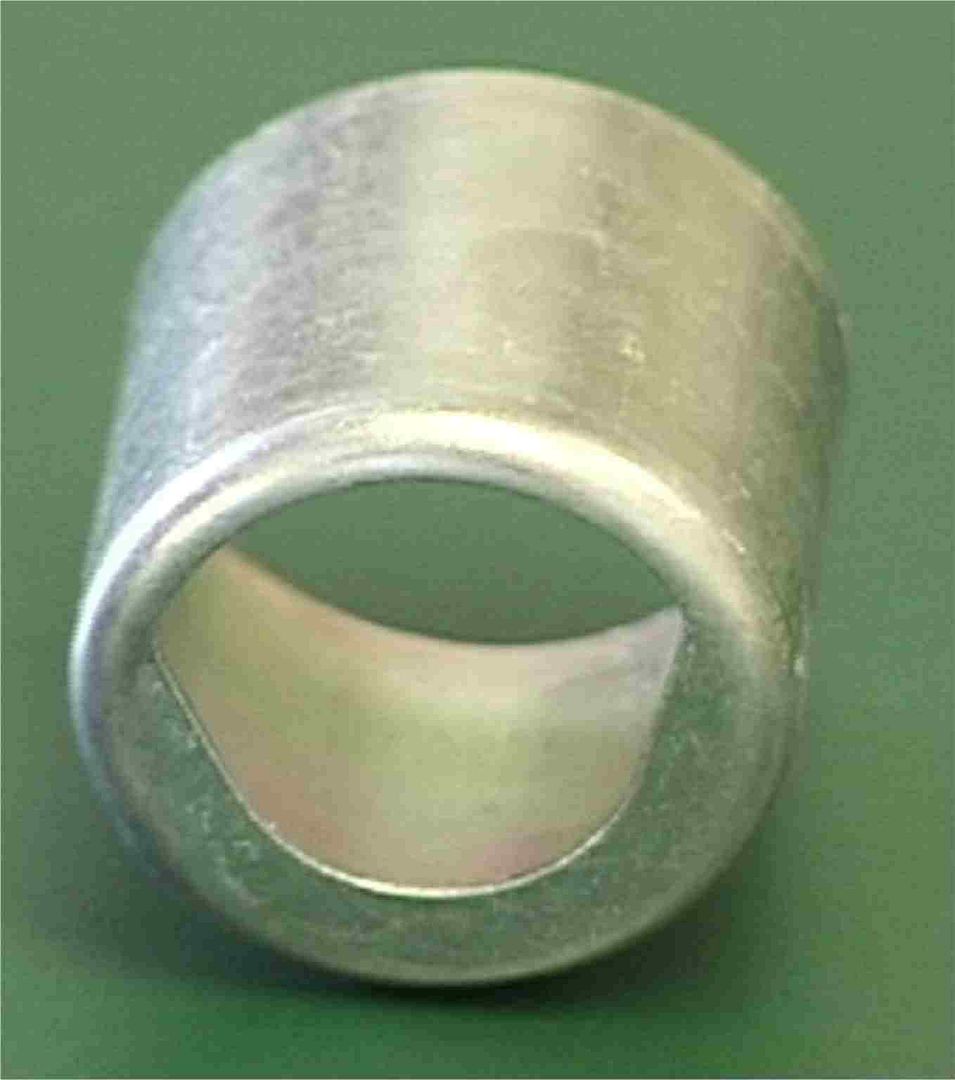
So these just slide into place, fit in-between the beads, then when centered by the hose they are locked into place. Pretty slick setup, so that is what I am going with. You can buy the ferrules in packs of 25 for each size and they come to about $1 per ferrule. So I am buying 25 of the #8 and #10 and will likely sell the left overs in the mall.
Here is a nice how-to on using these ferrules. It covers removing the old hose and assembling the new one with these ferrules:
http://www.mobileacproducts.com/hose_repair.asp
For crimping these, I am planning to just take the assembled hose with new ferrules to NAPA and have them crimp them for me. The other option is to buy a crimping tool... but they are about $150 for the cheapest one and I don't build A/C lines very often. One of the most compact crimpers I have found is the ATCO 3300 Handi-Clamp:

You can buy the whole tool with the dies for $155 from here:
http://tswf.com/koolkarzonline/tools.cfm
Or you can buy just the 2 needed dies (#8 and #10) and use a large bench vice to compress them. The dies are only $20 each from here:
http://www.atcomail.com/forsale/3300parts.htm
|
|
I like, I need this tool for my next project 
|
|
|
|
fieroguru
|
NOV 30, 06:35 AM
|
|
Napa crimped my A/C lines with the hand tool shown above. They charged me $5 to crimp all 4 ferrules, so that wasn't bad at all.
|
|
|
|
fieroguru
|
DEC 01, 06:14 PM
|
|
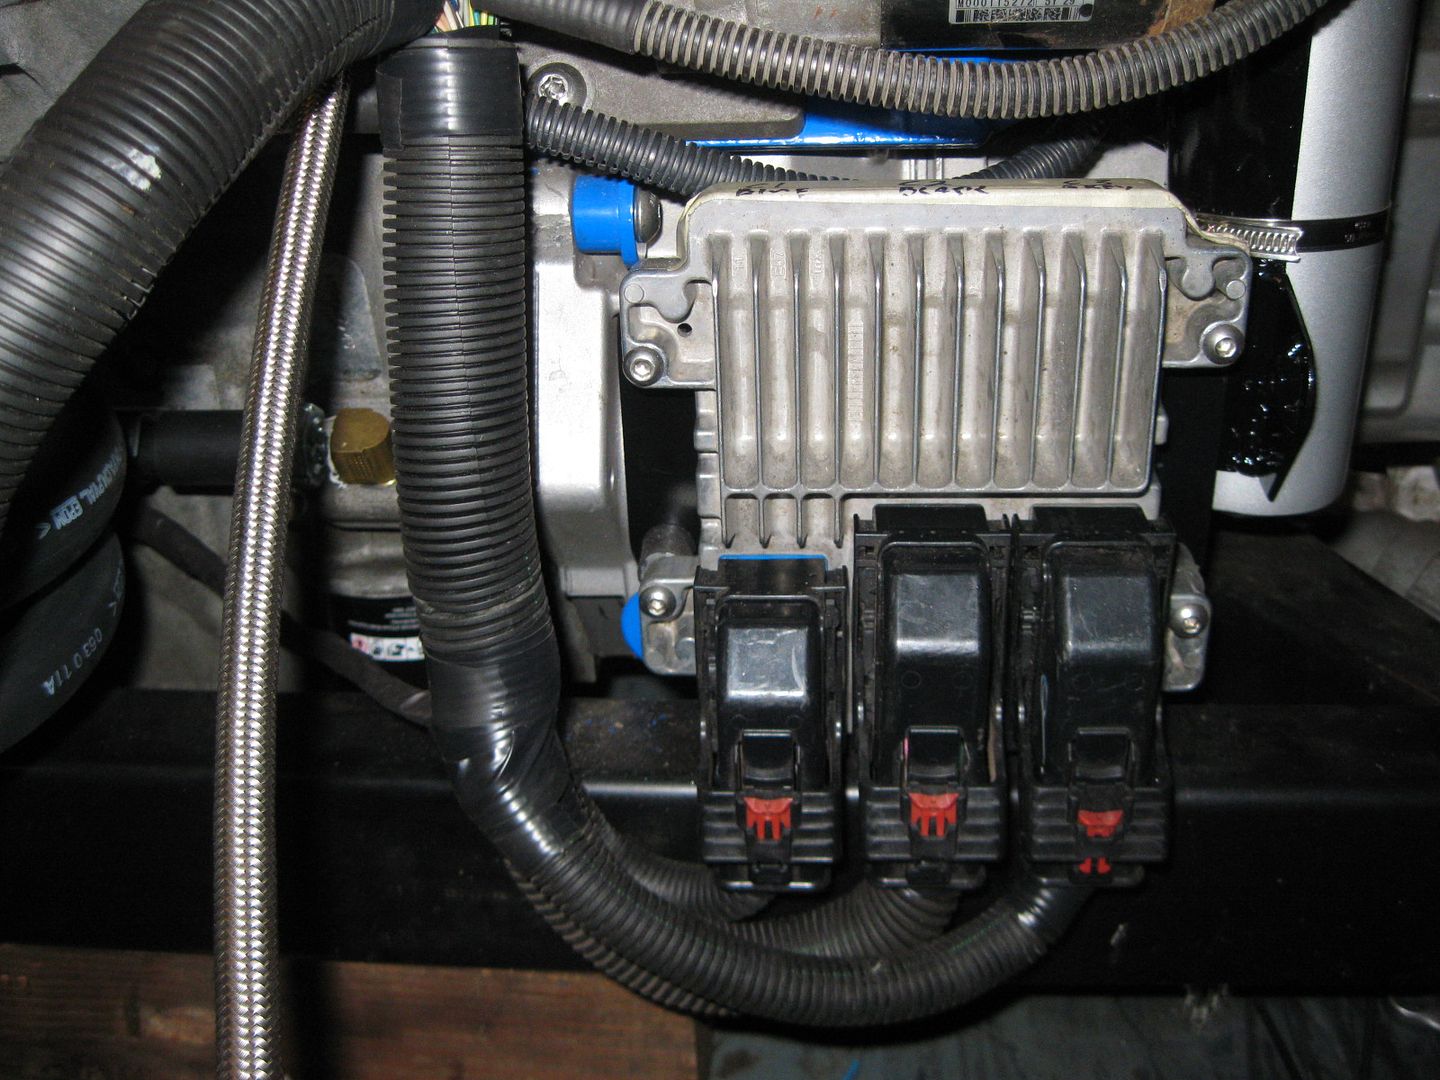
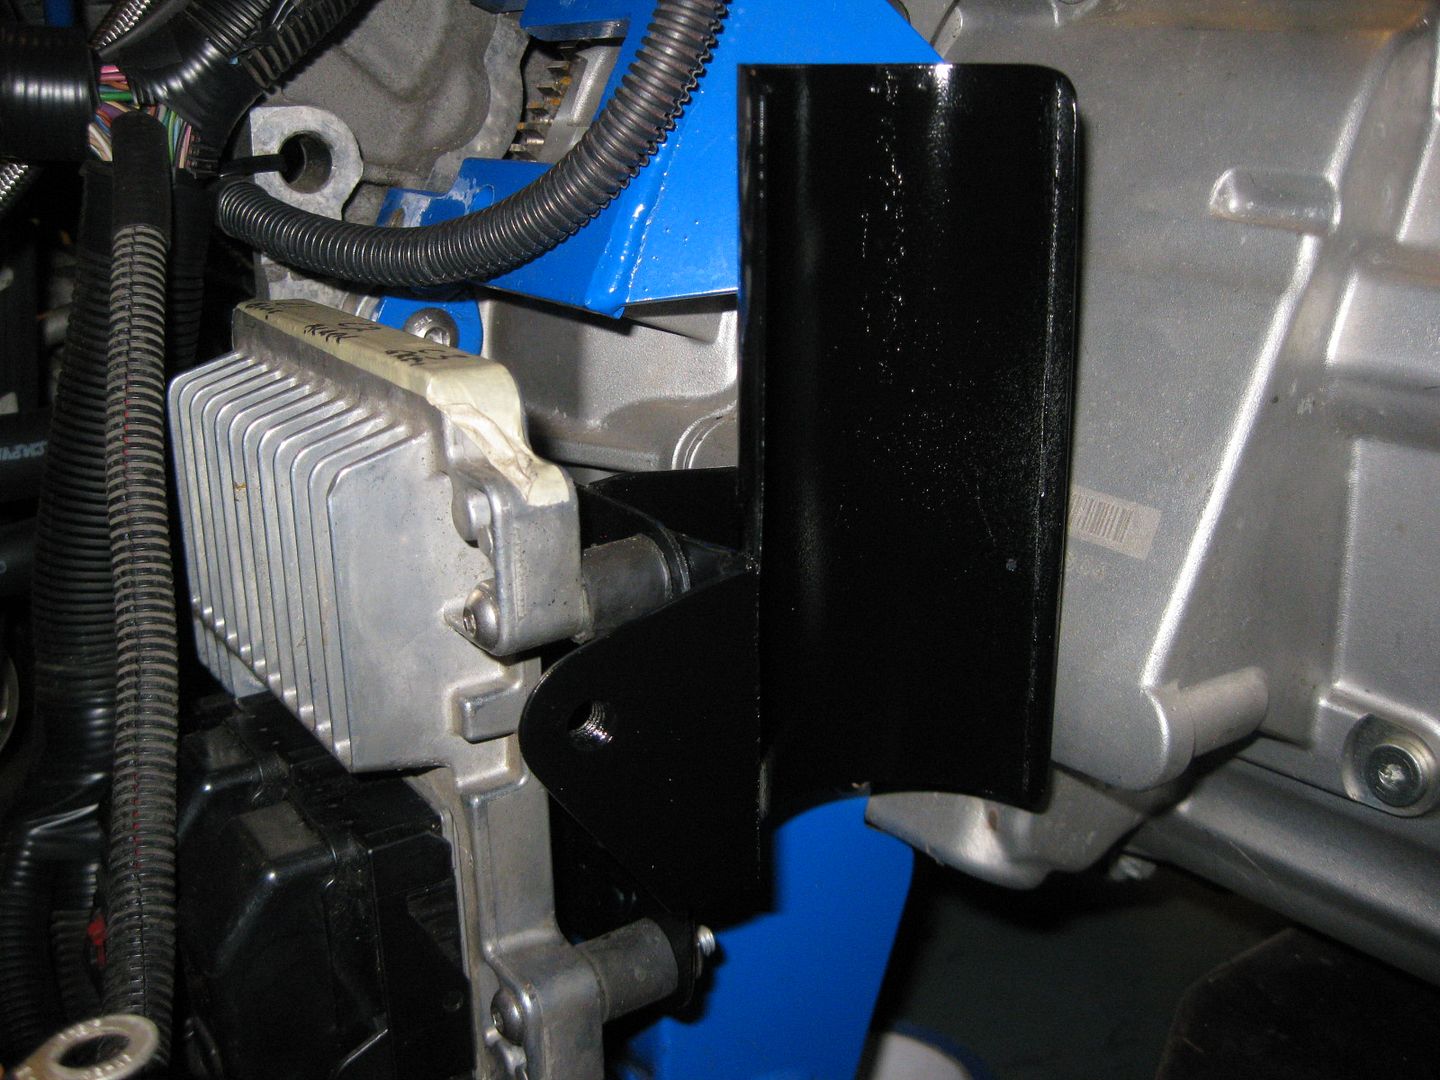
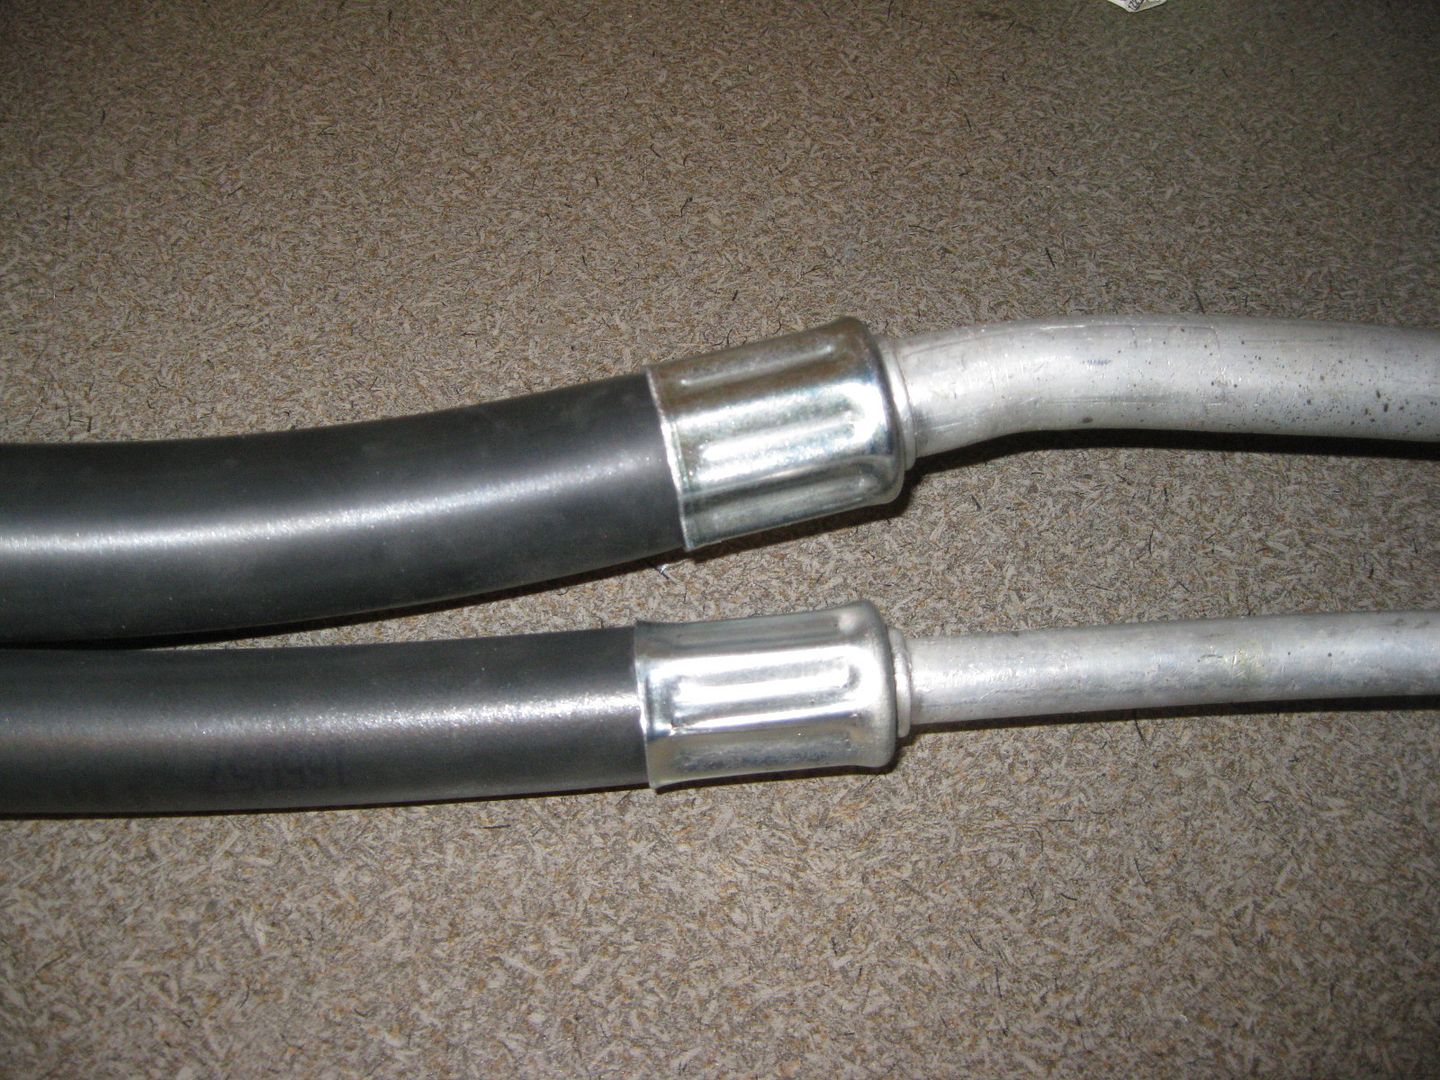
Confirmed that the A/C lines fit!
Then I cleaned up the garage in preparation of removing the engine/tranny/cradle for hopefully the last time.
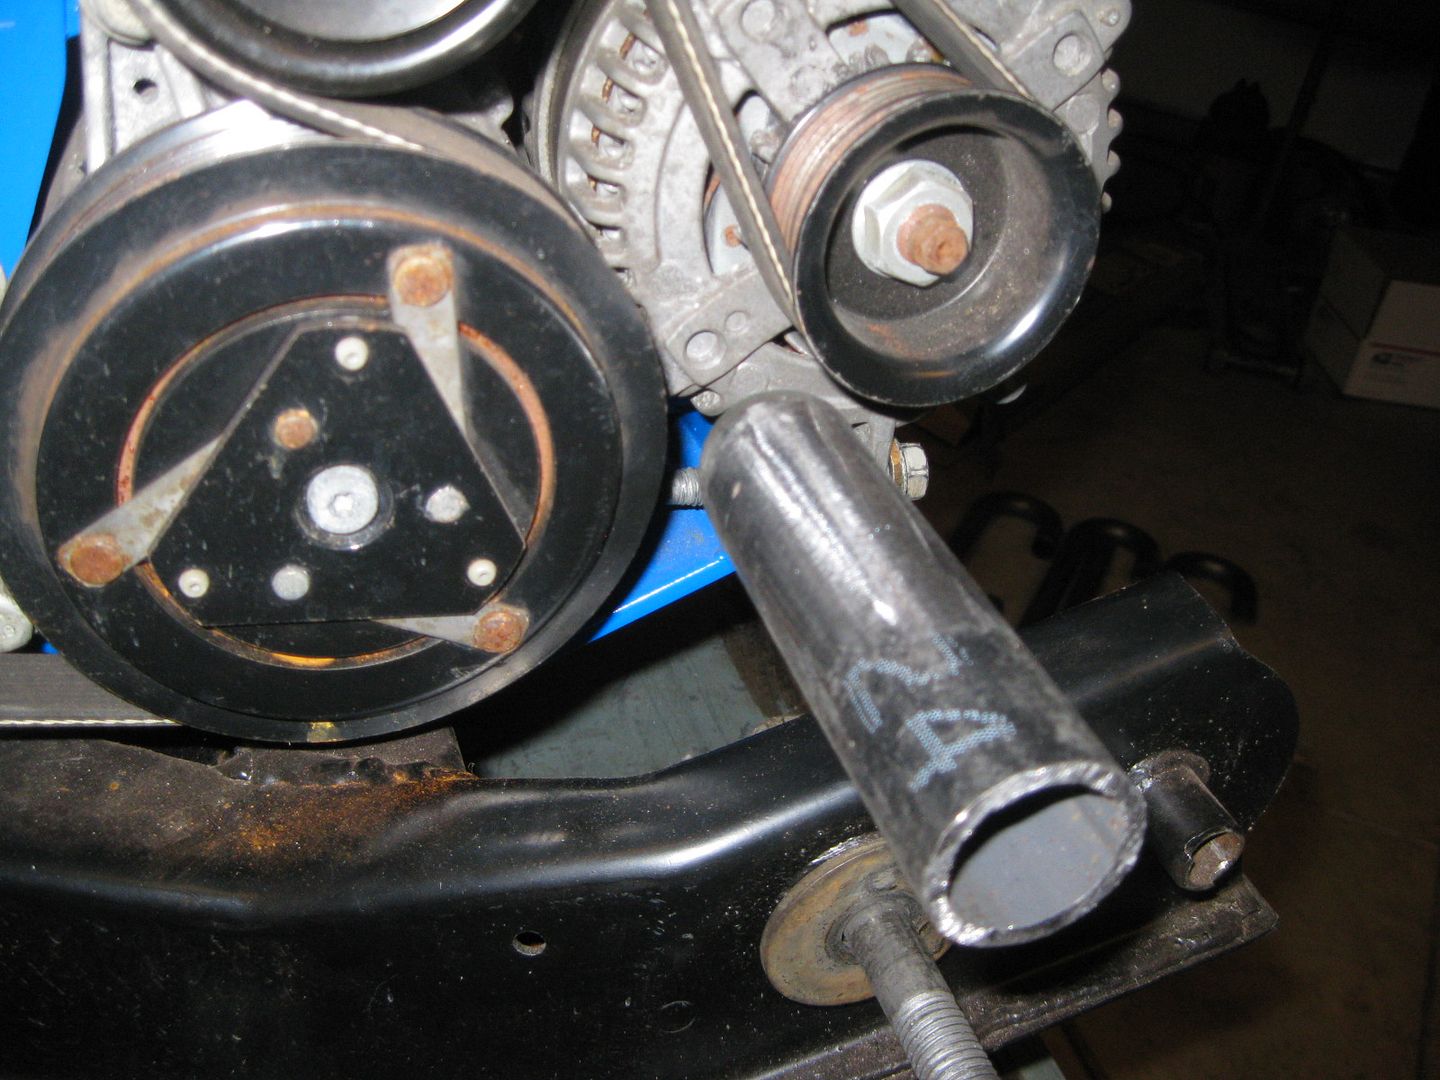
I fabbed up some guides to show where the ends of the coolant tubes need to be so I can build them on the bench vs. under the car:

Then disconnected the harness and removed it from the center console.

Once the engine/tranny/cradle is on the bench again, I will start fabbing up the coolant lines.
|
|
|
|
fieroguru
|
DEC 02, 04:49 PM
|
|
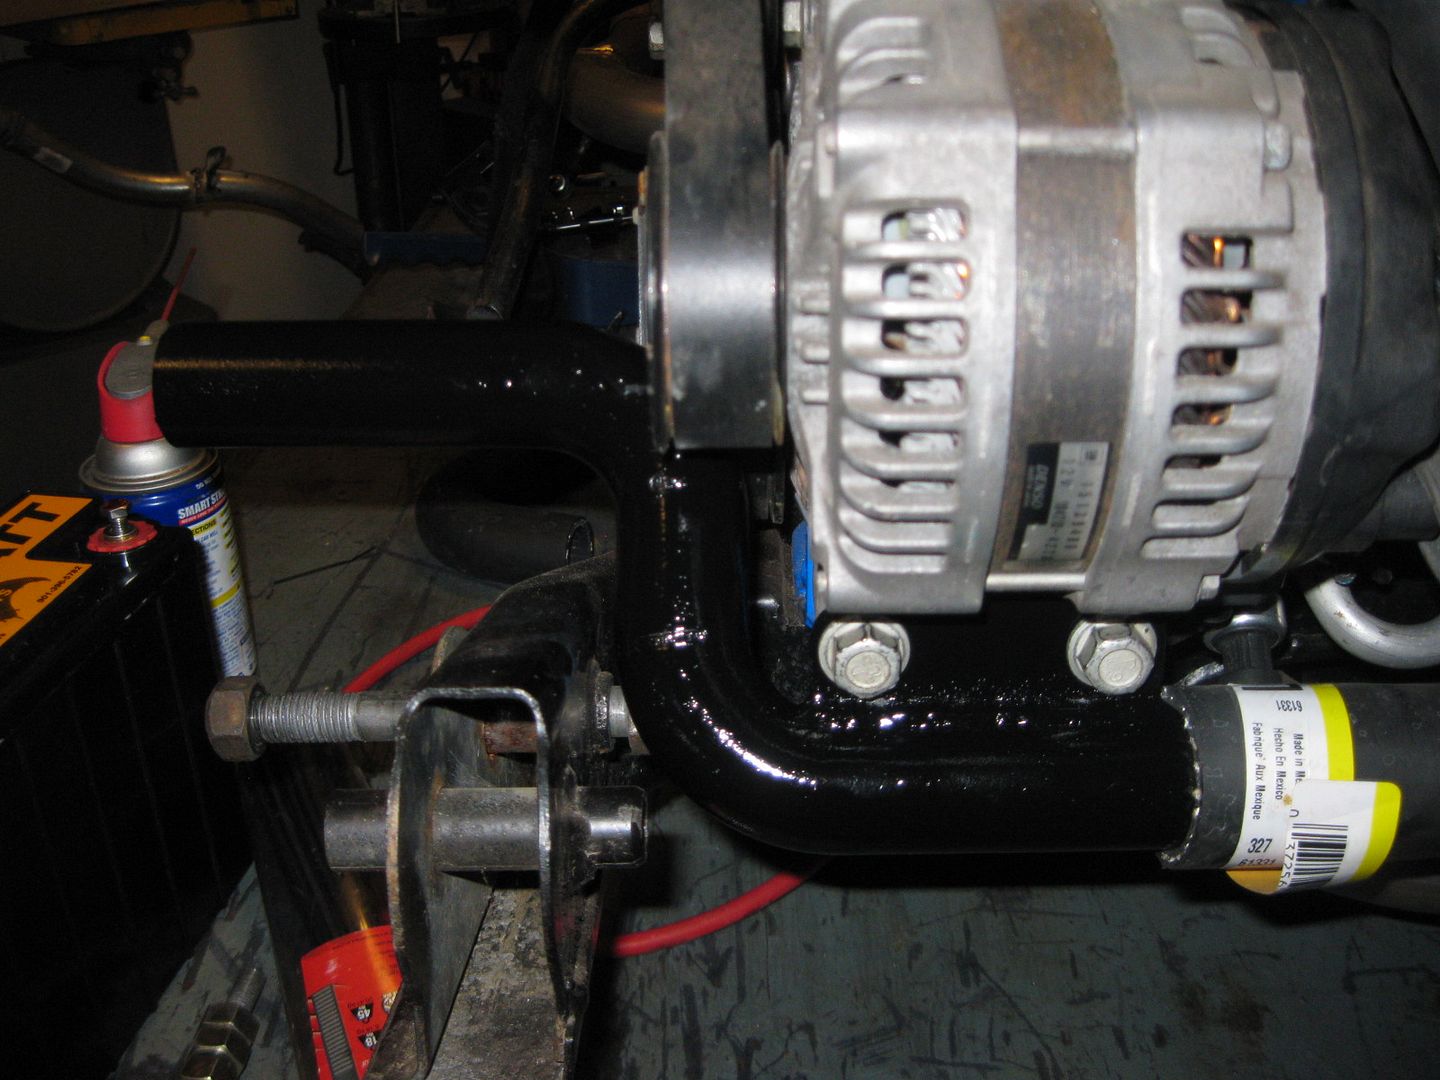
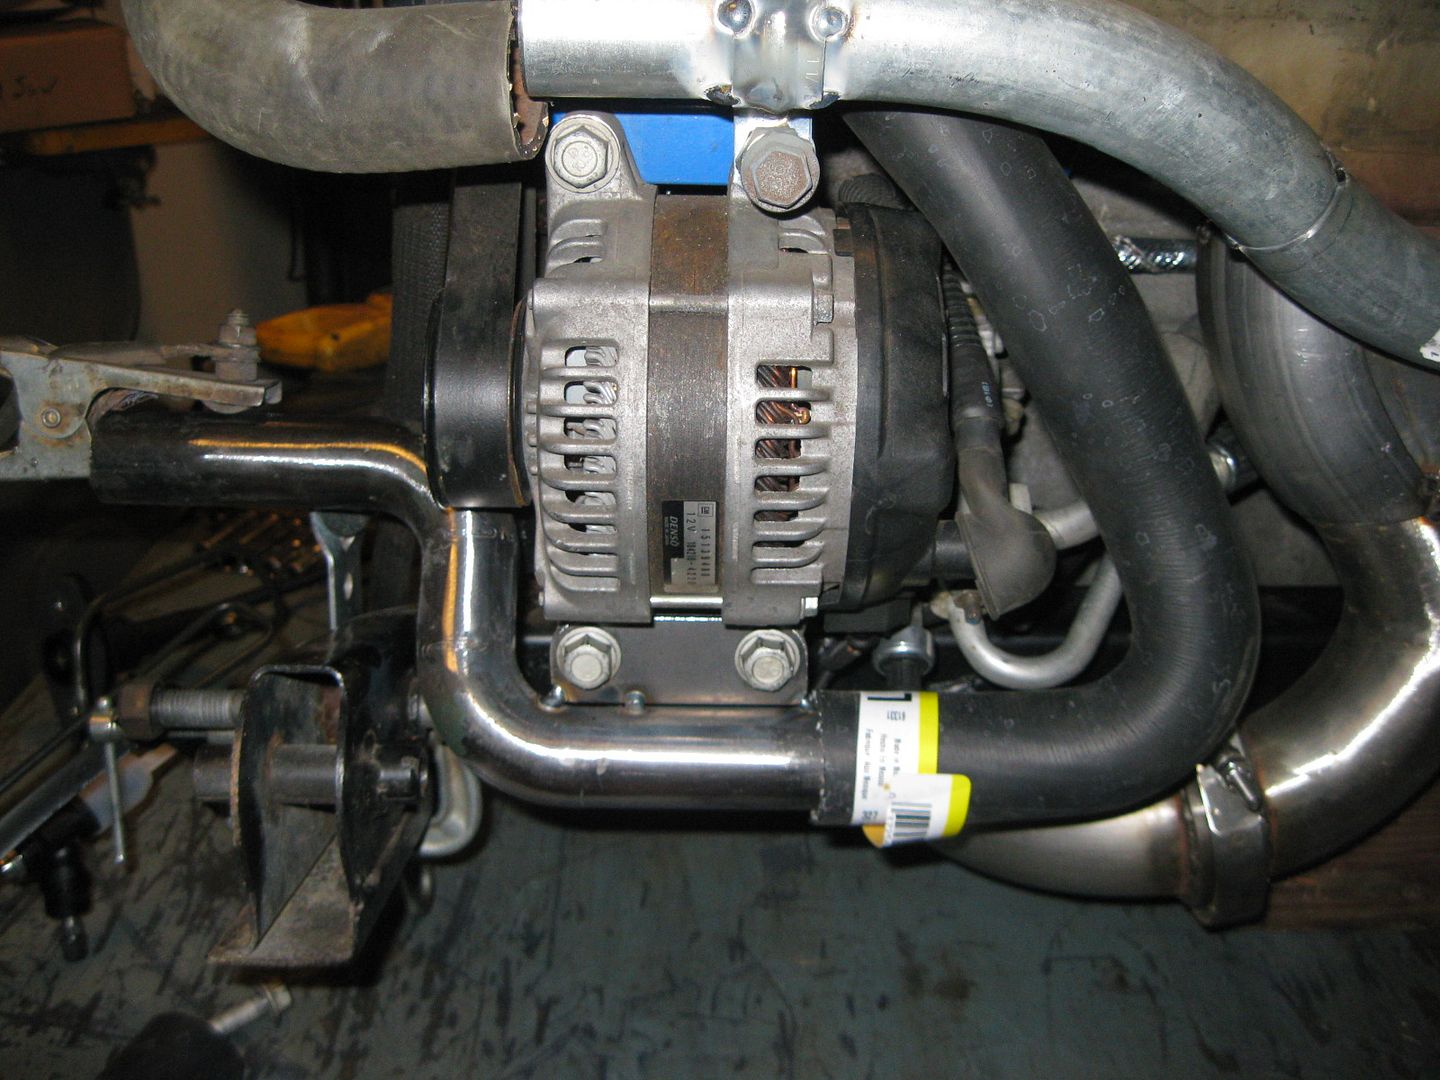
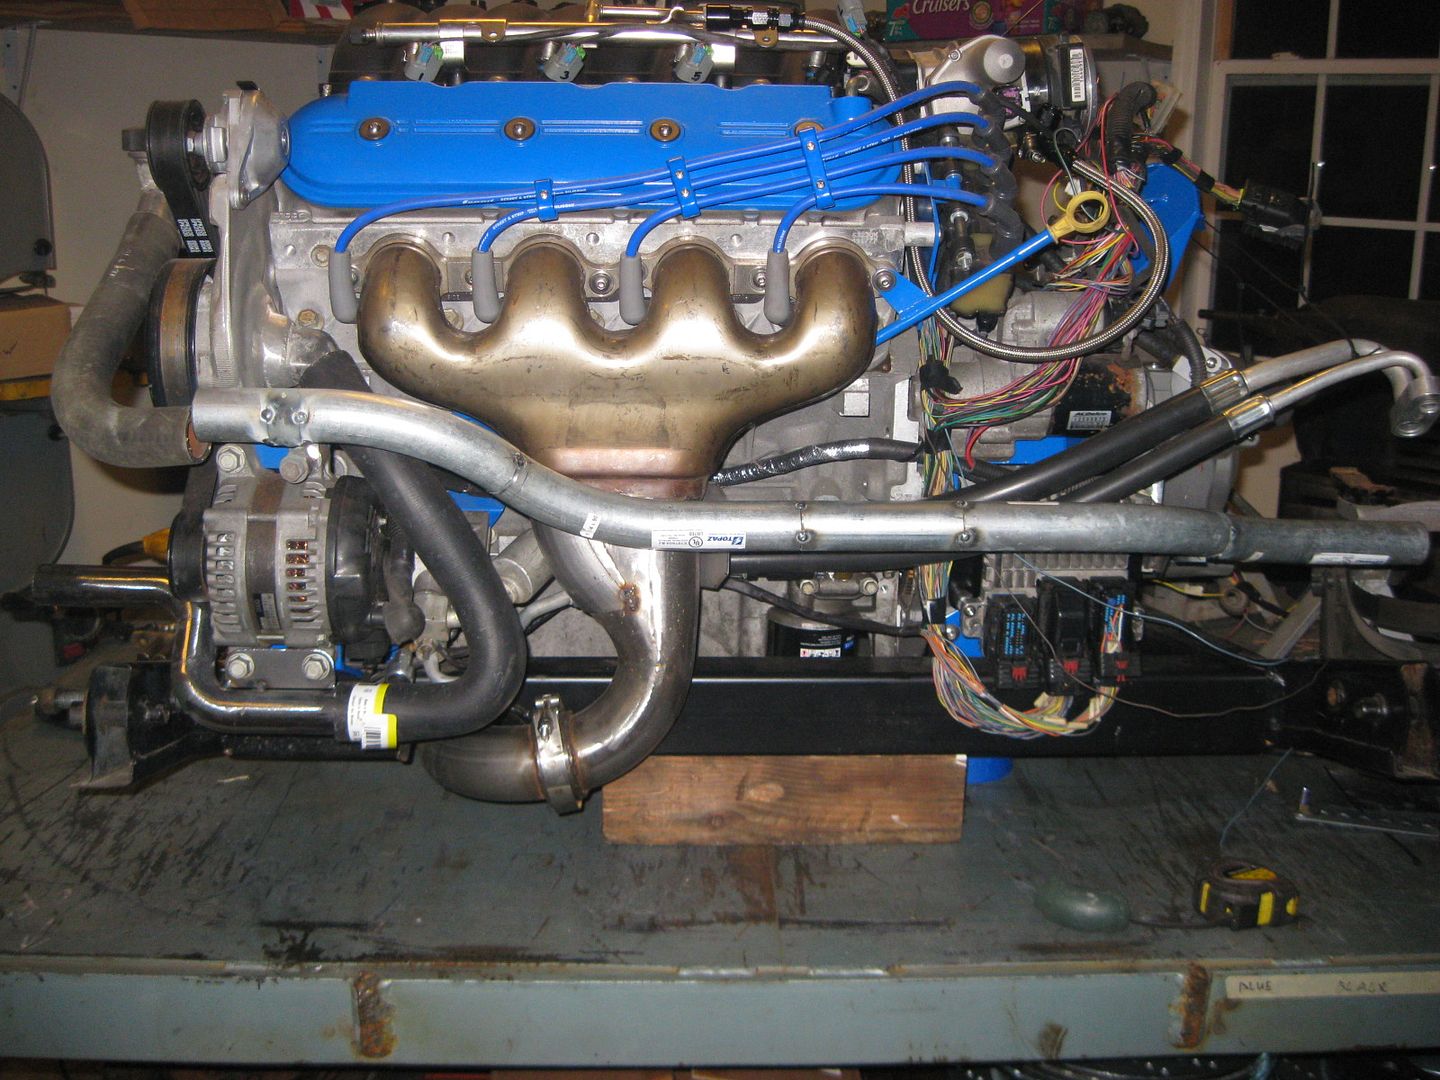
Everything is back on the bench and the crossover coolant tube is mocked up and tacked together:
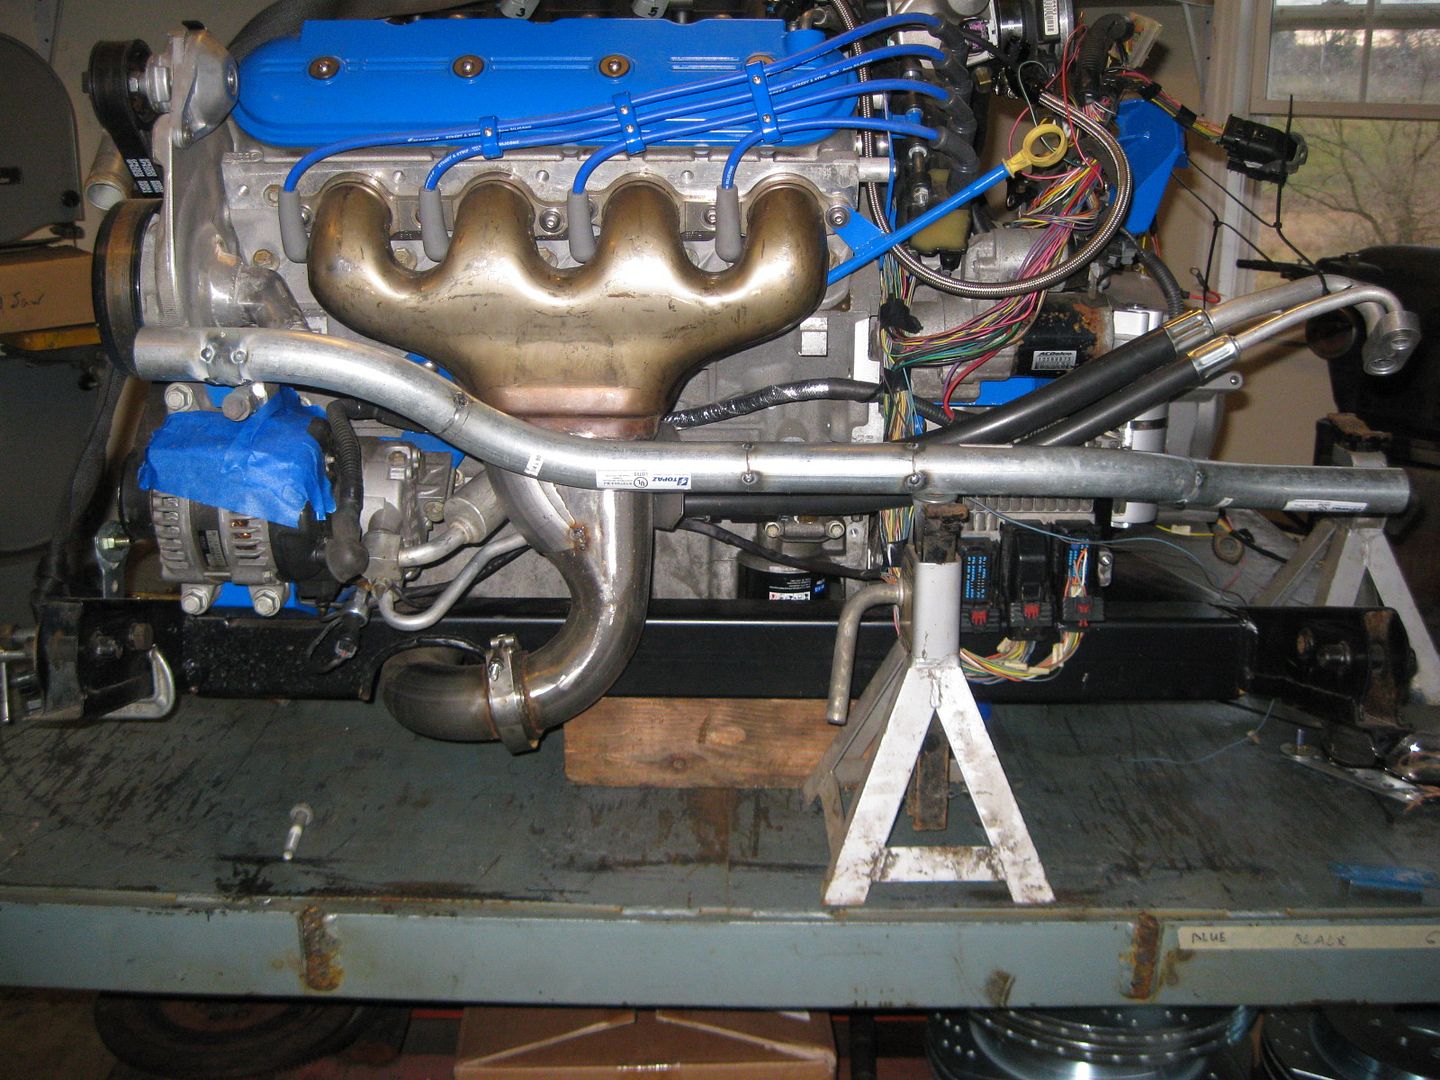
It is supported on the pulley side of the engine from a bracket off the alternator. I am fabbing up the bracket on the transmission side that will come off the catch can bracket.
This is the easy side... the other one is very tight with little room...[This message has been edited by fieroguru (edited 12-02-2012).]
|
|
|
|
fieroguru
|
DEC 03, 07:23 PM
|
|
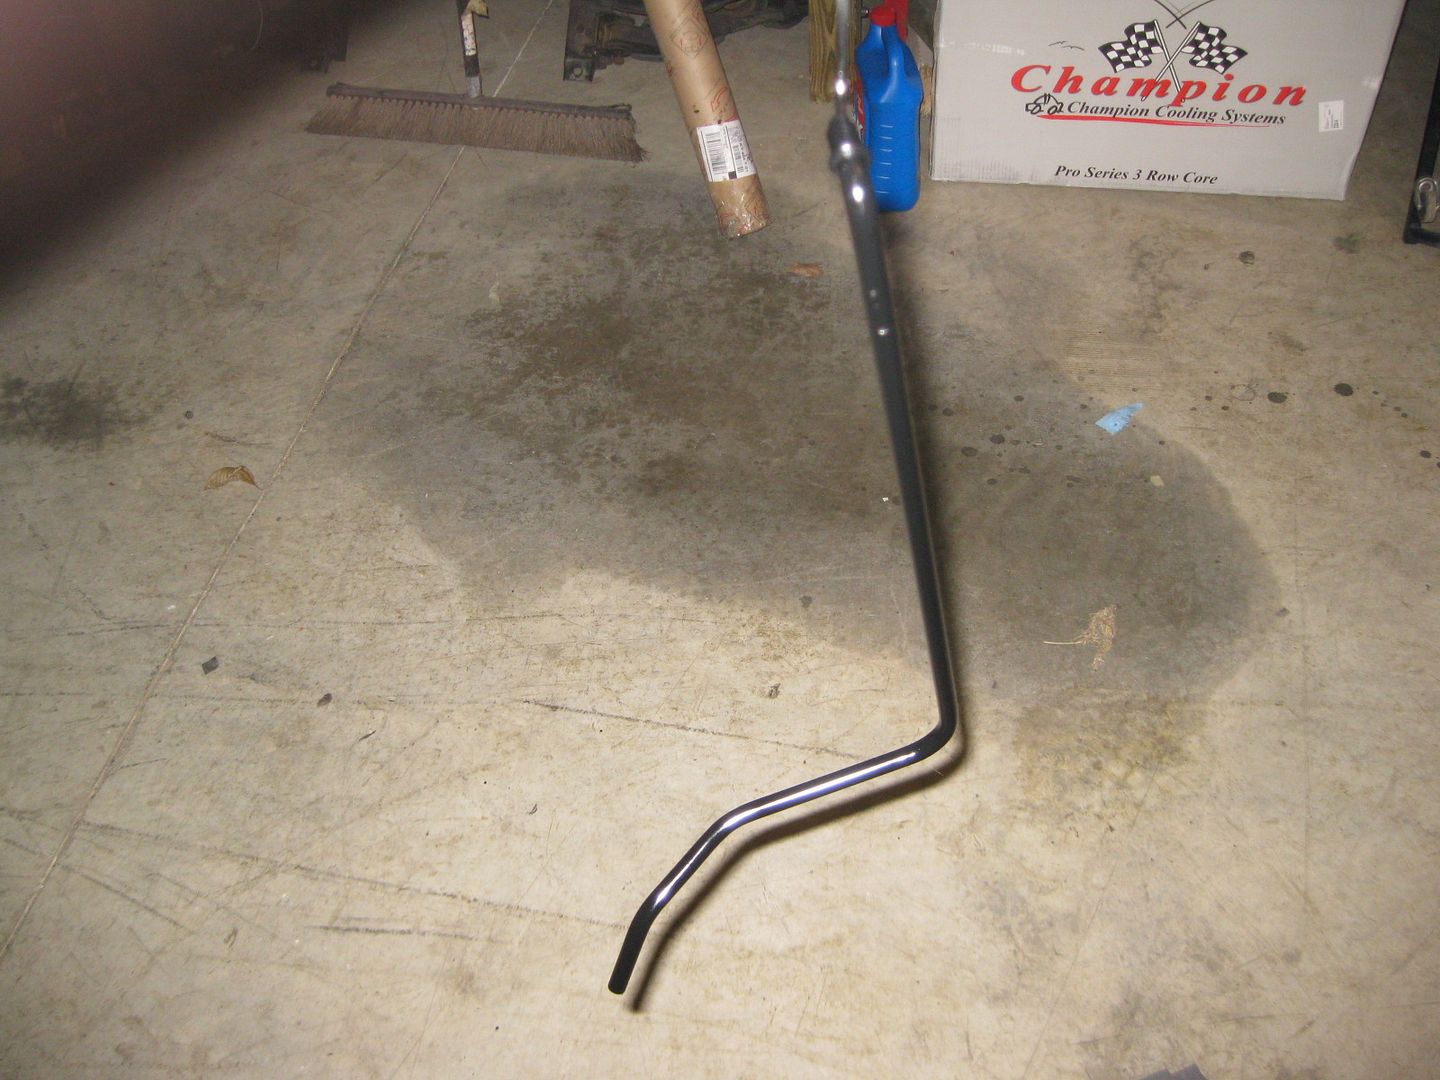
Ordered some black pipe butt-weld elbows for the passenger side coolant tube.
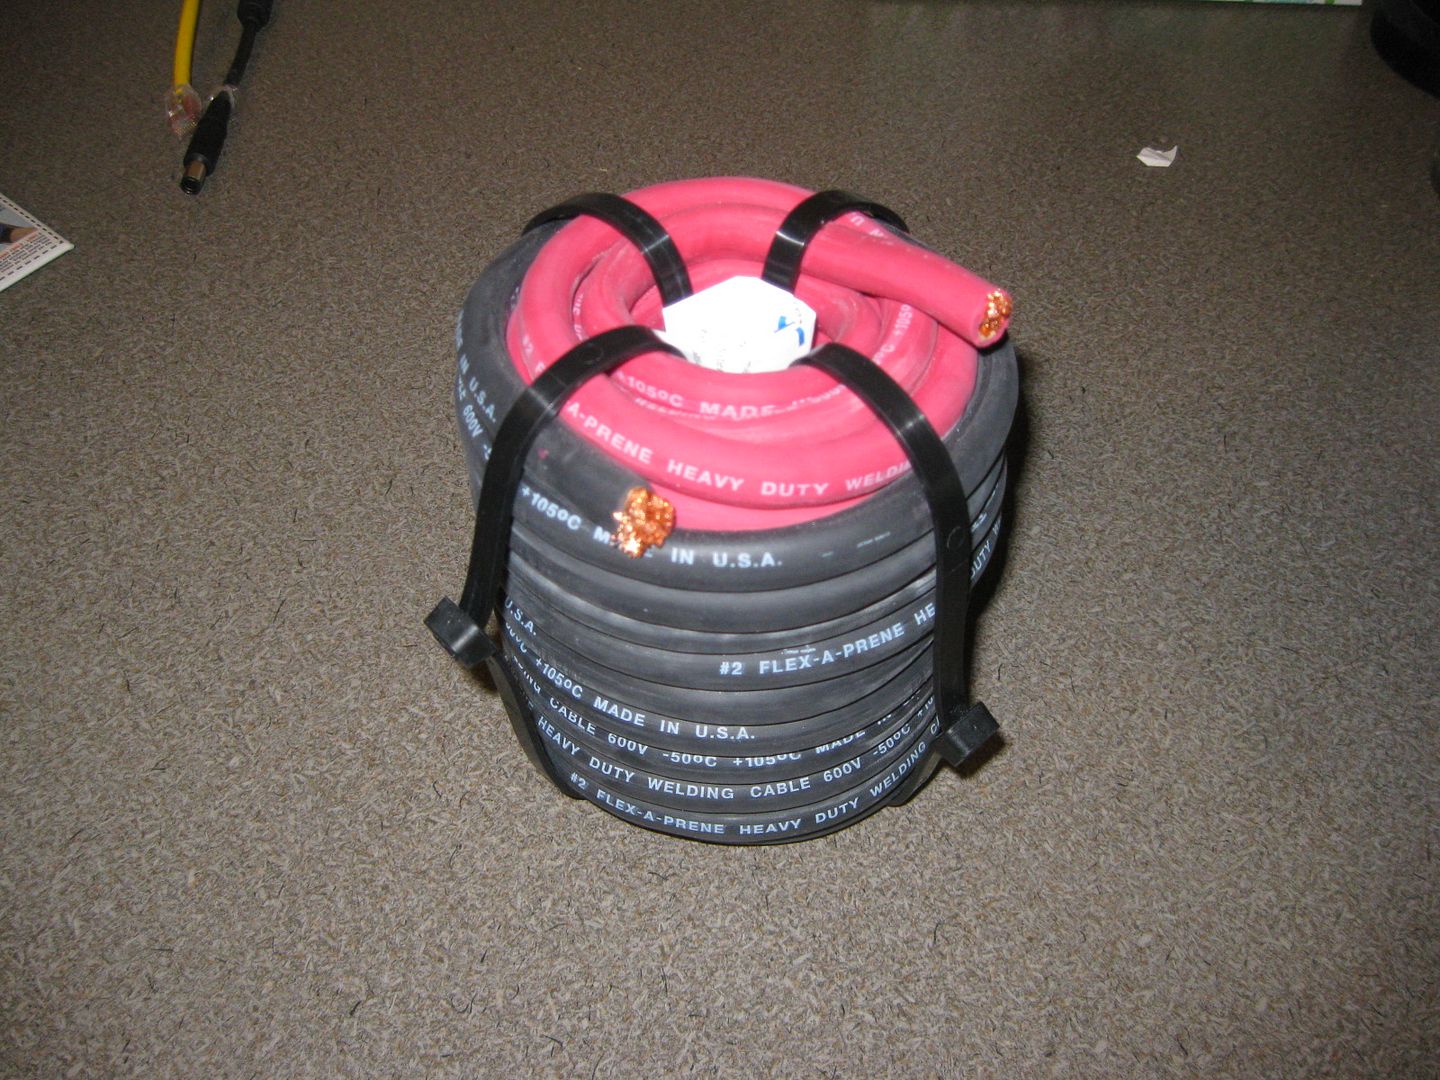
The battery relocation cables came in today. 15' of both back and red in 2ga welding wire for $66 shipped.
|
|
|
|
Bloozberry
|
DEC 05, 10:56 AM
|
|
| quote | Originally posted by fieroguru:
Napa crimped my A/C lines with the hand tool shown above. They charged me $5 to crimp all 4 ferrules, so that wasn't bad at all.
|
|
I never even knew those ferrules were available, much less crimpable at NAPA or even at home. Learn a new thing everyday. 
|
|
|
|
fieroguru
|
DEC 05, 06:32 PM
|
|
| quote | Originally posted by Bloozberry:
I never even knew those ferrules were available, much less crimpable at NAPA or even at home. Learn a new thing everyday.
|
|
Yeah, I didn't know they were available either until a few months ago. It was a fun search once I came across them to figure out what I wanted/needed and then how to get them crimped. Once this car is running and I have more available funds, I will buy the hand crimper and add it to the collection. Napa only charged me $5 to do all 4 crimps![This message has been edited by fieroguru (edited 12-05-2012).]
|
|
|
|
fieroguru
|
DEC 05, 06:36 PM
|
|
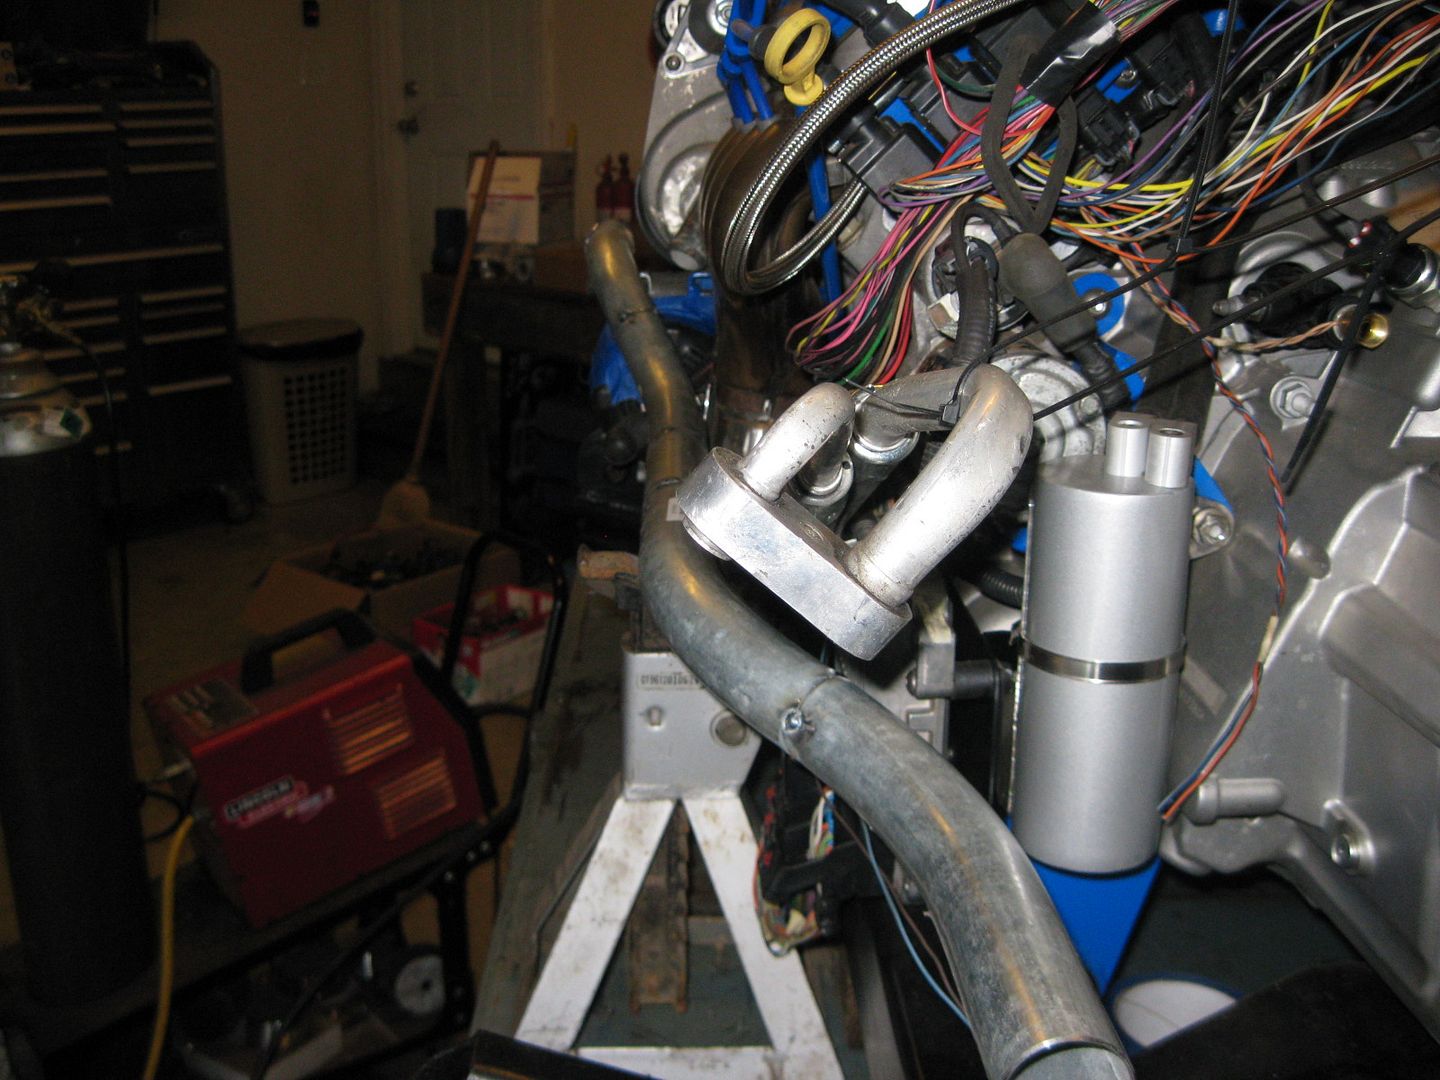
I think the passenger side coolant tube is figured out.
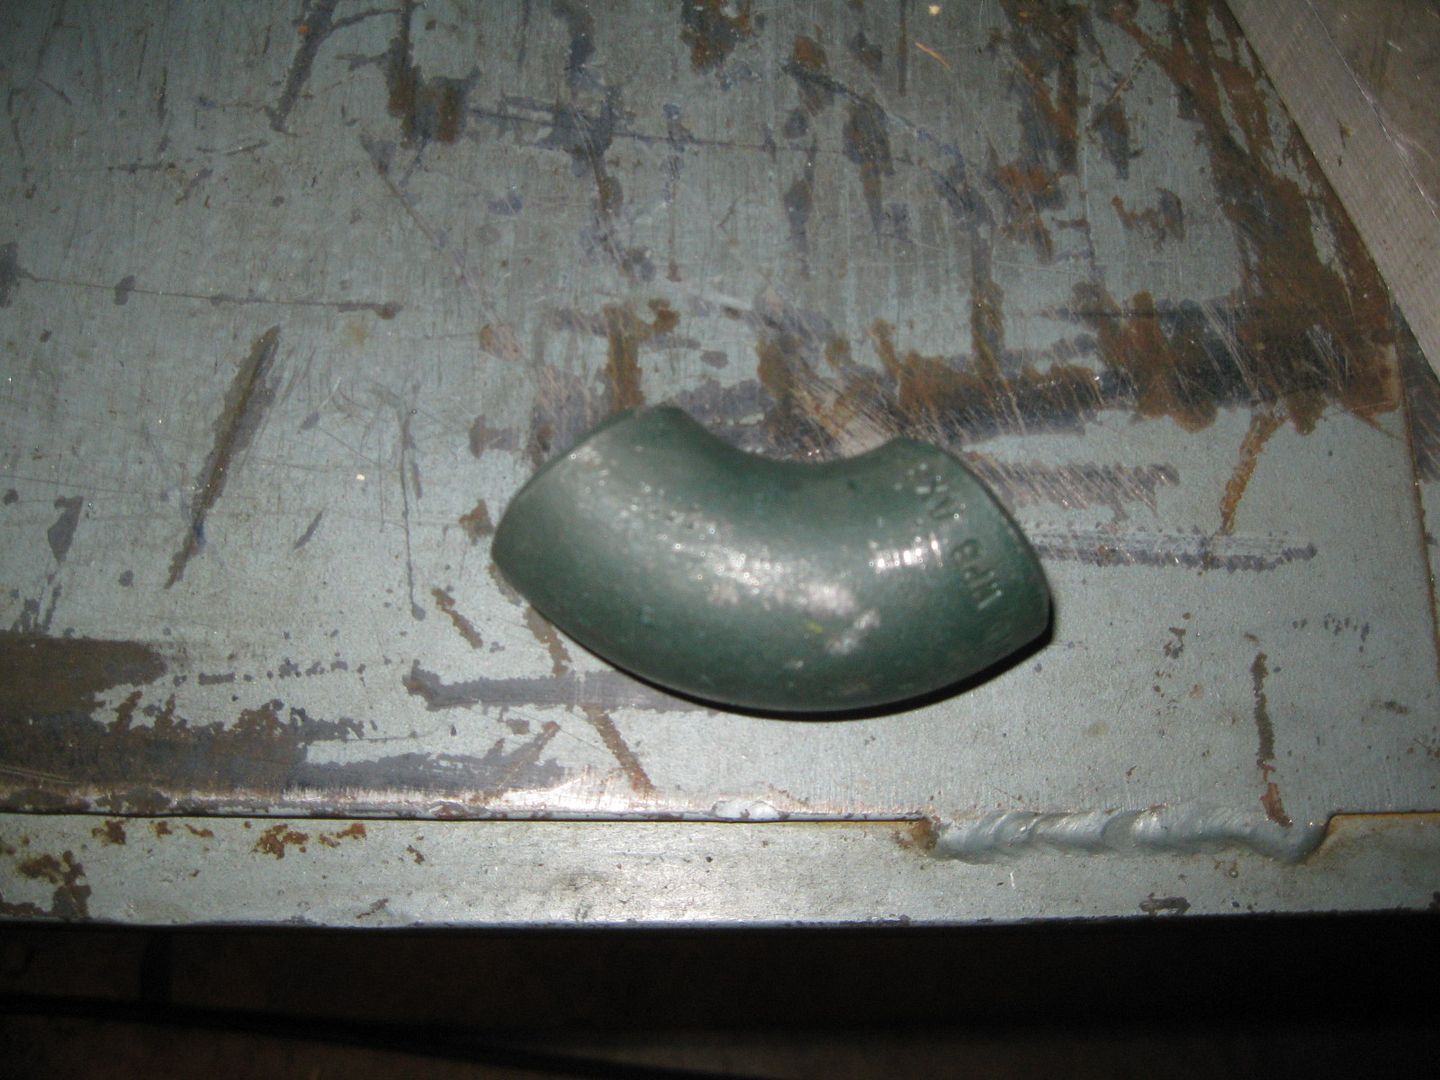
1" Schedule 40 black pipe is the perfect size for the fiero coolant hoses, so I ordered some butt-weld 90's to start with like this:
Then I just pieced them as well as some sections of pipe together and came up with this:
Just need to weld on the mounting tab (it is just tacked in place).
|
|
|
|
fieroguru
|
DEC 06, 06:43 PM
|
|
Battery showed up today!
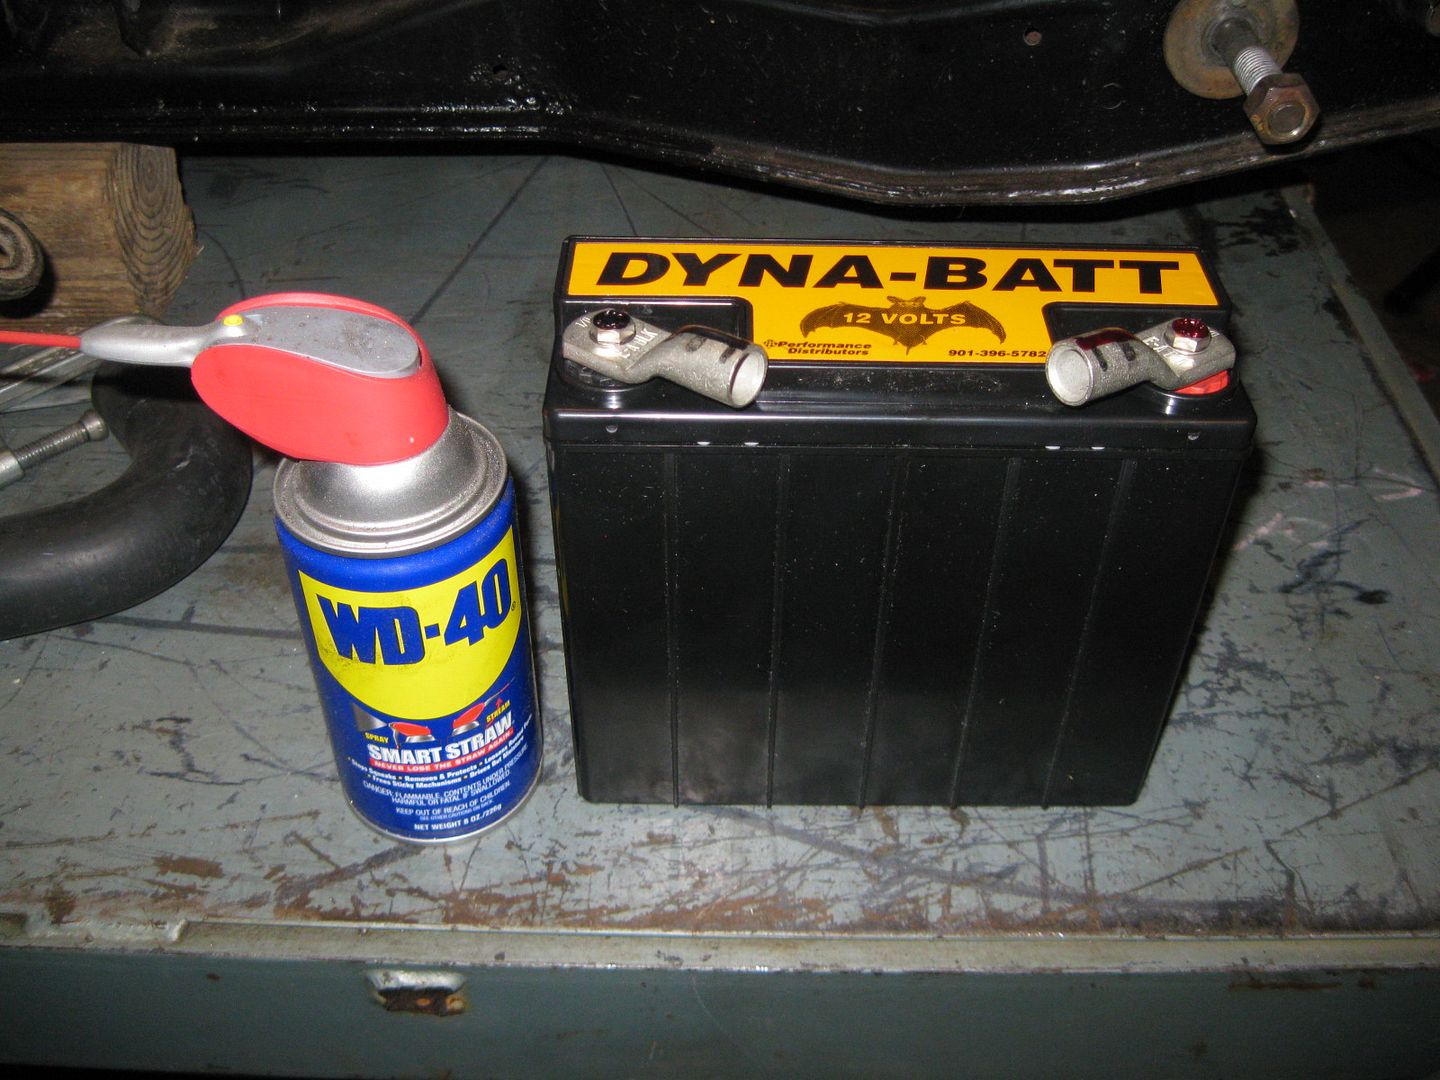
Here is one of the places I am thinking about mounting it. Easily accessible but out of the way. It is a dry cell battery, so I might be able to bolt it under the sheet metal and over the fascia edge below the passenger head light:
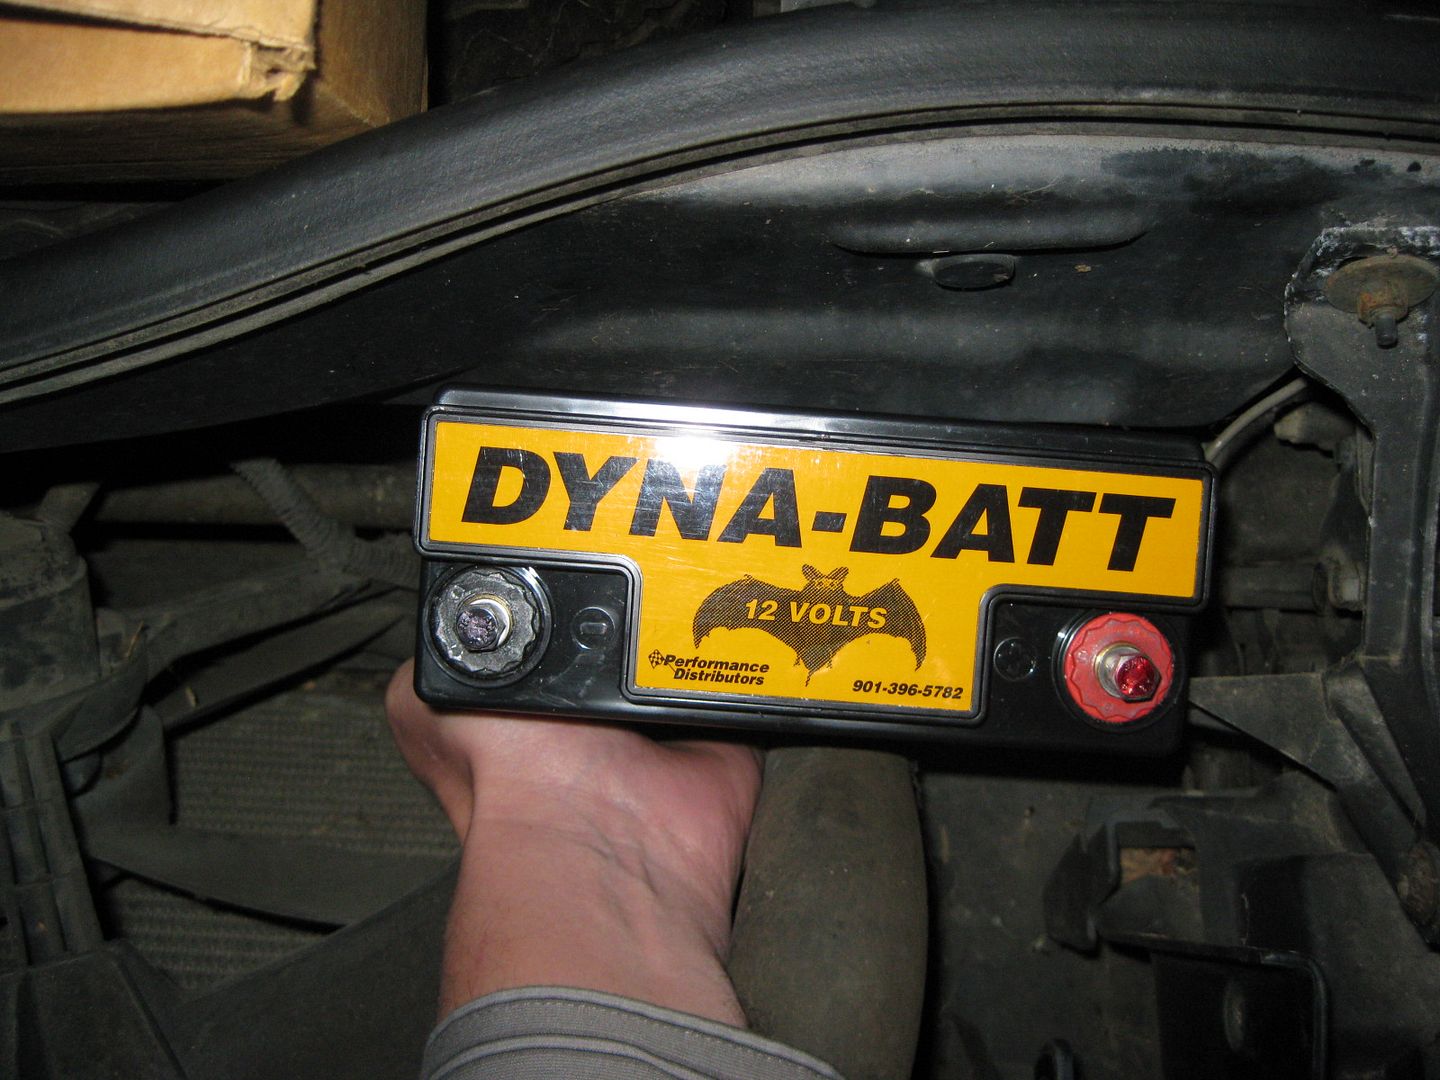
This weekend I will throw some cables together and try to crank over the engine. With it having a gear reduction starter, I don't think spinning the engine will be any issue, but it would be nice to "know" before I bolt the battery down.
|
|
|
|
fieroguru
|
DEC 08, 06:42 PM
|
|
|
|