|
| Ferrari 288GTO build (Page 52/64) |

|
shemdogg
|
MAY 10, 08:23 PM
|
|
Literally drooling! Cant wait to see it together. Must feel great to get to this stage congrats man almost there! Never get to really appreciate all the work we do till we see some major results like paint. Well done sir!
shem
|
|
|
|
Trinten
|
MAY 11, 11:47 AM
|
|
Wow Wayne,
You have A LOT going on here!
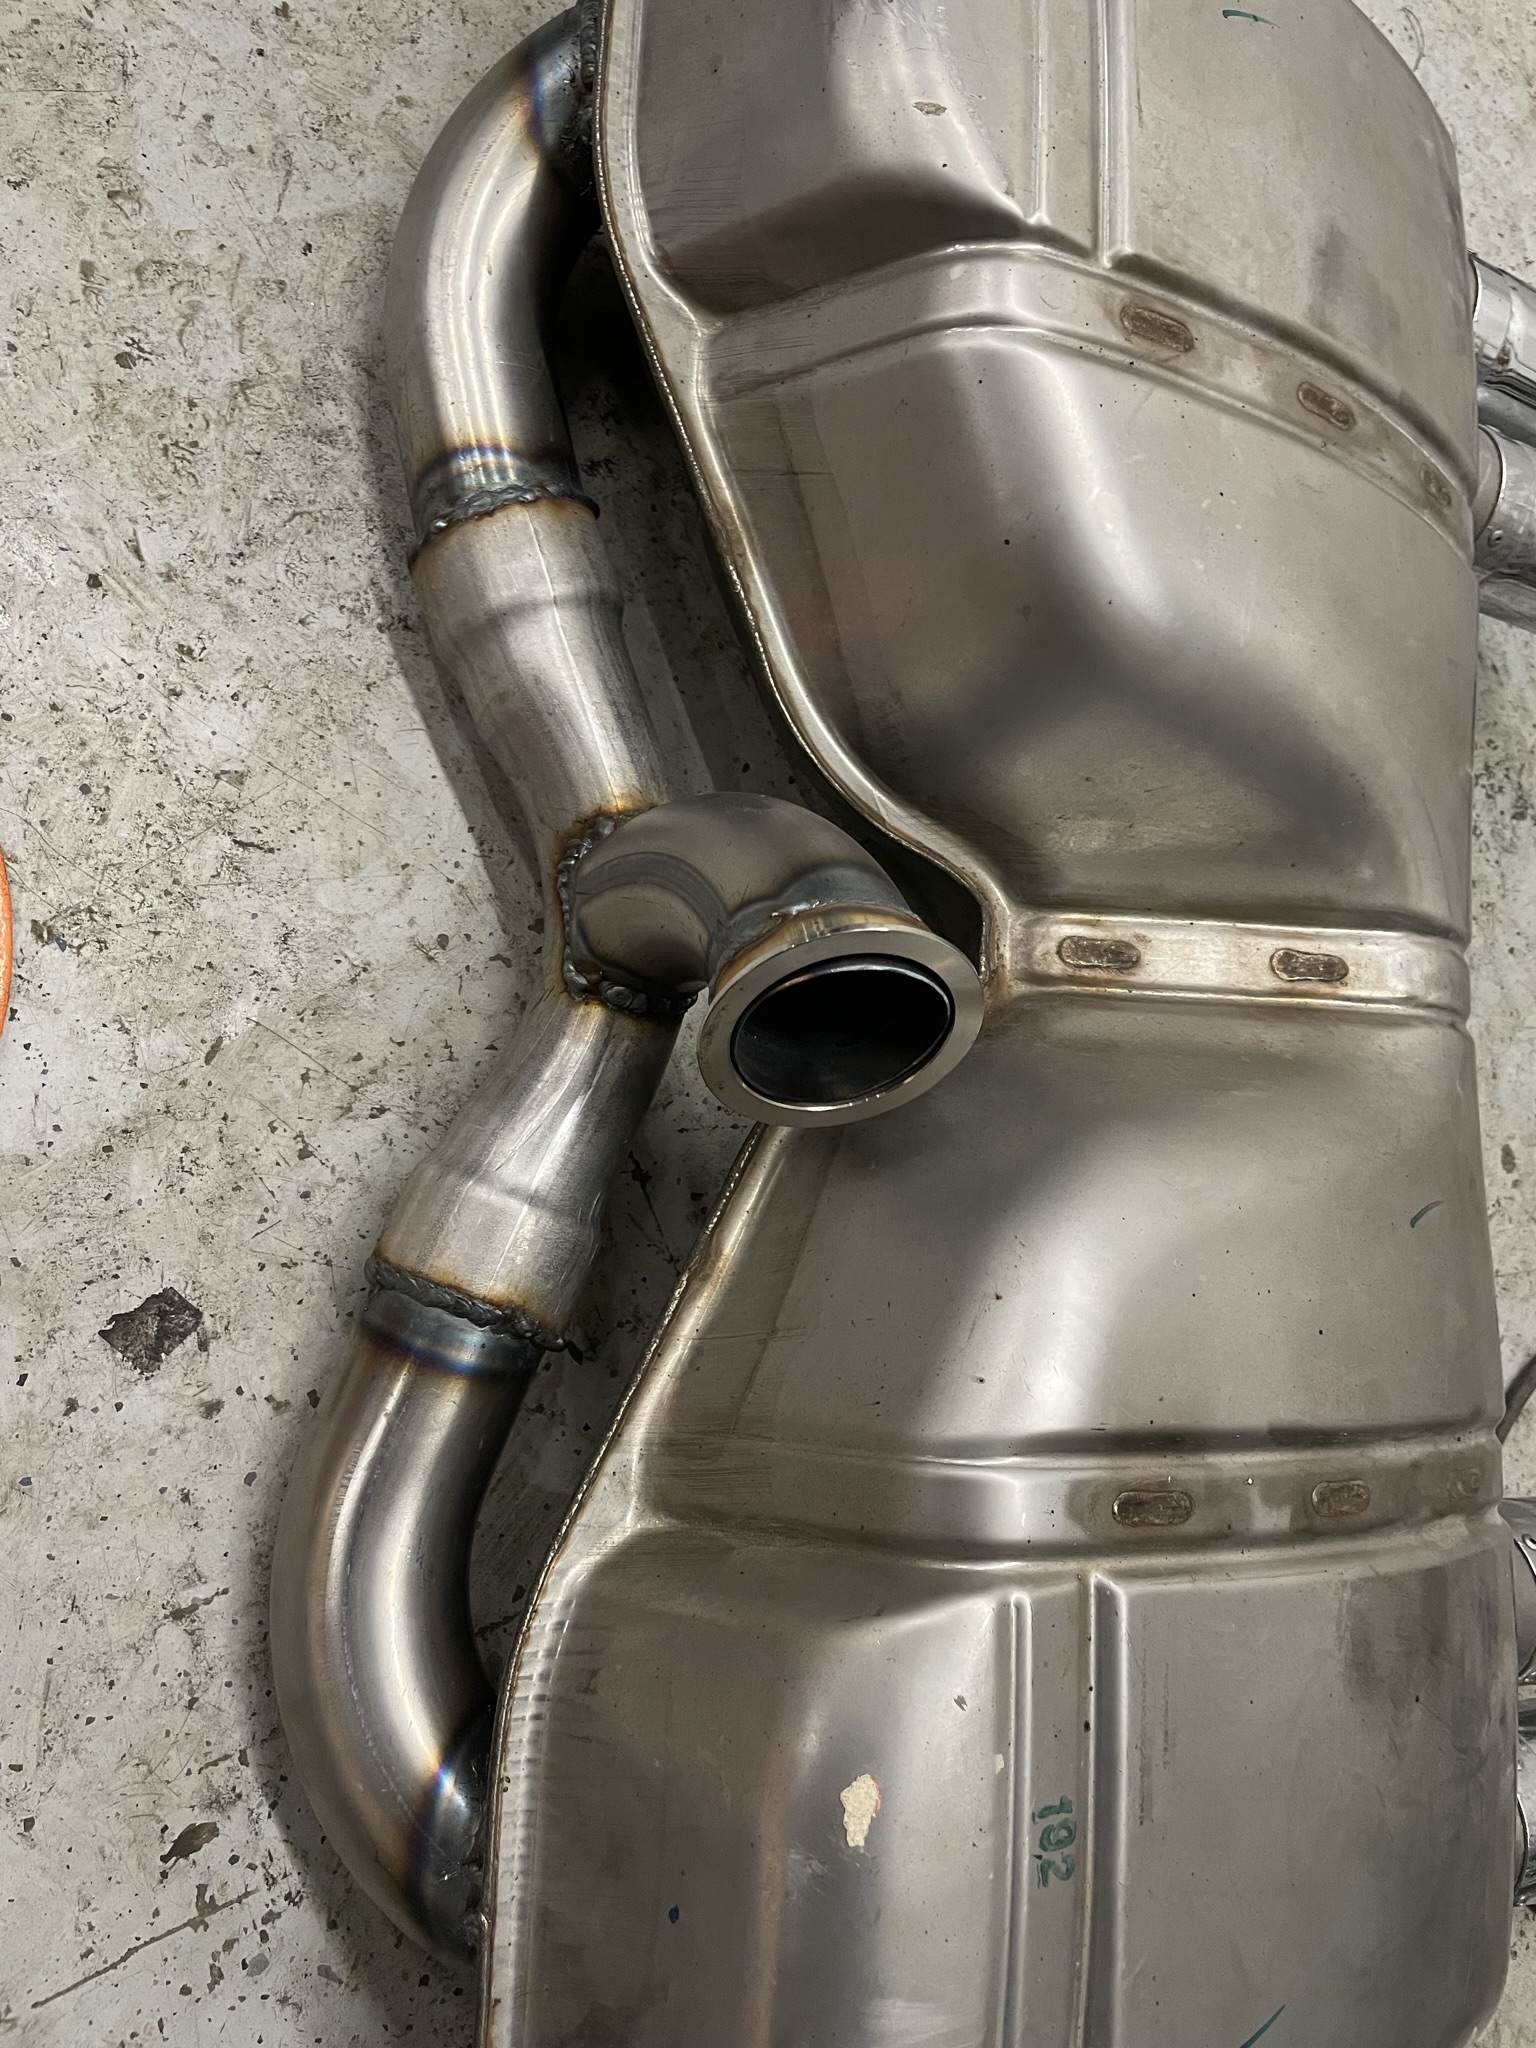
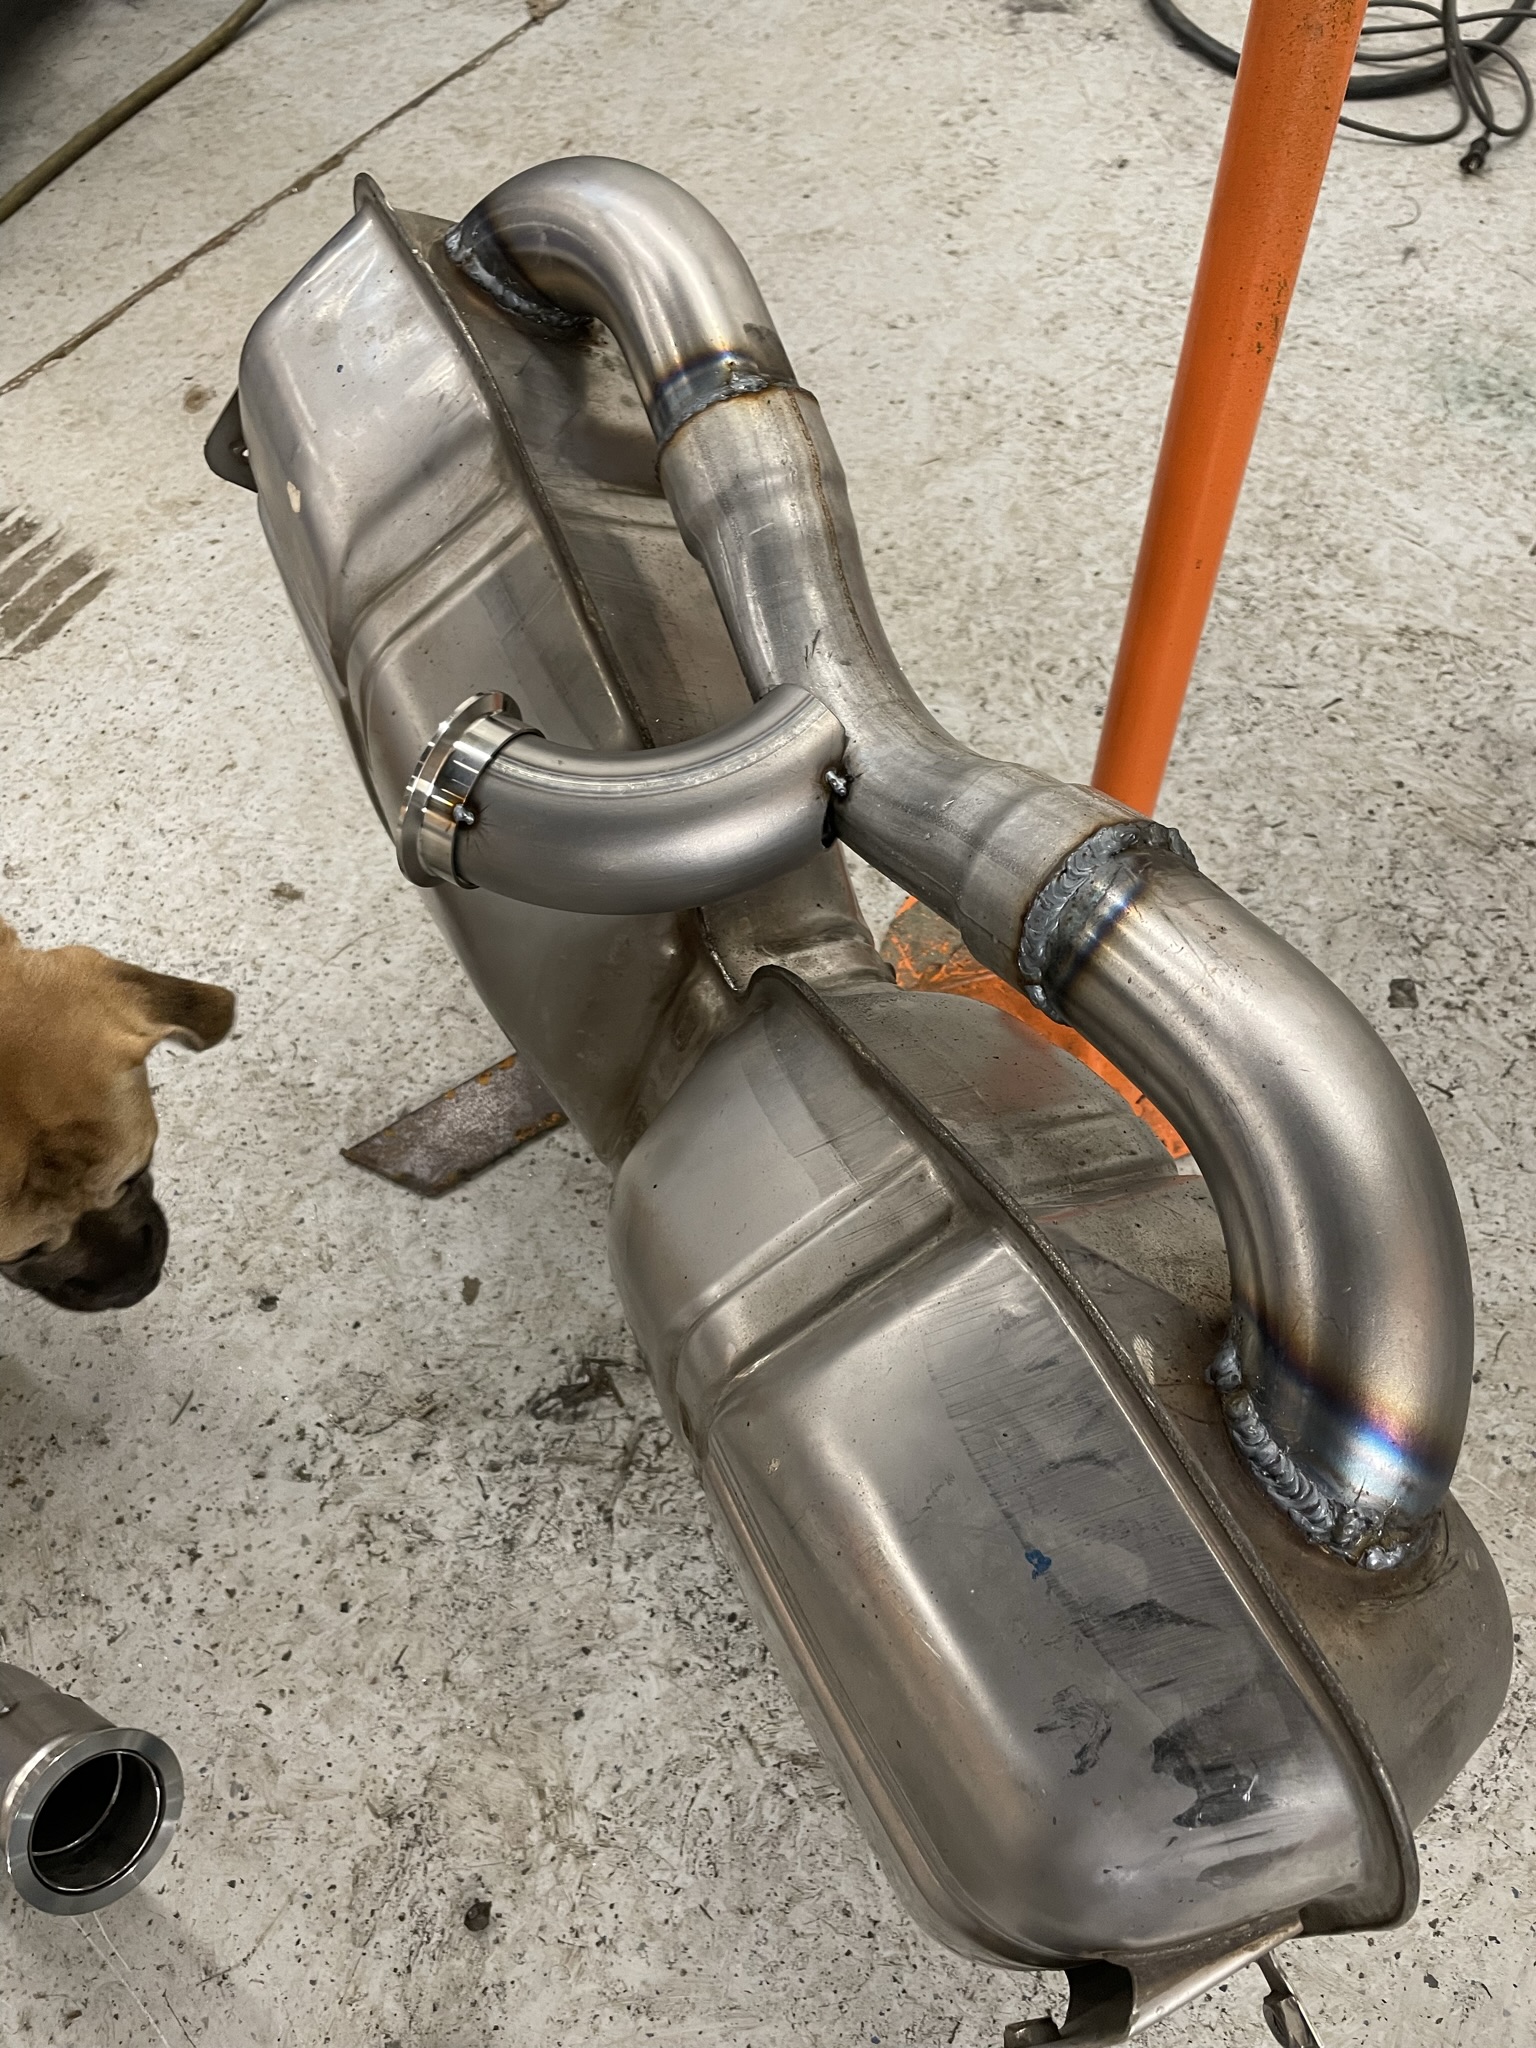
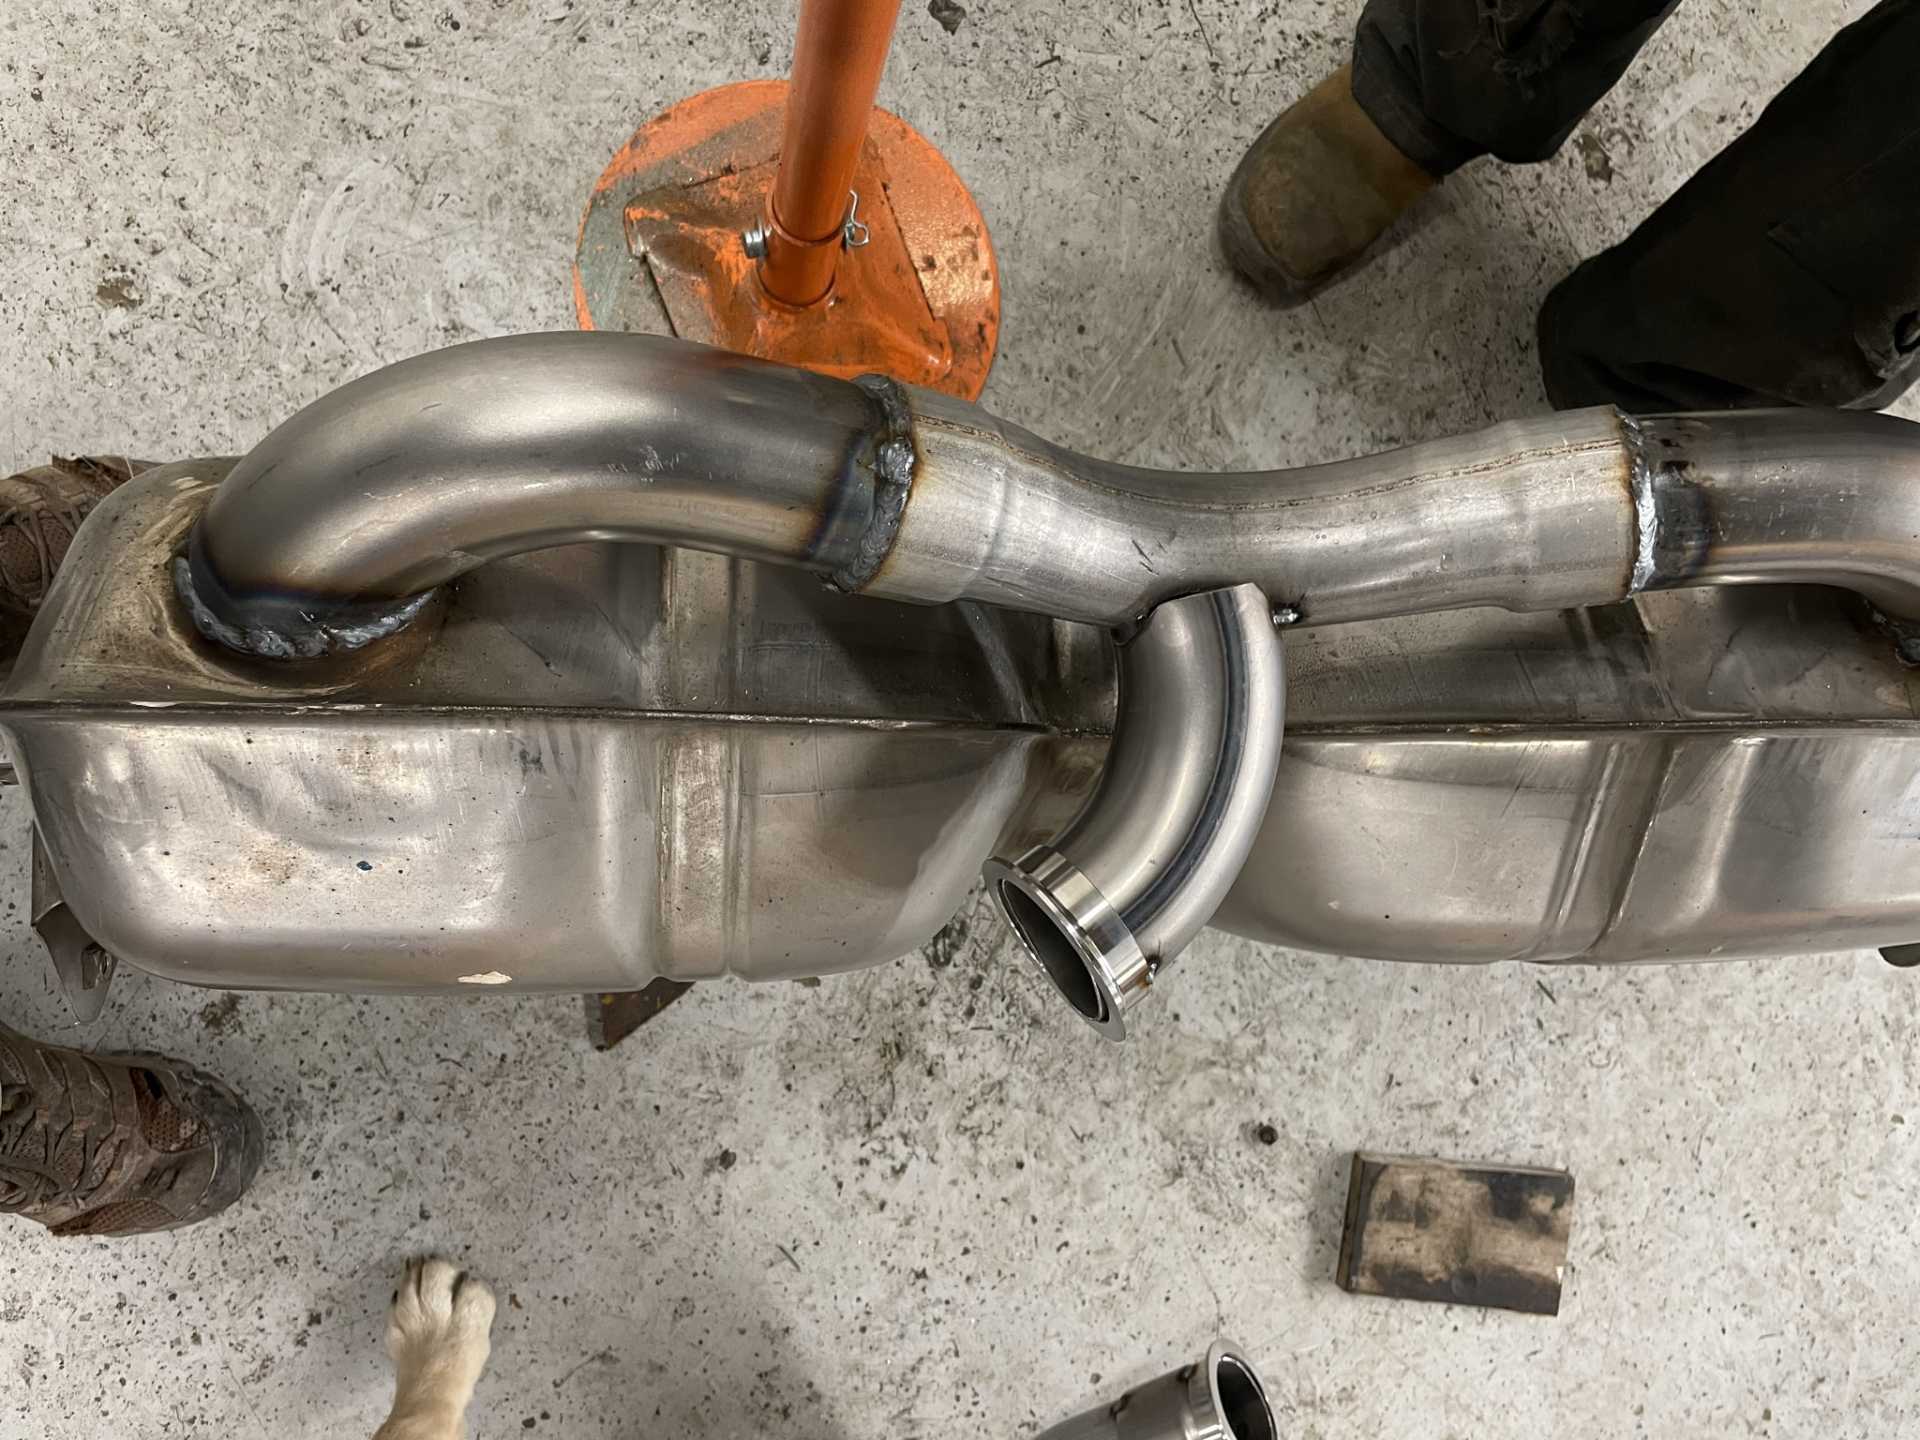
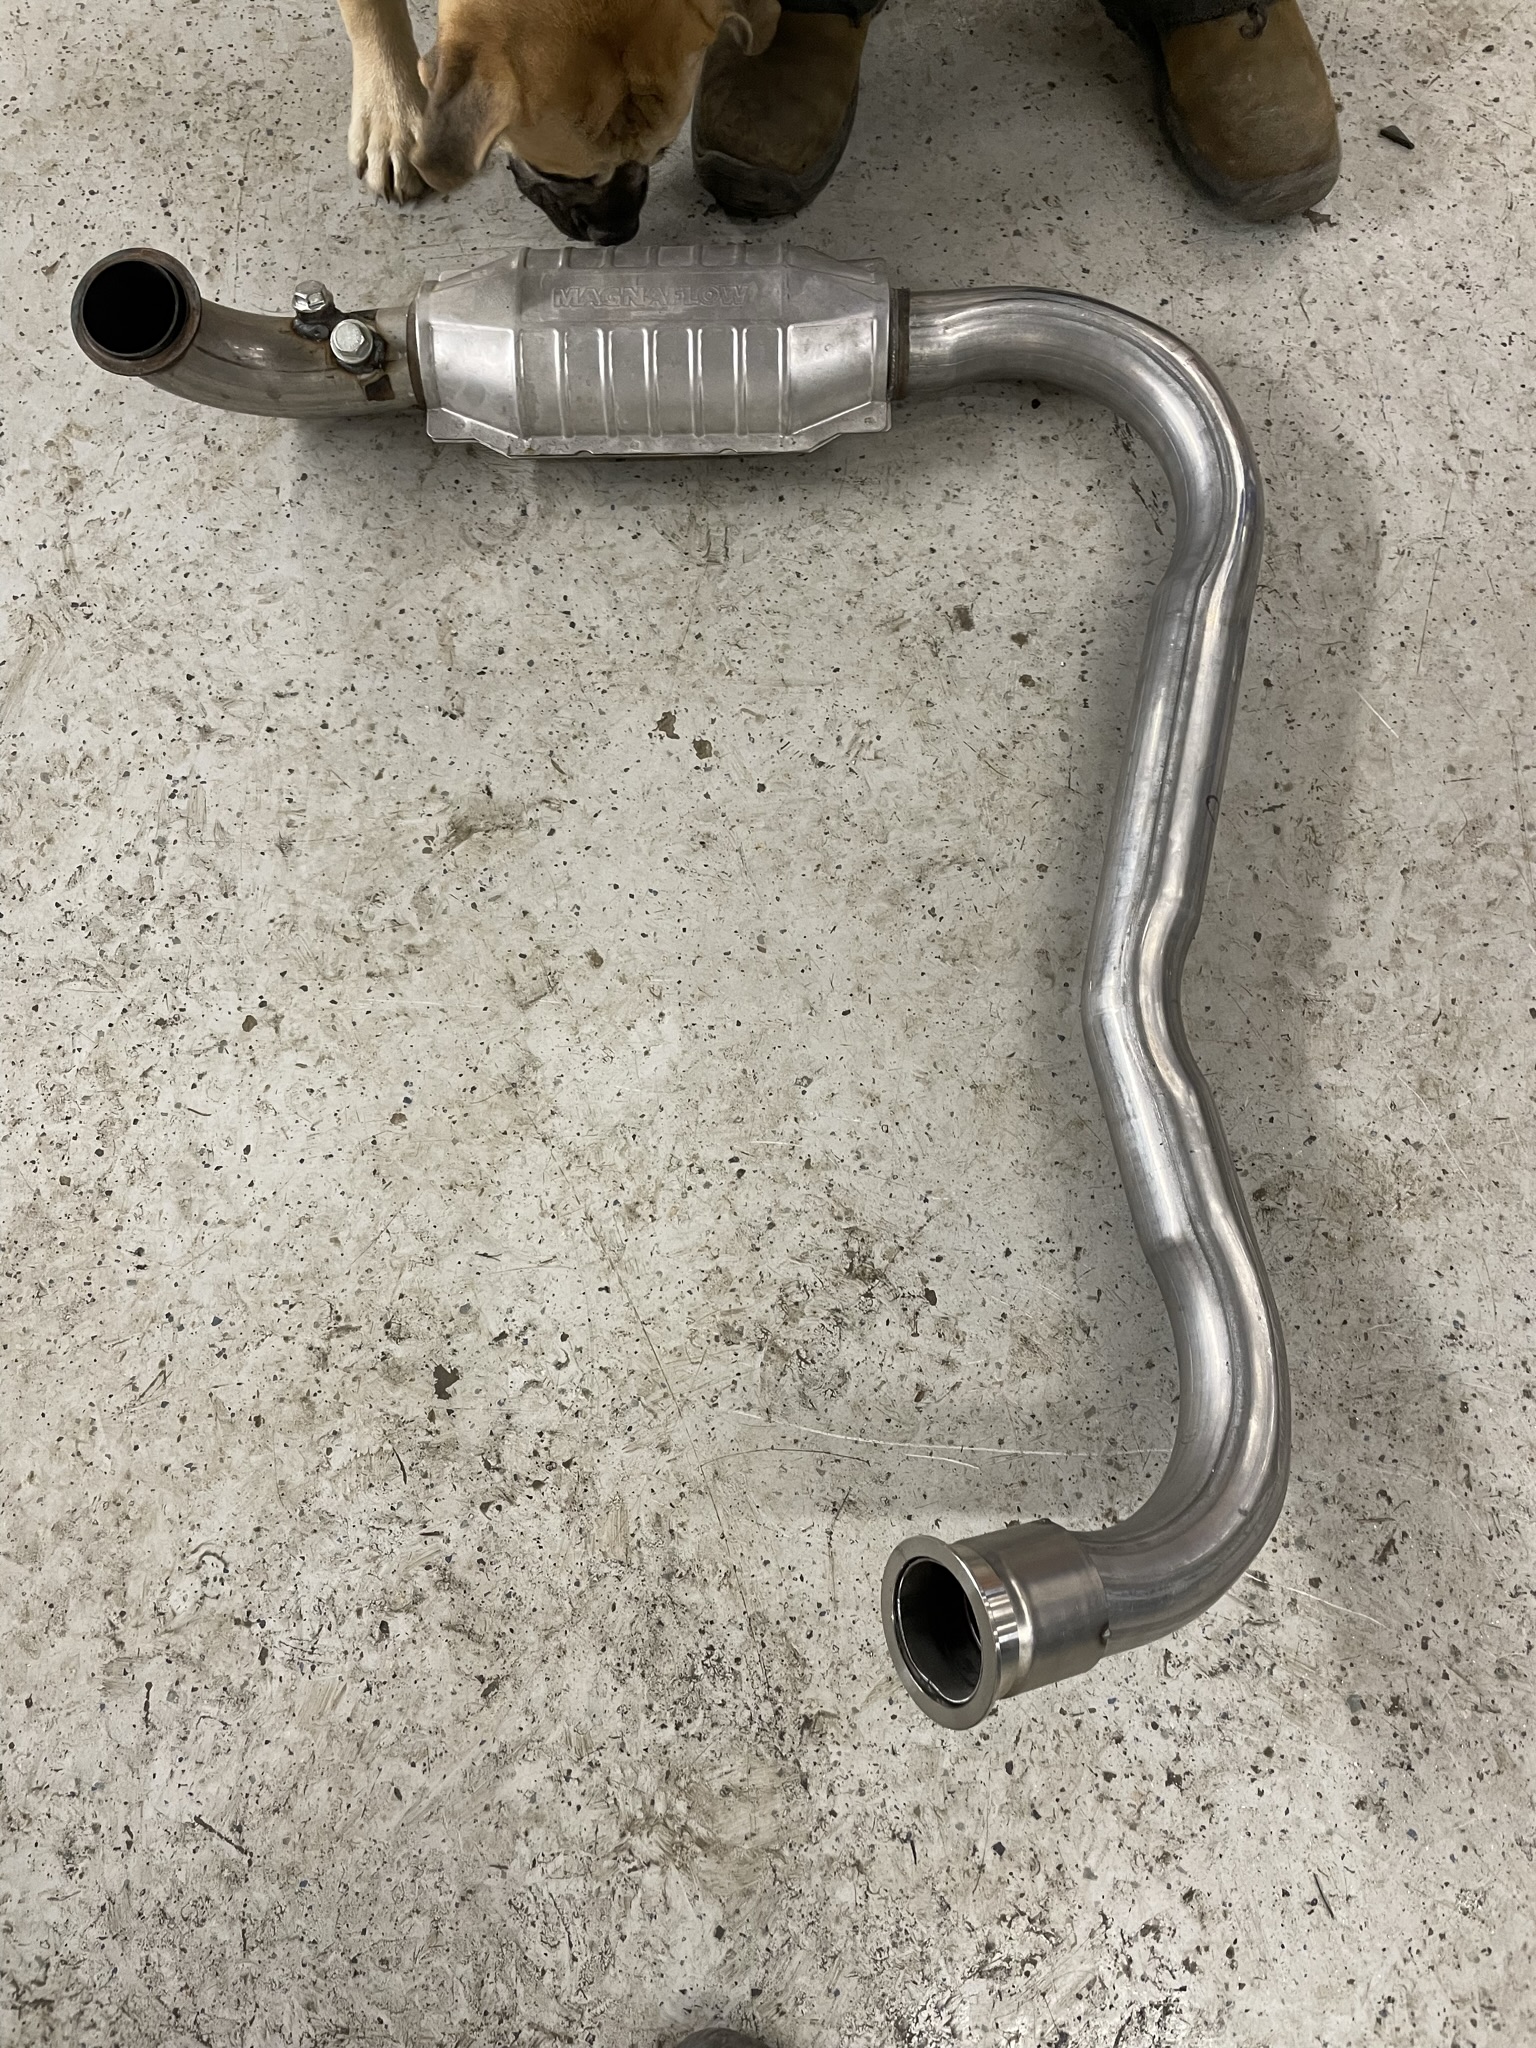
Is there a spot in your thread where you talk more about your muffler setup? That looks like you 'built' that muffler?
When it's running, I'd love if you could get some decibel readings somehow (some smart phones have an app for that) outside and inside the car, just in case I'm not happy with how quiet my setup is, I can possible mimic your idea. 
Second question, the HVAC controller(s) you had pictured, with the number of PCB boards up there, I'm guessing this is a project not just for your car but to sell? Can you share more details on that? Is it to replace the "half electronic, half motor/manual" controls we currently have? Will it support auto-climate control?
I think it was PhoneDawgz that was selling the aftermarket hvac controller for the F355 Amida interiors, they had the auto-climate button, but the kit wasn't setup for it. I'd pay handsomely for an updated HVAC controller that had that ability!! Even if it wasn't plug and play, right now with the interior of my car entirely removed, changing any other components would be easy. Please let me know!
|
|
|
|
dobie1
|
MAY 11, 10:25 PM
|
|
|
|
|
Trinten
|
MAY 11, 11:14 PM
|
|
Thank you for the details and additional info on the muffler and the HVAC. I'm hoping the mufflers I selected are going to be quiet enough without hurting performance too much (it's a balancing act), but we did setup the exhaust so we can make changes to the mufflers easily in the future if I don't like what I got.
And thanks for correcting me on who was providing those other HVAC modules.
So the one you and Don are planning to use is going to be a (nearly) drop in unit that will have an updated interface, work with the existing HVAC mechanical portions, and auto-climate control?
Please send this to your friend:

In all seriousness, I understand projects like that take skill and time (just like our cars!). Feel free to PM me if he has a number in mind.
|
|
|
|
dobie1
|
MAY 15, 08:07 PM
|
|
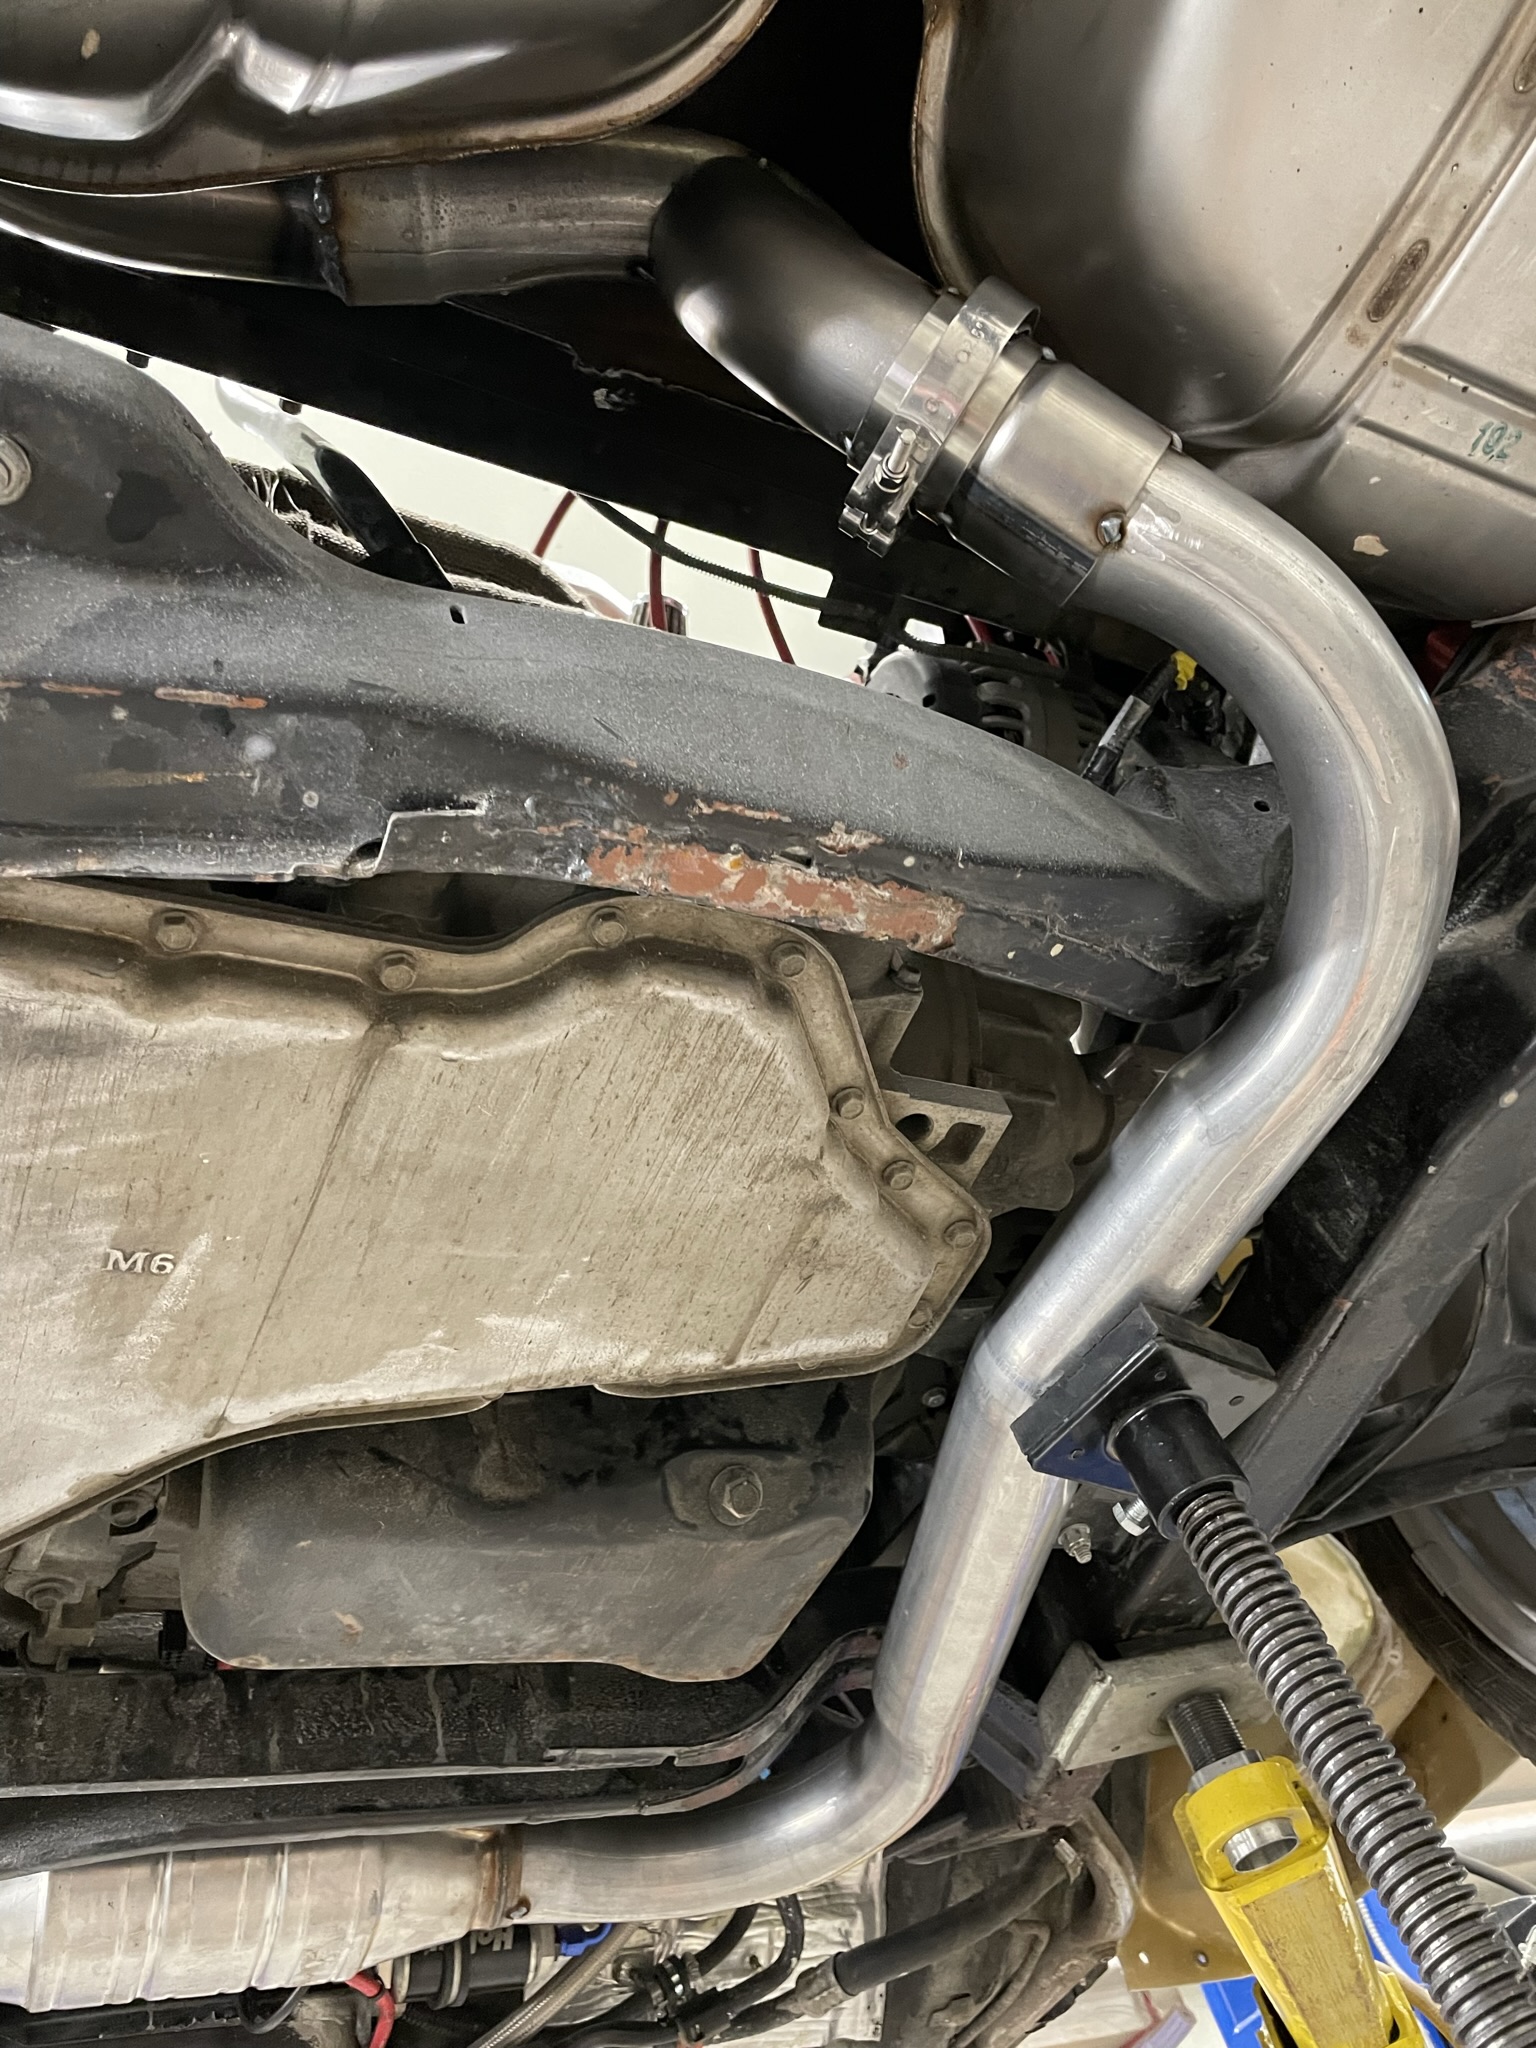
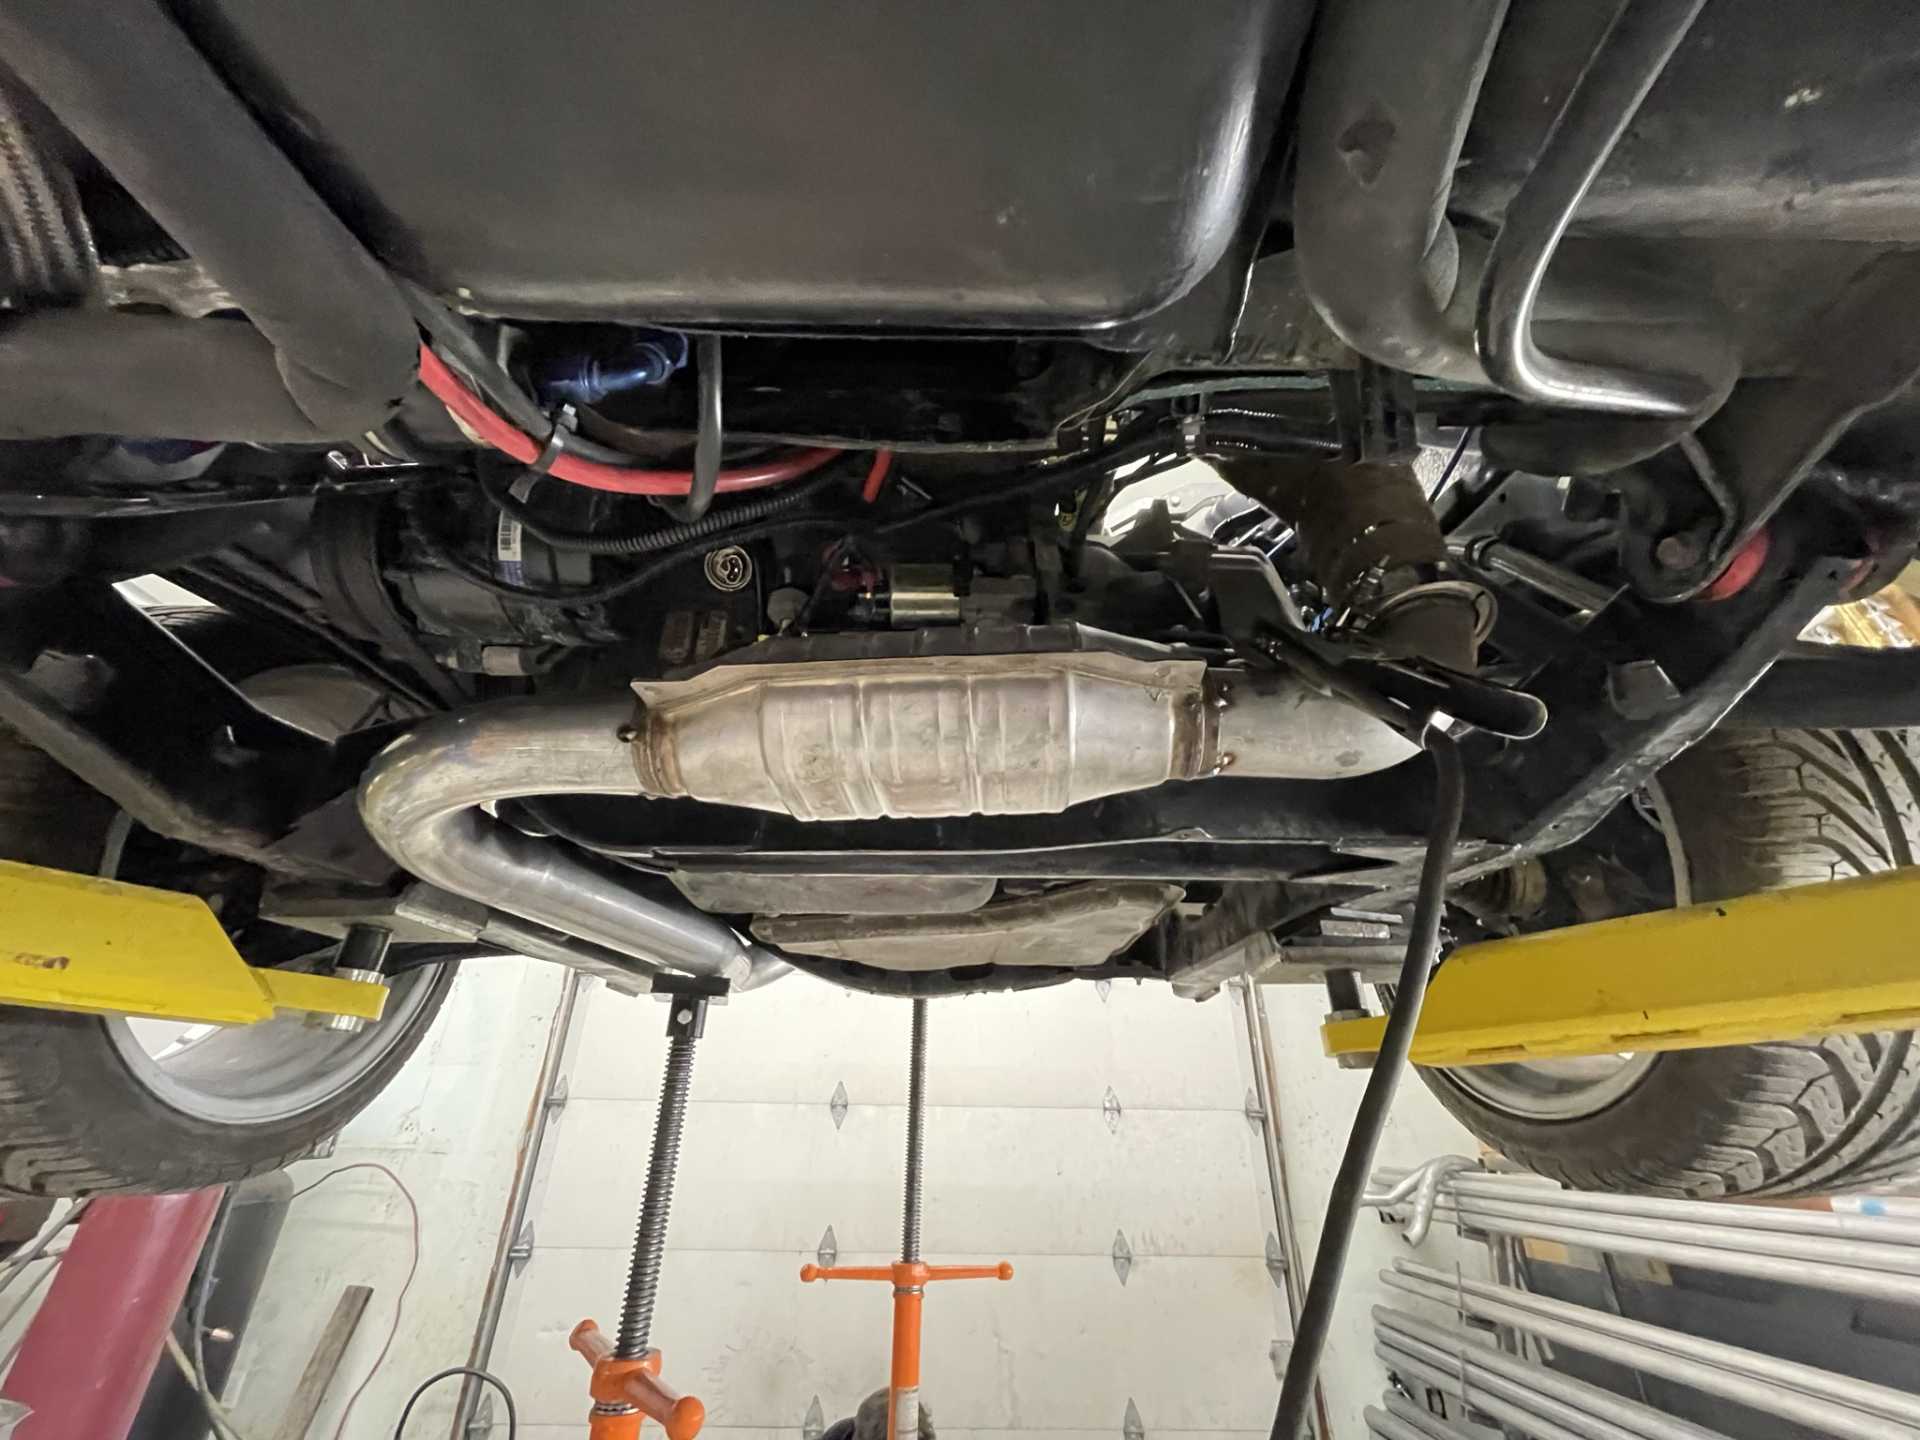
So I posted to YouTube a video of my exhaust it is “indoors only” DB at idle it is 65-69 reviving the engine goes to 85 DB . I think out doors it would be quieter over all.
The video is posted for anyone interested in a quite performance exhaust for our Fiero based builds.
Supercharged 3800 with SS headers BMW M3 E90 muffler and HP cat.
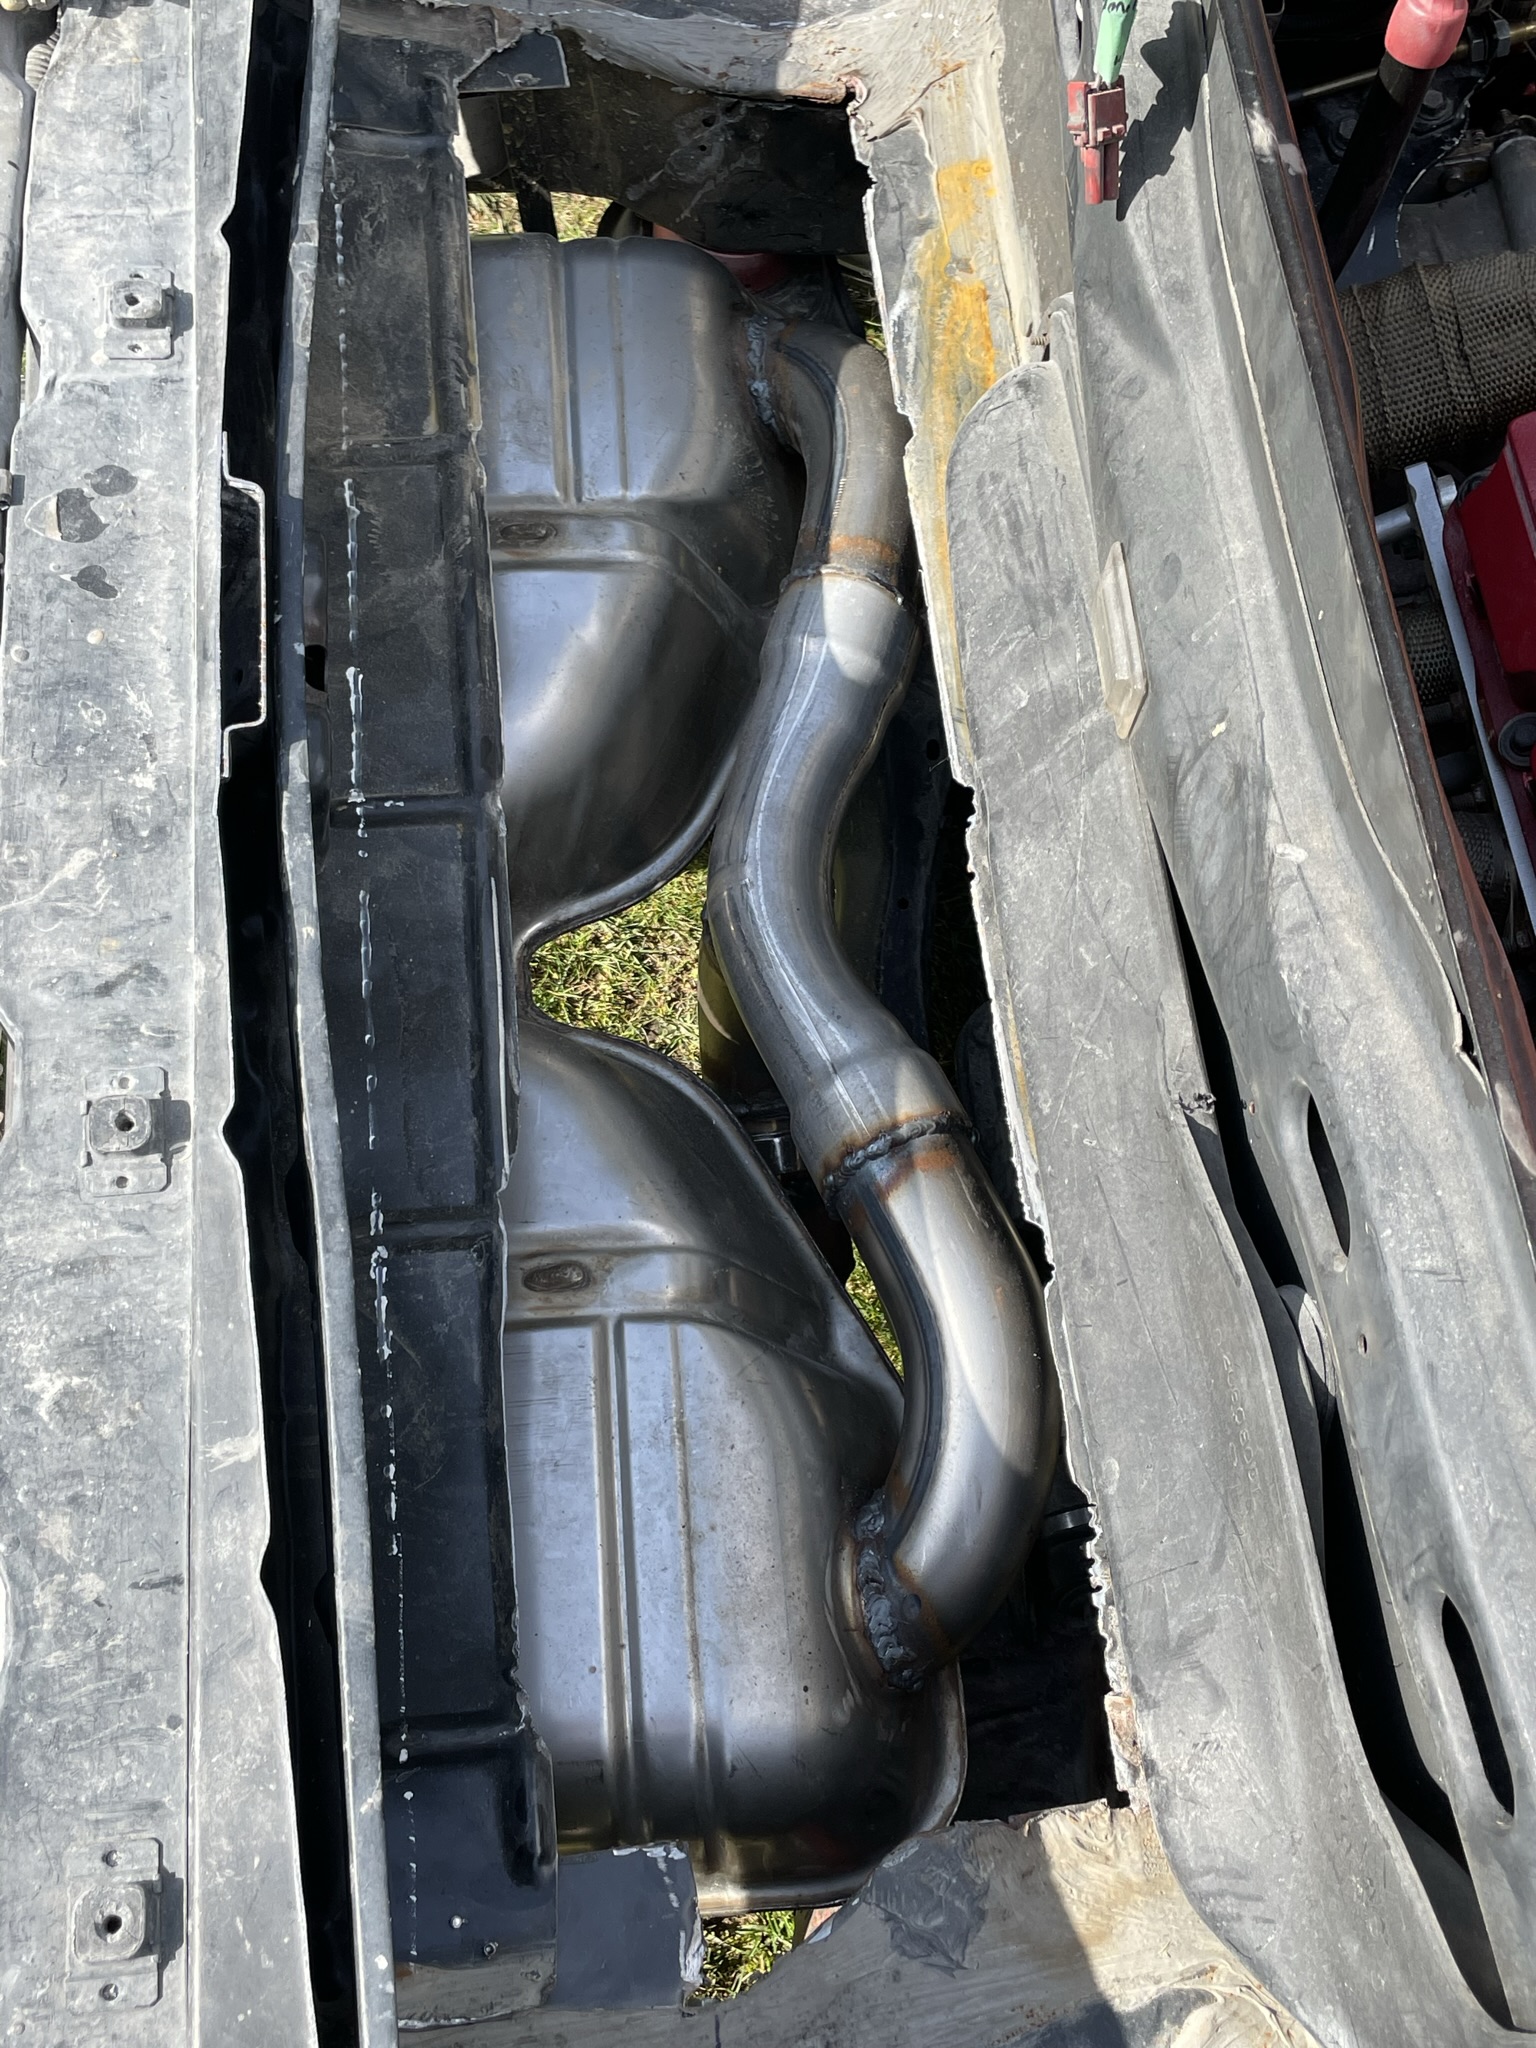
I also got the rear tow bar hole cut into the body and test fit the bar into and onto the mounting bolt. Remember this is behind the license plate so no one will see the mounting hole in the body.
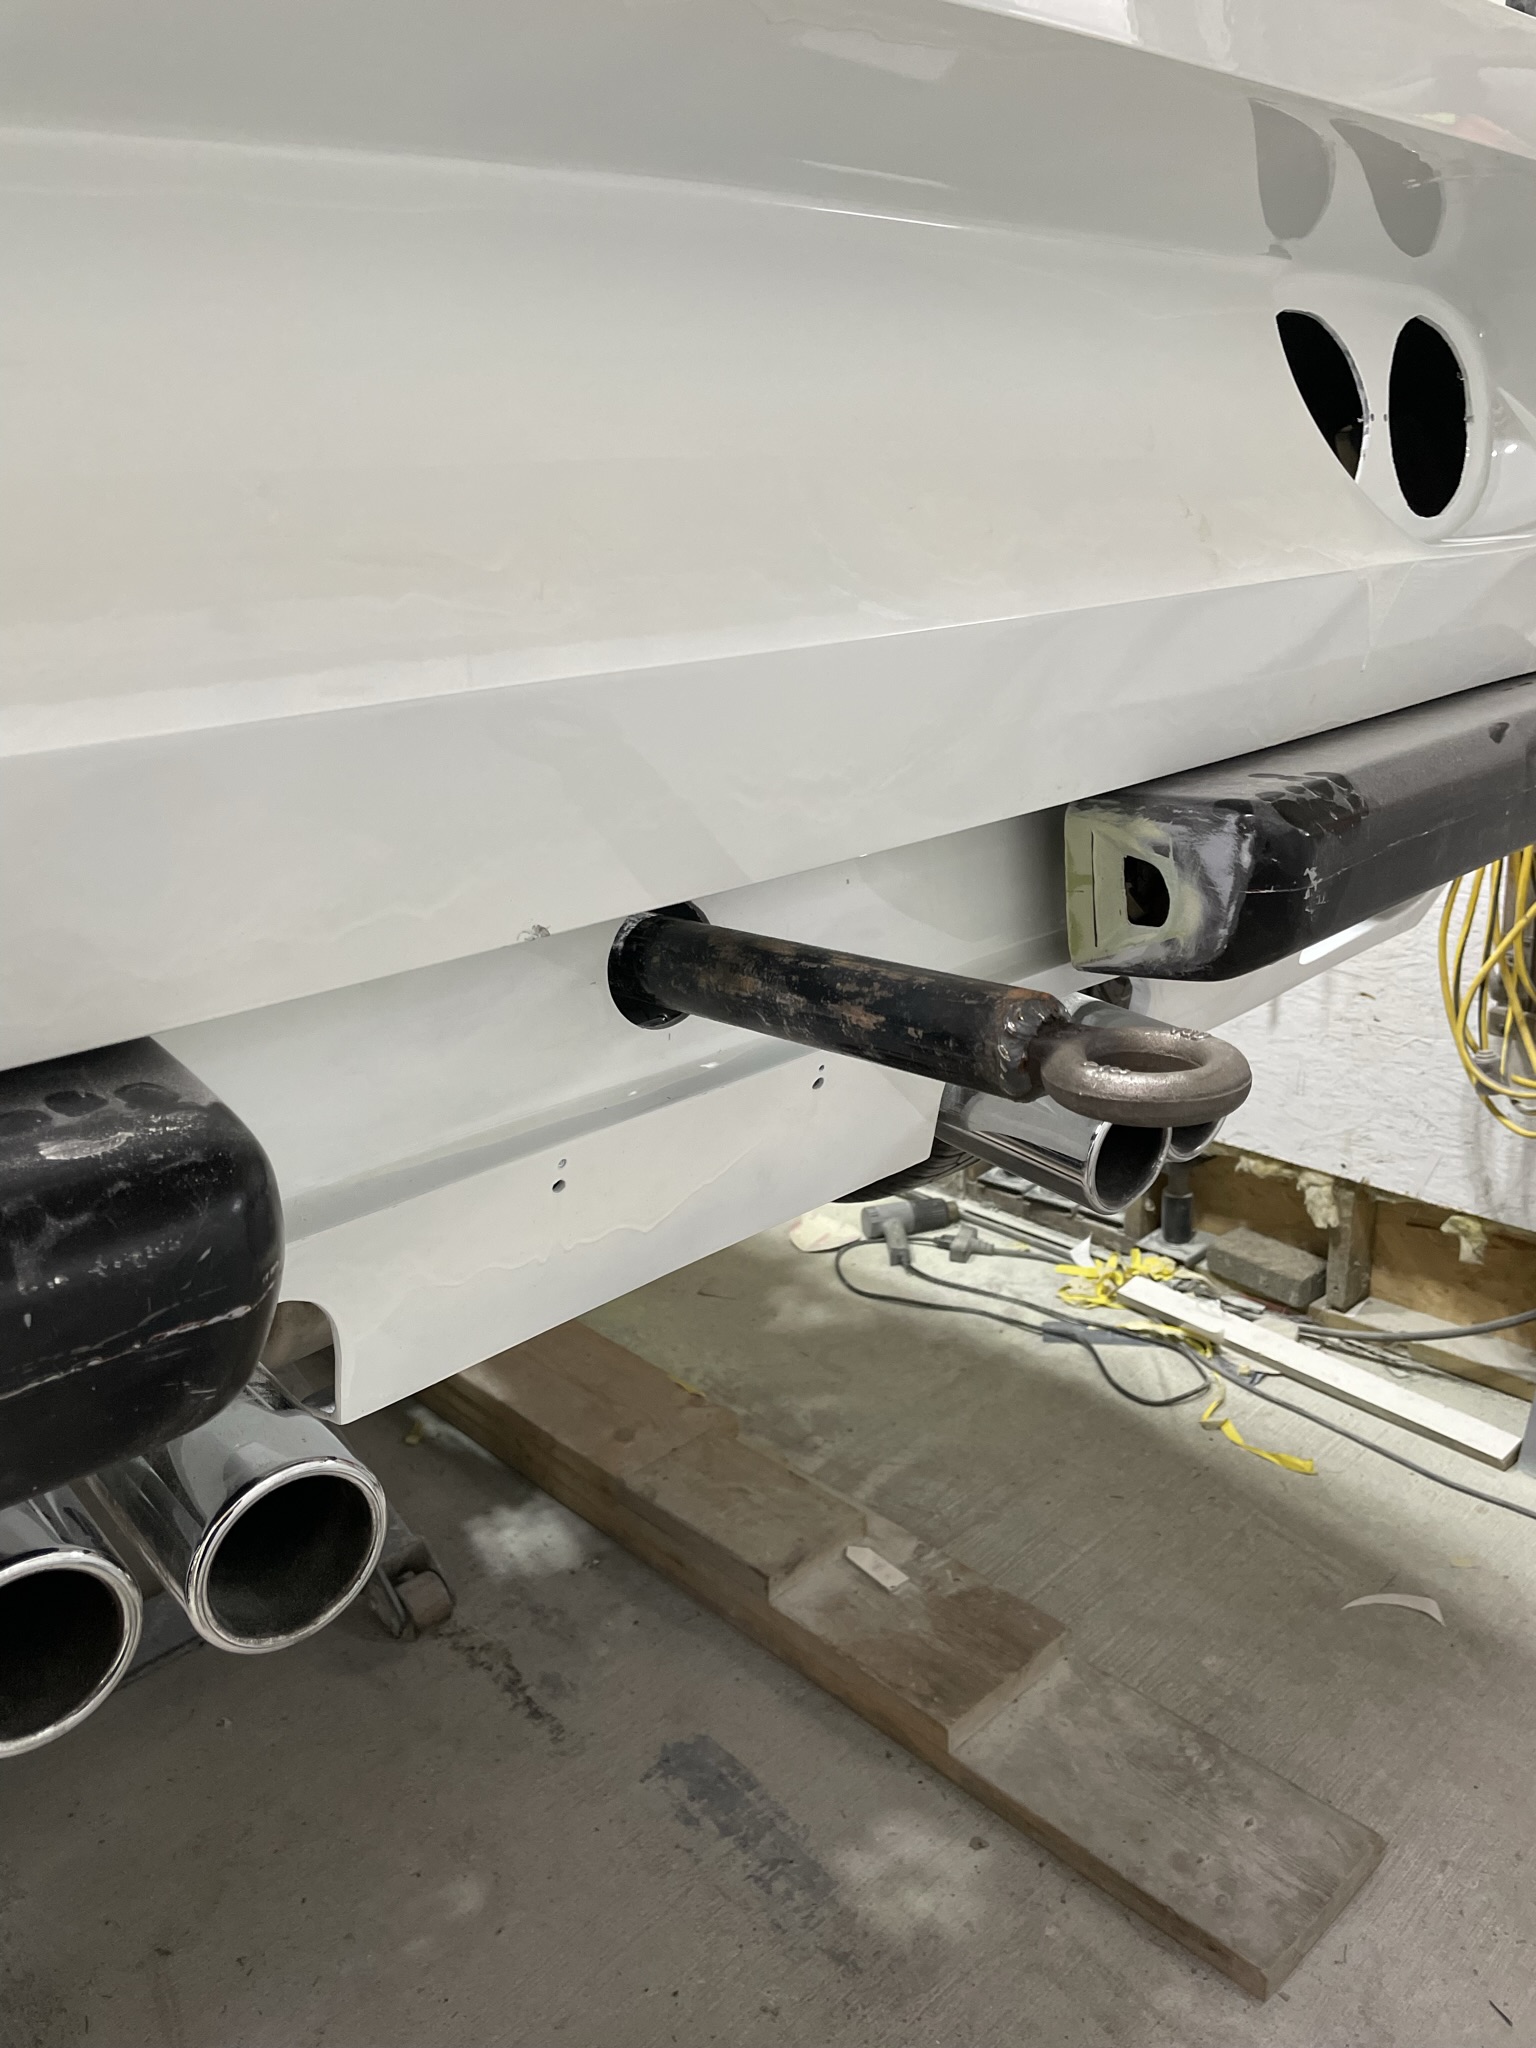
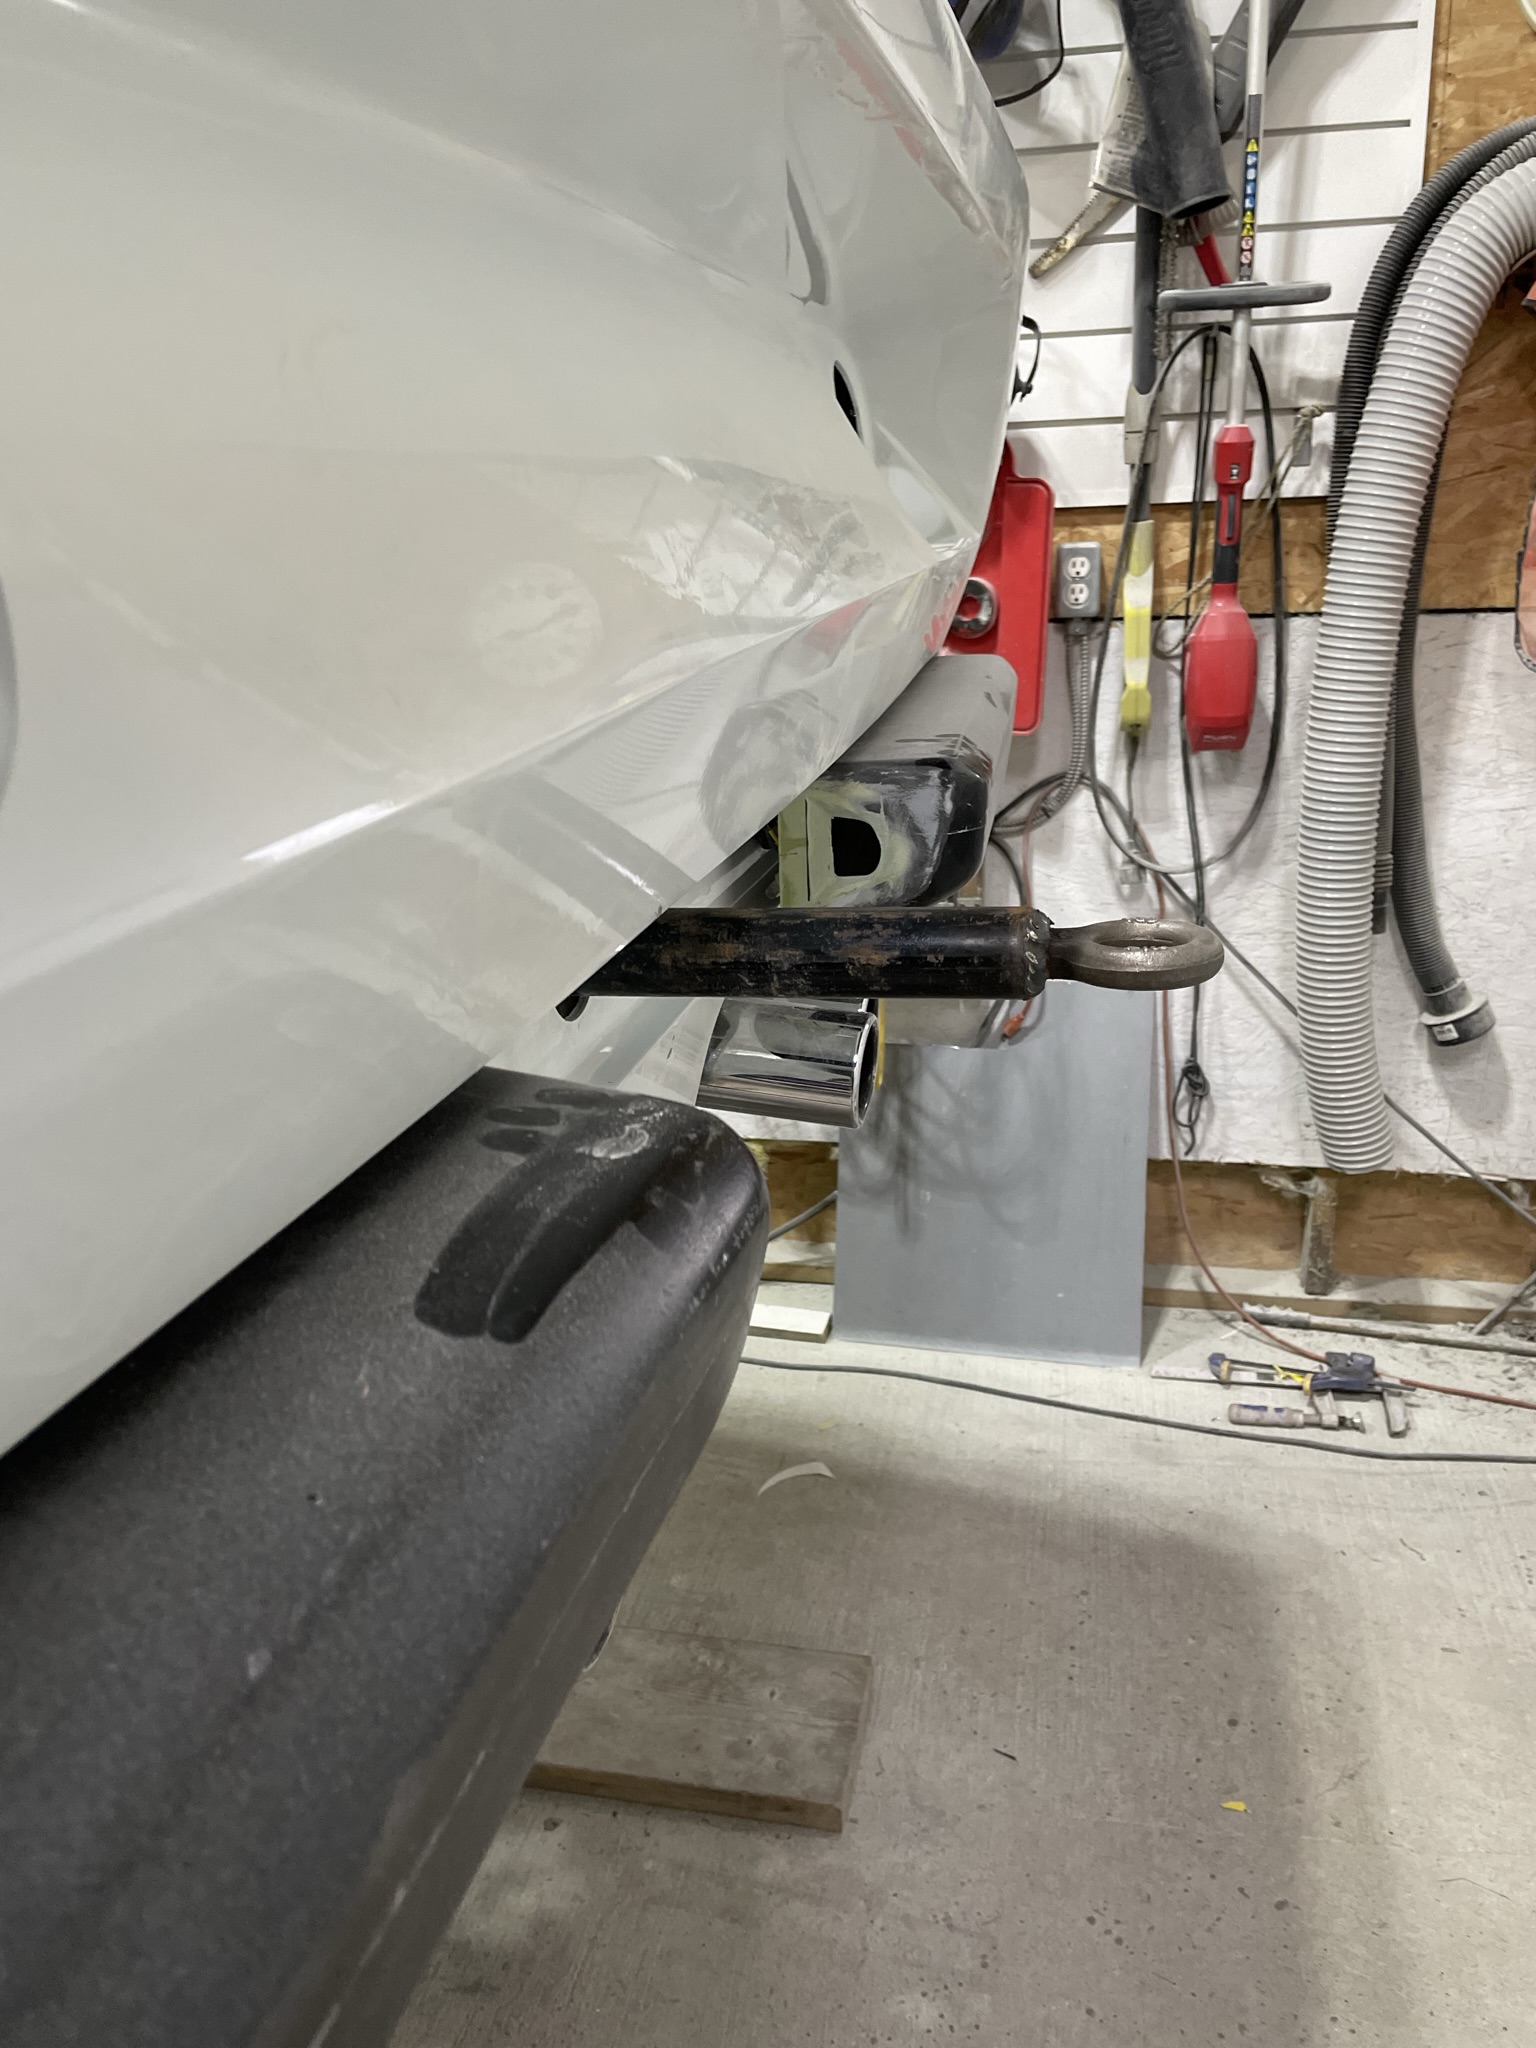
Lots of clearance from the tow hook!!
Stay safe.
Wayne[This message has been edited by dobie1 (edited 05-15-2022).]
|
|
|
|
Trinten
|
MAY 15, 08:26 PM
|
|
|
What is your youtube channel name? Or can you post a link to the video please?
|
|
|
|
dobie1
|
MAY 15, 08:56 PM
|
|
Sorry everyone I just thought you could search it with the description which is the title of the clip.
https://youtu.be/xjKHtRZlAN8
YouTube Channel is
Dobie Gillis[This message has been edited by dobie1 (edited 05-15-2022).]
|
|
|
|
Trinten
|
MAY 15, 11:04 PM
|
|
|
Thank you, and I apologize, I didn't realize that the description you gave in your post was the title of the video. In hindsight, I should have, and yes would have been able to find it that way.
|
|
|
|
dobie1
|
MAY 29, 11:18 AM
|
|
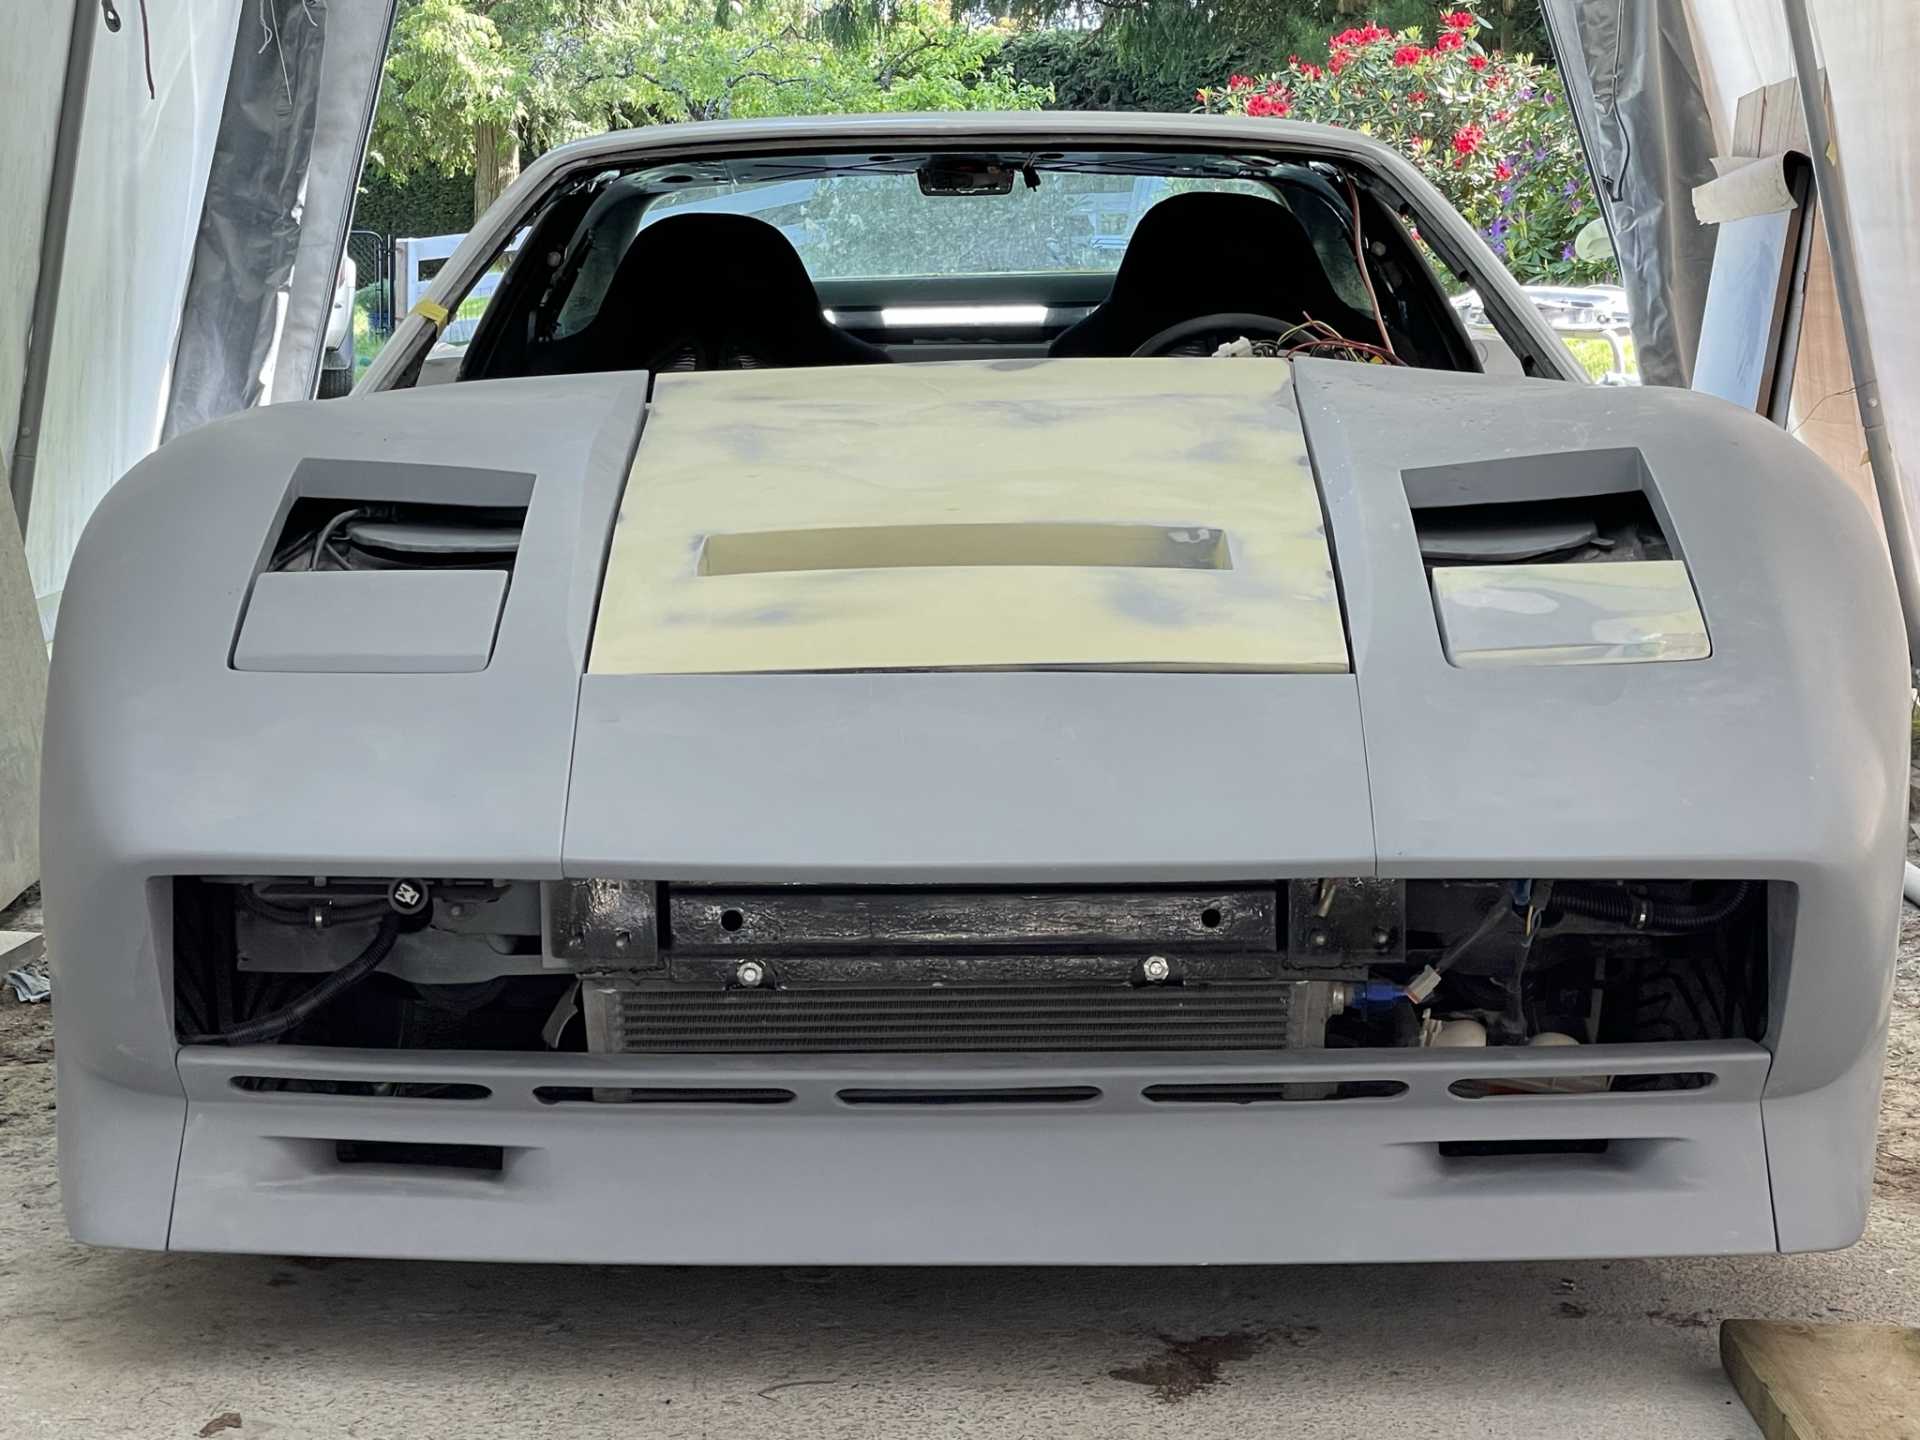
Here are the latest update on my journey to completion.
After mounting all the body panels to the chassis it was interesting to find that I needed to replace all the 1/4 x20 rivenuts. I found that when I tightened them down one of two things happened, a couple ether just pulled out or spun in the hole. And a second finding that because they were aluminum rivnuts a couple bolts had oxidation. So I went with steel 6 x 10mm rivenuts mounted to 16gauge steel then bonded the piece to the inside/ backside of the fiberglass part. This gave me very strong torque points for the panels to attach to each other.
So next thing that is coming up is bonding the outside door panels to the metal of the doors. A couple things that have come up is being able to guarantee that when I bond and clap the door to allow the glue to set the door is in exactly the right place both in height and position for door gaps. One thing has been decided though is the door is coming off the car , this will hopefully make bonding easier and at the same time I’ll paint the door jams.
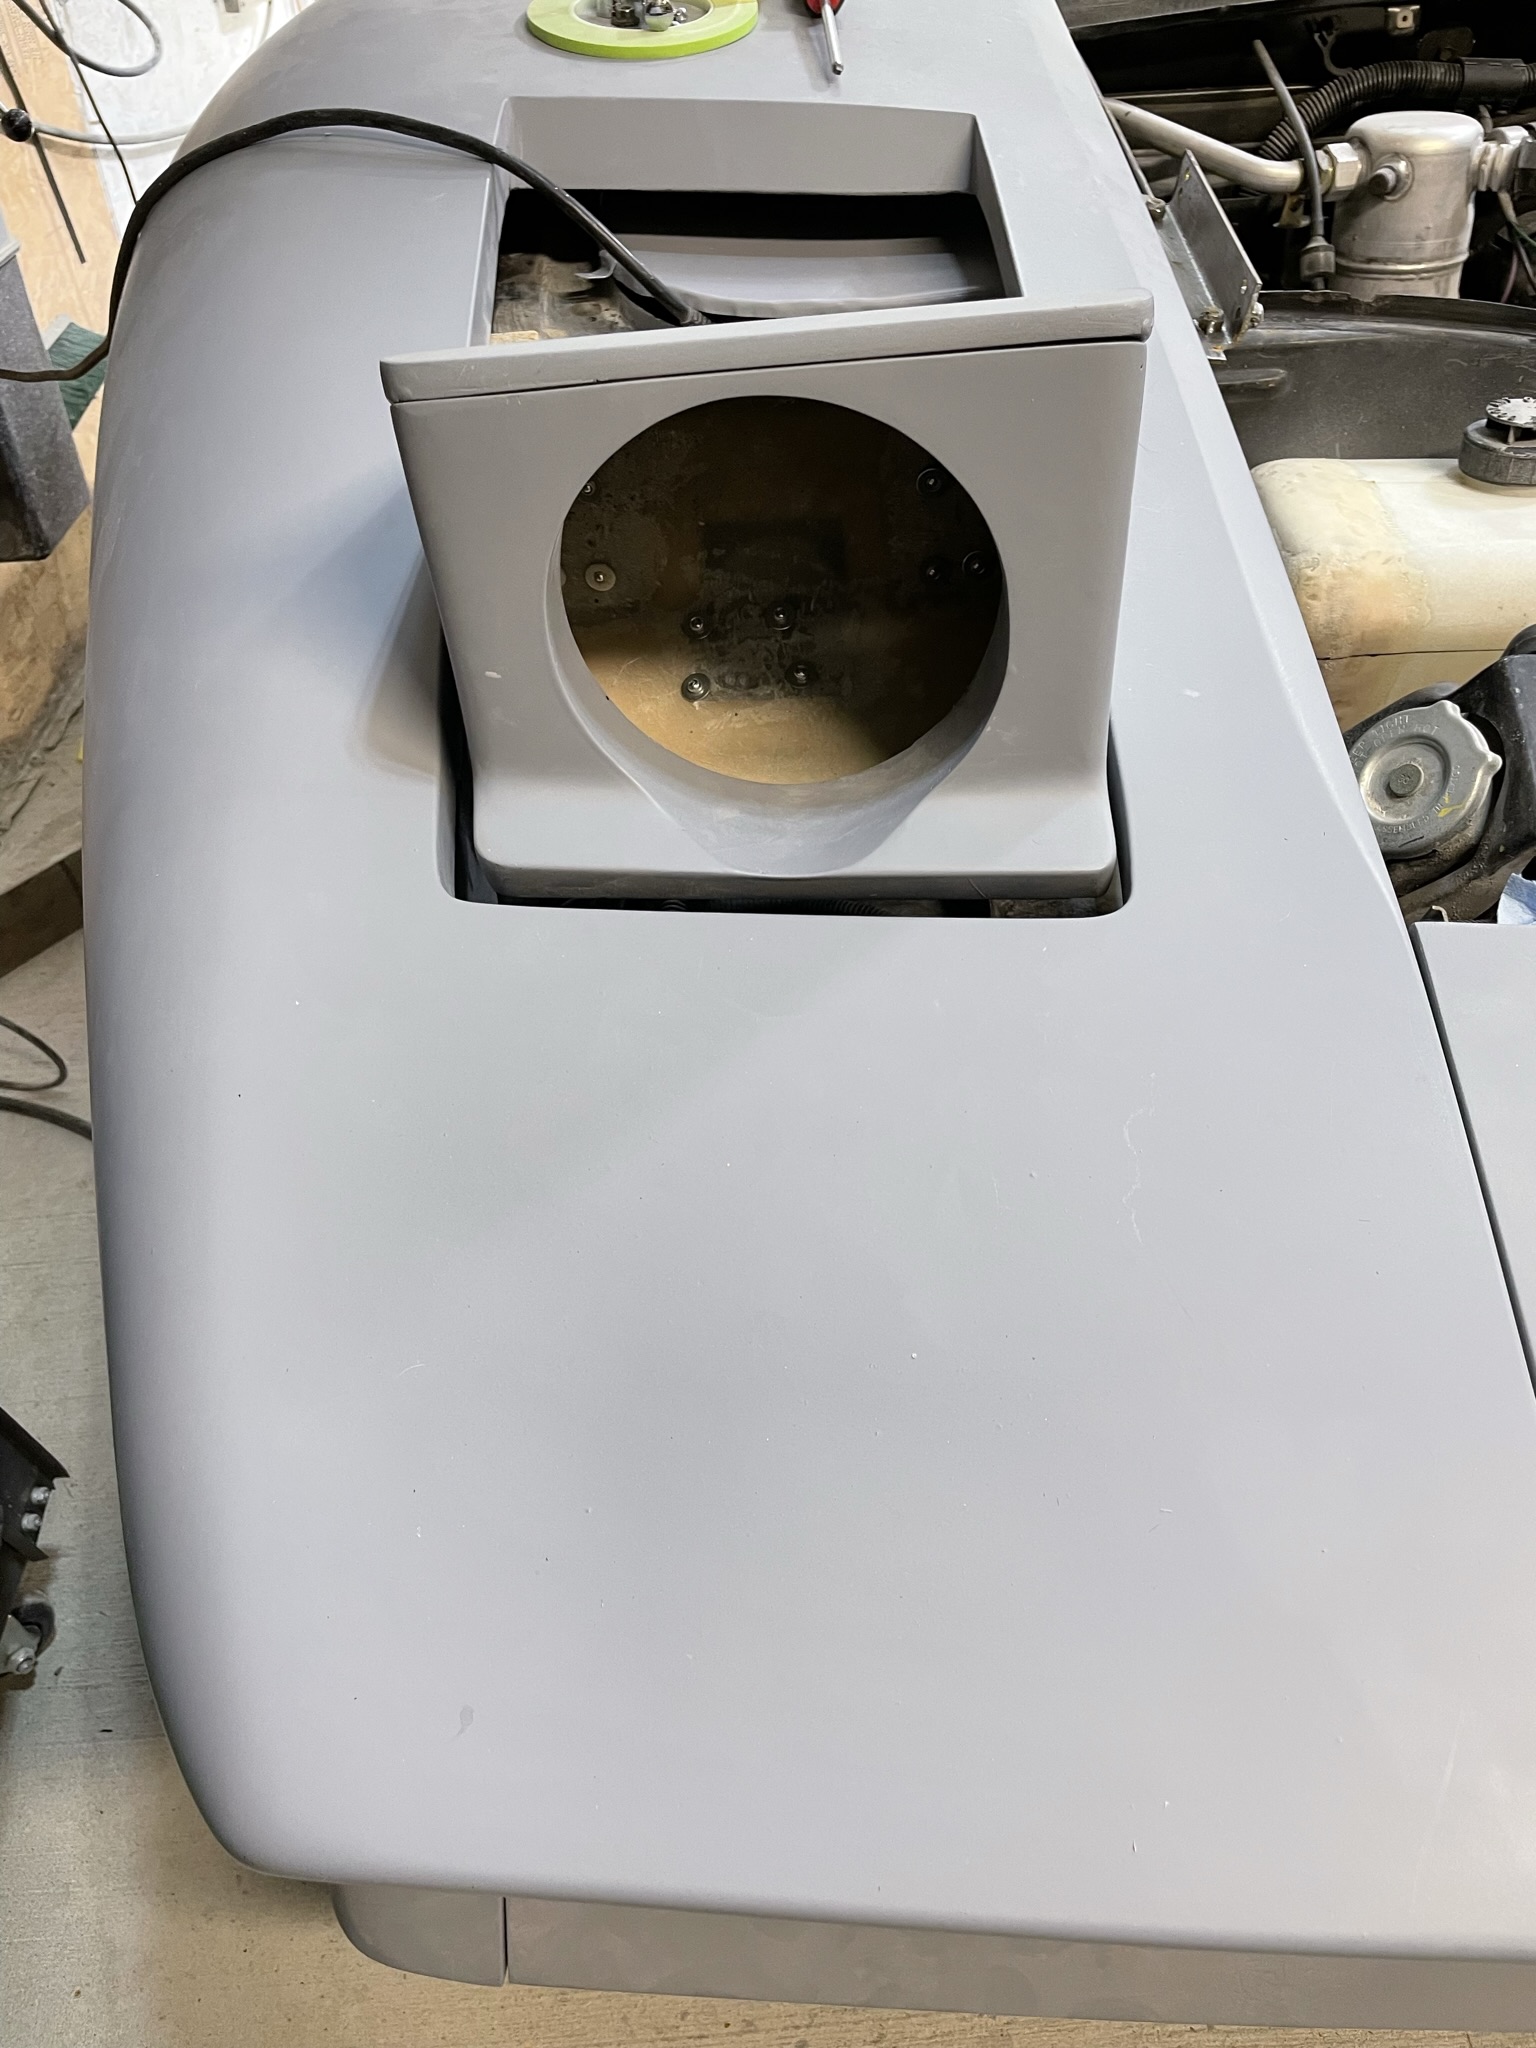
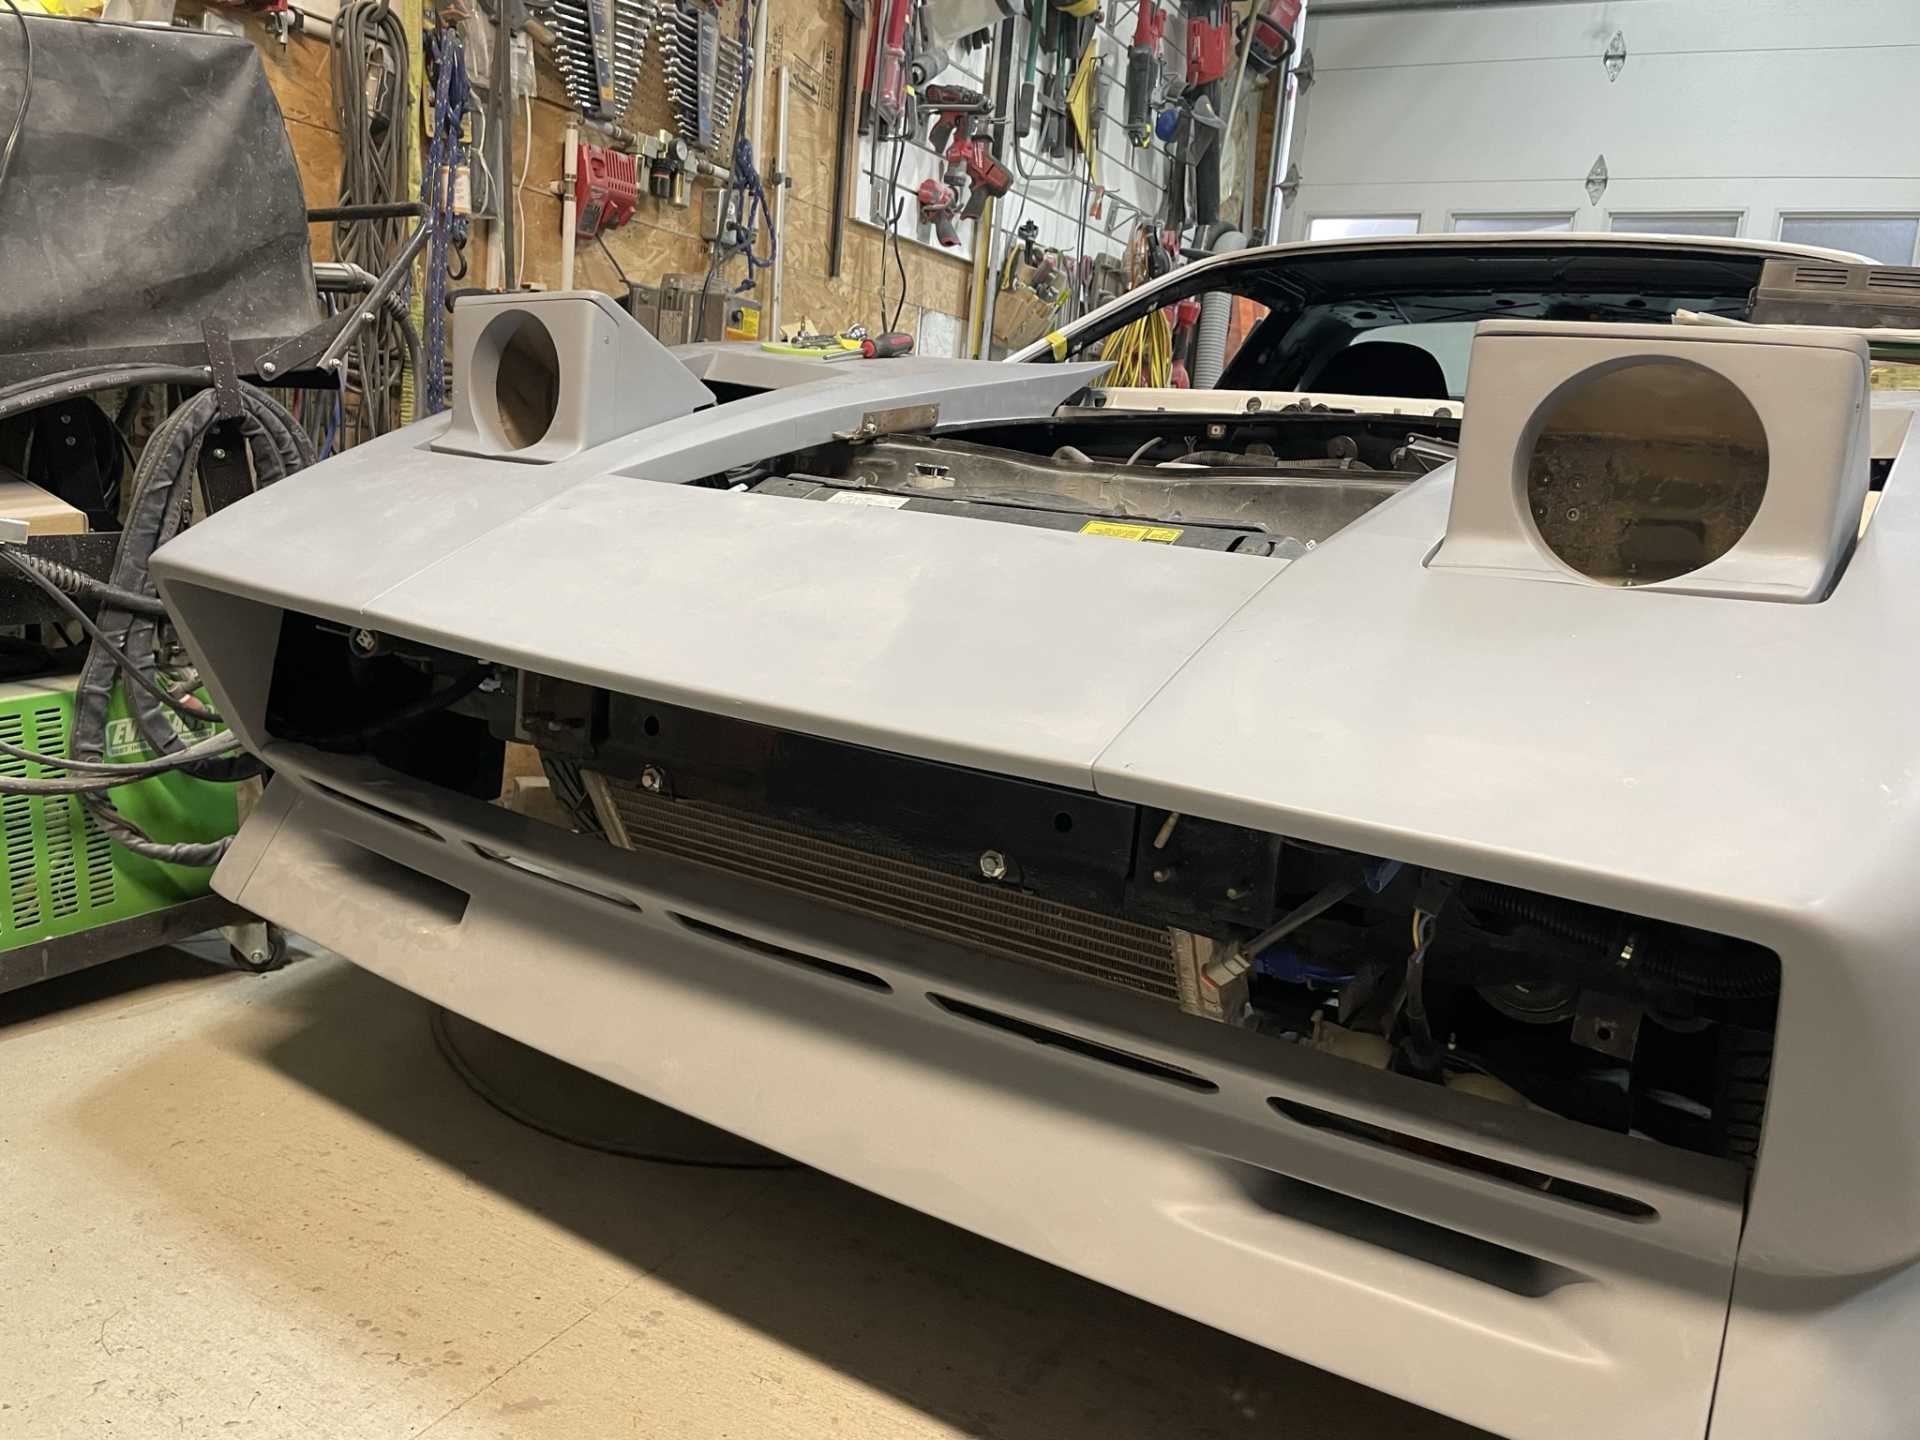
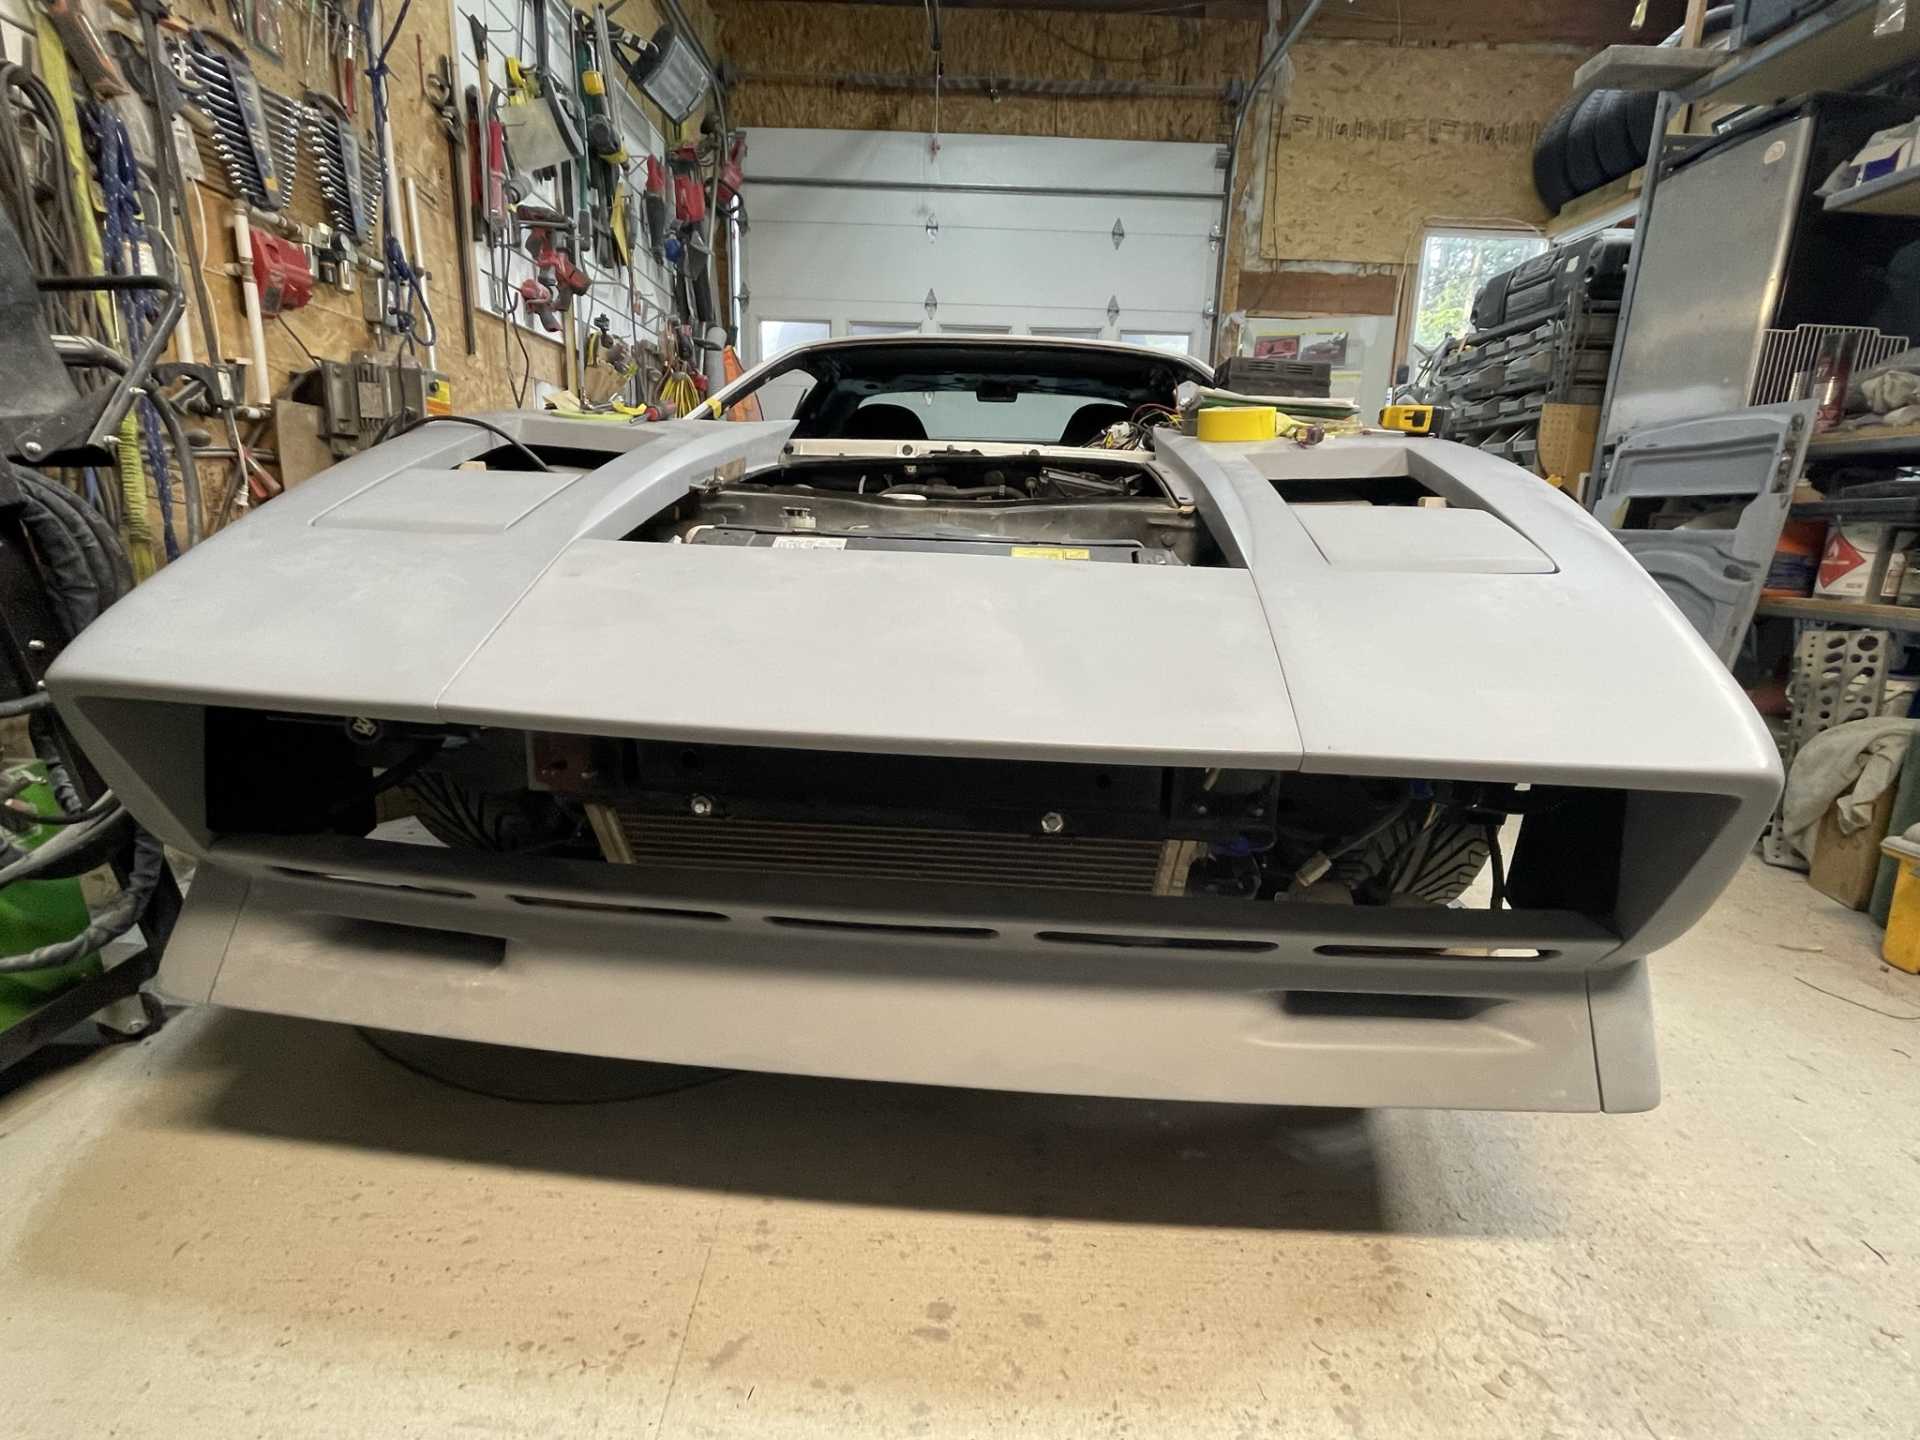
I finally got the pop up headlight buckets I made mounted, “Don O is the builder and designer of the light conversion buckets”
This is Don’s car
. Don also helped me with the first molds I ever made to reproduce his light buckets. I’m very happy with the final look still need a bit of alignment but function exactly as designed.

Thanks for stopping by
Stay safe everyone
Wayne.
|
|
|
|
dobie1
|
MAY 31, 11:01 PM
|
|
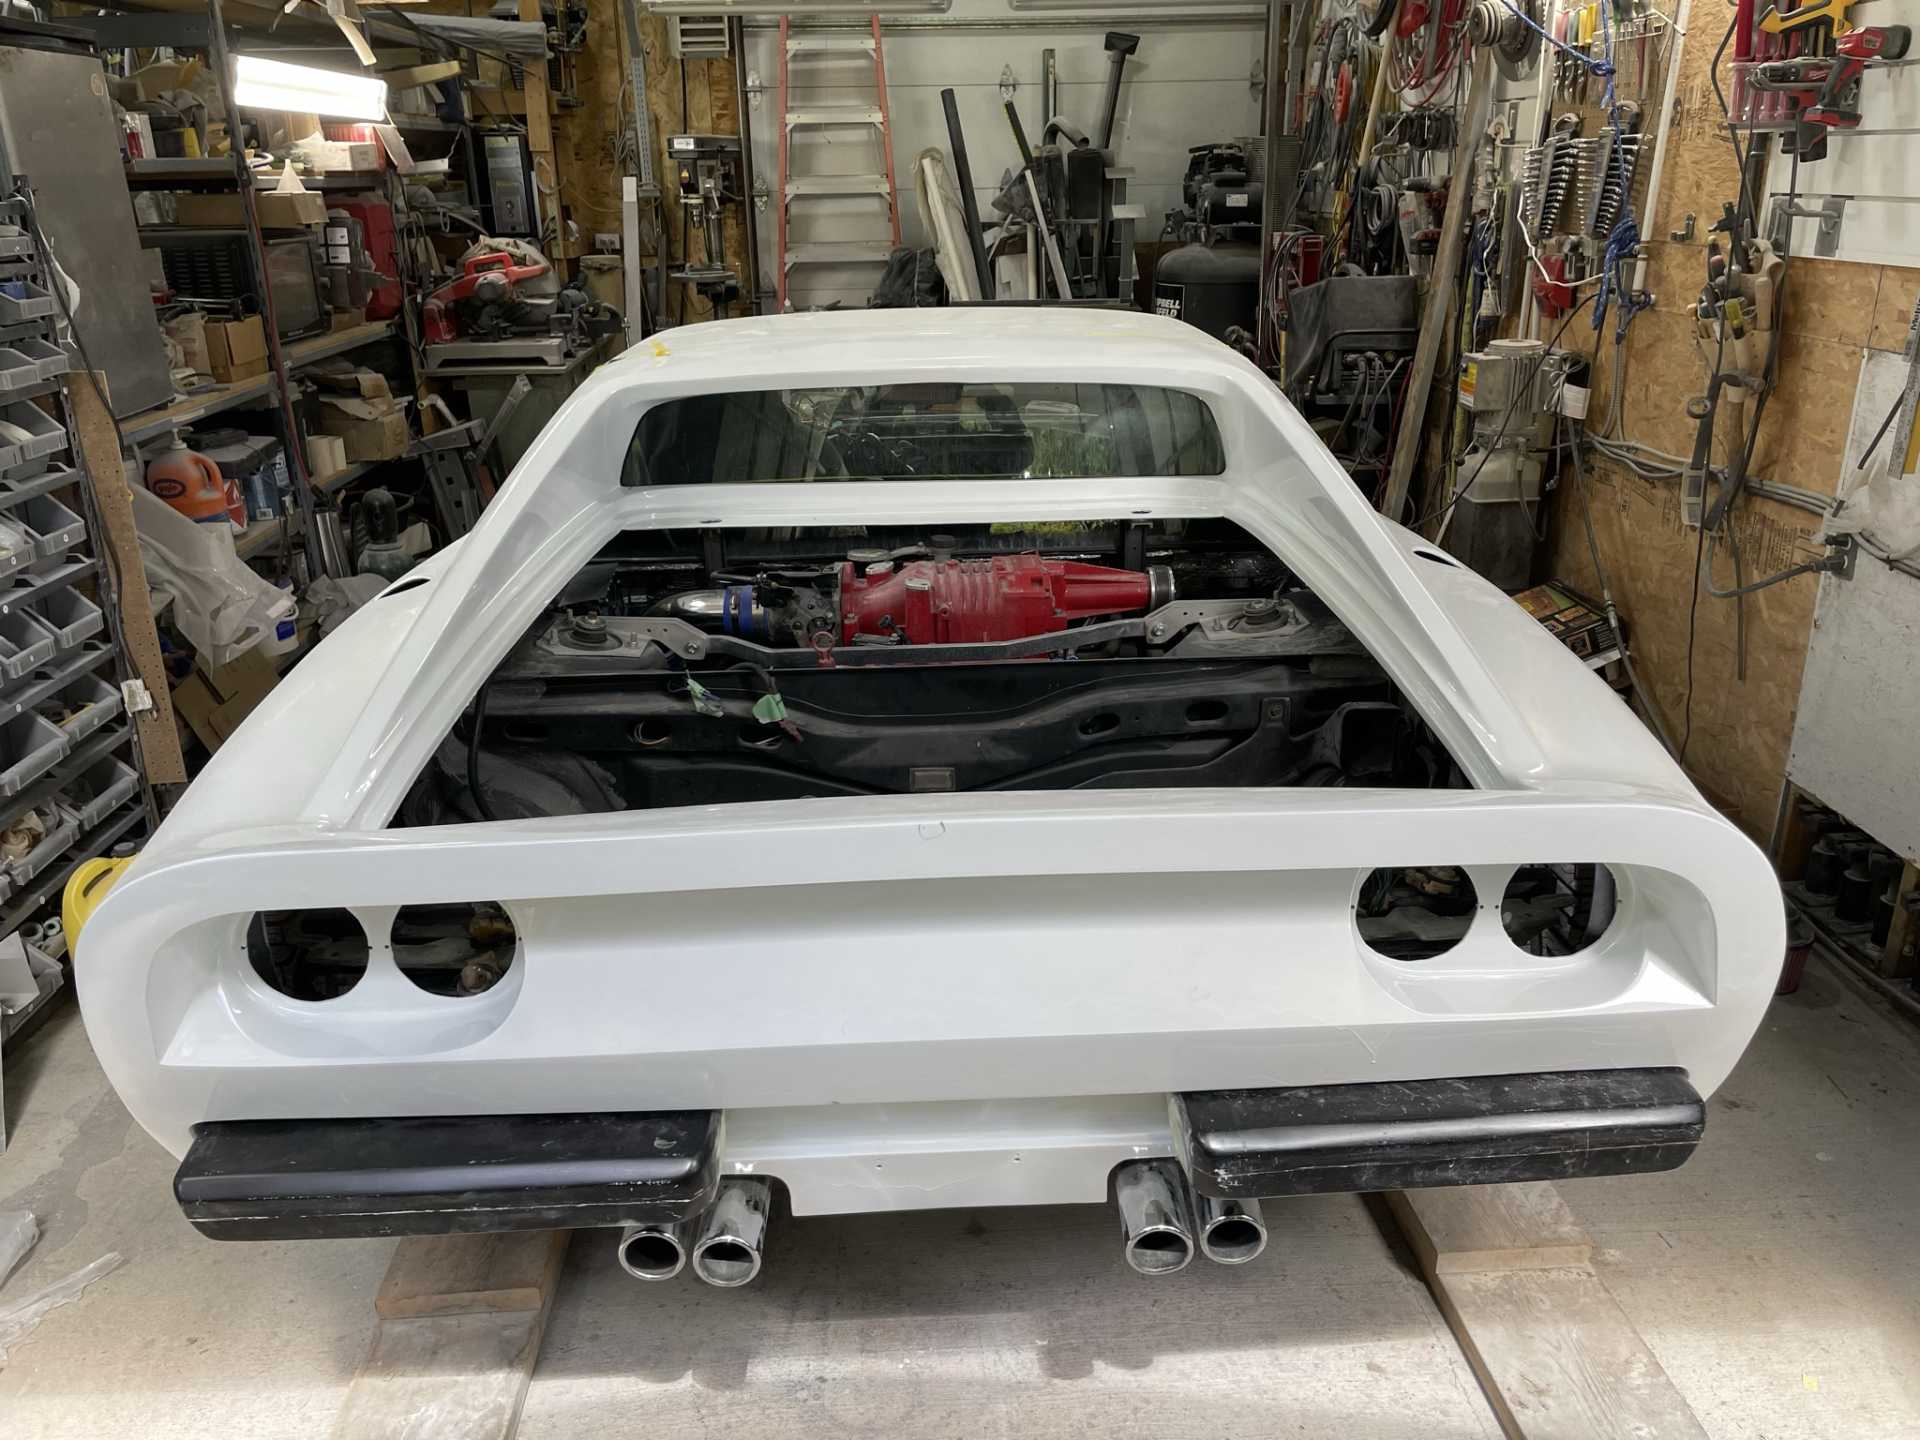
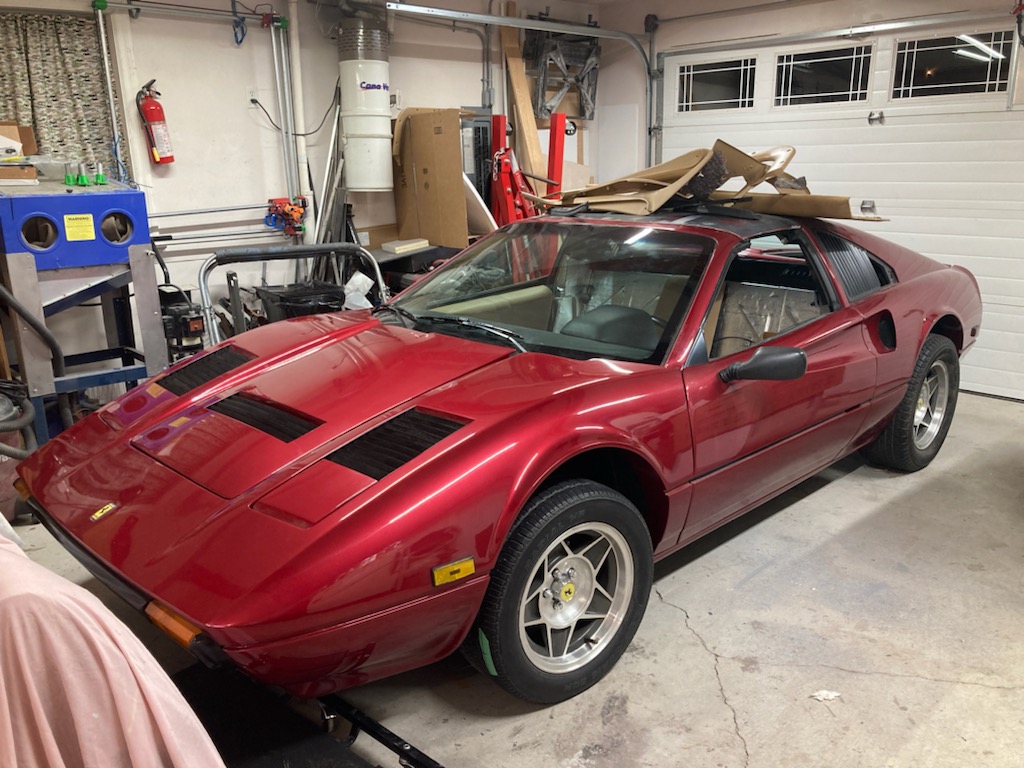
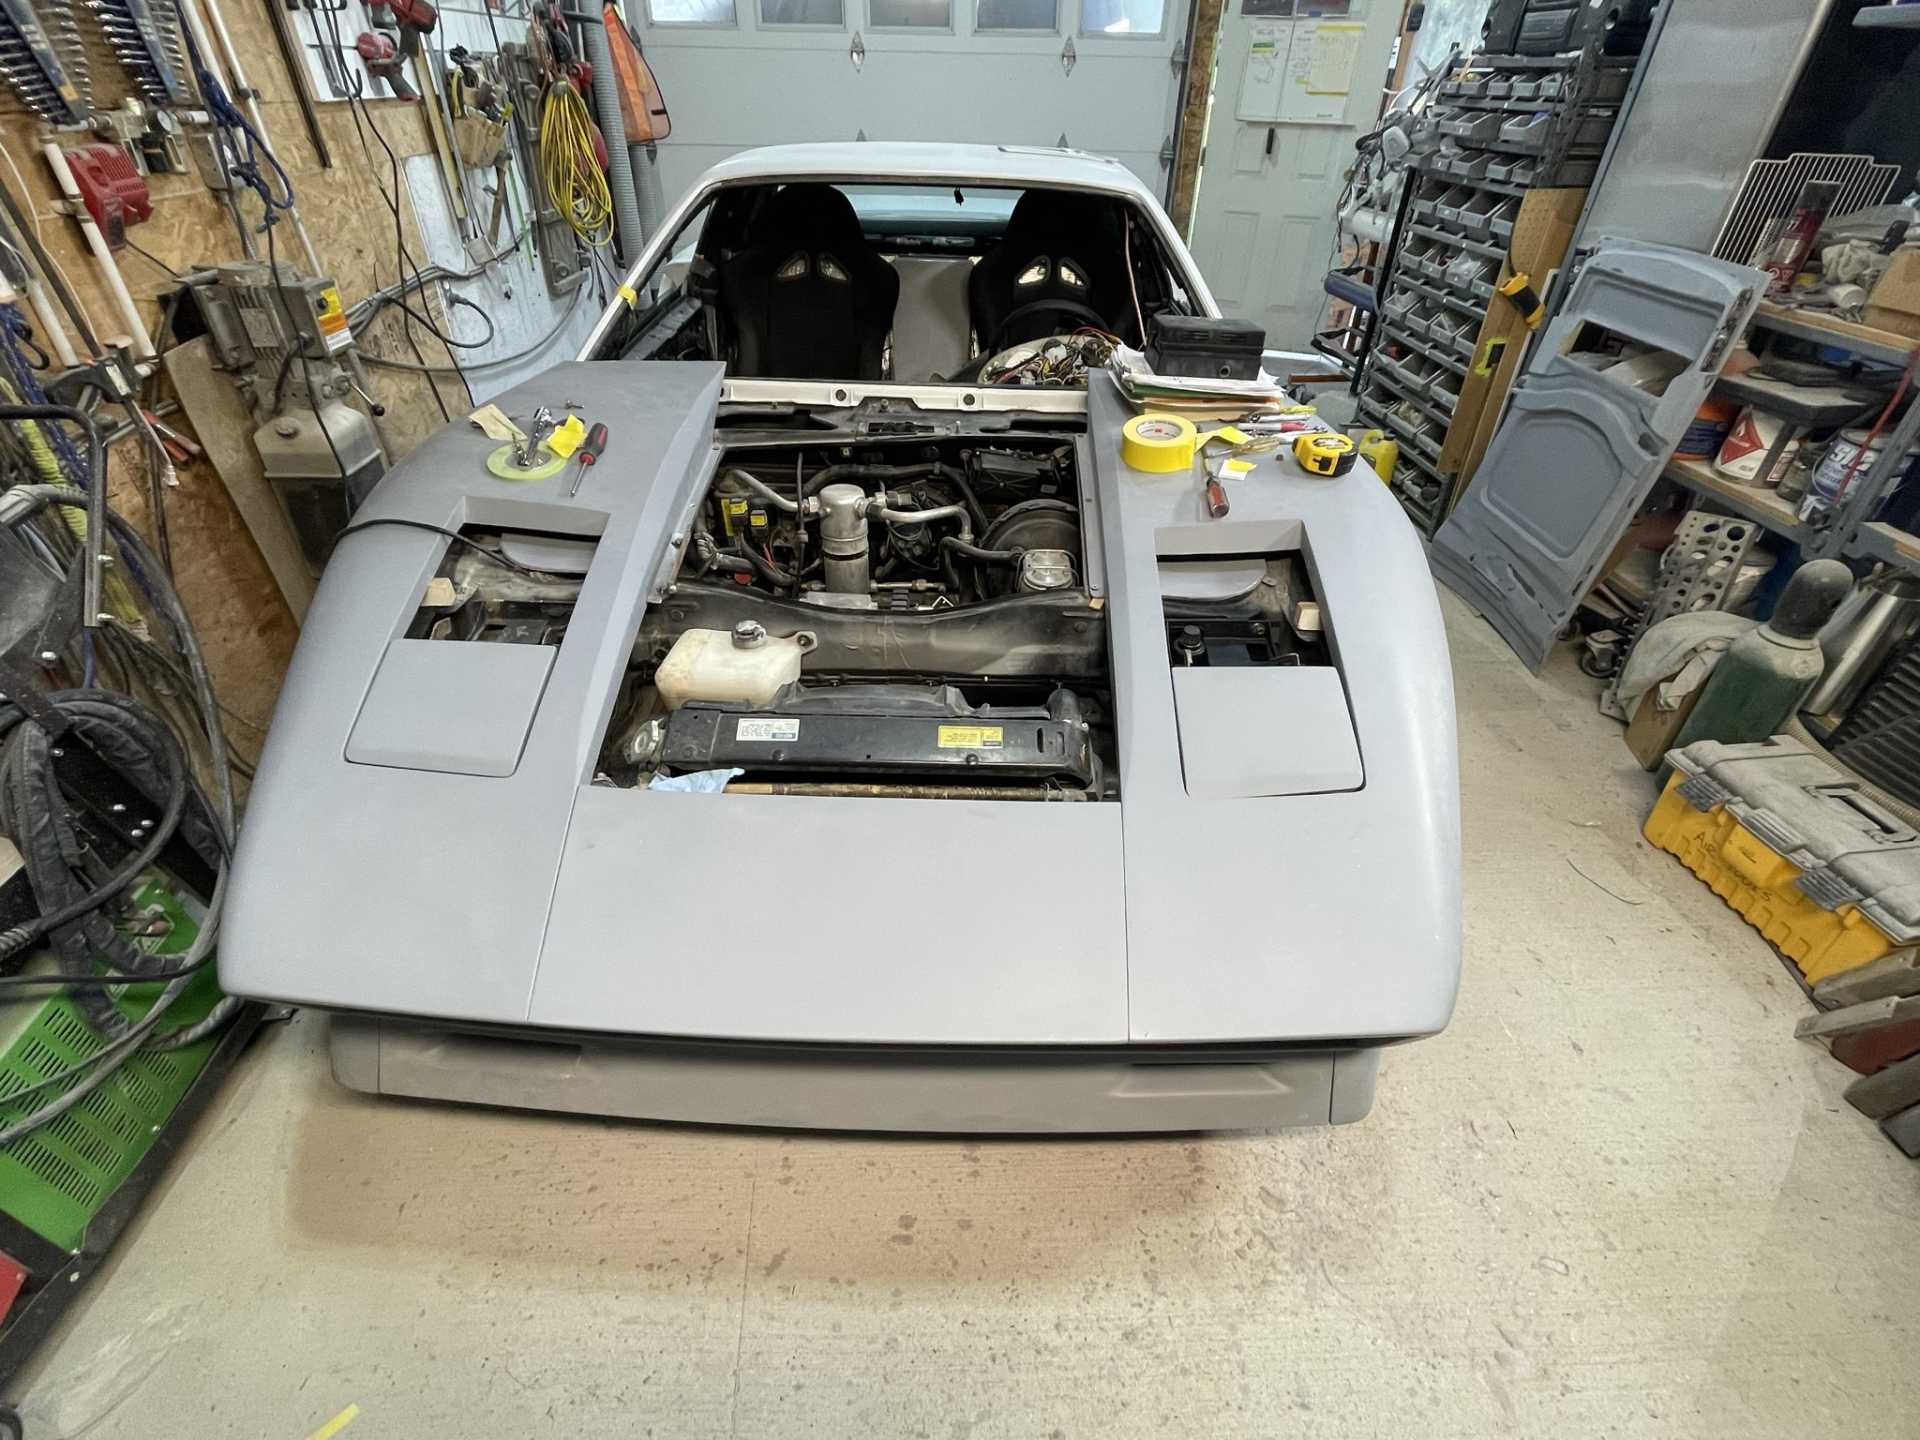
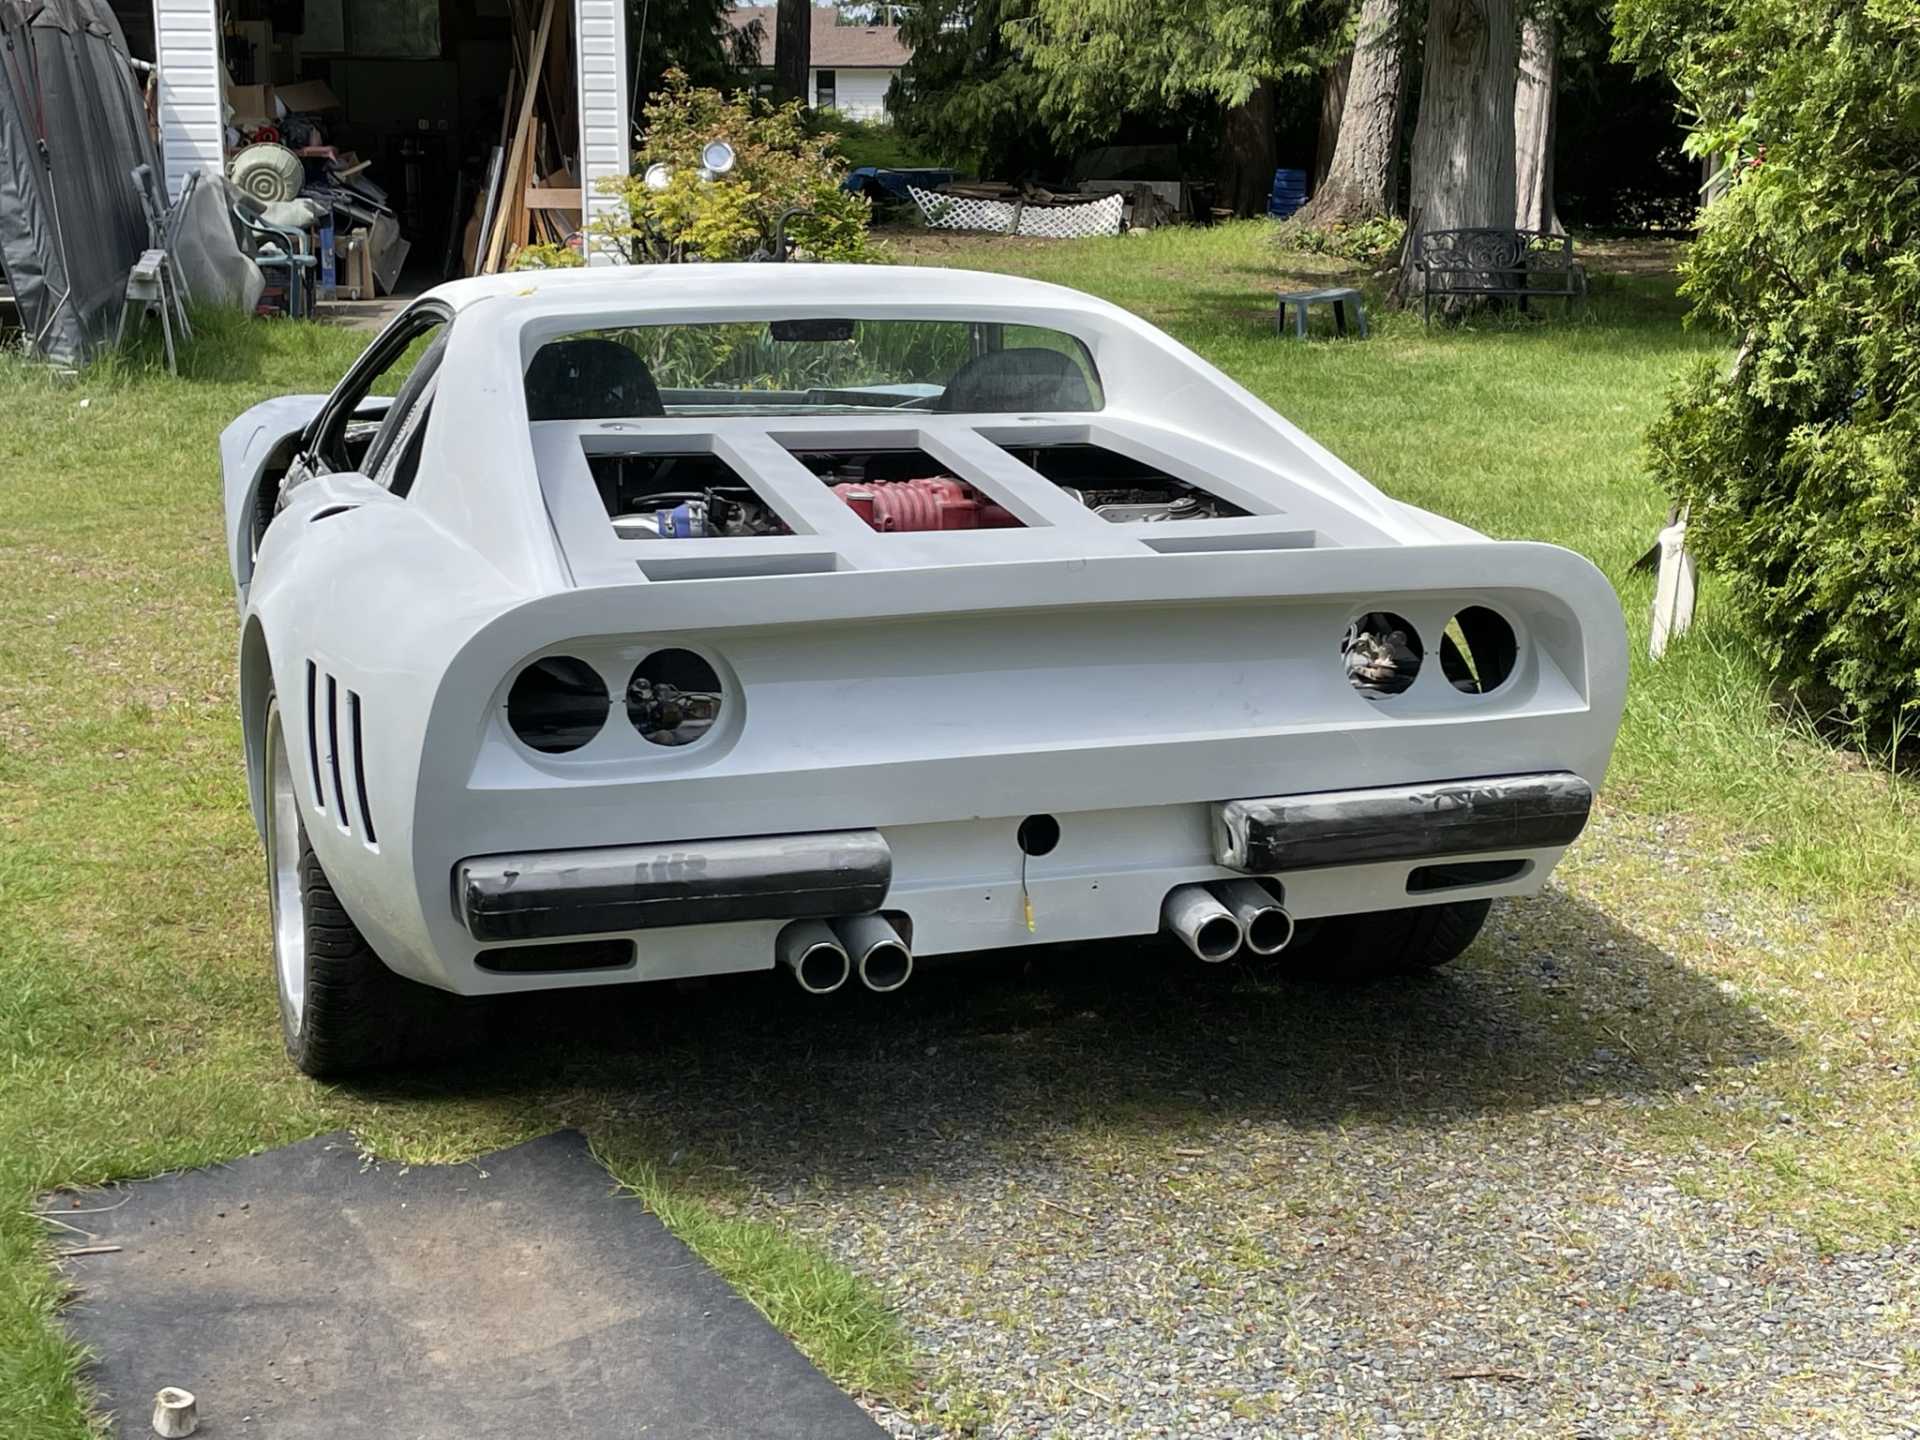
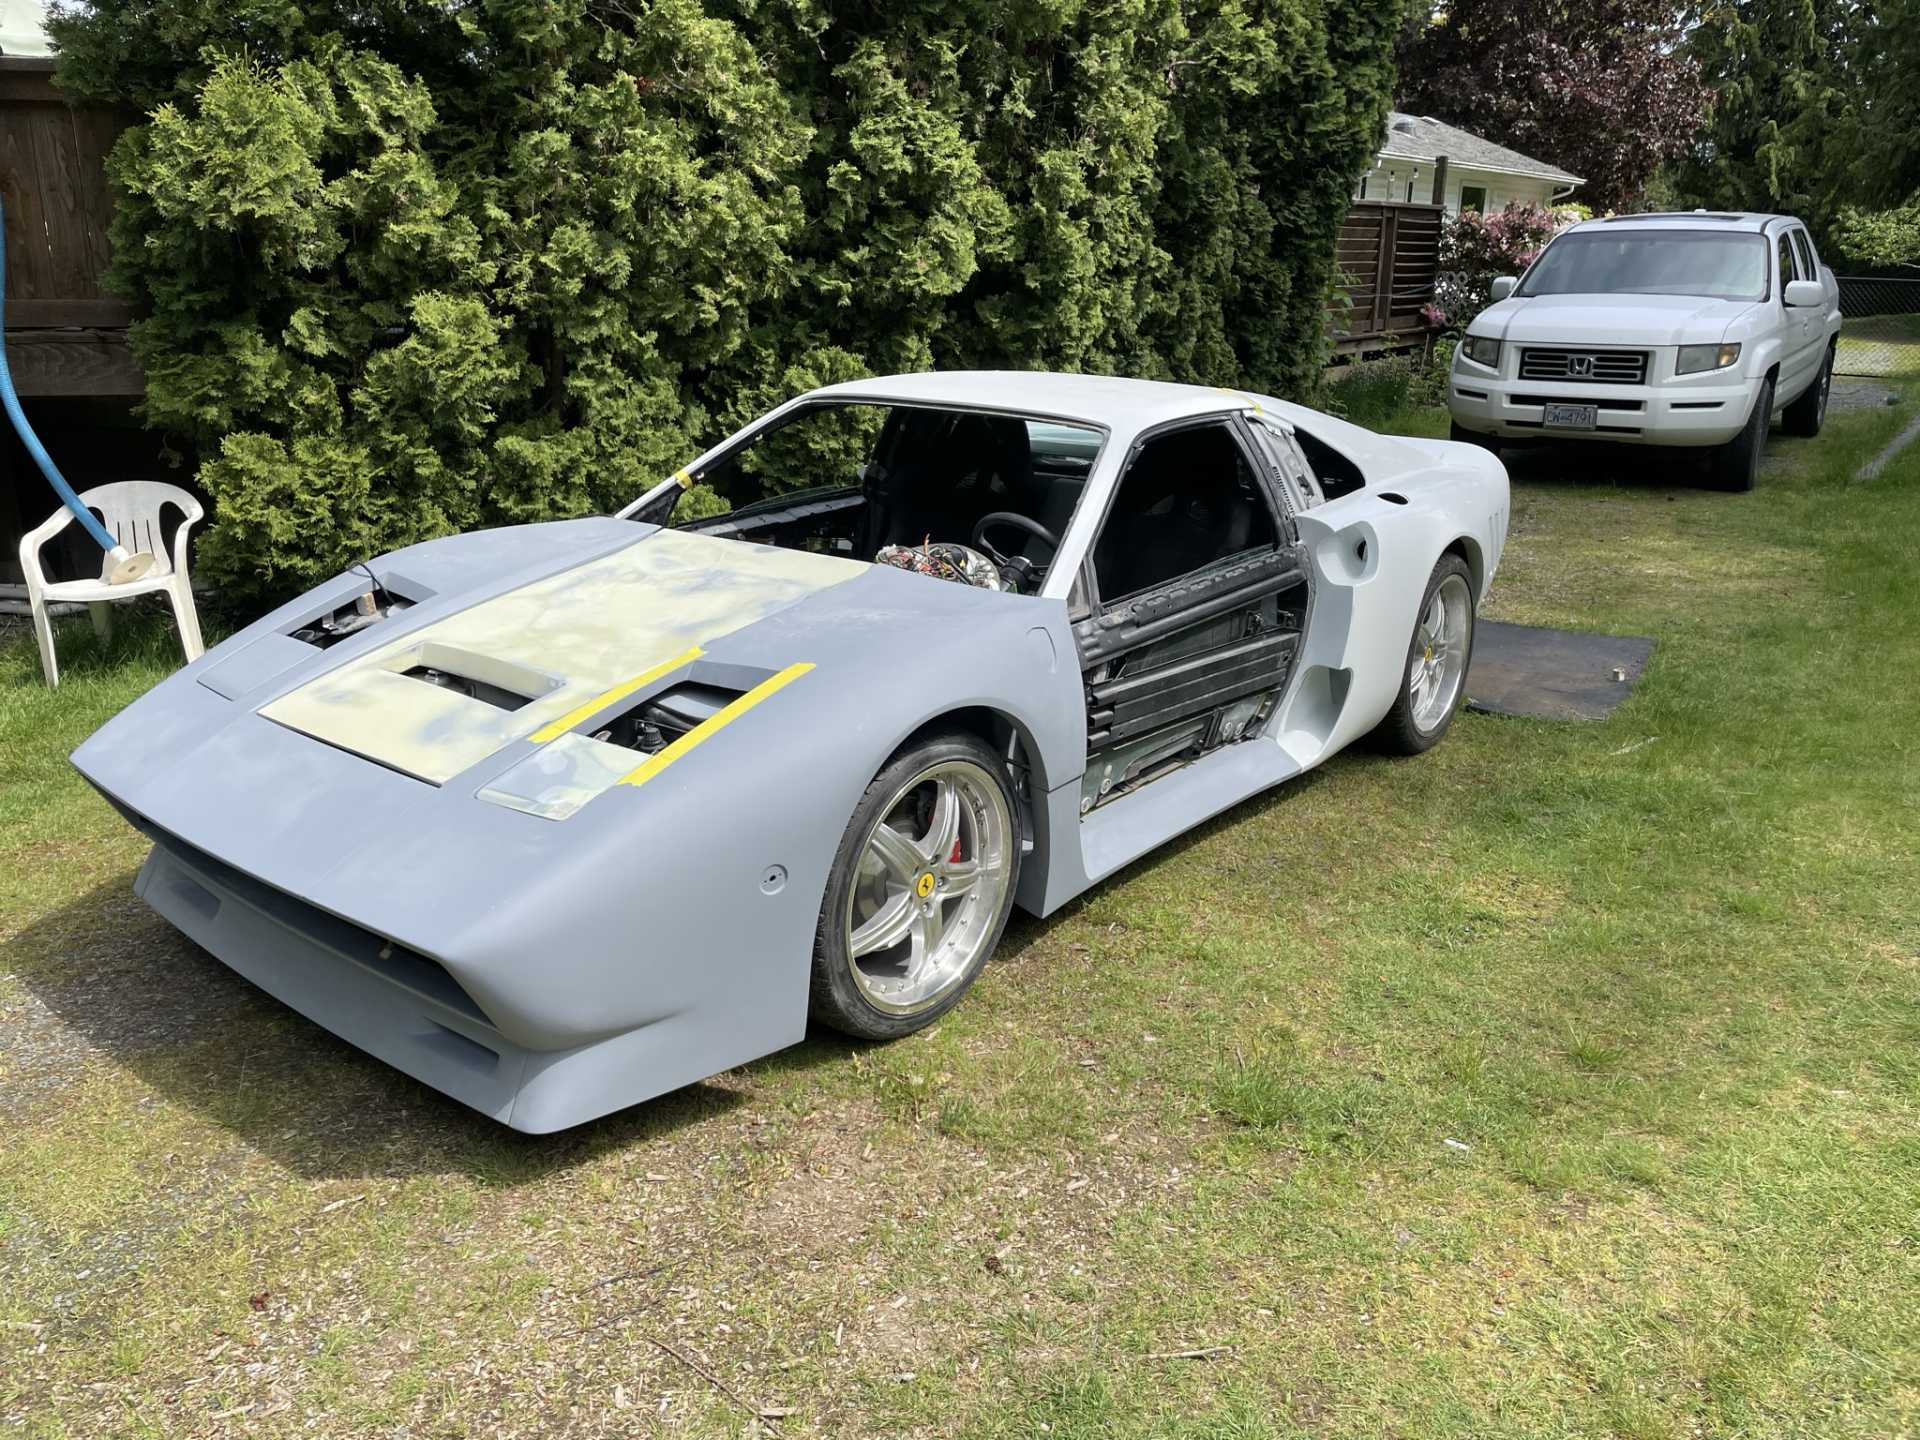
I had to move the car outside today so I could move the car lift it keeps creeping forward and to the right so I was running out of room !!
I got a couple nice shots of the car with front and rear hoods in place and checking ground clearance for the front spoiler and running boards.
Stay safe
Wayne
|
|
|