
 
     |
| Trinten's SBC/F23 build - The work has begun! (Page 44/76) |

|
Trinten
|
JUN 25, 10:55 PM
|
|
Thanks for clarifying.
I don't have an answer for that. Next time I'm there I'll ask!
|
|
|
|
jb1
|
JUL 13, 03:49 AM
|
|
|
Following , interested in how you done your front.. I am doing c6 on rear except going longitude ls setup... Was planning on figuring out front once rear is complete. ------------------
3800sc plug and play harnesses for sale.
85GT Northstar/ 4t80e
Northstar Rebuild
|
|
|
|
jb1
|
JUL 13, 03:52 AM
|
|
|
Following , interested in how you done your front.. I am doing c6 on rear except going longitude ls setup... Was planning on figuring out front once rear is complete. ------------------
3800sc plug and play harnesses for sale.
85GT Northstar/ 4t80e
Northstar Rebuild
|
|

|
Trinten
|
JUL 14, 12:00 AM
|
|
Updates as promised!
So to complete the answer to an earlier question about why Mike is using bushings in the new cradle, instead of solid mounting: given the engine/trans will be solid mounted to the new cradle, having those bushings in place will help reduce some of the vibration going to the body, and that tiny bit of flex could help in other rare situations.
The last few weeks he hadn't had much time to work on my setup due to unavoidable commitments. But he did build up some of the mounts and bracing on the cradle. It was pretty rough (all still in the tack-weld-fit-test-check stage), so I'm just giving you a teaser of one side!
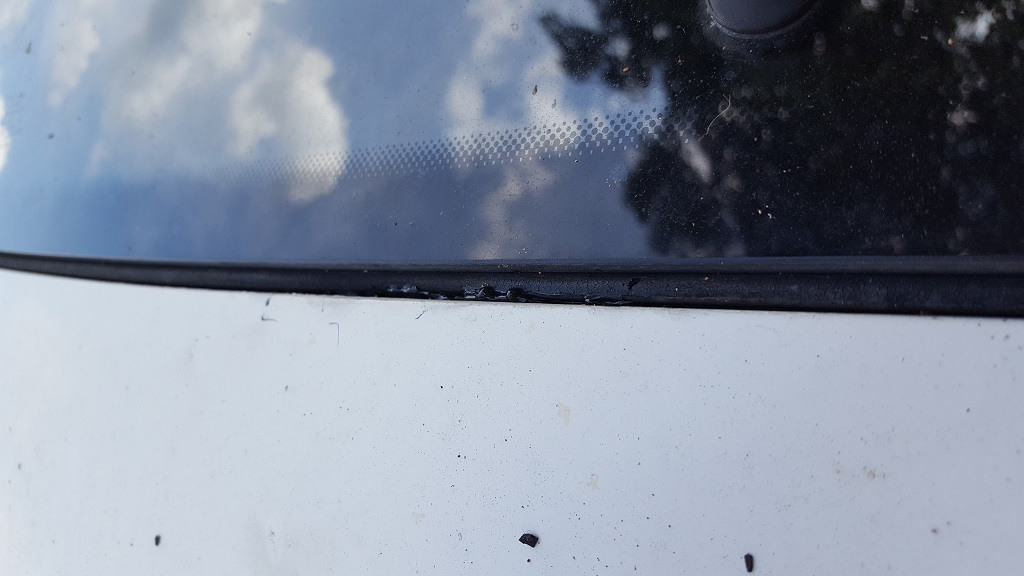
Onto other issues, we did find a tiny bit of water in the cabin. Despite being out in many other rain storms, no water was found, but we had some seriously heavy rains in the last few weeks. Mike started to check it out, and found a little rust under the gasket. So I'll be hitting the Mall to order some of those stainless sunroof rails. In the meantime Mike put some sealant on under there.
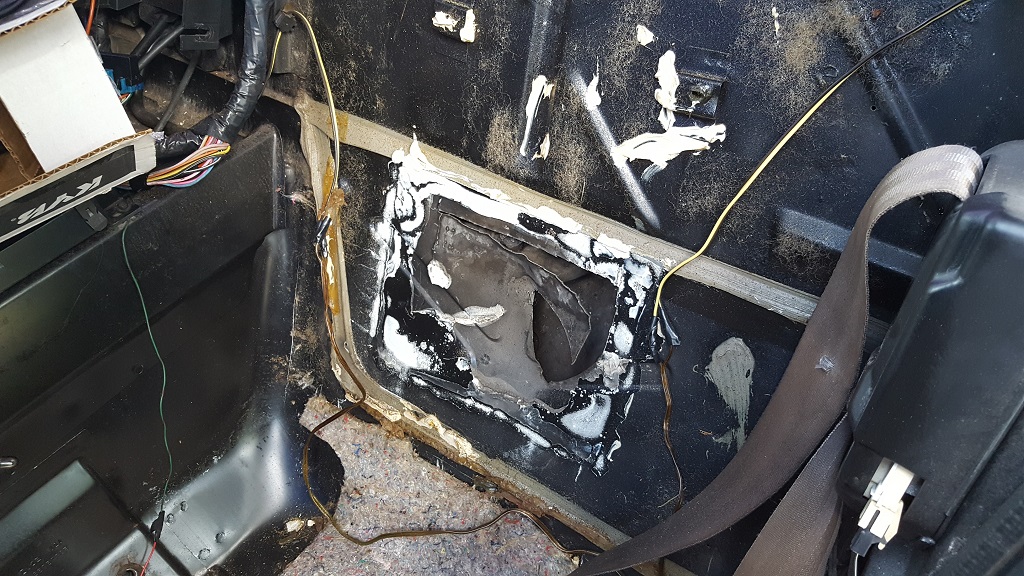
On the rear of the cabin on both sides, the previous-previous-owner had cut (or tried to cut) out a panel, given all of the shoddy speaker wiring going on, it was probably to try to put a subwoofer on the passenger side. When they realized that the same pocket did not exist on the driver side, they put down some heavy duty foil type material and lots of caulk over where they started to cut. I stripped that off, Mike is going to weld in a new piece of metal once the gas tank is dropped.
Now onto the exciting stuff! The frame rails will need to be modified to fit the new setup in there... instead of doing a little trimming like existed to make the original setup work, Mike is going to do something a bit more intense. He's going to take a large chunk of the framerail out on both sides, and replace it with a rock-solid bolt on chromemoly piece.
Why bolt on? Because this way getting to the valve body of the transmission, and the belt routin on the other side (plus most of the pulleys), can all be done without dropping the cradle. Just take off the wheels, wheel well cover, the cross beam, and access!
Oh yeah... and the strut towers? Getting rid of those, too, and going to weld in some smaller/better pieces.

Mike removed the spot welds and started disassembly the strut towers

More modifying
See the holes near the yellow markers on the right of this picture? Those were made by this awesome little air-compressor run tool he had, slipped it over the metal, hit the button, a quiet hiss of air and out popped a perfect little plate of metal! This way he can put spot welds back in.
Annnnd it's gone! To be replaced soon with the new and improved bolt-in-rails!
[This message has been edited by Trinten (edited 06-04-2024).]
|
|
|
|
wftb
|
JUL 14, 09:15 AM
|
|
|
Interesting stuff. Now I won't be the only one to build a stock wheelbase upper and lower wishbone coil over suspension. (SLA) ------------------
86 GT built 2.2 ecotec turbo
rear SLA suspension
QA1 coilovers on tube arms
|
|
|
|
Trinten
|
JUL 14, 09:19 PM
|
|
|
Cool! Do you have a link to your build thread? I'd love to check it out!
|
|
|
|
wftb
|
JUL 14, 10:50 PM
|
|
|
|
|
Will
|
JUL 17, 12:14 PM
|
|
| quote | Originally posted by Trinten:
So to complete the answer to an earlier question about why Mike is using bushings in the new cradle, instead of solid mounting: given the engine/trans will be solid mounted to the new cradle, having those bushings in place will help reduce some of the vibration going to the body, and that tiny bit of flex could help in other rare situations.
|
|
We'll have to agree to disagree on that one. That logic is backwards. The suspension needs to be hard mounted while the powertrain should be soft mounted.
|
|
|
|
Trinten
|
JUL 22, 11:01 PM
|
|
So some updates!
Weather sidetracked some things. This Saturday Mike tackled starting to dismantle the passenger side strut tower, and he welded the cuts the PPO (previous-previous-owner) did for their after market stereo stuff... which they apparently cut with tin snips!
The driver side was easier to clean up, prep and welded on a new piece of metal. We also got a tube of seam sealer (which I learned is different from RTV. Don't laugh. No one was born knowing that). Seam sealer has not been applied to the welds yet, the only tube of it in town we could find is not designed to go into a caulk gun, so once we open it, we have to use it.
The passenger side was a disaster. The jokers that did this used the aforementioned tin snips, then used pliers to bend back the jagged edges, THEN filled in the gaps with a creative combination of things. Including a bondo spreader, paper, a towel, window caulk, and this rubbery yellow stuff that was incredibly pliable, very tough to pierce, stretchy... but gave NO warning when it hit it's tensile limit, and it would instantly tear. It was very slow to dig that crap out. Then Mike unbent the jagged metal, dug out MORE of that garbage, cleaned it up and welded it!
The 'shapes' on the welded pieces are the glue that was on those metal pieces. They started their life as the top layer of a Saturn hood (before GM bought them).
Oddly, I didn't seem to take a picture of it after the final welding and painting. The picture of the passenger side is after all of the spot welding was done, but I think before he did the final grinding and painting.
I also took out the 5 speed shifter. I almost did it without anymore of the skeleton breaking. Almost. Only one small crack.
Because of the slight roof leak, and the scent of mildew that was on the carpet, I suspected some of the spots on the floorpan was mildew. When we went to lunch and made some stops for steel for the frame I picked up a bottle of mold/mildew cleaner, and cleaned the floorpan, console, etc.
This weekend Mike has plans, but said they might change, then he's going out of state for a trade show the second weekend of August, and making a trip back to his home state. Returning early September. That leaves, at best, this Sunday if his plans change and he's free (I have plans on Saturday), and
the weekend of August 3rd. After that, there won't be any progress until sometime in September.
Now then, pictures!!!
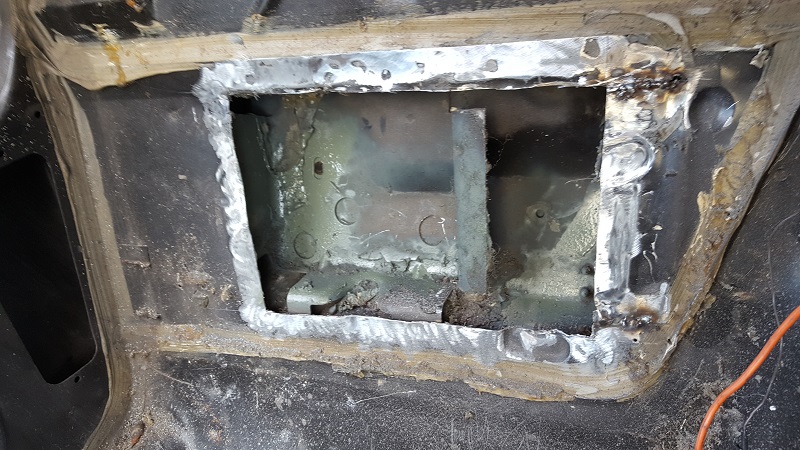
Driver side cabin hole prepped for welding... I guess when they saw the GASTANK FILLER TUBE they realized it was a bad idea.
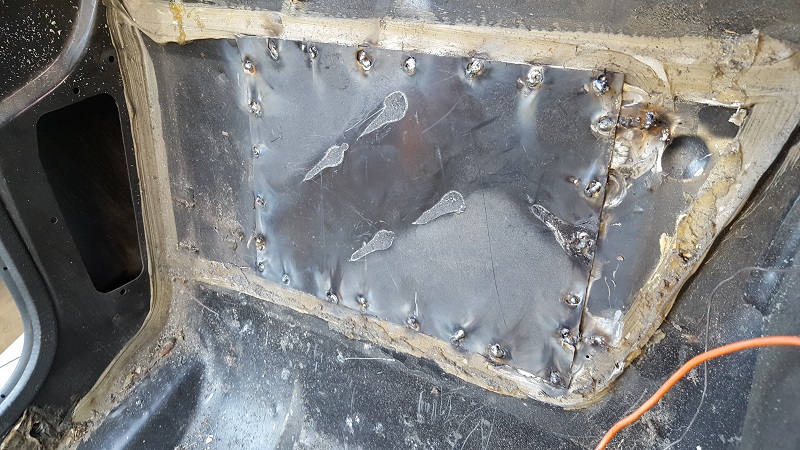
All welded. Mike even used a airtool and hand tools to dimple in the steel to follow the original dimples!
[IMGhttp://images.fieroforum.com/2020/pstostart.jpg[/IMG]
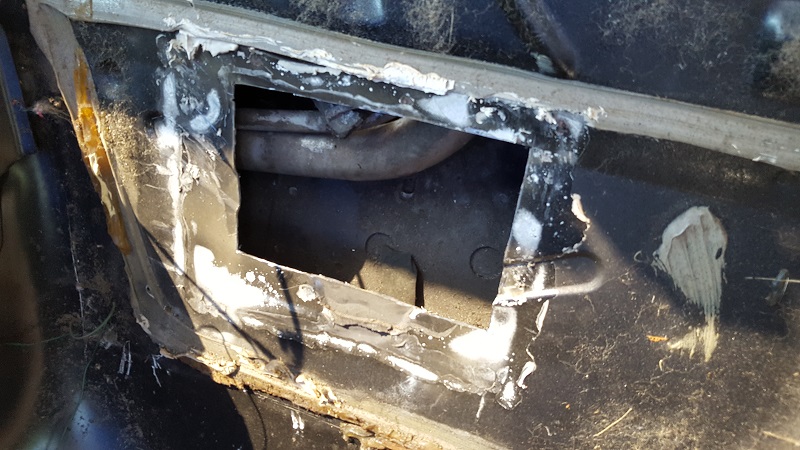
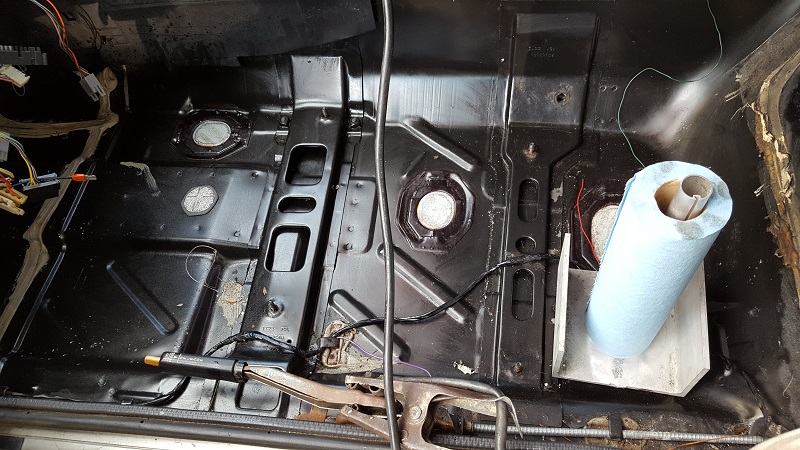
Here's the passenger side... it looks deceptively okay! Just wait...
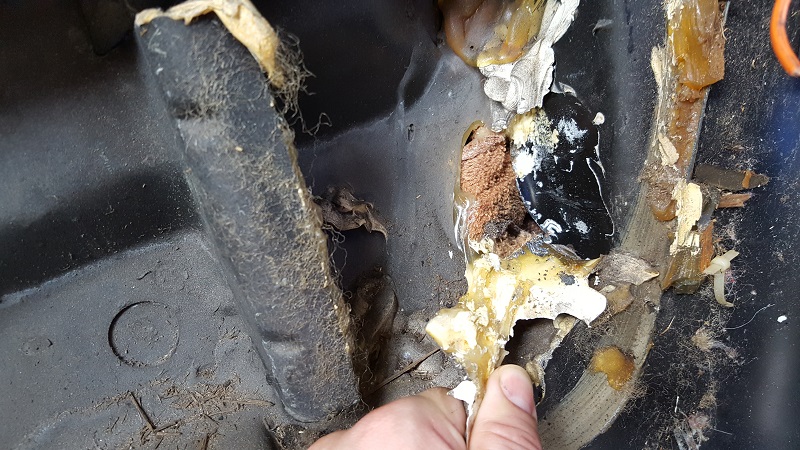
Yup... there's the towel. You can also see the caulk.
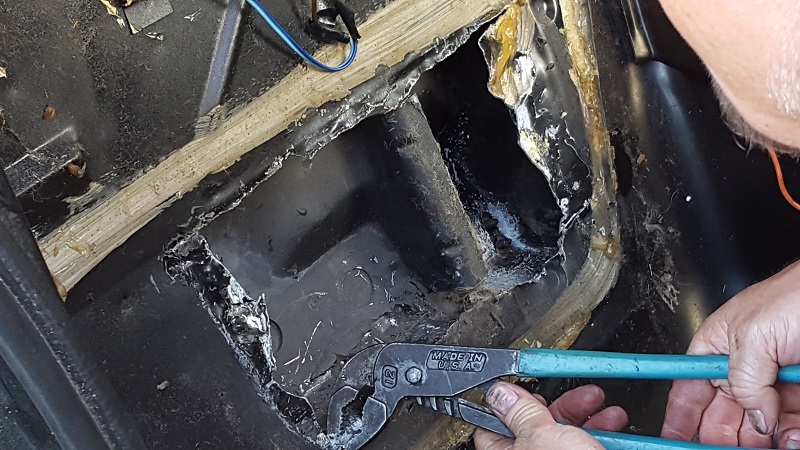
Mike is unbending all the metal, you can see all the jagged bits.
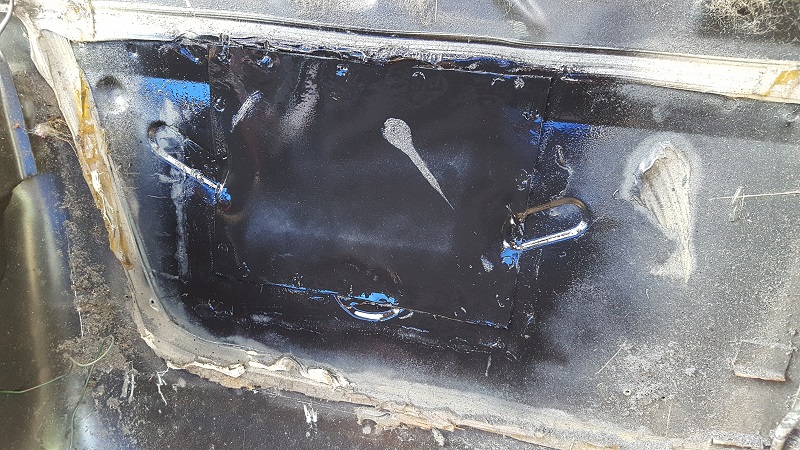
All cleaned up, some spot welding. Ready to be sealed up!
The near-finished product... I still can't believe I didn't take a finished picture. 
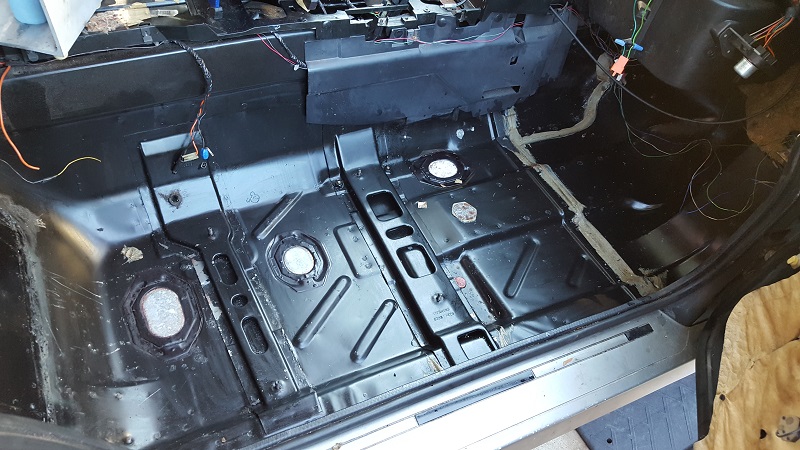
Clean floorpan!
Last picture for today, the partially disassembled passenger side strut tower!
[This message has been edited by Trinten (edited 06-04-2024).]
|
|
|
|
Trinten
|
AUG 03, 09:34 PM
|
|
Today was a very accomplished day.
We had to stop at 3pm because Mike had other commitments, so I got out there a little earlier than I normally do. It was a great day to work on the car. Most of the day was overcast, so it was a little cooler. But the humidity spiked up later in the day and that sucked a little.
Anyhow. I started applying the Cool-It mat I bought. It's sound deadener and heat shielding. I had it in my last Fiero, and it made a difference with the heat. It's tough to say how much it helped with noise, since my exhaust was also upgraded when it was installed.
I got two rolls of it, which seemed to work out near-perfect. One full roll was used on the driver side. After this is in, I also have Thermo-tecs sound deadening stuff that's a little thicker, that'll be going in as well.

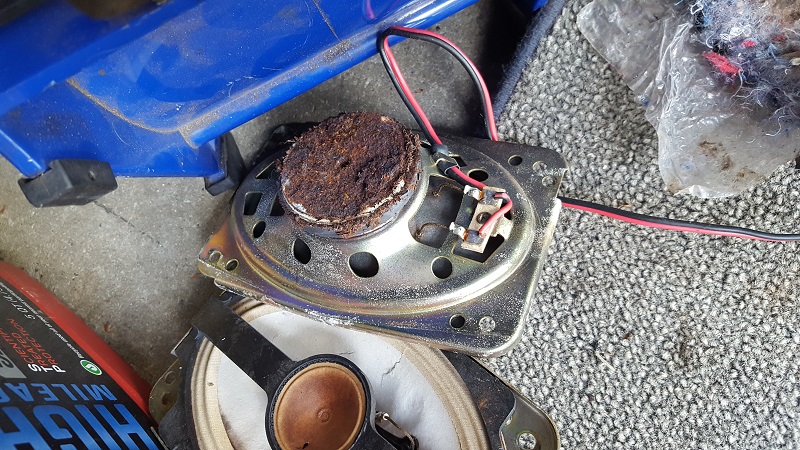
I even had a perfect little piece left over that went on the B-pillar next to the speaker. Speaking of Speakers... the stock speaker on the driver side? The back of the magnet was RUSTED. So badly that there was a crust of rust in a perfect little circle on the jute behind the speaker. So that jute will be replaced. Here's a shot of the speaker.
It took me an embarrassing amount of time... a lot of measuring, cutting -- with just a single edged razor blade -- and then fighting with the stuff to lay right initially before I used the roller to press it down.
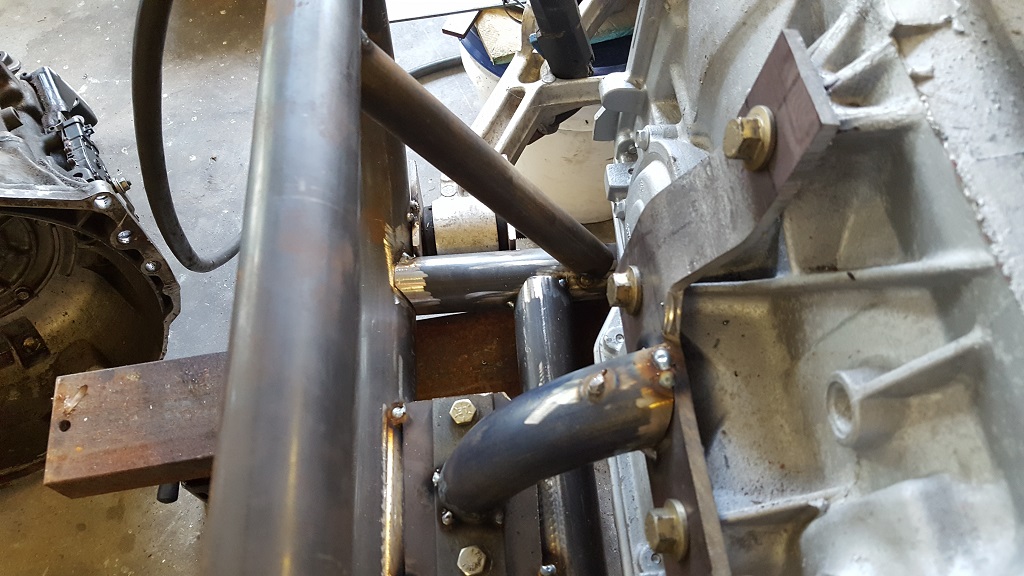
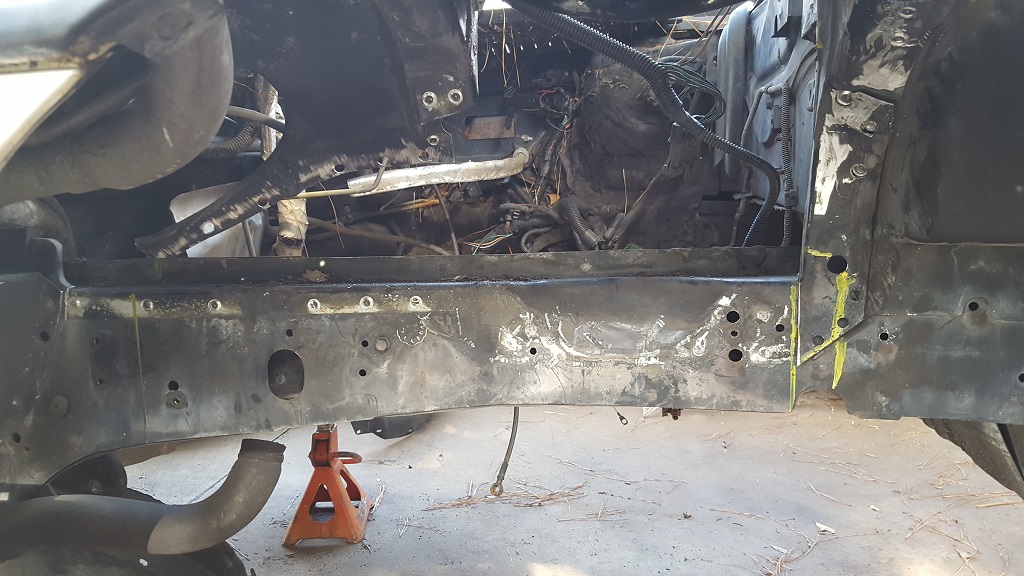
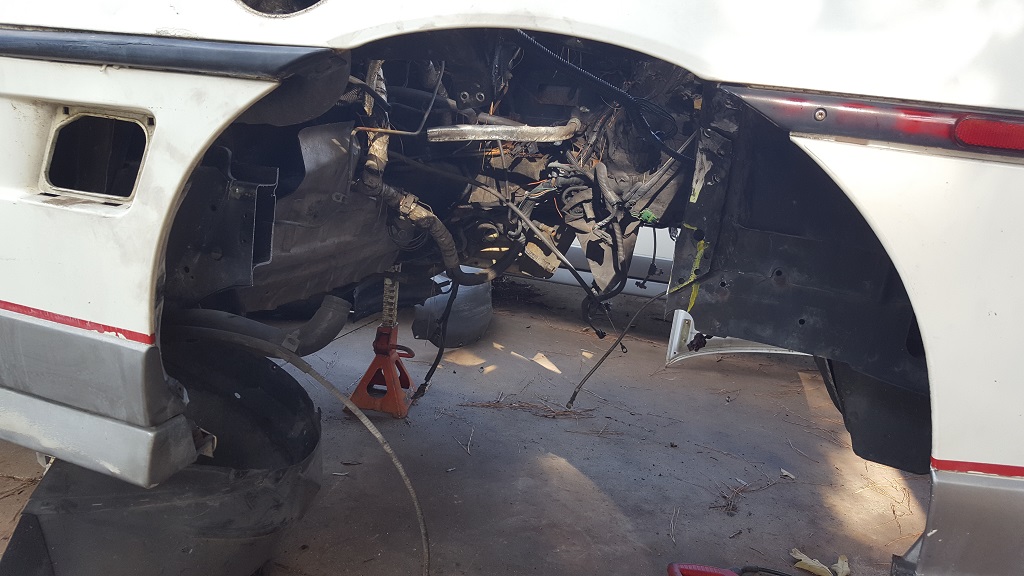
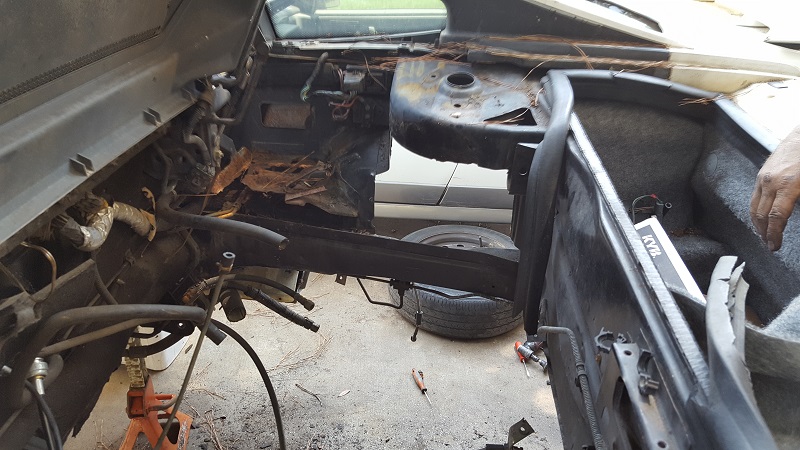
While I did that, Mike finished working on the mounting plates for the removable frame rails. He tacked in some angle iron for right now as a place-holder. I took a pick after he removed the original passenger frame rail... you can see the angle iron place holder on the driver side. You'll be able to see the installed passenger side one in a minute.
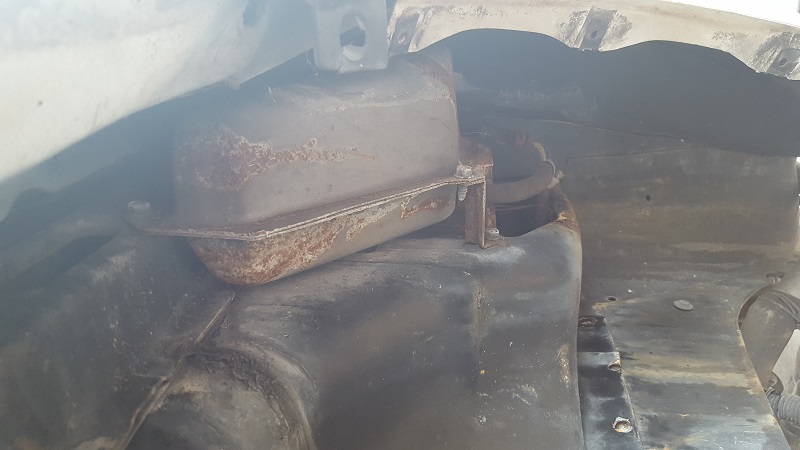
Mike also pointed out this vapor/expansion tank that was tucked up on the passenger side. I thought these only came in '88s? Can anyone confirm? It was in bad shape, the fuel lines running to it were so rusty that they broke when he was working to remove it.
I started installing the cool-it mat on the passenger side, which was going quicker now that I learned from my previous experience. Then Mike stopped me.
Why?
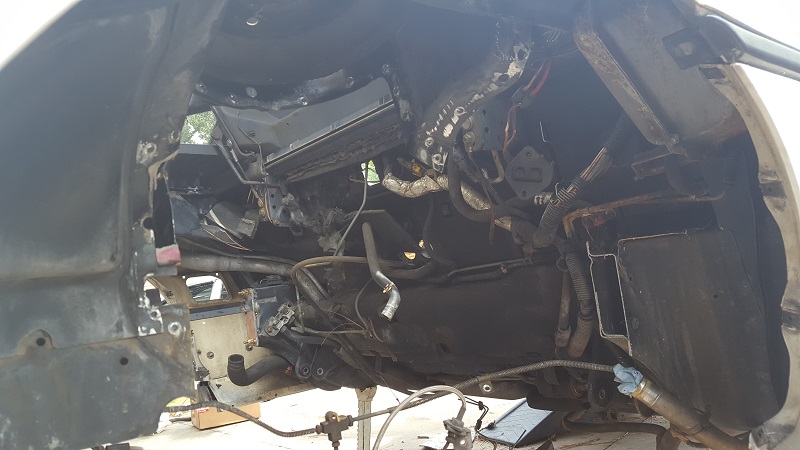
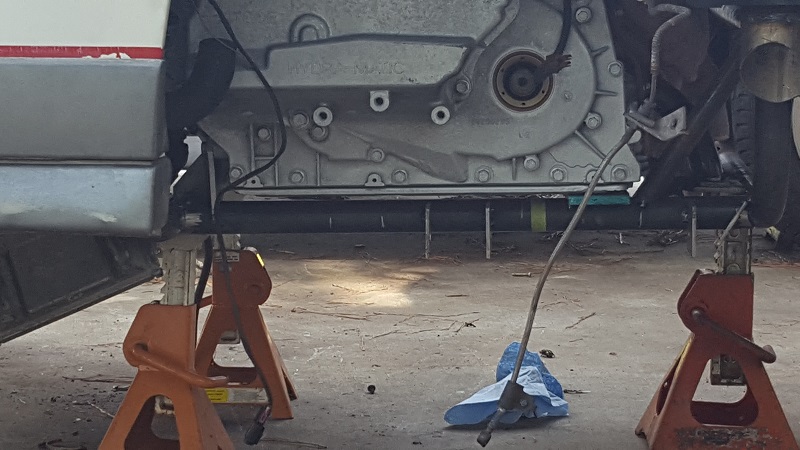
Because he needed me out of the car while he did this little bit of work called... test fitting the cradle/drivetrain in the car!
It was slow going, we had to watch clearances EVERYWHERE because the engine compartment still has a lot of useless crap. on the firewall, and of course all of the cool stuff FieroGuru had done (like wiring relocations) don't exist here (yet).
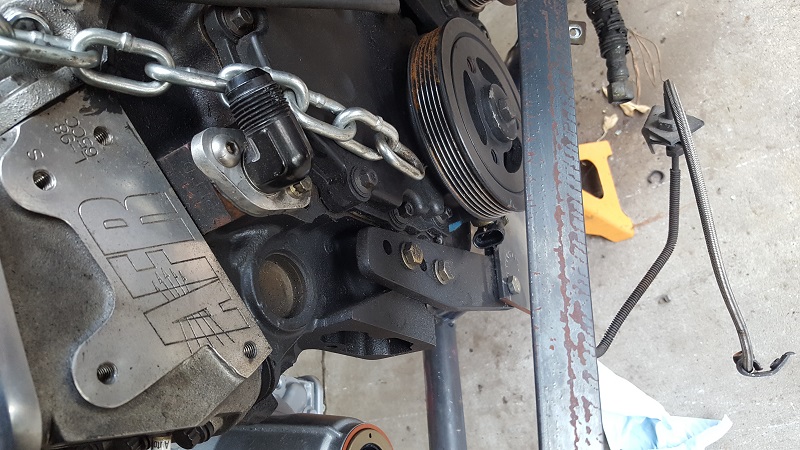
And another shot, I tried to show how much more room there is now between the rail and the engine... with the original strut towers, an engine belt wouldn't even fit between the tower and face of the pulley easily. Now there's miles of room. The circumference of the chrome moly isn't much bigger than the angle iron if you drew a circle connecting it's three outmost positions.
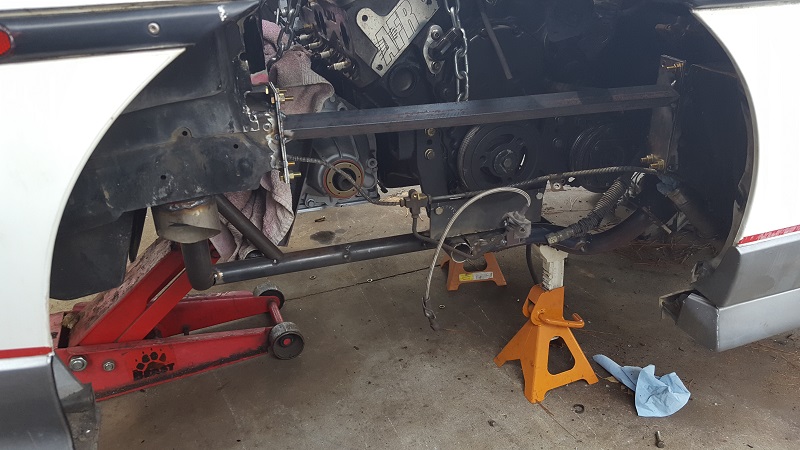
And here's one from the driver side - the bottom of the cradle lines up perfectly with the ground effects of the car. It's working out beautifully so far! And again, tons of room between the transmission and where the new rail will be.
And here's another from the drivers side.
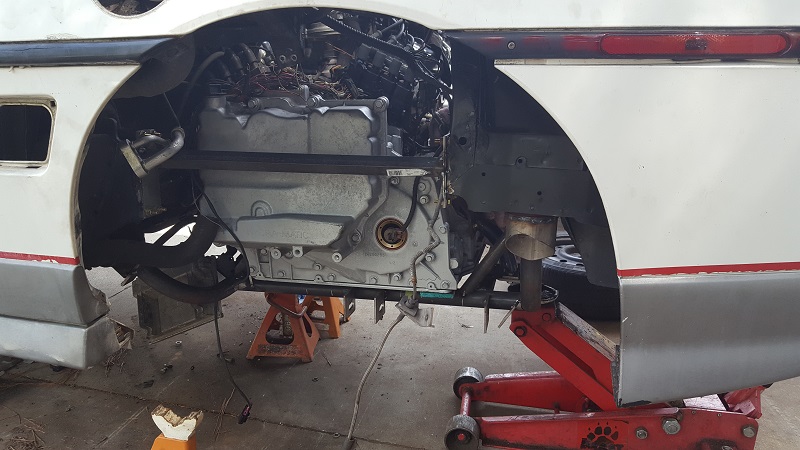
And lastly, one from the top, and then some details on fitment!
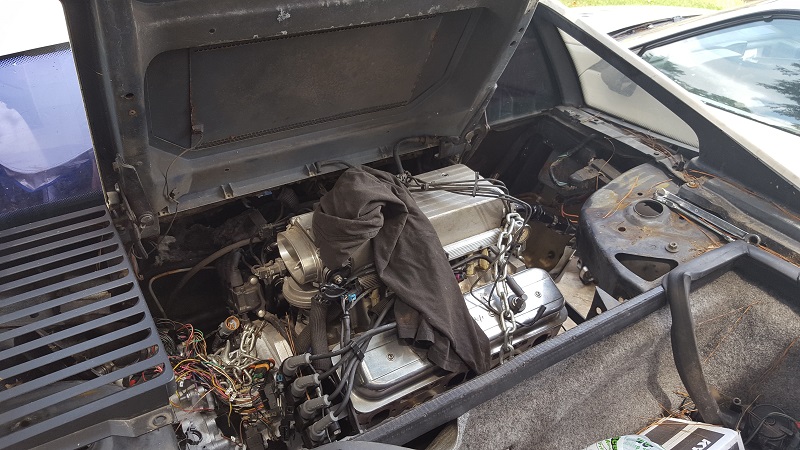
We did have to clearance the bracket for the decklid hinge on the passenger side. I expected this. Originally my first revision V8 Fiero was missing half that bracket. Mike didn't take that much off, just enough to get the body down far enough to bolt the cradle into place.
I did keep the awesome brackets that FieroGuru made when he did all the EFI work, so I told Mike I'd like those to go back in, which means getting rid of the stock spring and the rest of the bracket on both sides. We will also need to clearance the "support rail" of the decklid on the passenger side (about 1/8 of an inch), for the same reason FieroGuru had to -- so the decklid can close. Otherwise it hits the intake.
We're going to use the original Corvette Axles that came with all the parts, cut them, make some sleeves, and use them solely for test fitting to get perfect measurements, then the Drive Shaft Shop can make me a set.
Also!! I still have the OEM Getrag axles that were in this car... are they worth trying to sell? Or should I just throw them on a shelf until someone needs one? I know there are aftermarket options, but as FieroGuru has posted about in the past... the aftermarket ones aren't exact... just "close enough" to work in most stock applications. So anyway, let me know.
Mike is going to be unavailable for the next three weeks (approx), doing cool work stuff. So I don't expect to be back out there until sometime in early September.
[This message has been edited by Trinten (edited 06-04-2024).]
|
|
|
|