Ferrari 288GTO build (Page 43/64)
dobie1 DEC 19, 10:27 PM
Well this will be the last update for the year, going to take a couple weeks off for the holiday season.

Here is the latest update, I ran into a setback dammmmmm!

I started the second lower scoop having the first one finished and happy with the results I figured it would be a fairly uneventful mold build ,boy was I wrong.

I attached the flanges as before.


Applied the wax and PVA as before then applied the Gelcoat nothing out of the ordinary. I left it overnight then came back to complete it and found several areas that
had failed and "alligatored" meaning I had to remove the gelcoat and start again .


I'd thought about this before and thought that If I laid a couple layers of fibreglass down on top it would come off without destroying the flanges or damage the part . "WRONG"


It took the paint off down to the primer not sure exactly what happened some sort of contamination but definitely a setback, had to resand and do a bit of bondo repair ,I'll paint it soon and retry the mold build.

I also started to prepare the spoiler for the first part layup, hopefully I'll be at it in January


Stay Safe everyone , all the best of the Season .

Wayne

[This message has been edited by dobie1 (edited 12-19-2020).]

FRANKENSTEIN JAN 20, 04:35 PM
Watching this work or art in progress
dobie1 JAN 29, 10:50 PM
Sorry everyone for the long delay on a update, I've been very busy over the last few weeks helping a couple buddies Don O. and another friend with their projects.
I was helping Don mold a Lambourgini Countach OEM interior for a future project for him, It all went very well molding the15 pieces.
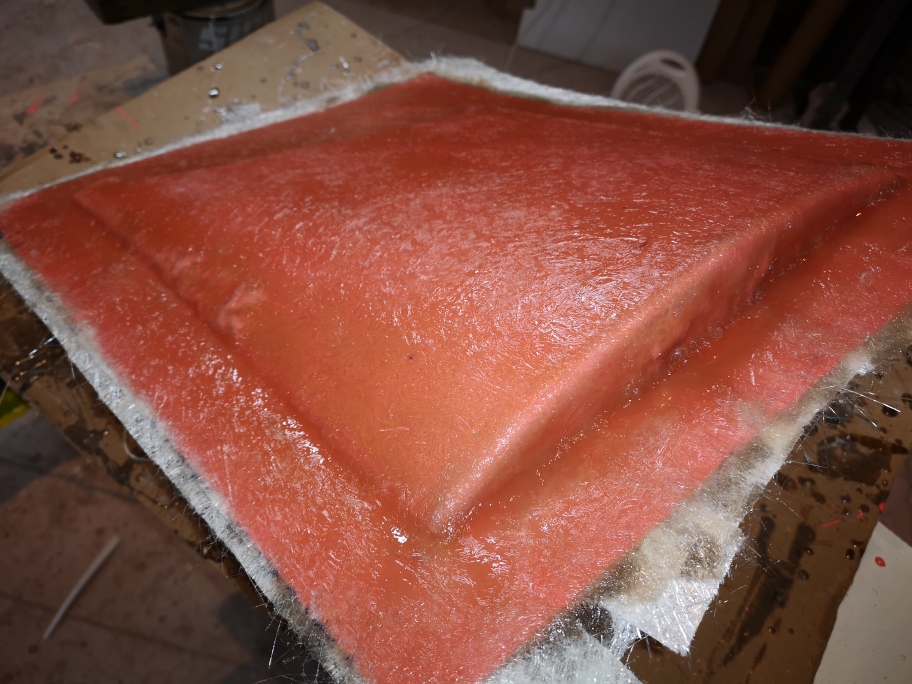
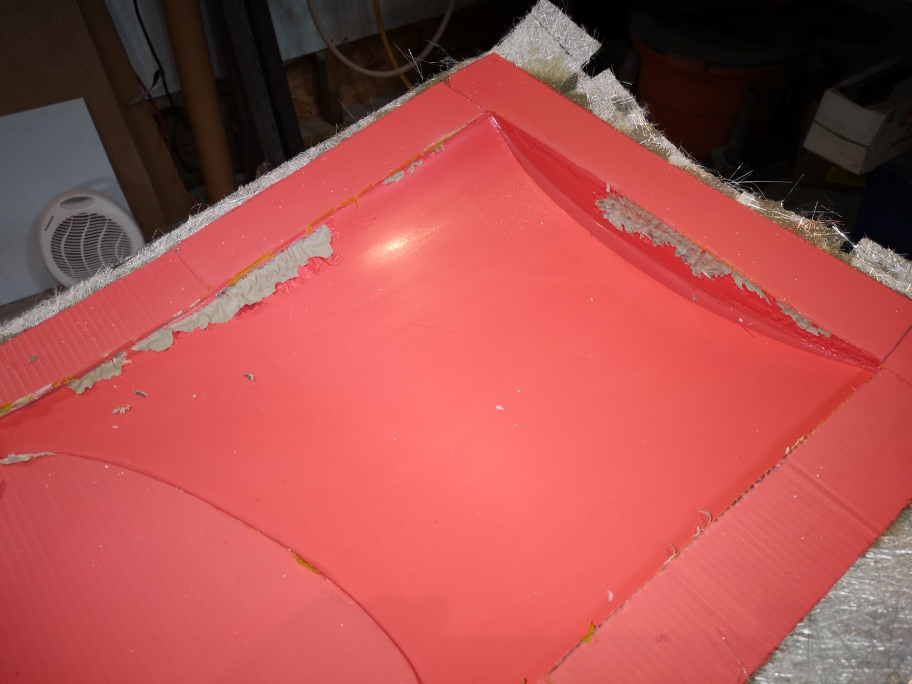
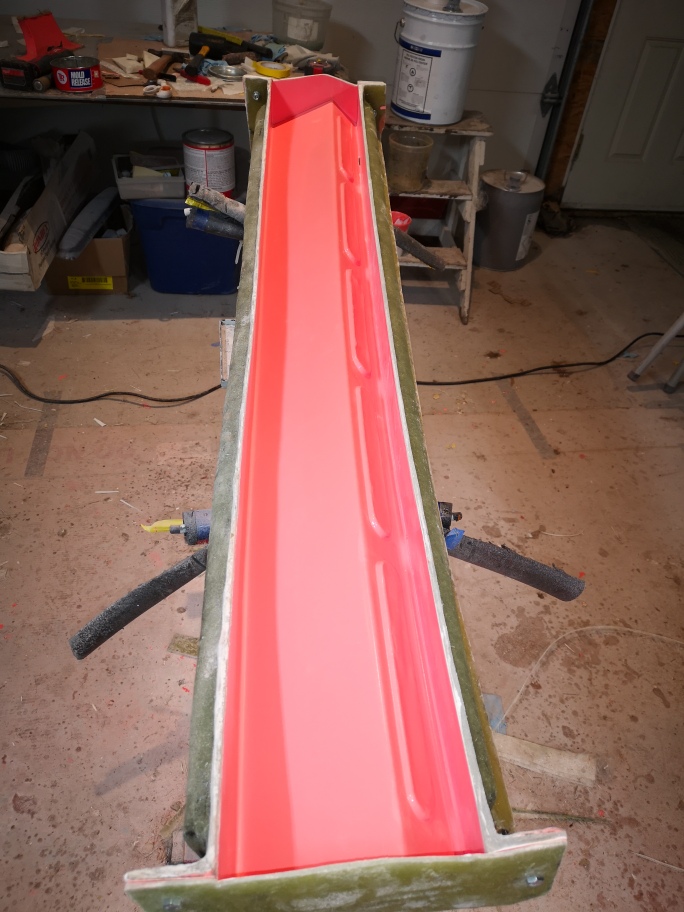
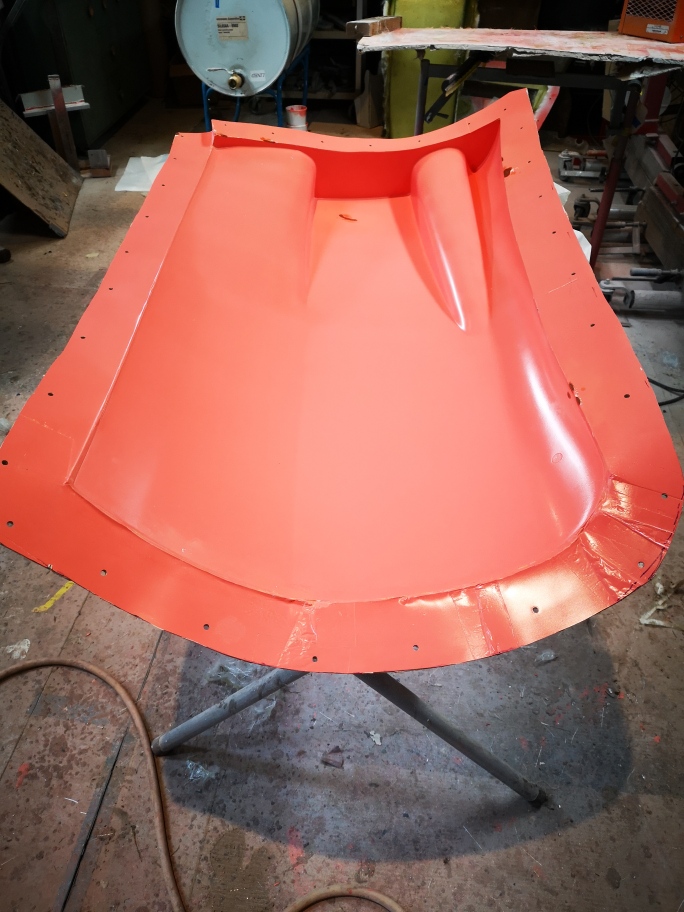
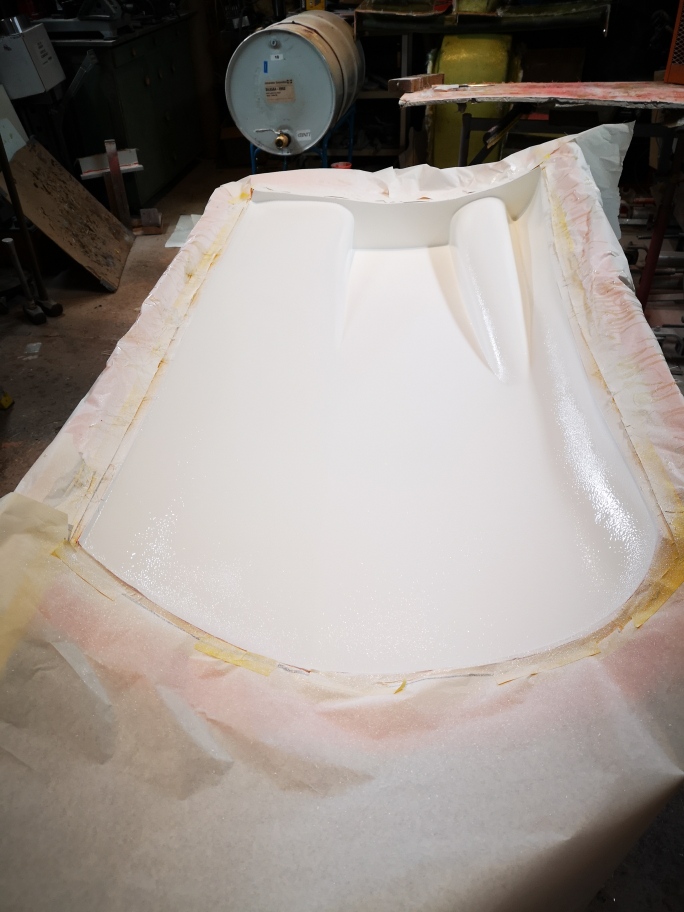
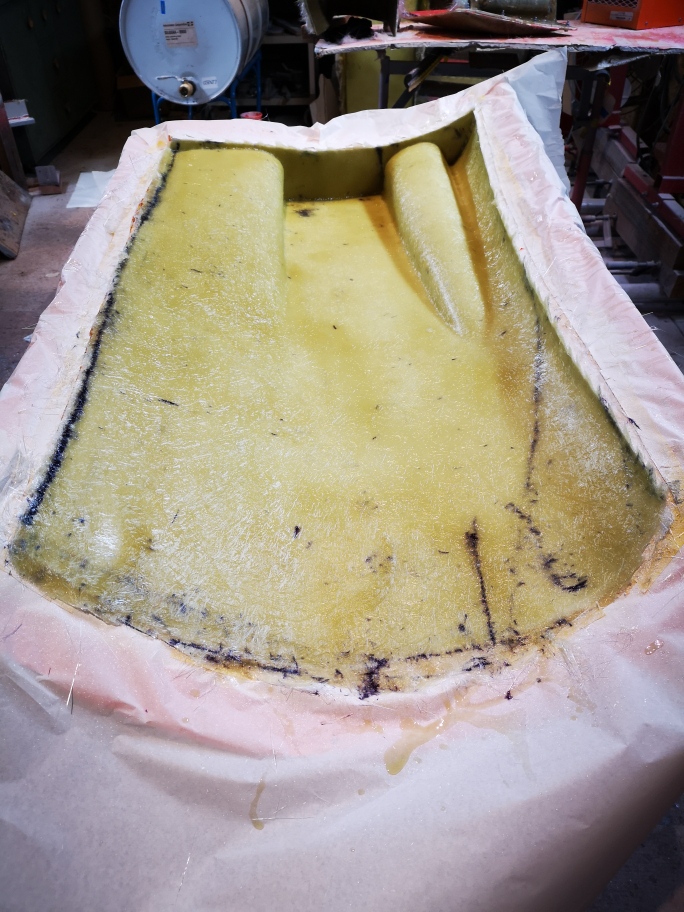
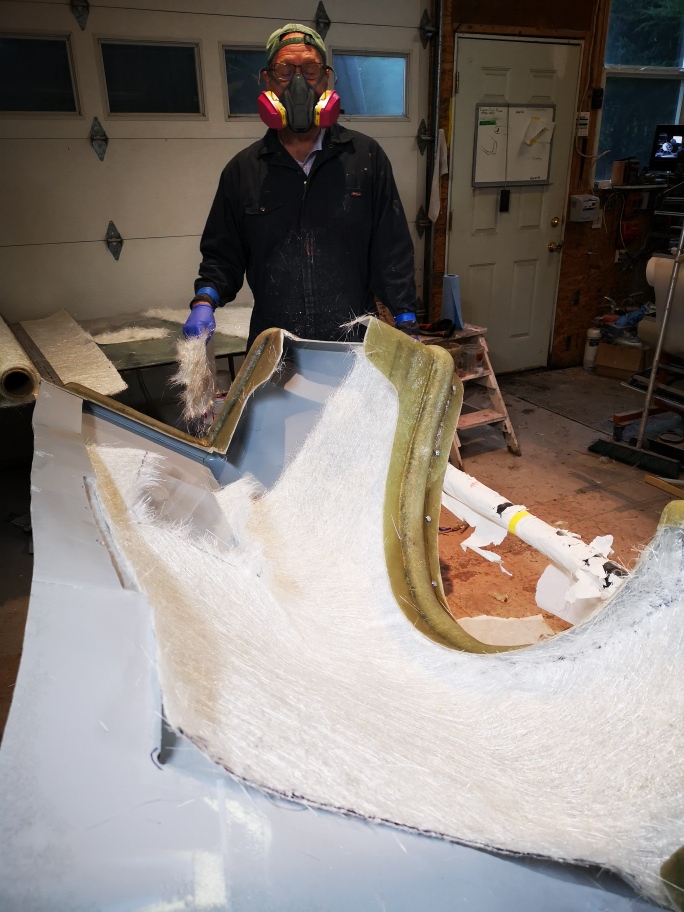
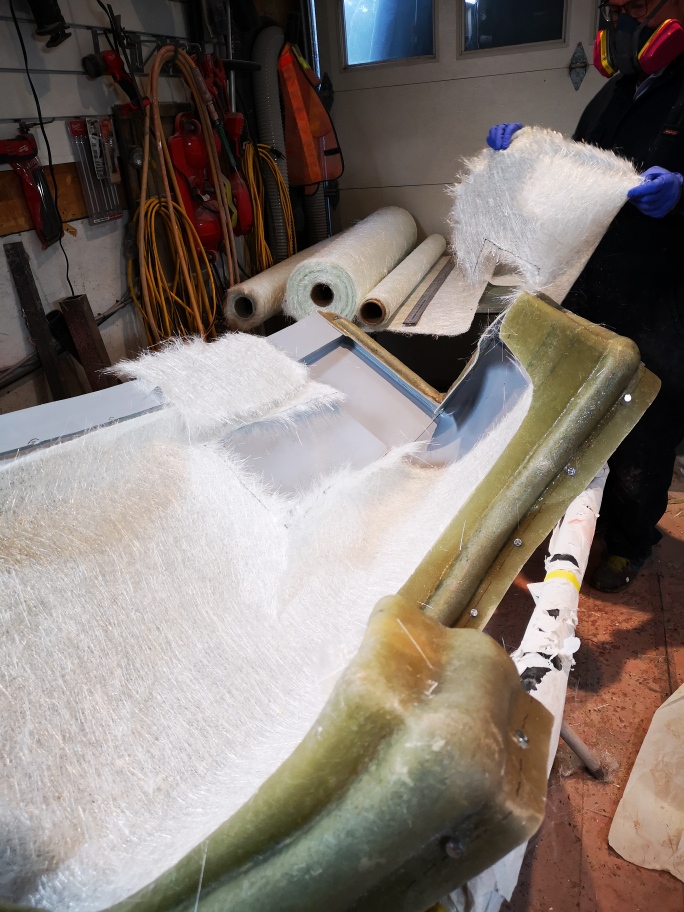
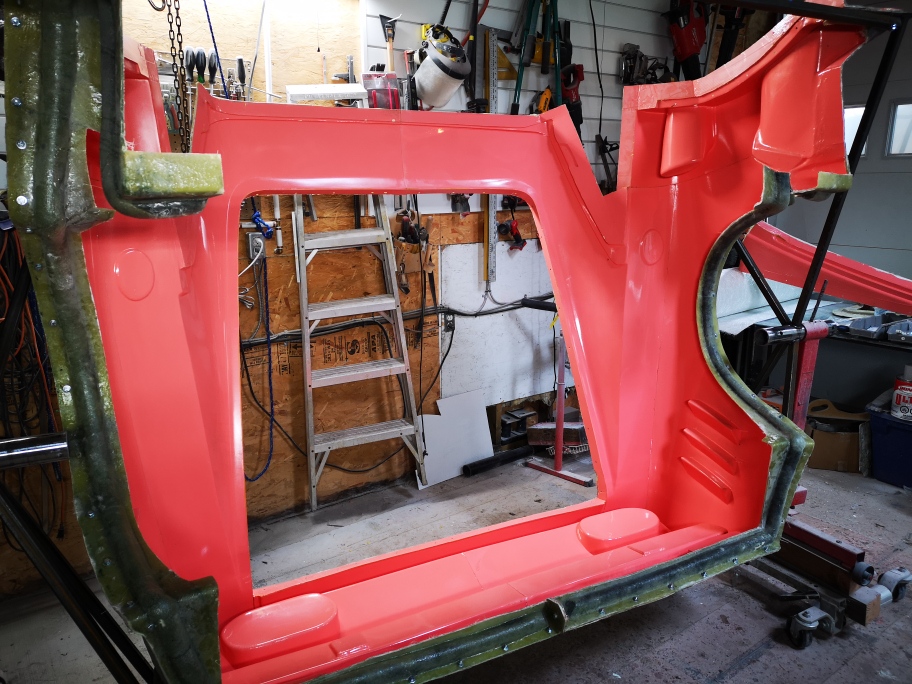
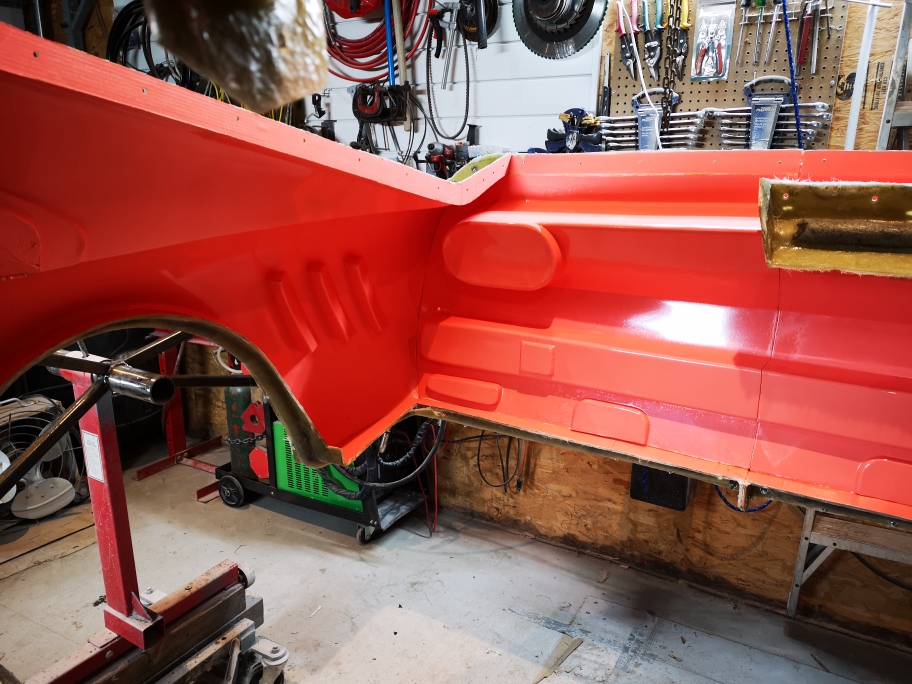
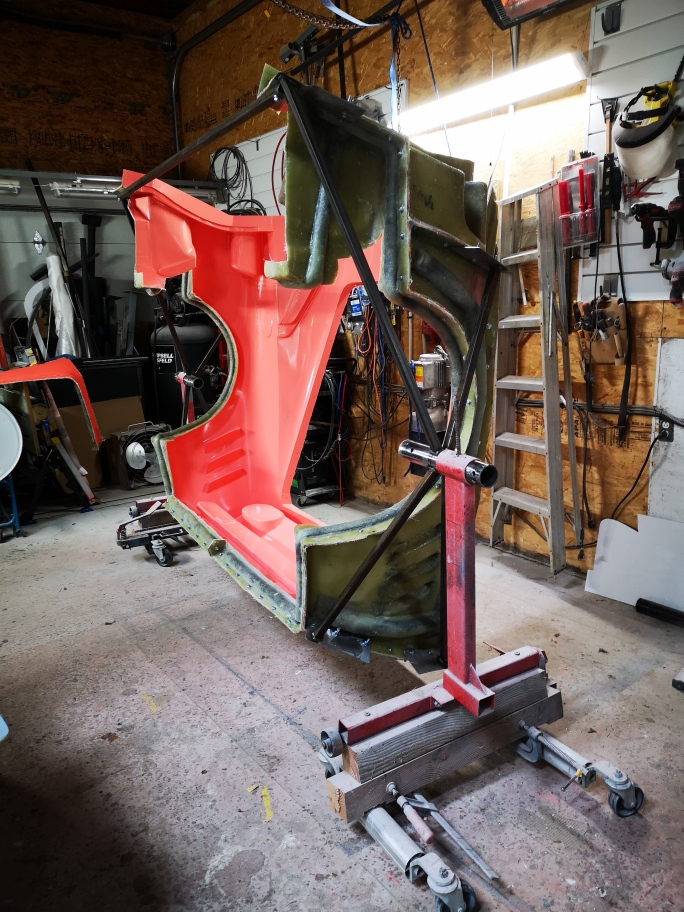
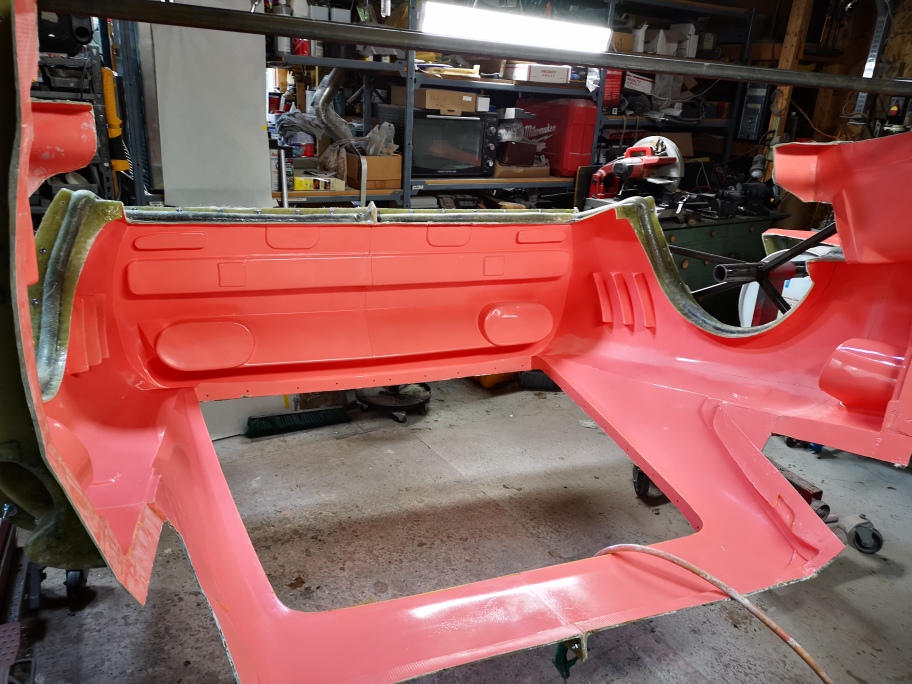
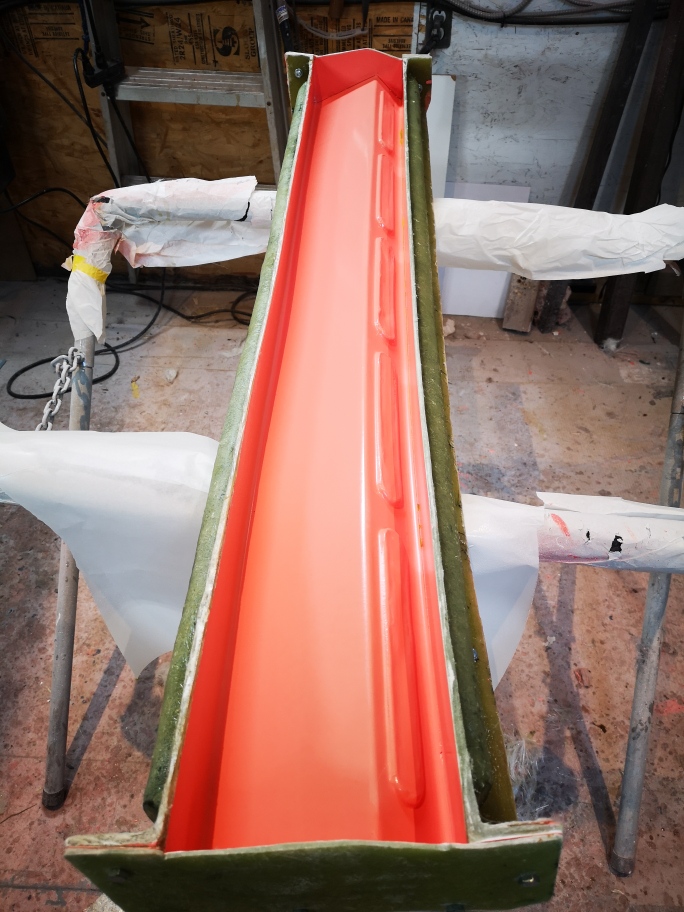
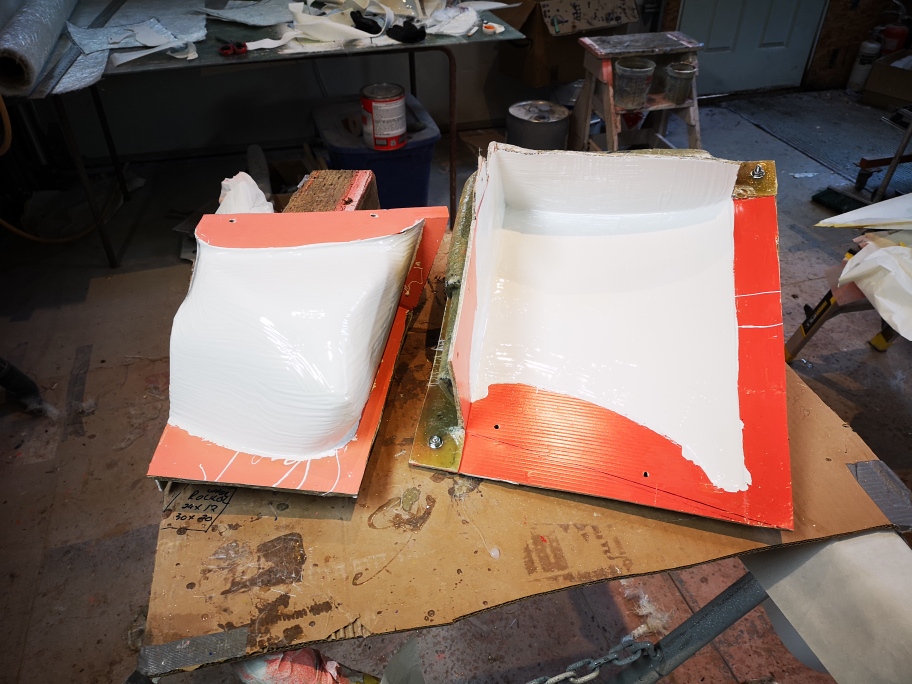
Once it was finished I started up laying mat into my molds to build my body, the molds have fully cured and are ready....
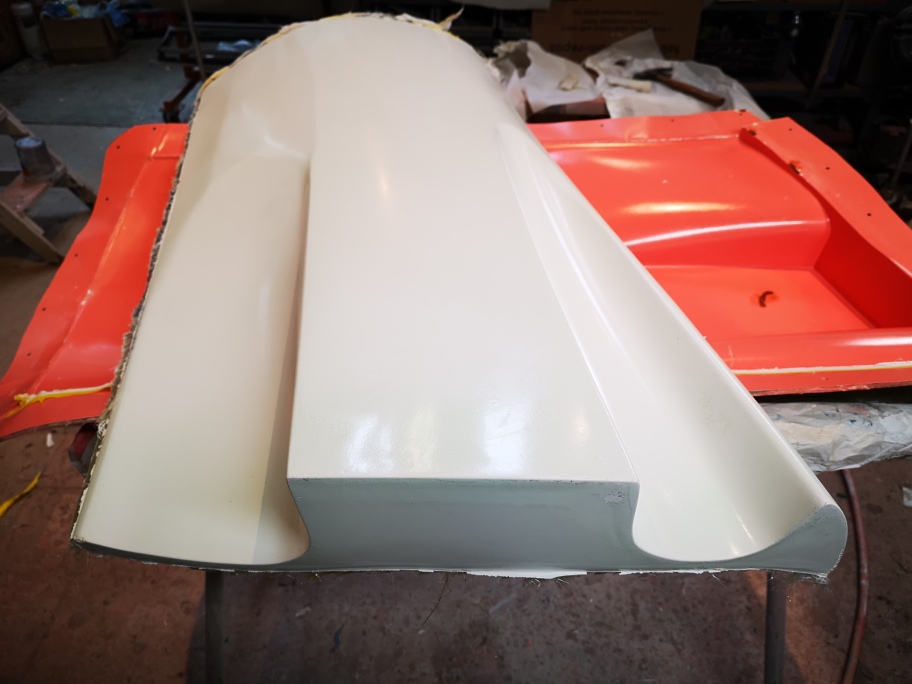
I started on the front spoiler as it was already handy and a good starting point.


I used 4 layers of 1 1/2oz mat with a extra layer on the top and the ends for attachment points.


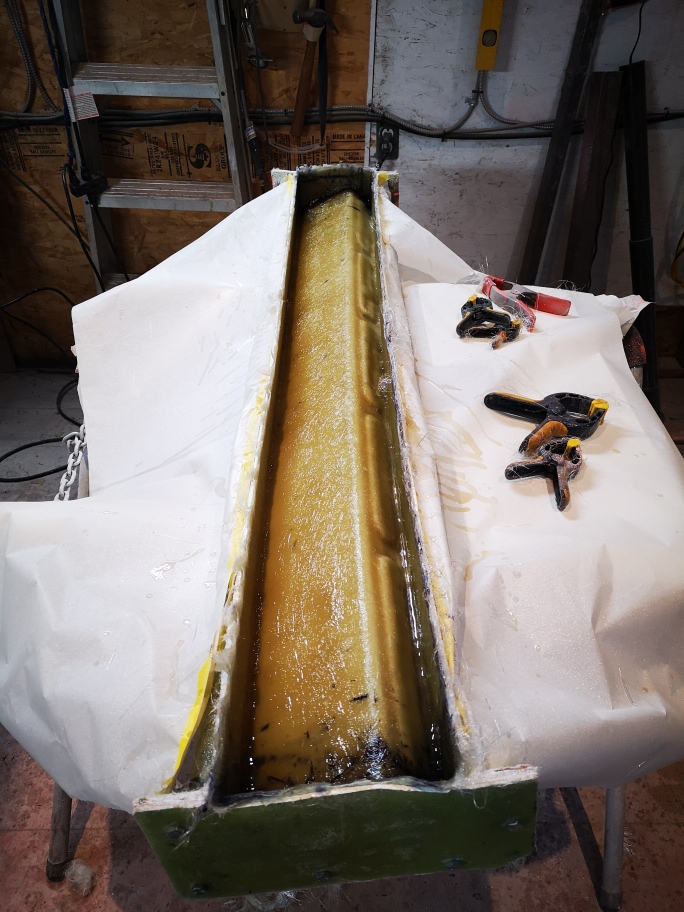
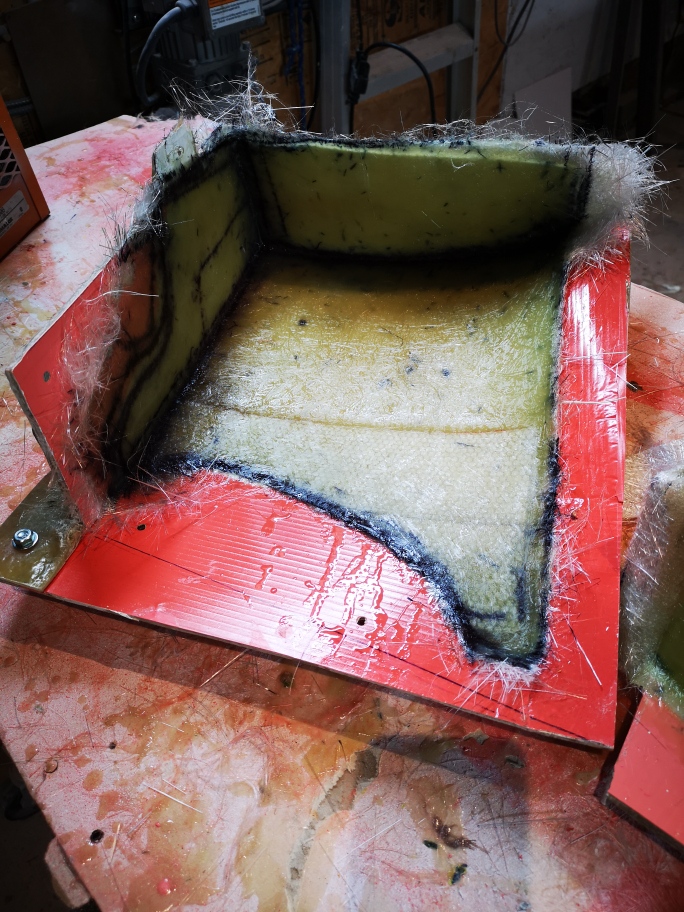
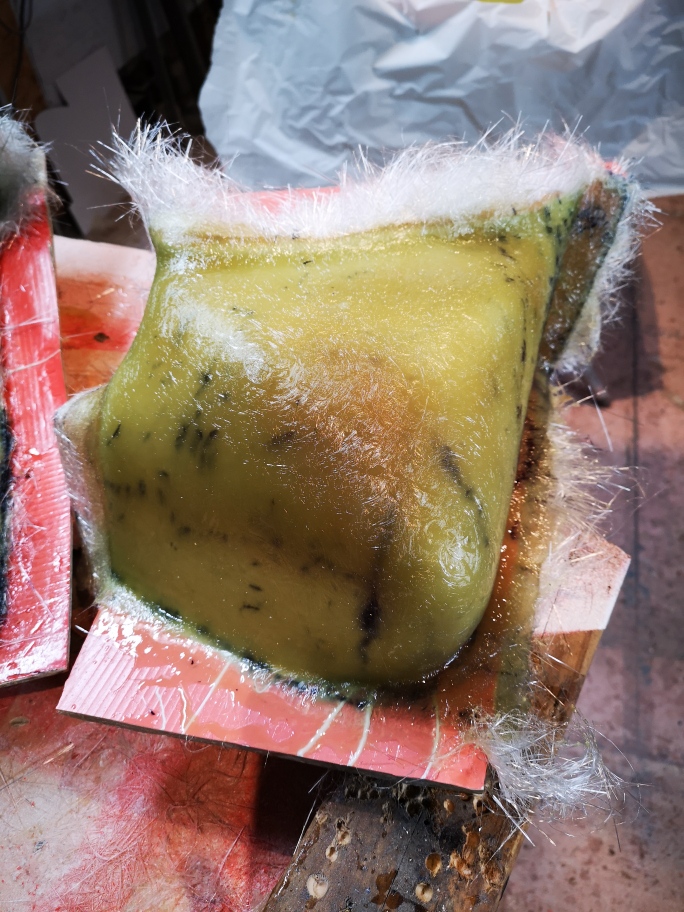
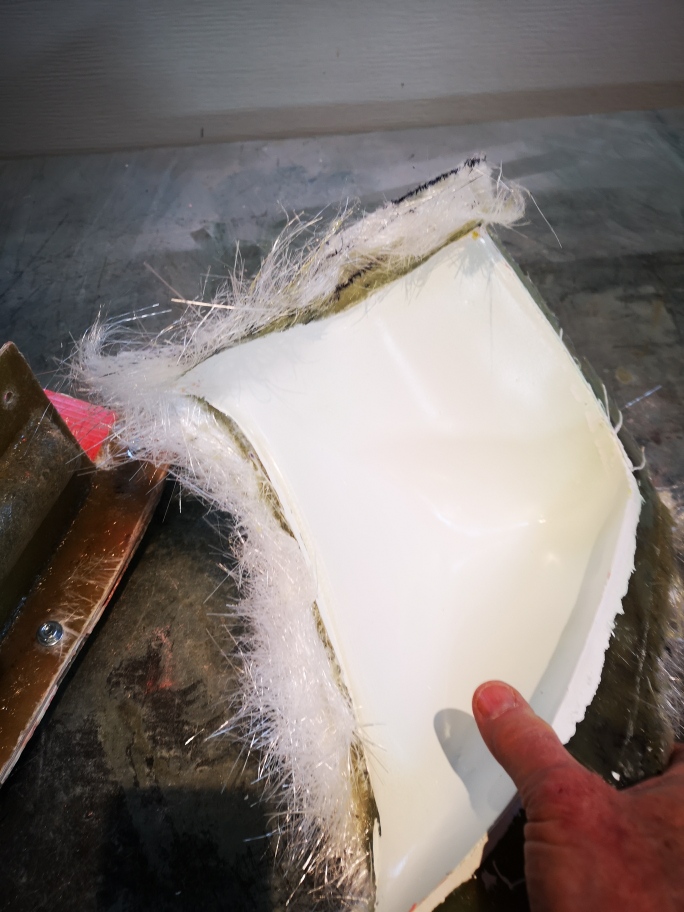
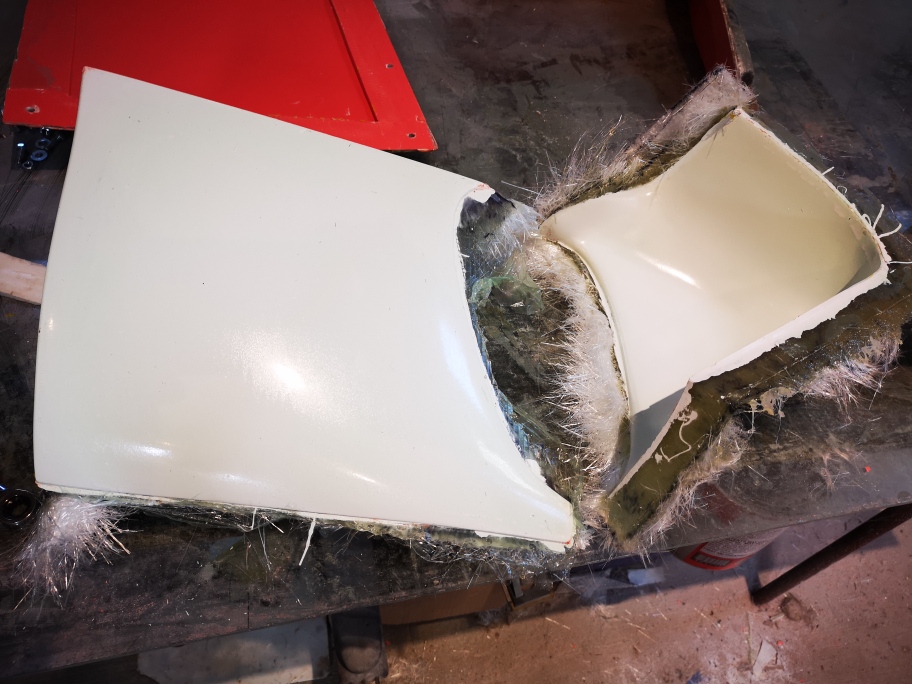
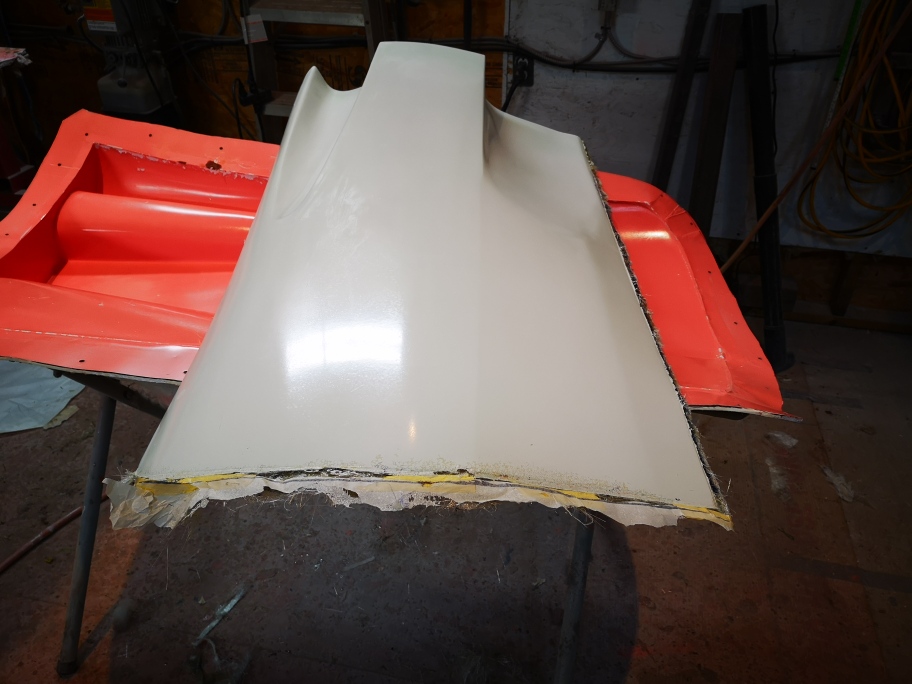
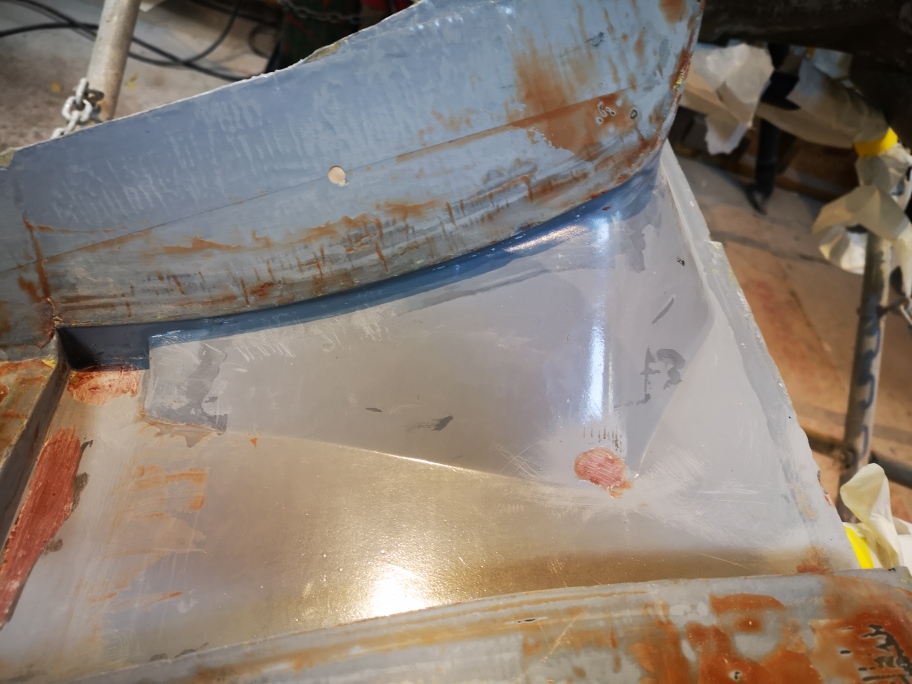
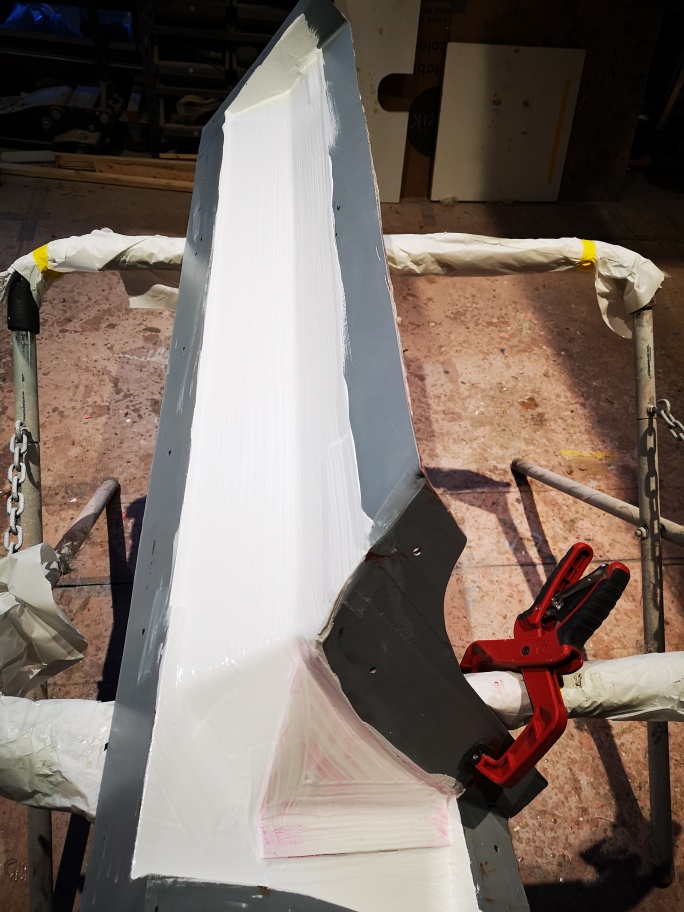
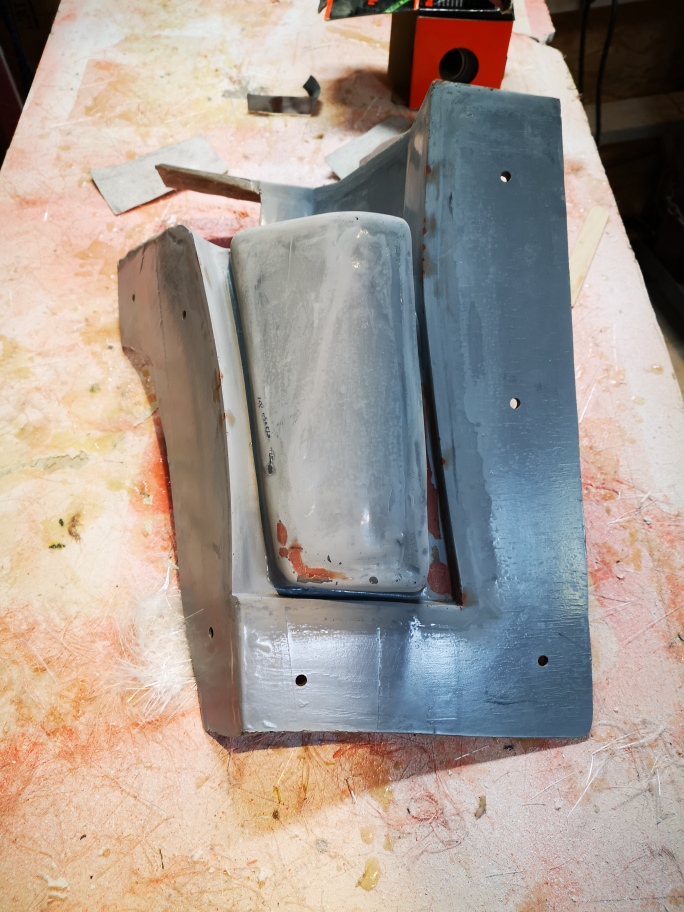
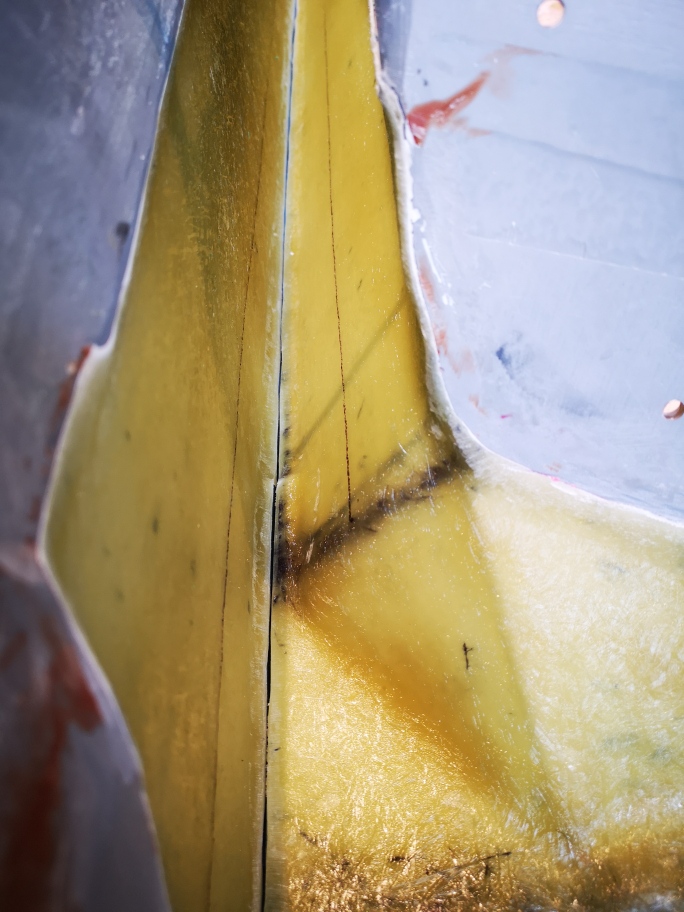
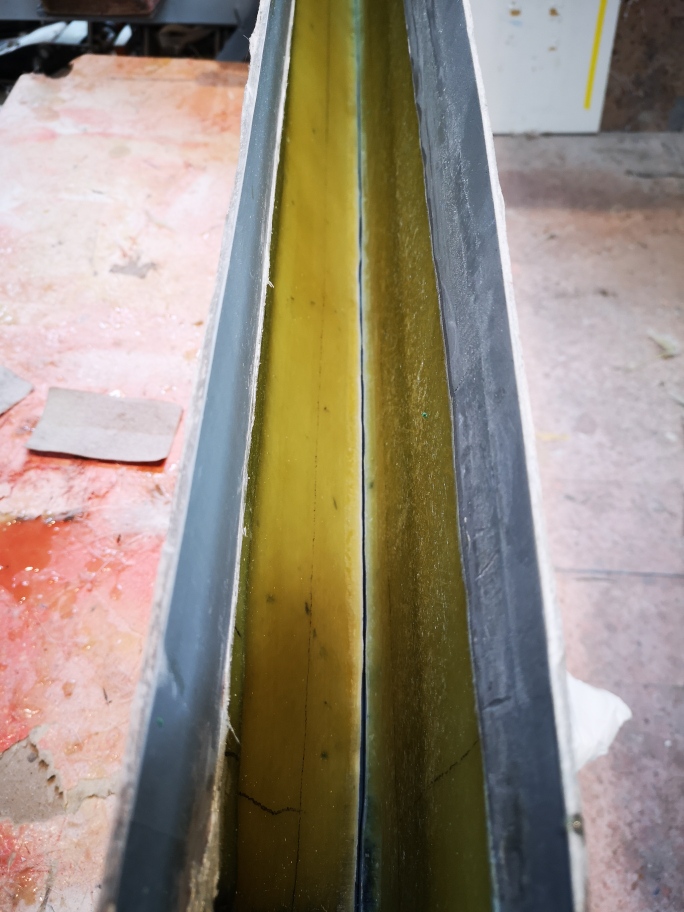
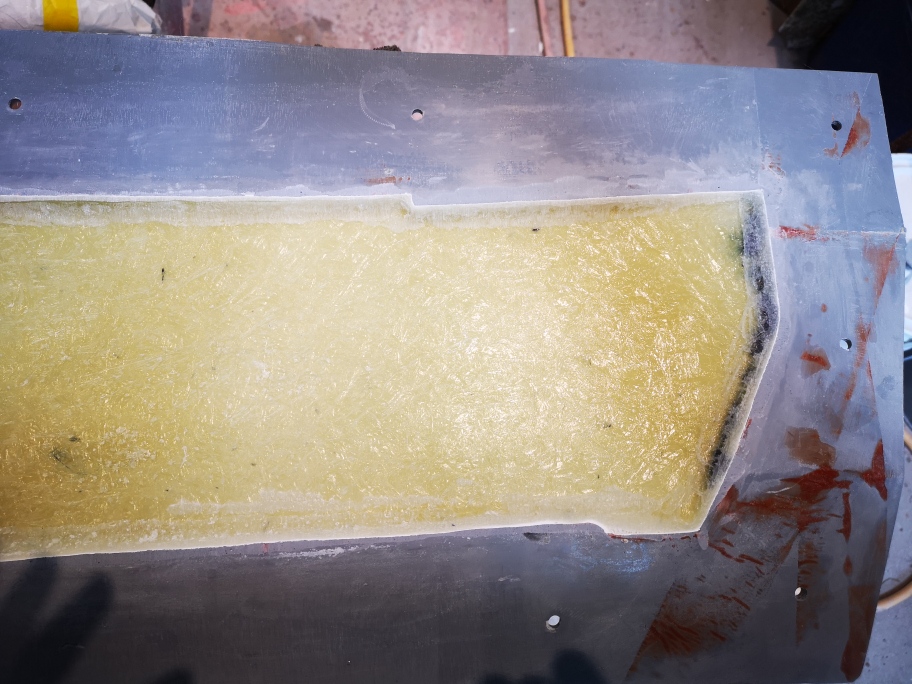
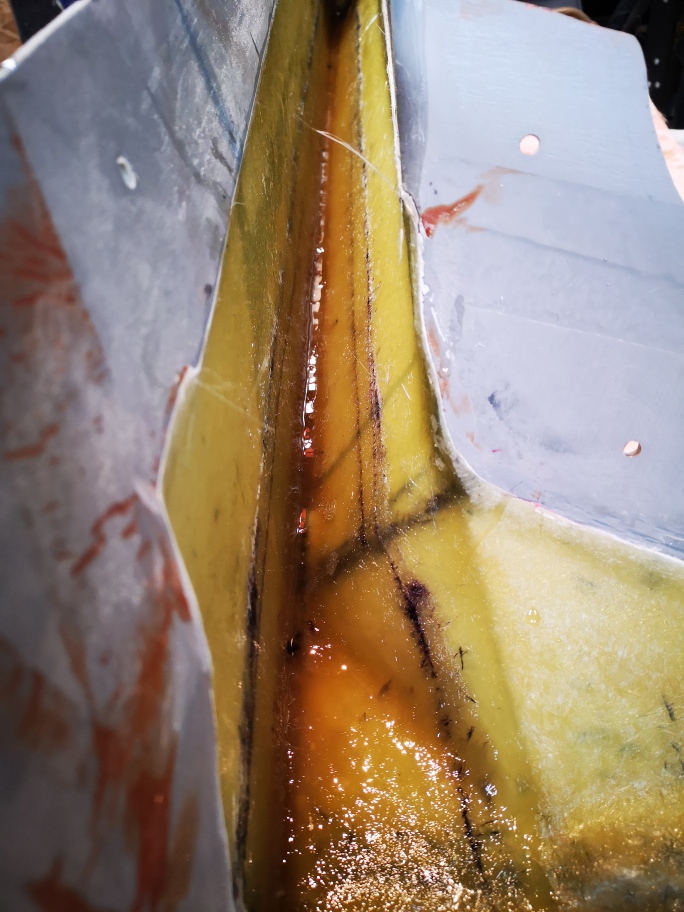
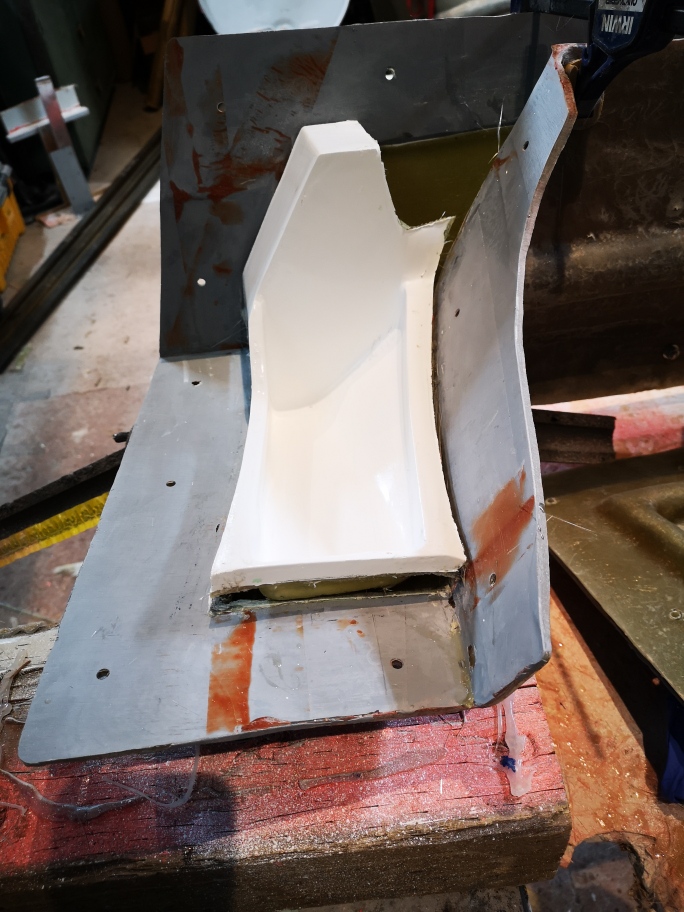
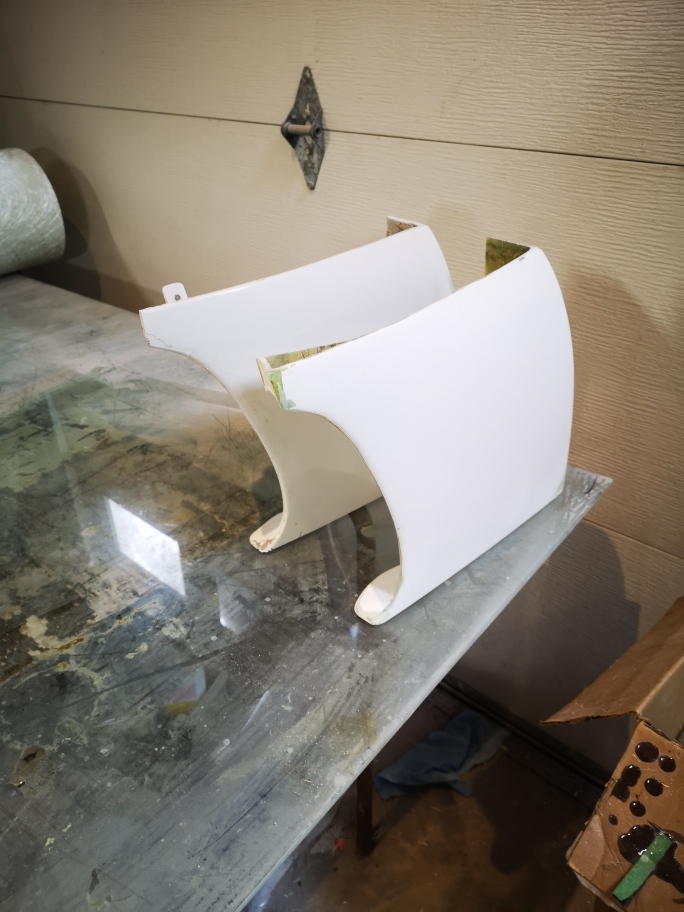
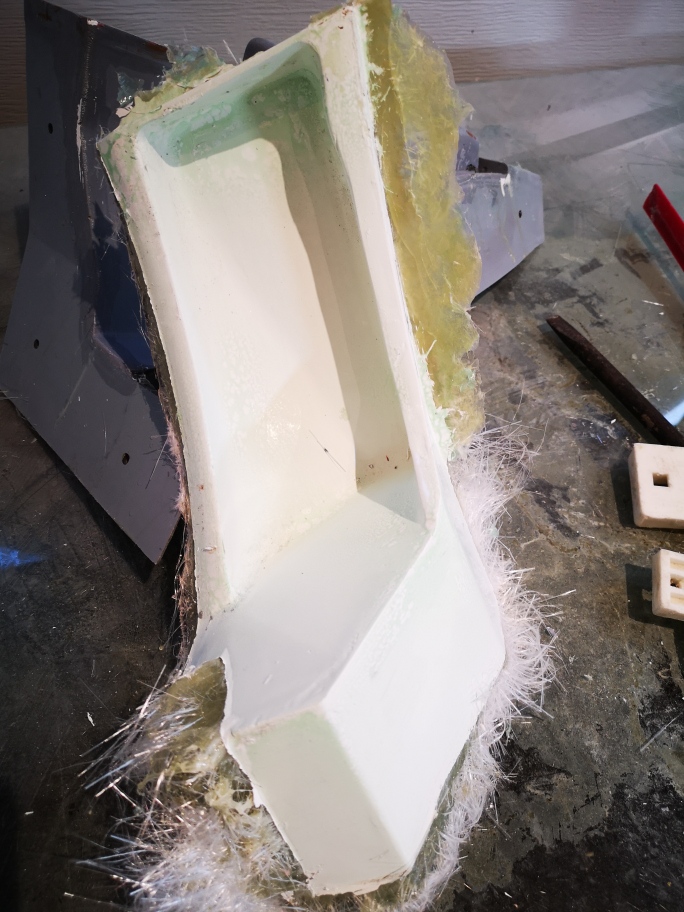
then I moved onto the first lower air duct ,it needs to be built in two pieces then i'll reattached the parts in the mold to ensure correct alignment crossing my fingers on this as I haven't done this before. I am fairly confident though in the concept ,we'll see.


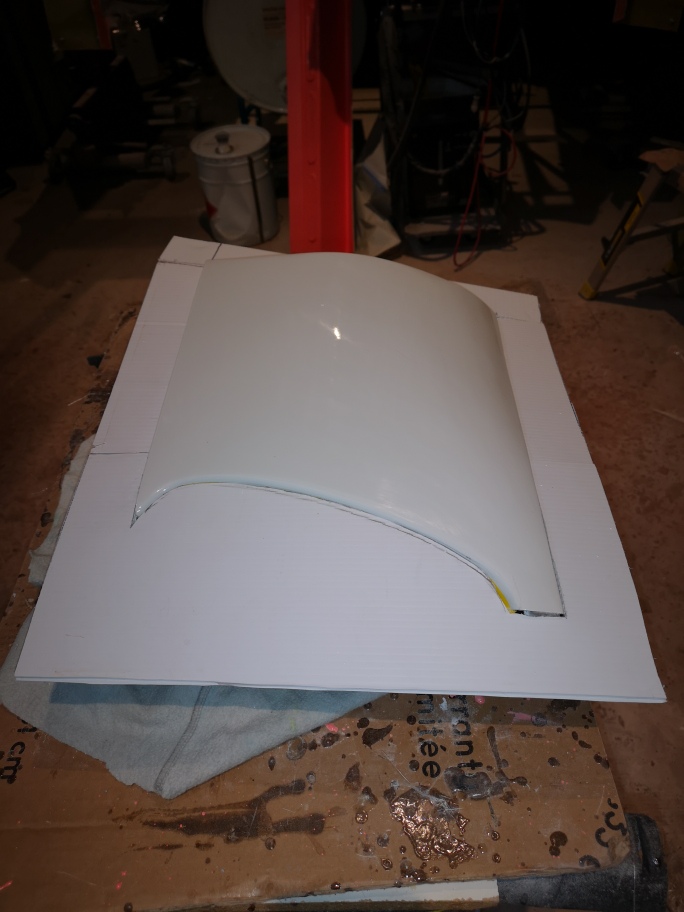
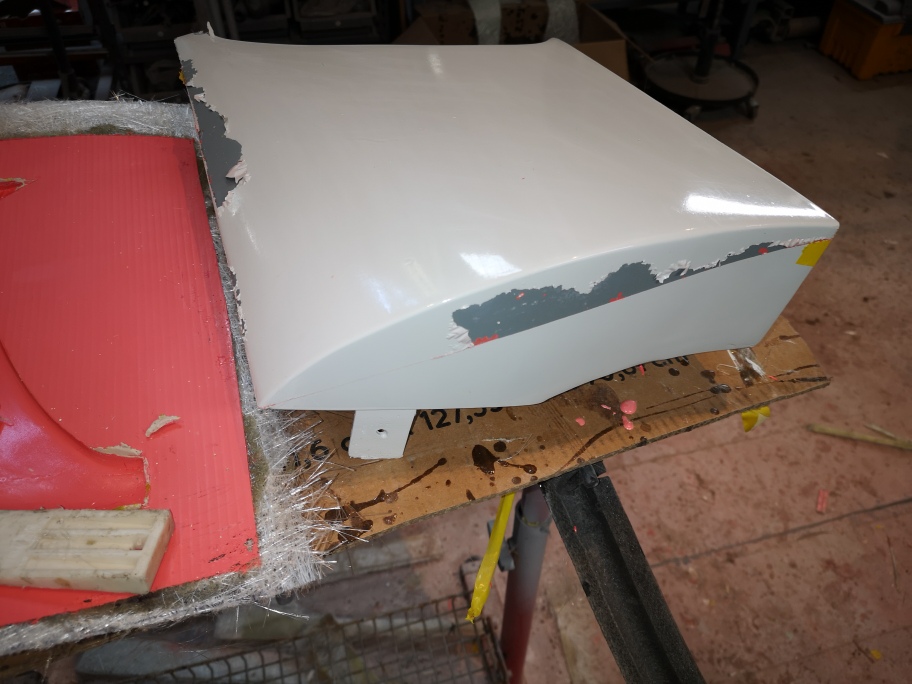
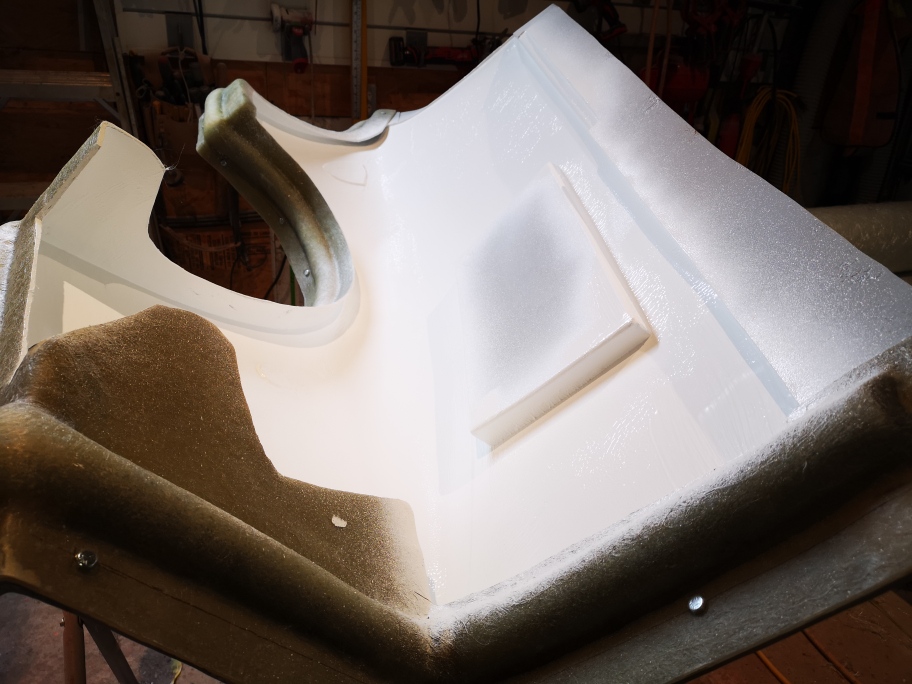
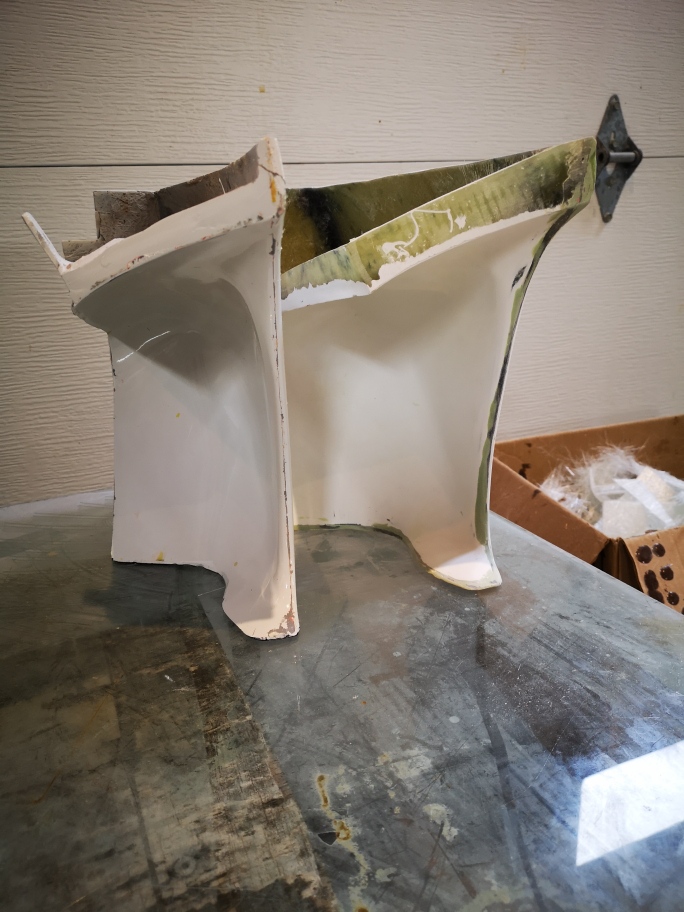
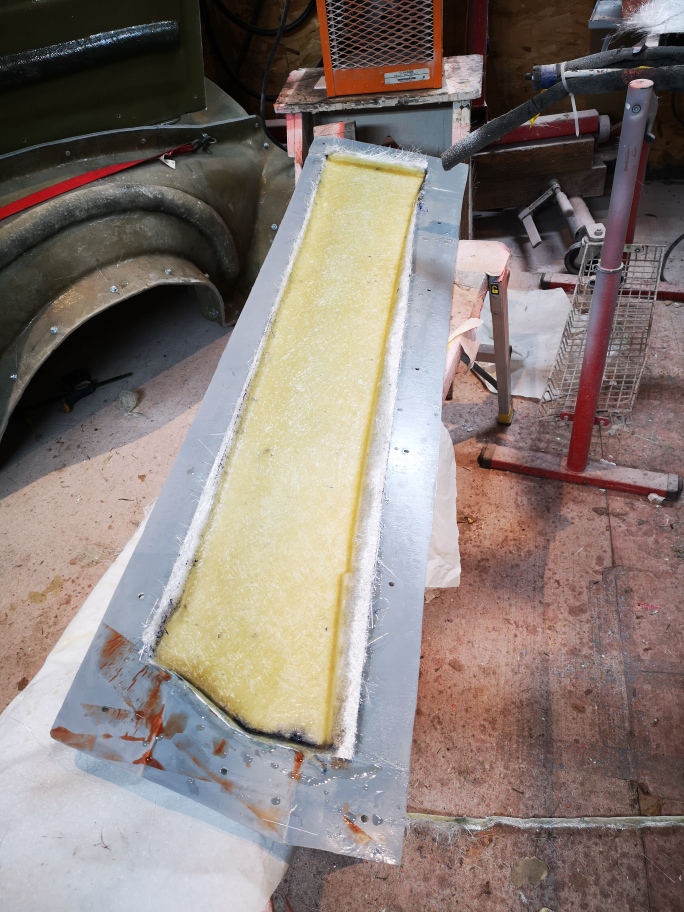
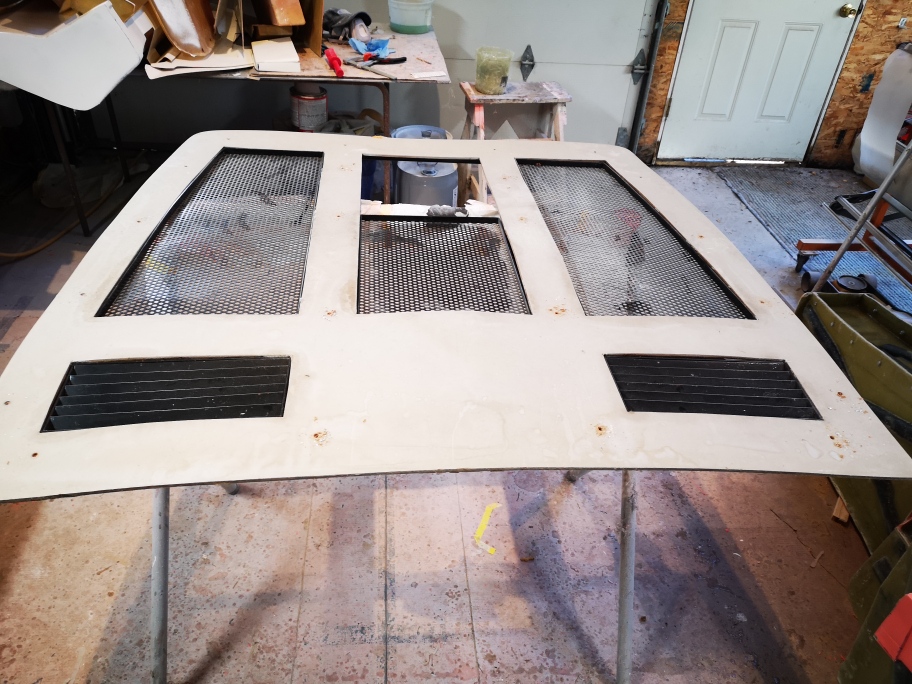
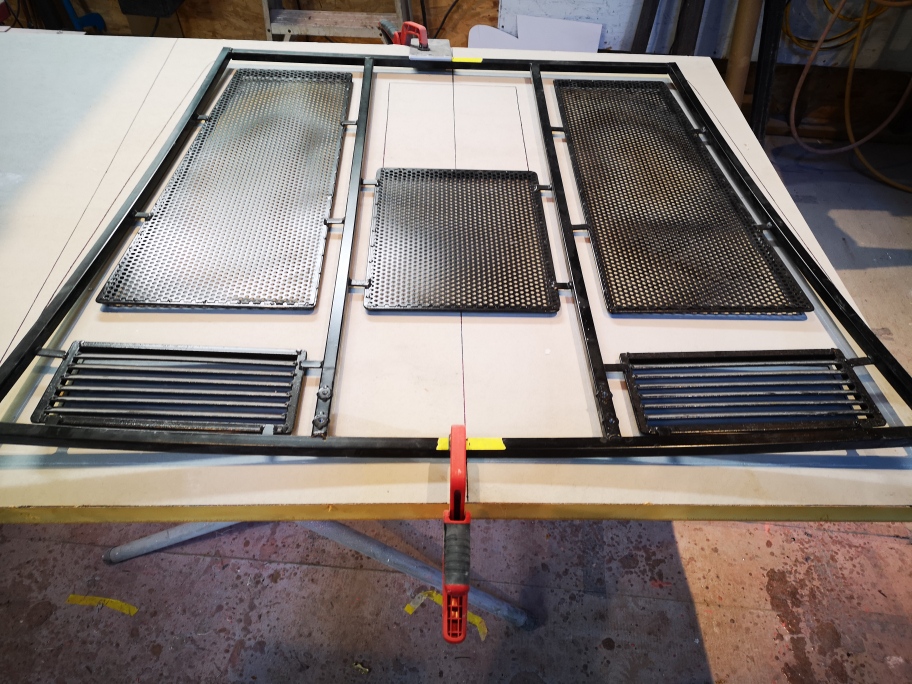
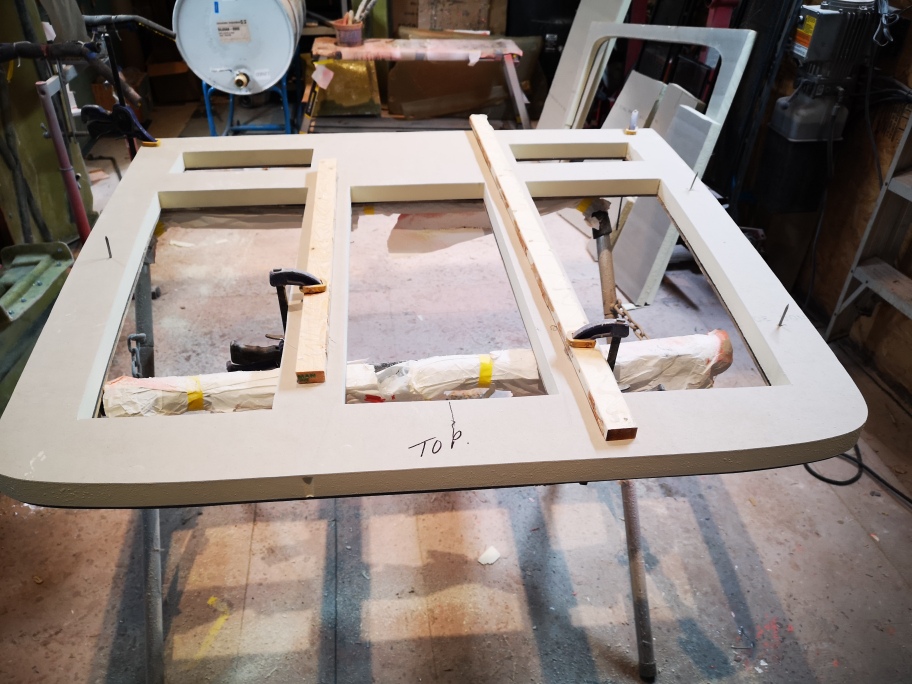
Although the rear engine hood works and is functional it isn't correct looking ,and with the steel frame I feel is too heavy. So I've decided to design and build a new one that will use the frame of the hood itself as at the structure and the vents will attach to the side walls of the openings. just as the OEM car uses. There are compound curves in two directions front to back as well as left to right at the back by the spoiler. I've cut it all out but can't continue until I have the rear body out of the mold. ( coming soon)

this is the one I'm replacing


this is the steel frame removed


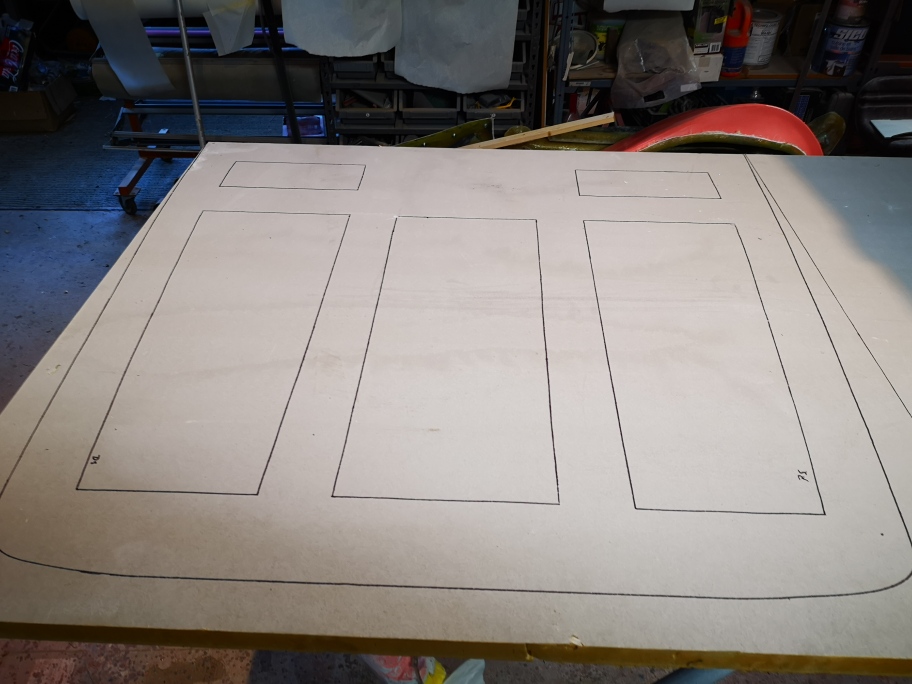
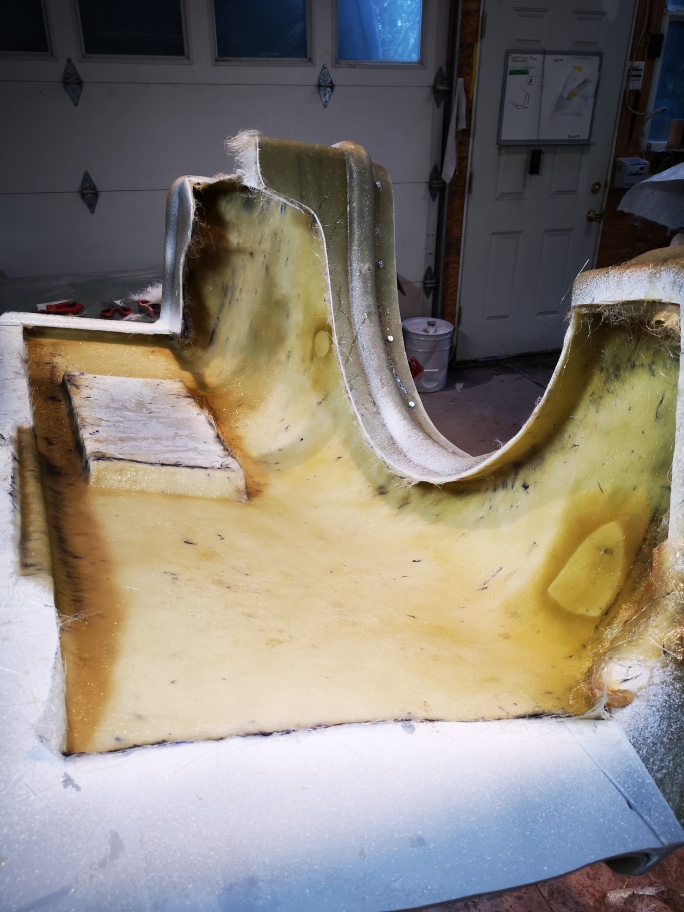
this is the cut out piece of 1 1/2" urethane foam ready to sand into shape, once that is completed I'll go through the process to make a top and bottom mold


I'll be back soon with more updates.

Stay safe
Wayne.
dobie1 JAN 31, 11:31 PM
I've been busy the last couple days ,I pulled the lower scoop parts from their molds and started the process of attaching them together.
I first needed to clean the slag off the edges as there is zero tolerance when it comes to putting them back in the molds to hold them together for the adhesive mixture of resin,1/4" chopped glass and milled fibreglass as well as a micro balloon to thicken so it doesn't run.


I'll post some pics of the piece once it has cured

The second part I was busy working on was one of the door panels. It is also a complicated part due to a attachment points I made to secure the panel to the steel of the door. There is very little clearance between the top and bottom of the door, making it difficult to fiberglass. So I molded two halves to allow the attachment points on one half then flip the mold over and attach to the other half . I hope this makes a bit of sense.
I layed up the out side half first trimming it to the flange edge and then layed 4 layers glass between both half to make them one.


I was really happy when I pulled the panel from the outside mold as the panel came out perfect , soooo happy with the finish. I trimmed it all up and reinstalled for the second half of the panel build .


My buddy Don O. came over to give me a hand today after finishing the door panel we pulled down one of the front fenders and prepped it for laying up the panel.
we measured up and prepared all the fiberglass matt for the part. Polished all the surfaces and shot the PVA and Gelcoat. There will be some acrobatics involve it laying it up tomorrow but I'm looking forward to getting another part finished.


I'll post some more soon
stay safe
Wayne

[This message has been edited by dobie1 (edited 02-01-2021).]

Sage FEB 01, 09:26 AM
Parts look GREAT!

I LOVE this stuff!

HAGO!
RCR FEB 04, 09:19 PM


Bob
dobie1 FEB 04, 11:32 PM
Thanks for stopping by Ted and Bob always appreciate it.

I got the lower duct cleaned up and am quite happy with the result , I weighed them both and new one on the right is 1 lb lighter so that's win... the new one has a glue flange for attaching the duct scoop to the car.


I got the fender finished it was a bit of a challenge getting at some of the areas but all turned out good.


I have been busy cleaning up the molds preparing them for molding. I started on one of the running board fender arches.


they are a very complicated part with a 3 piece mold , a upper , a lower and a back ( inside wheel arch area) the back side has really tight areas.


One big problem I discovered was I made a mistake molding one area, I ended up building a hook that locked the part into the mold. I found this out when
was removing the original plug from the mold ,ended up destroying the part. I had to come up with a work around to allow the part to be made yet unmold the part.
So I created a doggle into the part, the process i'm using is to create two parts into one. the red is wax that is 1/8" thick creating a low in the part. once I pull the part I'll lay up another the size of the red wax, then i'll permanently attach that to the part filling the doggle with the hook.


These are the three parts laid up ,I'll attach them tomorrow into one while the molds are secured together.


Don O is coming over on Saturday to help me build the exoskeleton rotisserie before I pull the plug from the mold and start to build the new body
stay safe everyone

Wayne

[This message has been edited by dobie1 (edited 02-04-2021).]

dobie1 FEB 07, 10:50 PM
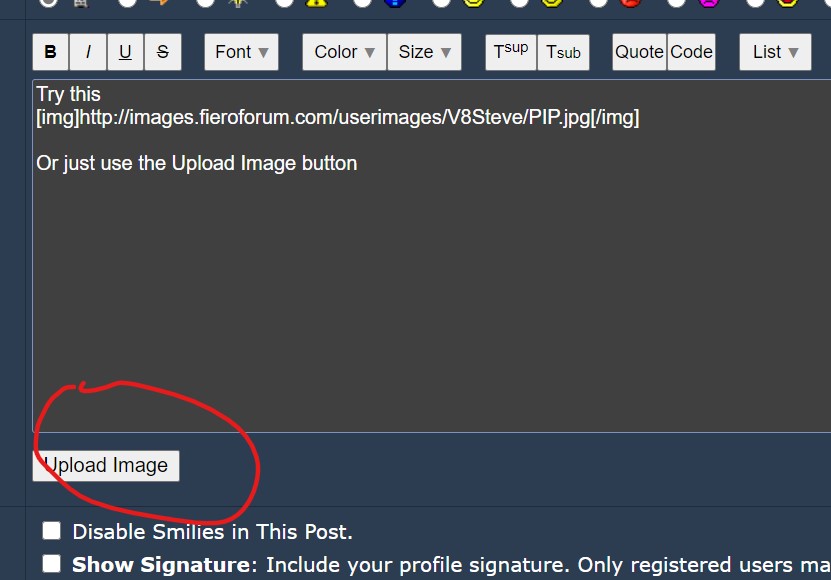
I'm hoping someone can help me , I've been using the Pennock's PIP to post pics but its not letting me , it's saying it can't find the server.
Am I doing something wrong, any help would be appreciated .
Regards
Wayne

[This message has been edited by dobie1 (edited 02-08-2021).]

V8Steve FEB 08, 07:13 AM
Try this


Or just use the Upload Image button

dobie1 FEB 09, 10:25 PM
The rear body is demolded and it turned out great , Don O came by and we welded up a exoskeleton frame to the mold ,I moved the 3” pipe
3”s to the the rear to give me a better balance during the rotation.
I’m busy getting all the glass Matt cut and ripped to size to facilitate a quick layup, fingers crossed


I also worked on laying up the fender running boards , another complicated part. I found this out when I molded the originals as one area protruding
Into a area locked the part in so the bucks were destroyed when I tried to remove them. Because of this I had to come up with a solution to enable the new parts to come out once they were produced.
The solution I came up with is to lay a area of 1/8” wax (red) area into the mold creating a doggel laying up the fiberglass over the whole thing hiding the protruding area with the wax. When the part is removed I’ll lay up just the red area in glass and bond the two together creating the part.
The other complicated area is the backside of the fender part of the running board it was supper complicated, it came out great but will also need to be bonded in after .


I got the scoop finished and was really happy as it came out a full pound lighter than the one It replaces!!


Stay safe everyone

Wayne

[This message has been edited by dobie1 (edited 02-09-2021).]