|
| Ferrari 288GTO build (Page 42/64) |

|
dobie1
|
NOV 09, 10:50 PM
|
|
Thanks Sage
As always thanks for your thoughts and input ,if covid wasn't around I would love your help!!!
I have been laying up the mold using 1 oz mat followed by 4 layers of 2oz mat the foam reenforcement is added before the last layer. not to your standard layup thickness but will work for my purposes.
I cleaned up the top side and flipped the mold over to do the last pieces. after looking at it I think I can get away with finishing the intake ,wheel well and bottom of the back (all the orange areas) in two pieces.
[img]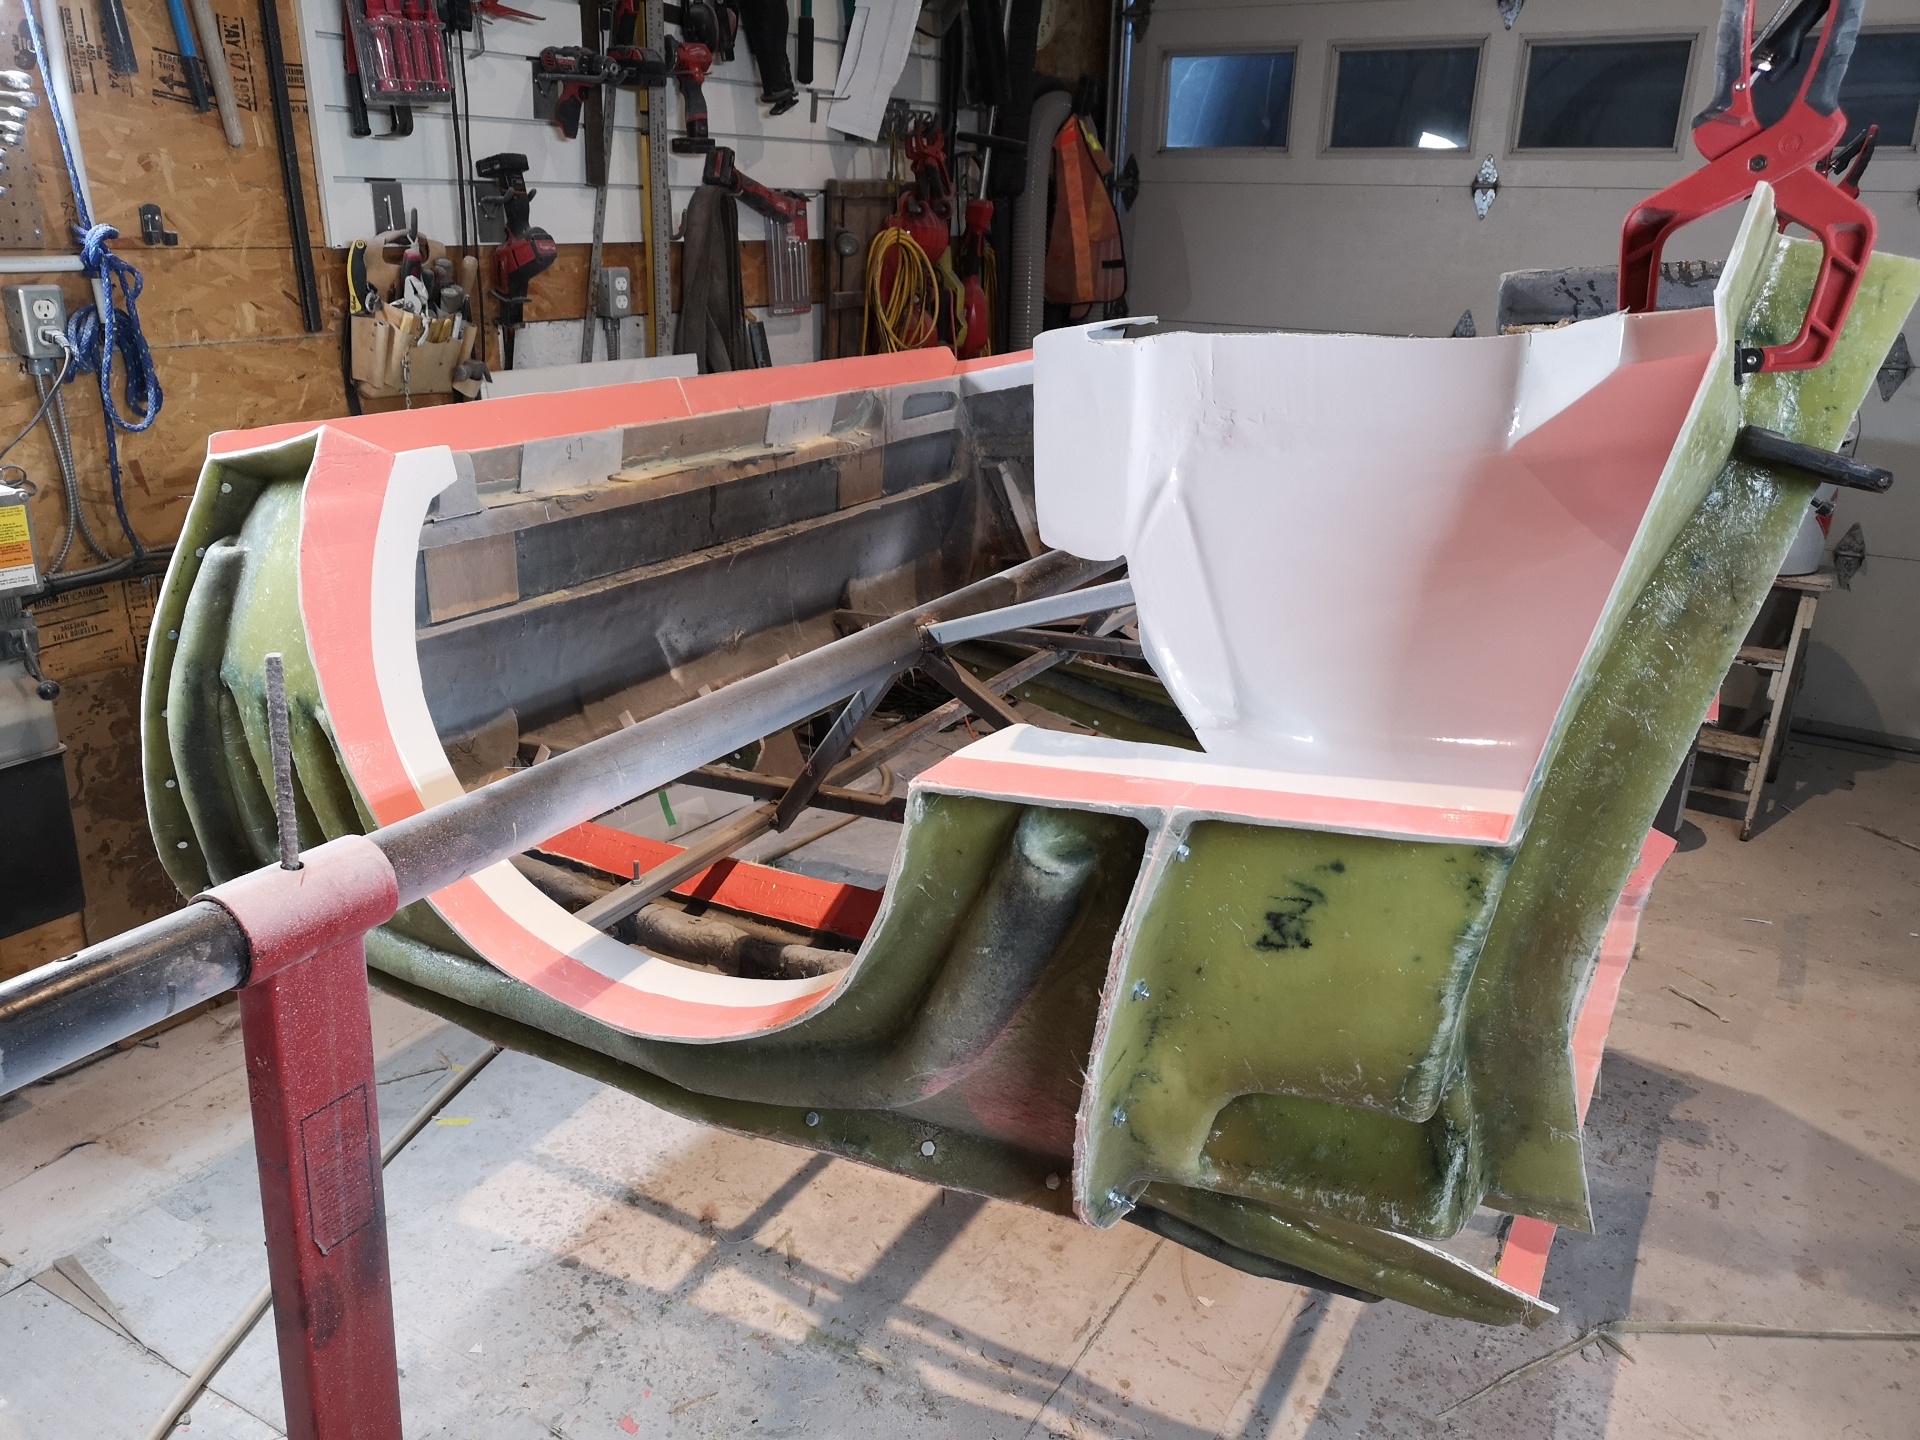
Wayne
|
|
|
|
Rickady88GT
|
NOV 12, 12:29 PM
|
|
|
All I can say is WOW. SUPER COOL. That looks very impressive.
|
|
|
|
dobie1
|
NOV 17, 11:45 PM
|
|
Thanks for stopping by "Rick" , I appreciate your comments.
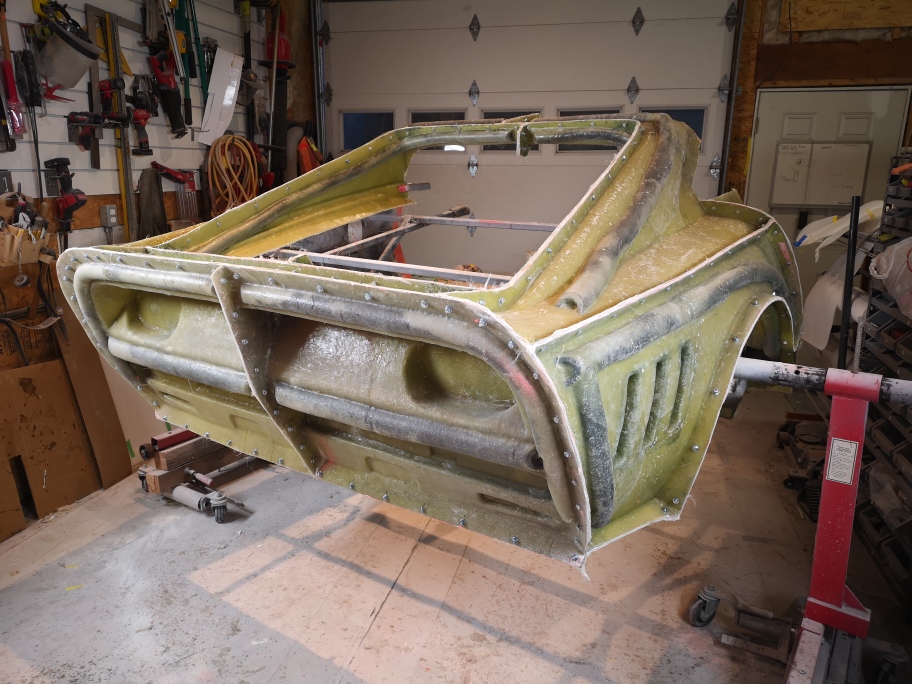
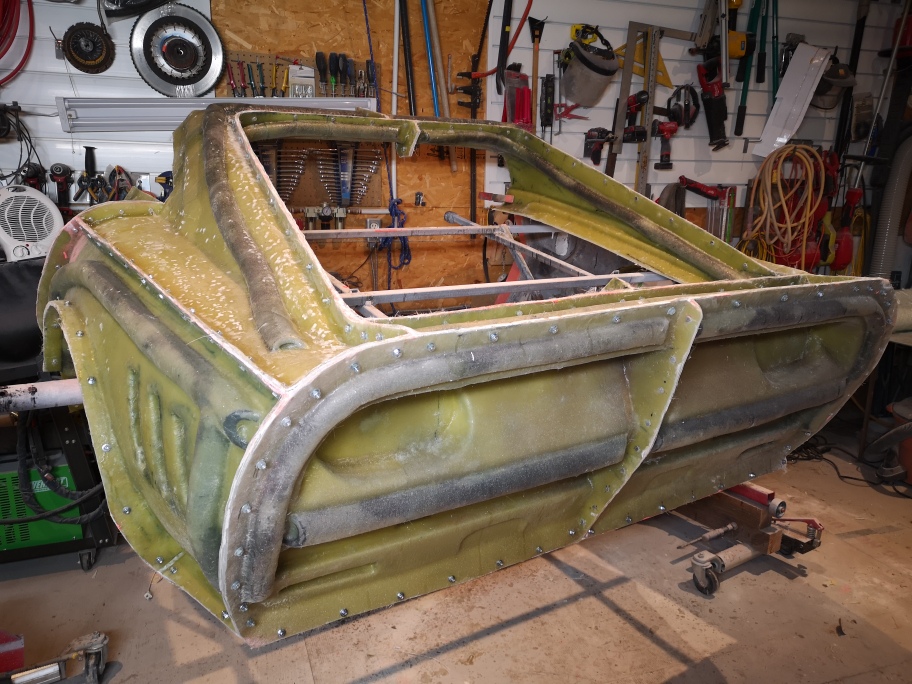
Well the molds are finally finished!!!
I'll have to leave the rear mold some time to fully cure probably 3 weeks, before I pull everything apart to pull the plug out and start to layup the body.
I need to get a bunch more supplies resin, mat and gelcoat, my supplier is waiting for a shipment to arrive hopefully in the next 3 weeks. Covid is now creating a supply problem
waiting for shipments to arrive.
I'm thinking of possibly molding the dash I built earlier, I'm not sure if there is any interest in it from anyone else
I'll take a look and see how much work it will be and if I have enough resin and mat left .
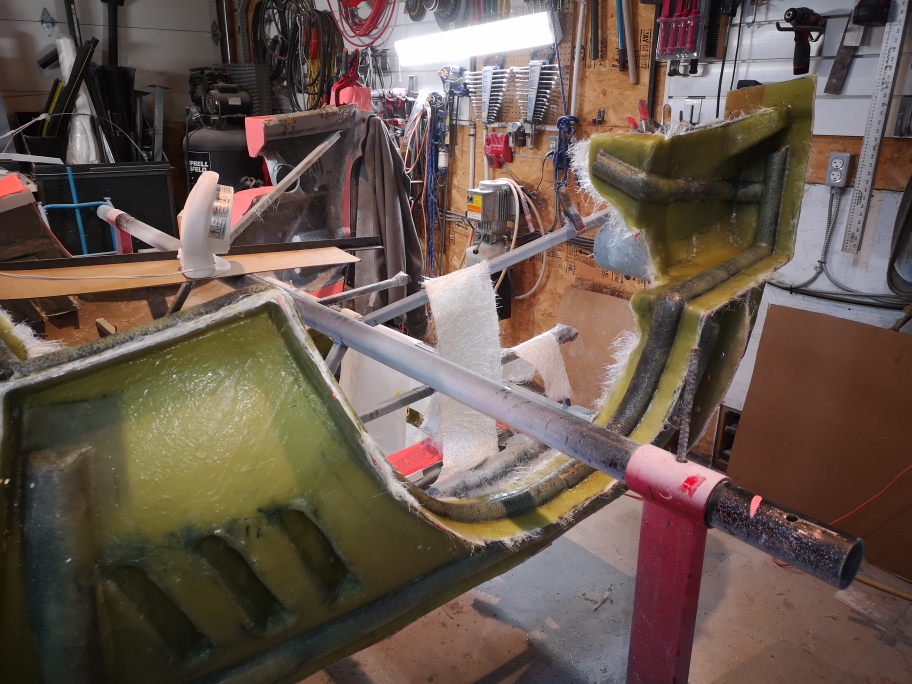
I have to say having the rotisserie to do the underside sure was nice ,I'm trying to figure out how to modify it to mount and use when making the parts from the mold.

Stay safe everyone
Wayne
|
|
|
|
Sage
|
NOV 18, 11:15 AM
|
|
Beautiful! 
Good idea on re-using the rotisserie to mount the molds for layup.
I generally make a "stand" for the plug I'm working on to keep it where it's easy to work on, and solidly based.
Then after the mold layup is complete, I cut the plug loose, flip it over and mount the mold to the same stand, then pull the plug out.
I have enough 1/4 panel molds now, that instead of having an individual stand for each one, (which I already have) I'm brain storming a mounting "system" that will utilize just one set of stands, and a mount affixed to each mold that can be plugged and unplugged from that one set of stands. Since you have the front and rear clips to layup, maybe a similar setup would be beneficial in your case? Just a thought!
Those molds look Sooooooo Goooood! Congrats on a job very well done!
Looking forward to seeing the plug removed, and the first part being taken out.....nothing compares! (JMHO!)
Keep the updates (& pics...) coming.
HAGO! 
|
|
|
|
shemdogg
|
NOV 18, 10:31 PM
|
|
I gotta addmit when I saw the first pics on the page, I thought you were making a huge rear spoiler and fender lips! Looks awesome! Then I saw it was for the mold. It too looks awesome! It looks kinda mad max w the bolts and tube reinforcements. The work is awesome too. Its just all around awesome, good stuff!
shem
|
|
|
|
dobie1
|
NOV 19, 02:00 PM
|
|
| quote | Originally posted by Sage:
Beautiful!
Good idea on re-using the rotisserie to mount the molds for layup.
I generally make a "stand" for the plug I'm working on to keep it where it's easy to work on, and solidly based.
Then after the mold layup is complete, I cut the plug loose, flip it over and mount the mold to the same stand, then pull the plug out.
I have enough 1/4 panel molds now, that instead of having an individual stand for each one, (which I already have) I'm brain storming a mounting "system" that will utilize just one set of stands, and a mount affixed to each mold that can be plugged and unplugged from that one set of stands. Since you have the front and rear clips to layup, maybe a similar setup would be beneficial in your case? Just a thought!
Those molds look Sooooooo Goooood! Congrats on a job very well done!
Looking forward to seeing the plug removed, and the first part being taken out.....nothing compares! (JMHO!)
Keep the updates (& pics...) coming.
HAGO! |
|
Thanks Sage for you input and info always appreciated. I’m looking at perhaps building a exoskeleton frame as having the round pipe running though the middle will make it more difficult to do the layup inside. I have looked at attaching adjustable legs at all 4 corners so that if I flip the mold over to layup it uses the same Leg attachments points. I’m still working on a plan...
I’ll post pics as I progress.
Stay safe Wayne
|
|
|
|
dobie1
|
NOV 19, 02:07 PM
|
|
| quote | Originally posted by shemdogg:
I gotta addmit when I saw the first pics on the page, I thought you were making a huge rear spoiler and fender lips! Looks awesome! Then I saw it was for the mold. It too looks awesome! It looks kinda mad max w the bolts and tube reinforcements. The work is awesome too. Its just all around awesome, good stuff!
shem |
|
Thanks for stopping by Shem , I had to look back on the pics you were referring to , and Yes the flang does kinda look like a spoiler mod. Probably should have given a better description in hindsight. Wasn’t until the exoskeleton is installed and it will be a mad max creation. 😆
Stay safe
Wayne
|
|
|
|
sourmash
|
DEC 05, 09:45 PM
|
|
|
|
|
dobie1
|
DEC 07, 11:39 AM
|
|
Hi Alan
Thanks for stopping by, oh I have been working away at the project.
I had to wait for a resupply of resin ,mat and gelcoat. I’ve also been waiting for the rear mold to fully cure” it’s been 3 weeks now”. Before I can demold the plug and start to build bodies.
While I’ve waiting I’ve been building the smaller piece molds ,I didn’t take a lot of pics but will post what I have soon. I still have the two mirrors and lower scoops to mold ,these will probably be the most complex ones I’ll be doing so I will take lots of pics to post of that process. Once they are finished the entirer car will have been molded and be ready to produce complete bodies.
I’m going to be helping my mentor-and friend Don O. Mold a OEM interior for a Lamborghini Countach before I get into laying the body for my build.
Mask up and Stay safe everyone
Wayne
|
|
|
|
dobie1
|
DEC 13, 03:40 PM
|
|
I've been busy looking after the grandkids for a few days so haven't had chance to post any pics.
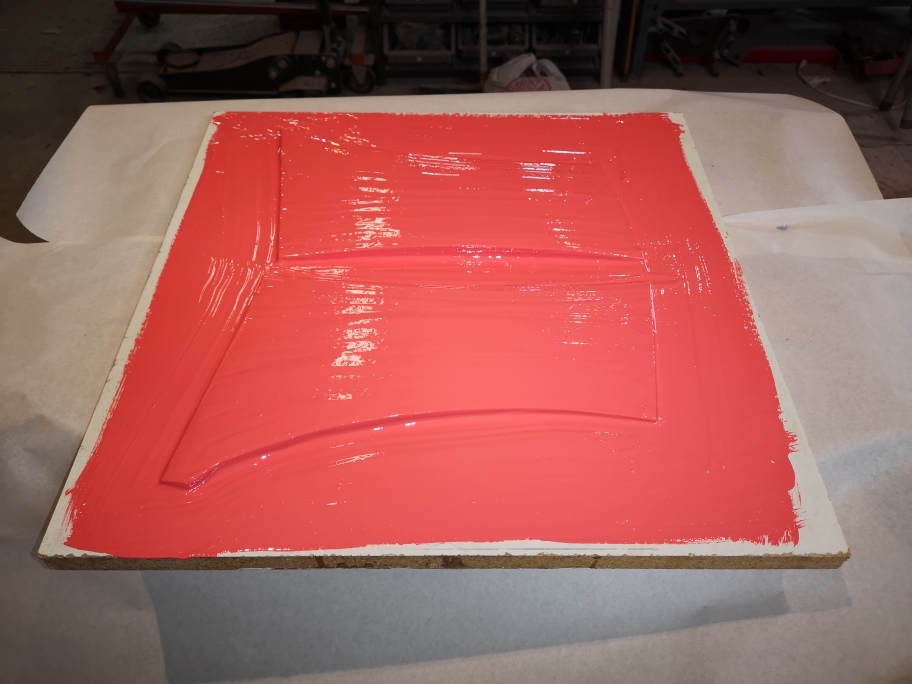
Here are a few to show some of the smaller pieces the first series are of the fender/running board outer covers one per side . I had made the decision to make these separate parts as I felt it was impossible for me to try to mold the part with any success because of the deep cutback for the fender screens.
there are two on the same flat mold, this is with first layer of gelcoat
this shot is with the first layer of 1 oz glass mat the witness layer of white gelcoat shows thru the glass

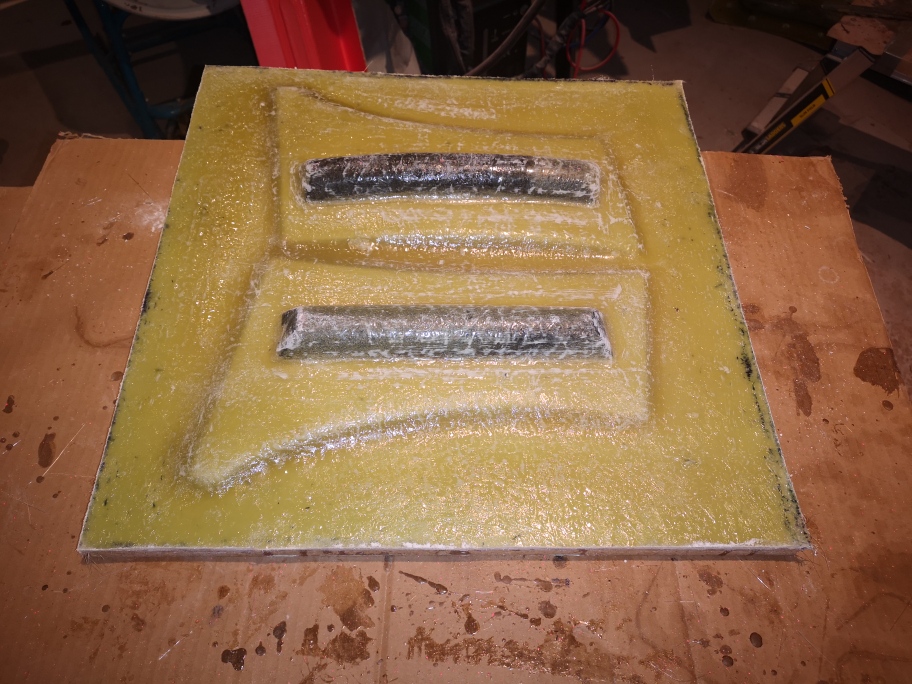
This shot is the completed mold with reenforcement
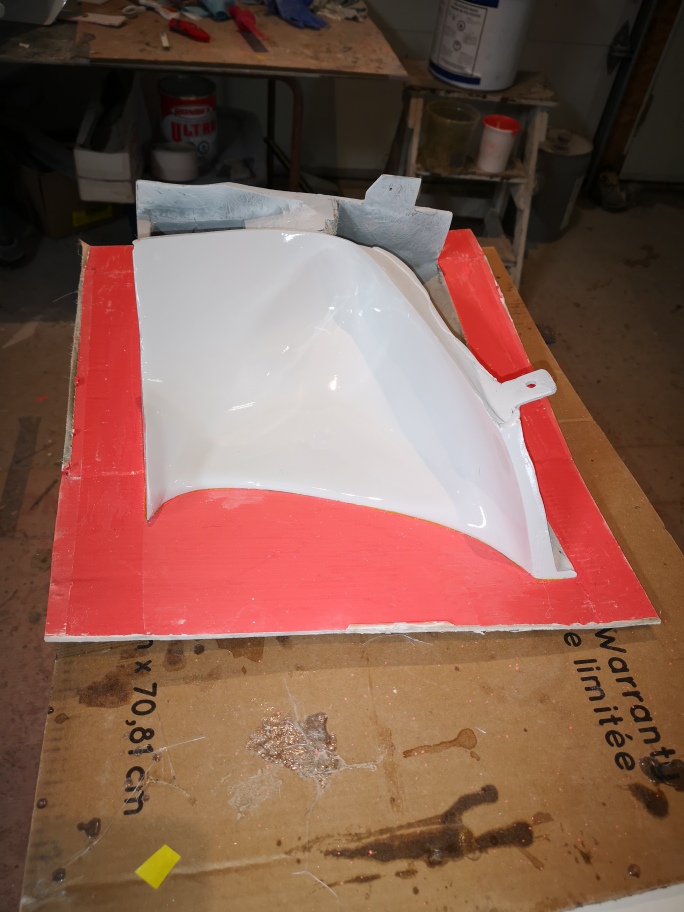
The next series is of the first of the lower side scoops, again this is a complex mold. There is the outside (body side) then the inner scoop ,it possibly could have been molded as one but I'm just not there yet so the inner will been molded as a separate piece that will be attached to the outer once the piece are finished.
this is with the flanges around the outer edge (out side of body showing)
same part gelcoat applied
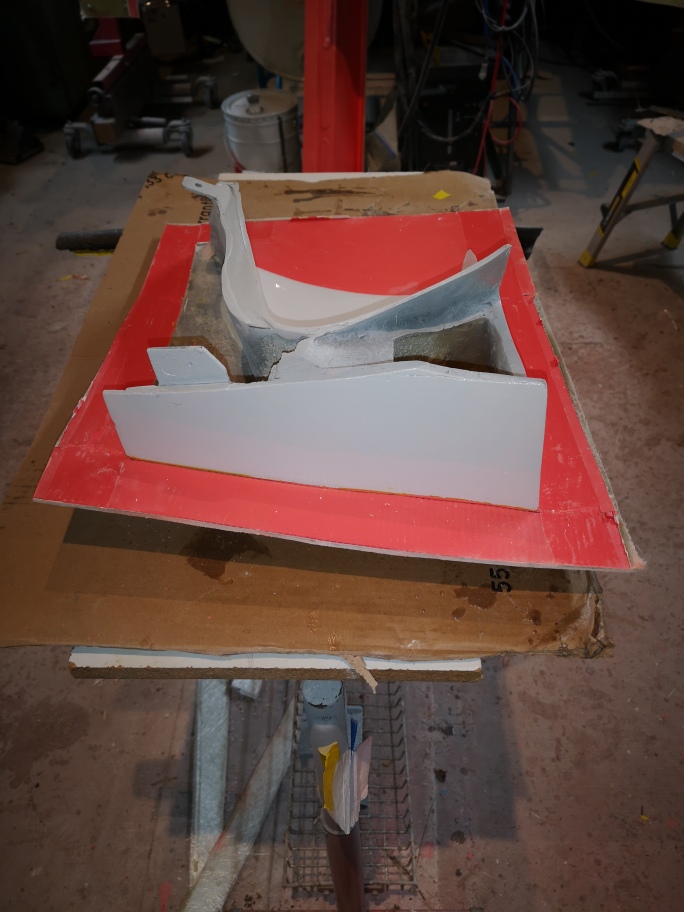
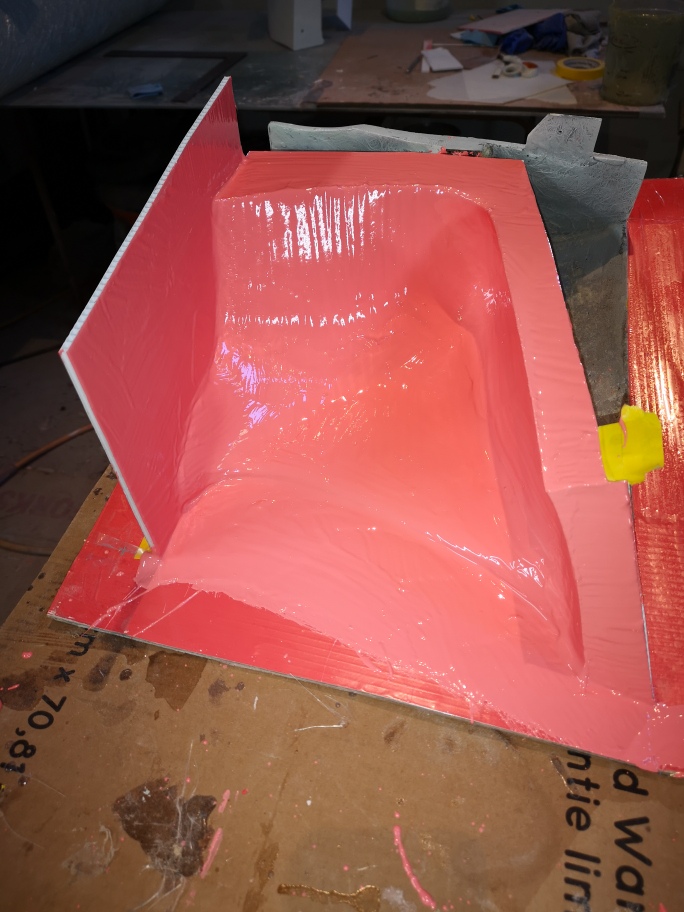
this is a shot of the inner scoop area to be molded
this shot shows the complex internals most of it will not be in the final part.
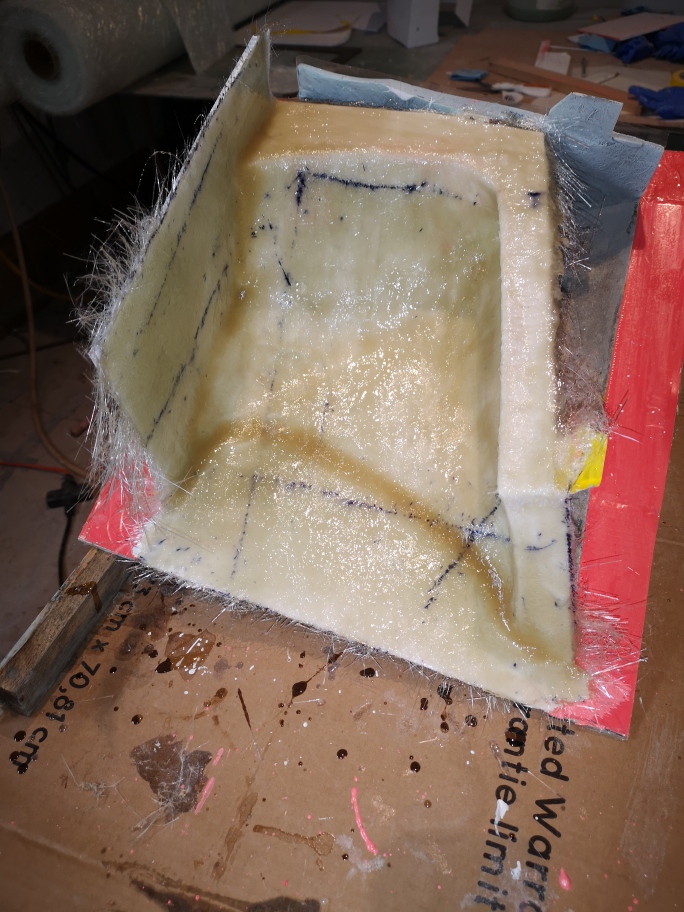
this is with the flanges attach and filets (yellow wax) applied
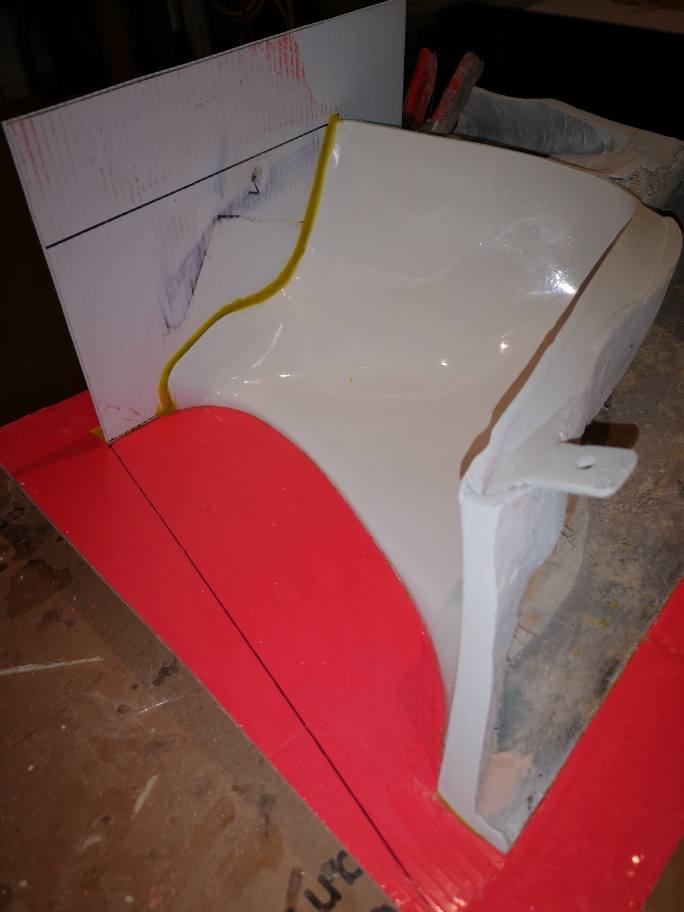
Gelcoat applied
first layers of glass mat
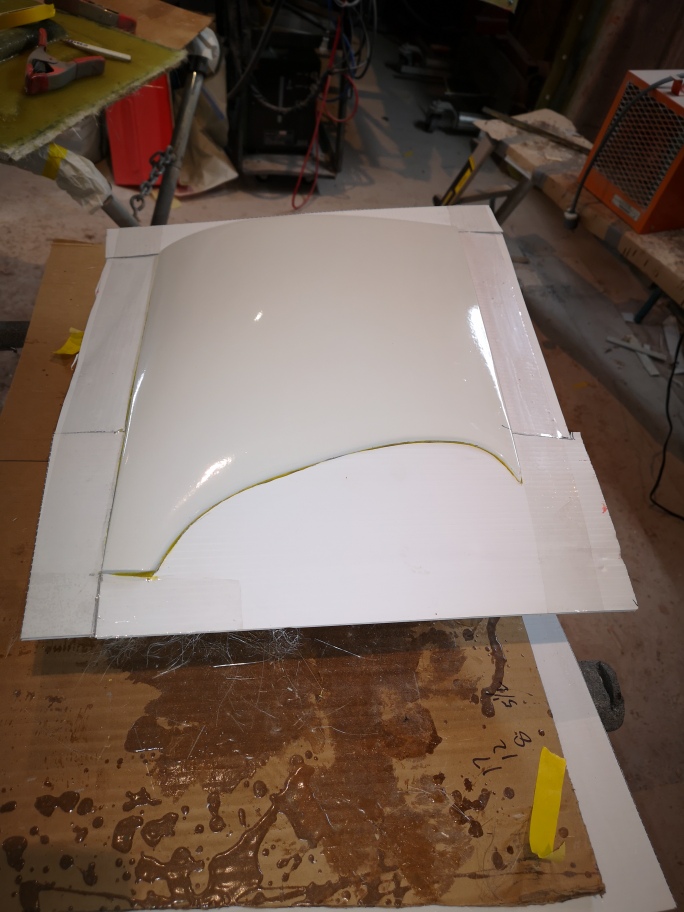
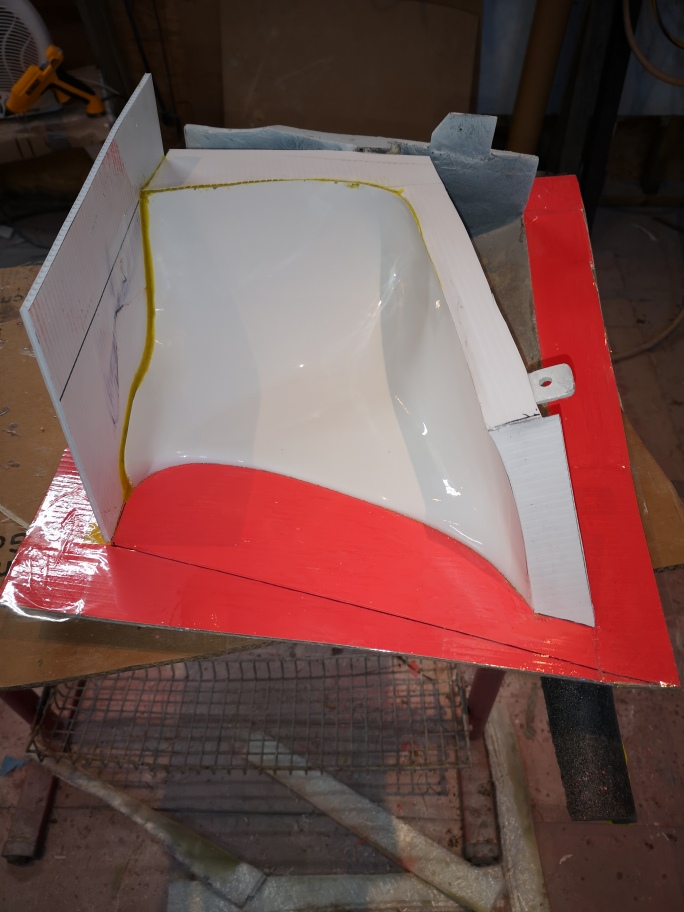
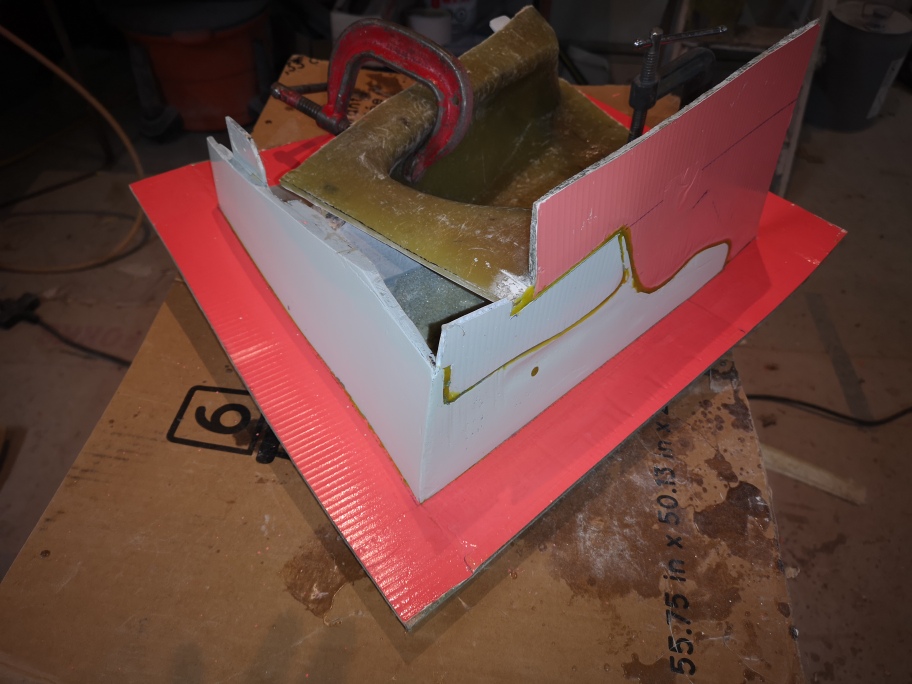
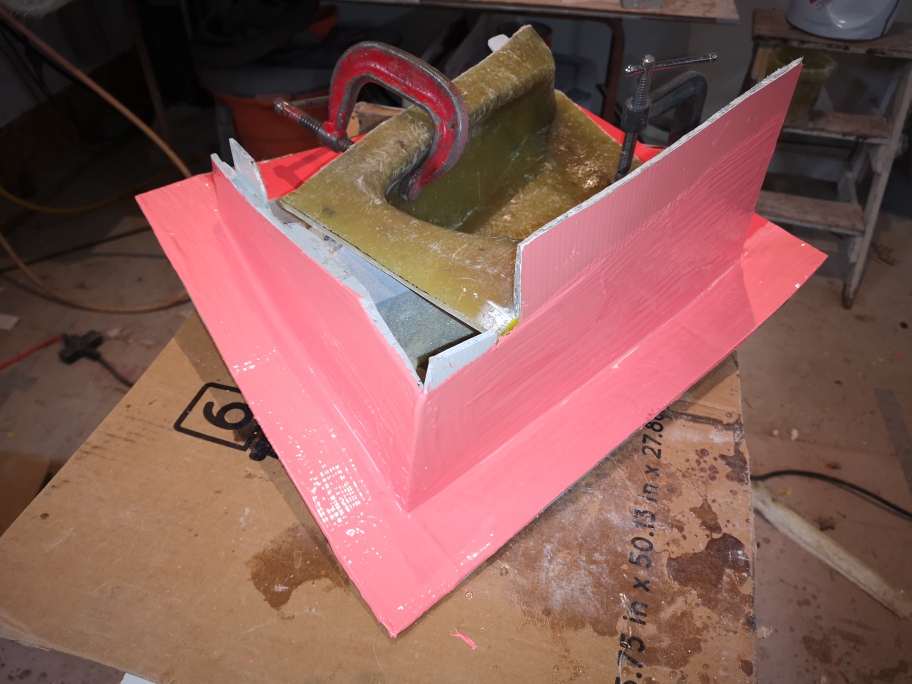
next is to install flanges for the second part of the front mold (lower part of the wheel arch)
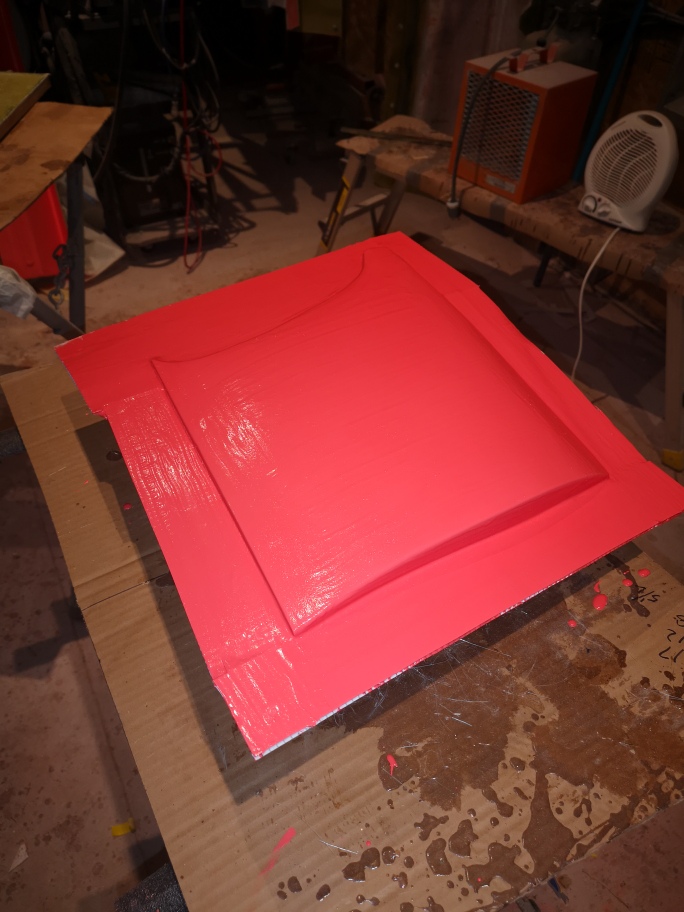
and this is with gelcoat applied.
Im hoping to get back out to finish of this mold tomorrow.
mask up and Stay safe everyone
Wayne
|
|
|
|