
 
     |
| JohnWPB 1986 GT Fastback worklog (Page 4/71) |

|
Hulki U. My-BFF
|
JAN 30, 08:04 PM
|
|
Curious why there are no pictures of you working on the car, John. I realize it might mess up a fresh manicure, and oil stains on your skin while flocking to the beach would truly dampen your day, but you must do something? 
|
|

|
JohnWPB
|
JAN 30, 09:05 PM
|
|
Well I was the one with the camera! I had to keep remembering to go pick it up to even update with pictures at all. I did do some of the work, but in all honesty, other than epoxying the mesh in the scoops, Jimmy did most of it. It's kinda a one person job, and nothing I could really help with at most parts of it.
@ Jimmy: Samantha says good night 
|
|
|
|
JimmyS
|
JAN 30, 10:09 PM
|
|
John,
Don't forget, you got to use a rivet gun for the first time.
|
|

|
JohnWPB
|
MAR 13, 08:23 PM
|
|
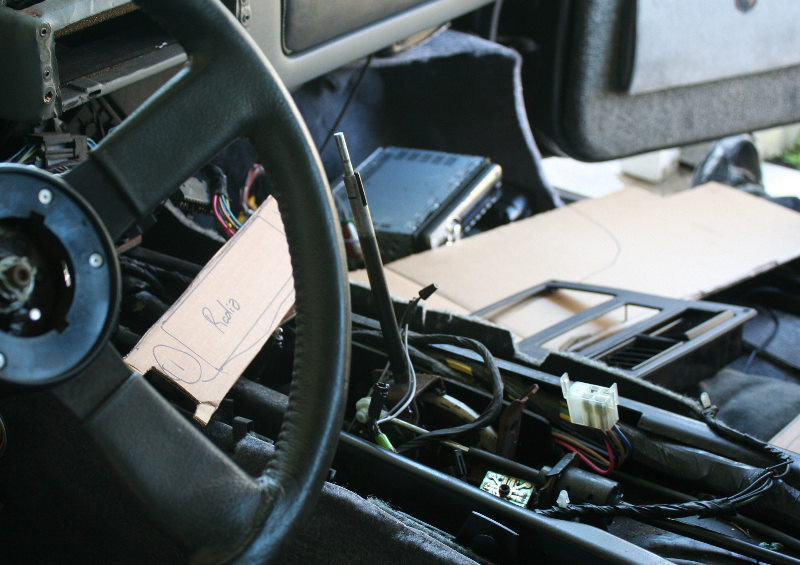
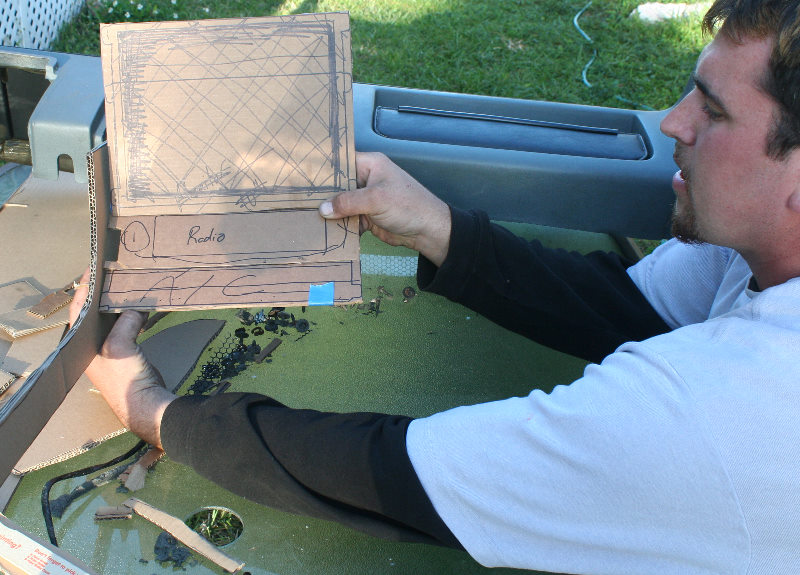
Well, I got some work done on the car today! A buddy of mine came over (He used to do custom interiors) and helped me out. We started with ripping everything out, and playing with cardboard. The mock up face plates were made for the A/C controls, the Head Unit, and the 10" touchscreen for the CarPC:
Next was to hot glue the individual pieces together and see how the curves, sizes of stuff, and everything lined up.
And here it is in the car to see how it all is going to look when we actually start the console:
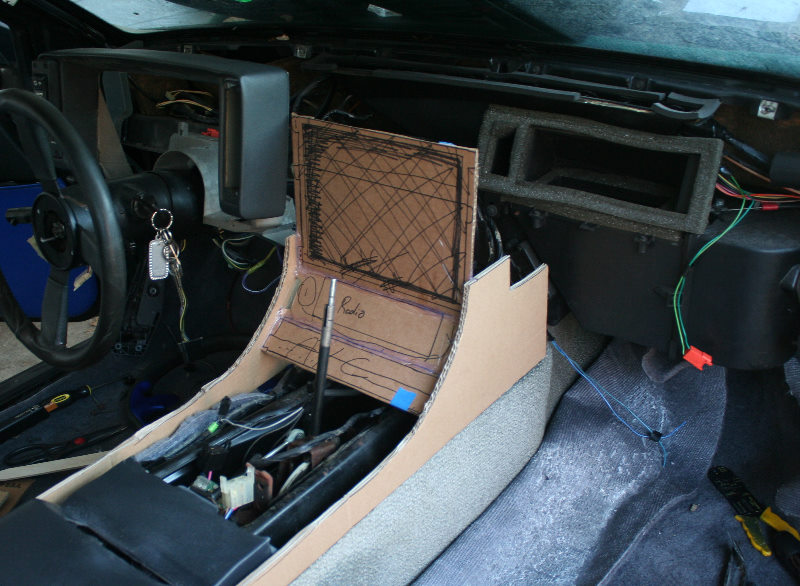
I still have yet to shorten the shifter, and I swapped out the T-Handle for a Camaro shifter. Also, looking at the photo again, I see the whole console will actually be going towards the front a couple more inches. It is almost butted up against the shifter in the photo.
I decided to go with the A/C controls on the bottom, as they are pretty shallow, and can go in on that angle. The head unit on the other hand is much deeper, and would not fint on the bottom, unless it was almost level.
Next will be to take all the measurements of the cardboard pieces and transfer it to the 1/8" door skin I have here. Glue all that together, make final adjustments and then delve into the fiber glassing of everything.
It's all pretty rough right now, but I can at least finally get a picture of it in my head of how it is going to look.[This message has been edited by JohnWPB (edited 03-13-2011).]
|
|
|
|
mattwa
|
MAR 13, 08:30 PM
|
|
| quote | Originally posted by JohnWPB:
I still have yet to shorten the shifter, and I swapped out the T-Handle for a Camaro shifter.
|
|
You mean your not swapping your GT to a manual?? 
Looking good, keep up the good work.
|
|
|
|
Pappy
|
MAR 13, 10:15 PM
|
|
That looks fantastic!
Keep the Pics rolling in
|
|
|
|
JohnWPB
|
MAR 14, 12:26 AM
|
|
Ok, it's dark outside, and no garage to work in..... So what to do?
Fire up Photoshop of course! This is a VERY rough idea of where I am headed. The corners will be rounded in the actual version, but it gives me something visually to work with, and alter from there in the real world.
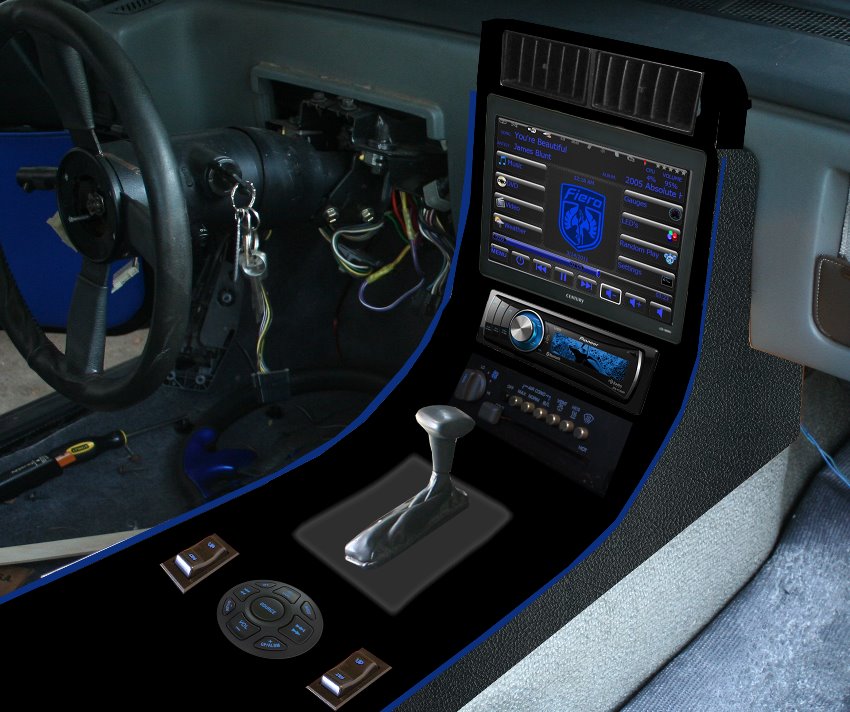 [This message has been edited by JohnWPB (edited 03-16-2011).]
|
|
|
|
JohnWPB
|
MAR 15, 11:51 PM
|
|
|
The more I think about this, the harder it seems I am making it.... I am trying to figure out how to attach the console & secure it, without having screws visible all over the place. I plan on covering the sides in vinyl, and having that come over the lip of the console just a bit, with the blue piping. Any suggestions on some sort of design to hide the screws and such? [This message has been edited by JohnWPB (edited 11-10-2012).]
|
|
|
|
craigsfiero2007
|
MAR 16, 12:02 AM
|
|
|
You could counterbore your holes out for the screws then make little plugs for them. Just one idea.
|
|
|
|
DIY_Stu
|
MAR 16, 12:15 AM
|
|
Use the Trees that the doors use.
Use Rare Earth Magnets
Use Super Glue.
Baling Wire and Duct Tape.
|
|
|
|