
 
     |
| LS4 / F40 swap - fieroguru (Page 4/216) |

|
dobey
|
DEC 16, 02:13 PM
|
|
| quote | Originally posted by fieroguru:
Especially since the car will not have catalytic converters!
|
|
Even without the cats, it probably puts out less emissions than the stock 2.8. If RickAdy got his car certified without cats in California, I don't think worrying about the emissions anywhere else is going to be an issue, unless you go really wild with building one. But at that point, it's probably easier to just go with an LS3, which has the much better heads.
|
|
|
|
Isolde
|
DEC 16, 08:00 PM
|
|
G8 is admittedly a much heavier application. With lame gearing. You should have excellent mid-range torque if you create some long tube headers like Wagoner did in his book. If so, I'm gonna predict 360 ft-lbs at the tires, on a DynoJet chassis dyno. I would say 365, but back to that intake manifold.
I did notice the discrepancy at the rear, but my line of thinking didn't go anything like what you just posted.
Did you ever get the '05 LS2 oil pan for this project? I have the PNs for the pan and the suction tube, and the magnetic drain plug, but I'm lacking the numbers for the dipstick and it's tube, and the windage tray. If you have them... TIA[This message has been edited by Isolde (edited 12-16-2010).]
|
|
|
|
dobey
|
DEC 16, 09:19 PM
|
|
| quote | Originally posted by Isolde:
Did you ever get the '05 LS2 oil pan for this project? I have the PNs for the pan and the suction tube, and the magnetic drain plug, but I'm lacking the numbers for the dipstick and it's tube, and the windage tray. If you have them... TIA
|
|
I think maybe you got my swap and guru's confused? I don't think he was planning to swap the oil pan, since he's sticking with a working DoD setup, where the larger LS4 pan would probably be better.
|
|
|
|
fieroguru
|
DEC 16, 09:59 PM
|
|
Correct, no plans to swap the oil pans.
On Friday I should have pictures of the cradle and the two transmission mount brackets...
|
|
|
|
fieroguru
|
DEC 17, 09:08 AM
|
|
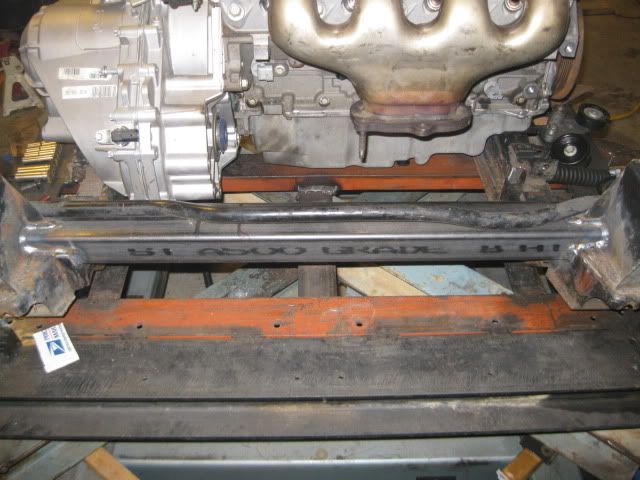
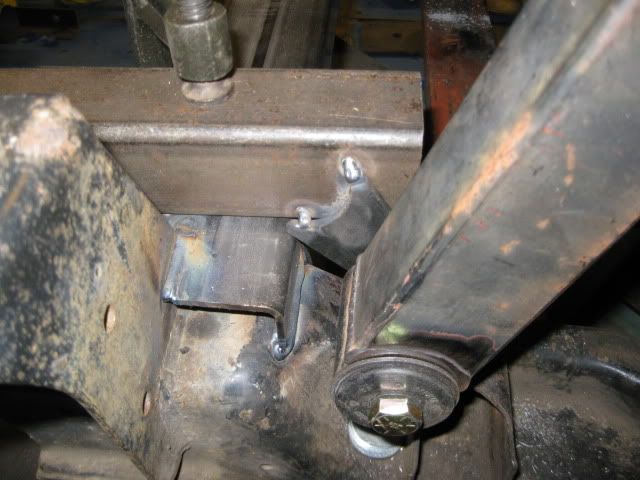
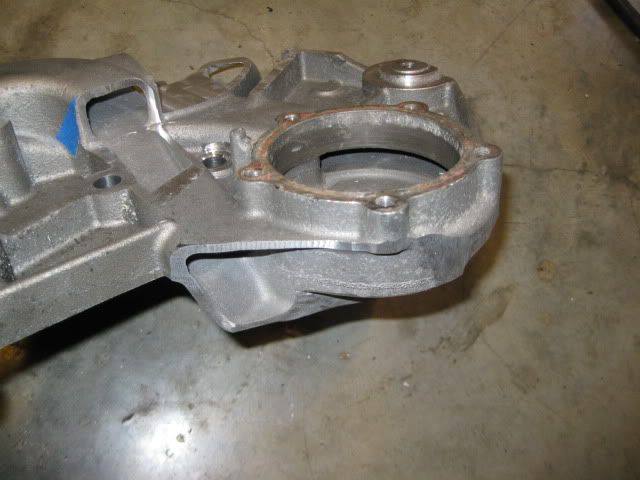
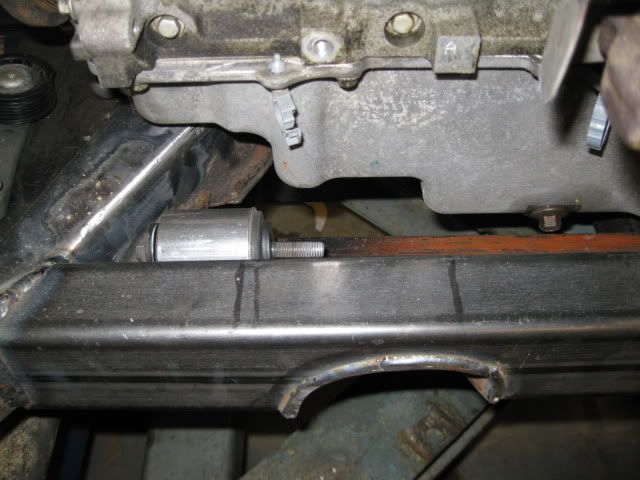
After the test fit, I knew there needed to be some modifications to at least the front cross member, so I took one the 88 cradles and did this to it:
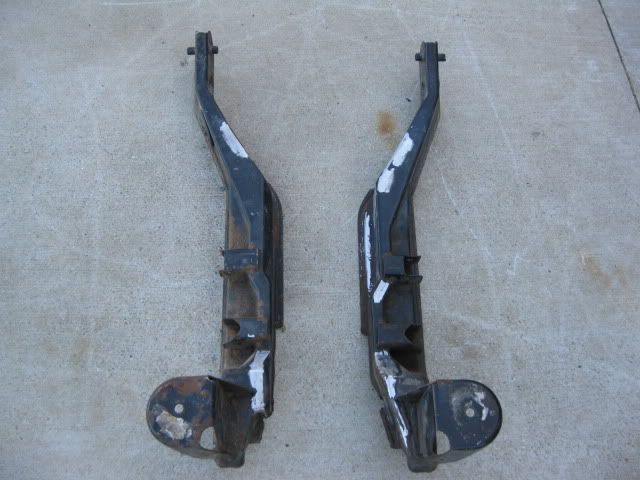
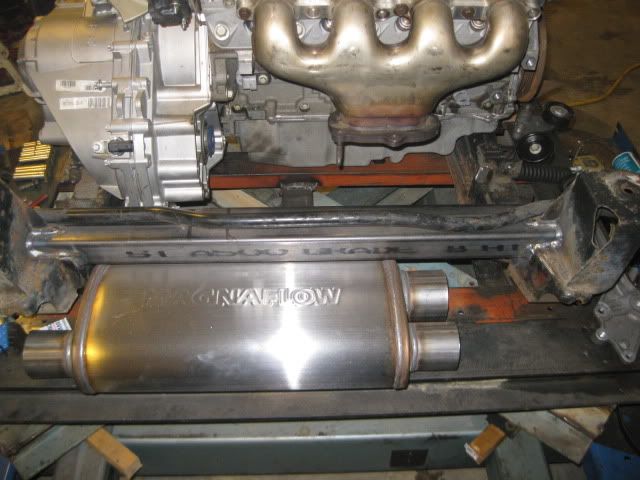
Then put it in the 88 cradle fixture and welded in new 2x3x1/8” cross members front and rear. The front one was moved further forward and the rear one was raised to increase room for a wider/thicker muffler.
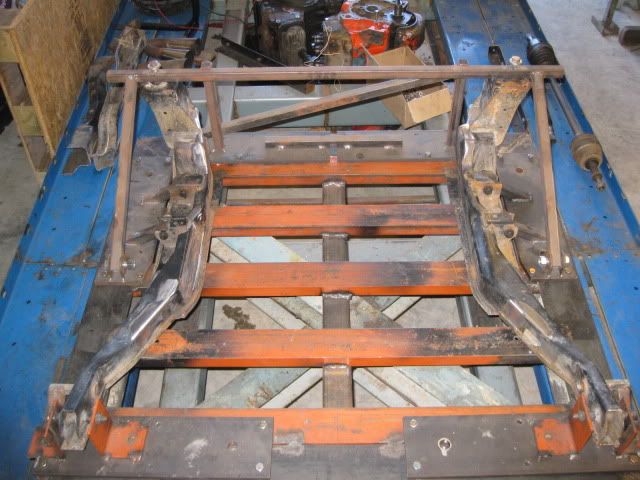
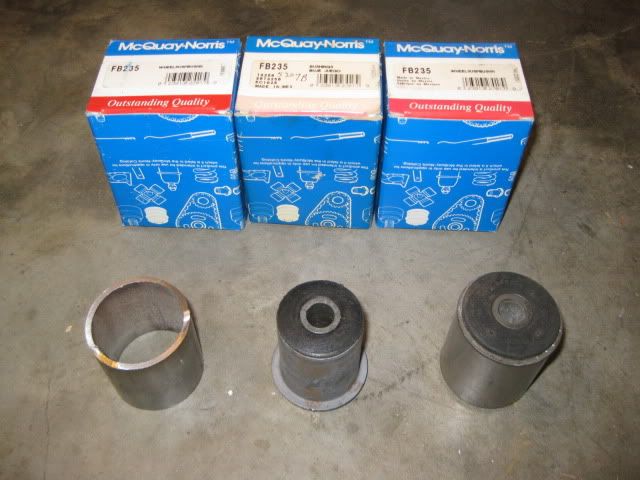
For the mounts, I will be using a 4 corner rubber mount system using the FB235 mounts that can be purchased for 6.99. These mounts will be pressed into a metal sleeve and the sleeve welded to the brackets.
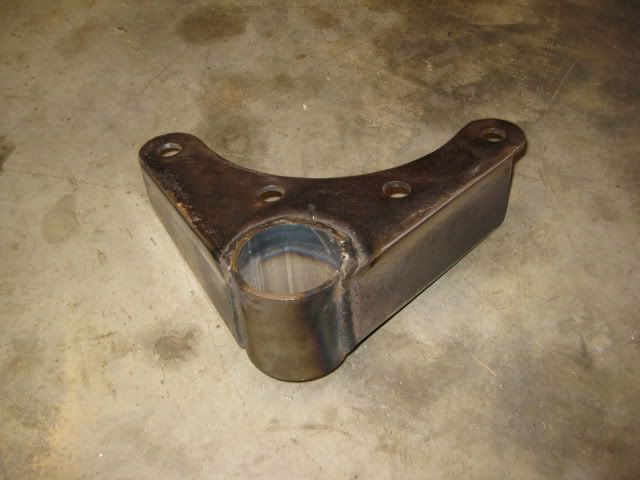
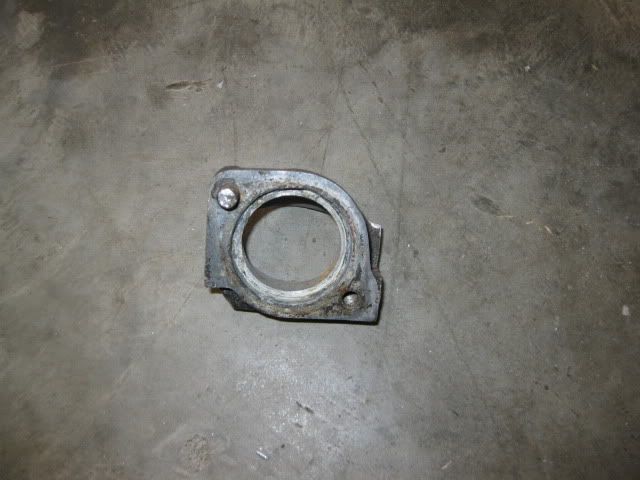
Here is the front transmission mount bracket:
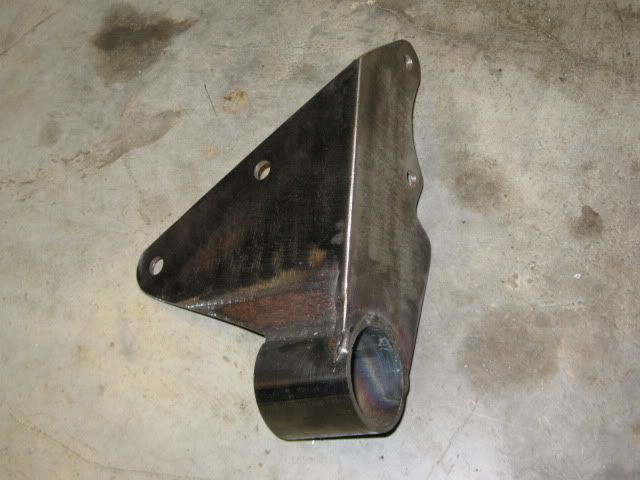
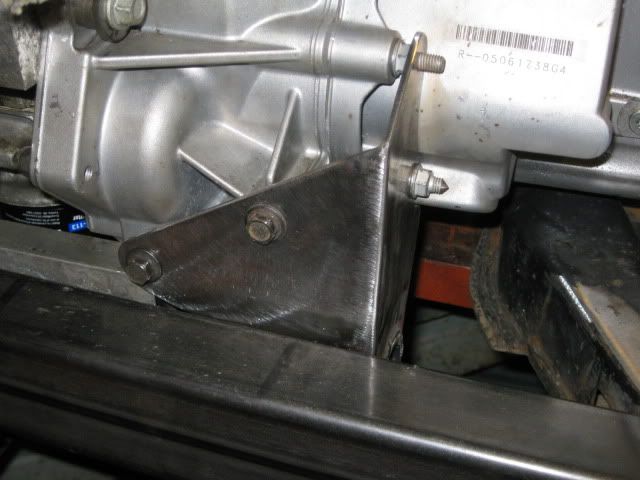
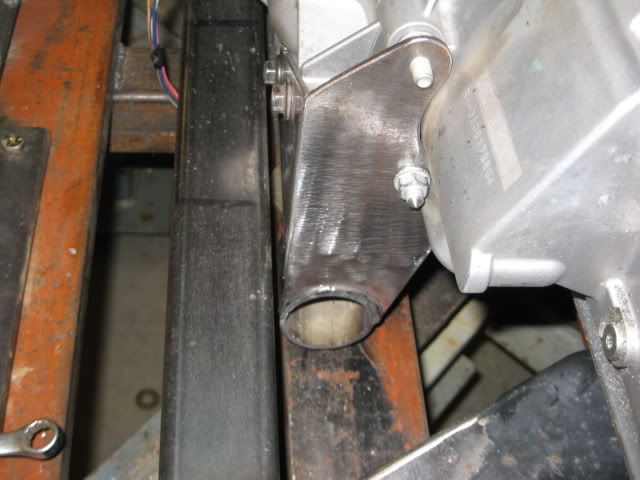
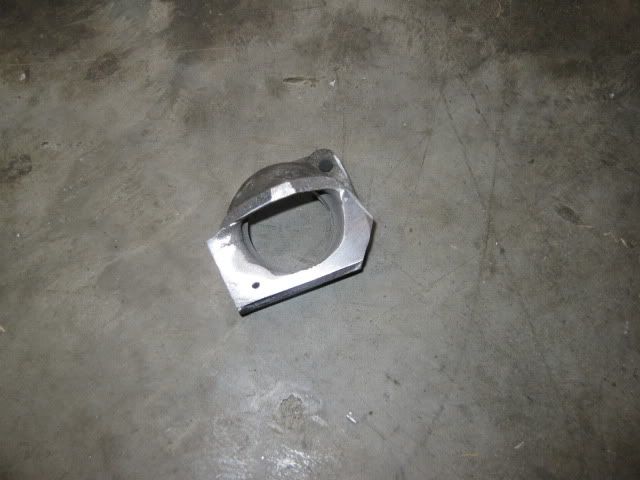
Here is the rear transmission bracket:
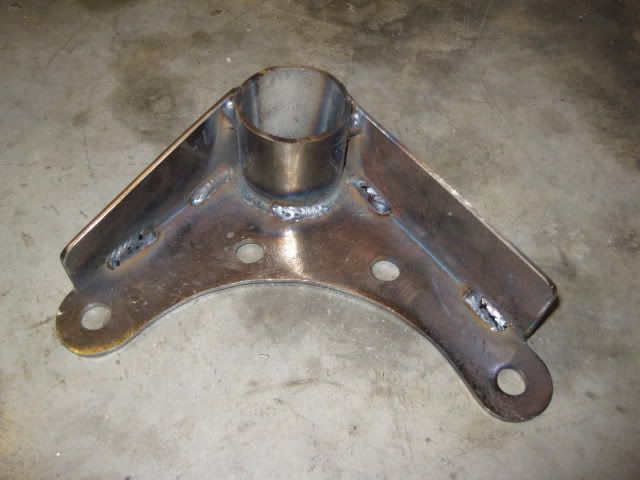
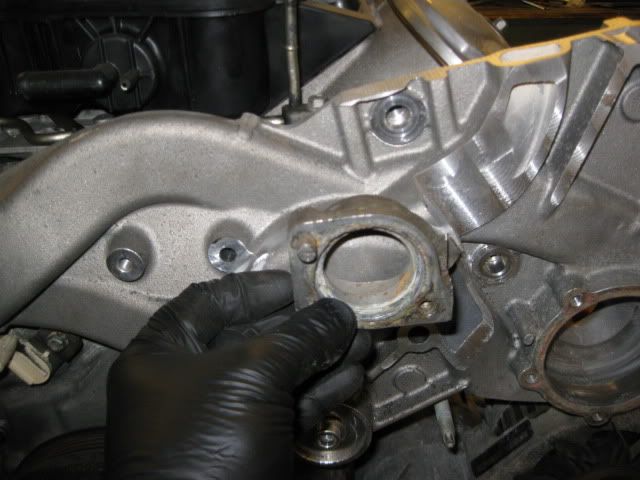
After the next test fit, I will fabricate the tabs that will be welded to the cross members to finish up the mounts.
The engine mount brackets are slightly more complicated, but I hope to have them done this weekend .
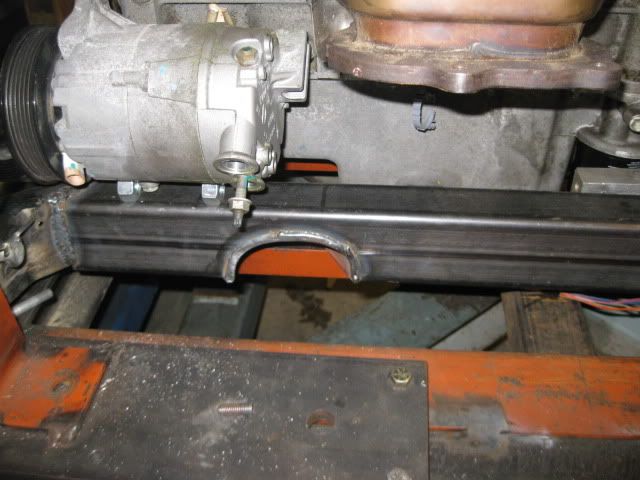
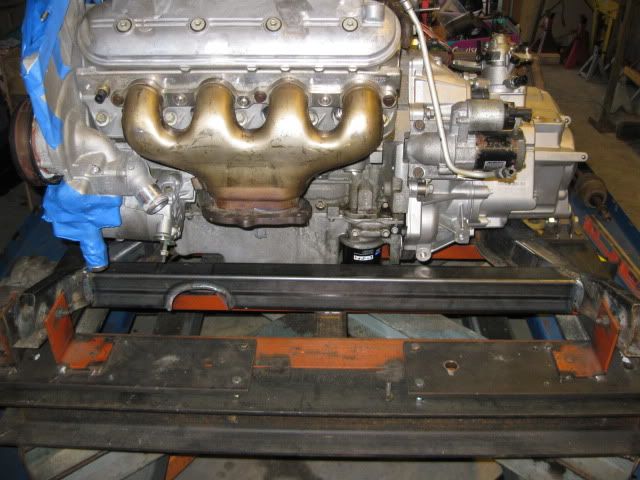
Here is a shot of the exhaust pipe clearance under the oil pan:
|
|
|
|
nosrac
|
DEC 17, 04:28 PM
|
|
| quote | Originally posted by fieroguru:
After the test fit, I knew there needed to be some modifications to at least the front cross member, so I took one the 88 cradles and did this to it:
|
|
My gawd man, WHAT HAVE YOU DONE ! 
This thread should be in the construction zone.
|
|
|
|
Bloozberry
|
DEC 17, 04:54 PM
|
|
|
I agree... time for the Construction Zone! I'm keeping this thread in my fav's as I gather ideas for tranny mounts for my Blooz Own project. Nice work Guru.
|
|
|
|
Rickady88GT
|
DEC 18, 01:19 AM
|
|
I like your starter mount.
I also think this thread needs a new home 
|
|
|
|
fieroguru
|
DEC 18, 01:47 PM
|
|
Thanks for all the compliments so far!
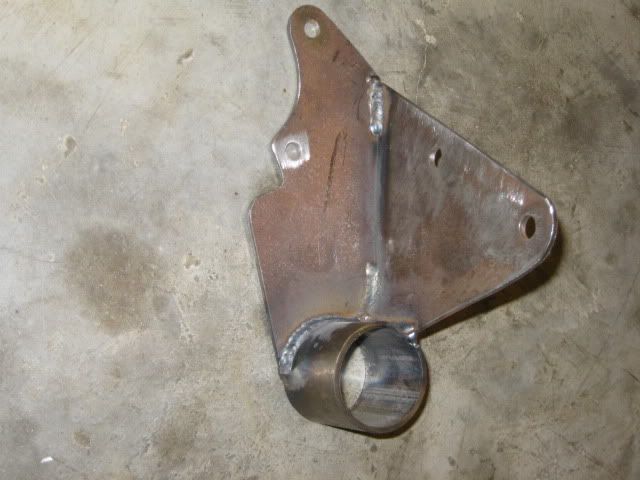
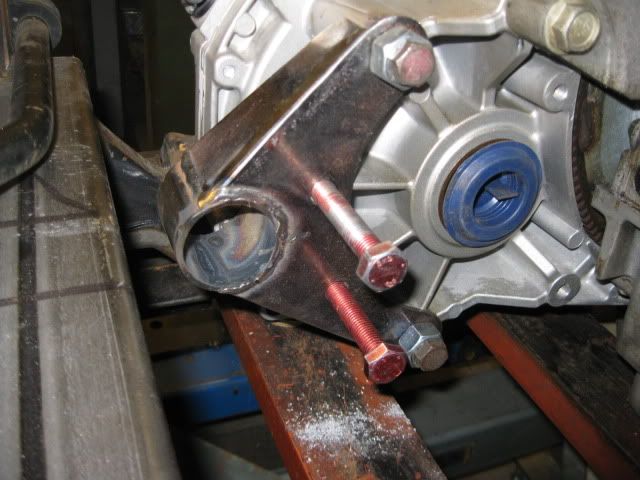
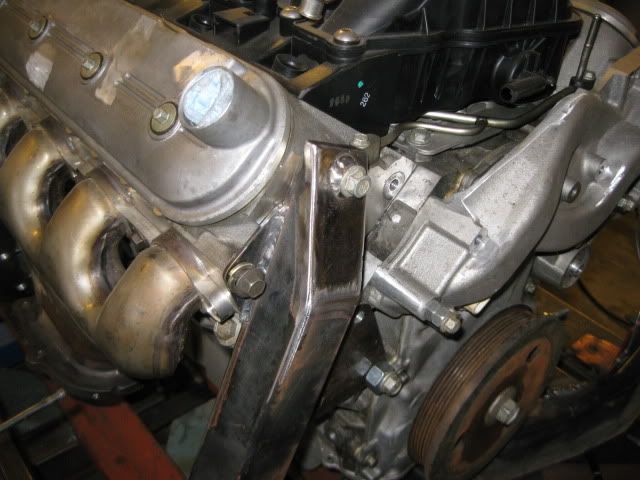
I ran out of time this morning before "quiet time" (nap time for the girls, so no cutting/grinding), so I was not able to finish the tapered contour at the top... but here are a couple work in progress picture of the rear engine mount. Just like the other 2 mounts, 4 bolt holes are used (one at the very top you can not see yet) to spread the load:
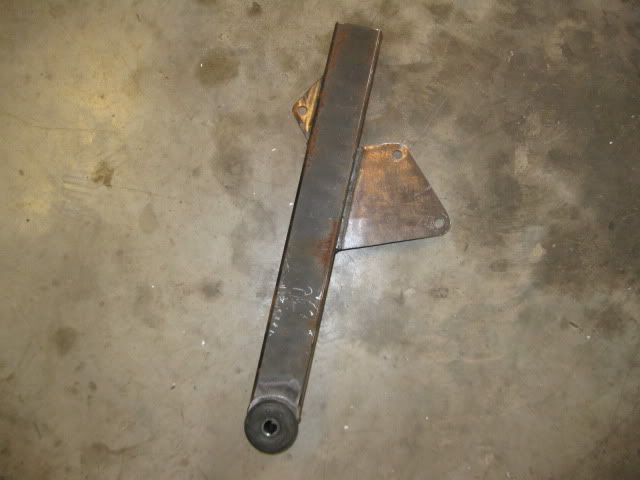
On the rear cross member is a locating tool for this mount... it locates the bottom bushing in the same location as the rear transmission mount. Doing this isn't required, but I try to keep the mounts co-linear when ever possible. I also like to position the mounts as far apart as possible to better control any drive train movement without needing any top side supports.
After "quiet time" I should be able to put the finishing touches on this mount.
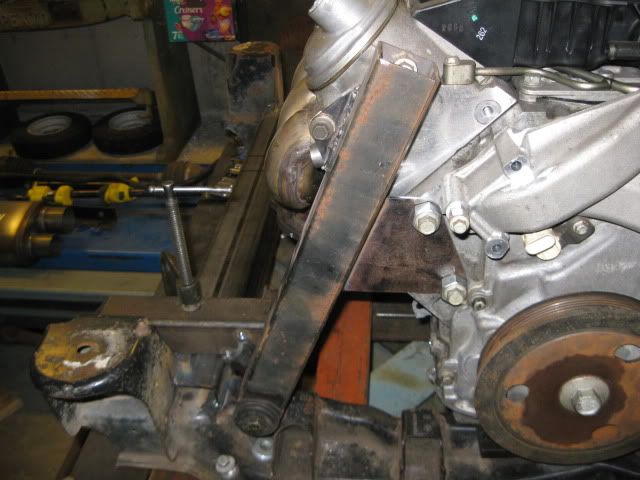
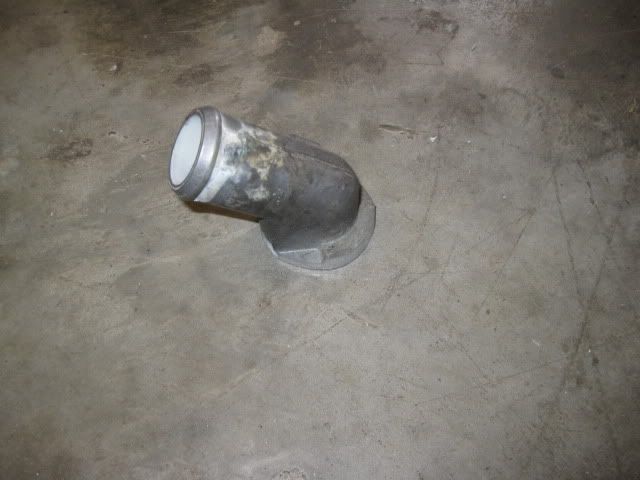
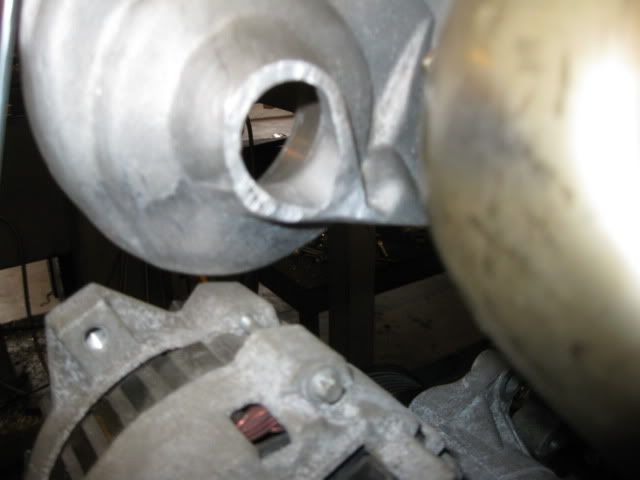
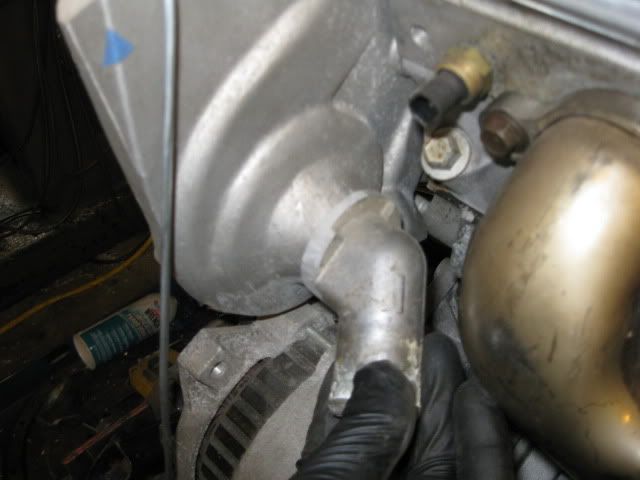
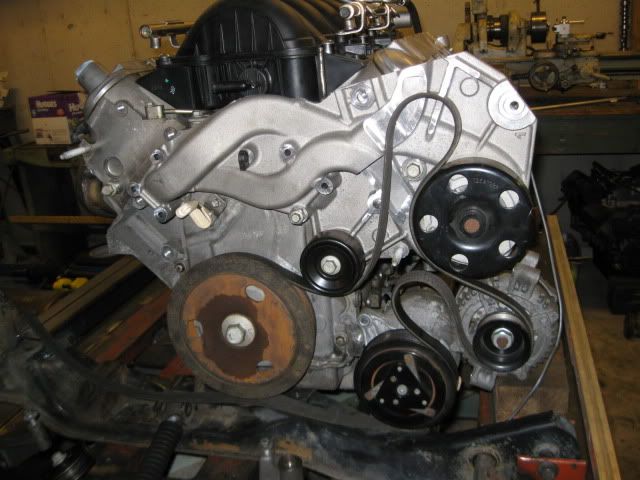
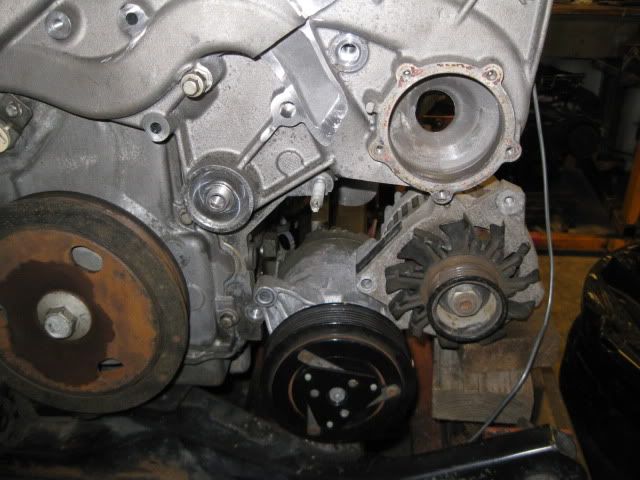
The front engine mount will be integrated with the accessory brackets... which brings me to the water pump. The stock LS4 water pump is compact in that it protrudes very little beyond the LS4 balancer. This helps ensure everything fits within the frame rails, but at an expense. The LS4 coolant fill location hits the stock deck lid spring box and the swaps so far have either moved the box or modified the water pump (or both). I chose to modify the water pump to fix the coolant fill issue, address the location for the alternator and the cluttered collection of hoses at the based of the LS4 water pump. All completed LS4 swaps have either trimmed the passenger frame rail to mount it on the rear of the engine down low (right above the axle) or use WCF reverse cantilevered mount to hang it over the old battery location. I am after a clean and simple design and wanted the alternator out of sight and along side the alternator (like all my other swaps have been). This avoids the frame rail mod and keeps the alternator hidden.
Everything in blue is going away:
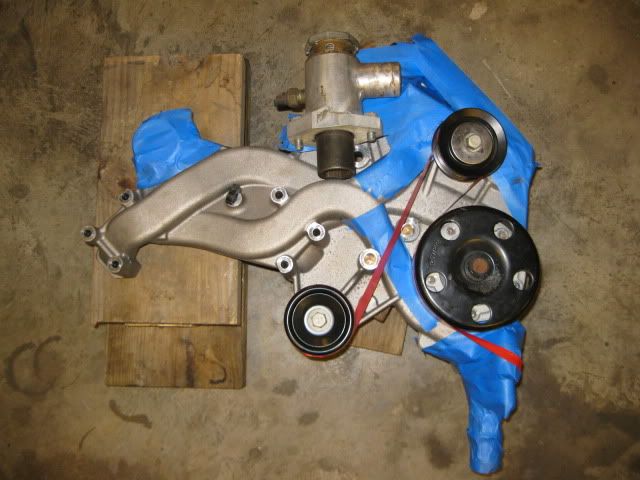
Once the majority of it is trimmed:


As you look at the pictures above, you can see the outlet for the water pump goes to the top and the portion removed at the bottom was just the passage to the thermostat housing (and the thermostat housing). Before you all freak out, here is my new (chunk of a 4.3 intake manifold) thermostat housing that will be welded to the LS4 water pump housing:
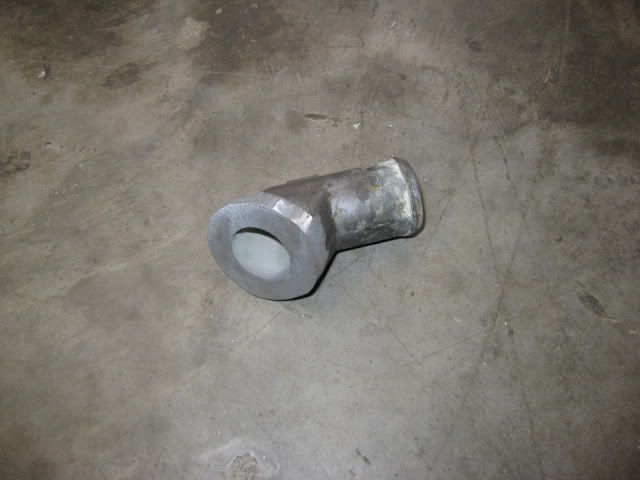
Here is the nipple (another modified thermostat housing) that will be welded on the back side of the water pump for the coolant inlet. I still need to shorten it some to gain more clearance to the exhaust (that is the outer heat shield, not the primary tube):
Here is a rough approximation of the belt drive for the accessories:
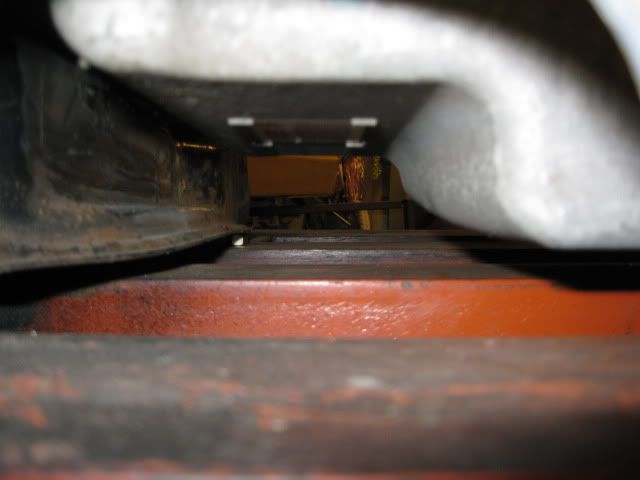
If you look close at this picture you can see a piece of 1/8" wire along side the alternator, the lower portion of this represents the slight indent in the double firewall section that gives just enough room (might move the engine/tranny rearward about 3/8" to gain more clearance when I finalize the mount locations on the cradle.
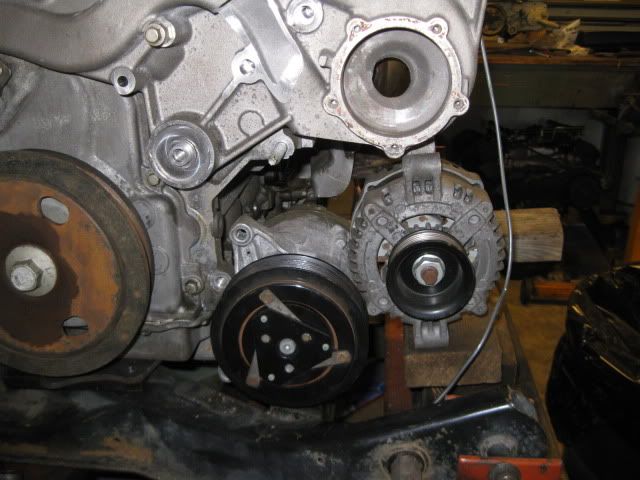
I was planning to reuse the LS4 alternator and A/C compressor since they came with the engine, but the LS4 alternator is mounted funky with the bottom mount flange mostly inaccessible... the 88 4cyl Fiero alternator fits better and would be easier to mount.
The jury is still out on the LS4 AC compressor. It only has 2 mounting ears so it can not be used to help stabilize the alternator mounting. The 88 4cyl AC compressor has 4 ears and could be used to help stabilize the alternator, but I haven't checked to see if it would fit yet (need to take it off another engine first).
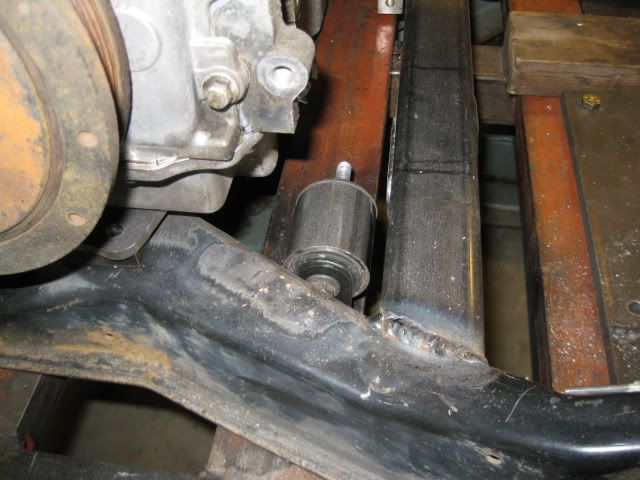
Below whatever I do for the AC and Alternator, there needs to be an engine mount in this general location:
One last bit of info... the LS4 came with a return-less fuel system and I plan to keep it return less. The easiest and probably a cheapest way to accomplish this is with a factory fuel filter/regulator built into 1 for the Corvettes. In my best Mad Max Thunder Dome chant "2 lines enter, 1 line leaves, 2 lines enter, 1 line leaves..." I picked mine up for just over $40 shipped:

 [This message has been edited by fieroguru (edited 12-18-2010).]
|
|
|
|
fieroguru
|
DEC 18, 04:24 PM
|
|
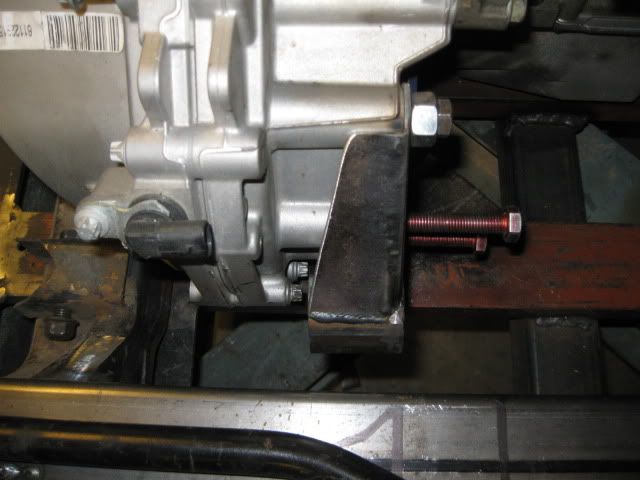
Here is the mostly completed rear mount:
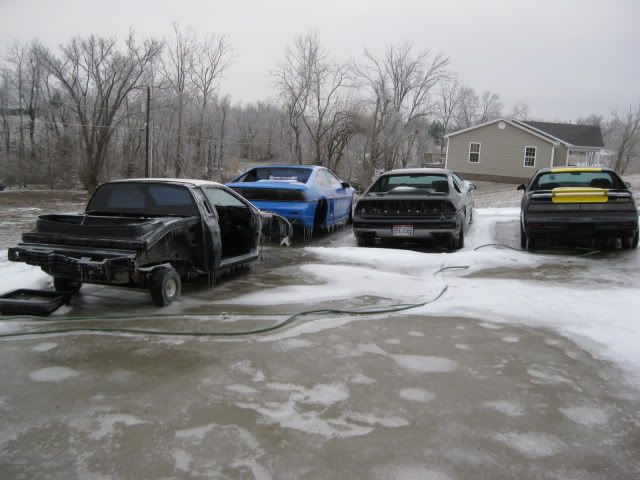
I am waiting for a day above 32 degrees so the mockup chassis can come back inside for another test fit... until then it will just keep the others company:
Sara started cooking the holiday cookies and volunteered to over see quality control, so not much else will happen today.
|
|
|
|