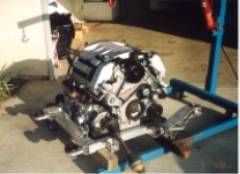
Aurora 4.0l / Izuzu 5 speed swap into 88 coupe (Page 4/102)
Will AUG 03, 09:31 PM
Lacquer thinner? lots of Brake cleaner?

Lacquer thinner/mineral spirits are at least available by the gallon.

------------------
'87 Fiero GT: Low, Sleek, Fast, and Loud
'90 Pontiac 6000 SE AWD: None of the Above

Luck, Fate and Destiny are words used by those who lack the courage to define their own future

cptsnoopy AUG 04, 12:09 AM
well, poop anyway. I am going to the junk yard tomorrow to see if they still have the 87 . i'll have to hope for the best. this one might be able to be cleaned but i doubt if breathing the odors is worth it.

EDIT: later the next day... went the yard only to find the 85 and 87 GT's had been removed and just two 84's were out there. no gas tanks to be had today... i tried to get some washers for the coilover conversion but after I removed the drivers side, i found the passenger side washer was missing. I bought the one washer for 89 cents and went home... kinda dismal...

[This message has been edited by cptsnoopy (edited 08-05-2004).]

cptsnoopy AUG 07, 10:20 PM
I gave up on the gas tank for now. Since it will be a little while before I really need it I will keep my eyes open for a local one that will work. I almost got the fuel sending unit cleaned up and working but as I was cleaning the wiper arm, I snagged a small piece of metal and broke it off rendering the unit useless. It was really gummed up and rusted so I don�t know how well it would have worked if I did not break it.

I put the engine back in the car today and installed the suspension minus the springs. I wanted to see where the axles would travel as they go up and down, stop to stop. It looks like there will be just enough room to install the rubber mounts at the passenger side of the car, front and rear. Here are some more pictures. My apologies for those of you with dial up connections. I know this must take forever to load.


[This message has been edited by cptsnoopy (edited 05-11-2012).]

cptsnoopy AUG 21, 02:31 AM
still working on the lower motor mounts. got the pads and gussets welded on today. please excuse the hardware as I don't have the proper bolts just yet to secure the mounts to the engine. I will try to get the cradle mounts for these two motor mounts welded up tomorrow. then i can start working on the forward crossmember and the upper front and rear rubber mounts. when the mounts are finished I am hoping the engine will be supported even with the trans disconnected. as i am not an engineer, this will be interesting to see.
Note: the mounts are not quite finished yet, I plan on adding stiffners to the side were needed.
special thanks to darthfiero for the cheap 1/2 ton dodge motor mount suggestion.

view from passenger side of engine.


front of engine, lower mount


front of engine, lower mount, different view


rear of engine, lower mount


rear of engine, lower mount, different view

[This message has been edited by cptsnoopy (edited 05-11-2012).]

Rickady88GT AUG 22, 04:30 AM
Have you put the right side drive axle in the tranny and hung the suspension on the cradle?
That motor mount on the right rear (pass side/trunk) looks like it is in the way of the long axle?
The axle will ride right inbetween the susp mounts and be an inch or two above the cradle with the susp fully extended.
You may have to make a longer mount that will not be in the way of the drive shaft?
You may have to look close but this is a pic of the S*. Look at where the drive shaft will be. This is an auto but the drive shaft runs in the same place for manual or auto.

------------------

Rickady88GT QuadCam 3.5 V6

[This message has been edited by Rickady88GT (edited 08-22-2004).]

cptsnoopy AUG 22, 10:29 AM
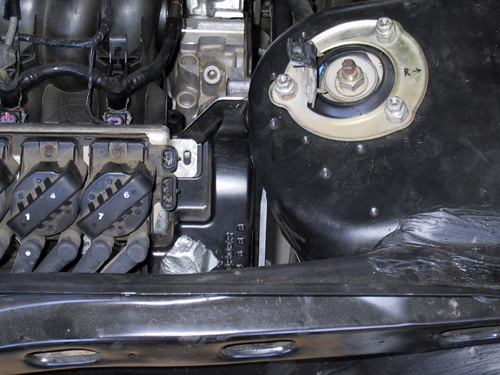
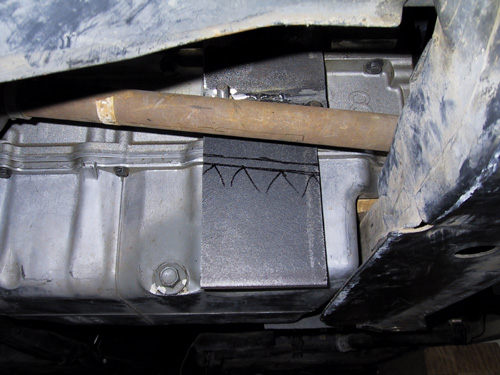
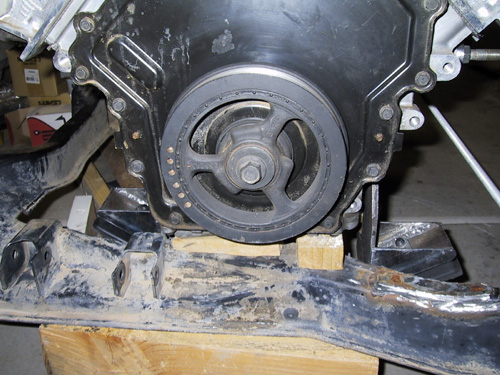
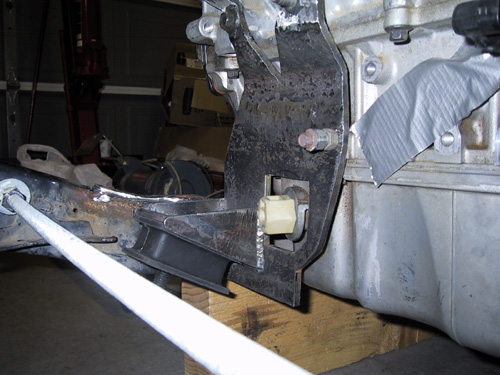
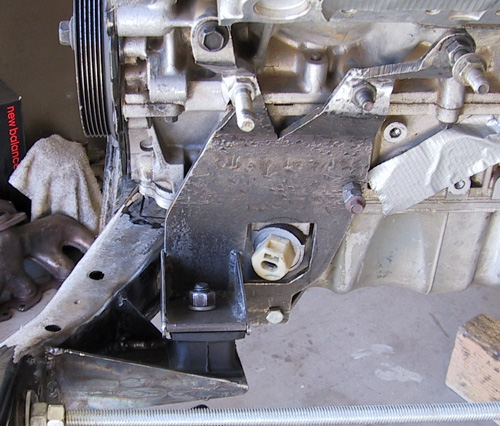
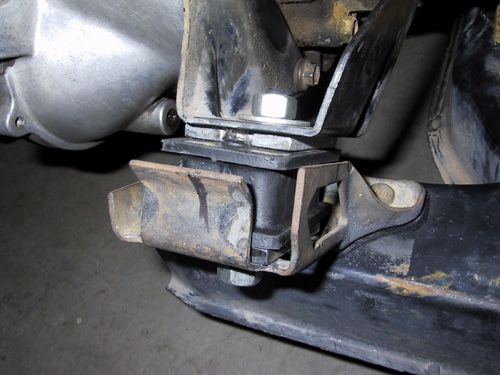
Hi Rickady88GT,

I put the cradle with suspension (minus springs) on the car and made marks (that's what the black lines are on the previous pics of the rear mount are. the gusset on the pass side is close but I can grind it down if I need to. there is still the possiblility that I messed up the measurements and will have to change it later though. thanks for the thoughts.

cptsnoopy SEP 01, 04:46 PM
i hope this works ok, it took enough time to fab... these are more pics of the lower pass side engine mounts, front and rear. Just as a note the forward mount bolted to the engine was a straight piece of 1/4" steel that was heated and bent to form the angles. the rear mount was cut in pieces first and then fitted to the engine, then welded to form the proper angles. that was much easier and quicker than heating and bending... again, the plan is to somehow fab mounts to the front and rear crossmembers that will attach near the middle of the engine heads to support the engine on four mounts and to have the tranny use its stock mounts. hopefully that will support the engine enough to not need a dogbone mount...

note: a couple of the pics are too tall to show, just click on the icon to see them...

view from the front.


forward engine mount pass side.


rear engine mount pass side.


[This message has been edited by cptsnoopy (edited 05-11-2012).]

Rickady88GT SEP 01, 09:44 PM
Cool.
Are you going to incorporate the front cradle brace into that front mount?
cptsnoopy SEP 02, 01:59 AM

quote
Originally posted by Rickady88GT:

Cool.
Are you going to incorporate the front cradle brace into that front mount?


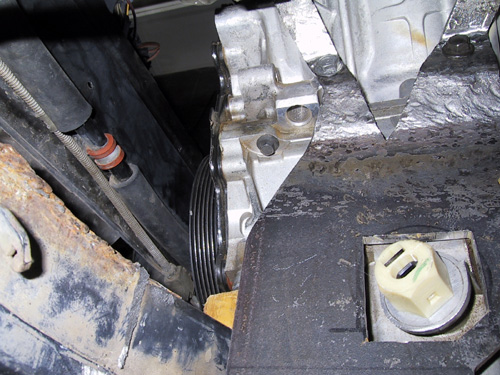
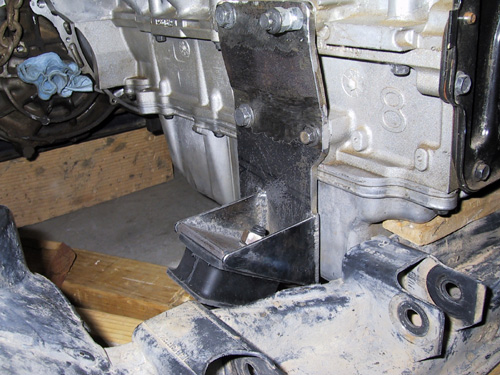
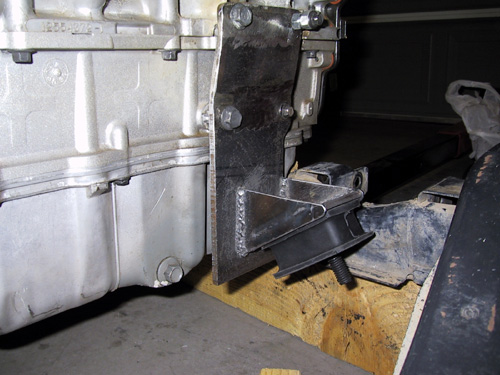
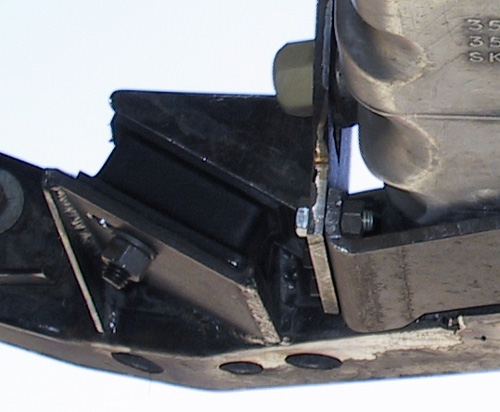
that is the plan for now. I am working on the tranny mounts right now. the forward one was coming apart so I borrowed another one of darthfiero's ideas and used the same type of mount to replace the rotten rubber. it took two pieces of 1/4" steel "pads", one on top and one on the bottom to make up the difference in space. the rear mount has a smaller space to fill so it will be different. when I finish those I will figure out how to replace the front cradle brace. what's left of the original brace that holds the trany mount and the front pass engine mount should hopefully both tie into the new brace...

[This message has been edited by cptsnoopy (edited 05-11-2012).]

The Punisher SEP 02, 02:34 AM
hey looking good. keep up the good work. This is great documentation

SH