|
| My 88 Formula Interior Redesign (Page 39/87) |

|
Sofa King
|
JAN 31, 05:23 PM
|
|
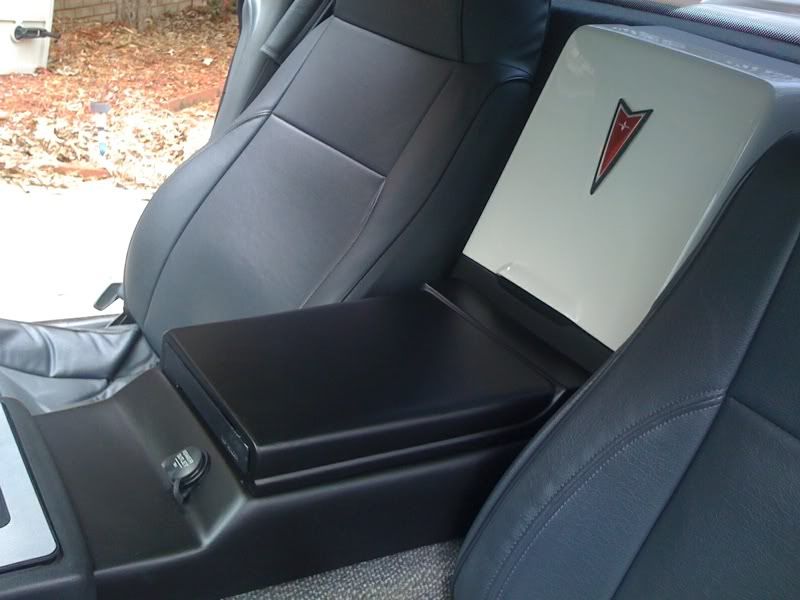
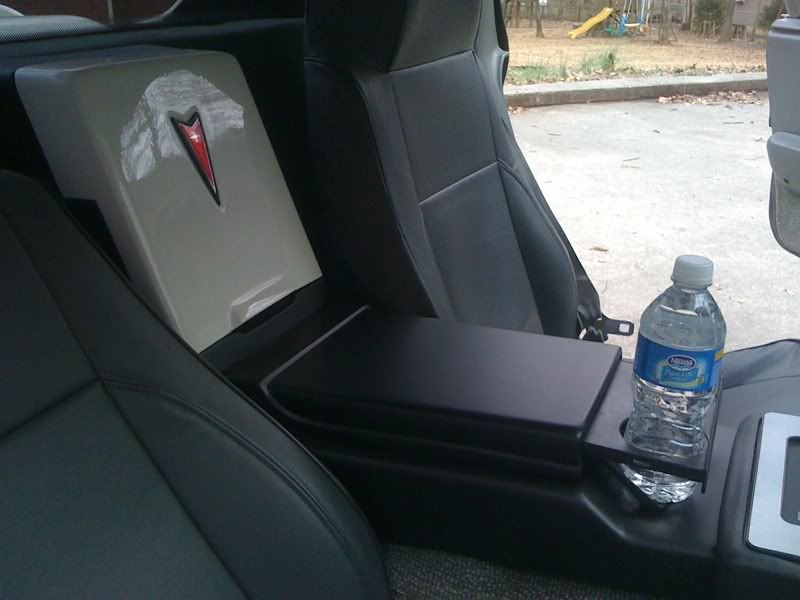
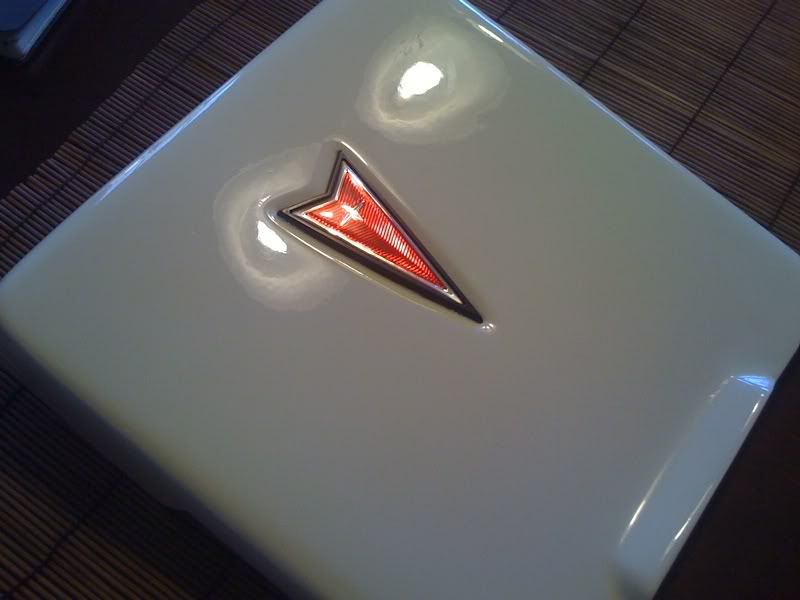
The Lid is FINISHED!!!! I just spray mounted the foam to the inside of the lid and used 3M double stick tape for the Pontiac Logo. Man-o-man... it looks really good! I never thought this day would come. One part down one to go... technically...
Lid with the newly spray mounted foam liner
With the newly taped Pontiac Logo
Just waiting for the hinge and the final layers of paint
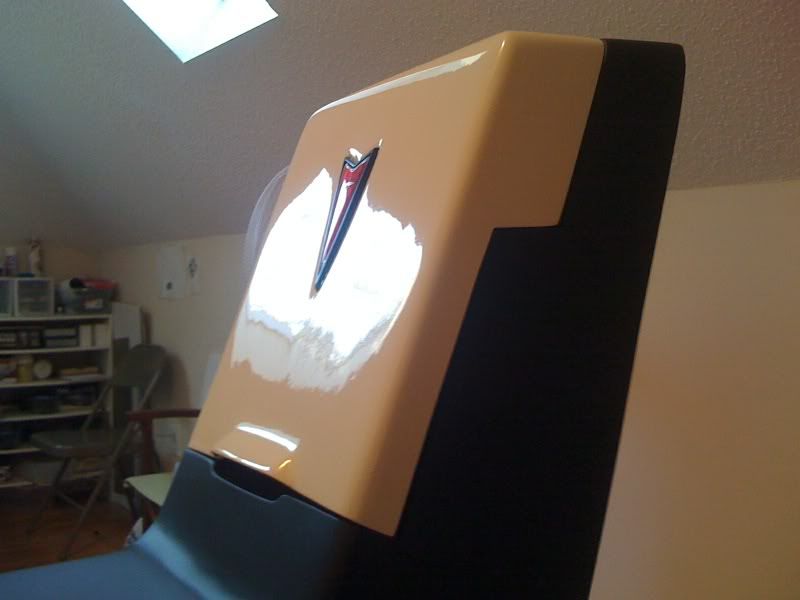
Another view
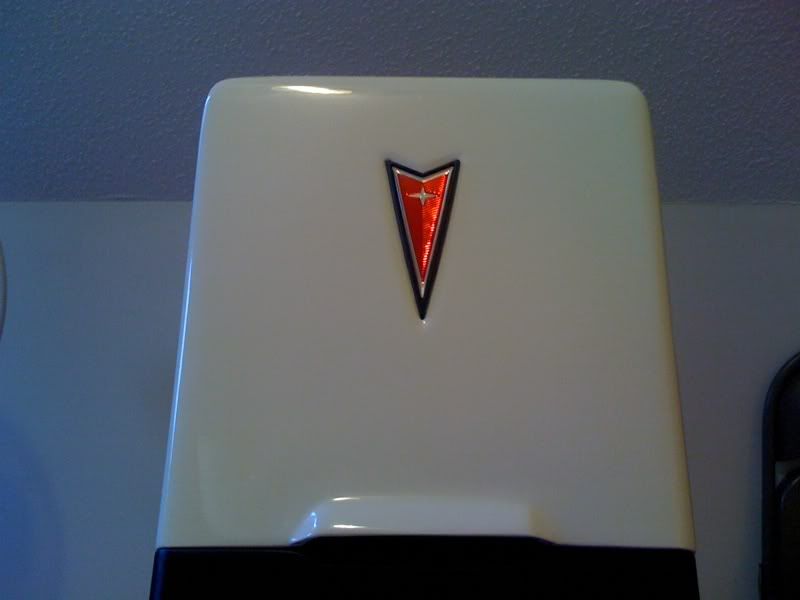
The beauty shot
|
|

|
revin
|
FEB 01, 11:10 AM
|
|
Man o man that looks SWEET!!!!( even without vents  ) )
Just take what we say as a grain of fiberglass. This is YOURS and what you do for a final out come will be nothing less of stellar!
you do have some great talent there!  maybe you should go into the console making job! maybe you should go into the console making job!
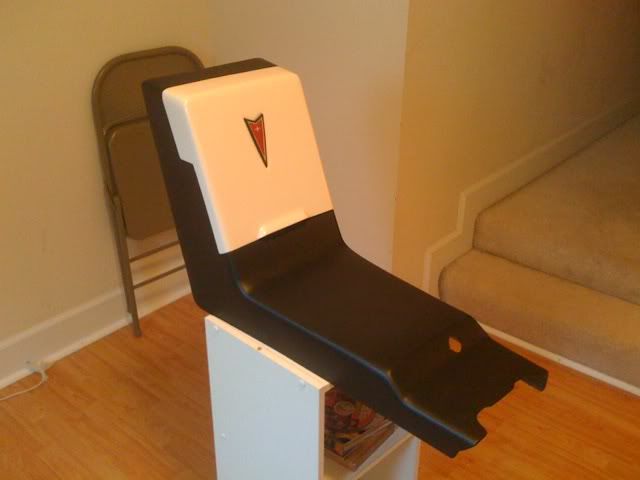
when do we get to see the"test fit" pics???
|
|
|
|
Sofa King
|
FEB 01, 11:53 AM
|
|
| quote | Originally posted by revin:
Man o man that looks SWEET!!!!( even without vents )
Just take what we say as a grain of fiberglass. This is YOURS and what you do for a final out come will be nothing less of stellar!
you do have some great talent there! maybe you should go into the console making job!
when do we get to see the"test fit" pics??? |
|
Hey R,
LOL!!! First and foremost. A big kudos to you for all the great advice you've given throughout this build. You made some great suggestions that really helped. And thanks for the kind words.  I'm absolutely thrilled with the lid (and build) so far. I'm hoping when I test fit the cole everything looks good, fits, works, etc. I think I'm going to test fit the console this afternoon, get the bolts cut and the hinge mounted and apply some foam to areas that might rub. For all intent and purposes - I might "technically" be finished! As for a going into business? I have thought about it. I might put together a simple armrest with integrated cup holder for the stock console and I might reporoduce Console Part II depending how well that turns out. Lots of ideas! I'm absolutely thrilled with the lid (and build) so far. I'm hoping when I test fit the cole everything looks good, fits, works, etc. I think I'm going to test fit the console this afternoon, get the bolts cut and the hinge mounted and apply some foam to areas that might rub. For all intent and purposes - I might "technically" be finished! As for a going into business? I have thought about it. I might put together a simple armrest with integrated cup holder for the stock console and I might reporoduce Console Part II depending how well that turns out. Lots of ideas!
But... I'm not "technically" done yet!
UPDATE!!!!
I'm still waiting to see how the texture paint turns out. I've had to spray 4 layers so far just to get the texture "activated" so I can see it. So far, I'm not impressed. I really don't know what to do if this texture doesn't work. I might go back to the Lunitec Paint System. I guess I could sand down all the surfaces of the dash, pillars, etc and then spray with the Lunitec? It's just an idea so far. I should know how the texture looks when I get home - let's hope for the best.
|
|
|
|
revin
|
FEB 01, 12:34 PM
|
|
I have never tried this:
The guys that add texture in homes, spray the bumpity spackle on THEN with the float(or trowl) they kinds smash/ smooth out the large bumps and get that texture you see on walls.
Home depot sells some kind of texture paint. maybe you can test this theroy on a scrap piece?
Oh and don't rush the ART !!
|
|
|
|
stryker
|
FEB 01, 12:34 PM
|
|
you might want to try the sem texture spray or the bed liner spray.make sure you use the hercules and not rustolems. it is to thin and wont leave a texture. the sem is nice because you can wet sand it to get the right texture you desire.i final got emailed back on the leather spray from them.WOW shipping is a killer!! thanks for your info on it too!
John
|
|
|
|
Sofa King
|
FEB 01, 12:59 PM
|
|
| quote | Originally posted by stryker:
you might want to try the sem texture spray or the bed liner spray.make sure you use the hercules and not rustolems. it is to thin and wont leave a texture. the sem is nice because you can wet sand it to get the right texture you desire.i final got emailed back on the leather spray from them.WOW shipping is a killer!! thanks for your info on it too!
John |
|
Hey J,
Yeah... the tax is what stopped me and Katatak dead in our tracks. That's why we're hoping for a group buy? But he did say something about a distributor in Philly?
I've looked in the SEM paint but again, it's not quite the texture I want. I really like the Lunitec paint. We'll see what happens?
|
|
|
|
Sofa King
|
FEB 01, 01:04 PM
|
|
| quote | Originally posted by revin:
I have never tried this:
The guys that add texture in homes, spray the bumpity spackle on THEN with the float(or trowl) they kinds smash/ smooth out the large bumps and get that texture you see on walls.
Home depot sells some kind of texture paint. maybe you can test this theroy on a scrap piece?
Oh and don't rush the ART !! |
|
Hey R,
Basically what that is like the "popcorn" texture they spray on the ceiling. The contractors just float a trowl over top to knock the high points off. It really wouldn't work. If would give the appearance of the part looking like stone. Also, it's very soft so it would require a "shellac" finish to it. I can exactly where you were headed. But I already looked at it. LOL
|
|
|
|
revin
|
FEB 01, 03:29 PM
|
|
hummm ok how about this:
spray on the regular paint, then get some platic wrap and wad it up and set it on the fresh paint for a visual wrinkle finish? nah maybe not. too much work involved and to be consistant would be a bear....
Oh what about getting the dash mat off a old dash, lay down some fresh resin, add a release agent to the dash pad and set it in the resin?? when dry ,you pull the pad off and a copy of teh texture would be left behind!! No sanding 
that is all for today......I will put my thinking cap back in a box and slide it under the bed for now.......
|
|
|
|
Sofa King
|
FEB 01, 04:12 PM
|
|
Hey Rev,
All great ideas. But as you stated - consistency. That's the key. I'm looking into alternative textures as well. Very frustrating.
|
|
|
|
Sofa King
|
FEB 01, 04:15 PM
|
|
|
|