
 
     |
| 1927 Pontiac Fiero (Page 38/41) |

|
Gokart Mozart
|
FEB 20, 06:31 AM
|
|
|
|
|
toddshotrods
|
FEB 20, 12:54 PM
|
|
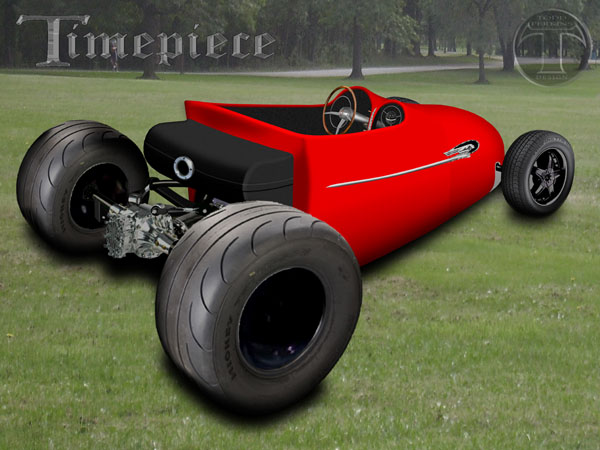
Little by little, I am starting to clean up some of the details and work on the scale and perspective of the components. I am usually not one to go red, but this looks good to me. I like red, just never seriously considered painting one of my projects that color. Also, I started working on the compass. Considering the Cheiftain, and most vintage cars, would have a clock there I really should too but I just love that ball compass! So, I am thinking about making it both. The floating ball compass in the center, and the clock in the larger space circling it. I am going to try it in the illustration later, but to really get the effect I need to do a 3D model. If I can get what's in my head out it would definitely be a conversation piece.
Yup, gotta have gauges. I still need to do my homework to find out what gauges EVs normally use. I know it'll need a speedo and gauge(s) to monitor the batteries, probably have a tach, and gauges to keep tabs on the temperature of the controller and motor - when I am abusing it. Nice suff in the links you posted, as usual, and it's definitely feeding my creative process.[This message has been edited by toddshotrods (edited 02-20-2009).]
|
|
|
|
toddshotrods
|
FEB 20, 06:14 PM
|
|
|
|
|
Gokart Mozart
|
FEB 20, 11:41 PM
|
|
|
|
|
toddshotrods
|
FEB 21, 08:53 AM
|
|
Awesome GM!  I wasn't really sure how I was going to make the clock work I just had an idea what I wanted people to see. Maybe I should put aluminum rings around the magnifying spot on each ring, so they look like antique jeweler's eyepieces. Not only would the numbers be floating in mid air, the eyepieces would revolve around them in mid air! The second "hand" should be kind of small and just catch enough of the outside of the numbers to let you find it. The minute "hand" should be about half the size of the numbers so it bloats the middle of the number, but leaves the outside of it normal size. The hour "hand" should bloat the entire number... With the right backlighting this whole pod should be pretty interesting at night. The numbers and eyepieces in the clock would really float in space, with a compass bobbing around in the middle... I wasn't really sure how I was going to make the clock work I just had an idea what I wanted people to see. Maybe I should put aluminum rings around the magnifying spot on each ring, so they look like antique jeweler's eyepieces. Not only would the numbers be floating in mid air, the eyepieces would revolve around them in mid air! The second "hand" should be kind of small and just catch enough of the outside of the numbers to let you find it. The minute "hand" should be about half the size of the numbers so it bloats the middle of the number, but leaves the outside of it normal size. The hour "hand" should bloat the entire number... With the right backlighting this whole pod should be pretty interesting at night. The numbers and eyepieces in the clock would really float in space, with a compass bobbing around in the middle...[This message has been edited by toddshotrods (edited 02-21-2009).]
|
|
|
|
toddshotrods
|
FEB 22, 02:27 PM
|
|
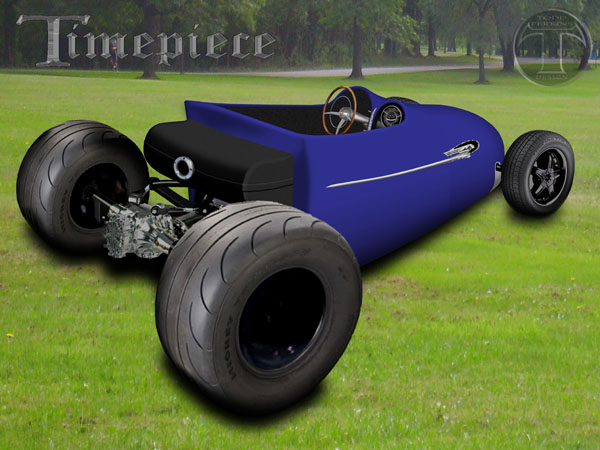
Blue.

|
|
|
|
Gokart Mozart
|
FEB 22, 08:54 PM
|
|
|
|
|
UCFieroCharger
|
FEB 27, 09:14 AM
|
|
| quote | Originally posted by toddshotrods:
Where'd you go?  |
|
(from page 2)
School consumed me. lol. I pulled out what I worked on before nowand may try some fun stuff out.
|
|
|
|
toddshotrods
|
FEB 27, 09:24 AM
|
|
|
Welcome back to 1927!
|
|
|
|
UCFieroCharger
|
FEB 27, 10:42 AM
|
|
Just finished reading through everything...man a lot has happened since page 1. Ive spent 2 terms of school working at D&D classic auto restoration as a designer for custom rebodies, which means I may be able to offer some of my insight 
http://ddclassic.com/isotta.html
If you click on the "archived news items" on the left it will take you to the Spitfire special that we did there. It is a 1600 HP rolls royce Merlin powered race car from the early 50s. I did not do any of the design work on that, but I did do some work on a second one. It isnt built yet, but probably will be eventually. I also did the design work on the interior of the 1928 Isotta (link is also on the left) as well as the colors/materials inside and out.
I also did a considerable ammount of design work on a 1930 Bentley that is being converted from a sedan to a touring car. Interior and exterior design, as well as a 1910 Stafford, so I have some experience which may help some 
Do you have a photo of your car/chassis you are starting with?
and the other question I have is, I see that you really want to do this properly which really excites me, when you were talking before about doing this on a budget It really kinda turned me off to it because I think in order for this to be a complete success it really needs to be well thought out and no corners cut in exchange for getting it on the road quicker. Im wondering what things you have set in stone right now.
If I were approaching this project, the first thing I would do is think of how pontiac would do the 1927 fiero as a production car, THEN hotrod/rat rod it from there. I would do it this way because it breaks the design project into two steps which should be much easier to complete than both at the same time.[This message has been edited by UCFieroCharger (edited 02-27-2009).]
|
|
|
|


