 
     |
| The Miura project begins (Page 37/84) |

|
85LAMB
|
OCT 16, 12:16 PM
|
|
Archie
Can I make a suggestion.....
Buy your guys some luch because they are doing a great job 
Keep it up !
|
|
|
|
Archie
|
OCT 16, 12:36 PM
|
|
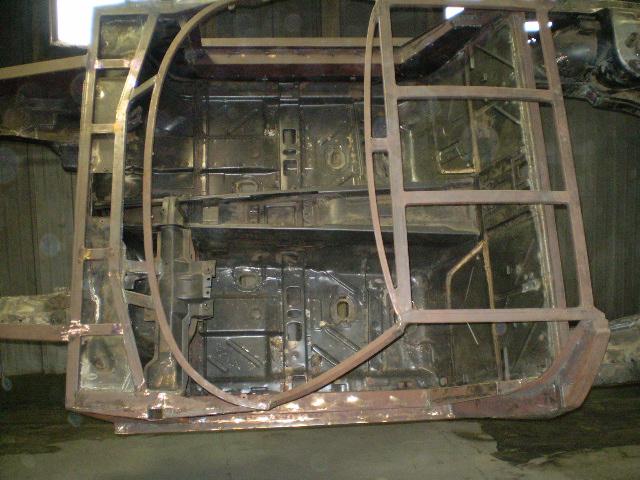
Next, the 1st set of parts came back from the upholstery shop.
_2.JPG)
We started working on fitting them into the car. We had left certain gaps at the edges of the panels to allow for the material to be wrapped around the edges, so fitting them into the car was necessary to make sure they fit right. We also had certain other parts to make & needed these parts in the car so we could make more parts.
_1.JPG)
.JPG)
.JPG)
_1.JPG)
_2.JPG)
_1.JPG)
_1.JPG)
_1.JPG)
Due to the thickness of the wrapped material the center console section wouldn't fit down in there all the way, so we had to modify & move the center dash part forward about 1/4"
.JPG)
_1.JPG)
_2.JPG)
Archie
|
|
|
|
Archie
|
OCT 16, 01:10 PM
|
|
We had originally instructed the upholstery shop to wrap the material into the defroster vents but they didn't.
When we got the interior panels back from upholstery, the right upper dach panel had been damaged in shipment & was going to have to be re-upholstered anyway. So we decided to see what was going to have to happen to open up the defroster vents.
When cutting the material, we found that there was not enough material to wrap it around properly & that's why the upholstery shop didn't do it.
After looking for some detail pictures of the defroster vents on the Internet, we found that the original car had flanges around the defroster vents.
Here is how it looked when we cut out the material around the vent.
_2.JPG)
We went ahead & made custom flanges for each of the defroster vents.
_1.JPG)
.JPG)
_2.JPG)
_1.JPG)
.JPG)
Archie
|
|

|
madcurl
|
OCT 16, 10:44 PM
|
|
|
Wow! Incredible stitch work. You should've had Troyboy's interior stitched like that before it leaves the shop. Did you find the shop or did the customer? Locally?
|
|
|
|
Archie
|
OCT 17, 10:13 AM
|
|
| quote | Originally posted by madcurl:
Wow! Incredible stitch work. You should've had Troyboy's interior stitched like that before it leaves the shop. Did you find the shop or did the customer? Locally? |
|
This is a place in the customers hometown that he has worked with before.
Archie
|
|
|
|
whodeanie
|
OCT 17, 01:21 PM
|
|
Archie,
that car is looking fantastic!
it is good to see it moving along.
D.
|
|
|
|
Archie
|
OCT 18, 10:56 AM
|
|
Contunuing with Phase II of the interior panel panel making.
We needed to make interior headliner panels.
We decided to make a Left & a Right headliner panel & they'll be seperated by the overhead console.
If you've been following this thread, you'll remember that there is 1" x 2" retangular tubing making up the roof framework.
To maximize headroom, the headliner will have a recess between the tubes above the passengers.
Here Kris is making the Right side headliner out of sheets of flat fiberglass....
.JPG)
_1.JPG)
.JPG)
.JPG)
To save some time & to make both sides symetrical, Kris then used the completed Right side headliner to make a mold for the Left side headliner. This is the result....
.JPG)
With the Flocking equipment I bought a few years ago, we will be Flocking these parts to match the color of the material we've been using on the other panels.
Once the headliner panels were fabricated, we could start making the "A" pillar covers.
We found one of our Fiberglass molds that could give us a right angle pc. that was long enough to cover the "A" pillar. Then we sectioned it & fiberglassed the backside of it to get & hold the curve we needed. It was a lot more work & planning than you might think.
.JPG)
.JPG)
_1.JPG)
_1.JPG)
.JPG)
The top of the "A" pillar cover is ending at the headliner, that's why we needed to finish the headliners 1st.
.JPG)
.JPG)
The bottom end of the "A" pillar covers had to be designed to go up under the ends of the dash.
_(2).JPG)
.JPG)
We really had to plan these covers early on because they had to be removable (there will be wires routed down the "A" pillars from the overhead console). Also they had to be able to be installed AFTER the dash, windshield & headliner. So the fastener type, locations & the direction of attachment had to be figured out ahead of time.
These are some old style interior clips but are still used on some restorations & rods.
_1.JPG)
.JPG)
Archie
|
|
|
|
Archie
|
OCT 18, 11:48 AM
|
|
Shaping & fitting the headrests.
.JPG)
.JPG)
_1.JPG)
.JPG)
.JPG)
_1.JPG)
Because the ceiling is low we had to cutoff headrest posts to be shorter & the headrests have to be installed before the headliners.
We took a pc. of half round pipe & put holes in it. Then we welded tubes inside the pipe that the posts would fit tightly into. This was all welded to the bulkhead under the fiberglass cover.
_1.JPG)
.JPG)
This will give a secure & nicely finished look when all of the parts are covered. It will also be easy to assemble & service later if needed.
.JPG)
.JPG)
Then it was time to make the "B" pillar covers. Once again these were all made out of flat fiberglass panels. They were shaped to where they needed to be then a couple of layers of additional fiberglass were added to retain that shape.
_1.JPG)
The upper "B" pillar covers were made right on the car. Notice the brown tape protecting adjoining surfaces from the fiberglass laying in process.
.JPG)
_1.JPG)
_1.JPG)
.JPG)
_1.JPG)
.JPG)
Archie
|
|
|
|
Archie
|
OCT 18, 12:12 PM
|
|
Now it was time to fit the interior parts one last time before sending Phase II of the interior out for upholstery.
.JPG)
.JPG)
.JPG)
_1.JPG)
.JPG)
Hand Brake boot cover.
.JPG)
Seat Belts
.JPG)
_1.JPG)
.JPG)
Kick panels covers (I didn't mention making these but we did)... Also & Front Clip release lever attached.
.JPG)
Seating in place....
.JPG)
& Steering wheel...
.JPG)
.JPG)
.JPG)
Archie
|
|
|
|
Archie
|
OCT 18, 12:26 PM
|
|
|
|

_3.JPG)
_3.JPG)
_4.JPG)
_2.JPG)
_1.JPG)
_1.JPG)
_2.JPG)
