|
| F40 replica aka "operation turd polish" (Page 30/62) |

|
shemdogg
|
JAN 22, 01:48 AM
|
|
Your inputs always appreciated, saved the day w the headlight mod! I can see what it needs to look right, not too much work. The lower section that is. The upper is still a wee bit big and the opening is also. Matching up the lower to the real thing will make it blend better. Just tired of sanding lol, but the belt sander and cutting wheel have been good friends through this project. The belt sander w 36grit belt knocks stuff down instantly. Love the car but wanna get onto other stuff(and drive it!). Still so many things to do, still have this big box of airbag parts hoggin prime real estate in my tiny garage. Wanna get the interior in, wanna put the wheels on, etc. Going to be tough getting in n outta driveways, the body is 5" off the ground n the frame n cradle a bit lower. When I make the new rear lower vent thingies that hang down, I def wont be going in n outta driveways without the bags. Should be able to throw some time at it this weekend.
shem
|
|
|
|
IMSA GT
|
JAN 22, 09:28 PM
|
|
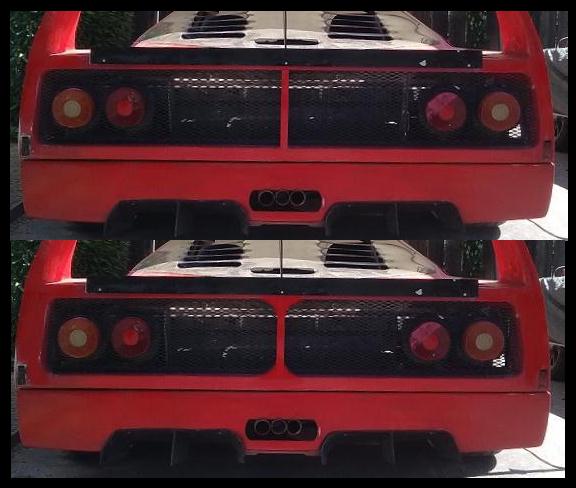
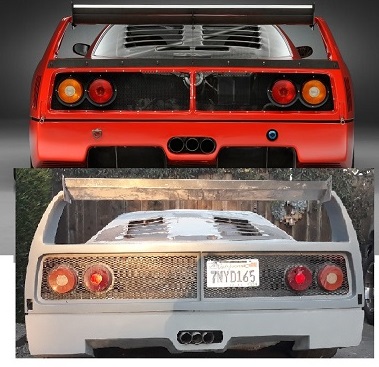
Here's a basic change just to say you made another mod  I moved the lights inward about 3 inches each, made the side panels above the latches fatter to compensate for the lights being moved, and rounded the corners of the center divider. I moved the lights inward about 3 inches each, made the side panels above the latches fatter to compensate for the lights being moved, and rounded the corners of the center divider.
|
|
|
|
shemdogg
|
JAN 23, 02:14 AM
|
|
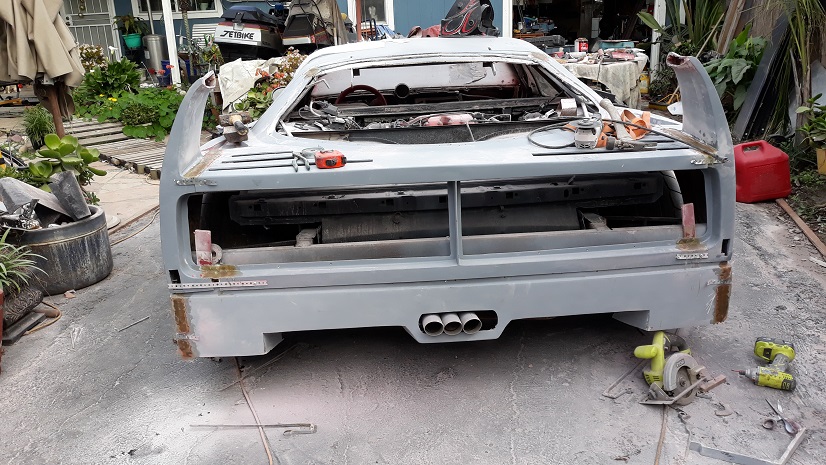
Interesting you went for the top, I went for the bottom.
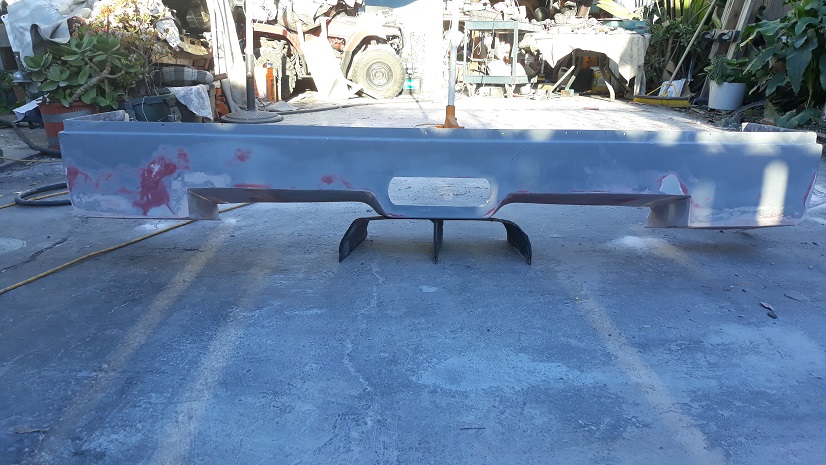
Cut the bottom outer sections off, held em where I wanted em w screws n plumbers tape, cupla layers o mat
n 1 cloth on the inside. After that dried i cleaned up n did a few layers on the outside, 2 coats o bondo, 4 hours n bam!
ba-bam!
The back upper section would be a nightmare to modify, I see what you mean. I would need to narrow the top. The how
just popped in my head right now lol. Im going to cut the sides of the taillight opening and leave the bottom as is and narrow
the top a few inches to give me that curve. Theres a giant support of 3/4" tubing buried around the taillight opening so its a
***** to cut and always catches fire quick around there. The back area only looks bad in the pictures, in person you dont notice it.
Maybe saturday. Rv shop just called, the brake inspections not part of the full inspections, so they recommended an axle pack. Theyre booked up so theyll have it another 2 weeks! Sweet I can move the car back from the drive way!
shem
|
|

|
JSannn
|
JAN 23, 01:35 PM
|
|
|
Looking good. Thumbs up for the dedication.
|
|
|
|
shemdogg
|
JAN 23, 11:08 PM
|
|
Thank ya thank ya- thank ya virry muuuch!
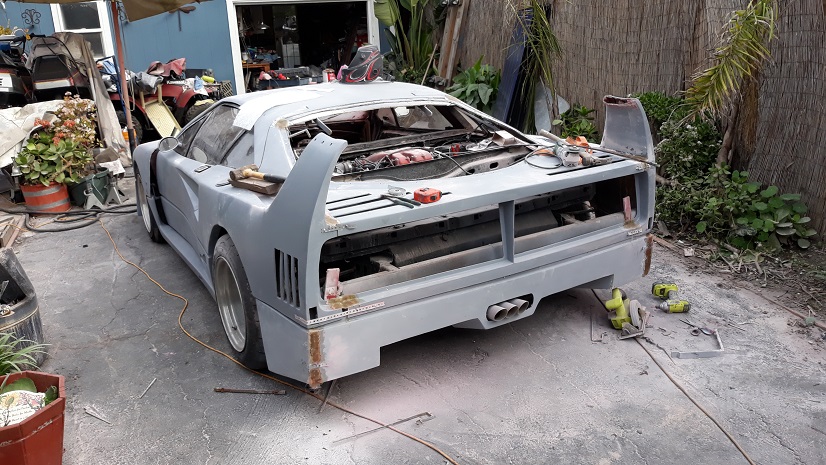
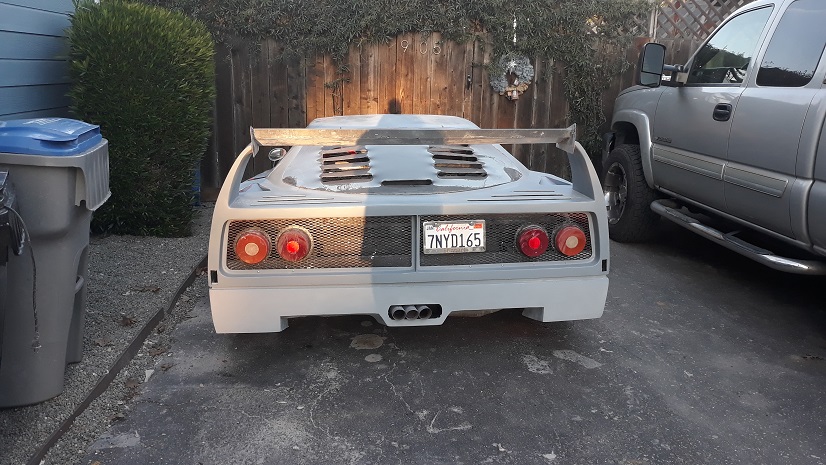
made this while babys sleeping
I need to narrow the whole back and taper in the top a smidge
gonna be tricky, tough, n messy
ill be back
shem
|
|
|
|
shemdogg
|
JAN 24, 10:58 PM
|
|
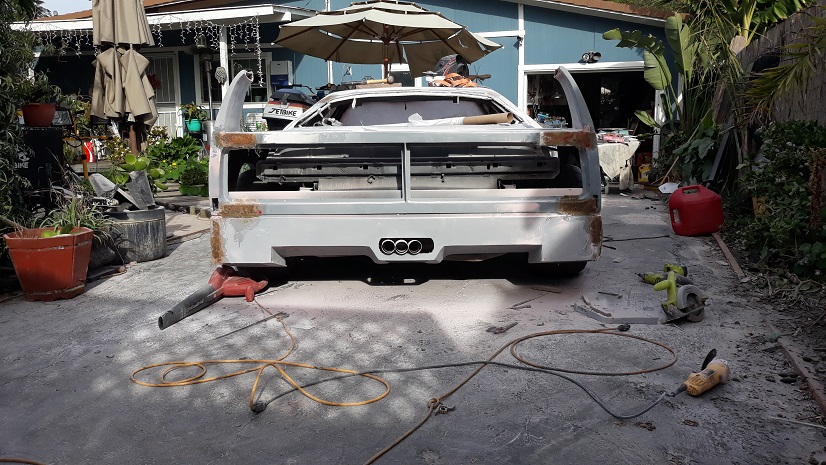
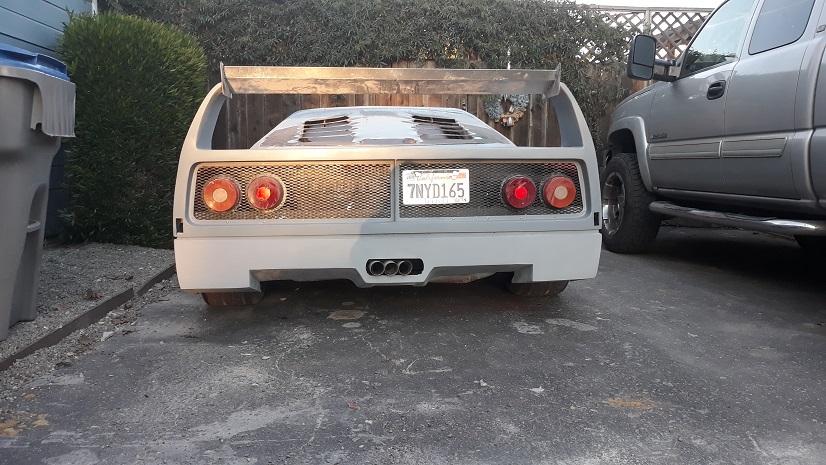
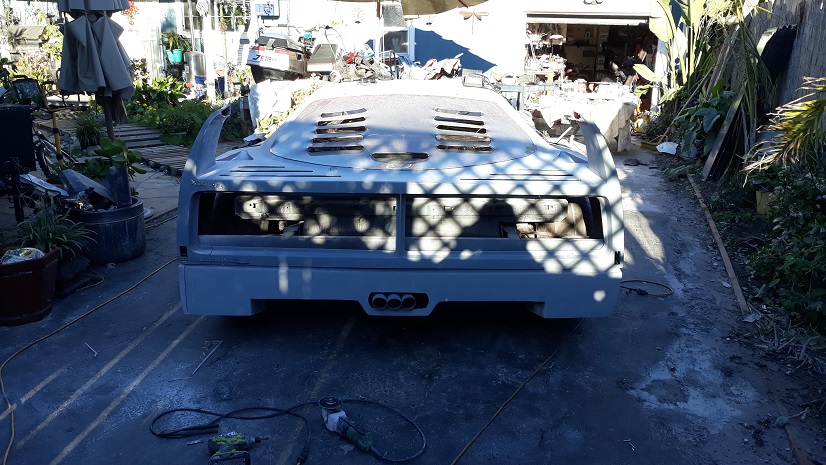
Had some time today after work, n cut up my car gar
heres the first cut, took 1/2" outta everything
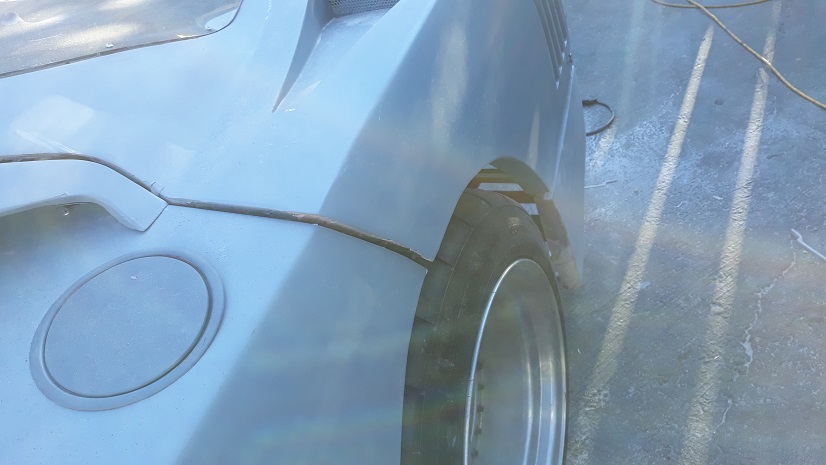
lower sides straightened out, still cant see the side vents from the middle
Fu@ked up a buncha stuff
deese panels wopped nah
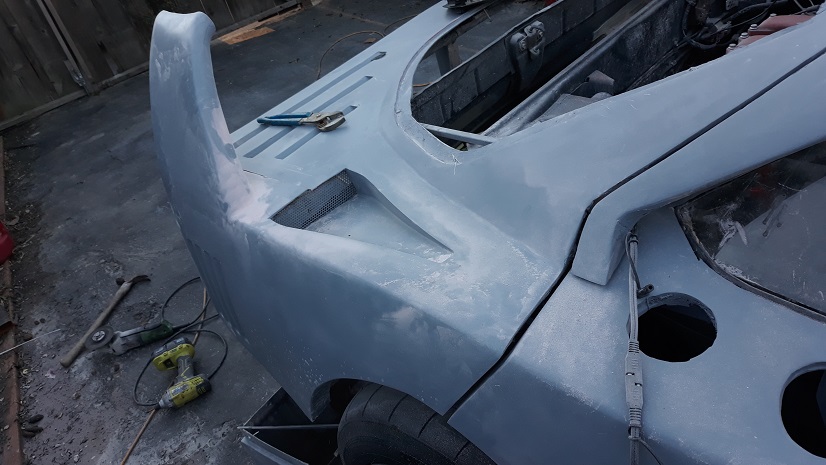
vents took some damage hyah
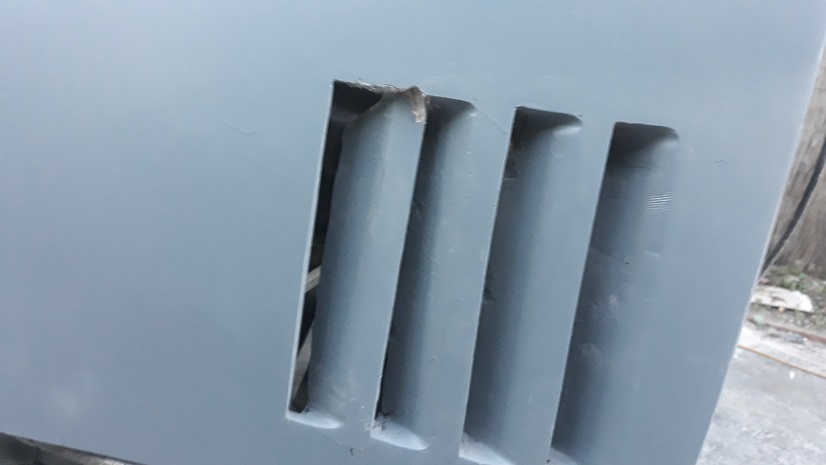
can see the back tapered in nowh
still need to trim the lower back down/ muffin top
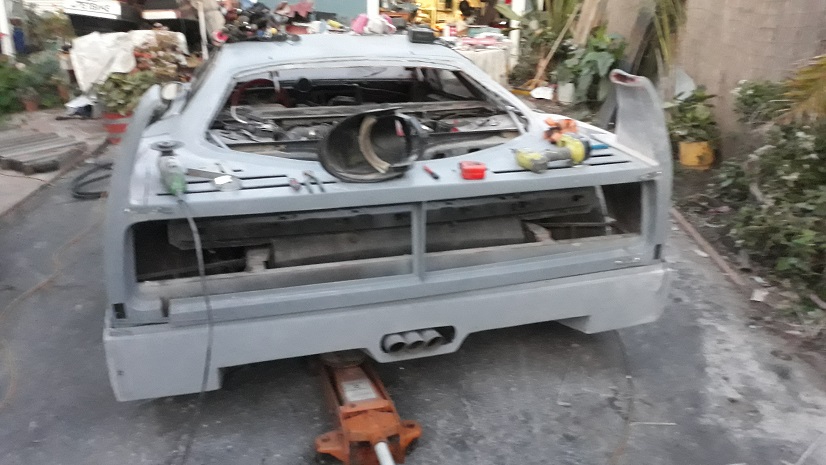
thats as good as its gonna get, boogers tomorrow
special treat for my hard work
mmm happy
shem
|
|
|
|
sourmash
|
JAN 25, 10:00 AM
|
|
|
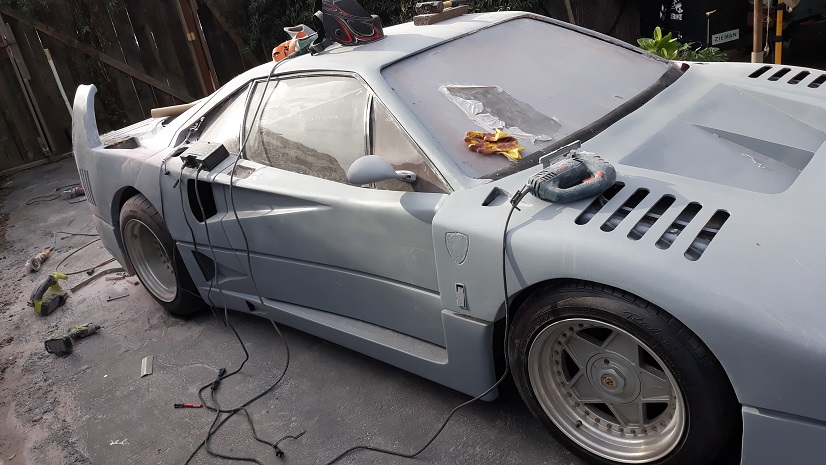
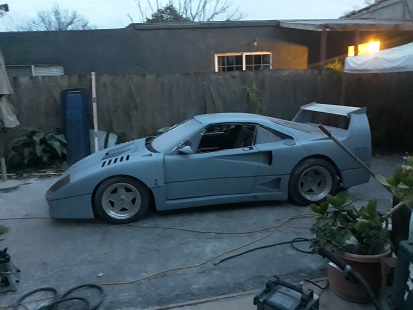
You've pretty well crushed it on the side and front proportions. It really is impressive. [This message has been edited by sourmash (edited 01-25-2019).]
|
|
|
|
shemdogg
|
JAN 27, 12:29 AM
|
|
|
|
|
Australian
|
JAN 27, 09:17 AM
|
|
|
The results are amazing. [This message has been edited by Australian (edited 01-27-2019).]
|
|
|
|
randye
|
JAN 28, 04:58 PM
|
|
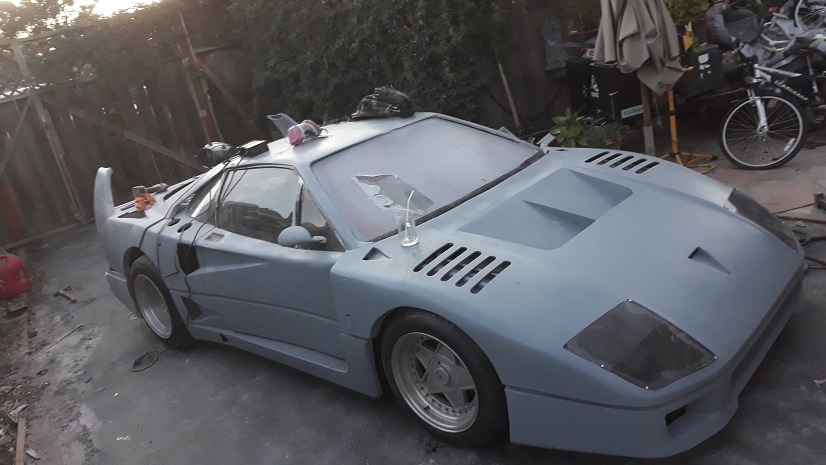
| quote | Originally posted by IMSA GT:
A lot of times, people don't realize how subtle details change the entire look of the car. Here are photos from the very first post and the current car. One hell of a difference:

 |
|
I had a LOT of doubts about where this was going to end up when it all started but I have to confess that I'm very impressed with the work so far.
Shem if you can keep that wheel and tire offset and chassis stance of the car as it appears now, (in primer), I really think it will be a success.[This message has been edited by randye (edited 01-28-2019).]
|
|
|
|