|
| The Miura project begins (Page 30/84) |

|
Erik
|
MAR 07, 12:19 AM
|
|
http://picasaweb.google.com...#5105265307028627122
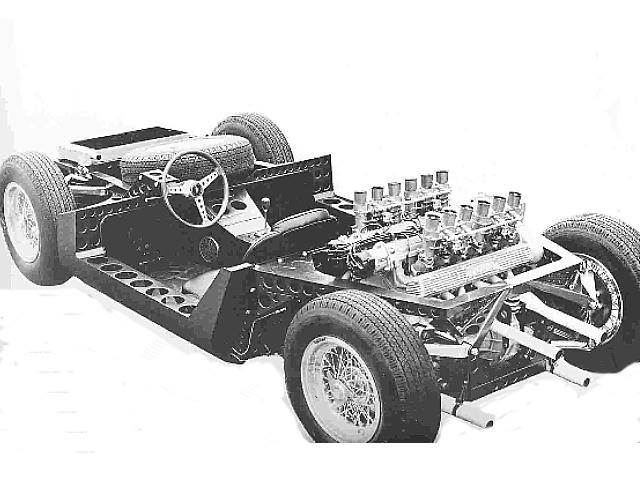
I did not know they made a targa Miura unless this is a custom. I notice no seals.. Anyway LOVE the interpretation of the real Miura interior[This message has been edited by Erik (edited 03-07-2009).]
|
|

|
Austrian Import
|
MAR 07, 04:28 AM
|
|
What's the make and model of that steering wheel? It looks very close to an original Miura steering wheel of that era.
Are you going to modify the HVAC controls to look more authentic Miura? Or are you going to do a more modern approach with Fiero/Ferrari F355 replica HVAC controls?
Would a larger stereo than single DIN fit? (i.e. Double DIN - in case the owner ever wants a Navi in the car. Would a flip up screen fit?)
|
|
|
|
Eau_Rouge
|
MAR 08, 10:44 PM
|
|
Nice build, love the console. I've always wanted cupholders in my car and this seems like a good way to get them and make them look OEM. If anyone is wondering, this console is from a 2006-2007 Volkswage Passat. It is the rear seat armrest/cupholder.
.JPG)
.JPG)
|
|
|
|
MIURA-S
|
MAR 12, 06:33 AM
|
|
|
Got any pics of the headlights and how you mounted them ?
|
|
|
|
jbuell
|
MAR 12, 08:53 AM
|
|
|
Regarding the headlight mountings , there are a few pics which show how it was done on page 7 , dated 2-22-09.
|
|

|
Formula88
|
MAR 13, 11:24 PM
|
|
|
|
|
Archie
|
MAR 17, 10:12 AM
|
|
We are currently working on the ductwork behind the dash for the defroster vents.
While it appears that the fabrication of the dash is about finished, it still has to be functional. that means a lot of work that people wouldn't even think of still has to be done.
When we're done with this, we still have to fabricate, mount up & connect the heater venting system.
This dash has 3 defroster vents as shown here....
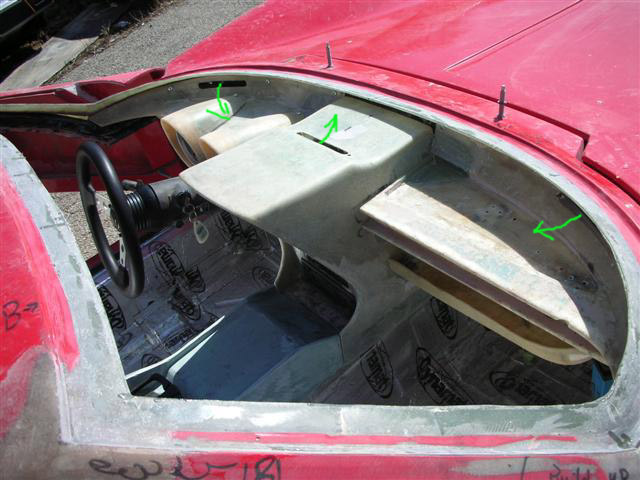
We'll be using 1.5" heater ducting hose like we did when we built my GT40.
Behind each one of the vents we have to fabricate a little airbox to attach the air duct tubes to & to direct the defroster air out thru the vents shown above. Each of these airboxes & the tubes running to them has to be built in such a way as t not interfere with anything else we have to have behind the dash.
For the center vent, Rob built a box under the vent.....
.JPG)
And a "lid" for the box that has a 1.5" Dia tube attached to it....
.JPG)
Then he fiberglassed the "lid" onto the vent
.JPG)
For the corner vents, he made & fiberglassed an airbox & tube directly onto the back of the vent....
.JPG)
.JPG)
.JPG)
More on this later...
Archie
|
|
|
|
whodeanie
|
MAR 17, 01:21 PM
|
|
All the little things that you dont think about are what take all the time.
I am working on the same thing on my dash.
Great job as always!
|
|
|
|
telefragg3d
|
MAR 19, 01:15 PM
|
|
|
om nom nom nom nom...i can haz miura?
|
|
|
|
Archie
|
MAR 27, 10:44 PM
|
|
We were needing to make a cover for the lower part of the driver's side dash & for the right side of the passengers' side dash. We also needed to Fabricate in the Ball Vents for both sides.....
This simple part will turn into a pretty complicated cover. This was made from a pc. of flat sheet metal bent to an angle in our brake. Then we just laid a few layers of fiberglass over the metal.
.JPG)
We then made a pocket for the ball vent.
.JPG)
.JPG)
We needed to cover the exposed underside of the steering column, so we flaired that....
.JPG)
.JPG)
Preparing to fiberglass flats onto the ende of the part.
.JPG)
.JPG)
.JPG)
The end on the inside end is a lip about 1.5" wide to allow this part to be mounted to the left side of the gage cluster console.
.JPG)
The outboard end covers the whole end so you can't see behind the dash when the door is open.
.JPG)
While doing all this, Rob is also making a pc. to do the same job on the right side of the dash.
.JPG)
.........
|
|
|