|
| My 88 Formula Interior Redesign (Page 26/87) |

|
Sofa King
|
DEC 18, 07:23 AM
|
|
I'm feeling 1000 times better than I was yesterday. It's amazing what 12 hours of sleep for 4 nights in a row will do for ya! I have to clean the garage first before I do anything... you saw the messages... LOL But then it's full speed ahead!
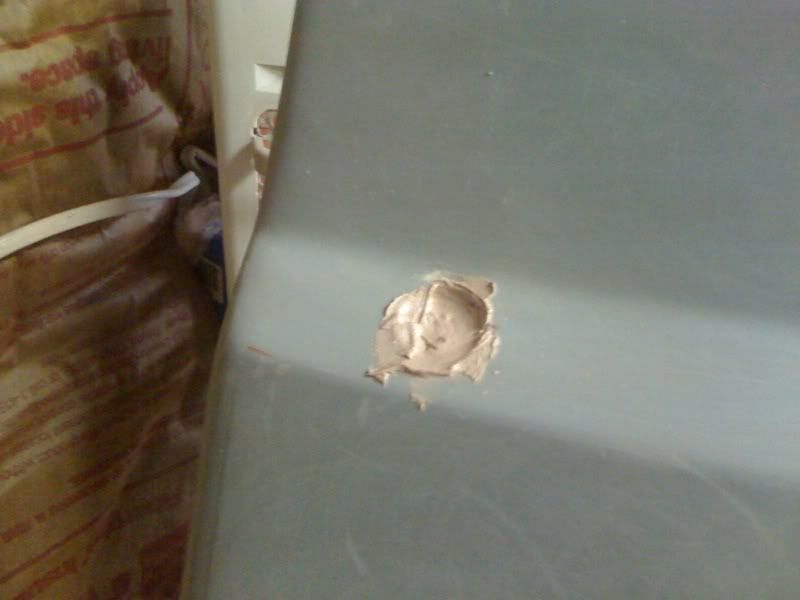
I have decided to move the 12v outlet. So I'll fill the existing hole and probably put the outlet either in the armrest glove box or someplace else. I will need it... just have to figure out where. I think I'm in the final stretches now. I have to glass the back of the main glove box and resin the front and then it's just minor touch up work before the first layer of final paint gets sprayed!
|
|
|
|
revin
|
DEC 18, 09:33 AM
|
|
|
Don't forget the ADL(whatever) connector under there!!!
|
|
|
|
Sofa King
|
DEC 18, 09:45 AM
|
|
| quote | Originally posted by revin:
Don't forget the ADL(whatever) connector under there!!! |
|
Luckily the ALDL doesn't interfere with the console. I might have to make an access panel - which would be fairly easy. I can use the torque screws similar to the dash. hmmmmmmmm
|
|

|
Sofa King
|
DEC 18, 10:07 AM
|
|
| quote | Originally posted by 87GT2M6:
much it would be to reproduce for those who want to buy one...  |
|
Hey 87,
I'm actually going to rebuild an all new console using the same steps Archie takes to building his fiberglass projects. That way I can get everything to measure evenly, clean lines, straight edges and there's no guessing. Right now, I'm figuring 3 pieces to start - the lid, glove box and main console. The armrest will come later. Once I have those masters made, I'll look into what it would cost to use that as a plug to create more.
Cost? 1 billion dollars! muhuhuhahahahaha... Actually... I have no idea... maybe 200 - 300 dollars. But that also depends on sanding, prepping, etc... and the cost of the molds.
I hope this helps?[This message has been edited by Sofa King (edited 12-18-2009).]
|
|
|
|
87GT2M6
|
DEC 18, 10:31 PM
|
|
|
It sure gives me something to look forwards to, Thanks.
|
|
|
|
Sofa King
|
DEC 19, 10:16 AM
|
|
Hi all
There are updates! I spent the better part of yesterday cleaning the garage before doing anything. I woke up early this morning, did some Christmas shopping and was able to get a few layers of glass laid. I'm just waiting for photobucket to update!
Once the resin dries I'll be doing some light sanding and filling those hard to reach areas. I'm also going to finish up the armrest, fill the 12v outlet and prepare for final paint!!!
Photos coming!
Just got an email - door panels are on their way![This message has been edited by Sofa King (edited 12-19-2009).]
|
|
|
|
Sofa King
|
DEC 19, 11:38 AM
|
|
|
|
|
katatak
|
DEC 19, 04:37 PM
|
|
At least you are making some prgress.........
Did you use the foam in the glove box with some mat layed on it? Or just the foam board and resin? I'm rethinking my shft cover and might use the foam board. I'm thinking about using the foam and resin to make a mold, cover it with packing tape or wax paper then laying a few layers of mat over the top to make a shell for the shfit over. I want to take some of the "block" look out of it.
|
|

|
Sofa King
|
DEC 20, 04:26 PM
|
|
Hey P,
I used all 3 - foam, resin and glass. I quickly realized that the resin, while strong, is only a very thin layer and will not keep the foam core from snapping - it is after all just paper and foam. It needed a little bit of glass to give it the strength required.
Now - UPDATES!!!!
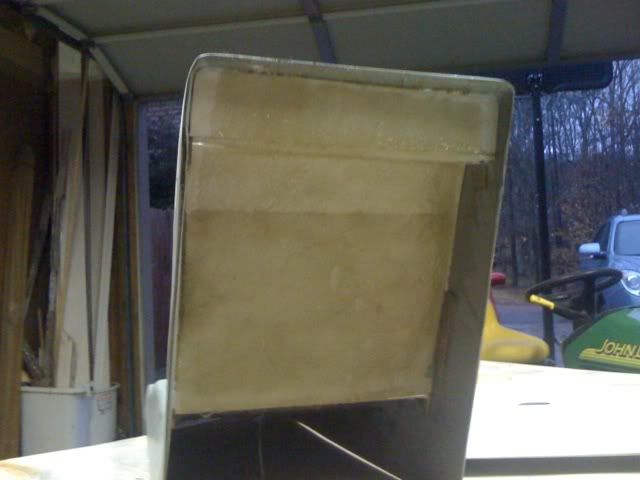
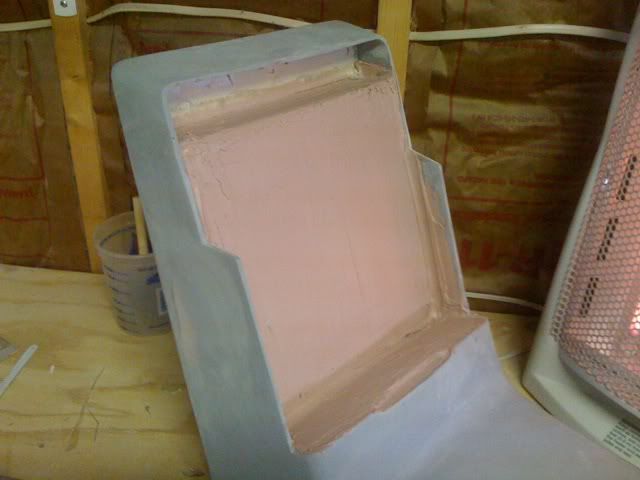
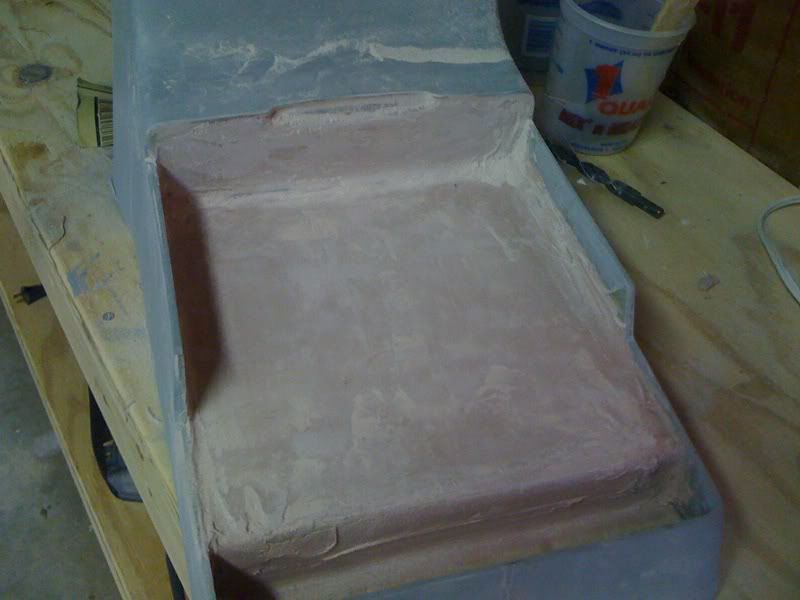
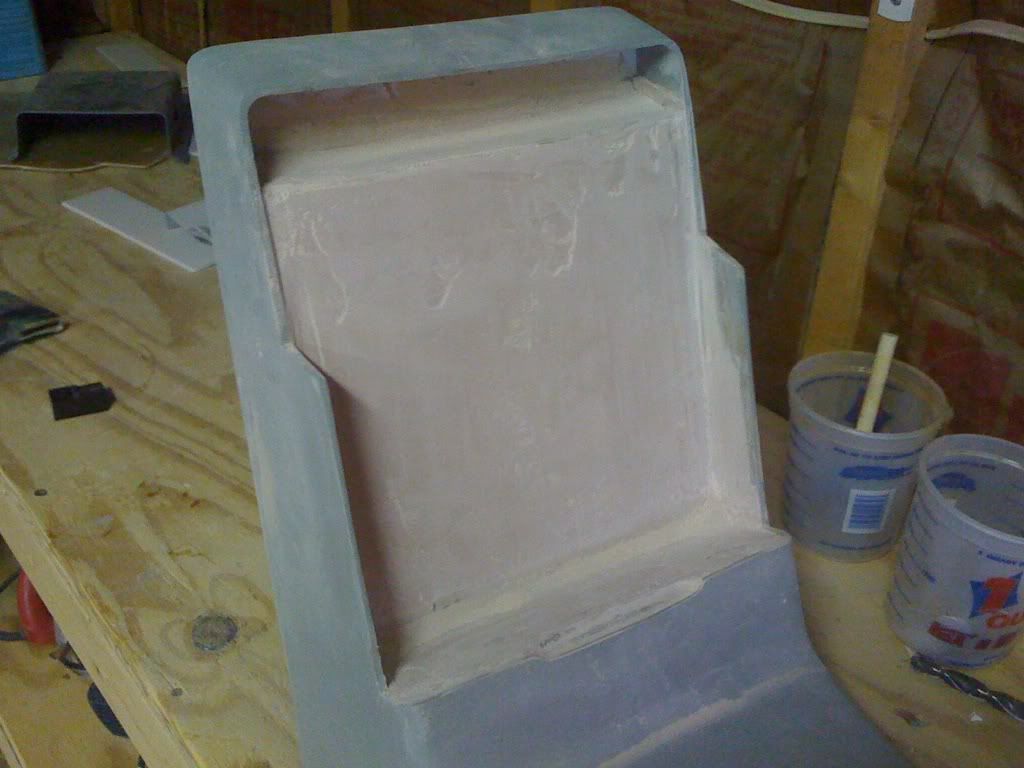
I went ahead and began to sand the inside of the glove box and added lot's of body filler. Since this is going to be laid in felt - it doesn't have to be perfect!

Another - catching some rays
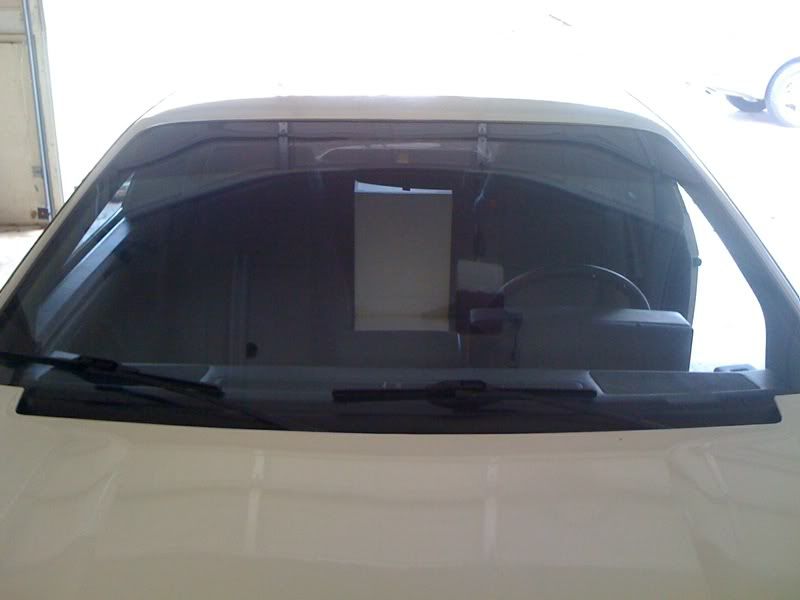
I also filled the 12v outlet hole
Believe it or not... this little area has required the most sanding I've ever done. Although it's going to be covered I still need to knock down the high areas - total pain!
And more sanding
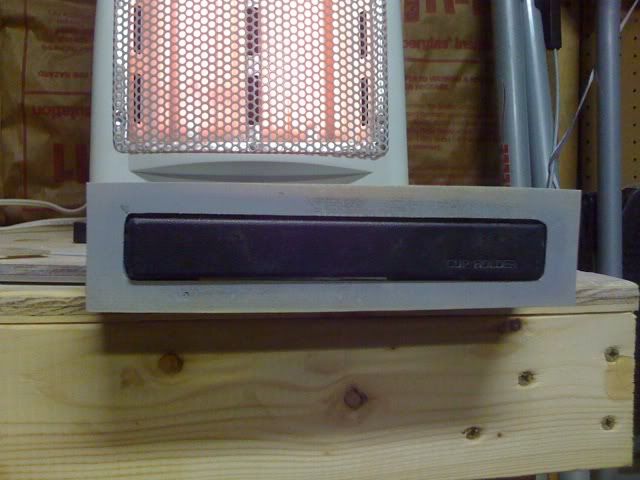
AHHH... I shall call him... MiniResin
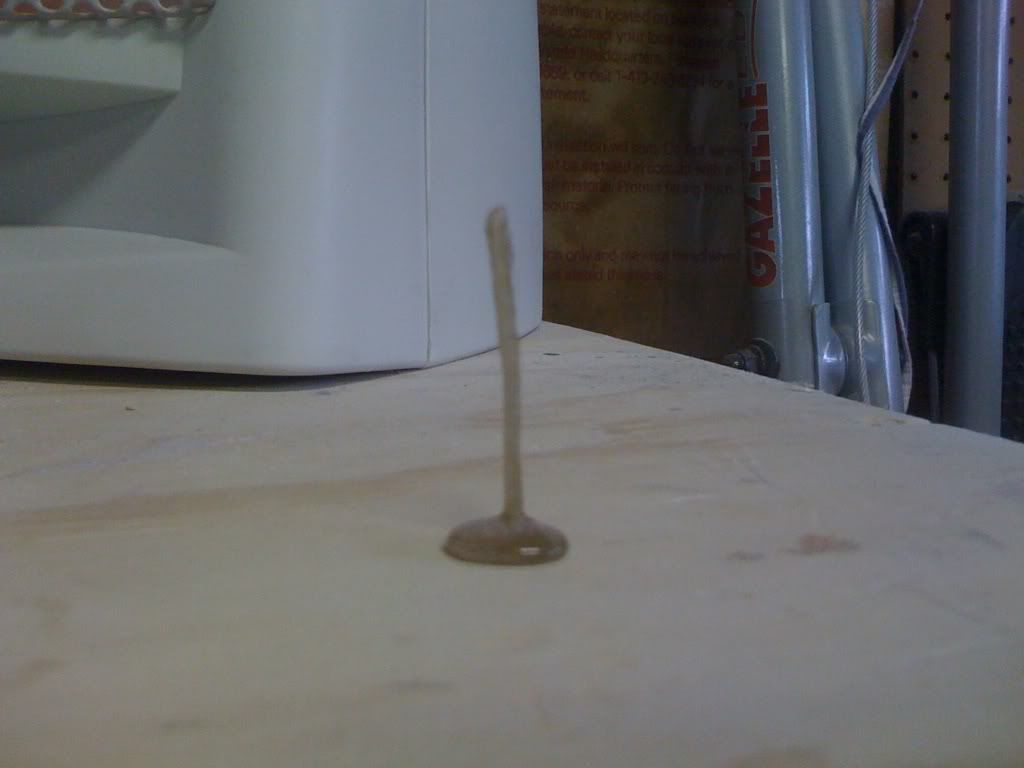
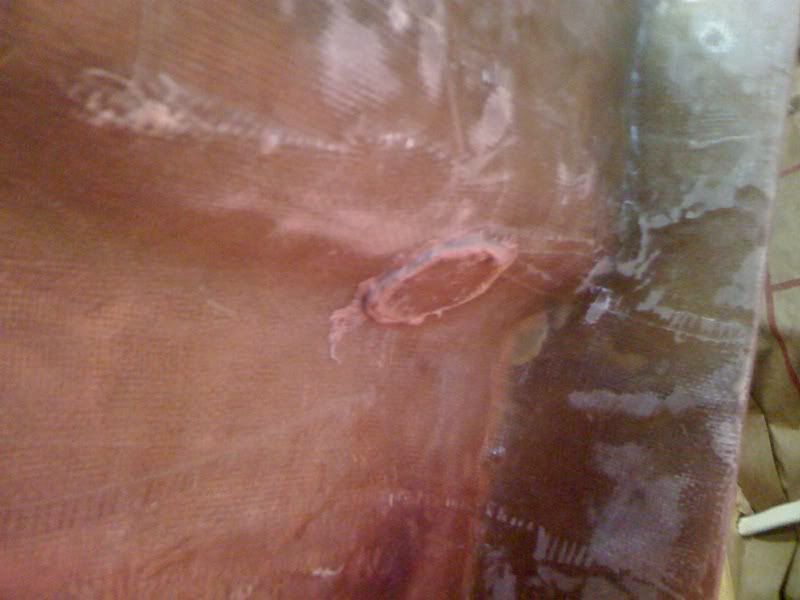
Slight set back. While sanding the armrest, the front plate that I attached popped off. I'm now adding more resin - it has been really cold and I'm wondering if that's having anything to do with it?
Now... on to the good stuff... Remember all that foam core I purchased? Check it out! Armed only with a ruler, X-Acto Knife and VERY little common sense... I have begun work on Console Part II. The first thing I did was trace an outline on the foam core using the original console. This console is slightly bigger than my first console but should still fit snug
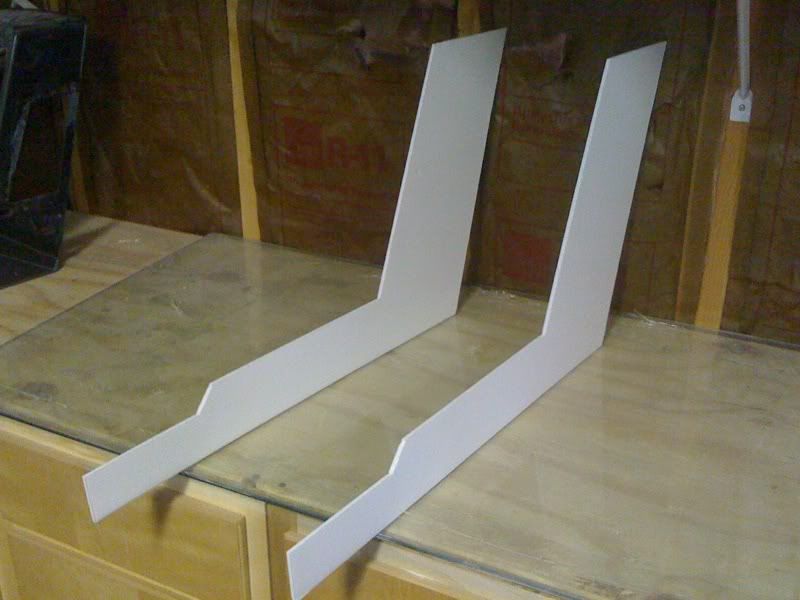
This was the fastest console I've ever built! Other than taping together - it took about 15 minutes
Inside shot - you can see how perfectly straight the lines are. This makes it easy to create the new glove box
Marking the new glove box lid - the nice thing about foam core is that it's cheap and if you make mistake - it cost 50 cents - not 35 dollars
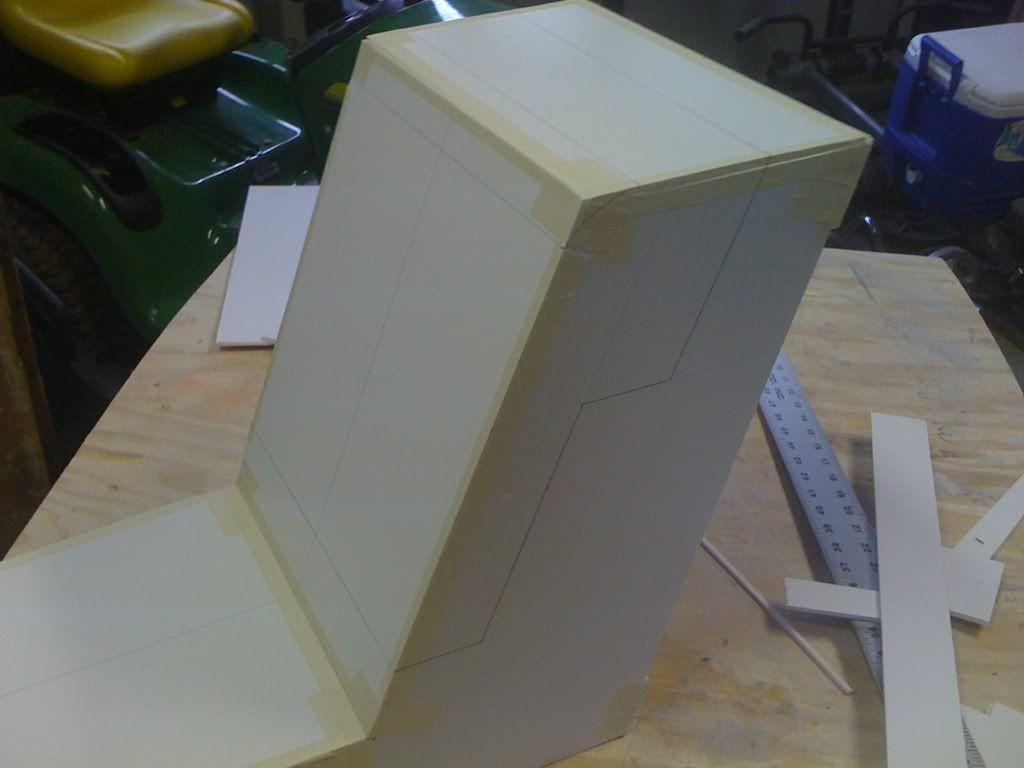

Following the same lines as the original console I cut the edges to ensure it fits in the car

Another

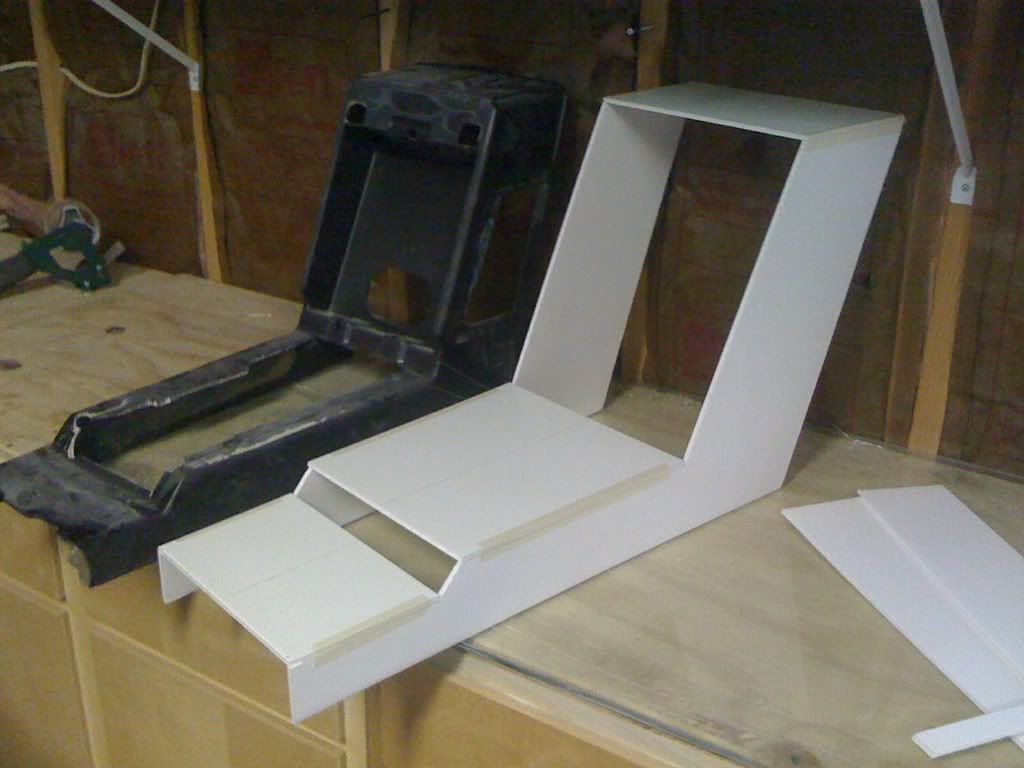
I then tapes the edges

I rounded out the back part of the console
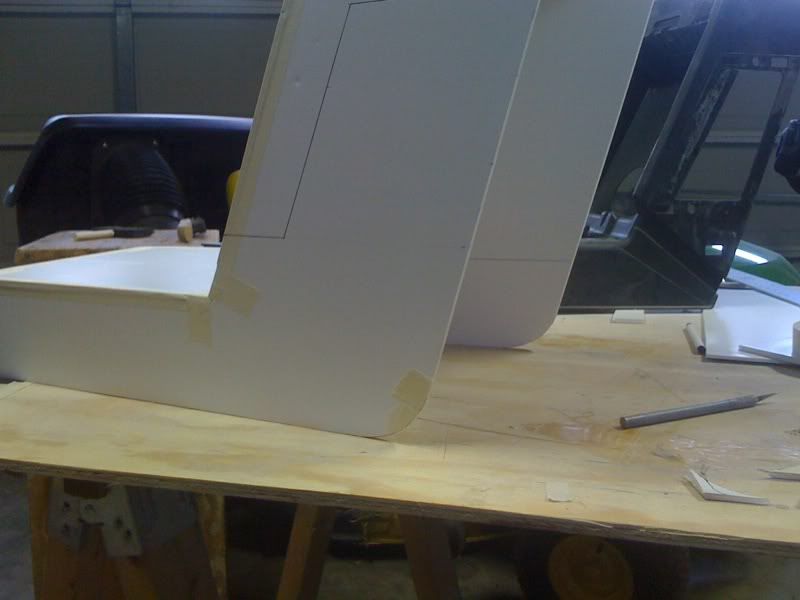
Here it is in the car - notice I added more space in what will become the glove box.
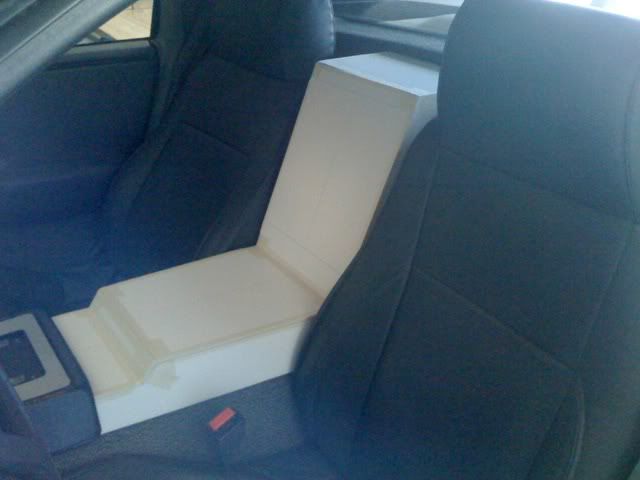
Front - FIT PERFECTLY!
One more - this new console will also be used to create more consoles should I decide to go "global" LOL

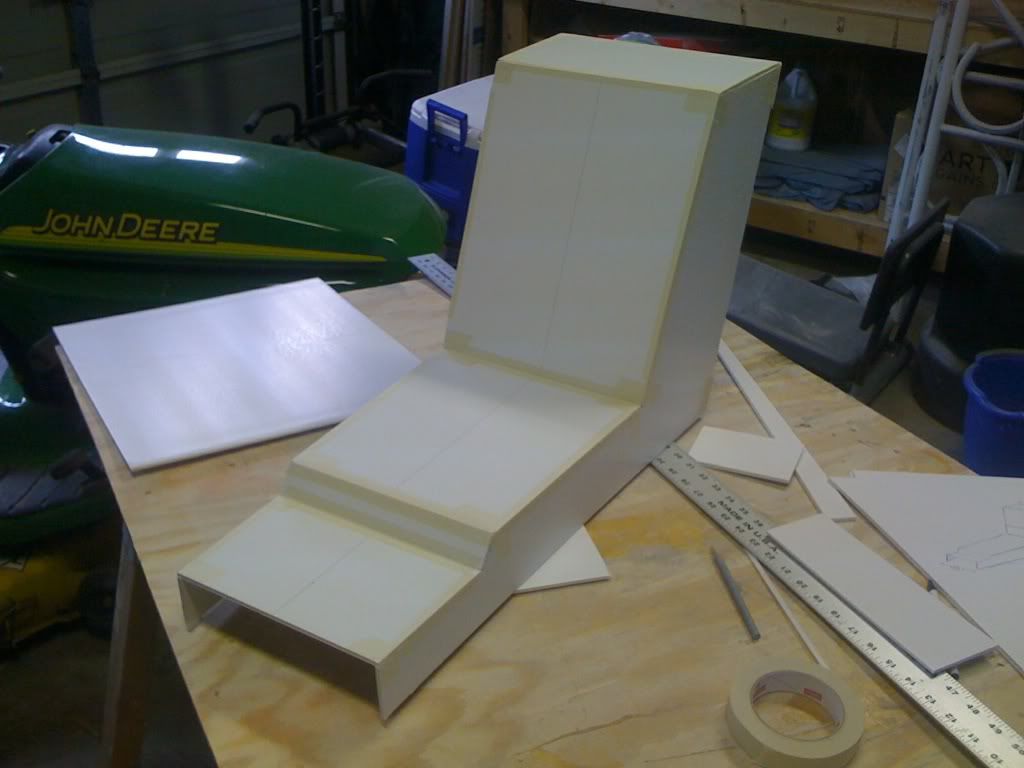
I spent about 1/2 hour to 45 minutes total on this new console. Why? I'm not ending at the console, like Katatak, I'm going to continue moving forward all the way through the radio / ac housing to the dash - I might even make a new dash - not sure yet. BUT! The foam core works wonders and allows me to see exactly what I want to do and what direction I want to head. I can also paint the foam core to get a better idea of color schemes, textures, etc... Can I use just the foam core to create a new dash? Yes and no. I have two directions:
1) Once I get everything in place and all the measurements made I take apart the console, create fiberglass panels and transfer those measurements to the fiberglass - that's a lot of glass work and a lot of fabricating but there's very little guess work.
or
2) With the foam core in place and using more masking tape than I know what to do with... I glass both sides of the console similar to what I'm doing to the glove box on the original console. I don't have to be as forgiving on the inside but I would need to work smart on the outside to ensure straight edges blah blah blah...
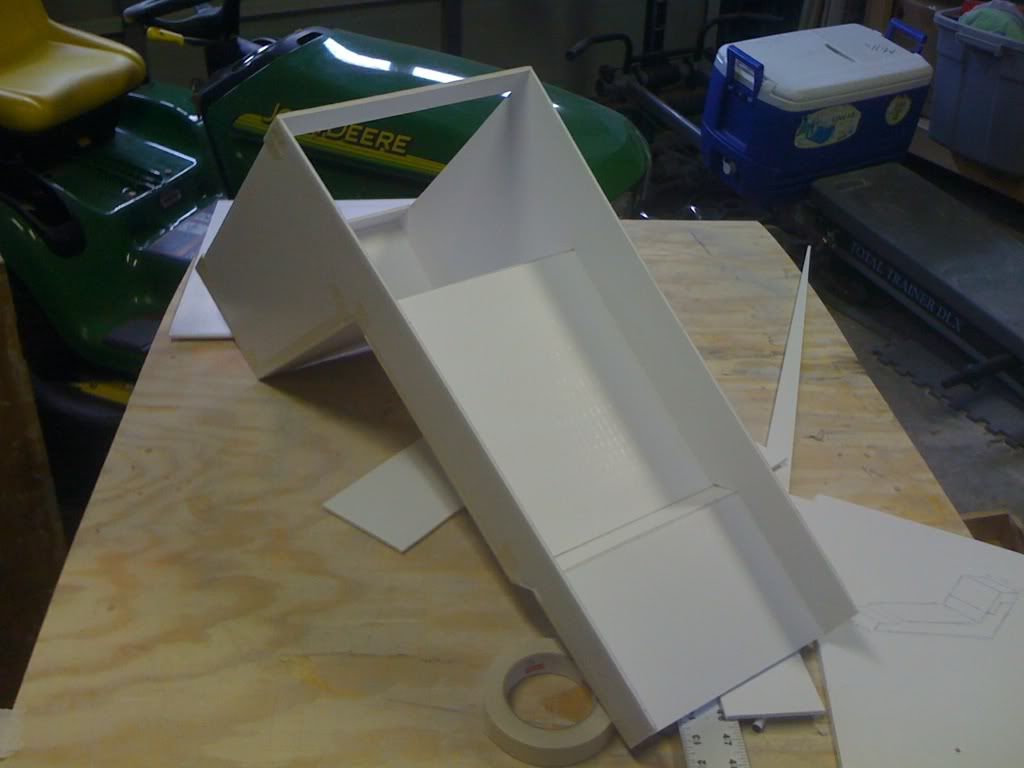
From here... the next steps for the new "foam core" console are to cut the lid and create a perfect glove box along with a new style armrest and mini glove box. This will also allow me to begin to design a new shifter plate and radio a/c housing.
Not to worry - I'm still moving forward with the original console build. Once the glove box is sanded smooth I will begin to put the final pieces together for the armrest (to include the mini glove box), lay the felt lining inside the glove box and lid and get to paint.
P (and everybody else of course),
Go back to Hobby Lobby and get a bunch of foam core! I promise this will help with any idea or direction you might have. And yes, you can cut curves - not compound courves, but you can do simple curves. I'll post a pic in a few. (JUST SAW YOUR THREAD! YOU GOT THE FOAM CORE! How funny is that! - Great minds!!!)[This message has been edited by Sofa King (edited 12-20-2009).]
|
|
|
|
Sofa King
|
DEC 20, 05:50 PM
|
|
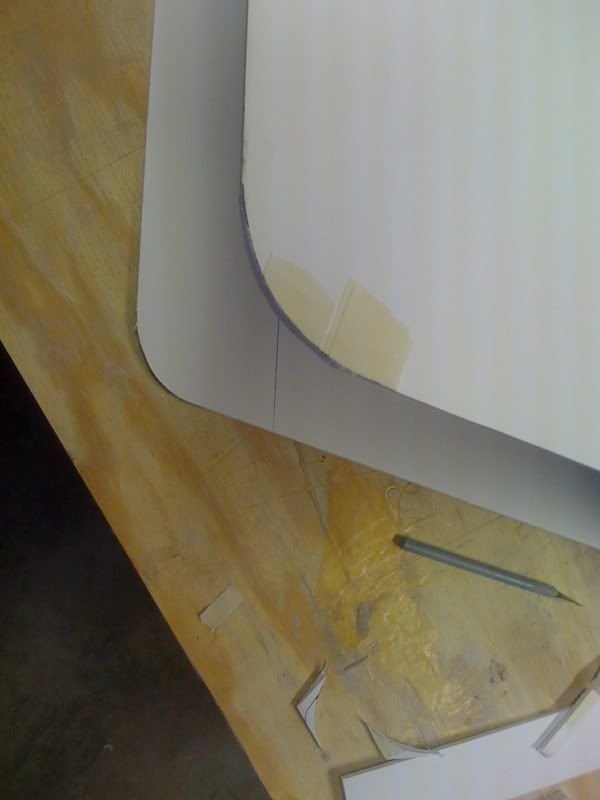
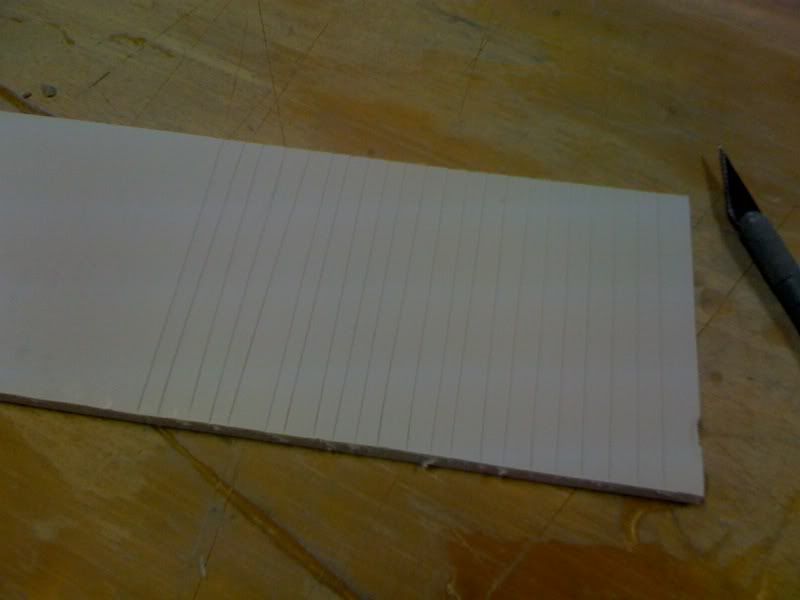
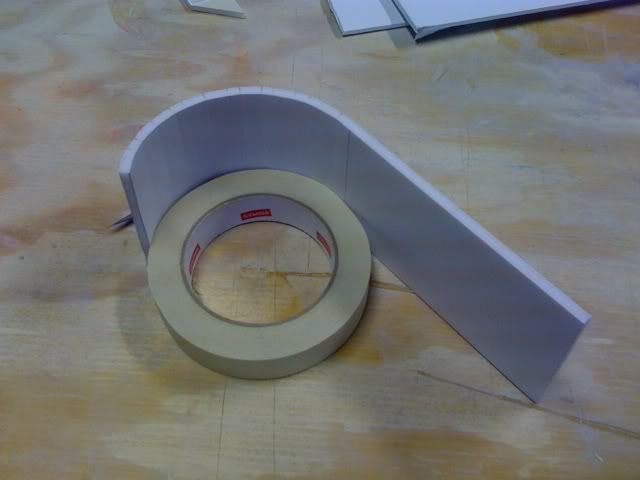
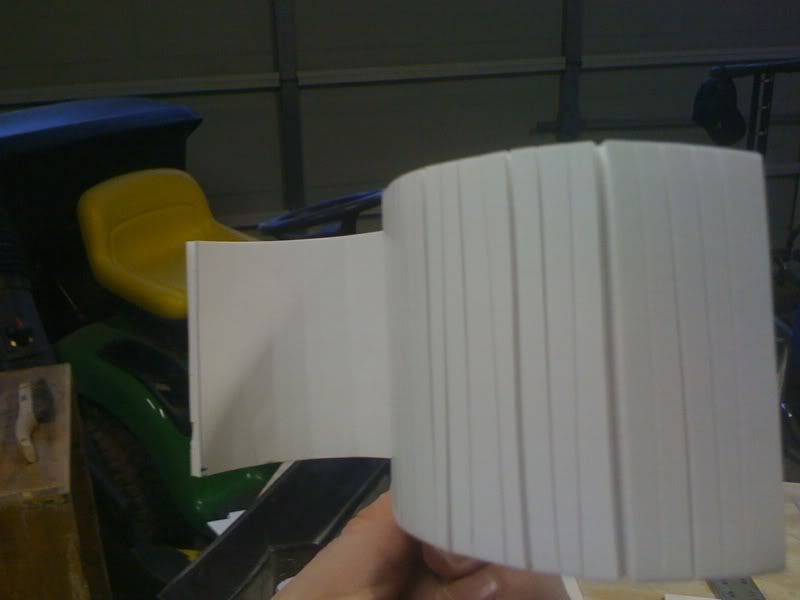
Creating curves using foam core - I'm using a scrap piece of core for demonstration purposes only
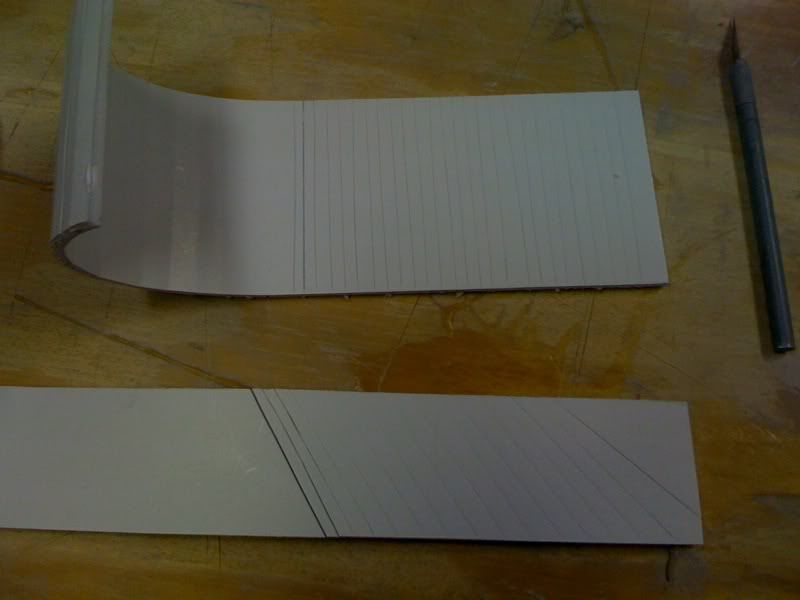
Using your X-Acto kinfe and a metal straight edge you score the foam core through the top paper layer and through the middle foam being careful NOT to go through the bottom paper layer - a few practice swipes will help you determine how much pressure to apply. You create multiple score lines depending on your curve. The more score lines the more smooth your curve will be.
Score lines
Then use your fingers to spread the foam core apart being careful not to tear through the bottom paper layer - remember, the more score lines the smoother it will be. However, you may need to use your straight edge to help spread the foam core apart
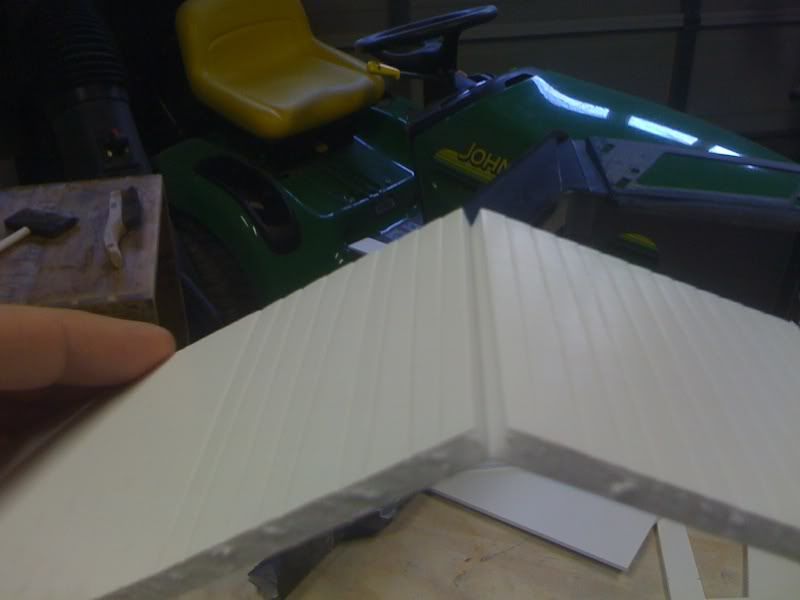
You do this to all the score lines until a simple curve is achieved
As you can see I used the masking tape as a reference for the curve.
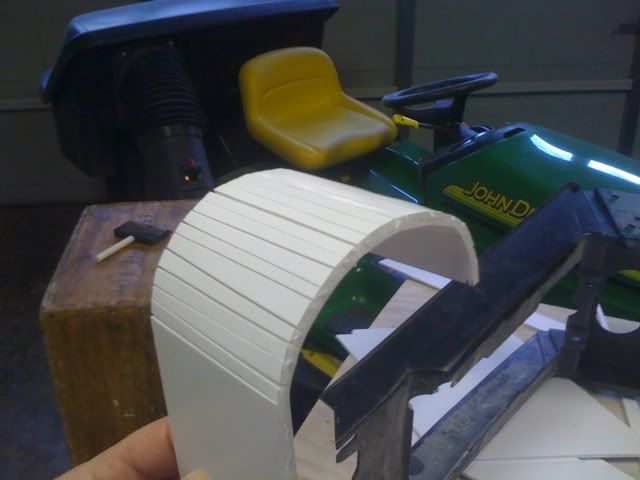
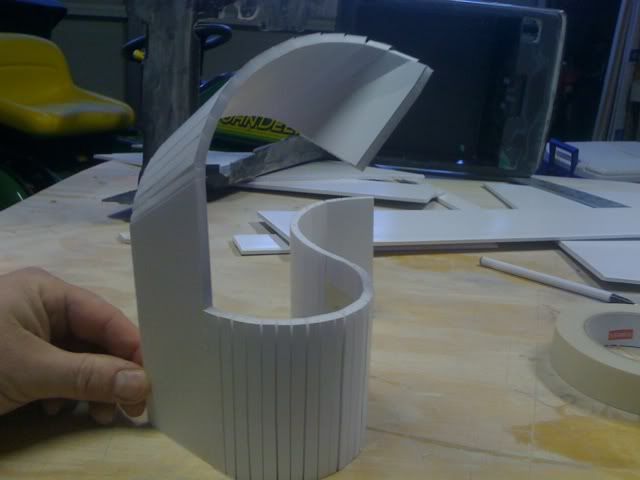
You can create different angled curves and mutli-directional curves
Angled score lines
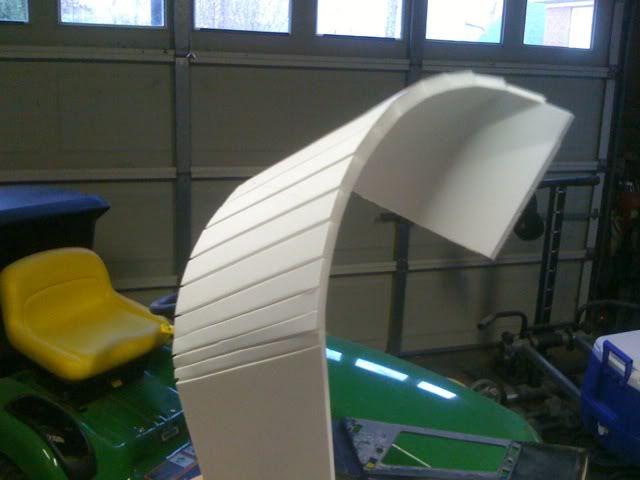
Figure eight - score lines on both sides of the foam core
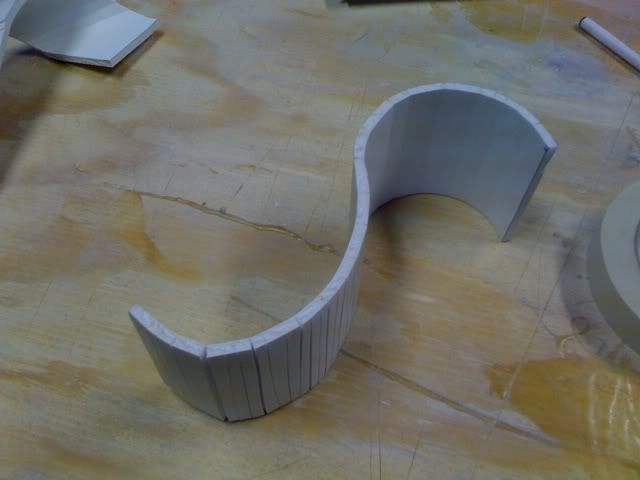
All this creates Super Happy Fun Time!
The next question: How do I keep the curve in it's desired position? Assuming you alreay know what the measurements are and the shape you want you can do one of two things. First, simply lay the curved piece of foam core over the area and tape into place. The other - use a piece of scrap foam core and trace the outline of the curve you want. Then use the X-Acto knife to cut out the curve and use as the template in which to tape your curve. Once you get the curve you want carefully add masking tape to the inside and/or outside of the curve. The tape will both push and pull the foam core keeping it's desired position.
Anywho, I hope you like these new updates.
|
|
|
|