|
| LS4 / F40 swap - fieroguru (Page 25/216) |

|
dobey
|
MAY 06, 09:32 PM
|
|
I am guessing that the MAP sensors from the 07+ LS4s doesn't work, but the one on the 05-06 does work on the LS2 intake. Mine's an 06 and it just popped right in. The 07+ LS4 moved the MAP sensor to the top rear of the intake though, so I guess the body on the sensor changed to add a bolt hole?
They moved it, to help with emissions control. I'm thinking I might try to mount mine on the back side of the manifold as well. Not sure yet what I would do to fill in the hole on the throttle neck though.
And nice job on the half-shaft and axles. Great info as always!
|
|
|
|
fieroguru
|
MAY 07, 11:43 AM
|
|
The issue with the MAP sensor has more to do with the port that goes into the manifold being too large to fit the LS2 intake hole. I probably could have over sized the hole, but was concerned about the plastic getting too thin... and I didn't like the look of the unused bolt hole in the LS4 sensor. The LS2 one is much better "looking" and keeps everything intake related (intake, throttle body, fuel rail, and injectors) all LS2 components.
If you wanted to relocate the MAP sensor to the rear of the manifold, you could probably tap the current hole for a plug, find a freeze plug that will slide into place, or just fill the hole with some sort of epoxy.
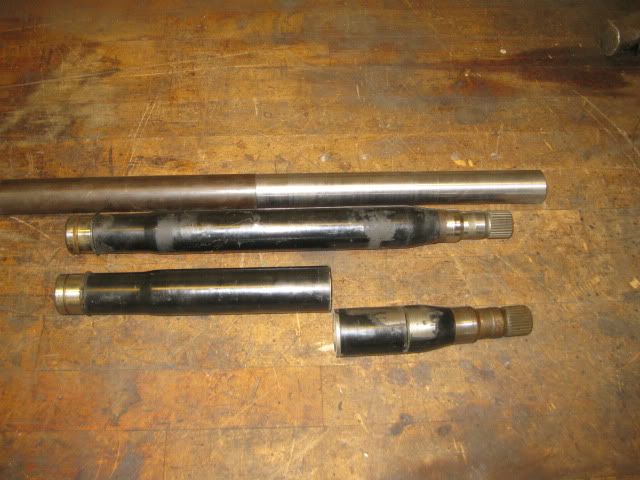
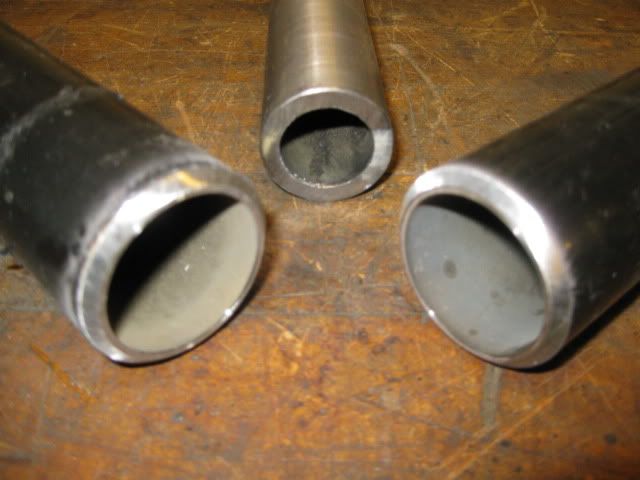
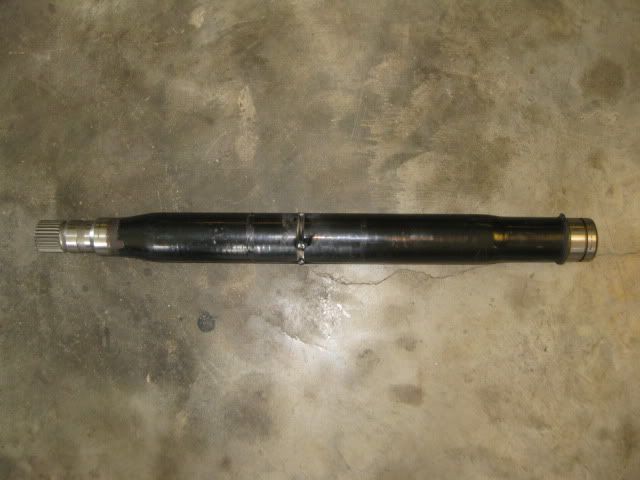
A little further on the intermediate shaft. The inner sleeve was 1 1/2" 1/2" wall DOM material. It needed turned down to about 1.45". I moved the cut on the first intermetiate shaft to place the seam closer to the center on the final product (and to make room for the inner sleeve to extend about 5-6" past the seam). Also located the cut line on the second intermediate shaft to increase the total length by 1 7/8" as a starting point. The edges of both intermediate halves were beveled as well for good weld penetration (and I do not need to worry about blowing out the back side since the sleeve will be there). I will tack weld the two ends together w/o the sleeve to test fit and check for axle binding in the chassis.

I am going to work on the chassis to remove the aluminum firewall (being replaced) and the hinge boxes. Then I can do another test fit with everything on the engine.
|
|
|
|
fieroguru
|
MAY 07, 11:50 AM
|
|
| quote | Originally posted by Ruffy:
I see your still building on my car. make sure you have it done by this week! i wana drive it lol. |
|
You can't drive it until you catch up on your progress payments! Until you are current with the payments, I will consider it mine. The parts list (including engine/transmission purchase) of just the final components used in the swap is over $6K not including my labor charge.
The parts costs for this swap is still on track for being less expensive than the previous Ramjet/HTOB Getrag swap... and will be lighter with a stronger transmission, more HP and better fuel efficiency... I just need to make it look as good as my old Ramjet setup and I will be pretty happy![This message has been edited by fieroguru (edited 05-07-2011).]
|
|
|
|
fieroguru
|
MAY 07, 05:56 PM
|
|
|

|
Fierofreak00
|
MAY 07, 11:11 PM
|
|
Can I have the old diamond plate firewall?!
Although I haven't posted in this thread yet, I've been watching it from the beginning.. I am amazed with you resourcefulness and ability to make parts out of thin air...-Jason
|
|
|
|
fieroguru
|
MAY 08, 07:18 PM
|
|
| quote | Originally posted by Fierofreak00:
Can I have the old diamond plate firewall?!
Although I haven't posted in this thread yet, I've been watching it from the beginning.. I am amazed with you resourcefulness and ability to make parts out of thin air...-Jason |
|
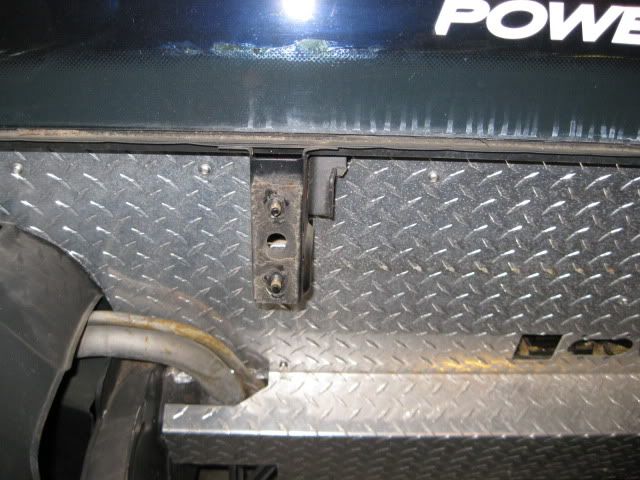
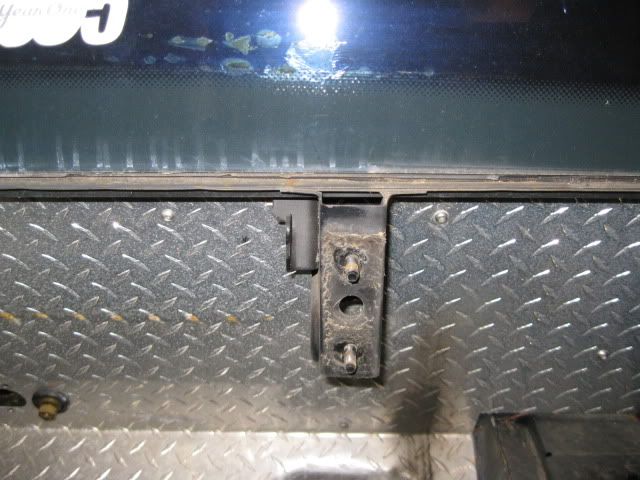
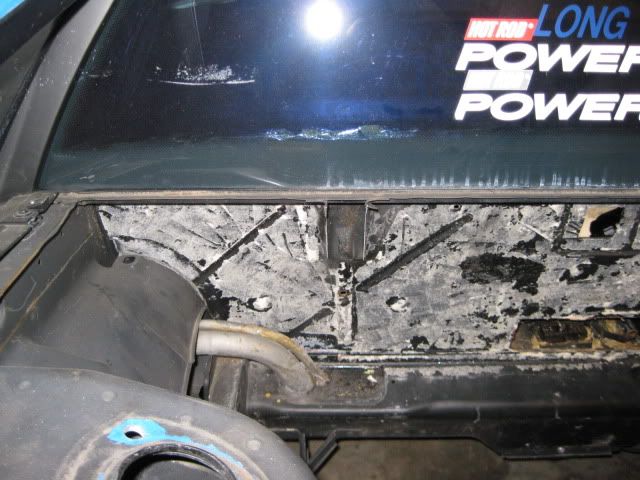
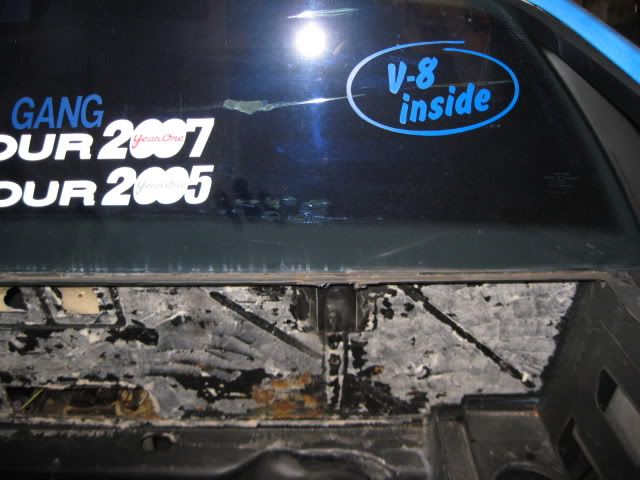
It decided to crack one of the fastback sail panels on removal, so it suffered the appropriate punishment and is no longer a piece anyone would want...
The single large panel was a major pain to install the first time w/o scratching or tearing anything up (I was in a time crunch for the 2007 HRPT and didn't want to take the time to remove the fastback), so when I make the new one, I will take the fastback off and remove the fuel fill tubes to have better access. This will also allow me to sand and repaint the back half of the chassis again (last done in 2005), since the car has spent since 2006 pretty much living outside (no garage space to store it).
The new firewall panel will only be the upper section and it will be a single flat panel, it will not bend down around the double firewall panel this time, mainly to save weight and the double firewall panel is already pretty smooth once the brackets are removed and the AC lines relocated from the driver side of the chassis. I am kicking around ideas to only have the single brake booster vacuum line pass through this panel and have everything else exit out the double firewall panel below...
Had the wife pick up some acetone so some time later this week I will remove all the unsightly adhesive from the factory fire wall and continue to make progress.
|
|
|
|
aaronkoch
|
MAY 08, 11:40 PM
|
|
| quote | Originally posted by fieroguru:
It decided to crack one of the fastback sail panels on removal, so it suffered the appropriate punishment and is no longer a piece anyone would want...
|
|
Good to know you are indeed human, and had an appropriate response.. :P
|
|
|
|
KissMySSFiero
|
MAY 12, 11:52 AM
|
|
| quote | Originally posted by fieroguru:
... I just need to make it look as good as my old Ramjet setup and I will be pretty happy!
|
|
Might flow too much for a 5.3 though
------------------
SSFiero@Aol.com 87 Gt-5spd-62k miles.

|
|
|
|
fieroguru
|
MAY 12, 01:09 PM
|
|
| quote | Originally posted by KissMySSFiero:
Might flow too much for a 5.3 though
|
|
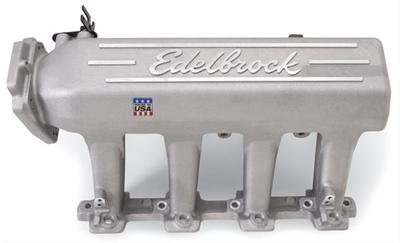
I like that intake and probably prefer the new Holley one that has removable upper sections (but it only works with the square port heads, not cathedral).
http://www.holley.com/300-116.asp
Both intakes would lose bottom end torque even on the larger cube engines, but with the fiero weight and F40 ratios that isn't necessarily a bad thing. If/when I swap to a larger cube setup I will probably swap to one of these tunnel ram type intakes (probably also send my heads out for some CNC porting during the same upgrade time).
But for now I am trying not to get distracted so I can get this car on the road this summer. An LS Fest is in Bowling Green (2 1/2 hrs away) in September and I would love to take it down there... but it needs to be running, tuned and dynod well before then.[This message has been edited by fieroguru (edited 05-12-2011).]
|
|
|
|
fieroguru
|
MAY 14, 07:34 PM
|
|
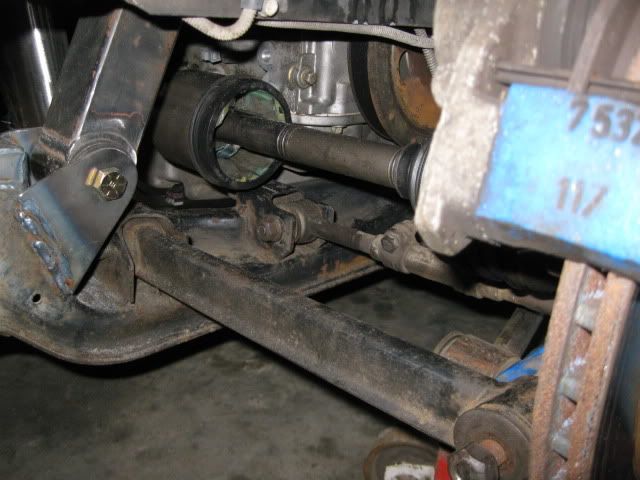
Tacked the two parts of the intermediate shaft together and then put the engine/tranny/cradle back into the fiero to confirm the final length of the intermediate shaft and check clearance to the alternator and upper belt tensioner:
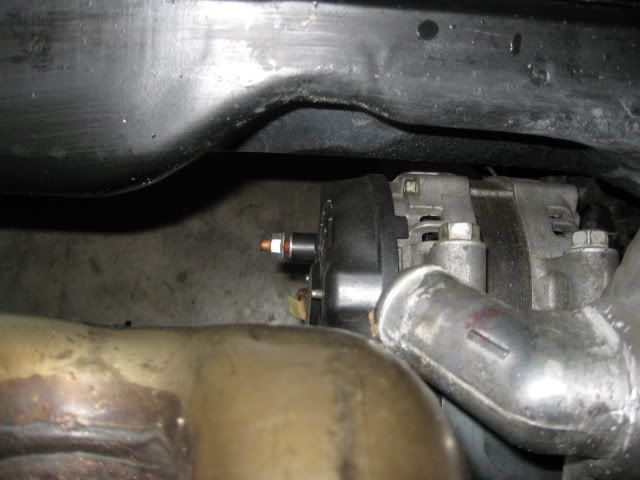

Before I could confirm the axle length, I had to swap out the G6 CV with a fiero CV:
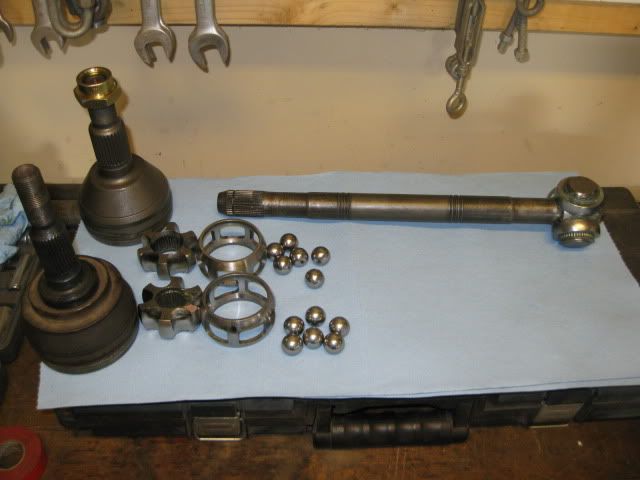
Then I put the PS rear suspension on and leveled the lateral links to check the placement of the tripod rollers in the tripod cage. There was 3/8" of clearance before the rollers were bottomed out and with the rollers bottomed out there was 1 1/2" from the edge of the rollers to the edge of the tripod cage. So shortening the intermediate shaft by 3/8" will center the tripod rollers in the tripod cage at "stock" ride height.
|
|
|