 
     |
| A history of Skitimes car (Page 25/72) |

|
FieroAudio
|
JUN 19, 11:05 PM
|
|
|
i vote this one of the best threads i've ever read...bump to maybe keep it alive? ------------------
-Blaine/FieroAudio

|
|
|
|
skitime
|
JUN 19, 11:07 PM
|
|
|
Hey thanks and now it is 7 pages too. I got to add the headlight covers and the intercooler and supercharger pulleys to the thread. ------------------

Red 88 GT T-Top 3800 INTERCOOLED SUPERCHARGED
White 88 GT Stock
Please give me a rating if you appreciate my contribution.
History of Skitimes Car
|
|
|
|
FieroAudio
|
JUN 19, 11:15 PM
|
|
Well there ya go...theres even more history to the most beautiful car on here 
|
|
|
|
skitime
|
JUN 20, 01:03 PM
|
|
OK, I am on my 2003 summer vacation and two shows are already under my belt. I got a rainy morning so I can continue my history tread. I was really rushing to get things done for the Carlisle show. I was lucky enough to take a first place in the Modified GT Class for a second year at Carlisle. I also won my first 1st in the Custom class at the GM Nationals. I must say the competition is getting better and better. Prior to the show I had a flurry of activities going. I was repairing my extraction hood. It had developed a 3� crack near the windshield. I decided to completely redo the bonding surfaces. I had never done a bonding like this so I chalked it up to experience. I had not overlapped the fiberglass enough the first time. I was going to be sure it would not happen again.
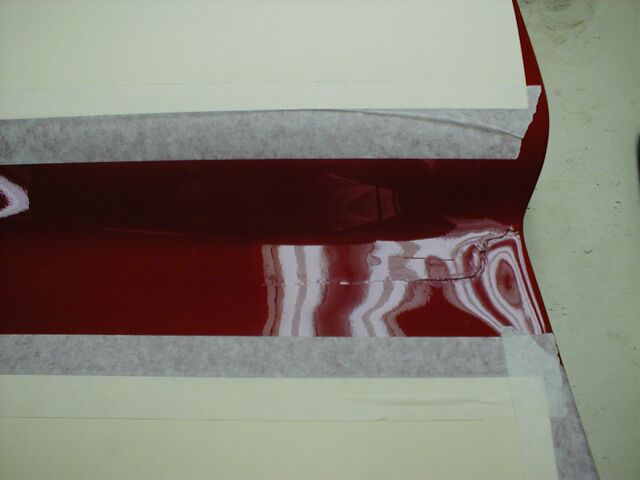 I used a dremel tool to remove all the old material. I did this on both sides just to be consistent and hopefully trouble free. It made me sick to have to redo the hood but it needed to be done. 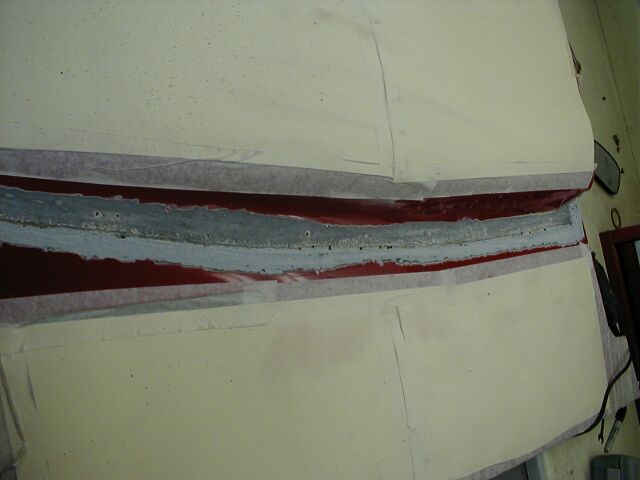 I also was not happy with two body panels. The passenger door panel had some imperfections on it. I never noticed it before until I was waxing it for the first time last summer at the Fierorama. 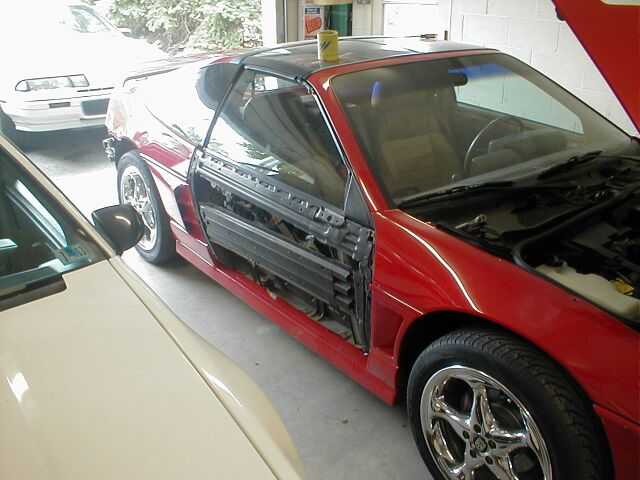 I was not happy with the rear bumper either. So I decided to remove it also and send it to the painter along with the hood and door panel. Luckily the painter had mixed a lot of paint last year knowing I would be back for more painting. He seemed to know me by now and knows I like to change things. So there was no worry of the paint not matching.
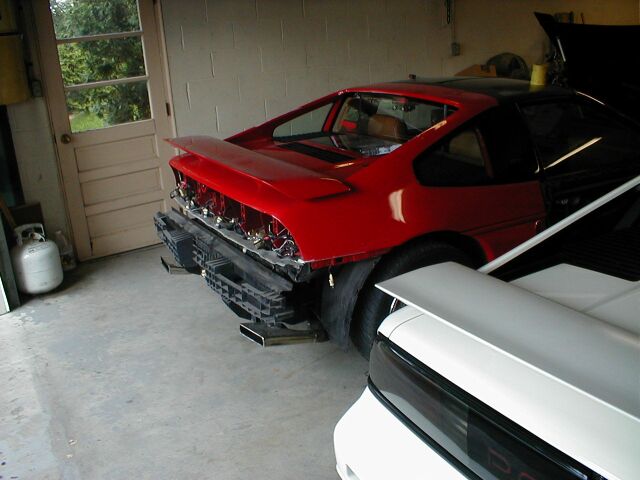 So with a week to go prior to Carlisle my car was missing a hood, rear bumper and passenger door panel. I had the exact same situation the previous two years. My painter seems only to work when there is a hard deadline
------------------
Red 88 GT T-Top 3800 INTERCOOLED SUPERCHARGED
White 88 GT Stock
Please give me a rating if you appreciate my contribution.
History of Skitimes Car
|
|
|
|
skitime
|
JUN 20, 01:04 PM
|
|
|
Now for the new mods this year. I had actually started one mod the previous winter. While working on my new hood last year, I was thinking of filling in the letters PONTIAC on the drivers headlight cover. I just thought that would be different. Well my mind started to get carried away with other ideas for the covers. What if I could just put different lettering on the covers? Hmmm. So off to a U-Pull-It yard and I came home with about 5 sets of headlight covers to do some prototype work. I teach AutoCAD in a high school and had some CNC machining experience. I decided that I could create the drawings of letters and import them to a CNC router. You cannot just use a font to create the drawings for CNC so each letter had to be a separate drawing. I decide to attempt to create FIERO GT in place of the PONTIAC on the cover and to advertise my 3800 supercharged engine I would letter the other headlight as well with 3800SC. After studying the covers I realized that it was going to be real hard to re-letter them since the headlight covers are not flat as they first appeared. 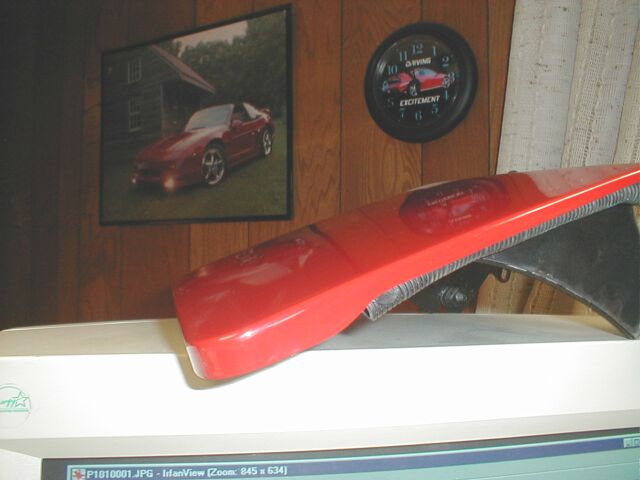 After talking with my buddy with the CNC router we decided that the it would be extremely hard to prevent the router from going all the way through at places. Then we discussed machining all the way through and just refilling it before painting. Seemed like a good idea but what should I fill it with. One material I could fill it with as resin. Problem with that was in was translucent and might affect the painting and color. Then it hit me like the classic light bulb going off in my head. What if I would keep it clear and light it from behind. Cool idea if I say so myself. Well I played around with the idea using a dremmel tool to see what was possible. 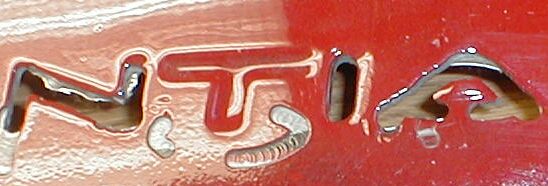 I then had to find a good resin material that would be clear. I had a real hard time finding good stuff. I discussed the resin with several others on the forum. (I am always surprised when I think about all the people that know about my �secret project�) The only resin I had around was for fiberglass work but it was slightly amber colored. Well I played around with it any way. 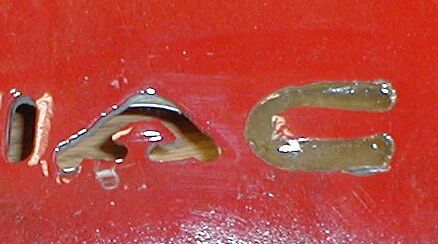 Then I realized the lettering would have to be colored yellow anyway. Any lights on the front of the car needs to be white or yellow according to federal law. So it would not matter if the resin was slightly colored. I used yellow tape to give it a consistent legal color. Here is the first prototype we did with the CNC. It developed new design problems.  Here is the covers after getting them back from the CNC router. Bridges had to be worked into the CNC machining code so that the centers would not fall out. 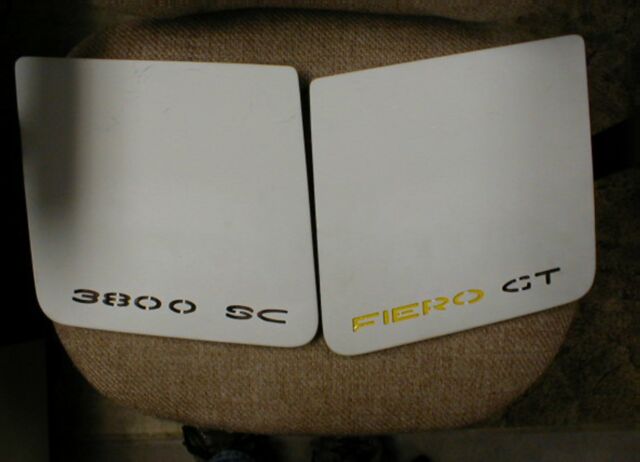
|
|
|
|
skitime
|
JUN 20, 01:05 PM
|
|
|
The sides of the letters were not painted and the resin could possible fall out if pressed hard. So I had to figure out how to overcome these problems. The painter was also concerned with the color interacting with the resin. So more test needed to be done. Luckily the painter was spraying some of my other parts so we could test interactions at the same time. I developed a way to cast all the letters into one piece, which would prevent letters from falling out. Along with the painter, we came up with a paint sequence to make it work. Since the clear had to be painted on the base within 18 hours timing was critical. The plan went like this. He would paint the base red on the covers and inside the letters at the end of his day. I would pick it after work and cast the lettering so it had maximum time to cure. The casting had to be done it two steps. First a shallow casting was done so that I could dremmel tool out the bridging when the resin hardened. Then I would fill my mold entirely so I would get a good bond to the first layer. I would drop the covers off at the painters in the morning and he would spray clear over everything. This was done on different days for each cover. (Sorry I forgot to take pics of some of the steps.) Here is what they looked like after getting them back from the painter and with the yellow tape on the backs. 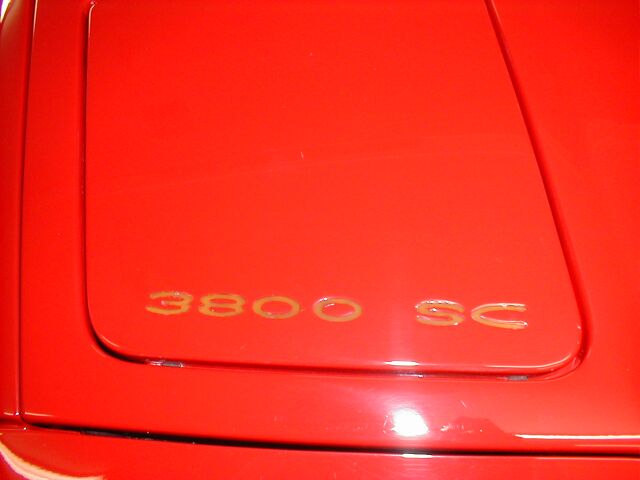
 Well, the next major hurdle was trying to figure out how to light them up. I tried every type of lighting I knew. All incandescent bulbs no matter how small created too much heat. Also the compartment I needed to put them in was about 1/4 inch thick so it had to be a small light to work.  I was starting to think I ran into an insurmountable roadblock. I ran this lighting question past many of my Fiero buddies but to know avail. I was doing Internet searches and stumbled upon cold cathode lights. These were designed for tabletop and hand scanners. They are very bright and are basically miniature neon lights and amazingly are powered by 12V DC. To top it off they are only � inch think. I was thrilled to find them and ordered some to experiment with. At that time they only came in 10 and 4-inch lights. I need two 4 inch ones for each headlight cover.
  I played with the 10-inch tubes too and used them in my engine lighting. 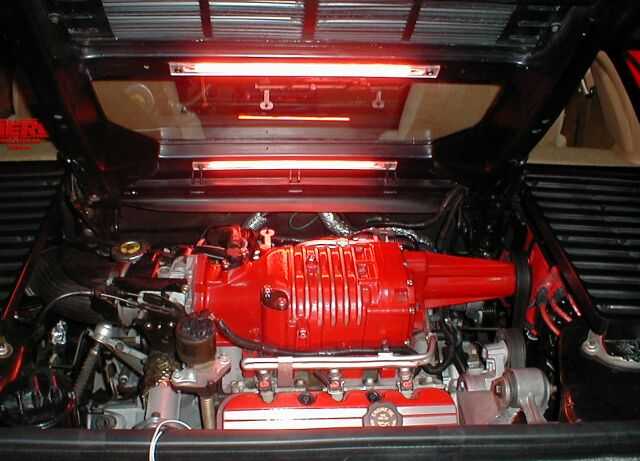
|
|
|
|
skitime
|
JUN 20, 01:06 PM
|
|
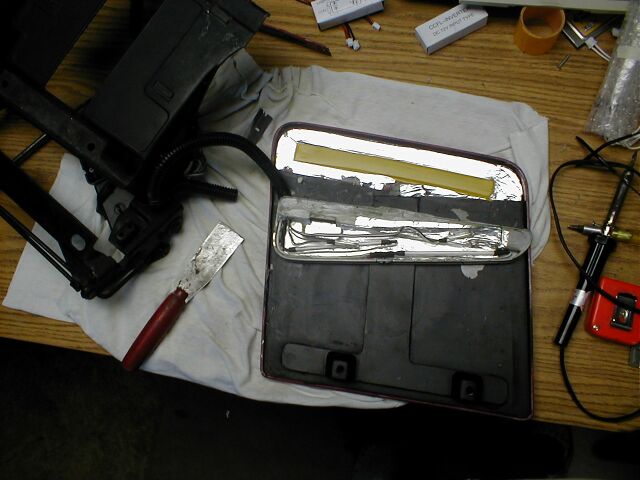
Before the 2002 Carlisle show I had one headlight cover completed with lighting but did not have time to finish the second one. I was going to then complete them for the 2002 Fierorama show but Vonnie insisted to keep them till the next season so I would have something new. So I just put the pieces away till prior to 2003 Carlisle. Course it was a mad rush to get them done in time for the 2003 Carlisle show. I had a real hard time designing a system to mount the wiring and control boxes with all the moving parts in the headlight assembly. 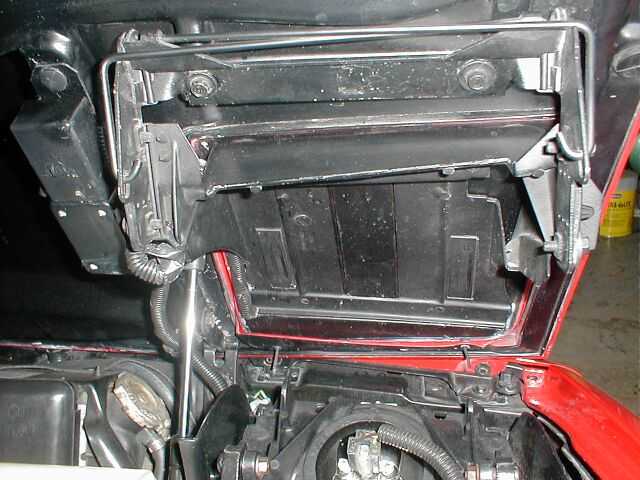 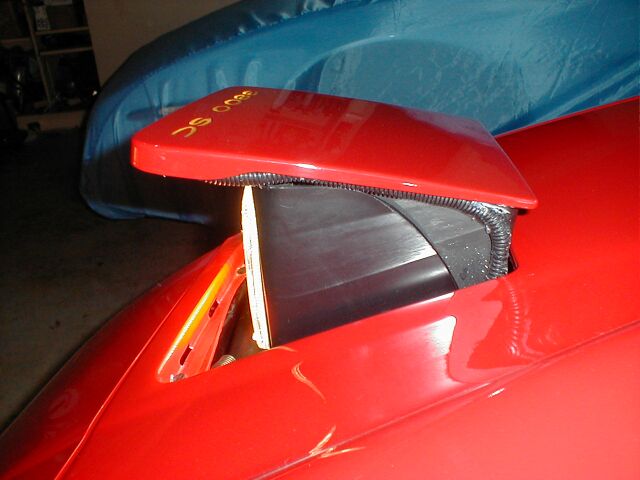 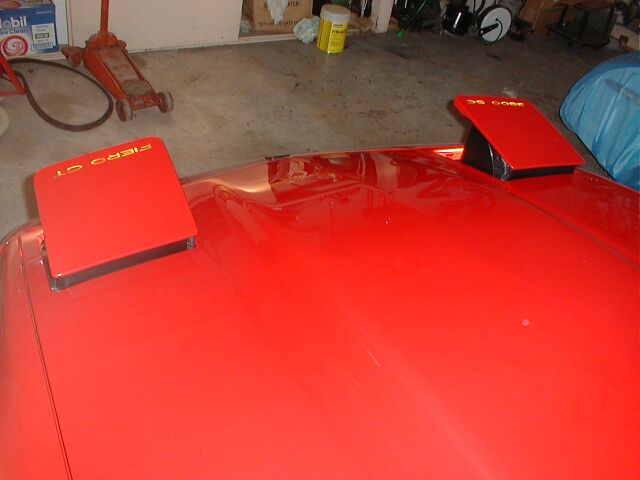 I also added a pair of adjustable strobe lights into the covers. They work great and really attract attention to the car at shows and cruise-ins. The cold cathodes are wired to the same wire that lights the GT �PONTIAC� lights on the taillights so they come on when you start the car. I also have switches to turn on the lights and strobes separately.   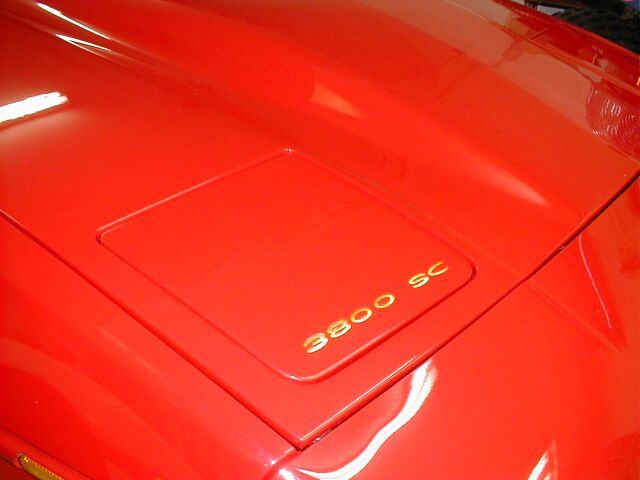 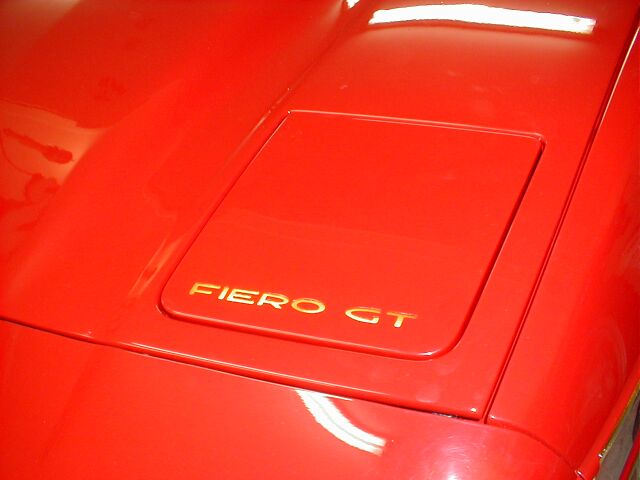
|
|
|
|
skitime
|
JUN 20, 01:07 PM
|
|
Well, it has been a rough winter for me. I was not able to work on the car because of a partial knee replacement until late spring. I figured when I was able to work in the garage again I would concentrate on horsepower. I rolled over some of the money from selling parts off our wrecked 88 GT t-top into this car. I wanted to be one of the first 3800 supercharged Fieros to have an intercooler. I decided on the ZZP intercooler since it was a complete system although it was designed for the Grand Prix GTP. 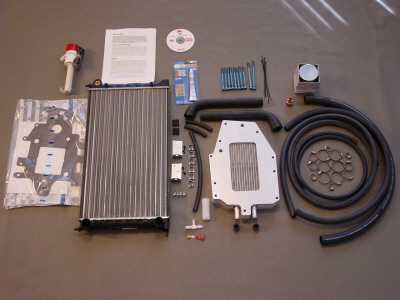 I was hoping to have it done by the Carlisle show but it did not arrive in time. In preparation of the intercooler I modified my trunk lid. I found it interesting that even though I had done a major modification to my engine compartment prior to Carlisle not even one person noticed it. Actually that pleased me since I knew it must of appeared stock therefore not noticeable. The intercooler is 2 � inches thick so the supercharger would be raised that much and would interfere with the trunk lid so a major modification needed to be done for clearance. So I had to cut a lot of clearance into the trunk support and the trunk hinge. That was a little scary since the trunk lid was already highly modified with the window and engine vent. I redesigned the trunk hinge so it was a 1 � higher than before as well as the trunk lid support. A steel backer plate was installed behind the fiberglass for the new hinge to bolt to just like the factory piece that was cut out. I also had to design gas struts supports since the original torsion bars would no longer work. Amazingly not one person commented about the changes at the Carlisle show. I even told some that something was changed and they could not find it.  I originally was going to design my intercooler radiator like the GM prototype and build it into the wing. I even gathered pieces to design intercooler in the wing. I was worried about cooling when the car was not moving which was an advantage to the front radiator design. The front radiator would allow cooling with the fan even if the car was not moving. 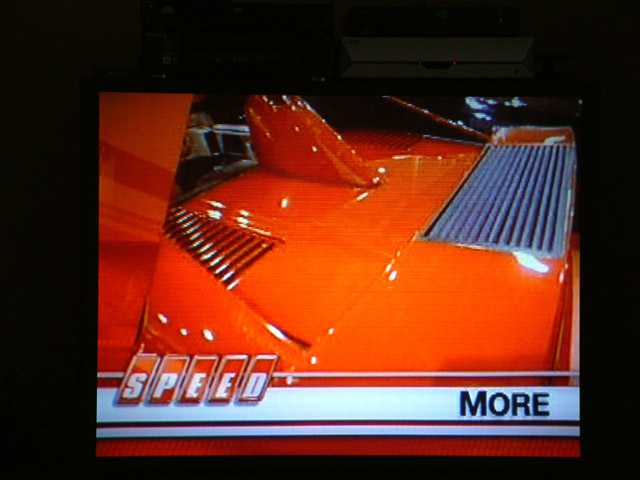 After a lot of thinking and planning, I decided with the window and the trunk engine vent that a third vent would be a bit too much so I went with installing a radiator in the front. 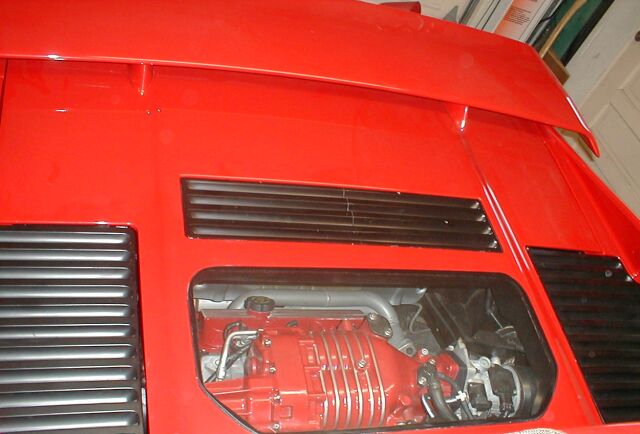 I had to adapt the ZZP radiator to get it to fit in front of the AC core. All the fittings had to cut off and replace so it would fit the Fiero. 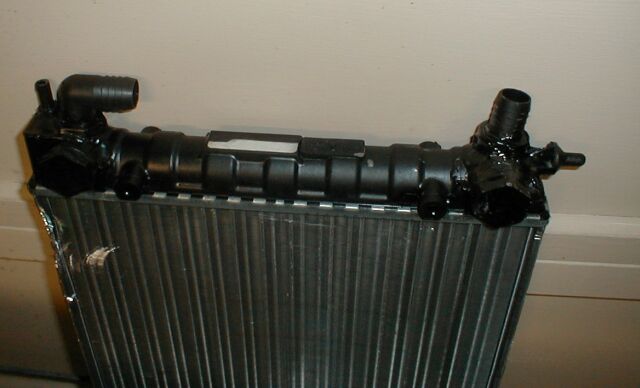 Since the radiator was a long way from the intercooler I decided to use metal piping to get the coolant to the front of the car. This would have an added benefit. The pipes would act as additional radiators on the round trip of the fluid. I used 3/4-inch metal pipes so the fluid would have less restriction through the pipe and transmit more heat. 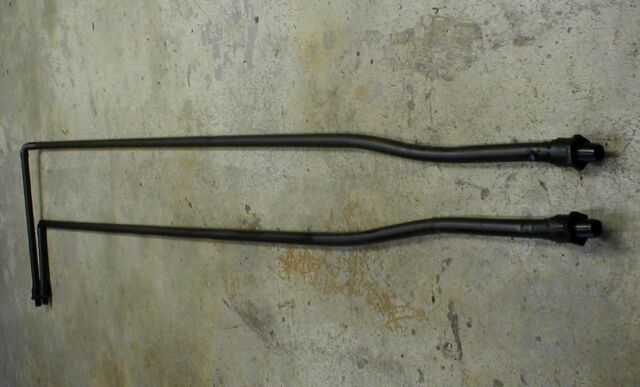
|
|
|
|
skitime
|
JUN 20, 01:08 PM
|
|
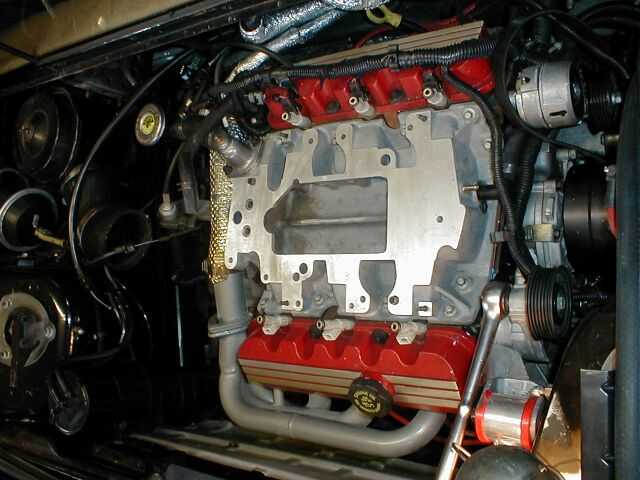
I was able to mount then that the pipes are not any lower than the stock lines. 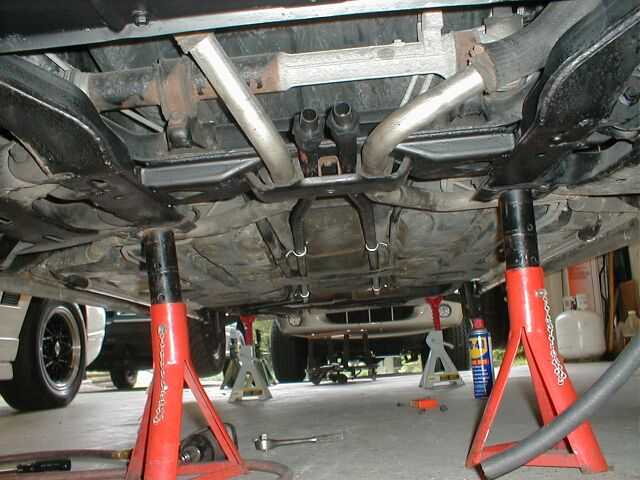   The pump was mounted behind the radiator. BTW, I am very pleased with the flow of the ZZP pump. I have a sight tube at the intercooler and it is really moving a lot of fluid swiftly. 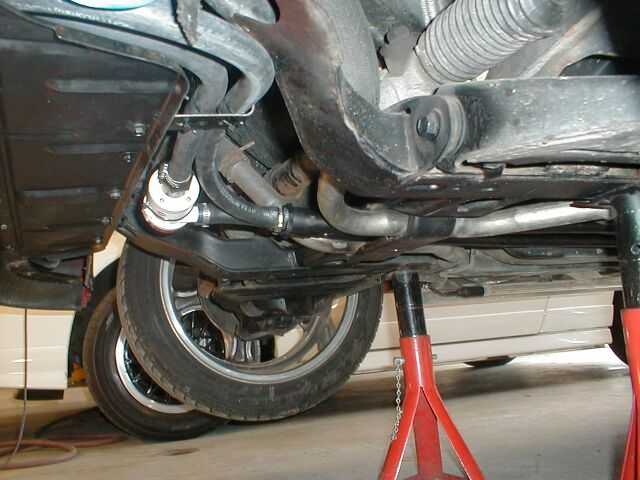 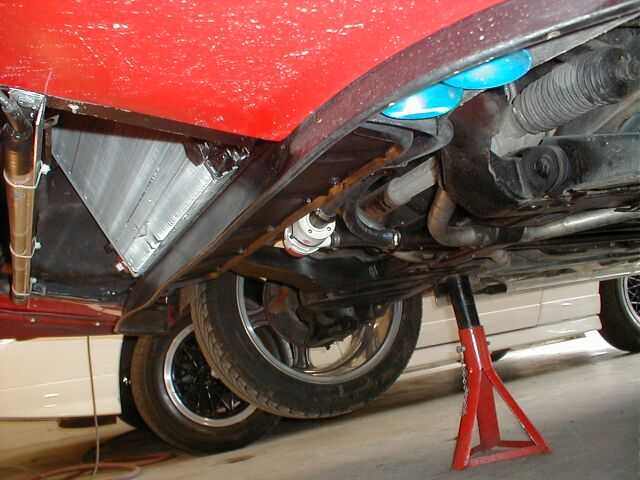 I also replaced the intake manifold with the ZZP modified manifold. This manifold allows even more cooling of the incoming air. I sure hated to be tearing a engine apart that was a new crate engine and now with about 3000 miles on it. Here is a pic of the stock intake manifold. 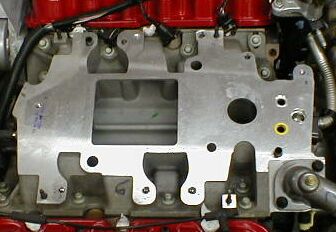
|
|
|
|
skitime
|
JUN 20, 01:09 PM
|
|
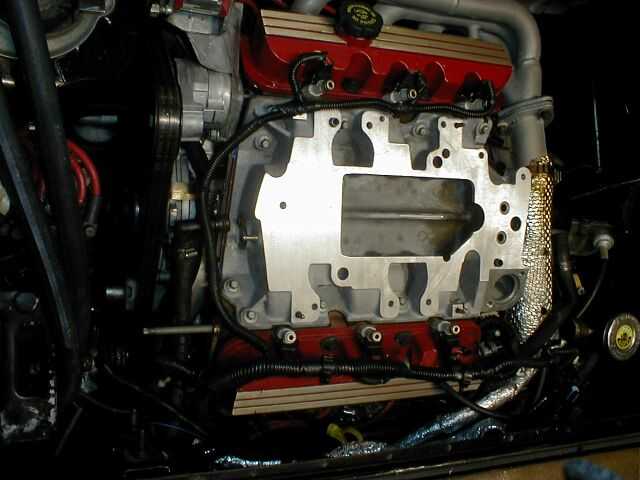
These engines are so well engineered I was pleasantly surprised when I got the manifold off. The gaskets have locating pins and almost no gasket sealer is needed because of the design of the gaskets. Look at the oil collectors for each push rod. I was impressed with the inside of the engine. 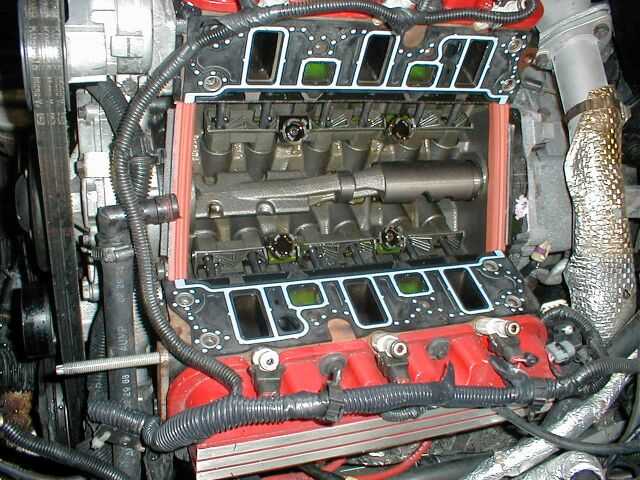 And here is the ZZP modified intake manifold.
I also had the ZZP 8-groove pulley at the Carlisle show but not the 8-groove belt. The 8-groove pulley gives 1/3 more gripping power. I now redesigned my belt path for even more wrap around the supercharger pulley. I previously had some belt slip at high RPMs. I believe this will take care of that.
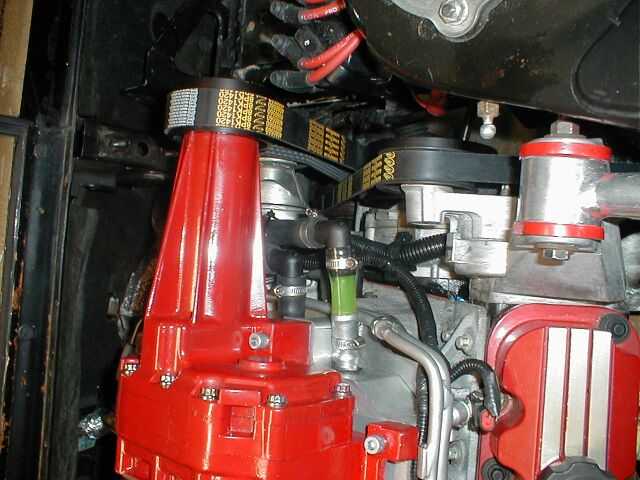
I was able to track down a Goodyear Gatorback belt at a local tractor-trailer parts shop. ZZP does not have a 8-groove pulleys in production yet so I modified mine from a 6-groove pulley to a 7-groove pulley. 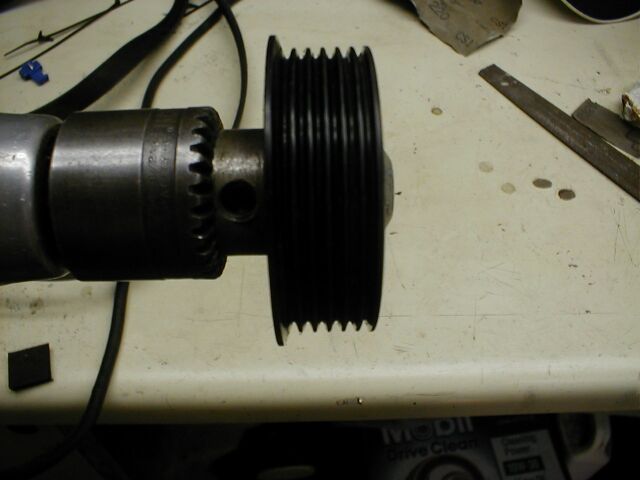 My belt path is greatly improved and I went from about 35 degree wrap around the supercharger pulley to about 270 degree wrap. With the 33% more belt I am sure belt slip is a thing of the past. 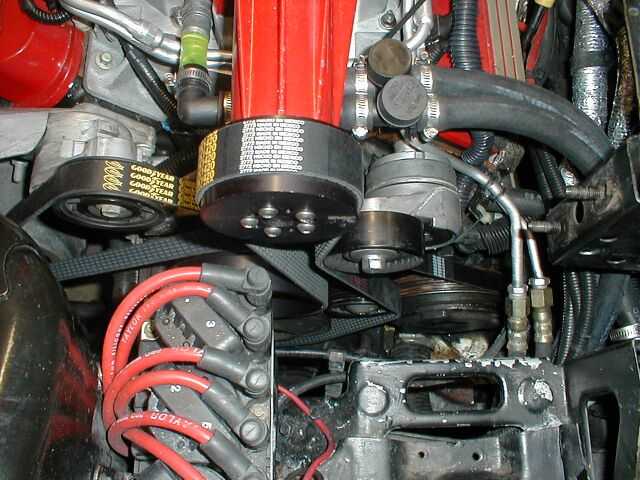 I now have 3 swappable pulleys. 3.4, 3.25 and a 3.0 Zooomer owner of ZZP says I will be able to run the 3.0 with no additional mods to the engine. With the 3.0 pulley I should be approaching the 300 HP to the rear wheels along with the help of the WCF headers.
Also in this pic you can see where the intercooler lines connect to the intercooler. I added a sight tube to allow me to observe the coolant.
|
|
|
