 
     |
| Project "off the Rickst'er Scale" begins (Page 23/117) |

|
Bozzie
|
JUN 13, 06:44 PM
|
|
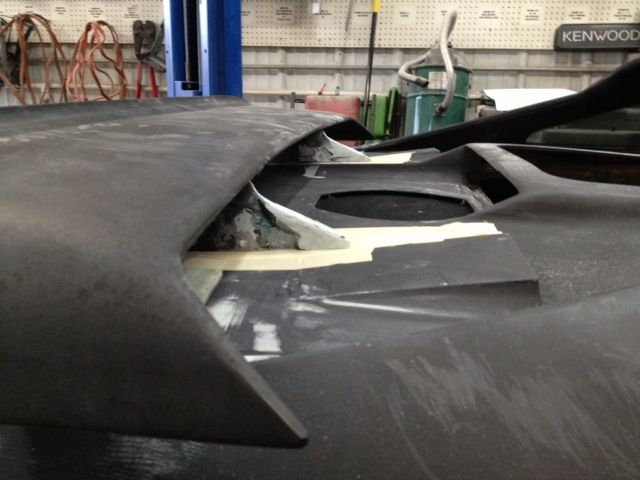
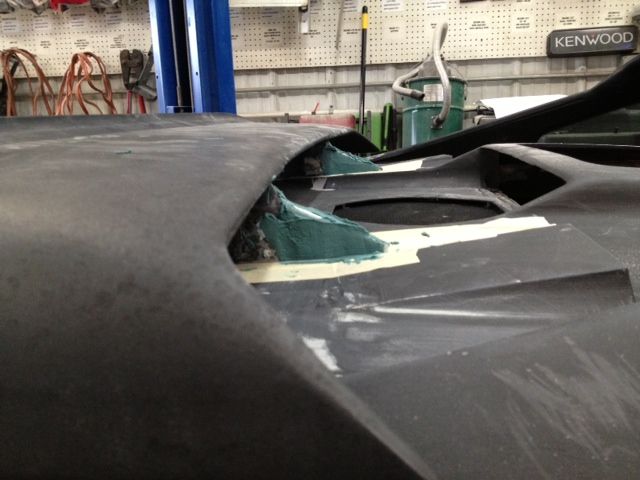
Upon looking at the stands i thought they needed to be more raked so i cut a template out of a paint stick and glassed it on

|
|
|
|
Bozzie
|
JUN 13, 06:46 PM
|
|
Glassed and 1st layer of filler to shape
|
|
|
|
Bozzie
|
JUN 13, 06:47 PM
|
|
2nd coat of filler and sanding
|
|
|
|
Bozzie
|
JUN 13, 06:50 PM
|
|
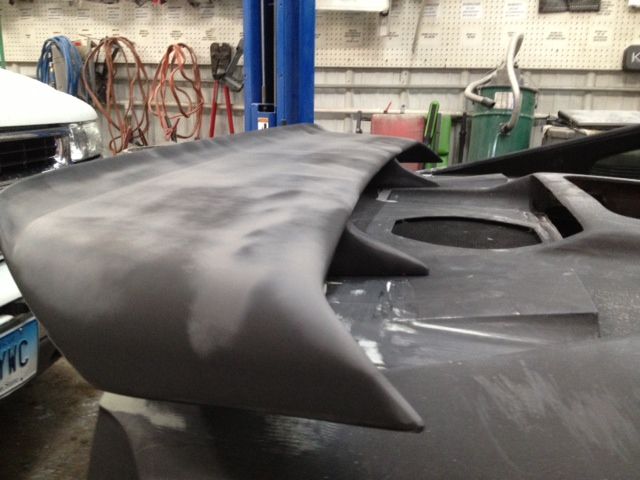
Shaped / primered and fitted......you can also notice the lip spoiler i bonded and shaped to the top of the wing for added presence......
|
|
|
|
Amida
|
JUN 18, 09:57 PM
|
|
|
|
|
Bozzie
|
JUN 19, 07:30 PM
|
|
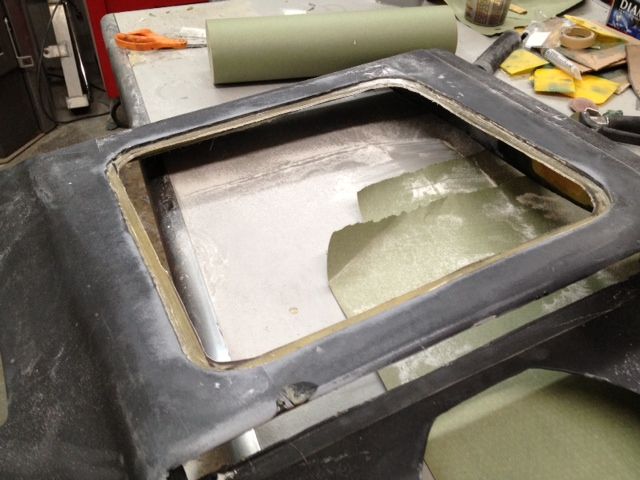
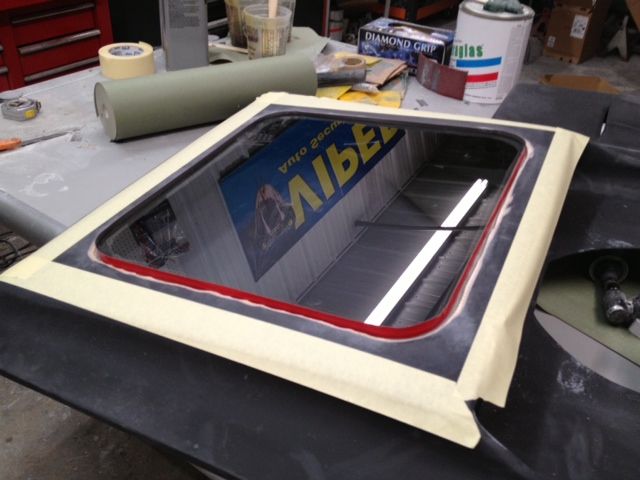
Thanks Amida....thats def. a compliment ! Moving onto the rear hatch engine window. I startet with a Piece of Safety glass tinted already. It was cut with aprox. size and radius to within a 1/2 inch of my precut opening.

|
|
|
|
Bozzie
|
JUN 19, 07:32 PM
|
|
I laid the glass in after i protected it with masking tape on the edges. Its a good fit. I spaced it out to acount for the spacing on the glass, glue and mounting tab. Hear it is ready to glass in the mounting flange.

|
|
|
|
Bozzie
|
JUN 19, 07:34 PM
|
|
Here it is with a 3" wide glass flange. Its plenty strong and thick with 3 layers of fiber. Then i just popped it out.

|
|
|
|
Bozzie
|
JUN 19, 07:37 PM
|
|
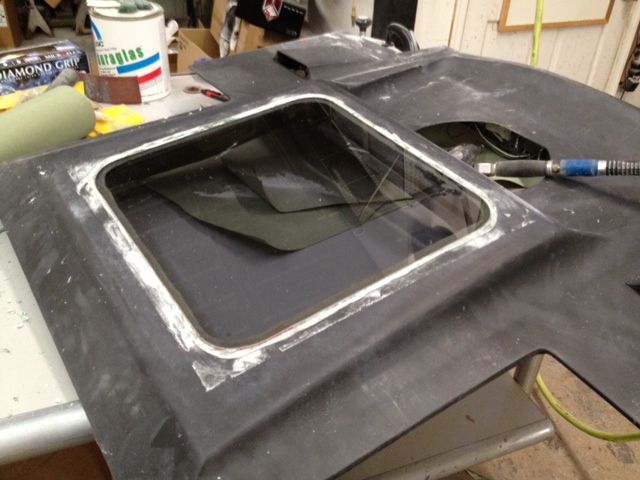
After the glass is removed this is the opening for it with the new mounting flange. A ruff opening.

Then i trimmed it to 1/2 " all the way around.
|
|
|
|
Bozzie
|
JUN 19, 07:40 PM
|
|
I then placed the glass in with a 1/16 tape wrapped around it to provide a nice fit without being to tight.
A layer of filler is applied.....sanded and reapplied and sanded
|
|
|


