
 
     |
| LS4 / F40 swap - fieroguru (Page 214/216) |

|
fieroguru
|
OCT 24, 07:07 AM
|
|
| quote | Originally posted by ericjon262:
Thats a bummer that it will cost you that much to get it running again... I will say, back during the 'vid, I got a chance to try and play with a MACH 3 langmiur, it was kinda a nightmare compared to the firecontrol software. I think you will like that aspect of the "upgrace"
|
|
Time will tell. I didn't mind Mach 3, as it didn't need much input. My workflow is:
- Draw the part in NanoCAD 5 & save as .dxf (this has a very sililar feel to AutoCAD that I use for work).
- Import .dxf file into SheetCAM for tool path assignments and generate the .tap file.
- Import .tap file into Mach 3,
- Load the table with the right metal,
- Change consumables,
- Set torch height,
- Use Mach 3 arrow buttons to inch the torch to the proper zero point,
- Set the proper zero for X & Y
- Press Cycle Start to begin cutting.
- When I need to pause the cut - press space bar.
- Press Cycle Start to resume cutting.
On my table, I have several of the slats removed so there is about a 12" unsupported section that allows the parts to just fall into the water table and avoids much of the concern with tip ups. It leaves slight nub on the part that is easily smoothed out. For larger parts, as the final outer cut is made, I place magnets behind the torch cut path to help support the larger parts as the torch reaches the end of the final cut.[This message has been edited by fieroguru (edited 10-24-2025).]
|
|
|
|
FieroWannaBe
|
OCT 26, 08:52 AM
|
|
I ran a fleebay CNC plasma with mach 3 and a Chinese's control/driver board.
I went through 3 PCs from failed motherboards.
I upgraded to a Masso Controller.
I think PCs arent meant to live in vicinity of the HF noise a plasma produces.
|
|
|
|
fieroguru
|
OCT 26, 11:59 AM
|
|
| quote | Originally posted by FieroWannaBe:
I think PCs arent meant to live in vicinity of the HF noise a plasma produces. |
|
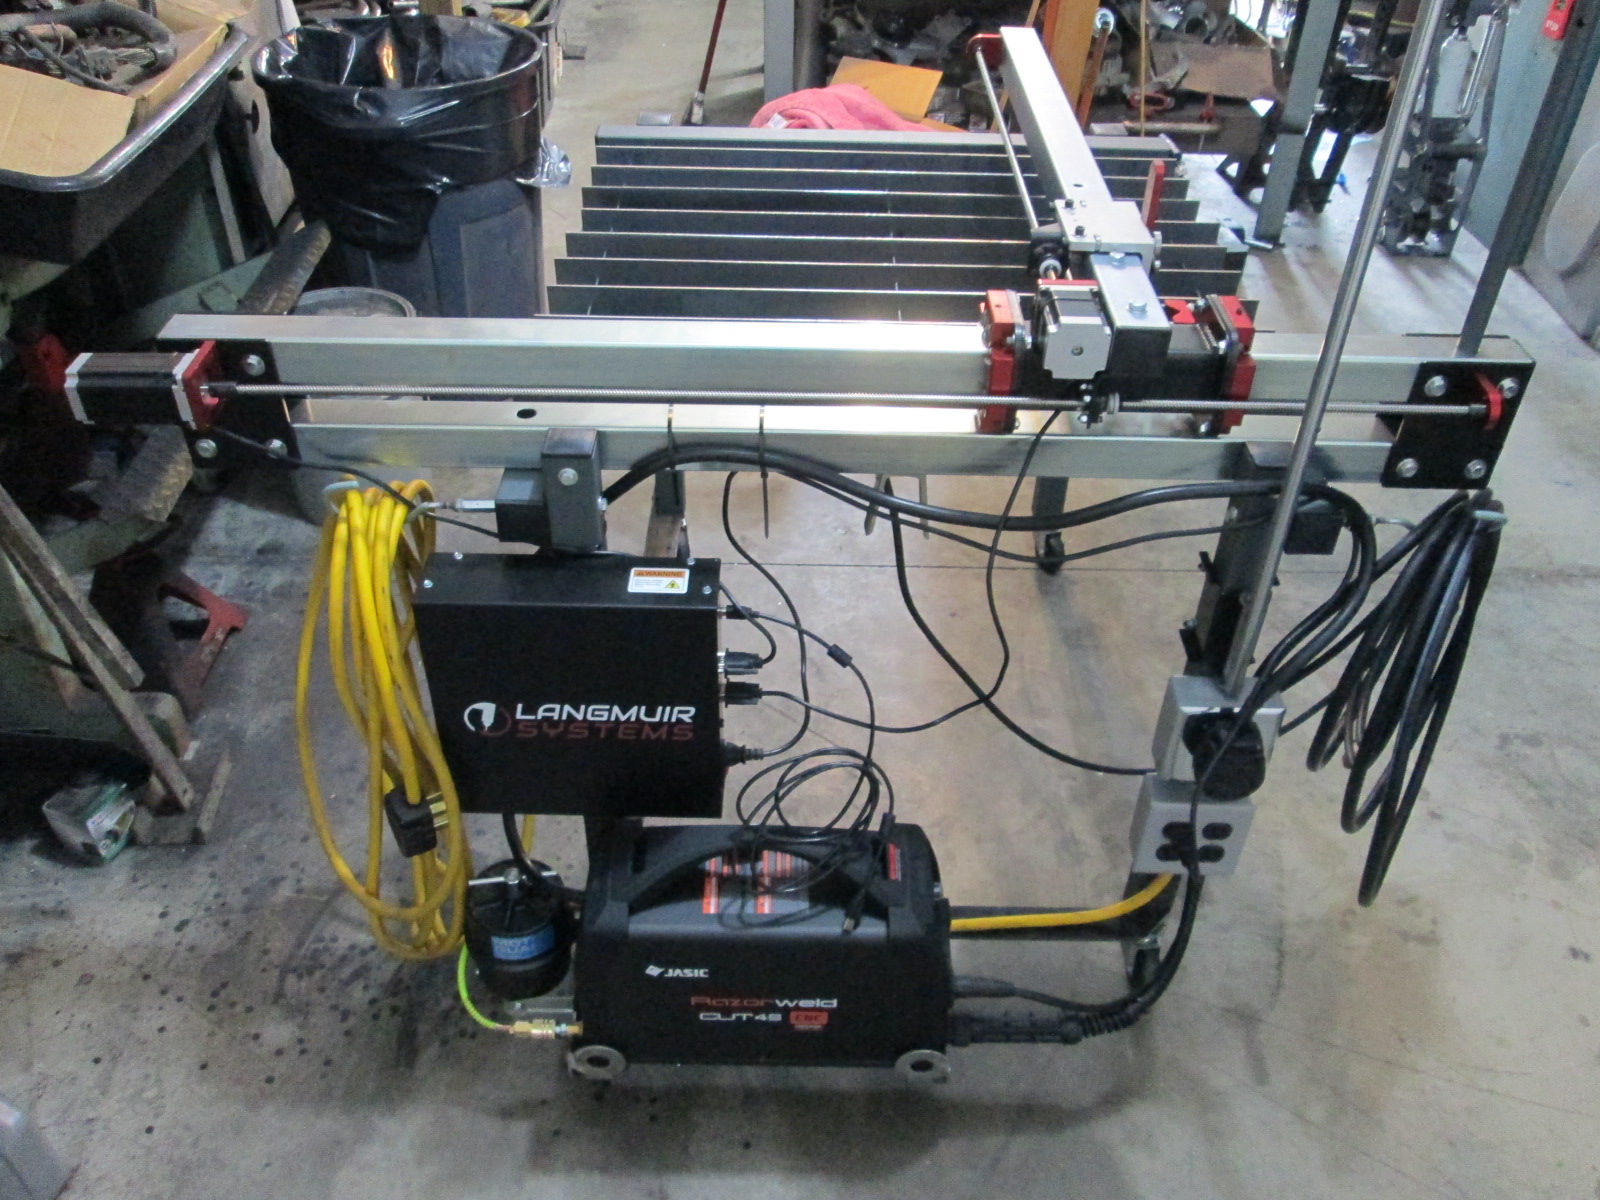
Here is my old setup with the control box basically right on top of the plasma. The board that went bad on mine is in the upper right of the control panel. With the panel upgrade, I am going to try to move them a little further away.
"Most" of the upgrade arrived yesterday, so I started working on that. The stiffer lower rail is missing and they didn't include the 50:1 voltage stepper connector for my plasma cutter (it probably came in the original box 5 years ago, but it is long since gone.). I have asked Langmuir about providing it, also found it on-line, and ordered 2, but they are a week + out. Plan B is to do the direct wire option where I have to run 2 new wires into the electrical panel on the plasma.
If you notice, originally, I mounted the plasma cutter under the control panel. This made the plasma table stick out about 12" further from the wall than it needed to be. It was fine for 5 years, but made getting the drivetrain in and out of the bay very tight, so decided to move the control panel and plasma cutter up under the table to gain back precious space in my my grarage. I also ordetred the needed extension cables for the X & Y servo motors as they barely reached the stock control panel location.
I am still working on the final placement for those, so no pictures yet, but all the mounting brackets for the old positions have been removed and pushed the table back into its home closer to the wall and leveled it with my machinist level (just a construction bubble level before).
When I installed the Z-Axis I manually moved the torch head to the mechanical limits of the table.
In the Y direction, the water table is 34 3/8" long. At the minimim Y limit, the torch is now cutting air and about 1 3/4" past the edge of the water table. At the maximim Y limit, the torch is still in the water table, but 2 3/4" from the edge. Most of this is due to the Z-axis taking up more space and shifting the torch toward minimum Y. Not sure if the new lower rail will shift the X-Y carriage to account for this. If It doesn't, then I will likely relocate some holes and do the relocation (vs shifting the water table towards minimim Y).


The X-axis has a similar issue, but for a different reason, and has been there from day one. At minimum X, the torch is in the water table, but 2 5/8" from the edge of the water table. At maximum X, the torch is also in the water table, but 1" from the edge. The Water table in the X direction is 28 5/8", but the mechanical limits of travel are 3 5/8" less or 25".


The current X-rail stops about 2 1/4" from the outer edge of the machine, and the lead screw support bracket that is the mechanical maximim X limit is 3" from the edge of the machine.
Since I purchased the orininal Crossfire and then upgraged to the XL, I still have the original machined Y-rail (41.5") which is 5 1/2" longer than the X-rail. With some hole pattern transferring, I can extend the X-axis by up to 3" without going past the current foot print of the machine. I will need to purchase a longer lead screw, as I can't find the original one for the Y-axis.
The frame of the machine is made from 2x2 tube, so by removing the outer 2" tube that is parallel with the Y-rail and replacing it with some 1/4" bar stock, I can shift the water table 2" towards maximim X. Doing so will get me close to 28" of available X-travel and near fully utilize the limits of the water table.
Here is a sketch of the shifting the water table toward minimim Y and maximim X to better utilize its limited space.

I am off on Monday getting new HVAC installed in the house, so I should be able to make some more progress, while waiting on other parts to arrive.
|
|
|
|
fieroguru
|
OCT 27, 06:31 PM
|
|
The plasma table is back working!
While waiting for the HVAC guys to install the new furnace & AC, I finished up the bracket to hold the control box under the water table (it still needs painted). Then the servo motor cable extensions arrived, so I decided to hook everything up and test it out, without finishing the mount bracket for the plasma cutter.

Learned I needed up update sheetCAM for the FireControl Post, so looked up how to do that.
Then I learned I needed to updat all my tools in Sheet Cam, so did that.
Also, learned that all my cut files to this point will have to reran with the new tools and post, as they do not work with FireControl... not thrilled about that! So reran the files for the caps on the front cradle fixture support and the F40 shifter bracket.
I am still waiting on the connector needed for the Z-Axis torch voltage control, so I turned off the Z-Axis, setup my tools for no-Z-Axis, and ran a couple of files.

It feels better knowing that the plasma table is back in operation, even it all the upgrades are not 100% functional!
|
|
|
|
fieroguru
|
NOV 01, 05:02 PM
|
|
With the plasma table back in operation, I was able to finish up the front cradle supports.


|
|
|
|
ericjon262
|
NOV 01, 05:06 PM
|
|
Congrats on getting the table back together, I bet that felt nice to have off your back.
is the frame jig meant to be used for helping your pursuit of AWD greatness?------------------
"I am not what you so glibly call to be a civilized man. I have broken with society for reasons which I alone am able to appreciate. I am therefore not subject to it's stupid laws, and I ask you to never allude to them in my presence again."
I invited Lou Dias to trash me in my own thread, he refused. sorry. if he trashes your thread going after me. I tried.
|
|
|
|
fieroguru
|
NOV 01, 06:54 PM
|
|
| quote | Originally posted by ericjon262:
is the frame jig meant to be used for helping your pursuit of AWD greatness?
|
|
Yes, that is one of the purposes, but that will be at a later date.
The first iteration will just be RWD but with power steering, a quicker rack, and some weight reduction. I am planning to lower the main side tubes atleast 1/2" to maximize the space for the flipped rear differential and integrate and open path for axles. Ideally the differential could be added later without a complete redesign, just some added tubes/supports.
|
|
|
|
fieroguru
|
NOV 02, 05:47 PM
|
|
Getting close to being done with picking up the sway bar bushing locations.
Here are the plates that bolt to the cradle:


I still need to make the lower tabs for the 5/8" bolts and then weld the stands to the tabs and the cross bar.
Then onto the steering rack.
|
|
|
|
fieroguru
|
NOV 08, 07:13 PM
|
|
Had to do some maintenance on the 2007 Colorado today...
I had a work trip to Port Washington, WI on Thursday last week, so I drove up Wednesday night and drove back on Thursday night. On the way back the truck started struggling to go up hills and was kicking down 2 gears. About 2 hrs from home it wouldn't keep up with interstate traffic anymore, so I took the next exit and did some preliminary checks. It wasn't missfiring, but I was down on power and didn't really want to rev more than 3000 rpm. So I stuck to side roads and kept it under 65 mph and got the truck home.
Once I got home, hooked up the scanner and the fuel trims were in the 10-15% range, but didn't climb with RPM or throttle. Drove it to work on Friday and then tore into it on Saturday. Whatever the issue is, it wasn't setting any DTCs.
Started with easy things:
Checked air filter - fine, but replaced as I can't remember when it was changed last.
Cleaned the MAF
Verified the thottle body went 100% open
Checked fuel pressure - it was closed to 60 psi, which is good.
Changed the oil - it was way past due and could cause the VVT not to work right, but that would set a code.
Symtoms and lack of DTCs indicated it simply wasn't puming air, but air fuel was maintaining, it wasn't mis-firing, and the intake path wasn't the cause.
So clogged catalytic converter... to the truck's credit, it just passed 275K miles and it was the OEM catalytic converter.
Fixed that, and the truck is now back to its normal power level.
|
|
|
|
fieroguru
|
NOV 15, 08:45 PM
|
|
Today was likely the last 70 degree day for this year, so I took the Fiero out for a couple of hours and washed before putting it back in the garage:

The car now has 12,900 miles in the last 2 years with the turbo, and about 68K miles with the LS4 swap since 2013. Time to work on some of the winter upgrades for it, but the plan is to keep the drivetrain in the car.
Decided to modify forty 1/2" carriage bolts so that the square under the head is 5/8" OD and trued up the underside of the head for use on the mounting tabs. 10 of them I turned the head down to 1.000" OD, so they can use used to square up parts on the table and be 0.500" off the hole pattern on the table.

I drew up the lower mounting tabs for the sway bar supports, and the brackets to locate the rack from the crossmember to frame bolt holes in the center. So on Sunday should be able to get those items welded up.
|
|
|
|