|
| LS4 / F40 swap - fieroguru (Page 207/216) |

|
dskebo
|
APR 23, 11:39 AM
|
|
|
It had the factory oil separator but the velocity of vacuum still sucked the oil out as a mist.
|
|
|
|
fieroguru
|
APR 25, 07:49 PM
|
|
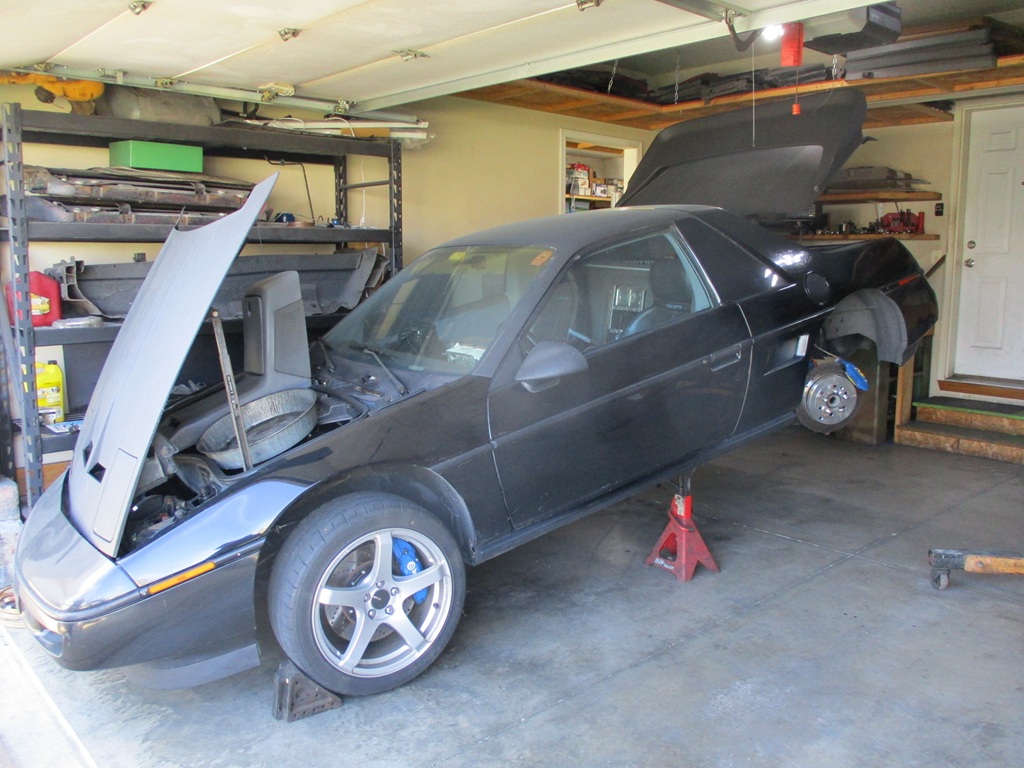
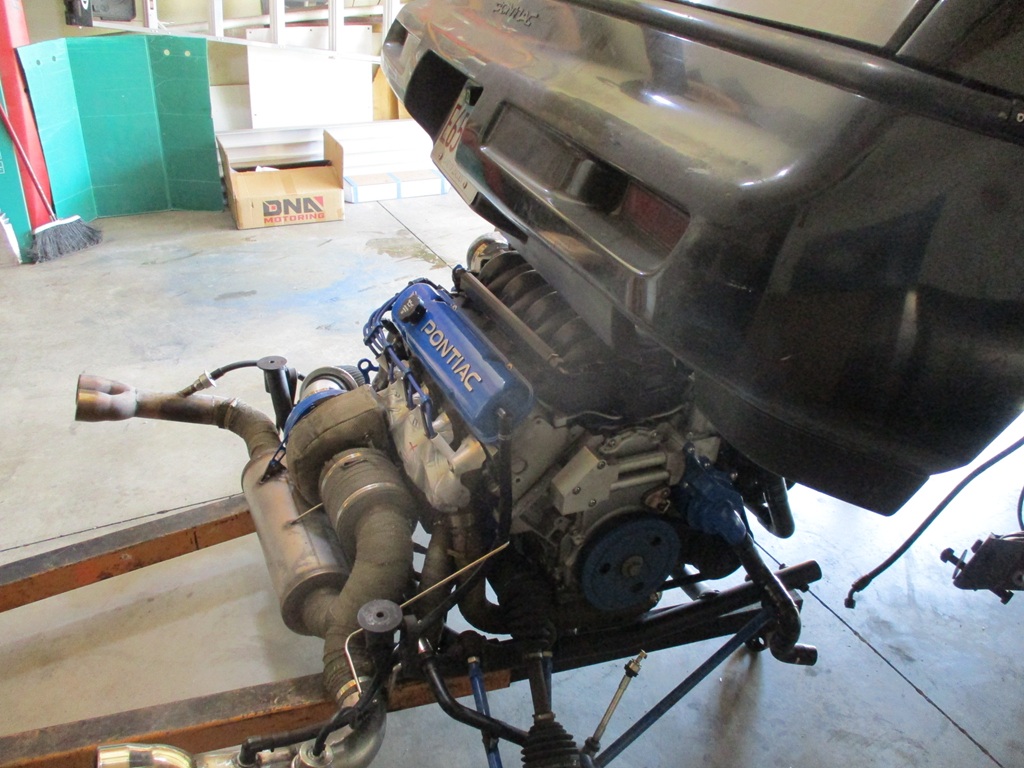
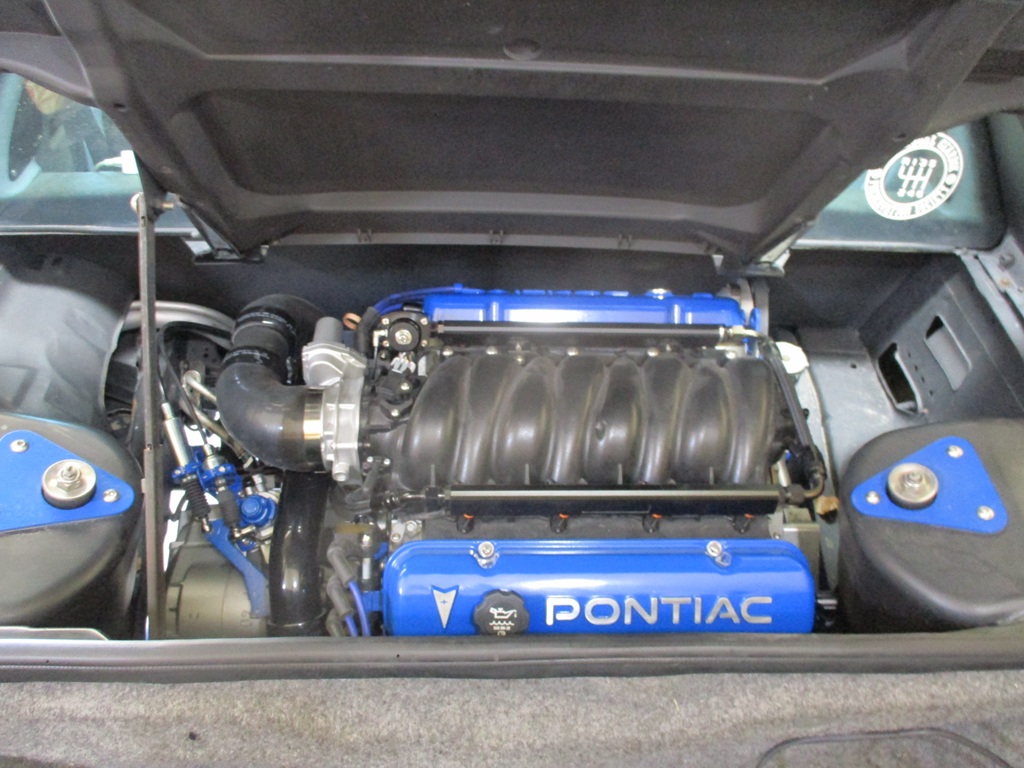
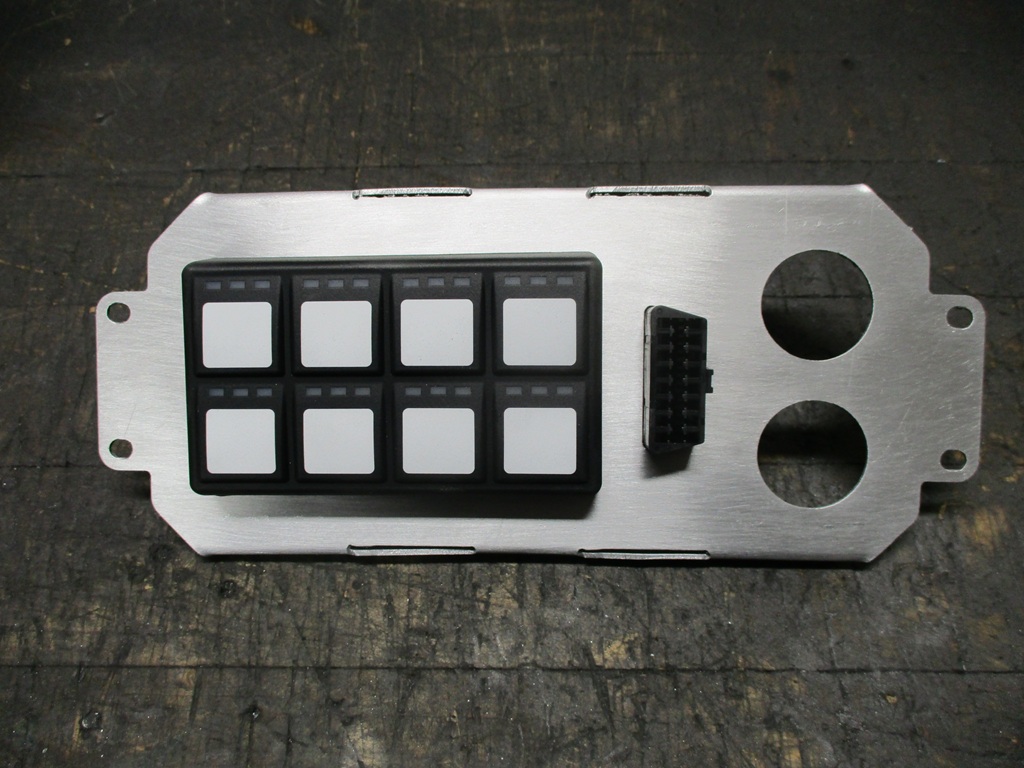
I forgot to post a picture of the panel that will be in the old radio area. It will be painted black.
Mechanically, the engine is just about ready to go back in the car. Maybe another hour to finish a few odds and ends:

The engine to ecm harness is pretty much complete. Most of the rest of the wires connect to the C203, C500, or other items in the car, so electrically it is just about ready for install.
|
|
|
|
fieroguru
|
APR 27, 02:08 PM
|
|
|
|
|
Filben
|
APR 28, 07:35 AM
|
|
| quote | Originally posted by fieroguru:
|
|
I know its too late now BUT a few casters bolted to the bottom of the wooden stand you had the subframe on makes it SO much easier to roll it under the car.
|
|
|
|
Will
|
APR 28, 08:43 AM
|
|
| quote | Originally posted by Filben:
I know its too late now BUT a few casters bolted to the bottom of the wooden stand you had the subframe on makes it SO much easier to roll it under the car. |
|
I built exactly such a dolly for moving my cradle around. The bottom of the cradle ends up 3" above the floor, so it does not require much extra lift of the body.
|
|
|
|
fieroguru
|
APR 28, 03:57 PM
|
|
| quote | Originally posted by Filben:
I know its too late now BUT a few casters bolted to the bottom of the wooden stand you had the subframe on makes it SO much easier to roll it under the car. |
|
I don't have a wooden stand for the drivetrain to sit on, just random blocks of wood when needed.
The cherry picker legs work and I don't need to store another dolly or cart. I am very space challenged.
|
|
|
|
fieroguru
|
APR 29, 10:01 PM
|
|
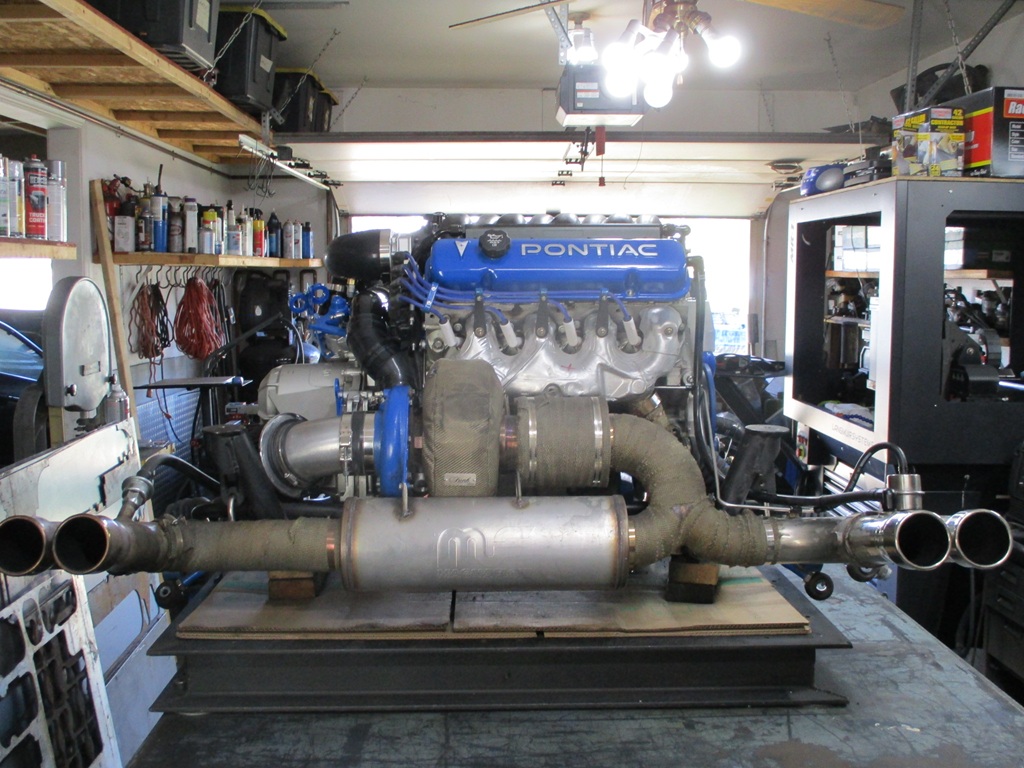
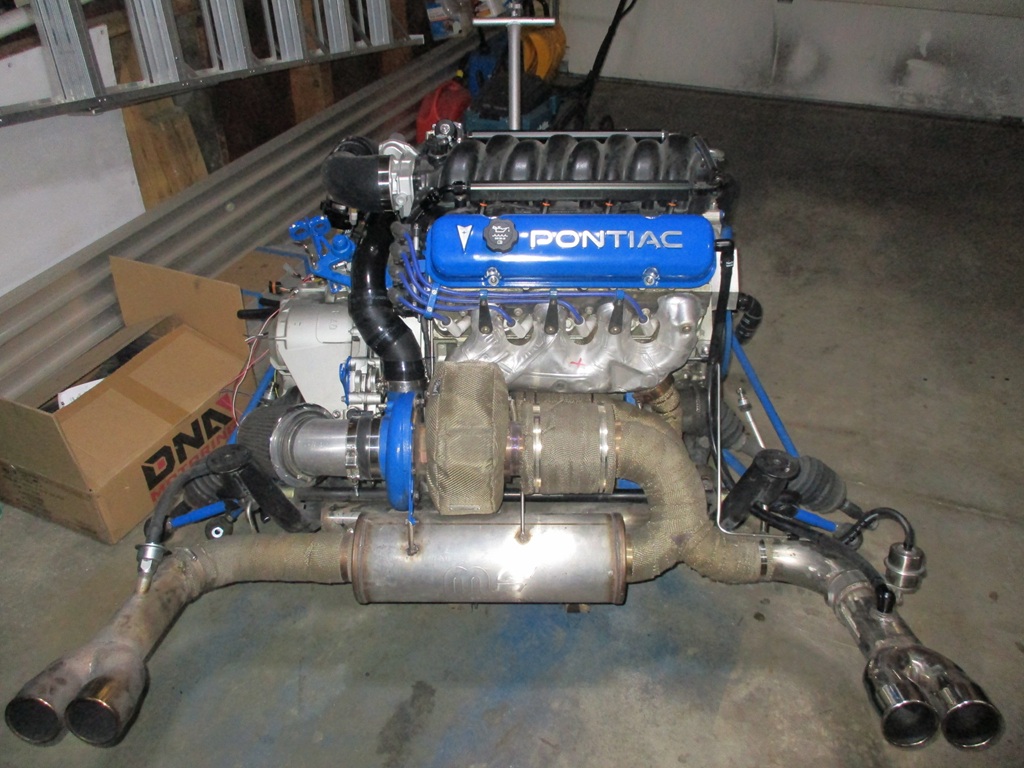
I am starting to get a collection of these tensioner brackets:
The middle one allows the valve covers to fit with the least amount of rotation of the tensioner:
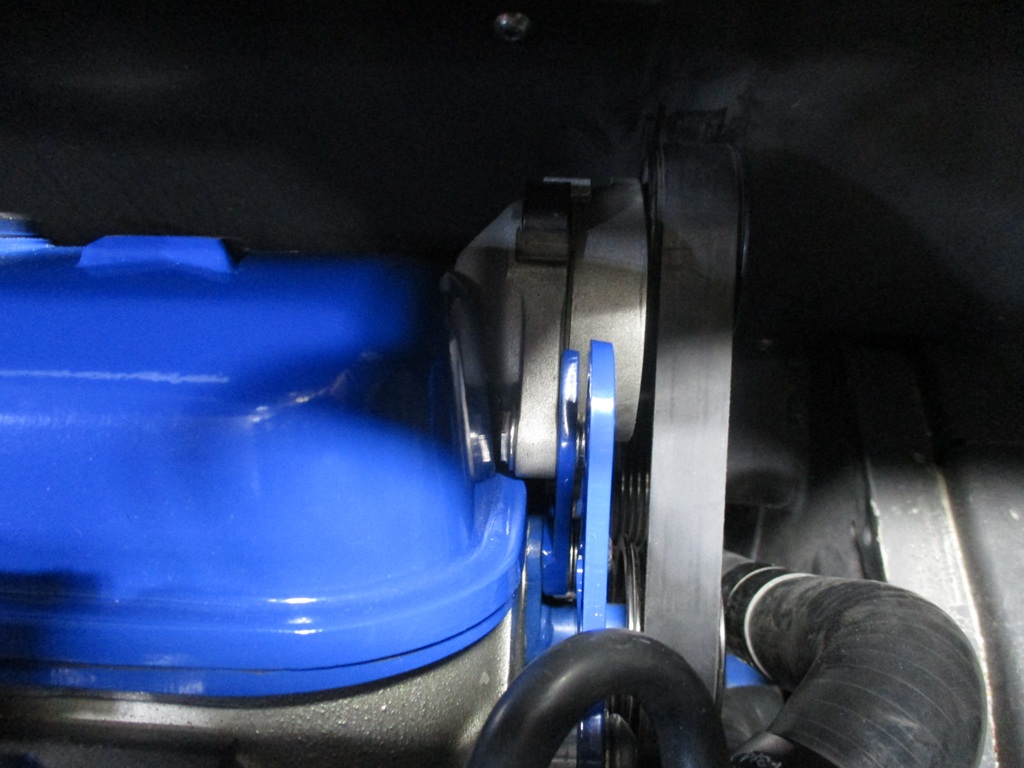
With this being the only change, there is now 0.14" clearance as shown with the washer:
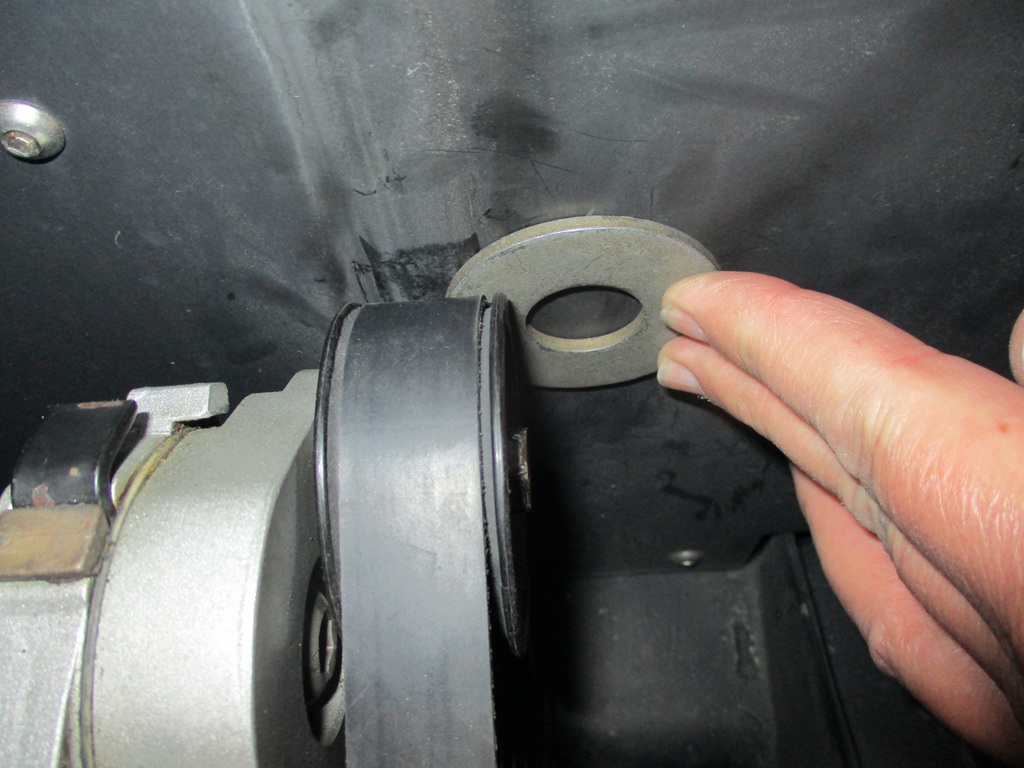
I will likely upsize one of the other idlers to restore the lost tension from lowering the tensioner, and when doing that the clearance will increase to about 1/4" which will be more than enough.
The cause of the clearance issue is when I made the drawing, it was on a parts chassis which does not have the smooth firewall panel spaced from the oem firewall.
|
|
|
|
fieroguru
|
MAY 04, 09:35 PM
|
|
Made some more progress, but didn't get as far as I would have liked.
During this past week:
- I setup the base tune in the Haltech ECM and configured the I/O for all the extras (Boost Control, Flex Fuel, Traction Control, Speedo, A/C, Cruise, Clutch Switch)
- Fuel return hose installed.
- Shifter cables installed.
- Clutch Line Connector is hooked up - but clutch is not bled.
- Brake booster vacuum line connected and insulated (close to the wrapped and heat shielded front manifold).
- Heater hose connected.
- +12V Battery cable to starter connected.
- Fuel supply hoses connected at filter & flex fuel sensor.
- Axles are in the wheel bearings & trailing links & sway bar links are attached to the struts - but not tighened. Still need to connect the lateral links and tighen everything up.
Things that needed some reworking and took a fair amount of time:
1. Heater hose connection. When I pulled the drivetrain in the fall, I forgot to disconnect this line and ended up bending the 5/8" aluminum tube past the OEM quick disconnect. So I ended up cutting the aluminum tube to remove the kink, then made a reducer to the 3/8" hose from the engine.
2. Driver side coolant hose. Since I reworked the coolant crossover tube to maximize space for an intercooler, I needed to made a new one. Of course I was one heat shrink tube shy, so I had to run across town to pickup another one. With this new hose, I was able to install both coolant hoses from the cradle to the chassis.

3. - Battery cable and alternator ground straps. The - battery cable was too long, so I cut it to a better length and installed a new cable end. Went ahead and made a new chassis to engine ground as well. While making these, I got to try out a new tool I picked up last year.

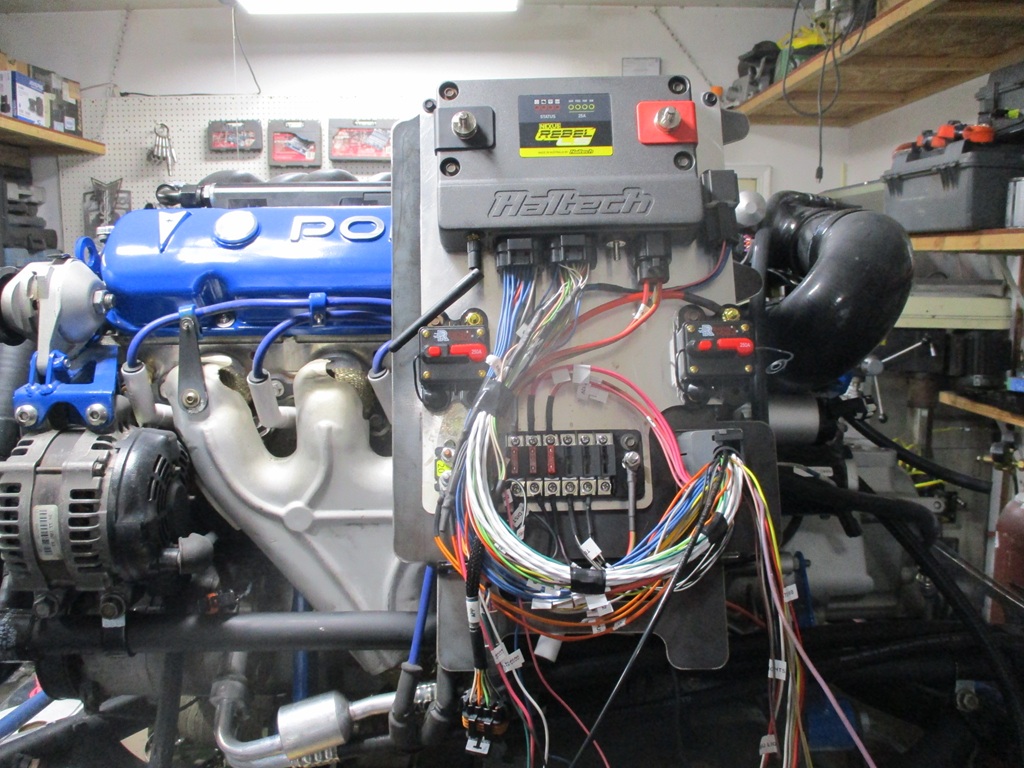
4. Made the +12V cable from breaker to ecm. Here you can see the cable end crimp:

5. Installing the ecm panel, breakers, and fuse panel and connecting them:

I still need to:
- Remove some old wiring in the console area to the pedal and gauges,
- Make the connections to the 203C and 500C connectors,
- Install the Haltech sub harness to the pedal
- Run the 4ga wires from the Haltech ecm to the front battery - after this point, I will try to start the engine!
- Run wires for the Haltech 12 position rotary switch and the 12 I/O expansion module forward to the HVAC area,
- Rewire the Innovate W/B and A/F gauge
- Rewire the aftermarket instrument gauges
[This message has been edited by fieroguru (edited 05-04-2025).]
|
|
|
|
fieroguru
|
MAY 11, 08:28 PM
|
|
It was a busy week, but I managed to get all the critical wiring done and the car started on Saturday.
Sunday I put the rear suspension together, aligned the car, swapped out the radiator fan (bad bearings), and played around with the Halrch NSP tables. While the car started with the base information and tables, the values and units were not what I was used to. So Saturday night I did a lot of playing with the software and changed the Target A/F, VE, LTFT, Timing & Knock long term trim to all have the same axis, units, and rows and columns. I also spent some time converting the timing table I had with the E40 grams/cly vs RPM to MAP ve RPM to get the timing closer than the supplied table.
This ecm is closed loop wideband from idle to WOT and through boost. So there is a table where you can specify the target AFR for each individual cell. Here is what my rough AFR target table looks like. Some of the targets are a little rich for dialing them in and will be leaned out as the tune takes shape. I will likely flip axis so 400 RPM and 35 KPA is in the upper left, again to match what I am used to.

The NSP is tuner and logger in one. The long term trims tables for knock and fueling auto populate based on what corrections the ecm is doing, then they both have a buttom to apply the changes to the base MAP. So that is super easy. The long term trims for fuel and knock are capped at 16x16 tables, but the actual VE and Timing tables can go to 32x32. It is super easy to add columns and rows and the software autopopulates them with values (midpoint of the adjacent cells. Once I have the VE and Igntion tables roughed in, I will likely expand them to 32x32 and restrict the long term trims to 1/4 of the table at a time so I can have 100 to 150 rpm resolution for the cells for interstate speeds and lean the mixture out in my quest for 30 mpg.
A couple of cool things that should help a bunch before I get some of the other higher level features enabled (traction control and boost by gear).
Throttle body opening limit @ zero speed - It can be set from 0-40%. I think this could be used as a simple agressive launch mode. Where I floor the pedal, engine holds x% throttle and x RPM (probably 3500 or so RPM), until I release the clutch.
Gear identification - based on rpm and VSS settings the car will know what gear it is in once the clutch is engaged.
Pedal to TB tuning by gear - this will allow me to limit the throttle body opening % in 1st and 2nd gears to smoothly reduce power and launch the car w/o wheel spin. Gaining much more forward motion and speed in the two lowest gears where the car was already over powered before the turbo. This partial throttle opening will also help avoid boost until later in 2nd gear. 3rd gear has proven to be able to hold boost, so it will be 100% throttle and full boost.
This is a very feature packed software, that seems to only be limited by Inputs/Outputs, but Haltech has expansion modules for more I/O. Here are all the available features that can be turned On/Of:


I still need to:
- Run wires for the Haltech 12 position rotary switch, 12 I/O expansion module, and the CAN buttons forward to the HVAC area,
- Rewire the Innovate W/B and A/F gauge
- Rewire the aftermarket instrument gauges
- Rewire the aftermarket instrument gauges
- Hook the stereo back up so I can have tunes while driving
- Install the missing interior panels
- Cut & crip the A/C lines
- Charge the A/C
- RUn front wheel speed sensor to the I/O module
- Wire clutch & brake predal switches to I/O module
- Create cruise hareness from pedals, and stalk to I/O module
- Drive the car and refine the tune.
|
|
|
|
Trinten
|
MAY 15, 11:39 PM
|
|
|
That is some really slick software. I agree it sounds like you found a feature that can be used as a launch control, which is awesome.
|
|
|
|