
 
     |
| LS4 / F40 swap - fieroguru (Page 193/216) |

|
Rickady88GT
|
NOV 06, 02:43 PM
|
|
|
|
|
fliphone
|
NOV 10, 01:34 PM
|
|
|
That thing sounds mean! Congrats on swap!
|
|
|
|
fieroguru
|
NOV 12, 09:00 PM
|
|
Probably put another 50+ miles on it (filled up again today and put 7 gallons in it).
N/A speed density tune is just about done, I need to switch over and work on the MAF tune some more.
It is a different audible experience with the small turbo and wastegate. Just pushing the pedal while at speed will start the whirl of the turbo spooling up and the wastegate opening, I am glad I put a muffler on the wastegate so it isn't obnoxiously loud.
Drove the car at various speeds in town as well as between 65 and 90 on the interstate and there is zero drone anywhere. The turbo, dual inline mufflers and Helmholtz resonator tube work well. Also got my first thumbs up from a guy on the interstate.
The twin disk clutch is smooth as stock. Easy to modulate, easy to slip, zero chatter or shuddering... I really like it!
Going with a camshaft with slightly less duration, reducing overlap and increasing lift helped increased the low rpm torque, which make the car easier to drive.
Put the rear decklid on and had to rework the brackets to slightly reposition the front hood prop arm, so now it has a decklid and it stays in the open position.
Put the rear view mirror button back on and the rear view mirror.
Still have a lot more driving as the weather allows and work to put the interior together with the new gauge layout and work on the stereo install.
|
|
|
|
KissMySSFiero
|
NOV 14, 08:02 AM
|
|
Looks great.
I know you said no drone, but is it quiet enough to leave at 5am without the annoying the neighbors?
What are you going to do once the snow starts falling?
Any plans to offer that waterpump setup or is it too labor intensive to market?
How about the water manifolds?
------------------
SSFiero@Aol.com
|
|
|
|
fieroguru
|
NOV 14, 11:06 PM
|
|
| quote | Originally posted by KissMySSFiero:
Looks great.
I know you said no drone, but is it quiet enough to leave at 5am without the annoying the neighbors?
What are you going to do once the snow starts falling?
Any plans to offer that waterpump setup or is it too labor intensive to market?
How about the water manifolds?
|
|
Thanks!
It might still be a smidge loud for 5 am, but I plan to add another boost activate cutout on the driver side. For that one I will modify the butterfly plate (either with holes or trimmed sections of the butterfly) so when closed, it is still 25-50% open. This will allow startup and cruise with the exhaust mostly closed and quieter, but then use exhaust back pressure pre turbo to open it (and the passenger side) when the throttle is mashed.
With the tires on the car, I shouldn't drive it once the temps are below 50 degrees, so it will likely be parked in the garage most of the winter unless I swap over to the 16" wheels. This winter I want to get the 2-Din radio/nav unit installed along with the amp, speakers, sub and review mirror with front and rear cameras. I also want to start working on new front and rear cnc knuckles for the C5 wheel bearings front/rear for the ABS signals needed for my traction control system. But to do those, I have to shift my focus back to the CNC mill and learning Fusion 360 or some other compatible 3D CAD/CAM software.
The water manifold and pump still need some testing in hotter conditions as well as sustained higher rpms and hours of idling. Once that is done, both will need some redesign work and 3D CAD/CAM modeling so they can be made on the CNC mill. The CNC plasma will likely only be used for brackets and not complex parts requiring hours of welding going forward.
|
|
|
|
fieroguru
|
NOV 19, 09:10 PM
|
|
Put another 2 hours of drive time on the car while logging VE and then MAF. Got most of the cells dialed in within +/-1%. When I run this tank of gas out, I will fill up with E85. Unfortunately, the air temps are not going to be above 50 for the next 10 days, but that will let me work on the interior vs. tuning.
I will be looking for a go-pro camera during black friday sales so I can start getting better videos of the car in action.
Getting ready for Thanksmas with my side of the family. My mom insisted the gifts for the gift exchange game had to be made and not purchased this year. So I drew this up and cut it out today... It is 8.5" x 13" on 14ga steel.

|
|
|
|
Rickady88GT
|
NOV 20, 10:00 PM
|
|
| quote | Originally posted by fieroguru:
Put another 2 hours of drive time on the car while logging VE and then MAF. Got most of the cells dialed in within +/-1%. When I run this tank of gas out, I will fill up with E85. Unfortunately, the air temps are not going to be above 50 for the next 10 days, but that will let me work on the interior vs. tuning.
I will be looking for a go-pro camera during black friday sales so I can start getting better videos of the car in action.
Getting ready for Thanksmas with my side of the family. My mom insisted the gifts for the gift exchange game had to be made and not purchased this year. So I drew this up and cut it out today... It is 8.5" x 13" on 14ga steel.
|
|
Awesome
|
|
|
|
fieroguru
|
NOV 27, 09:52 PM
|
|
Since it has been in the 30s and now 20s over night, I started taking parts of the car apart to address minor things.
The drain line to from the turbo was leaking, so I pulled the tube and fittings to rework them. To get to the two bolts holding the drain housing to the turbo, I went ahead and dropped the exhaust (resonator tube in the way). To drop the exhaust, I had to rock the cradle back about 6". Rocking the cradle back for access is something I planned for in the swap layout and all it takes is loosing the front cradle bolts and removing the 2 rear cradle bolts. Everything else has clearance and range of motion for the cradle tip.
I went ahead and removed the boost signal stainless lines from the wastegate, charge pipe, and manual controller. Instead, I ran three 1/4" nylon lines into the passenger compartment. I have a manual boost controller knob (more about this later) and 2 of the 3 lines will be used for it. The 3rd line goes to the wastegate dome and is for future use with an electronic boost controller... if I want to switch from the manual one.
This was also a good opportunity to install the bulk head housing to the harness.
The pressure sender on the fuel regulator was also annoying me, so off came the fuel rails and regulator so I could disassemble the regulator and reassemble it to allow the pressure sender to be on the bottom hidden side. Much better!

Then I started messing with the interior.
I have a smart rear view mirror with back camera, front camera, and GPS antenna to install. The radio receiver also has GPS antenna as well as a back up camera. So I need to run some wires up the driver A-pillar and through the car to the rear. Planning for the backup camera wires to pass through the grommet for the parking brake cable, so out came the drivers seat, door opening trim, and the carpet. The dash is next to be removed...
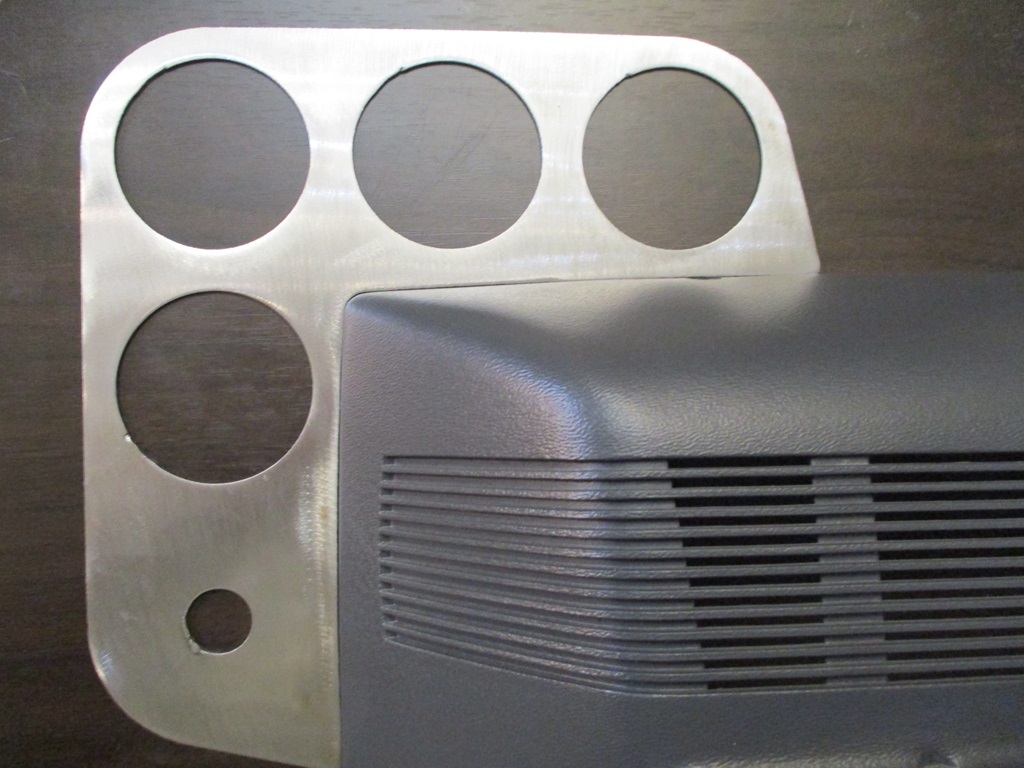
Before the dash comes out, I want to get the gauge pod better figured out. The current plan is to have the face of the gauge pod further forward, basically right at the seam between the cluster housing and the front cover. So brought the cover up from the basement and started taking some measurements and cut the first prototype out. This first part is very, very close to matching the cover contour: Here is the side that will face toward the front of the car:
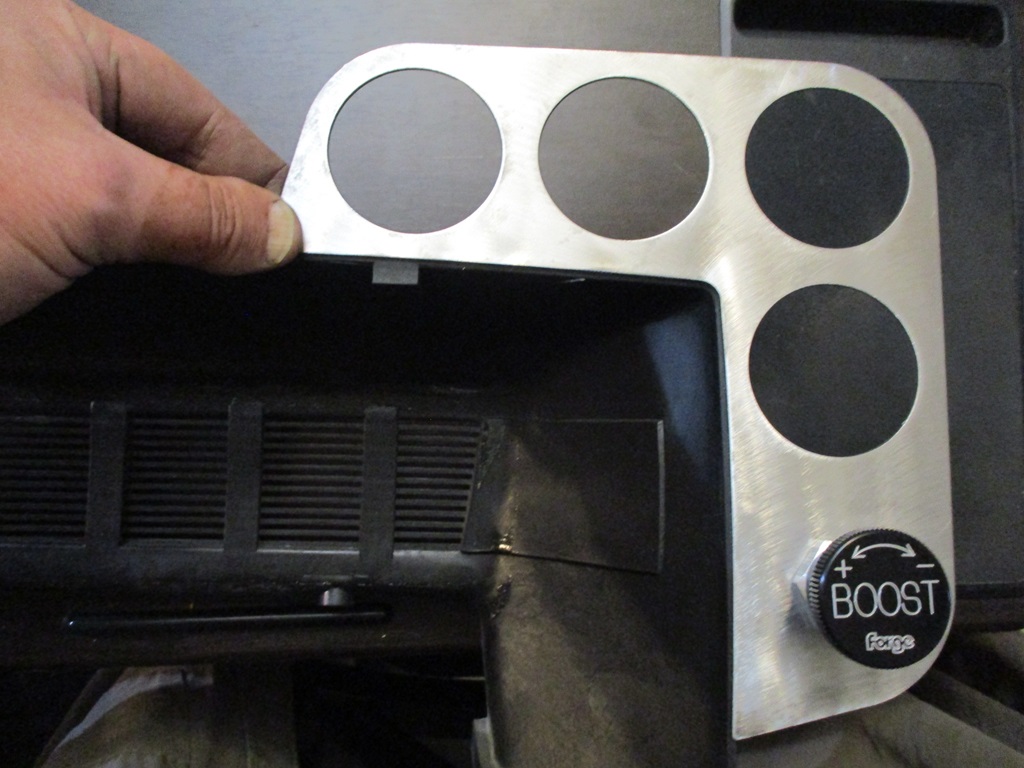
Here is the side that will face the driver (it also shows the location of the manual boost adjustment knob):
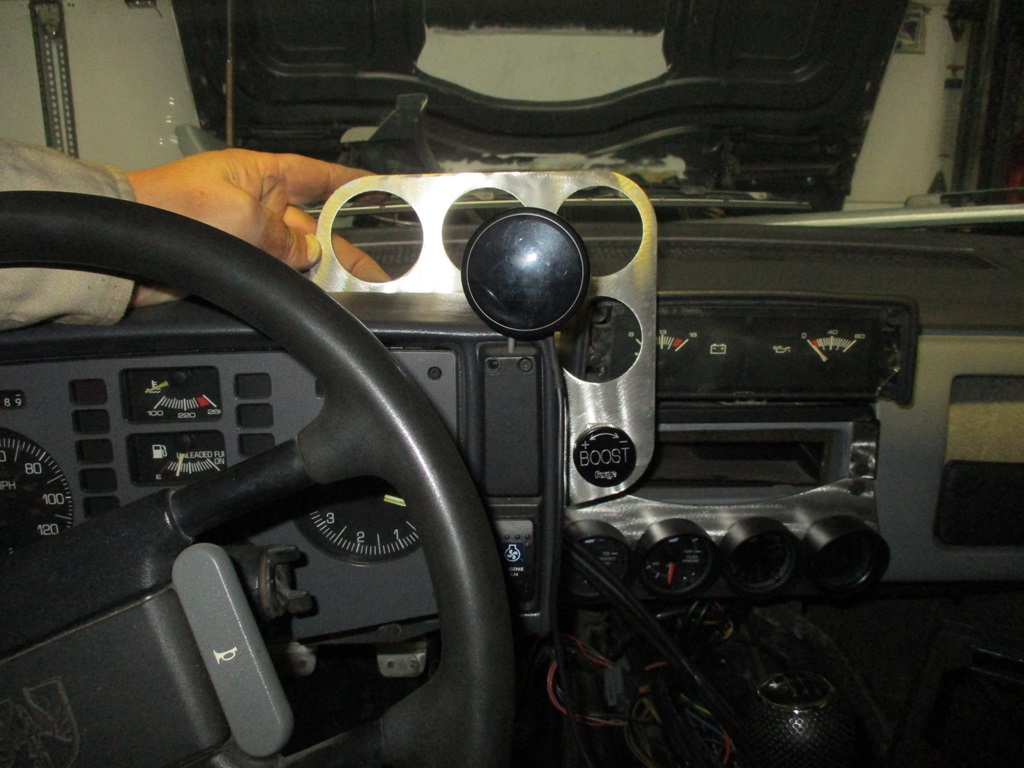
Here is a general look in the car. I need to set the seat back in so I can better mock up this gauge location from the driver seat to see how much of the new radio (mounted where the aux gauges are) will be obscured. I can shift the radio slightly to the passenger side if needed.
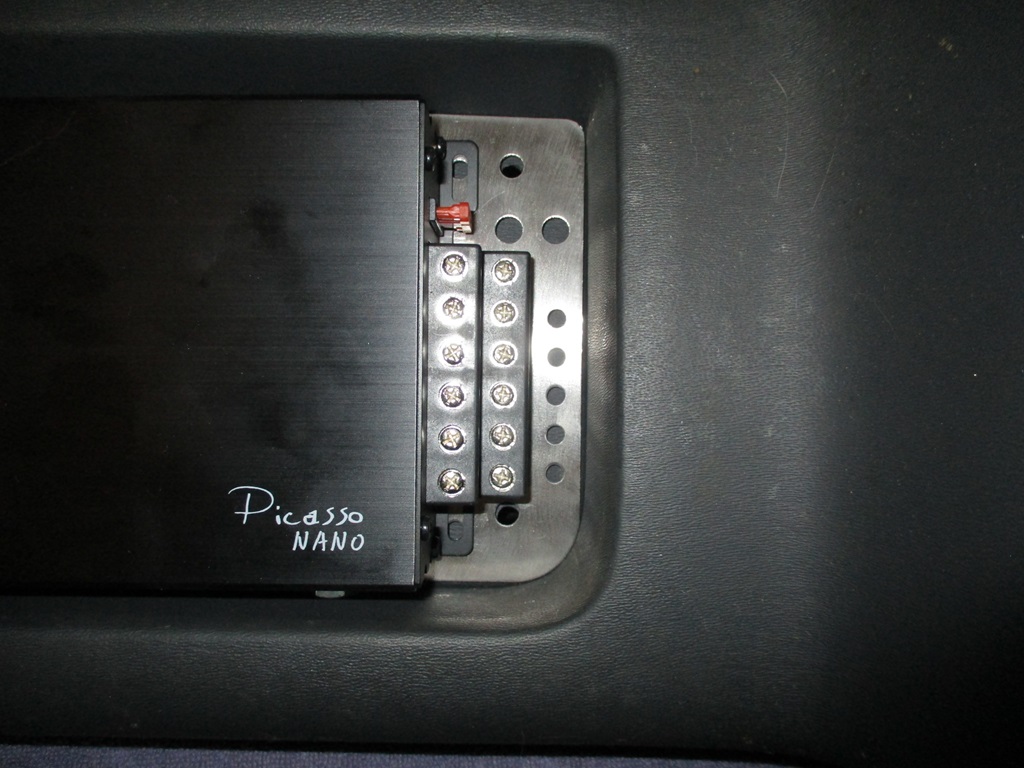
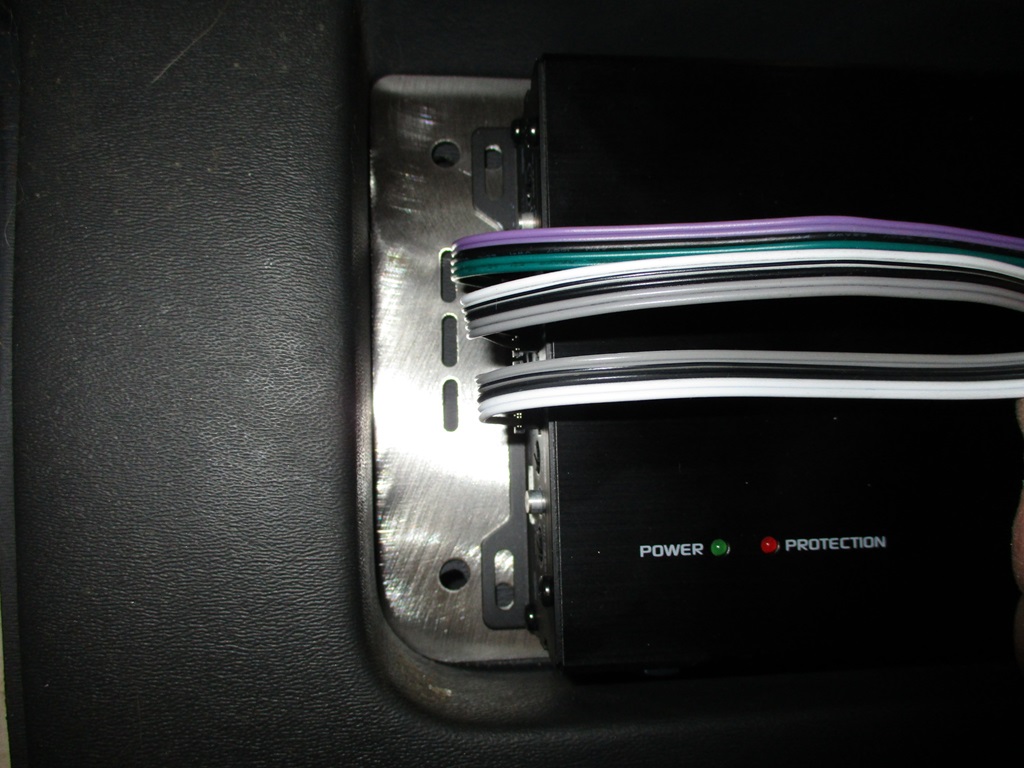
While I was drawing up the gauges, I also pulled the spare dash from the basement and started detailing out the base plate that will allow mounting the amp in the map pocket recess. This is the first one, so it still need some slight refinement (1/16" less length, sligntly larger radii at the bottom, move the location of the top mounting holes about 1/16" so significantly improve the fitment.
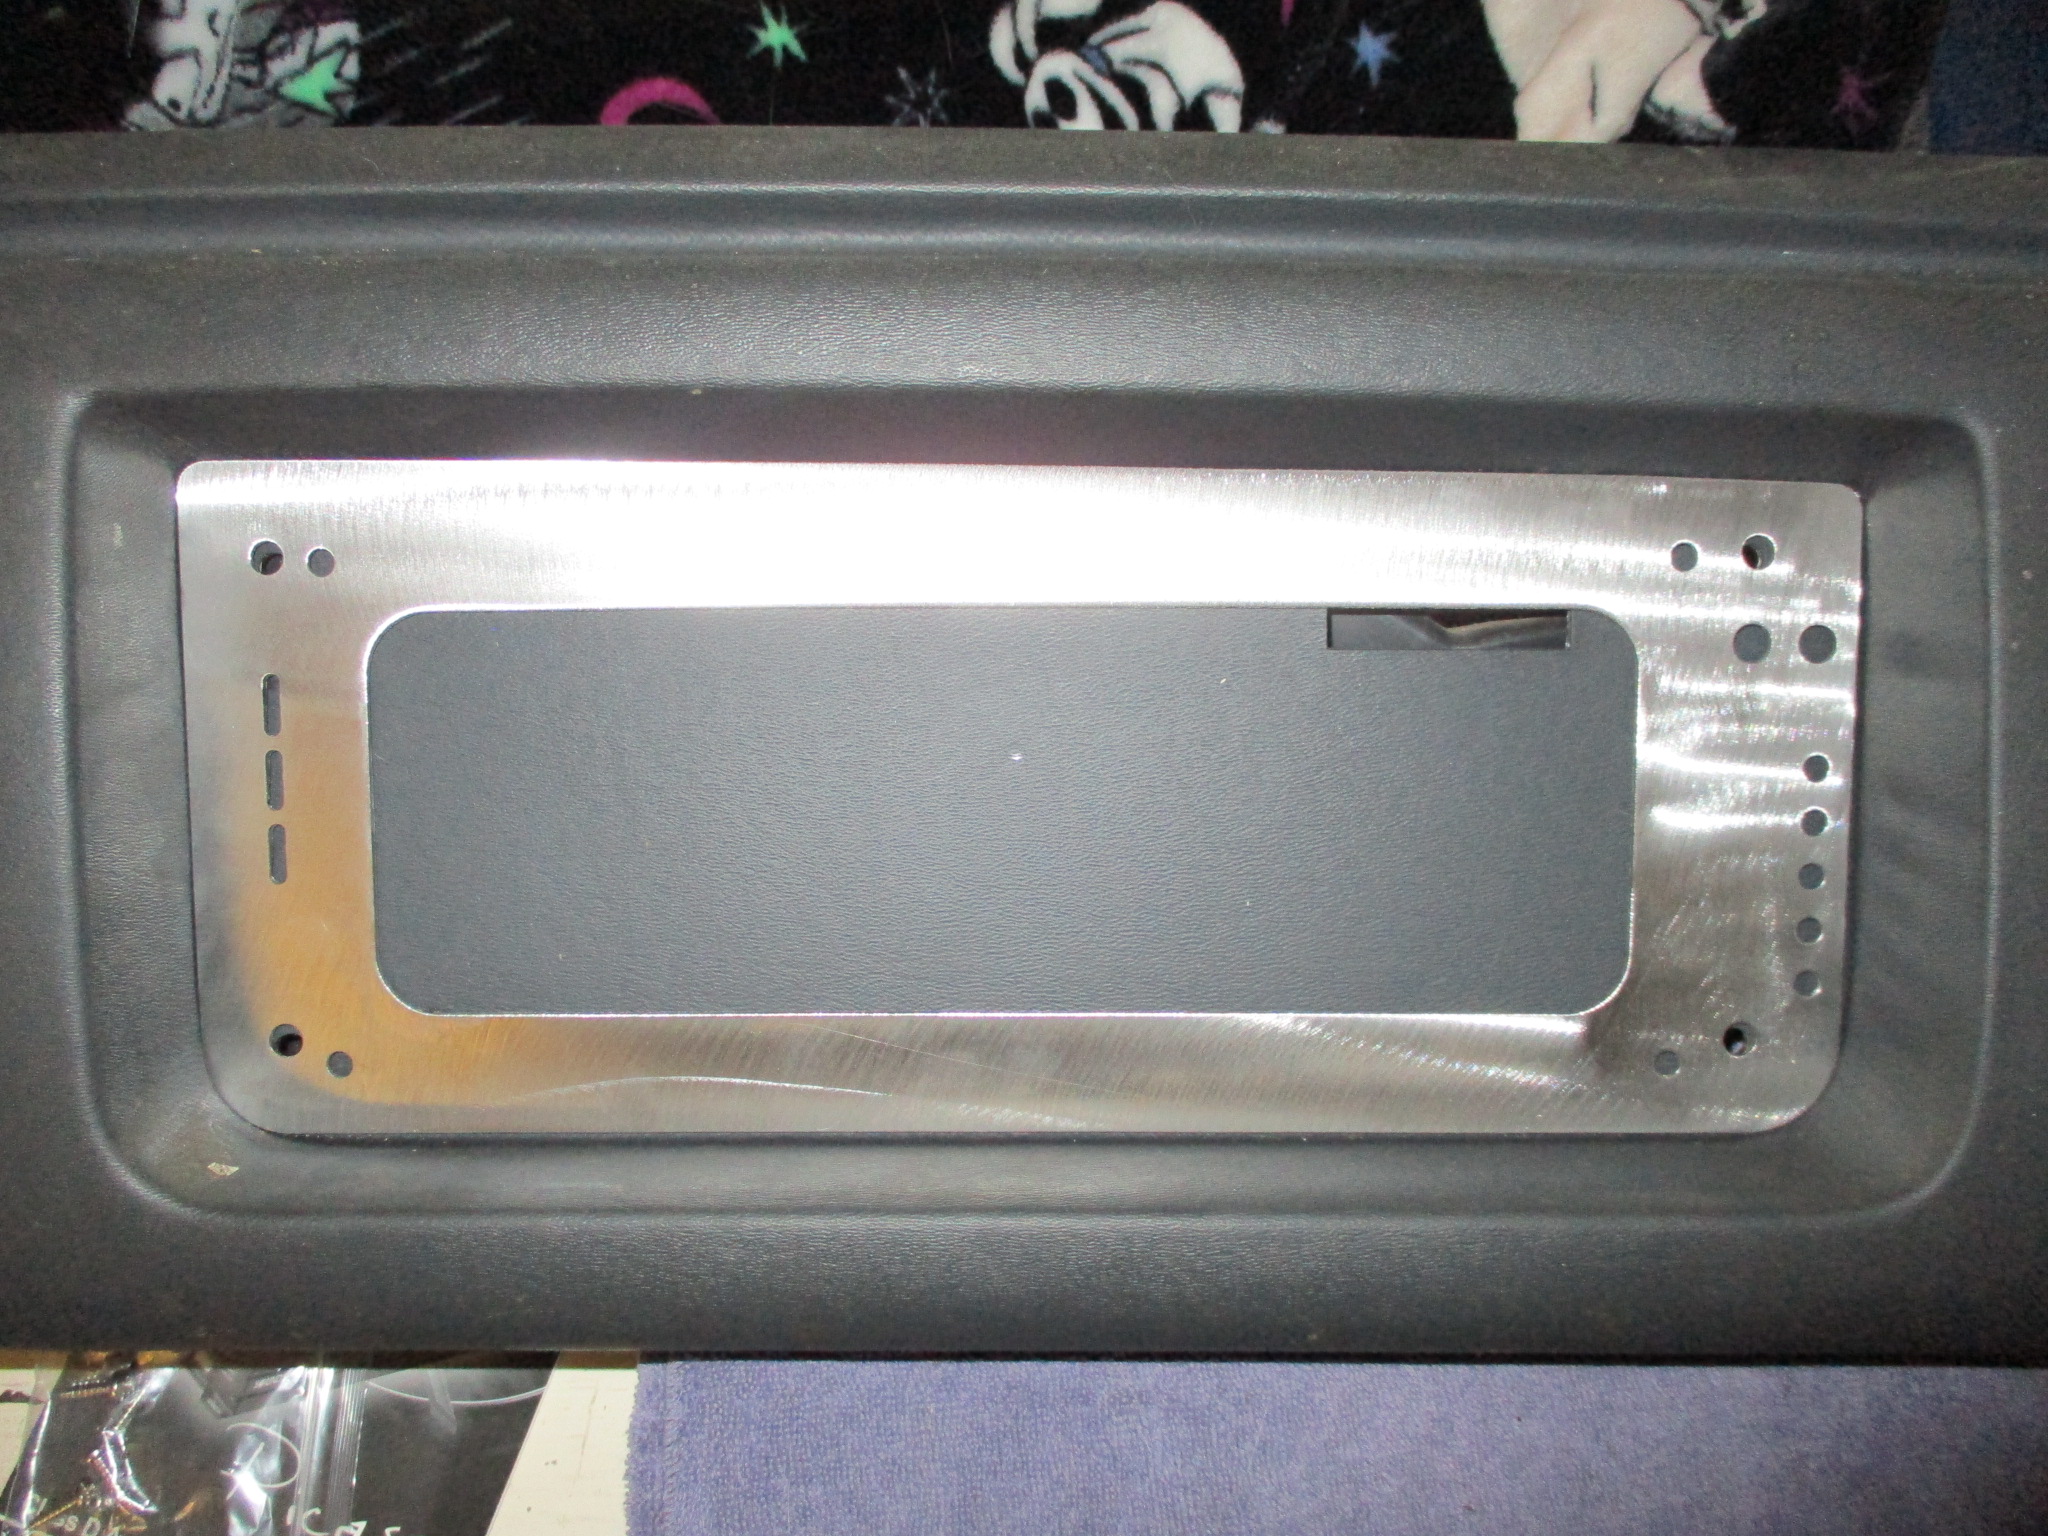
Here is the amp in the general location. All the wires will drop through the holes in the plate and exit out from the backside of the dash. I might even make a flush face trim ring to fill in the gaps...

|
|
|
|
Will
|
DEC 13, 07:03 PM
|
|
Congrats on getting it running and out on the road!
| quote | Originally posted by fieroguru:
Bled the clutch - twin disk clutch seems to be releasing and the HTOB didn't overextend, so that was good! Won't be able to test it further until the engine runs.
|
|
| quote | Originally posted by fieroguru:
The twin disk clutch is smooth as stock. Easy to modulate, easy to slip, zero chatter or shuddering... I really like it!
|
|
Which clutch are you using? Is there a post where you discussed it?
|
|
|
|
fieroguru
|
DEC 13, 07:17 PM
|
|
| quote | Originally posted by Will:
Which clutch are you using? Is there a post where you discussed it? |
|
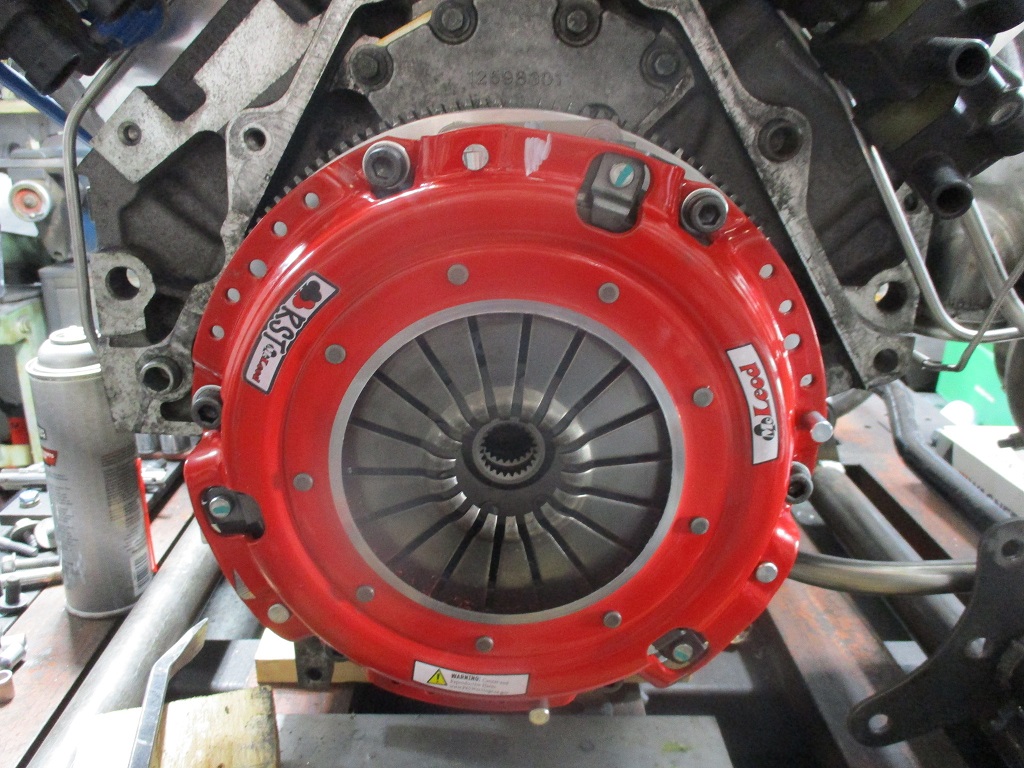
McLeod RTS 91/2" twin disk clutch, organic disks, with some slight modifications. It is a super tight fit.
This post is on page 46.
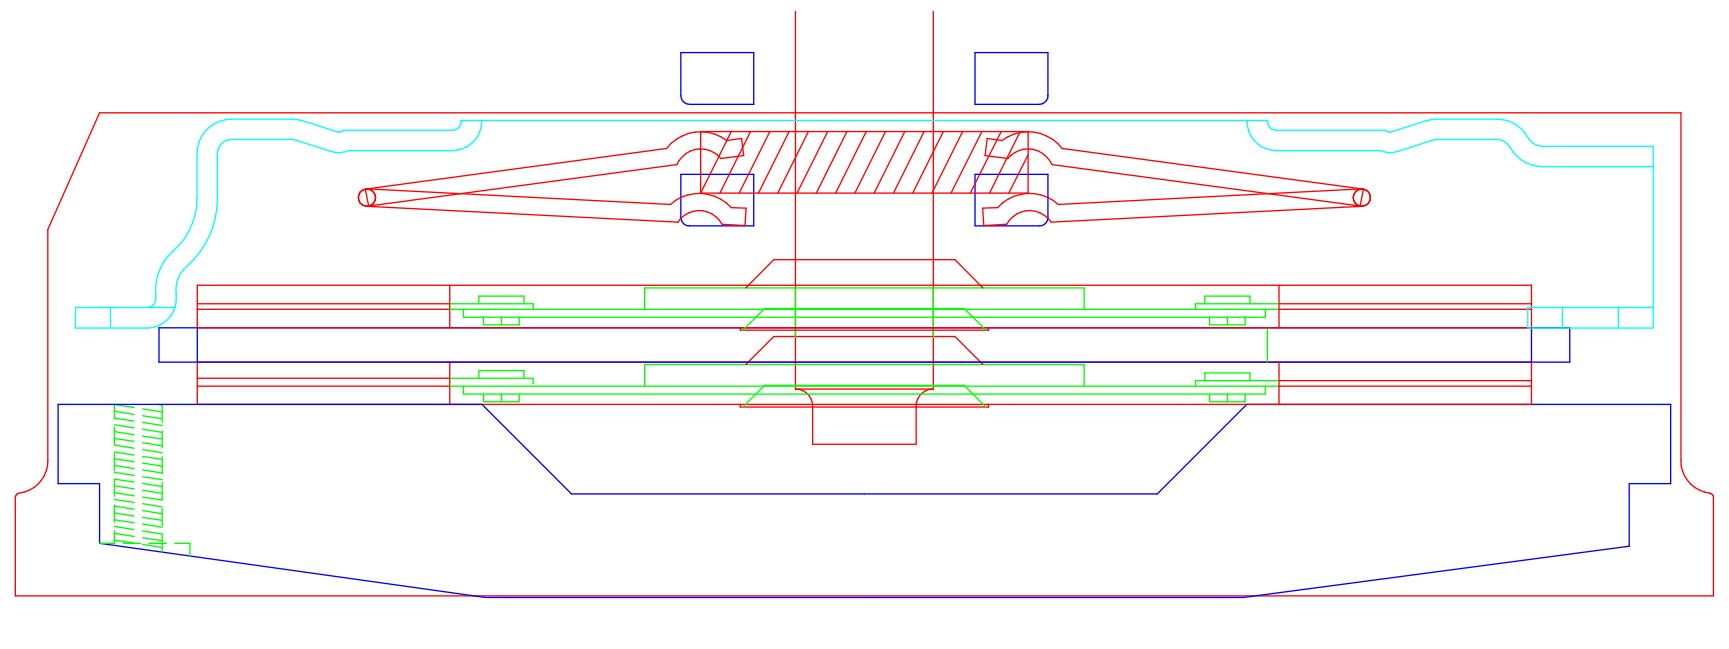
| quote | Originally posted by fieroguru:
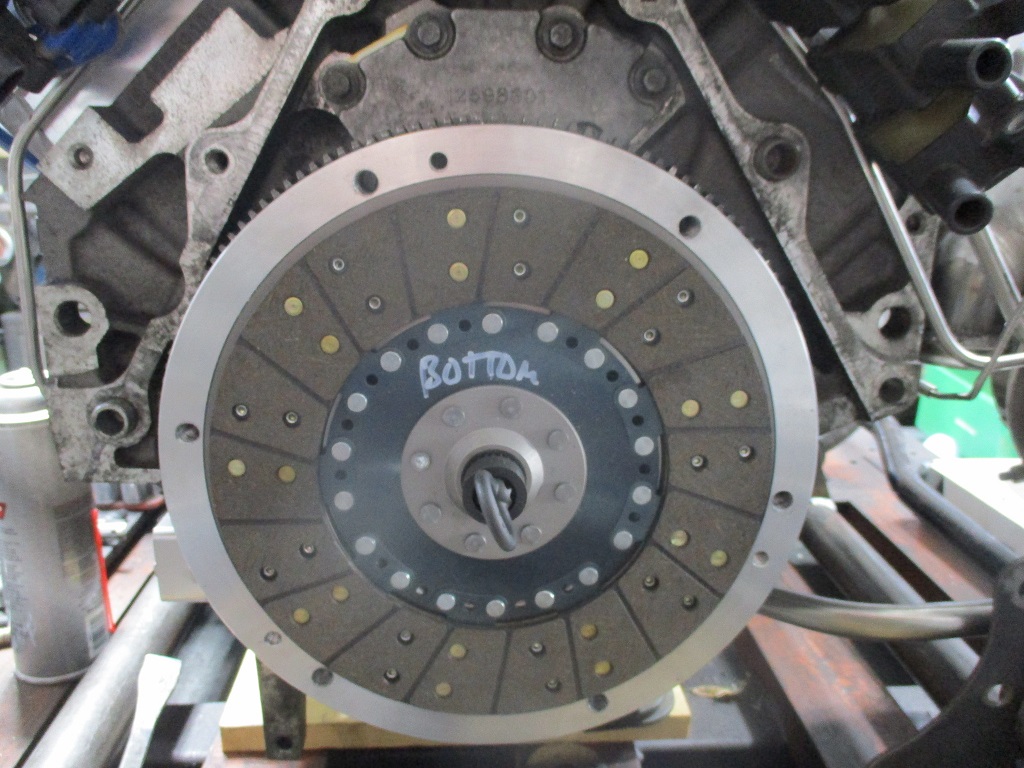
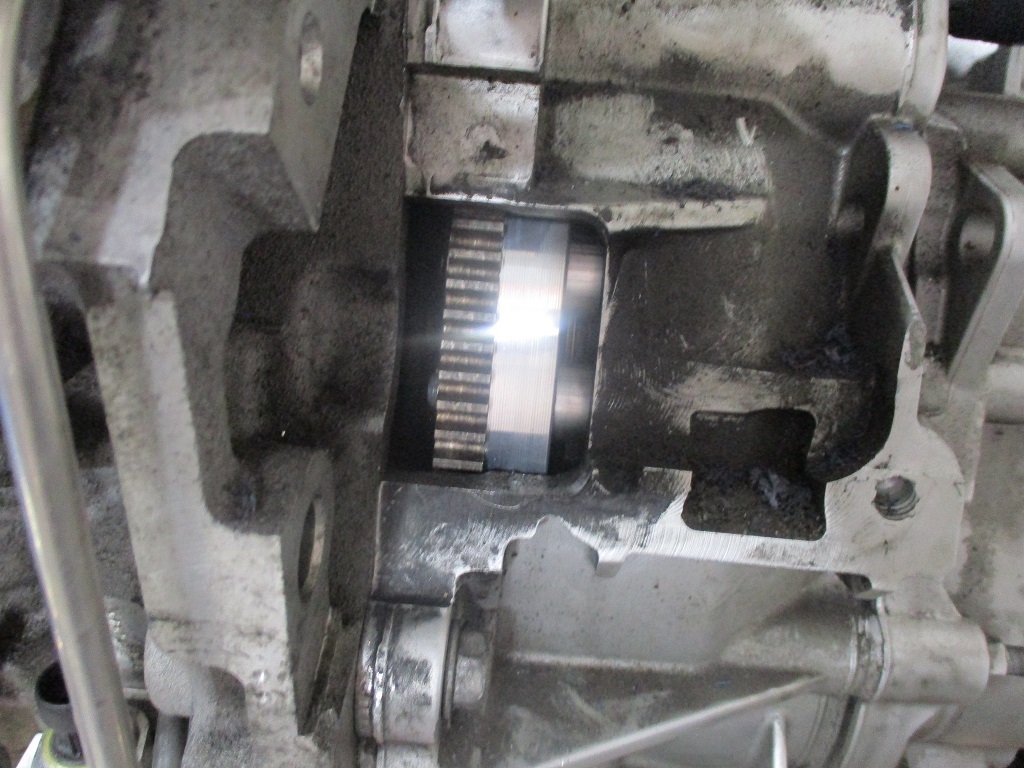
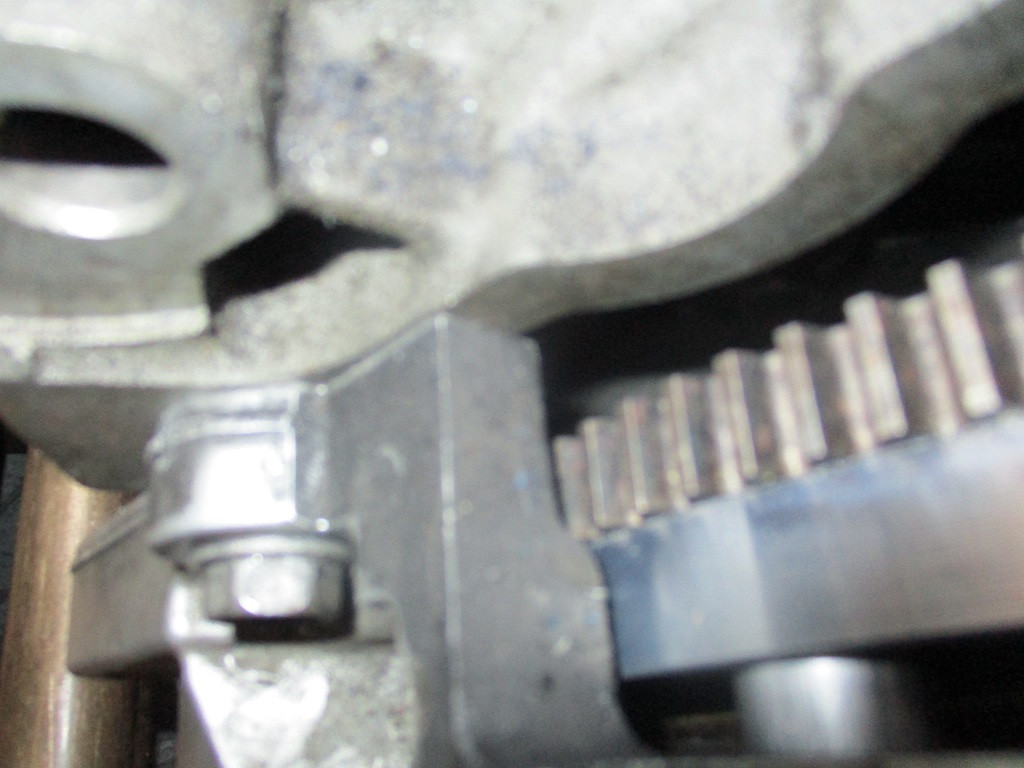
Flywheel and twin disc clutch are now done.
Sequence of installation
Flywheel:
Bottom Disc:
Floater Plate:
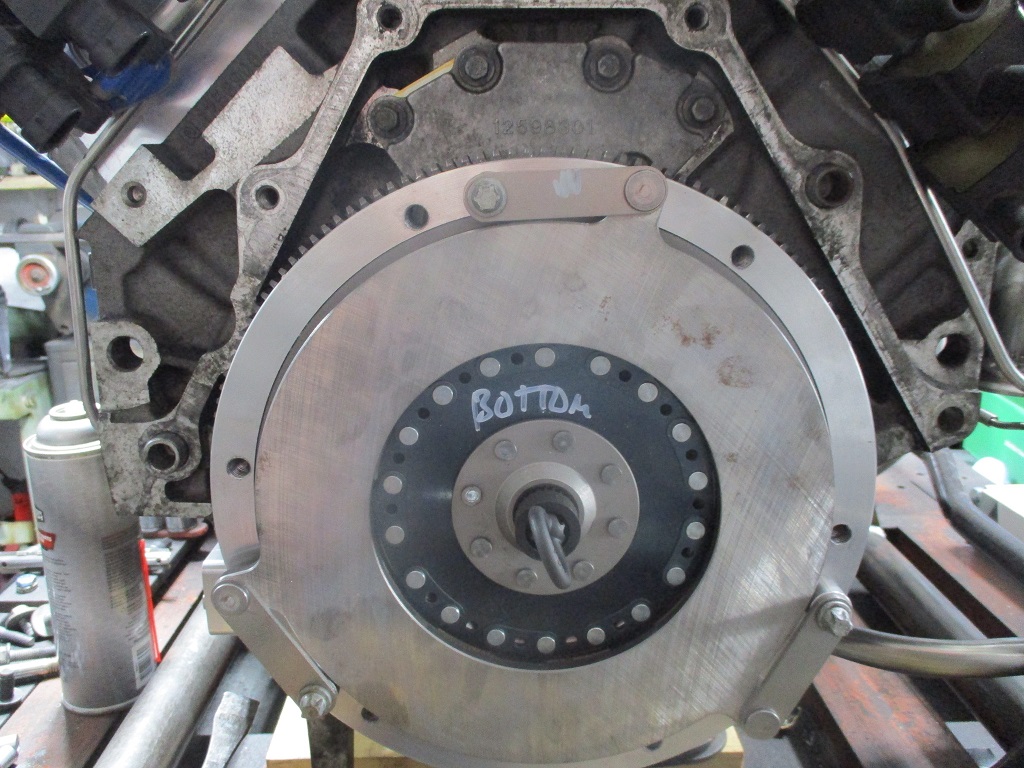
For some reason I missed taking a picture of the top disk.
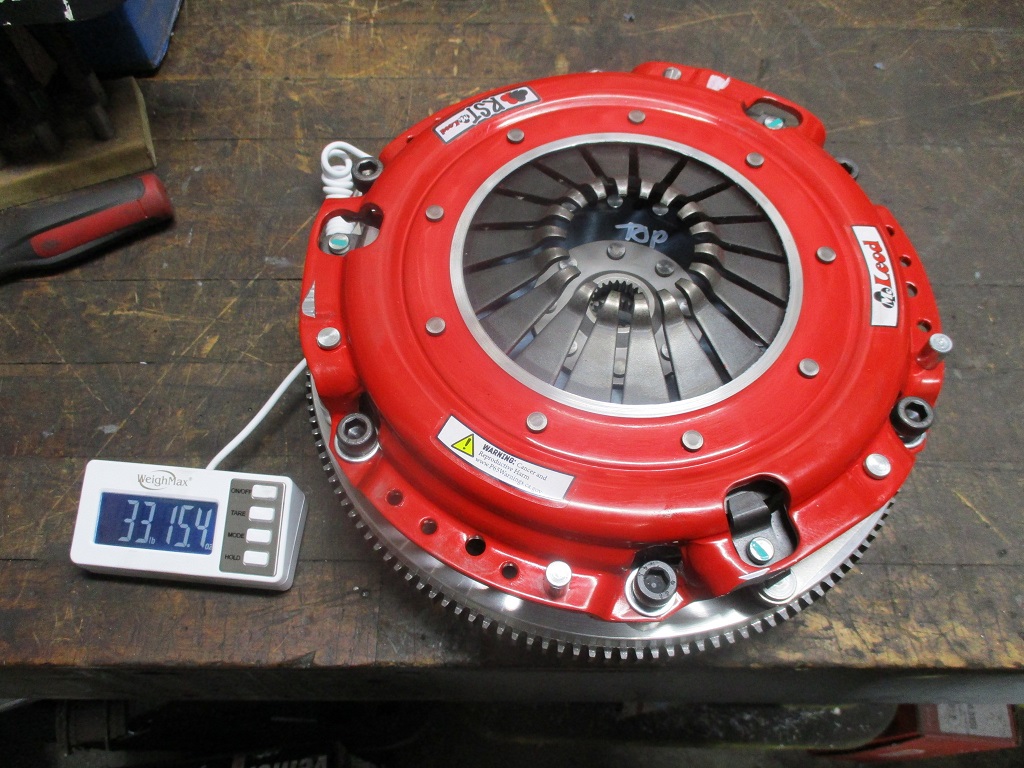
Pressure plate:
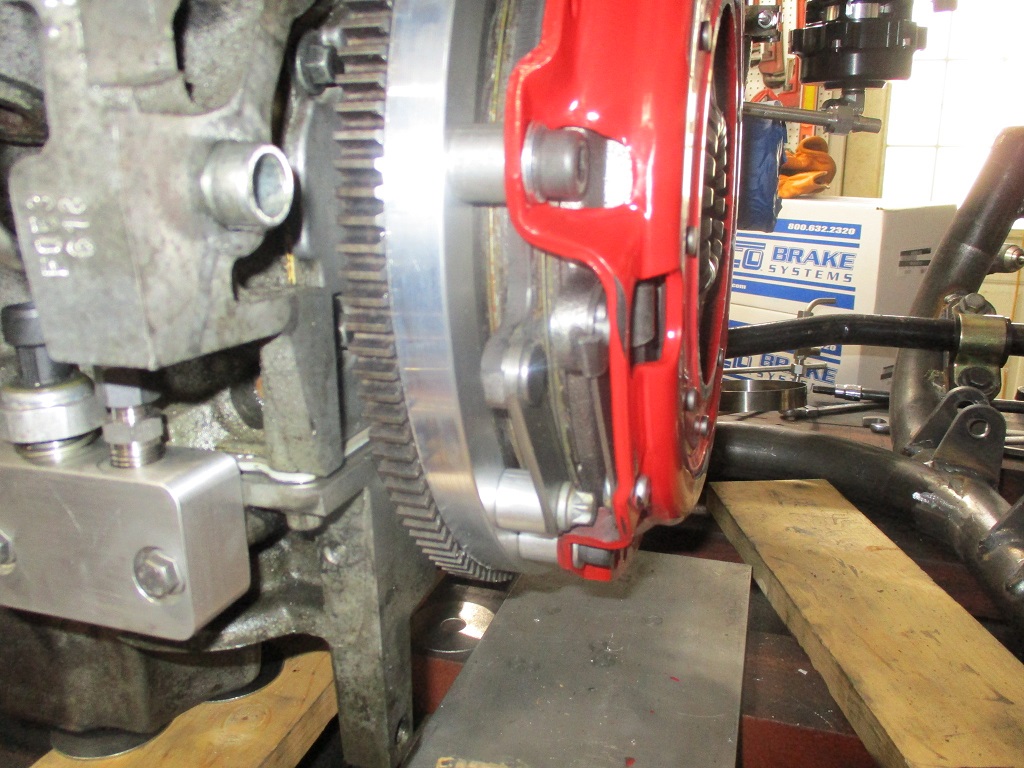
Transmission installed:
With my quest for weight offsetting for the turbo bits, the twin disc clutch is definitely heavier than my last setup.
However, like the turbo, the additional weigh is needed to hold up to 800 hp while keeping the car daily driver friendly, but the additional weight was still kept to a minimum.
For comparison, a stock 2.8 fiero setup is about 15 lbs for the flywheel and 15.6 lbs for the clutch/pressure plate = 30.65 lbs.
LS4/F40 Spec Stage 4+ combo is 11.2 lbs for the flywheel and 28 lbs total after 55K miles of use.
Stock 2000 LS1 is 24 lbs for the flywheel and 32 lbs for the clutch/pressure plate = 56 lbs and this weight is spread over a 2" larger diameter.
LS4/F40 flywheel/twin disc clutch combo is 13 lbs for the flywheel, and 21 lbs for the clutch discs, floater plate, pressure plate and all bolts. = 34 lbs So the setup will be about 3.5 lbs heavier than stock Fiero and 22 lbs lighter than a stock LS1 clutch setup.
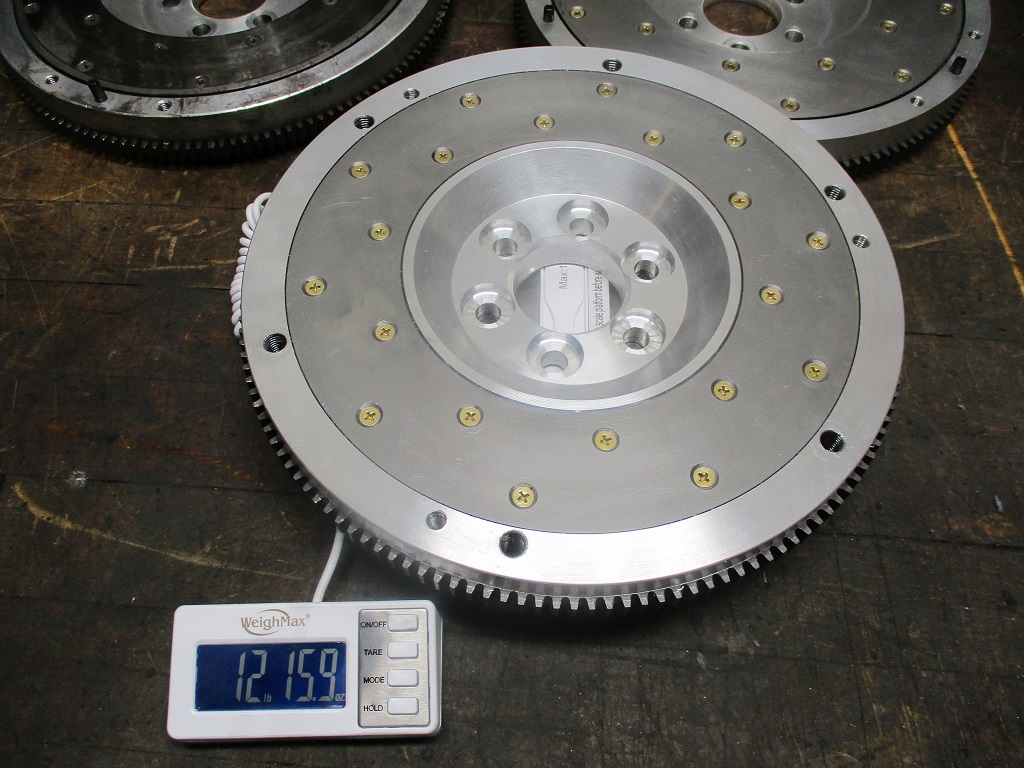
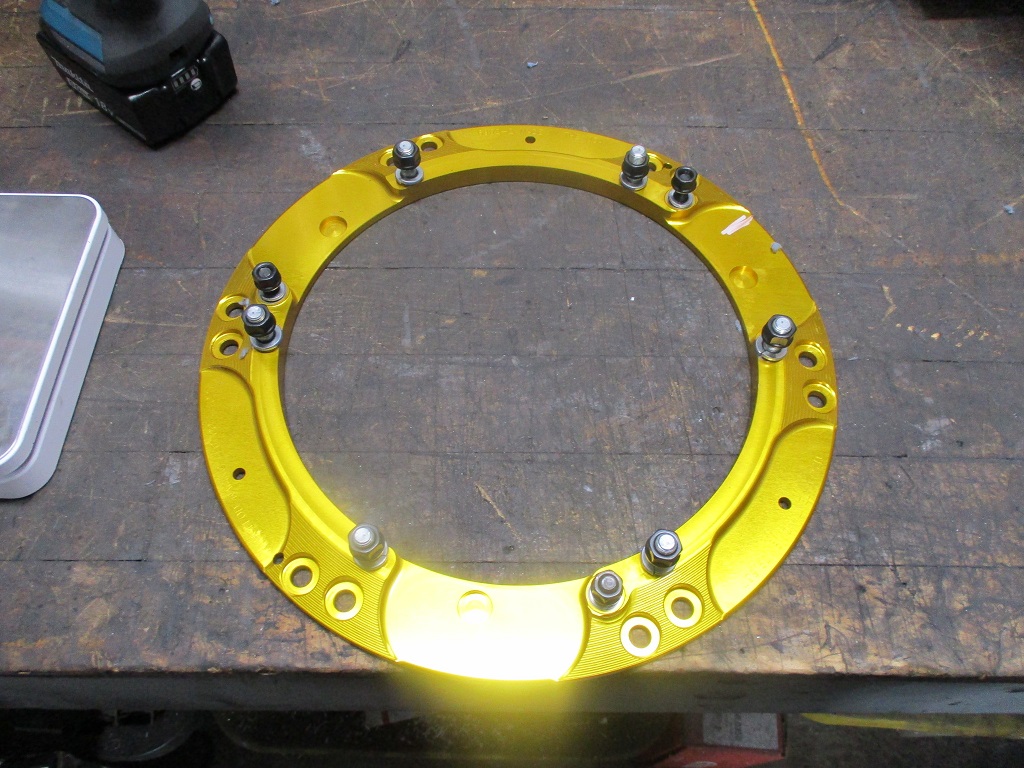
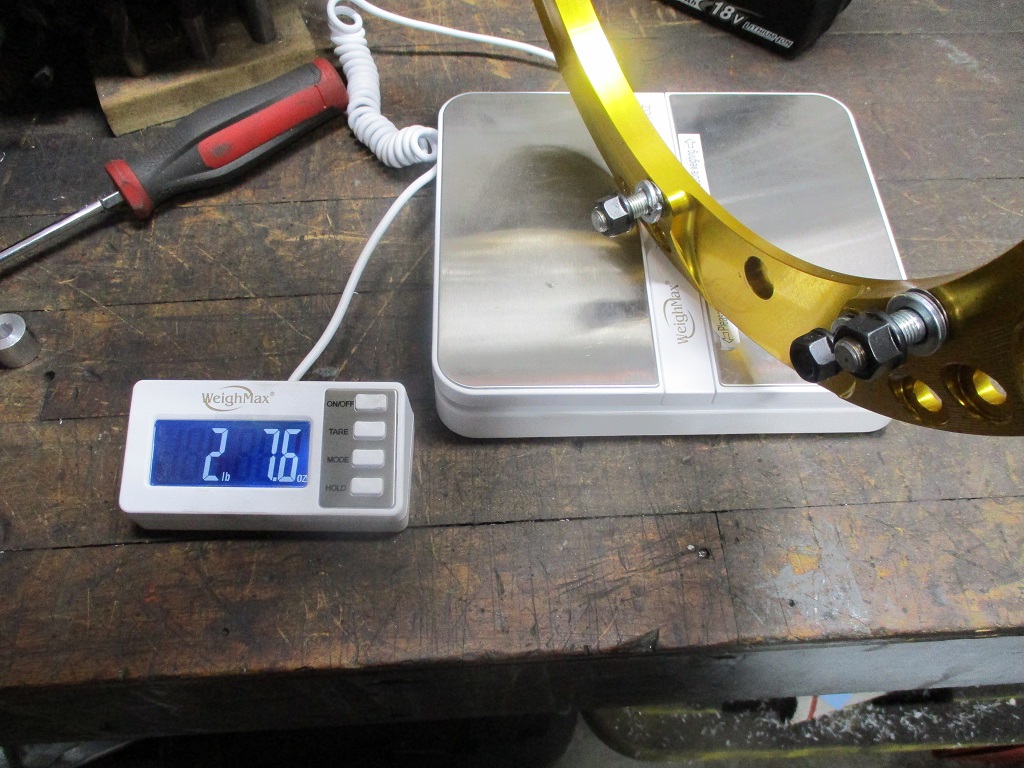
The clutch did come with this plate so that it could reuse the stock flywheel/pressure plate bolt patterns... I tossed it as it wasn't needed. This saved 2.5 lbs off the clutch kit as delivered.
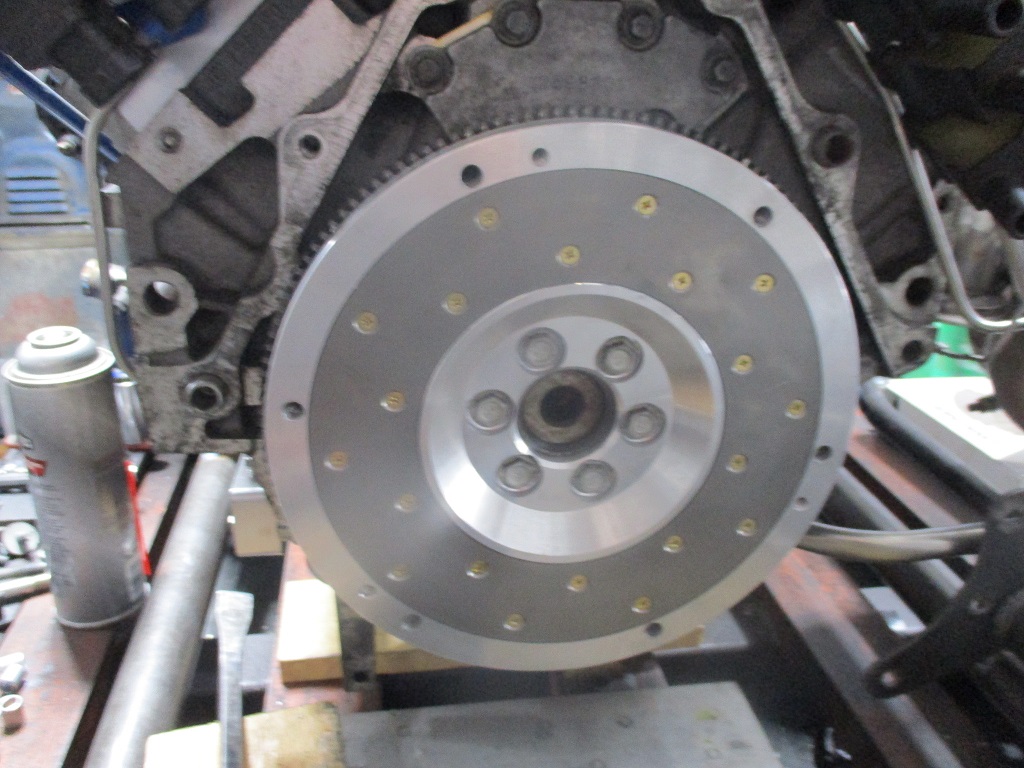
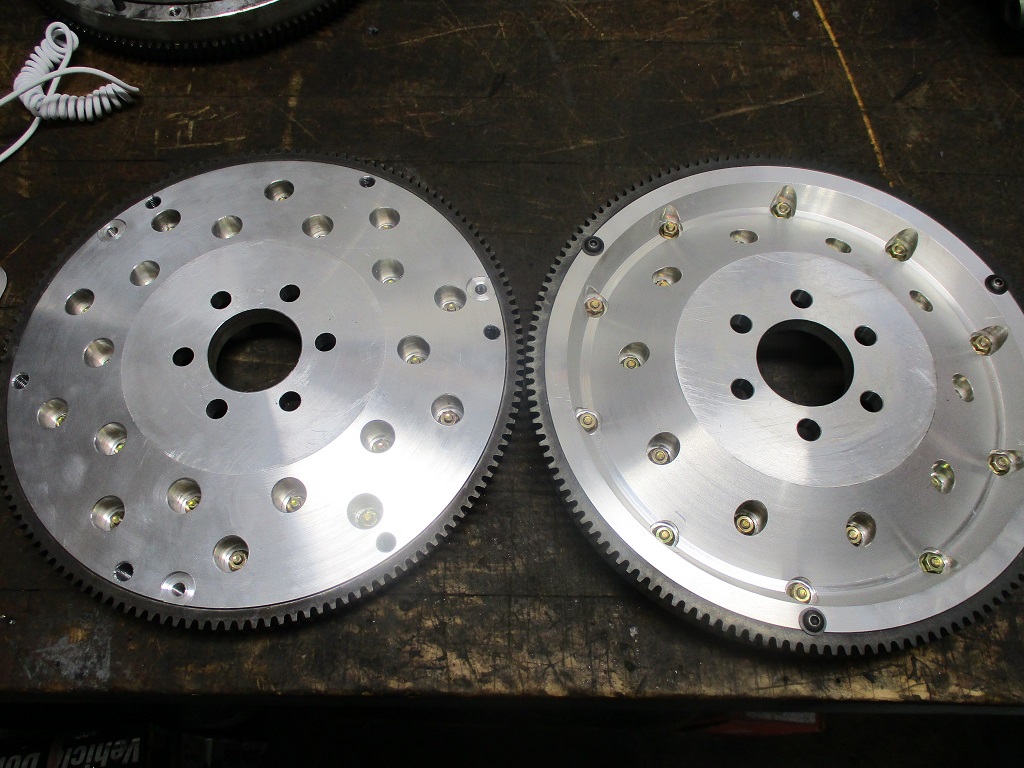
Here is a history of my LS4 flywheels:
Original prototype (after 55k miles) - fabricated with manual lathe and mill:
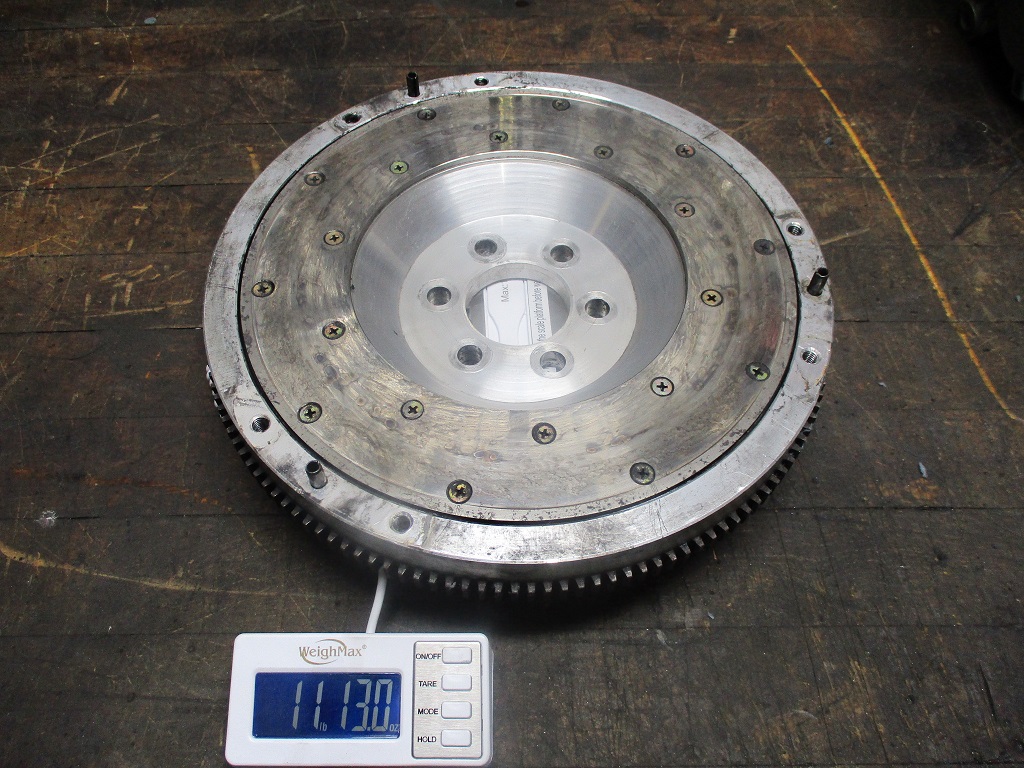
CNC version of original from small batch run:
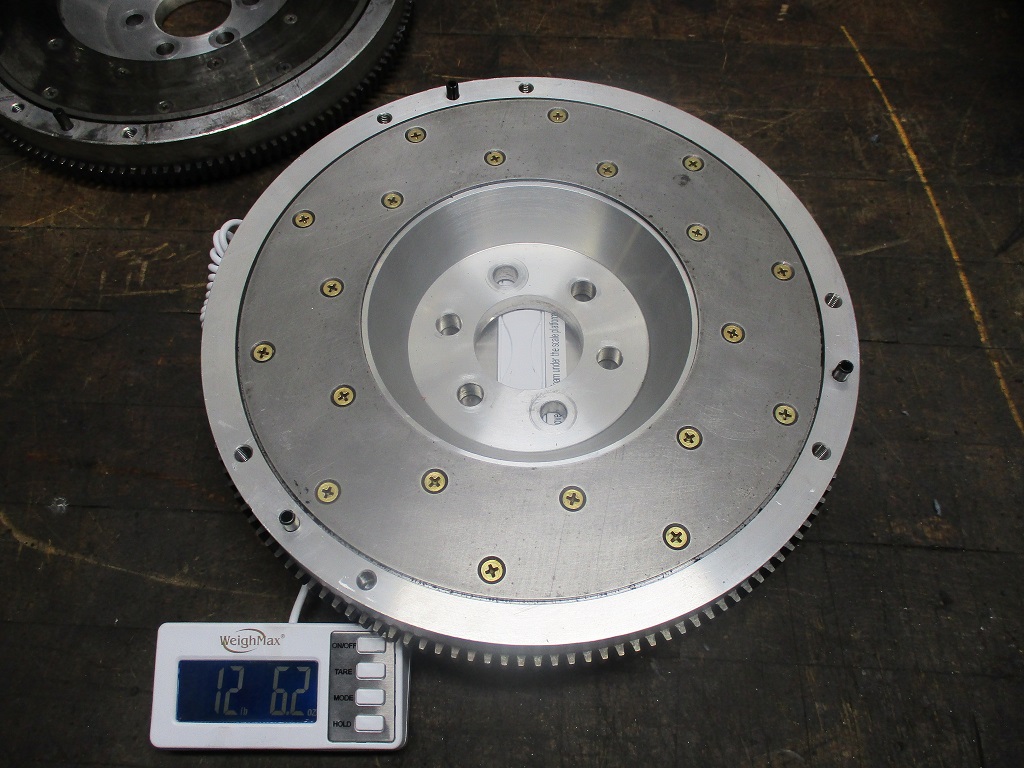
Protype of the twin disc version - fabricated with manual lathe and mill:
The twin disc version is heavier as there is minimal material taken off the backside:
Now it is pretty much time to start cleaning things, sand blasting them and starting to make then look pretty.
|
|
|
|
|
|