
 
     |
| Trinten's SBC/F23 build - The work has begun! (Page 19/76) |

|
Trinten
|
SEP 28, 11:57 PM
|
|
As always, thank you for the pictures and attention to detail!
I'm still floored by that IAC setup...
I was talking to a guy at work saying how when this is done, I'm going to print out some key posts and pictures, and put together a binder to take with me to car shows to put out so people can see all the little tricks that were done to get this to work. Something to put by the car at AutoFair in the spring, maybe with a self standing placard that says "V8 Fiero - no your friend did not have one with a V8 'from the factory'" then the highlights. lol
|
|
|
|
fieroguru
|
SEP 29, 03:40 PM
|
|
| quote | Originally posted by Trinten:
I'm still floored by that IAC setup...
|
|
Glad you like it!
It is one of the key mods for the HSR to fit under the decklid with just a minor notch. If this was a stock height HSR intake, then the IAC mod wouldn't be needed, but then the intake would be taller and require a larger notch to the decklid.
| quote | Originally posted by Trinten:
I was talking to a guy at work saying how when this is done, I'm going to print out some key posts and pictures, and put together a binder to take with me to car shows to put out so people can see all the little tricks that were done to get this to work.
|
|
I had one of those for my Ramjet car and have one for the LS4/F40.
|
|
|
|
fieroguru
|
SEP 29, 03:44 PM
|
|
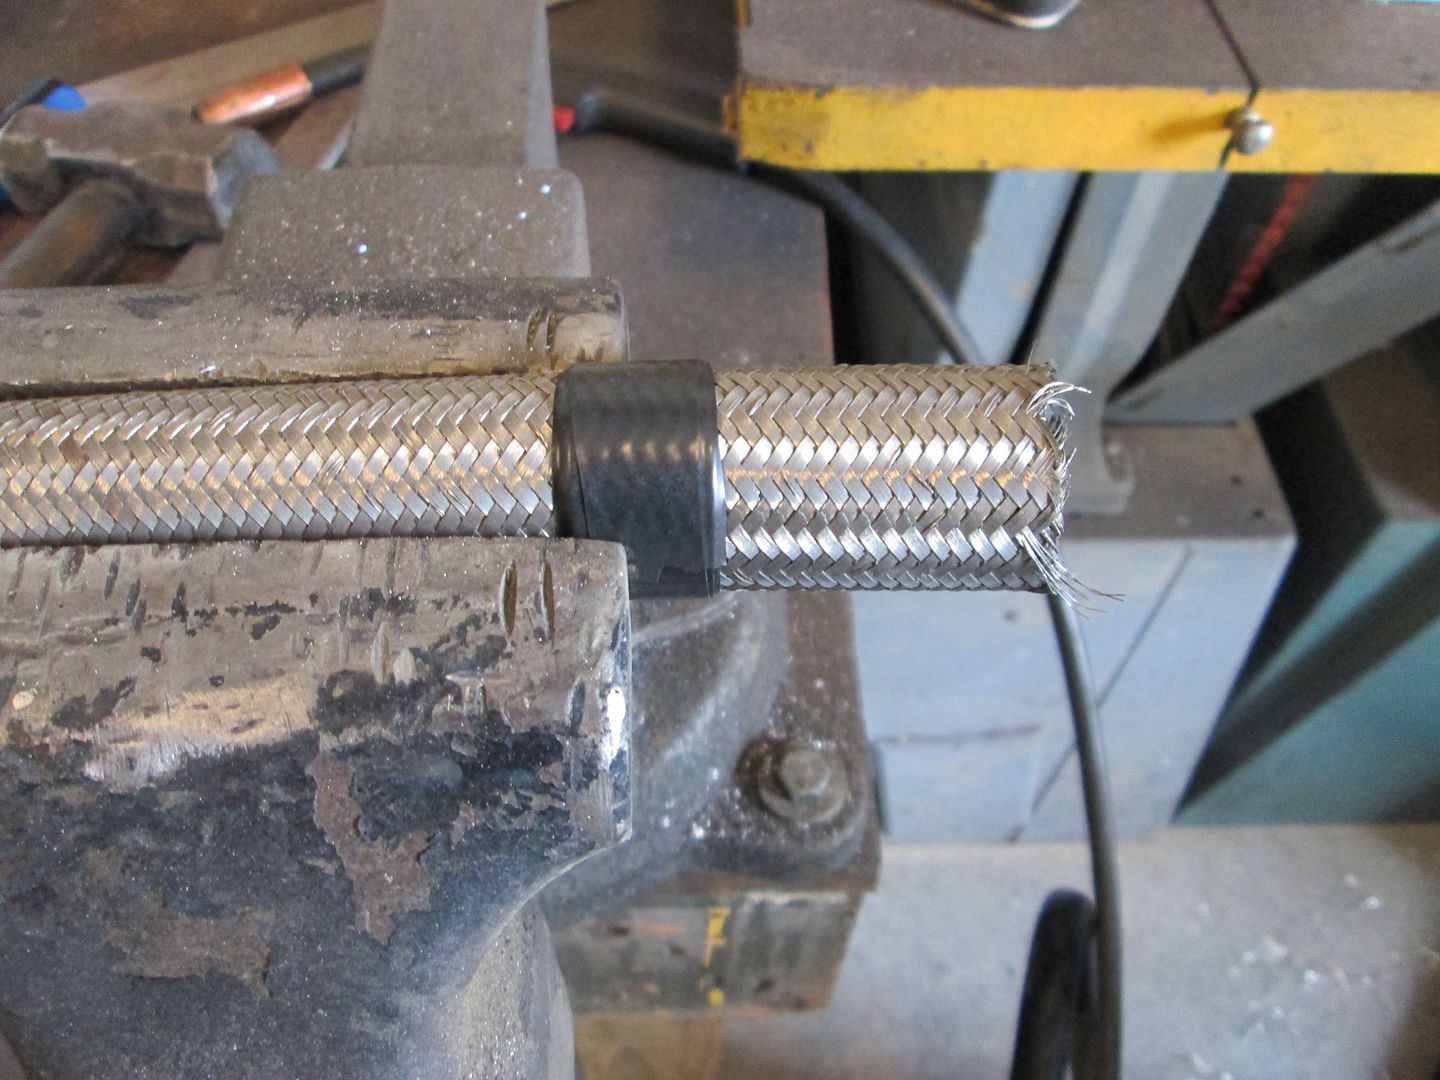
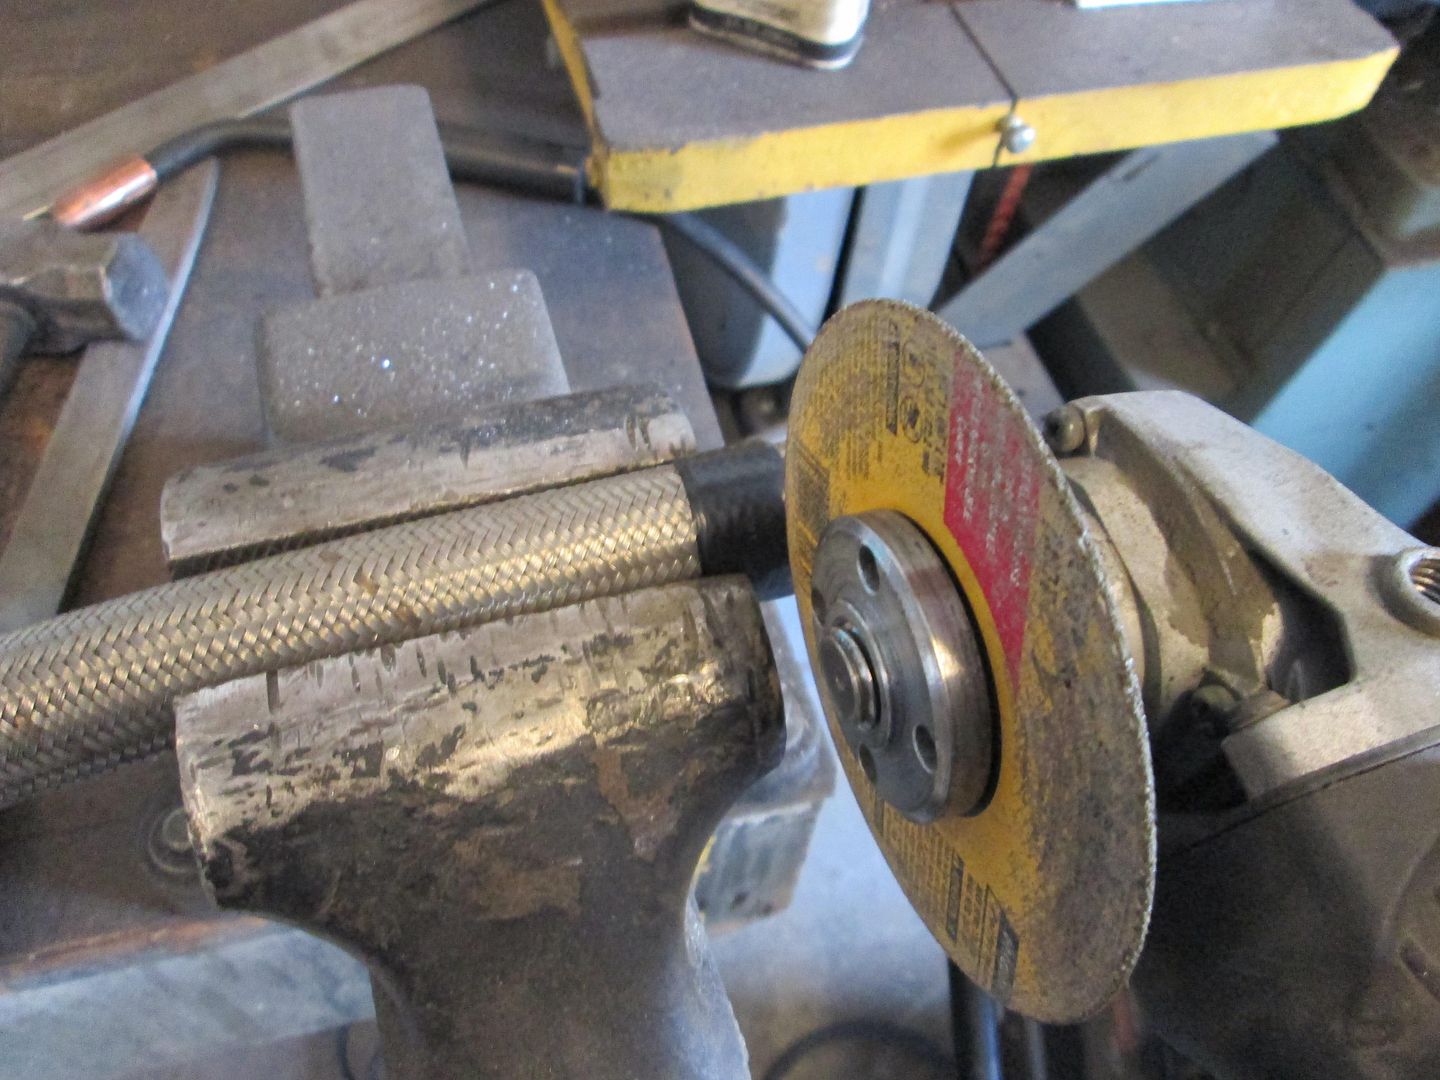
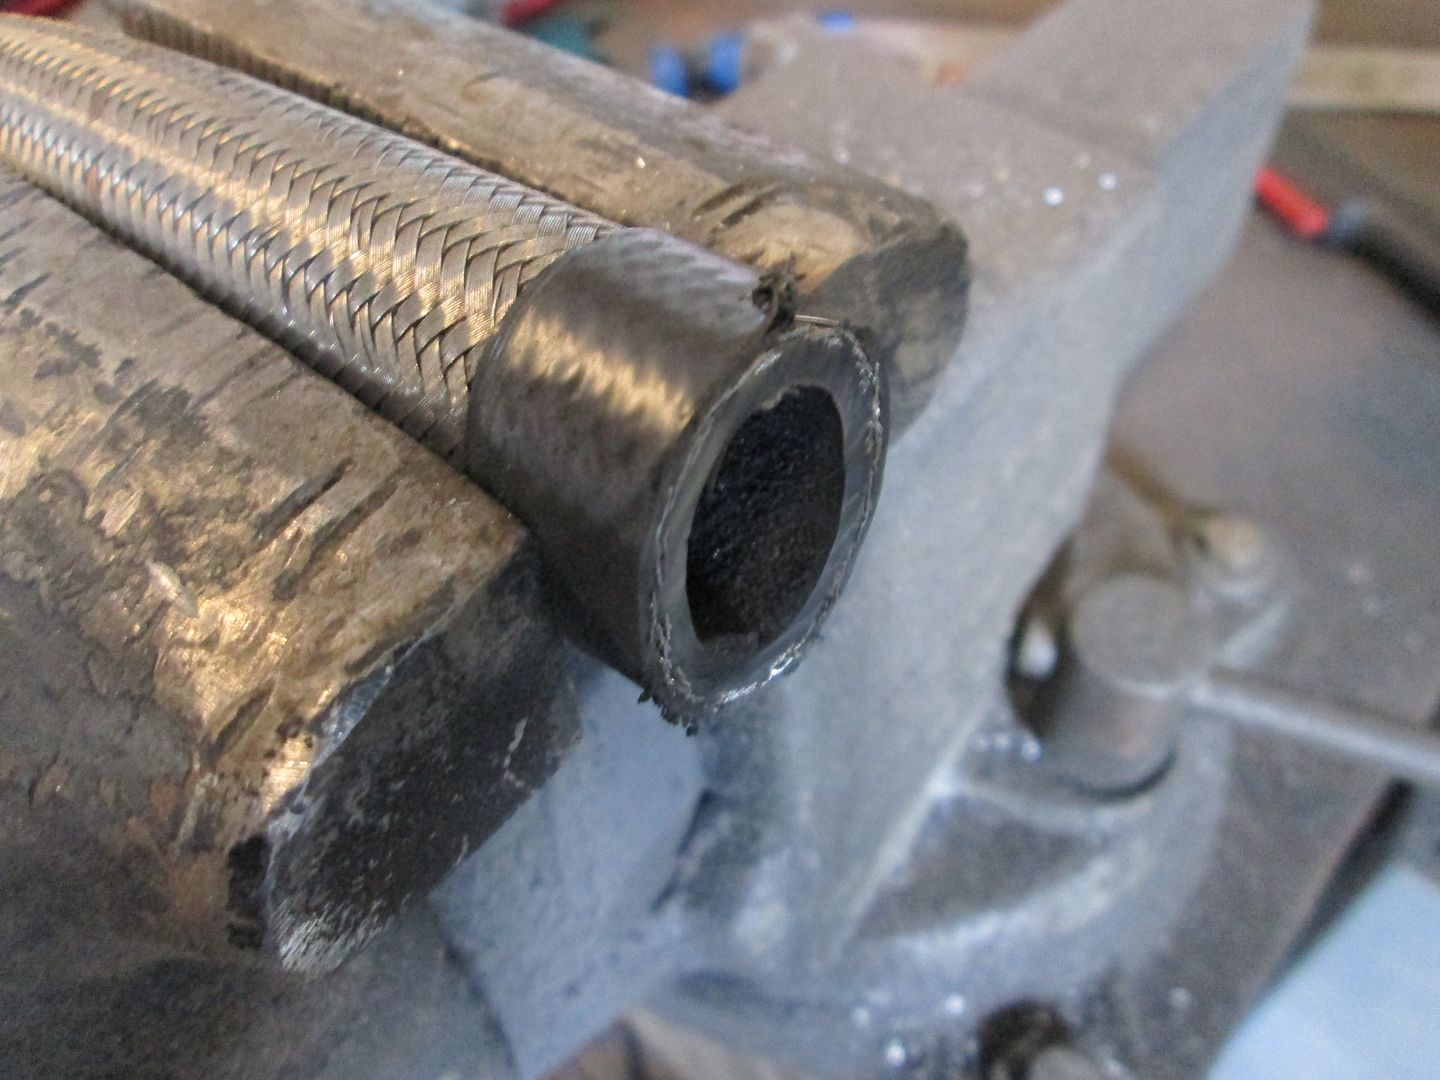
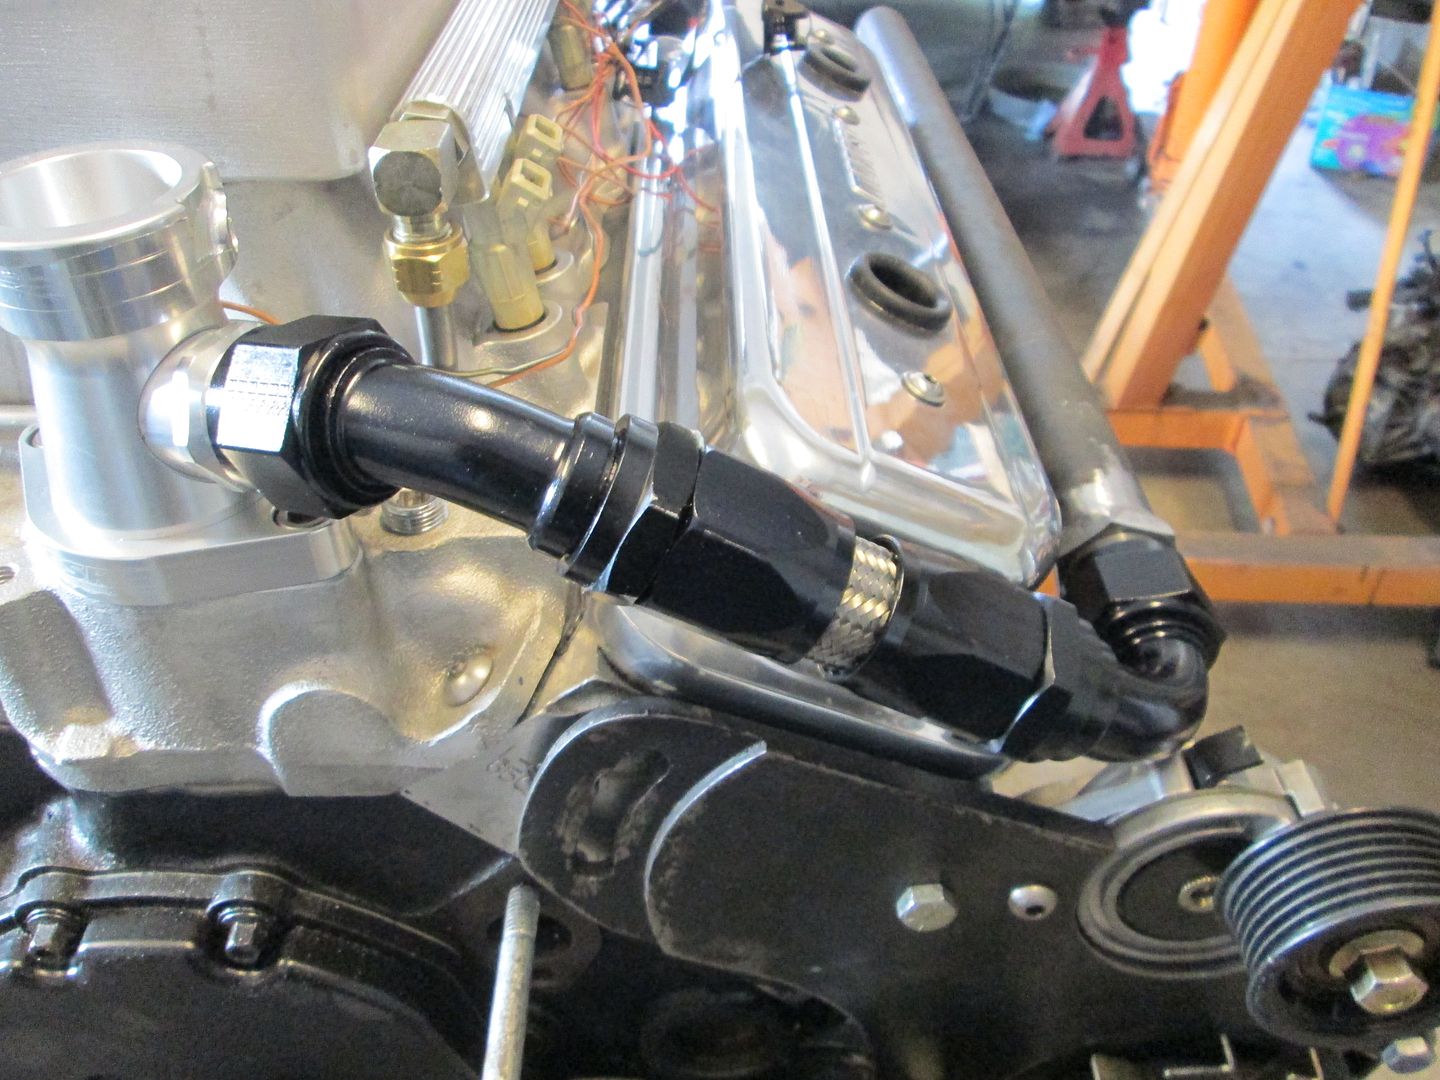
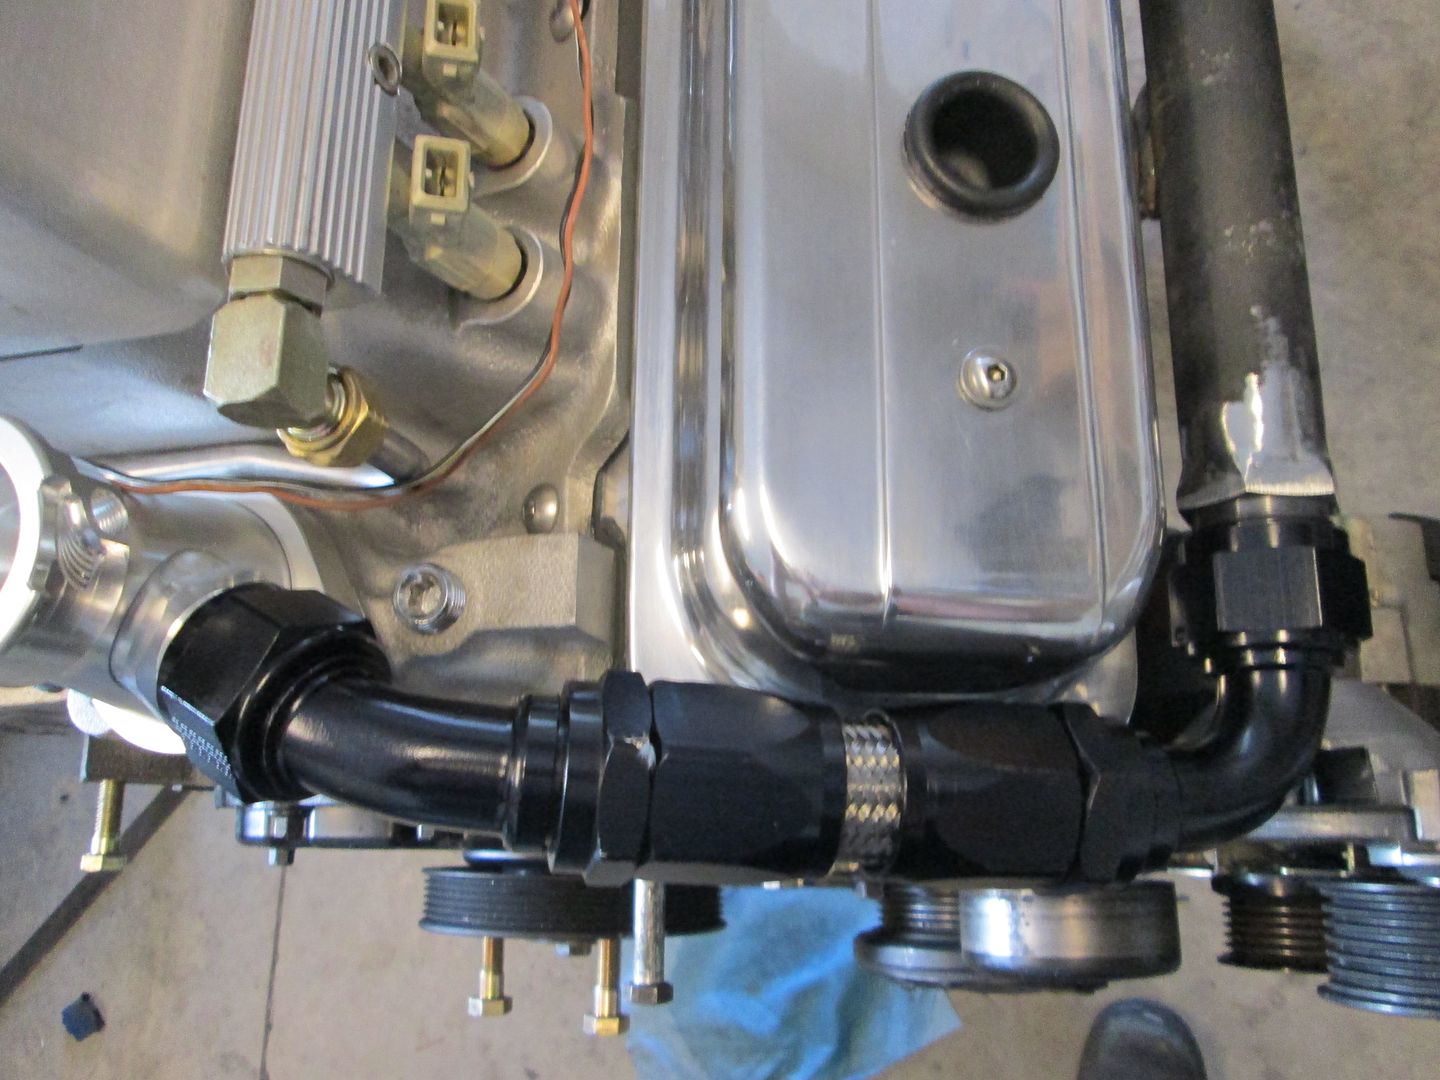
I welded the tabs to the coolant crossover pipe and then fabbed up the -16AN hose between the thermostat housing and the coolant pipe. When I cut the braided stainless hose, I wrap it with electrical tape about 5-7 times, and then cut with a cutoff disk. Clean, lube and assemble:
|
|
|
|
Trinten
|
SEP 30, 11:26 PM
|
|
|
Damn that looks so much nicer than it used to...
|
|
|
|
carbon
|
OCT 01, 10:59 AM
|
|
| quote | Originally posted by Trinten:
Damn that looks so much nicer than it used to... |
|
You know... after this is all done, people are going to hate you, in the way that's nice to be hated.  
|
|
|
|
fieroguru
|
OCT 01, 07:42 PM
|
|
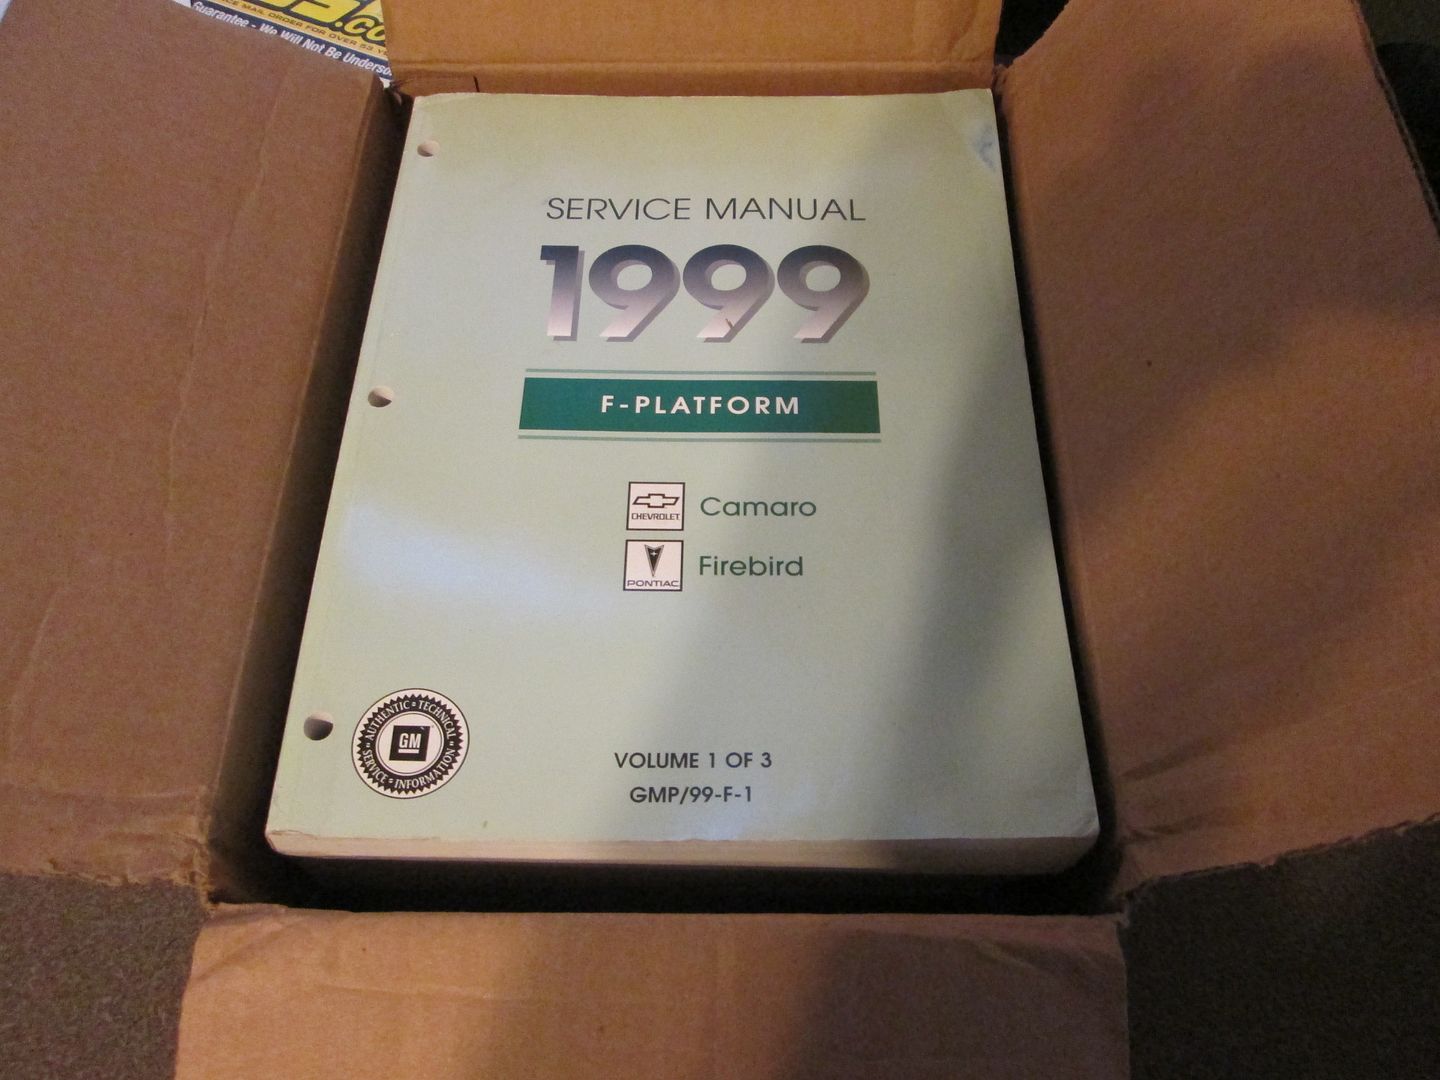
This Fiero is now a 1999 Camaro (or Firebird)... Service manual for the wiring side of things.
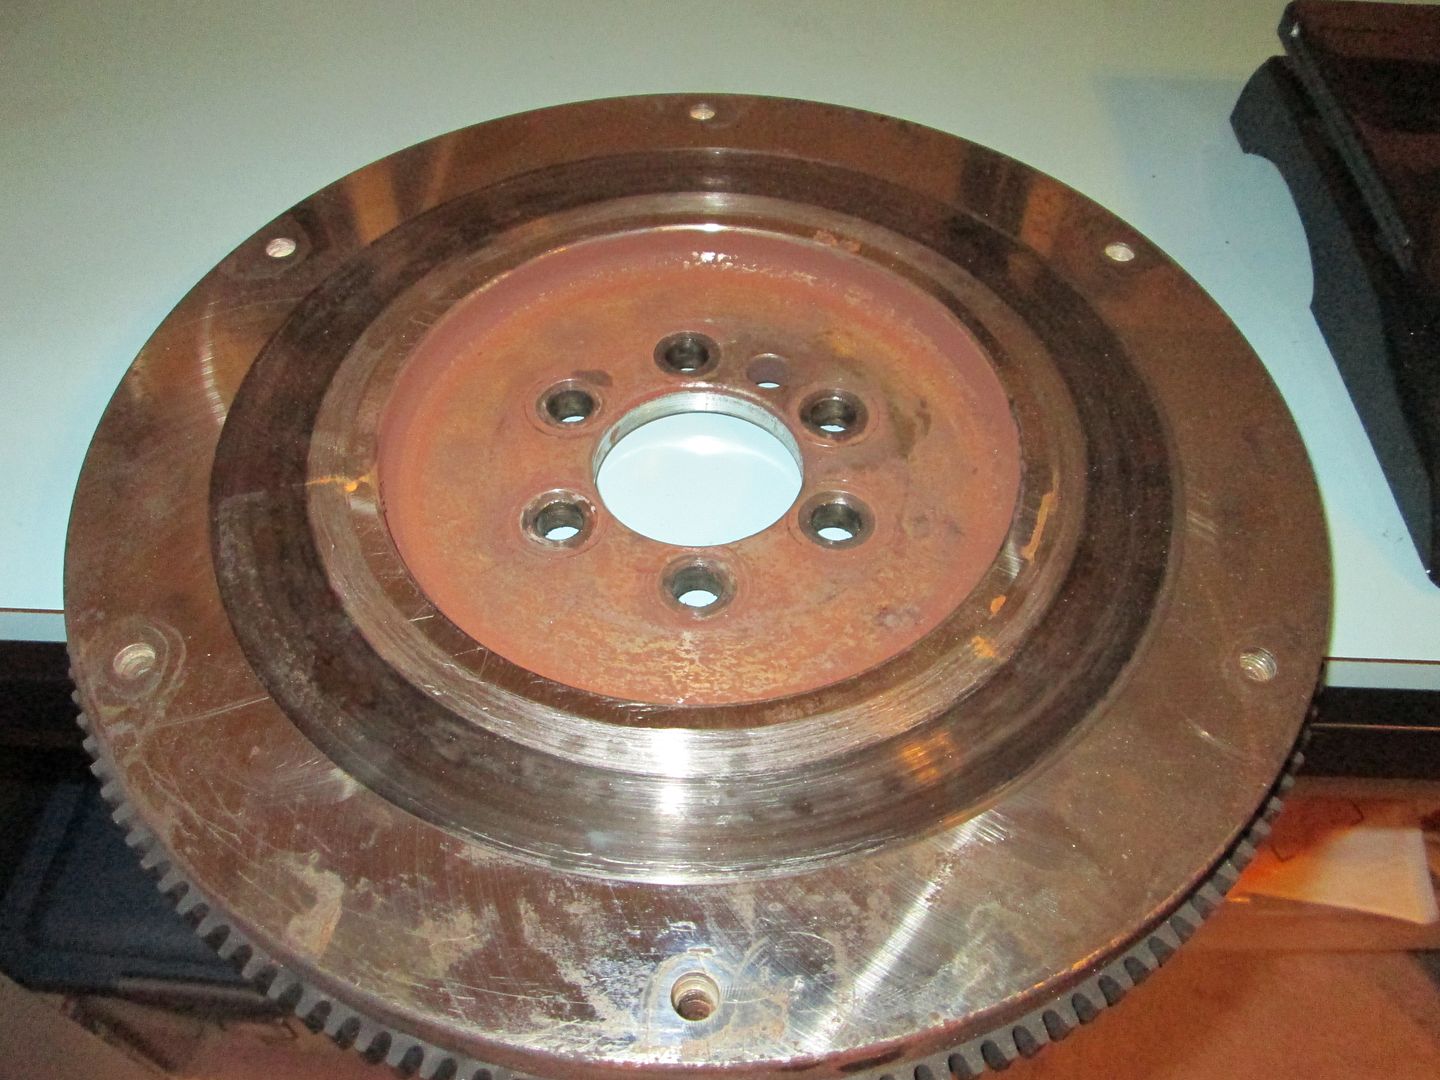
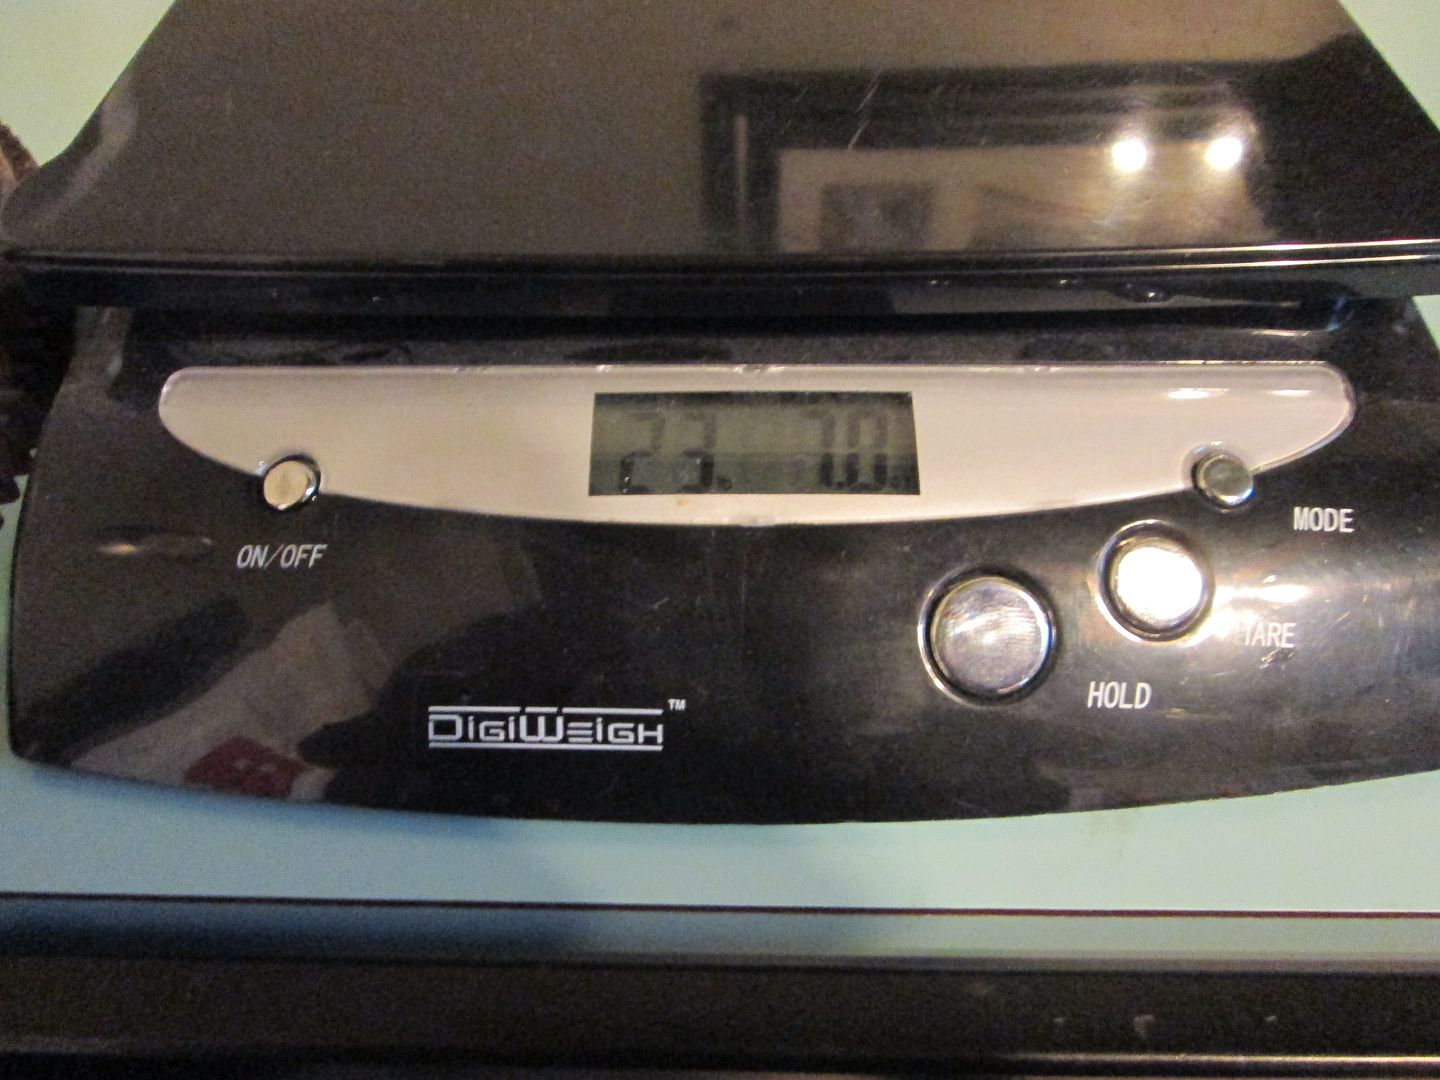
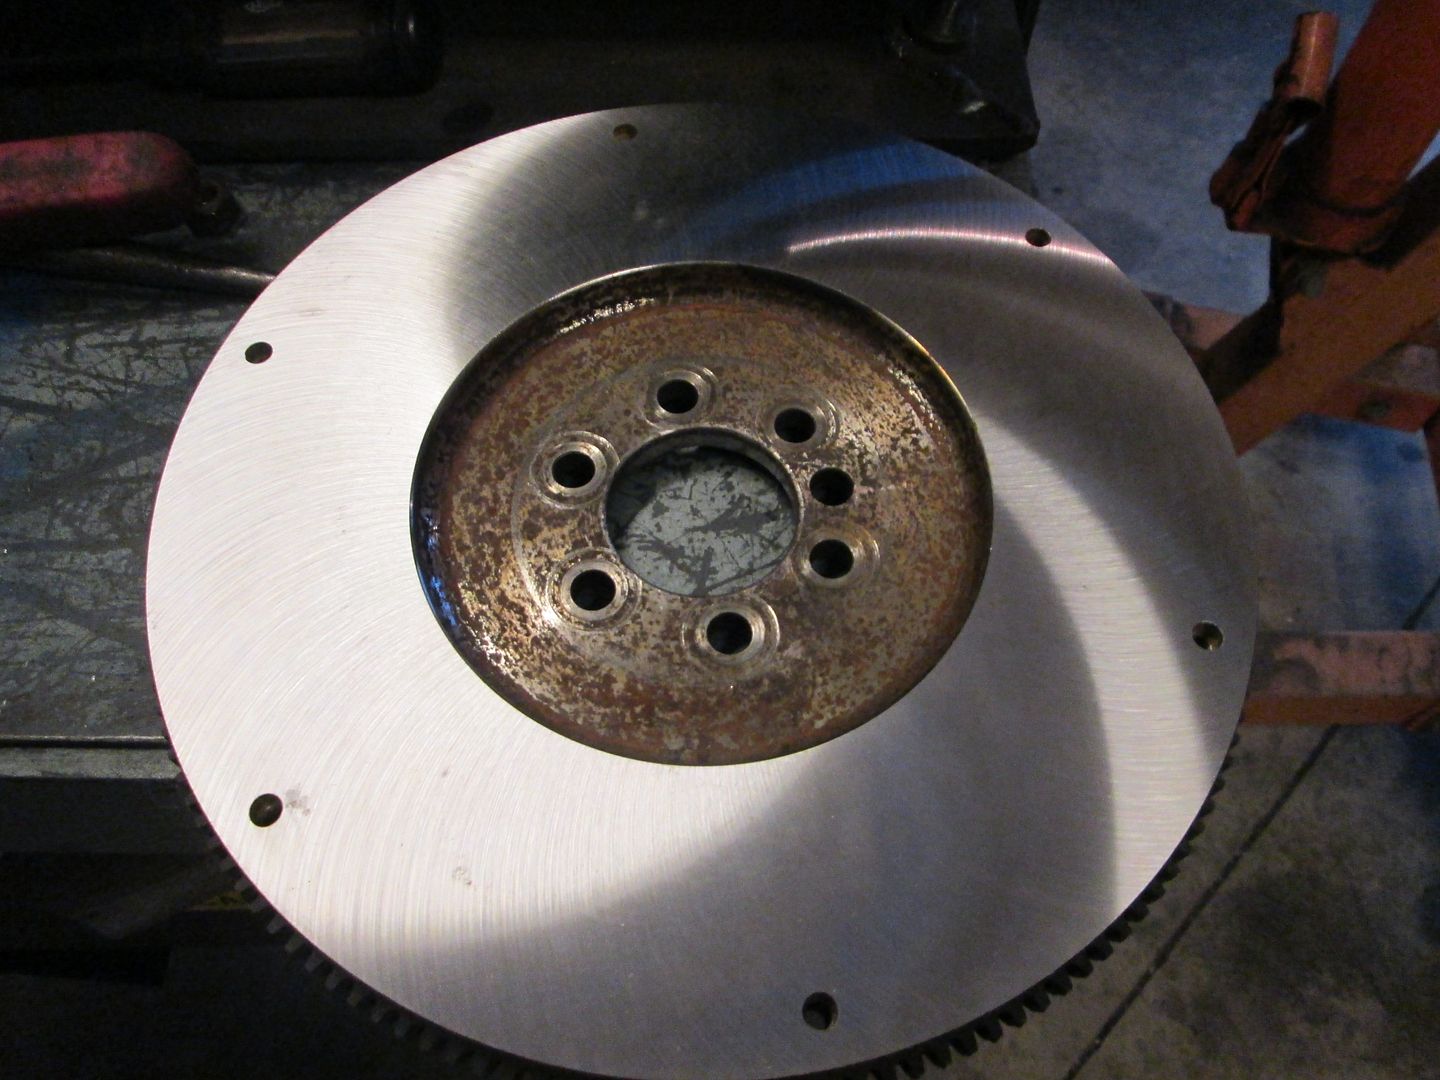
I removed the flywheel so it can be resurface (new Clutch is still MIA). The original Archie flywheel weighs around 29 lbs and I was curious as to how much this one weighs after it was modified for the 142 tooth ring gear... 23lbs 7oz:
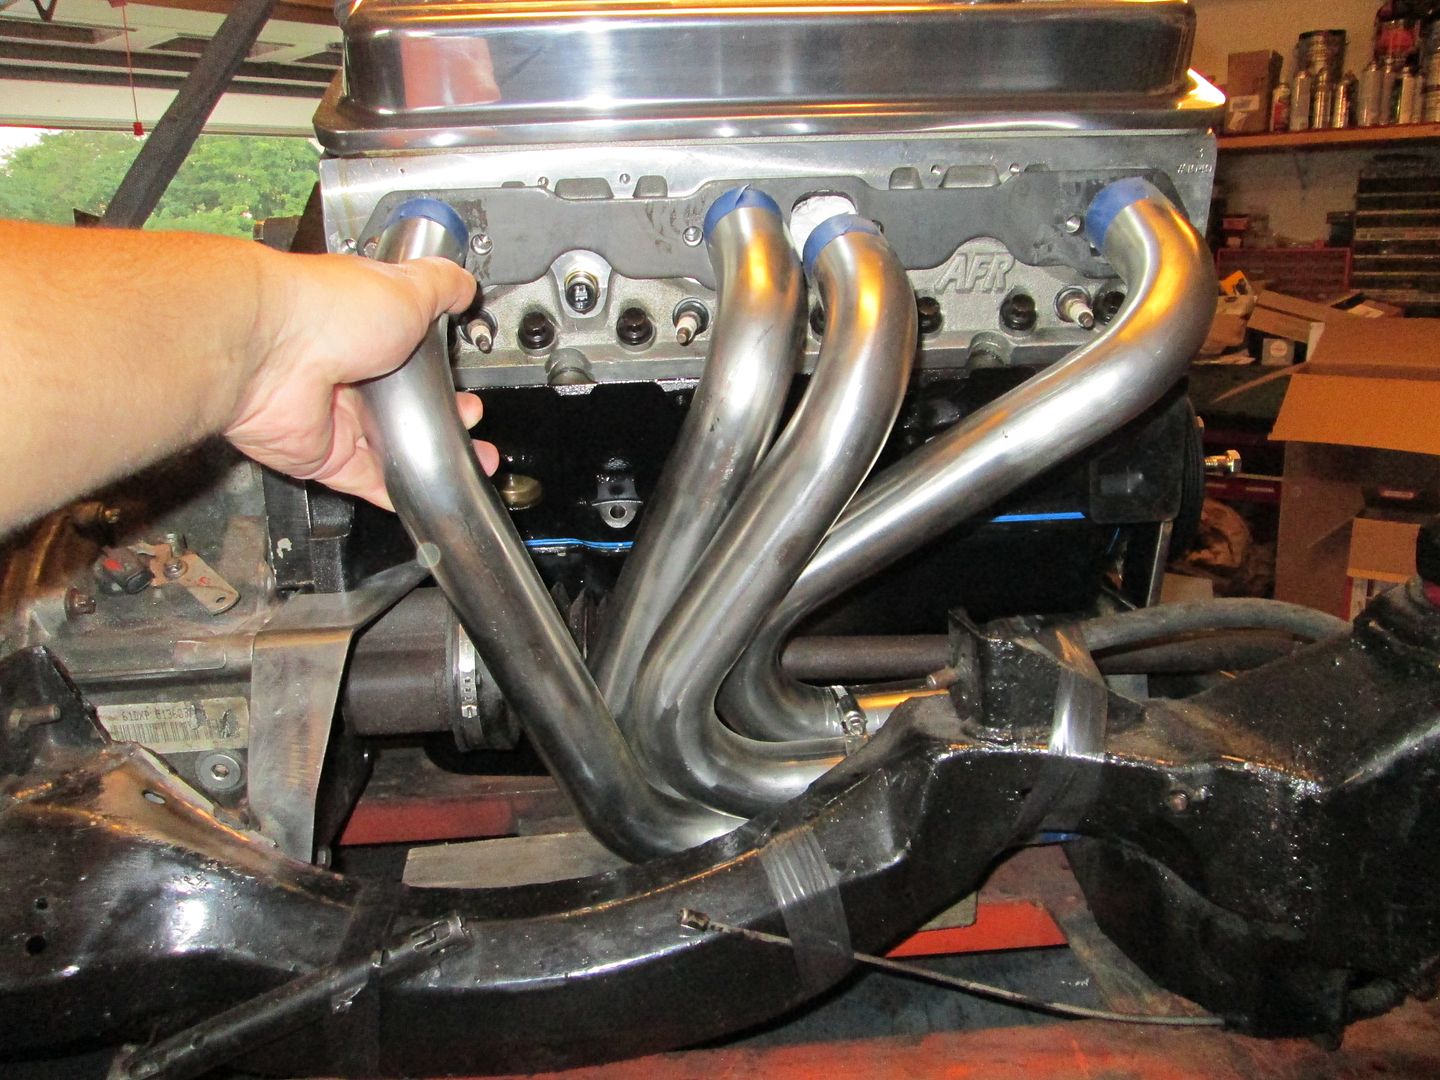
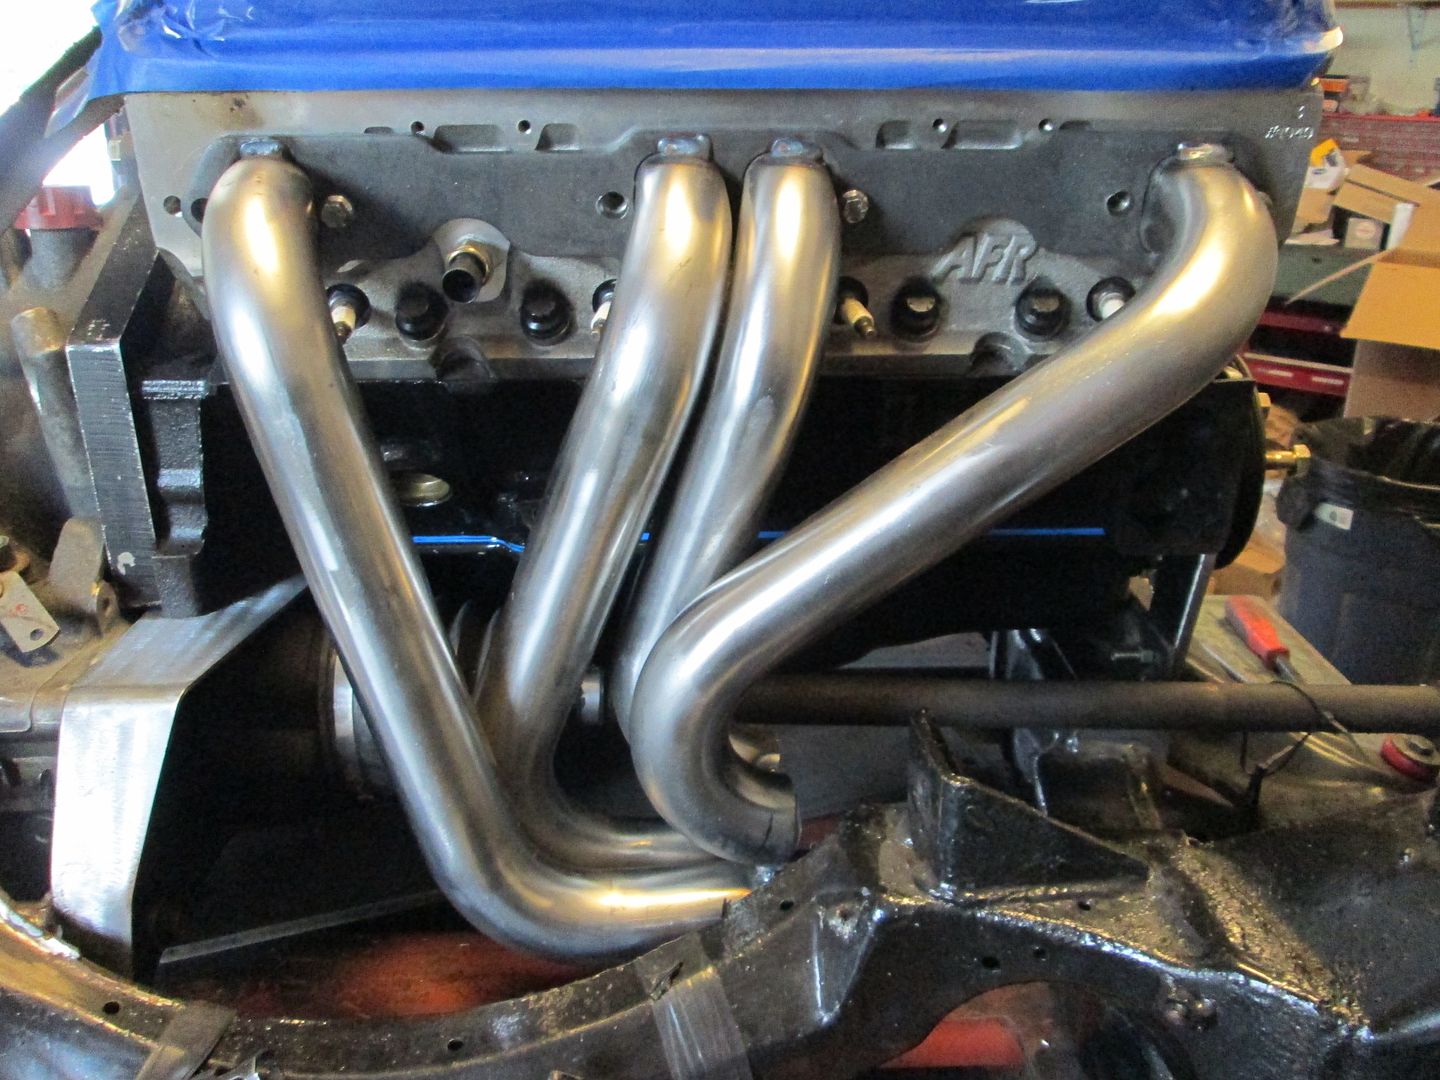
Put the engine/transmission on the cradle again so I can start mocking up the exhaust, the rest of the coolant crossover pipe and ECM mounting. Here is a very rough mockup of the exhaust I am hoping will work (1 3/4" primaries). The collector to 90 degree bend will be challenging and I might need to notch the rear crossmember some for additional clearance. The other side will be a mirror image so the tube on cylinder #1 should clear the alternator:
|
|
|
|
Trinten
|
OCT 01, 09:12 PM
|
|
Looking awesome!
I emailed clutchnet again (CC'd you, Guru), asking for another update. I got to say, this time around I'm a little disappointed in their service.
|
|
|
|
fieroguru
|
OCT 05, 05:45 PM
|
|
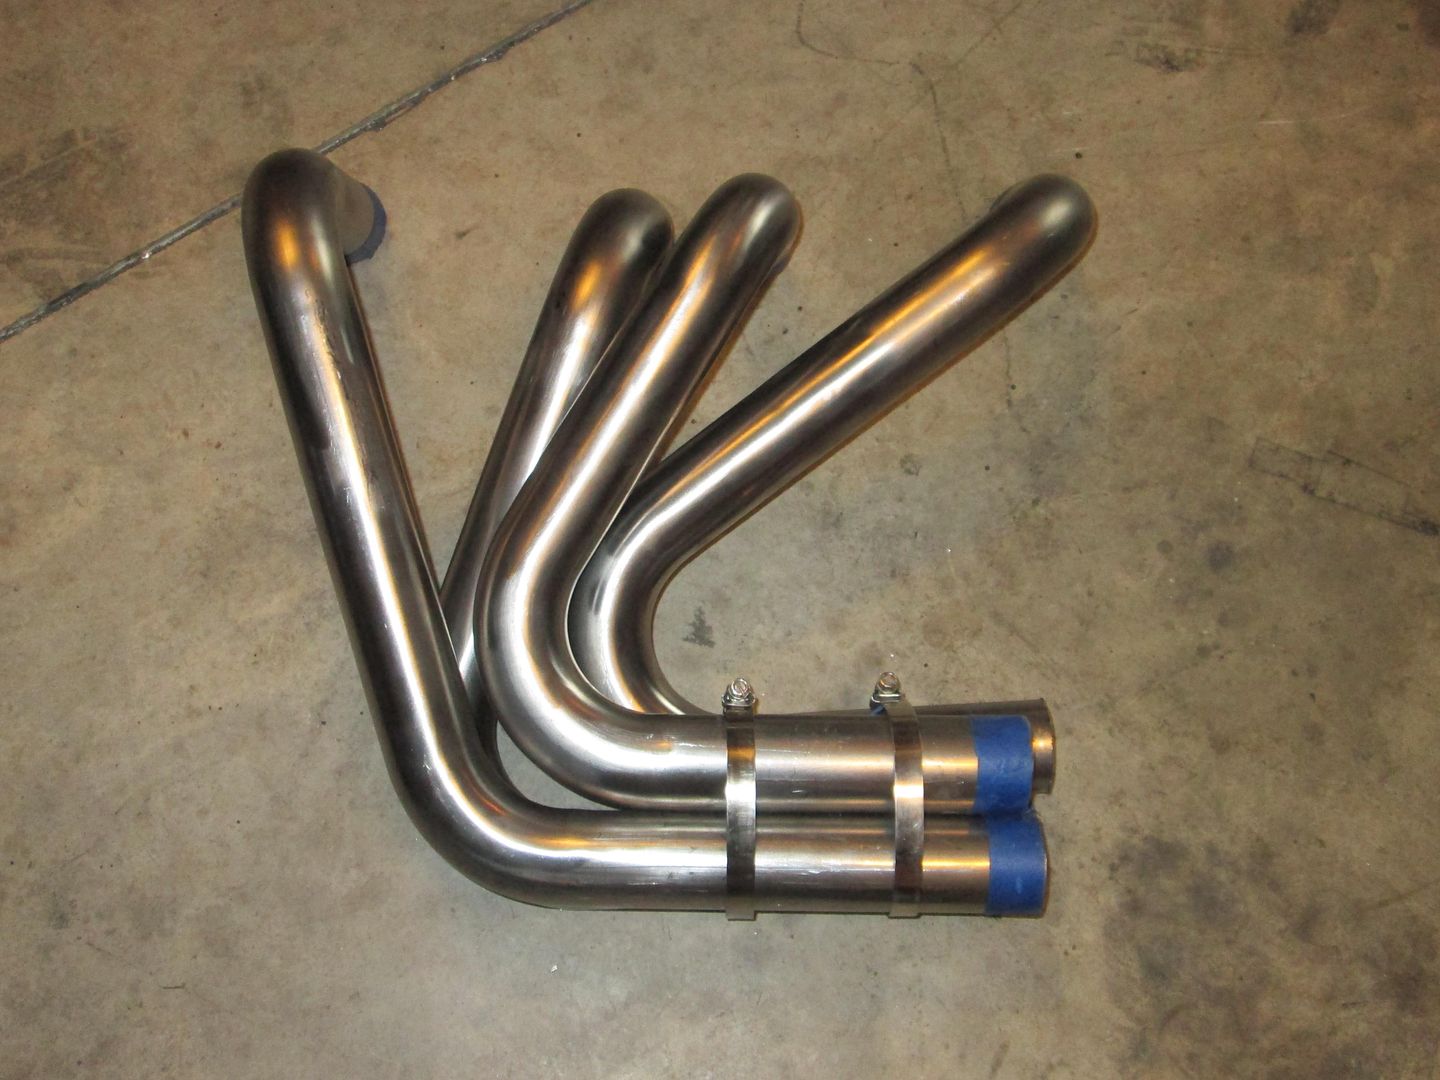
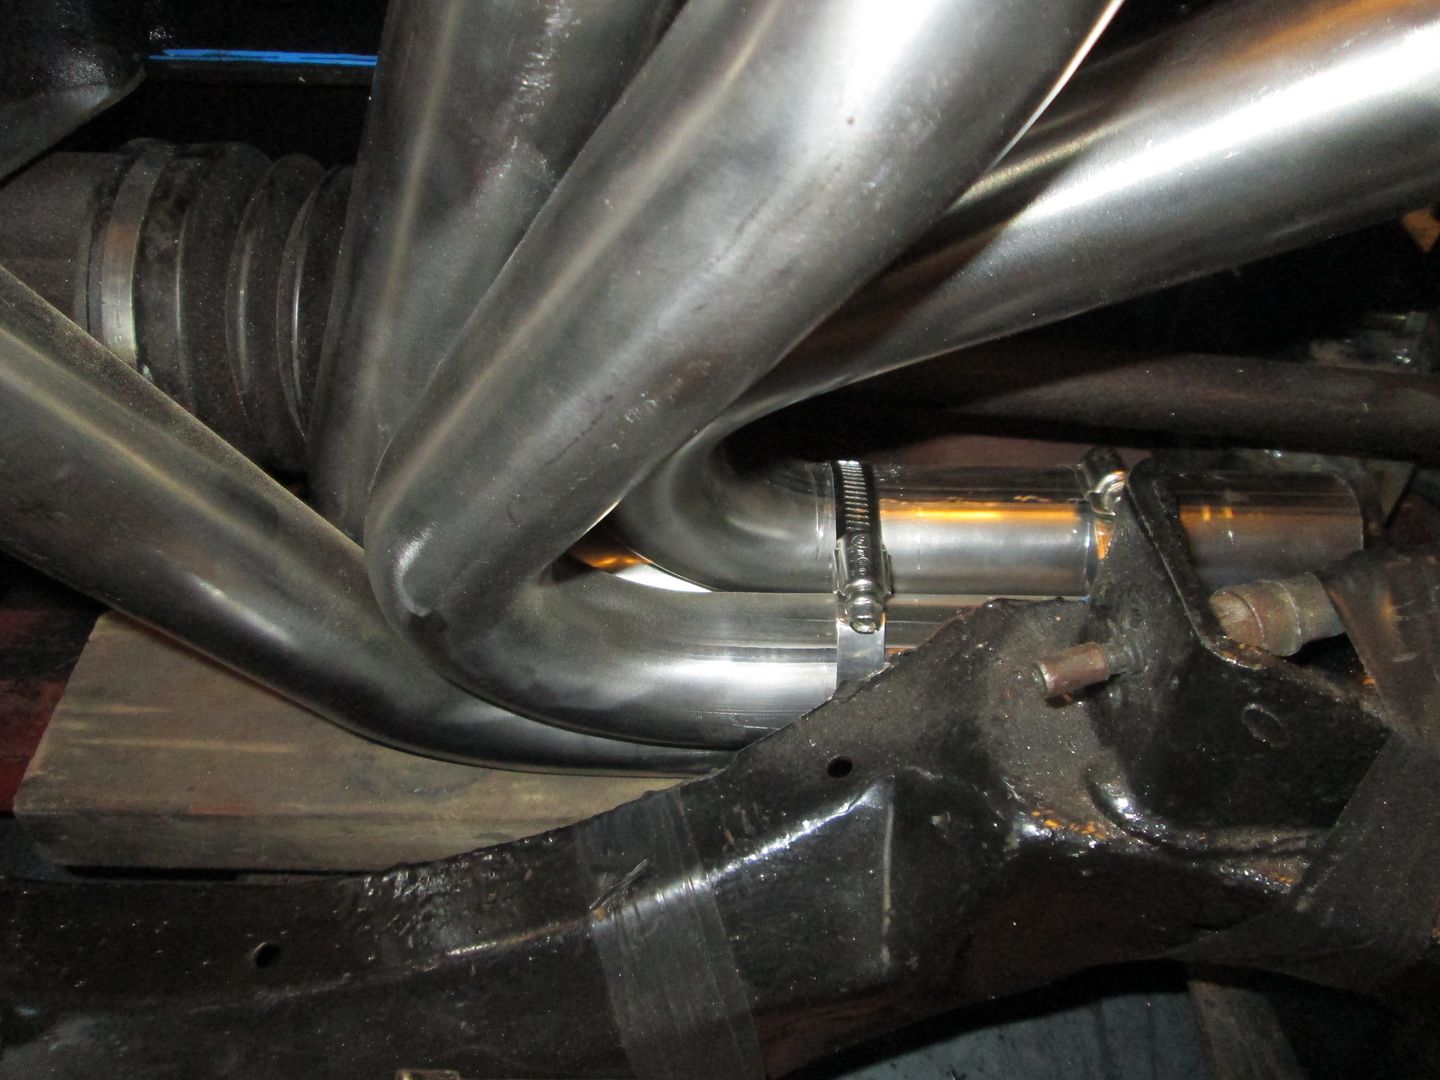
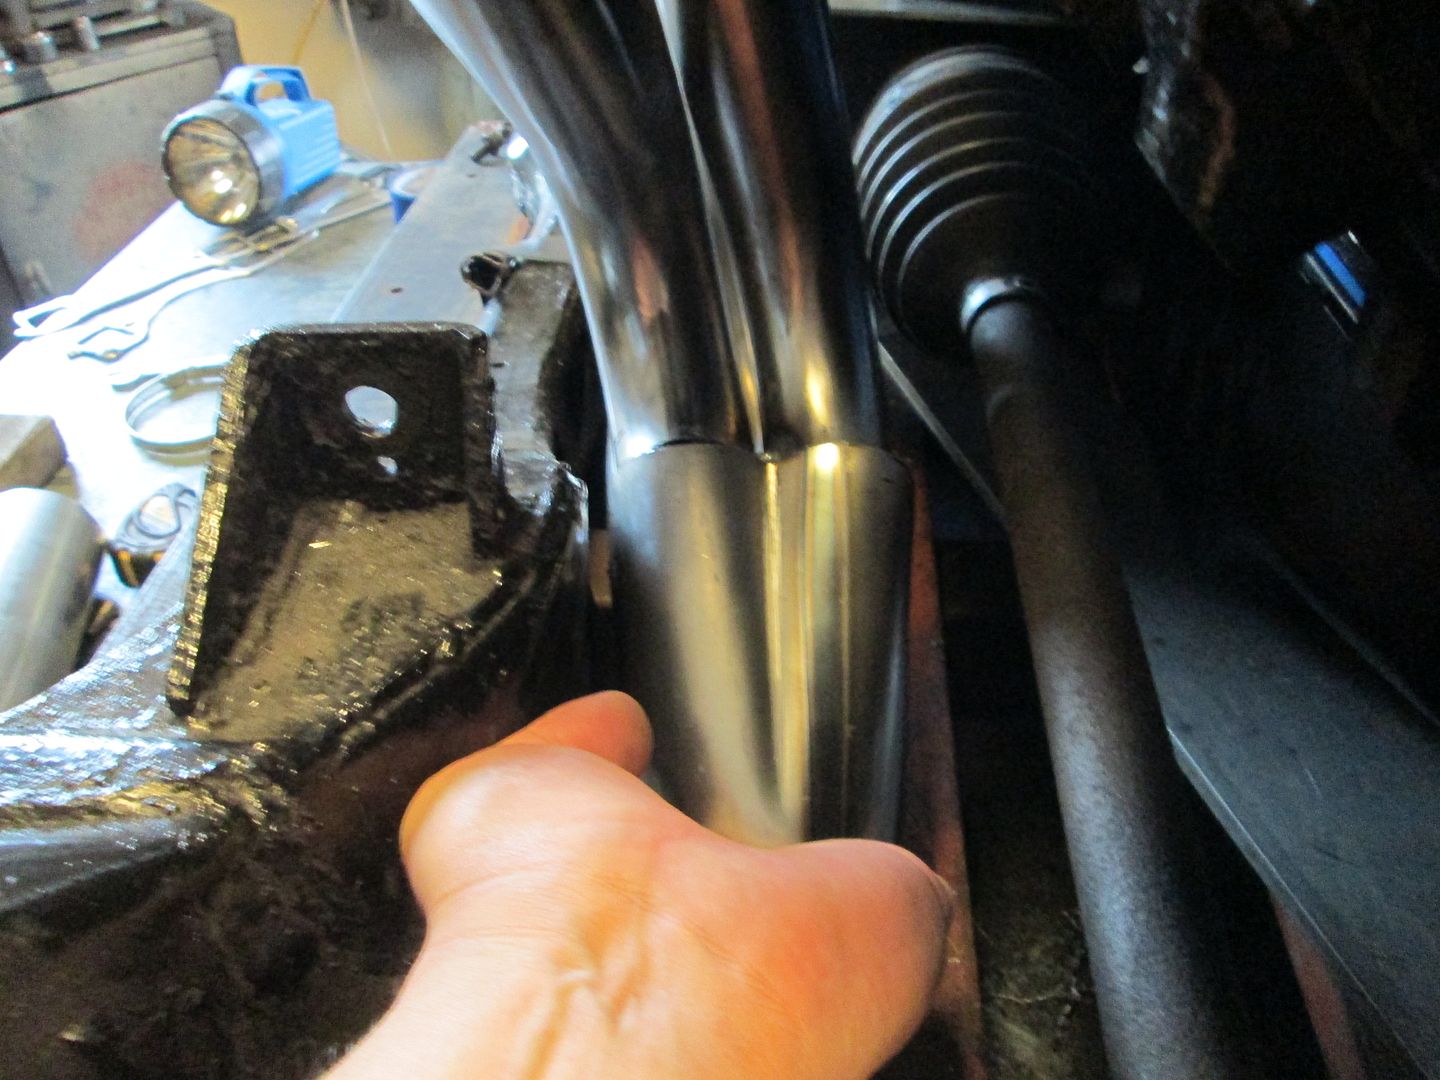
Spent about 4 hrs on the rear header... things are quite tight on this this. So lots of testing fit, remove, grind/cut, test fit... Here is the current state, the primaries are heavy tacked (3/4" bead top and bottom) at the flange and welded together at the collector, but the collector still needs to be welded in place.

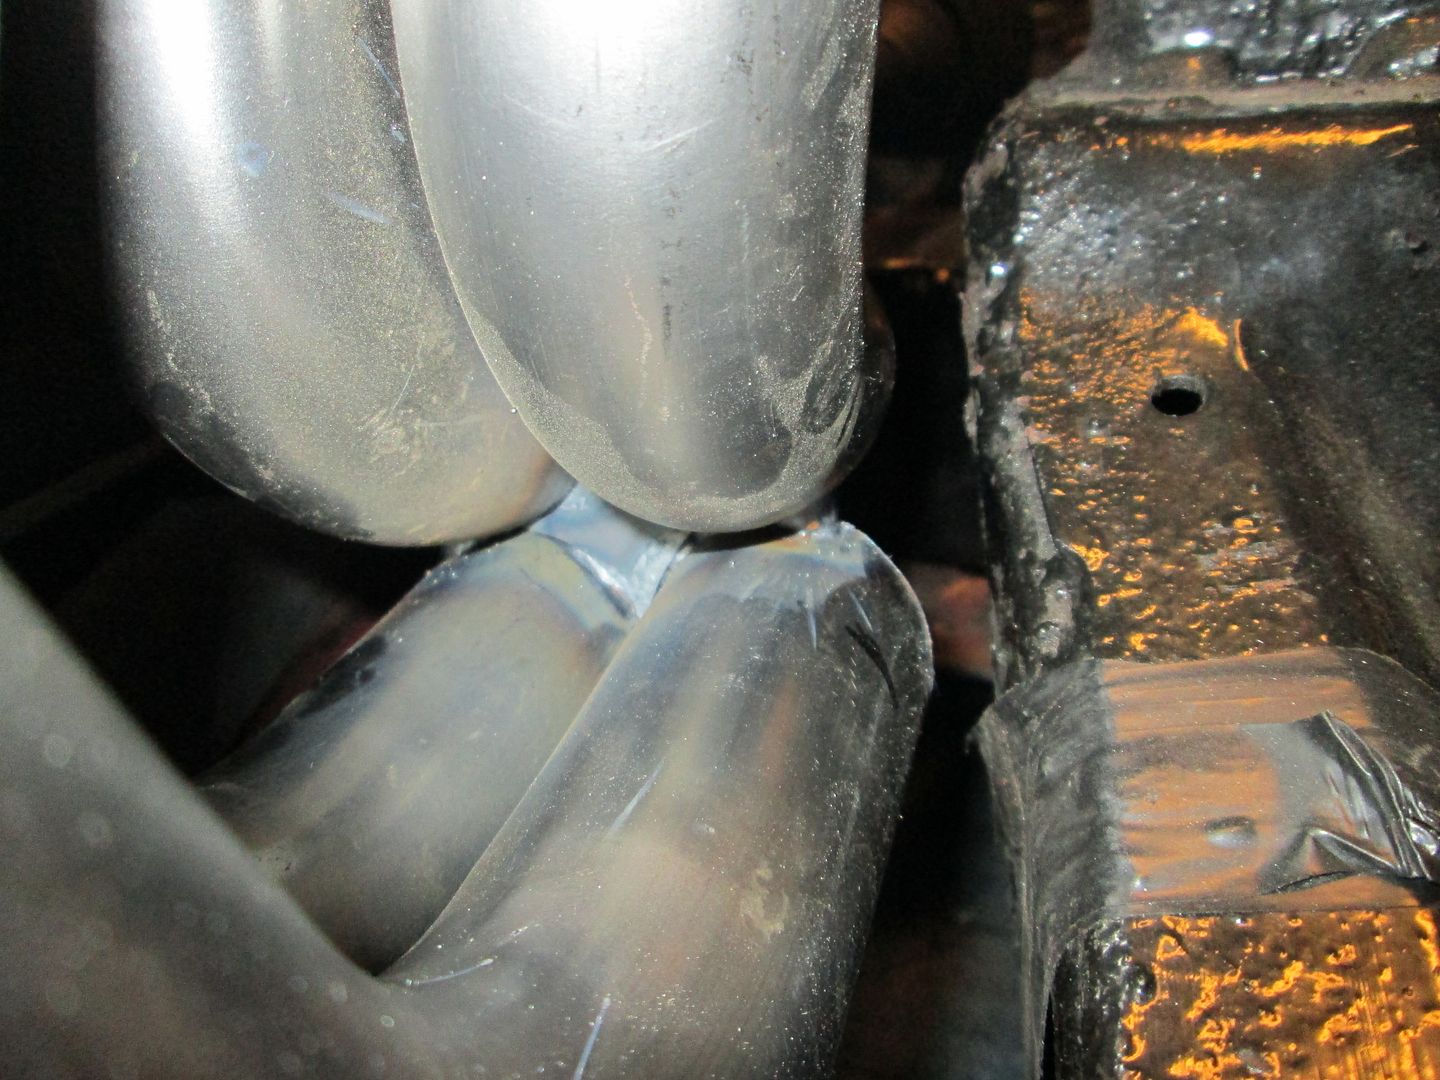
Here is the 3" exhaust elbow and the collector will be between these two:
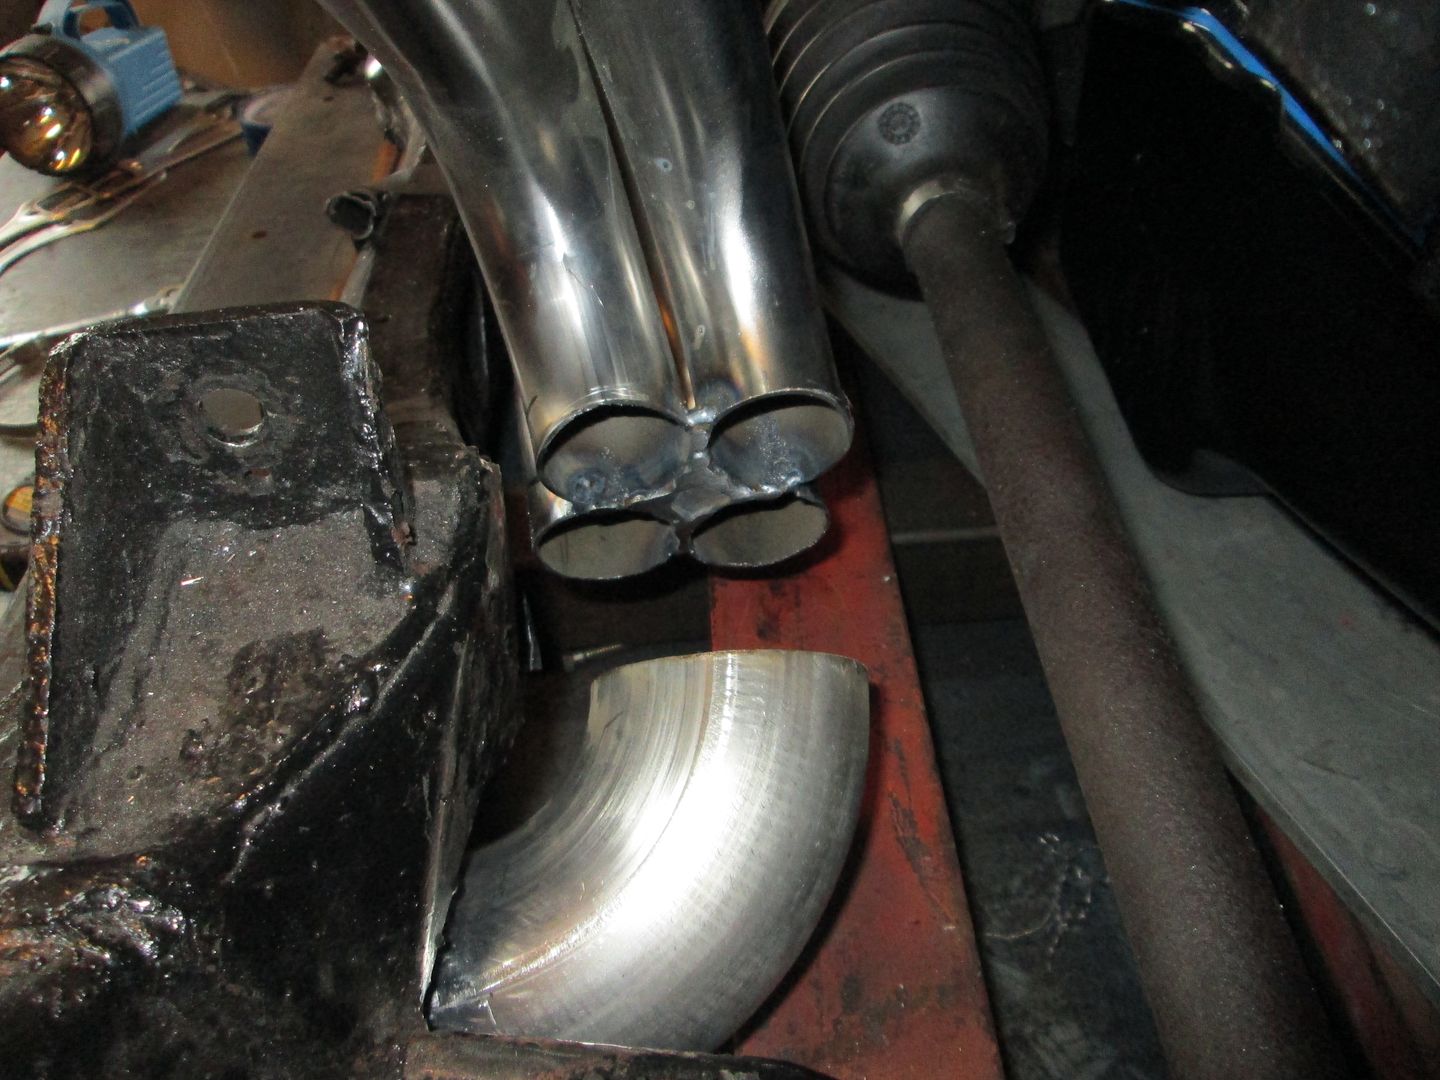
Here the collector is just sitting it place. I did cut the ends of the tube at a slight angle to help the collector angle down to the opening in the cradle:
|
|
|
|
fieroguru
|
OCT 05, 07:33 PM
|
|
Here is a pic of the surfaced flywheel. I am going to swap out the ring gear as it has some damage from some previous starter alignment issues:
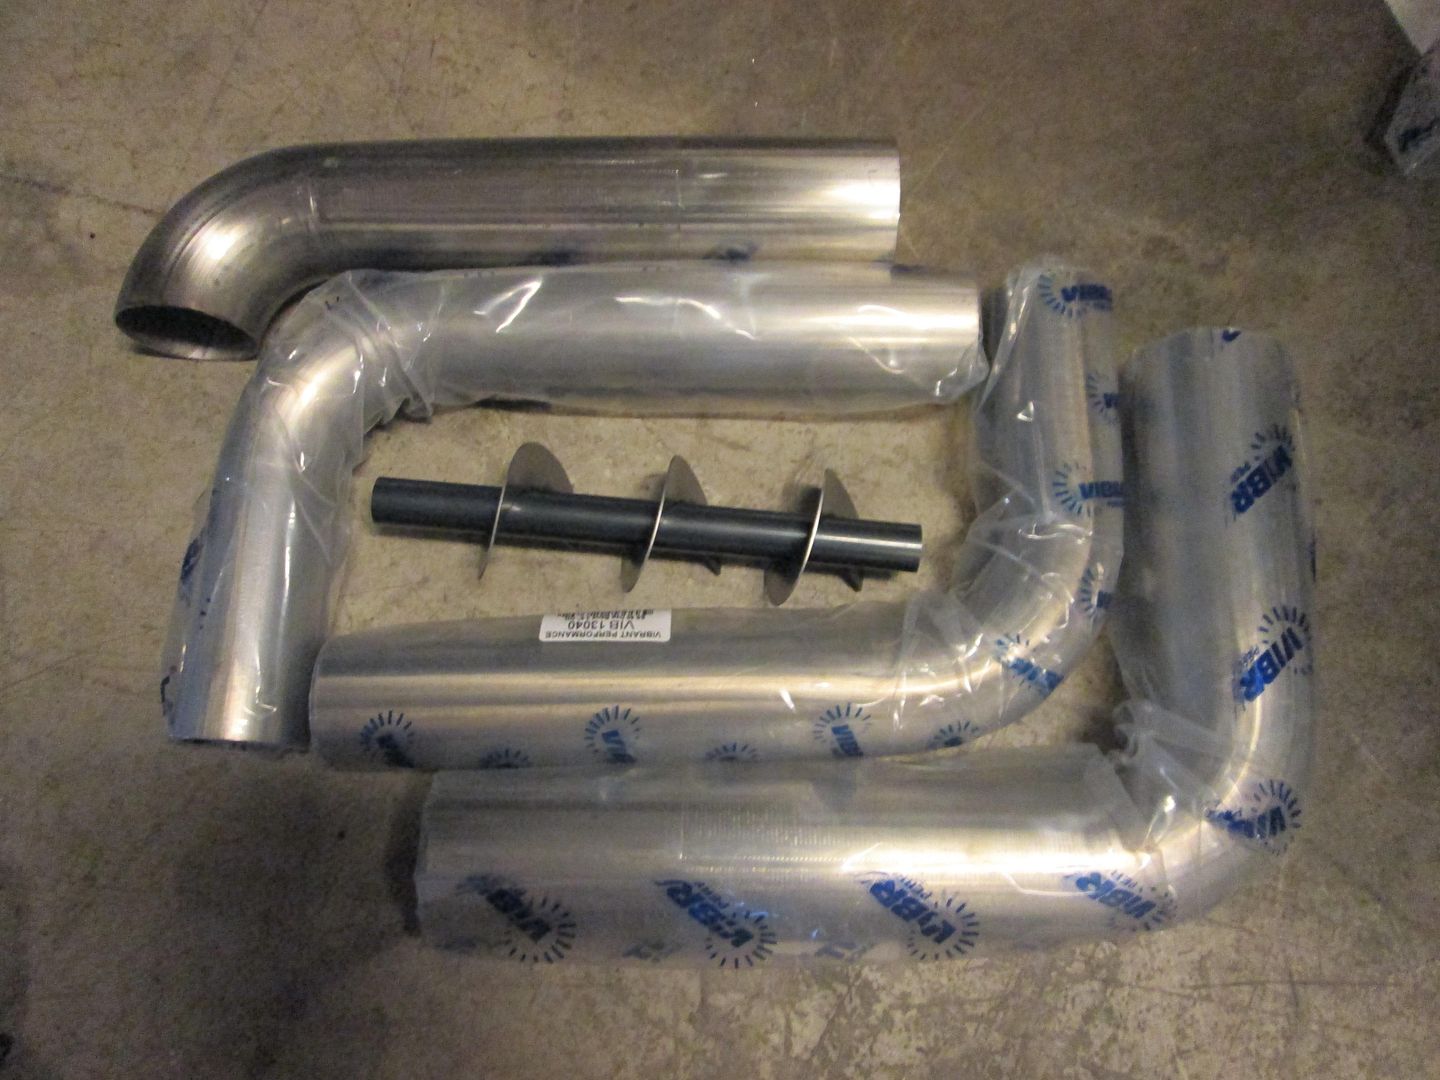
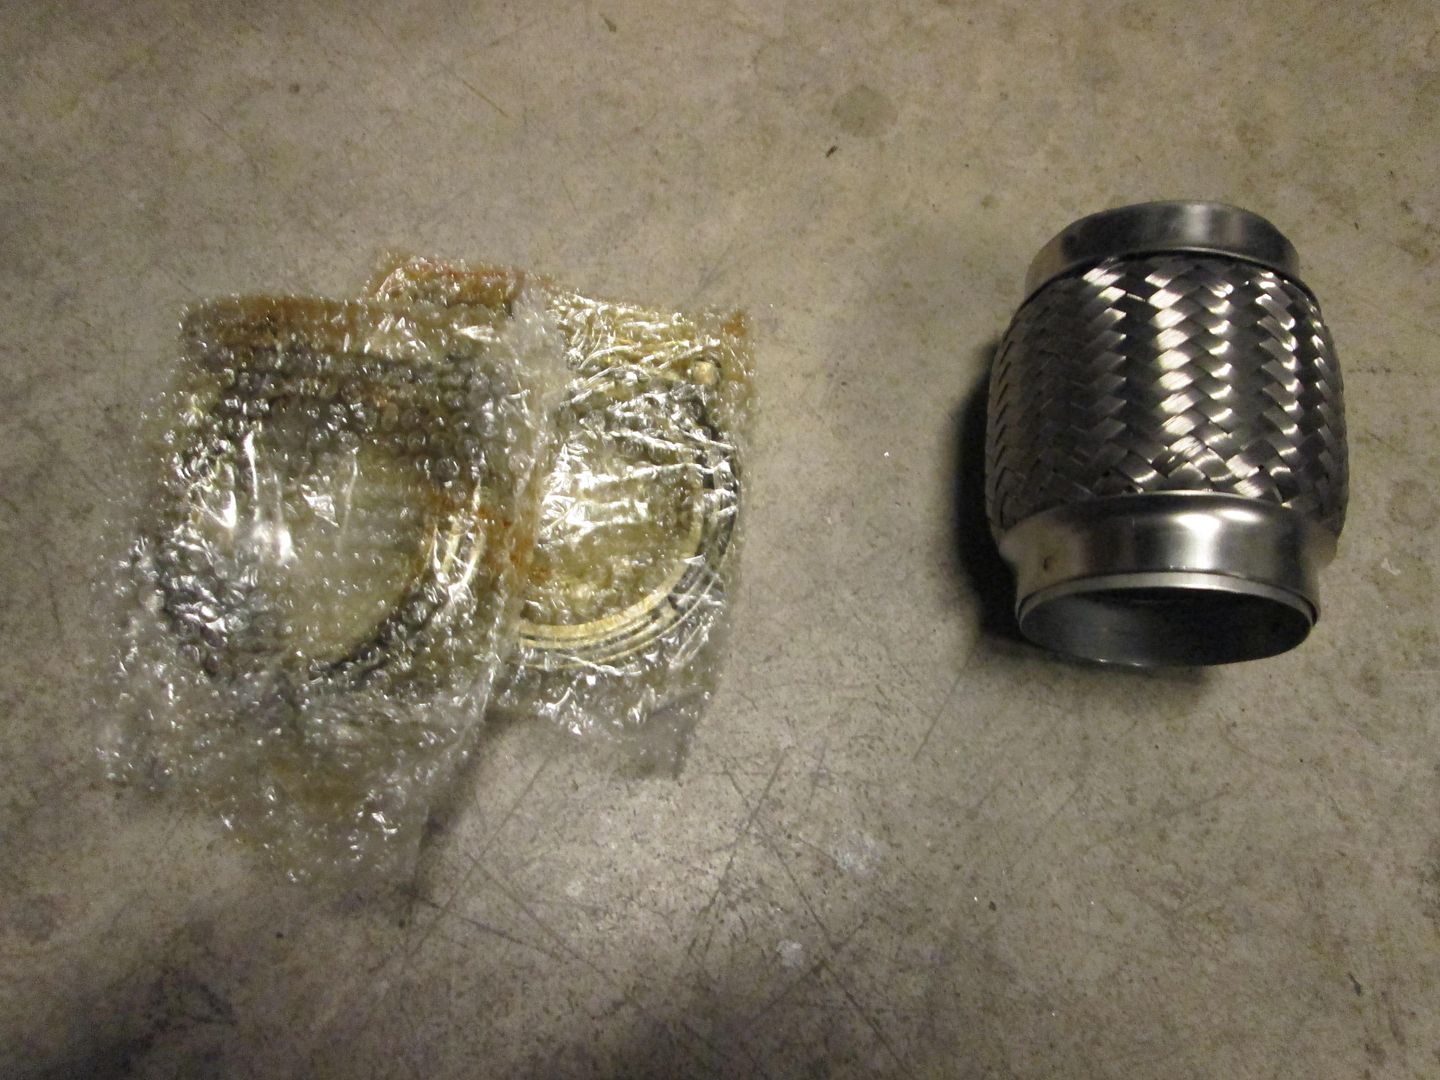
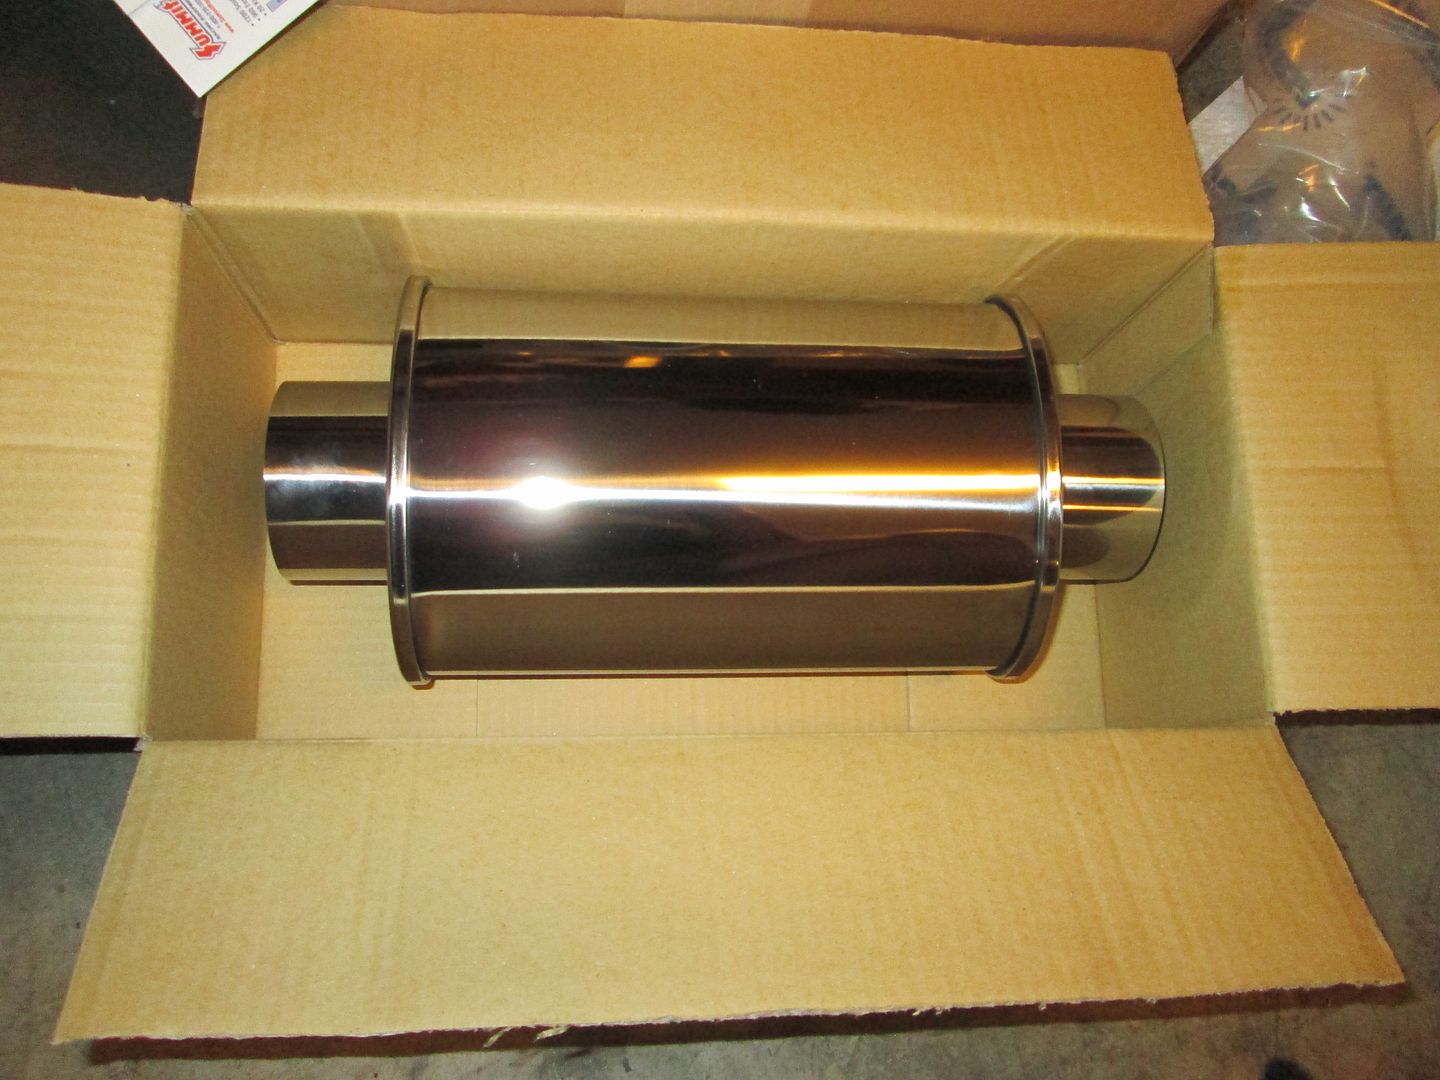
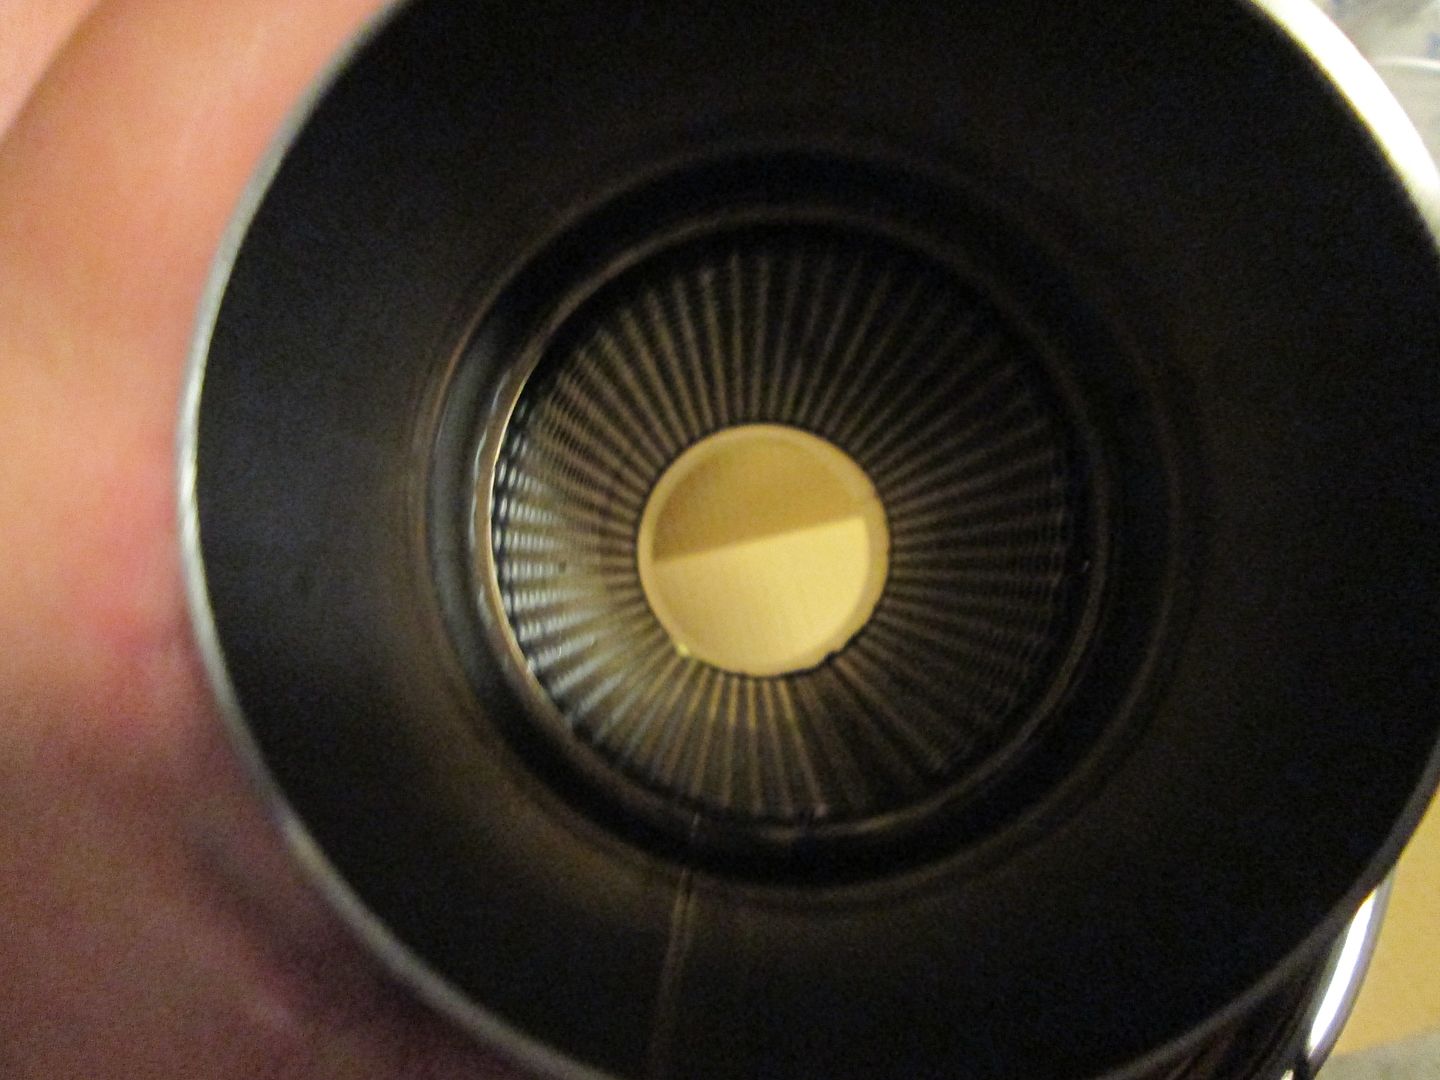
This car has the trunk removed below the shelf, so it has lots of room for the exhaust. Vince has asked for it to be rather quiet, so I am doing something different. 3" pipe from collectors w/ expansion joint on the front, Y'd into a single 3" pipe, then past the rear cradle cross-memeber turn 90 to go vertical, then turn 90 to the side, into a Vibrant Performance Ultra Quiet resonator, then 180 loop around to enter the Magnaflow cross flow muffler, then 2 1/2" pipes to whatever the tips are going to be. I am hoping the resonator in front of the muffler will make this car much quieter than all my previous V8 builds, but if it still needs to be toned down some, I will install the auger muffler insert into the resonator. Everything post headers will be stainless steel. The headers will be ceramic coated. Here are pics of the components:

|
|
|
|
Trinten
|
OCT 05, 10:02 PM
|
|
That all looks so awesome!
I haven't even thought about tips.. as you saw with the last setup, the pipe just "ended" after a short extension from the mufflers to get to where the tips should have been. Off to Summit Racing I go!!
|
|
|
|