|
| Enterra "Dark Shadow" Restore Thread (Page 19/65) |

|
Archie
|
JAN 14, 07:54 PM
|
|
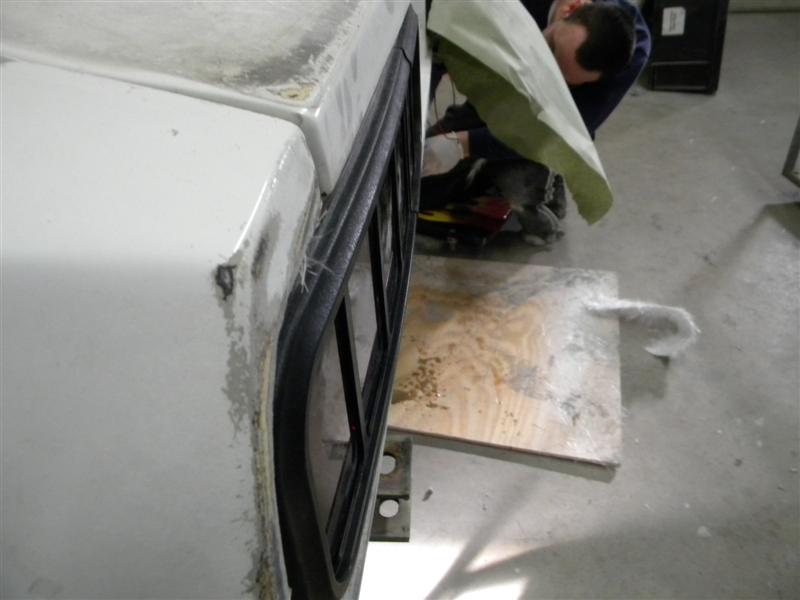
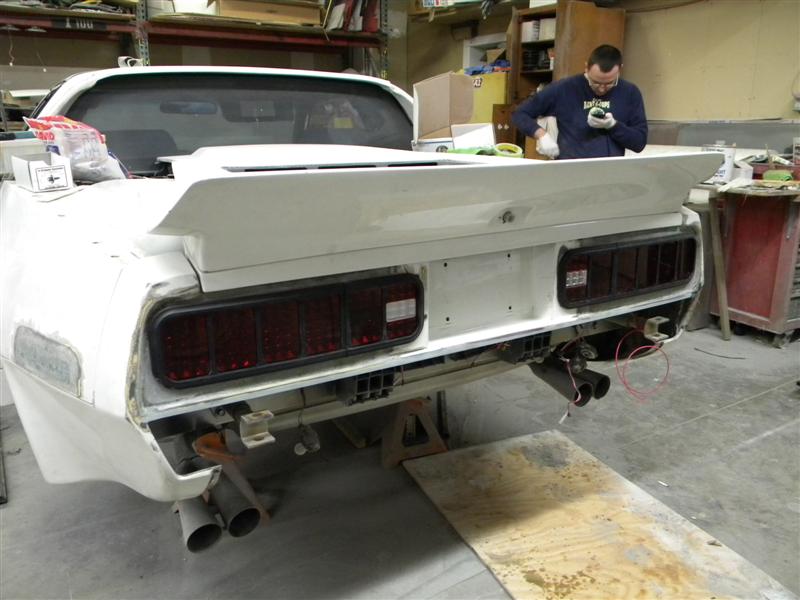
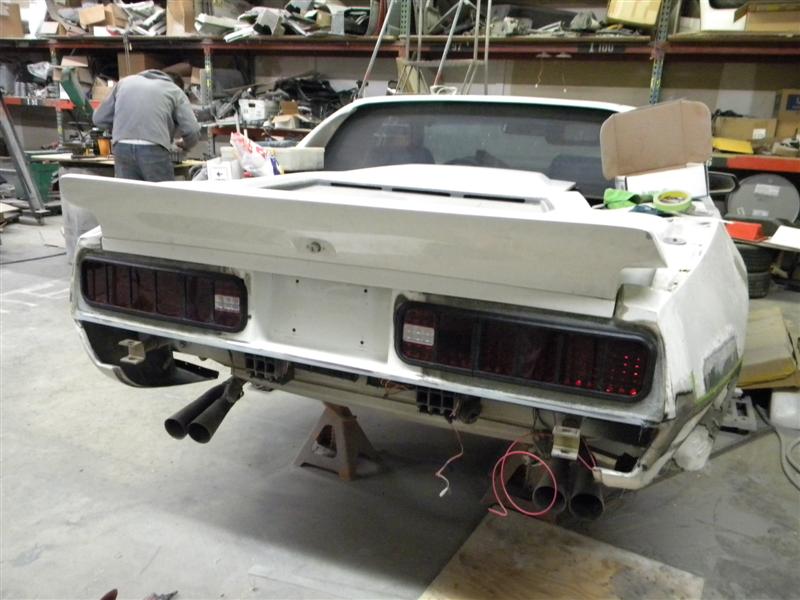
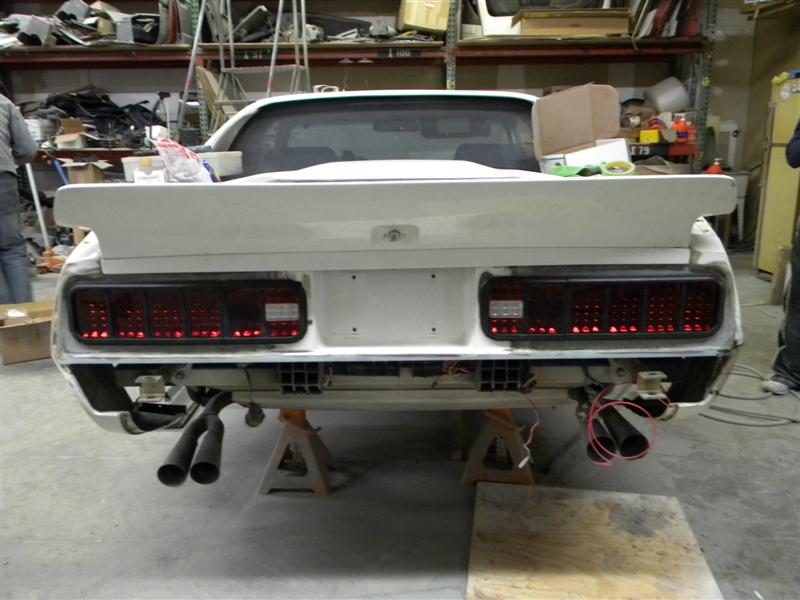
Some progress on the tail lights today.
.JPG)
.JPG)
These are going to look a lot better than the '80's econo box stuff.
Archie[This message has been edited by Archie (edited 01-14-2013).]
|
|

|
Patrick
|
JAN 14, 09:05 PM
|
|
Back on page three there was discussion regarding the color of the back panel. Seeing as how the trim around the new lights is black, it would seem to me that the rear panel should stay white now.
With the black trim around the lights and bumper being changed to black, I think there'll be enough contrast to look really sharp with the white body.
This thread is great. We all get to enjoy the process without having to pay for the restoration. 
|
|
|
|
troyboy
|
JAN 14, 09:42 PM
|
|
And as for you Patrick....
That hurt  j/k but mama is worth it j/k but mama is worth it[This message has been edited by troyboy (edited 06-07-2013).]
|
|
|
|
Patrick
|
JAN 14, 10:13 PM
|
|
| quote | Originally posted by troyboy:
And as for you Patrick....
That hurt j/k but mama is worth it
|
|
Troy, since I have your attention... 
I wanted to mention that I have a special interest in this particular car. Bill's a friend of mine and I had a chance to buy this Enterra from him long before you got your mitts on it. Although I love the Enterra Vipre (due to both its looks and its Canadian connection*), I basically turned it down because there's just no way I wanted a T-top car here on the we(s)t coast. (And I suspected it was going to be a much bigger restoration job than I could reasonably handle.)
However, it's obviously in the right hands. When I see what Archie and his boys are doing, I know this beautiful car is going to turn out great! 
(*Enterra Vipres were originally assembled just five minutes from where I live.)
|
|
|
|
troyboy
|
JAN 18, 07:34 AM
|
|
 [This message has been edited by troyboy (edited 06-07-2013).]
|
|
|
|
Archie
|
JAN 18, 01:32 PM
|
|
|
|
|
troyboy
|
JAN 19, 02:15 PM
|
|
|
looking good [This message has been edited by troyboy (edited 06-07-2013).]
|
|
|
|
Archie
|
JAN 22, 12:12 AM
|
|
|
|
|
madcurl
|
JAN 22, 01:18 AM
|
|
| quote | Originally posted by Archie:
Archie |
|
Refreshingly beautiful.
|
|

|
madcurl
|
JAN 25, 12:51 PM
|
|
I bored. Please excite me. 
|
|
|

.JPG)
.jpg)
.jpg)
.jpg)
.jpg)
.jpg)
.jpg)
.jpg)
.jpg)
.jpg)
.JPG)
.jpg)