|
| LS4 / F40 swap - fieroguru (Page 187/216) |

|
fieroguru
|
MAY 14, 07:16 PM
|
|
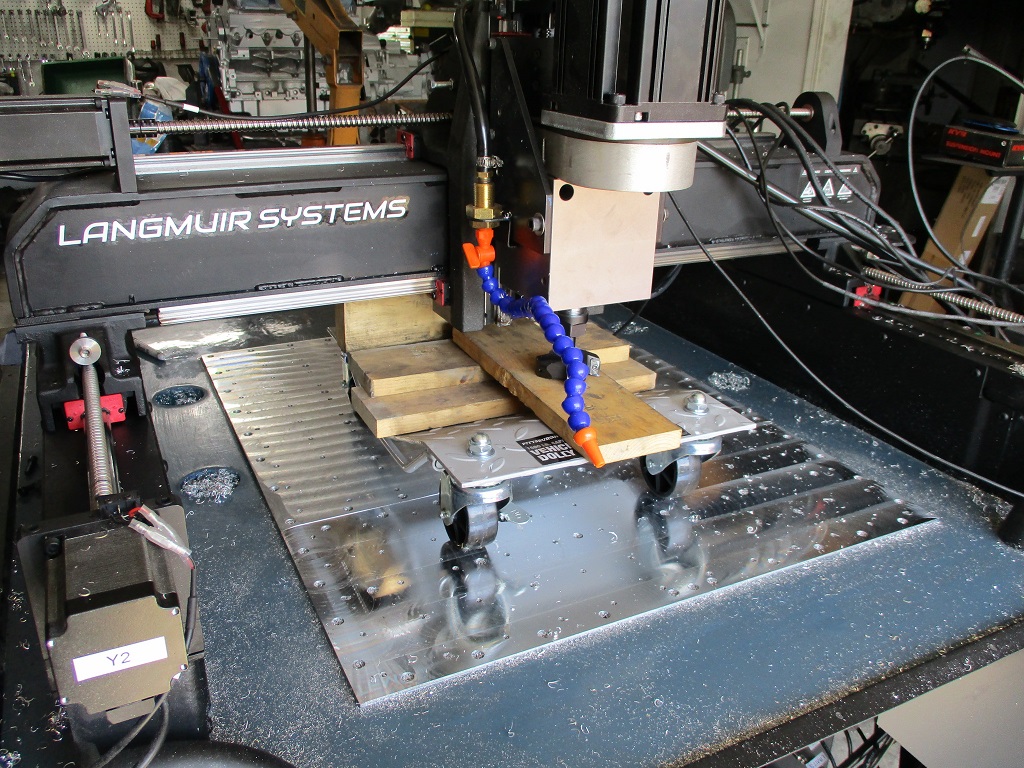
The baseplate is now fully surfaced and the X-axis is back in the proper orientation. Some things I learned... don't be surprised to see around .005" difference between the X-carriage and the baseplate when you flip it due to some tolerance stacking. I used some of the shims to true it up so the front and rear baseplates would be parallel with each other.
The wheel dolly worked great to flip the X-Axis around. The 3/16" spacers came in handy as I could pull them out and then the X/Z-axes would rest on the dolly and clear the Y-rail carriages
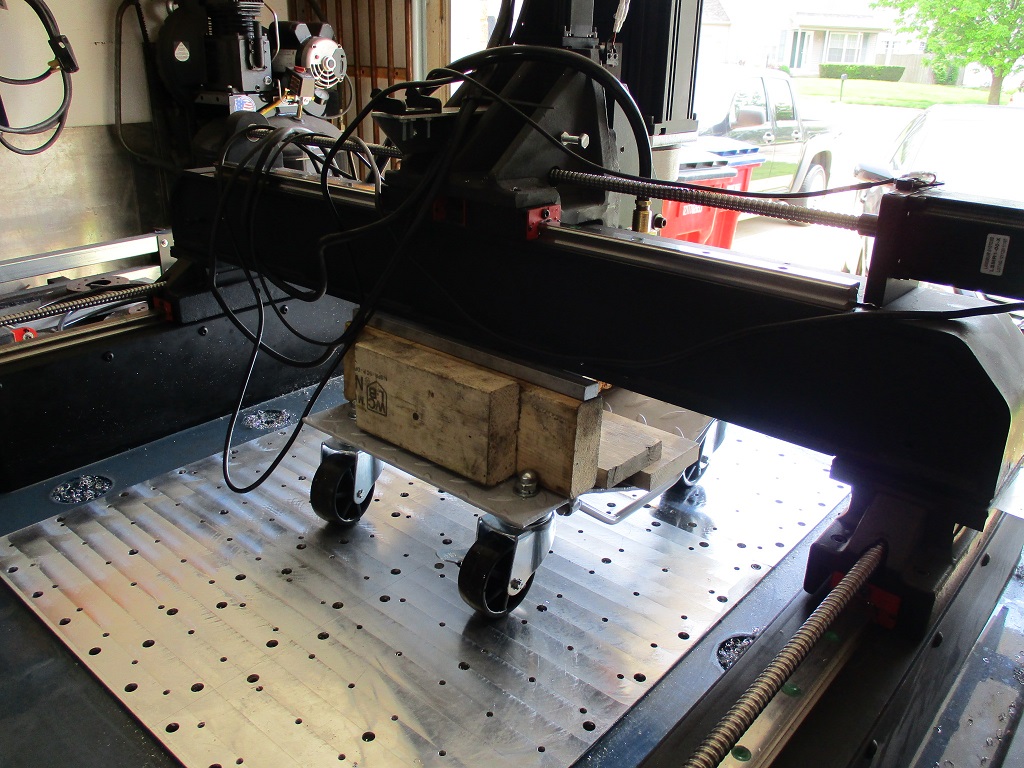
The one regret with all my mockup before concrete, I didn't install the Z-axis to verify where the spindle ended up along the Y-axis. With the flycutter, I could have easily made the baseplate 32 " and used this space at the front. I used the specified spacing from Langmuir, bit this was a missed opportunity.
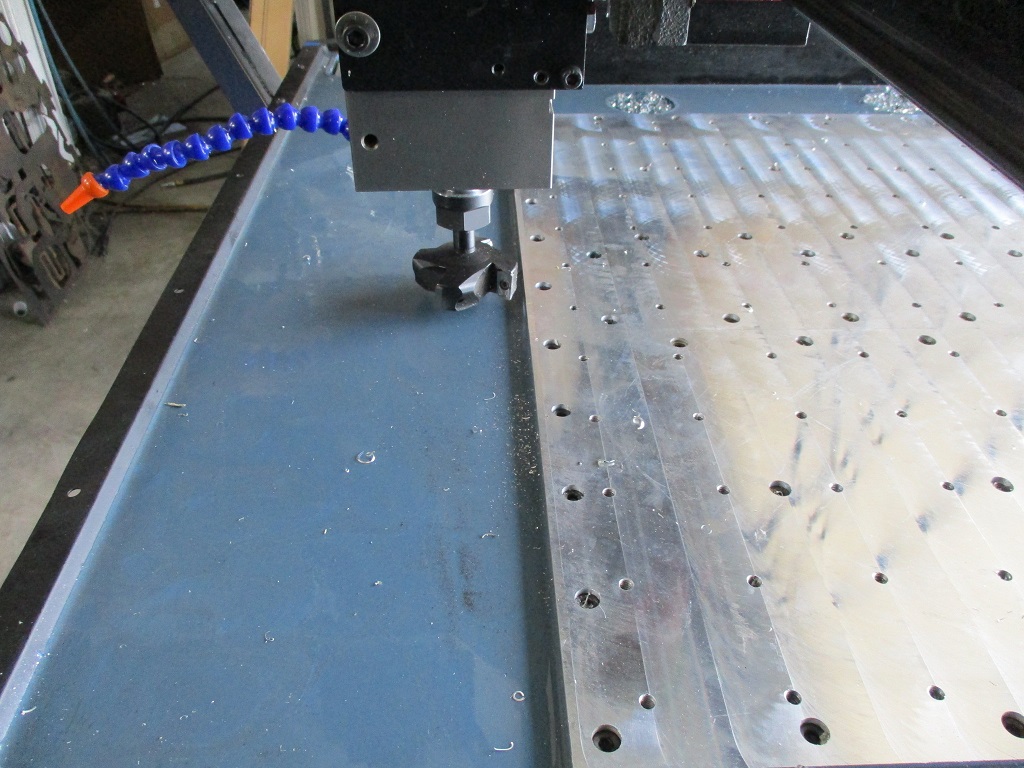
For the 2 center drains, I used some thick & coarse scotchbrite to act as a filter. Just cut them in slightly oversized circles and pressed them into place.

Now I get to work on the enclosure and lights.
|
|
|
|
zkhennings
|
MAY 16, 02:33 PM
|
|
You would probably kill it if you had a youtube channel that follows your work, I bet lots of people would be super interested. A retirement possibility?
Looking forwards to seeing chips fly, and also seeing the turbo setup fire up.
|
|
|
|
fieroguru
|
MAY 17, 06:59 AM
|
|
|
From the 3 forums I post stuff on, I get a lot of positive feedback and lots of views on my threads. I possibly could do more on Youtube, but that really isn't my thing. I would rather spend my limited free time doing what I love to do vs. cutting it in half to make, edit, and post videos. Sure it might be able to make some $$, but between my day job and LLC, I don't really need to make more. I have 19 years to go before retirement, so who even knows if Youtube or its replacement will be a thing then. My retirement plan is to have a full function machine shop in the garage that I can spend my days making parts and building things, some will be for customers but most will be for my projects, which is why I continue to expand and upgrade my garage equipment.
|
|
|
|
qwikgta
|
MAY 21, 11:17 AM
|
|
| quote | Originally posted by fieroguru:
From the 3 forums I post stuff on, I get a lot of positive feedback and lots of views on my threads. I possibly could do more on Youtube, but that really isn't my thing. I would rather spend my limited free time doing what I love to do vs. cutting it in half to make, edit, and post videos. Sure it might be able to make some $$, but between my day job and LLC, I don't really need to make more. I have 19 years to go before retirement, so who even knows if Youtube or its replacement will be a thing then. My retirement plan is to have a full function machine shop in the garage that I can spend my days making parts and building things, some will be for customers but most will be for my projects, which is why I continue to expand and upgrade my garage equipment. |
|
you may want to look into this, my kids tell me that those with a lot of followers, make serious $$$$ off youtube.
i'd watch.
|
|
|
|
fieroguru
|
MAY 30, 09:35 PM
|
|
|
|
|
fieroguru
|
JUN 03, 09:08 PM
|
|
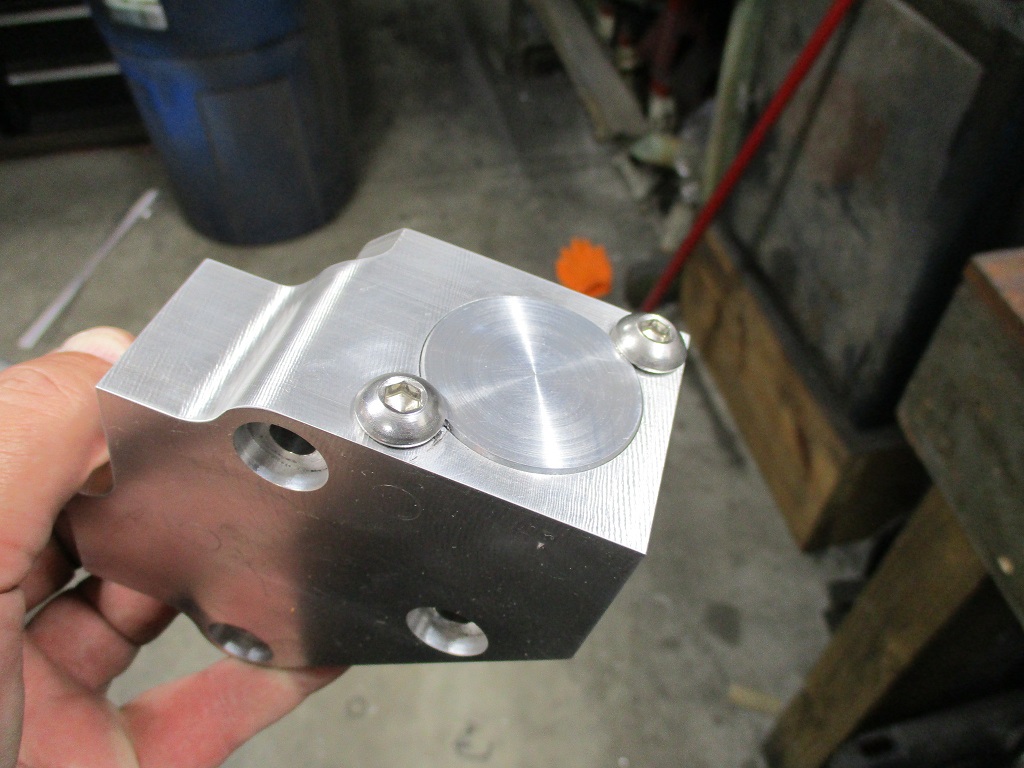
Marty and I both took Friday off so we could get the rest of the engine/transmission parts powder coated. So today I started putting things together for hopefully the last time.
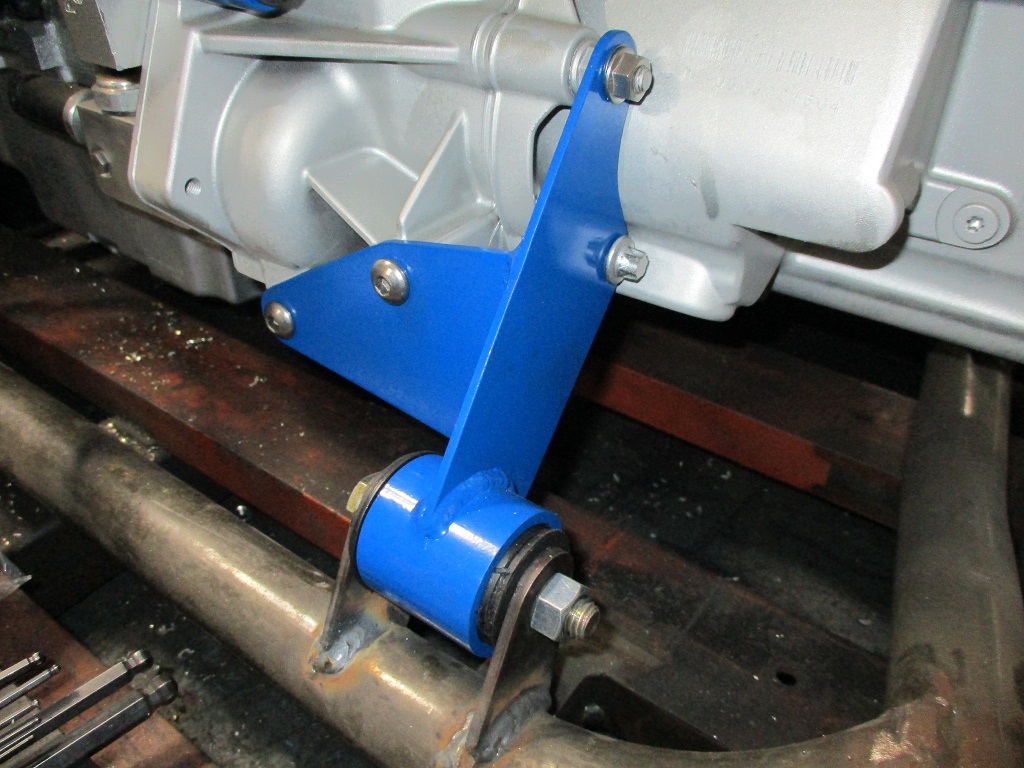
Front Transmission Mount: Clearly this was made before I got the CNC and I never bothered to rework it to add lightening openings.
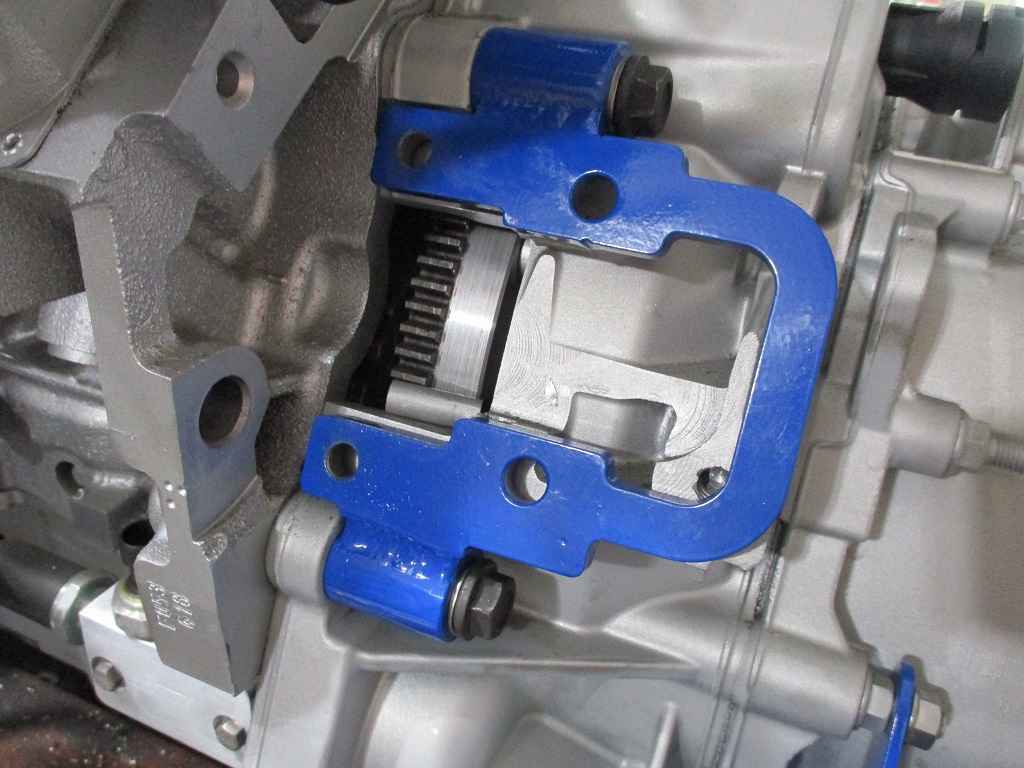
LS4/F40 Starter mount - this is my new style that uses a 5/16" plate with less material in non-critical areas, so it is lighter. Side note, I have a small length of flywheel ring gear that I put in the starter pocket to lock the crankshaft for tightening and removing the balancer bolt. Today, I tightened the balancer bolt with a 3' long 3/4" breaker bar.
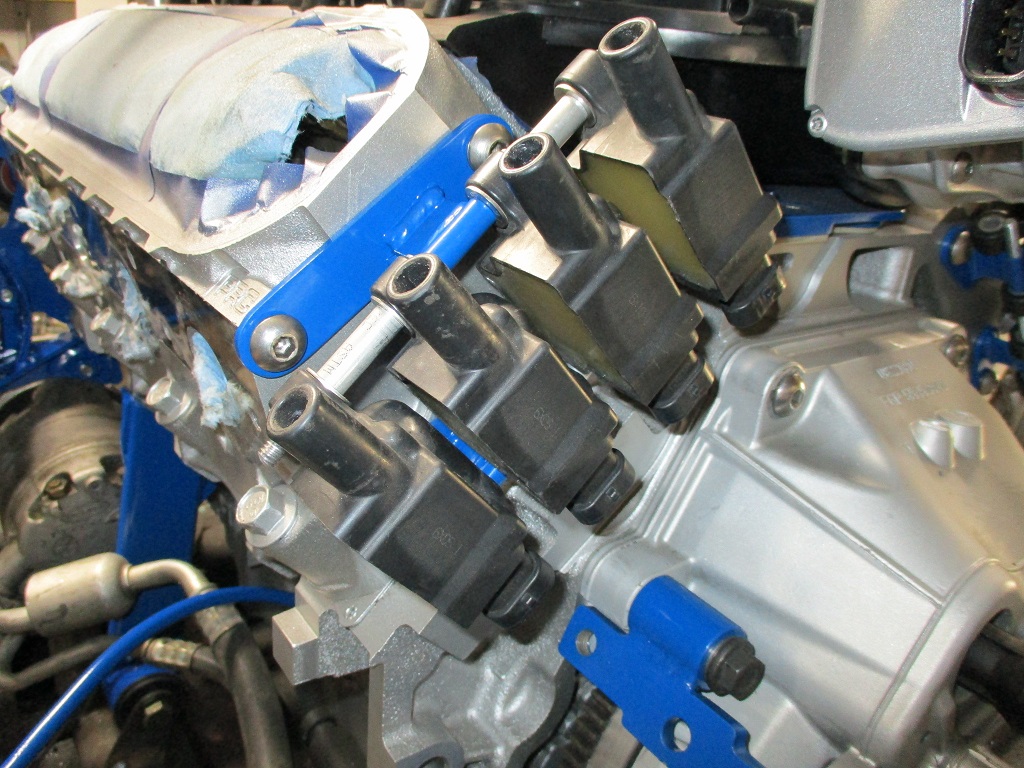
Front bank coil bracket - this used to have a large 1/8" plate that covered the end of the head. Everything except the bolt locations and tabs were cut away to save weight. The 1/4" all thread is also aluminum to save weight.
Modified LS4 dipstick - cut the stock bracket off, bend the dipstick to exit the rear, reshape the bracket, then weld it back together.
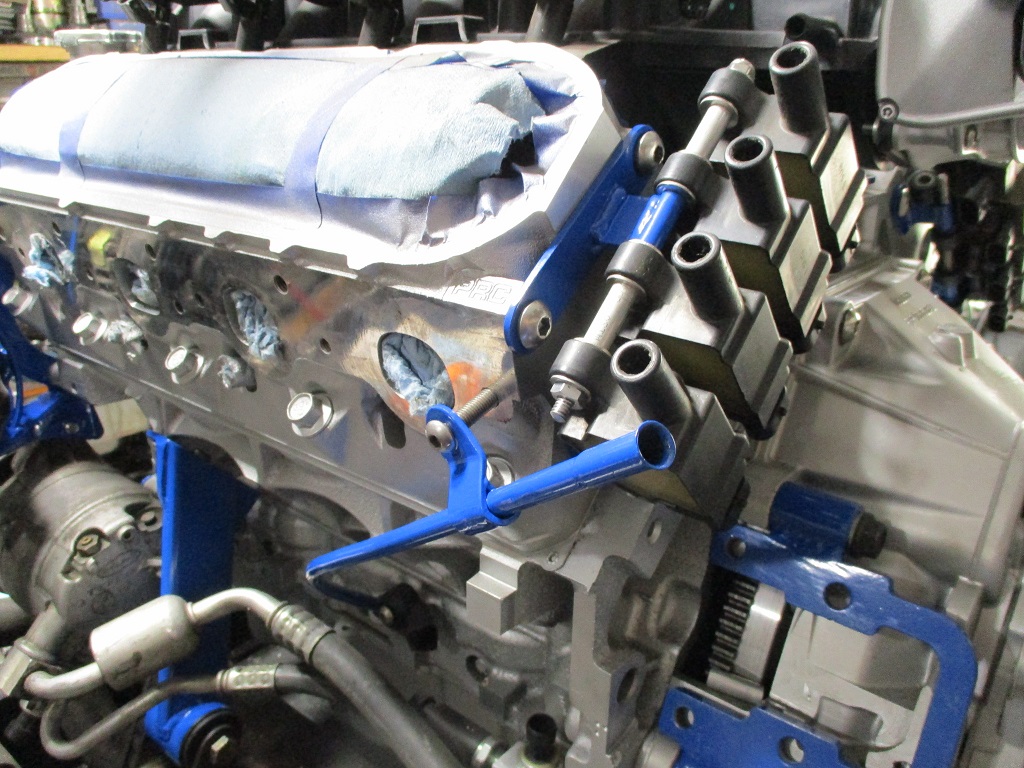
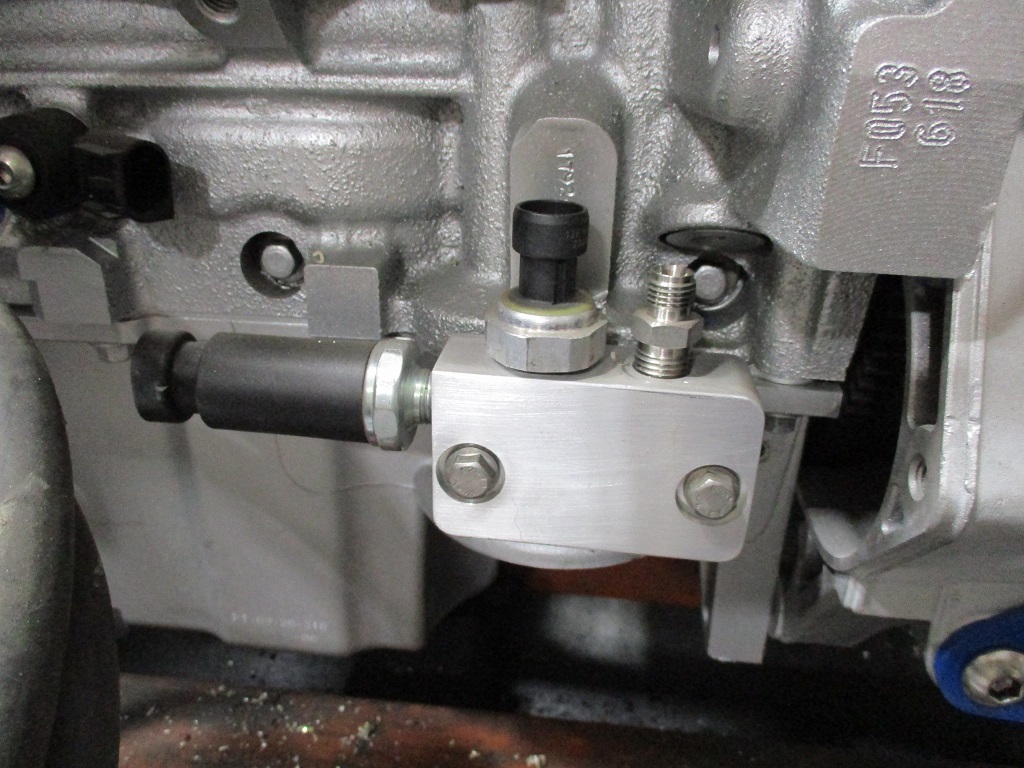
One of my LS4 Multi-Port Oil Bypass plates with the stock LS4 and Fiero oil pressure senders.
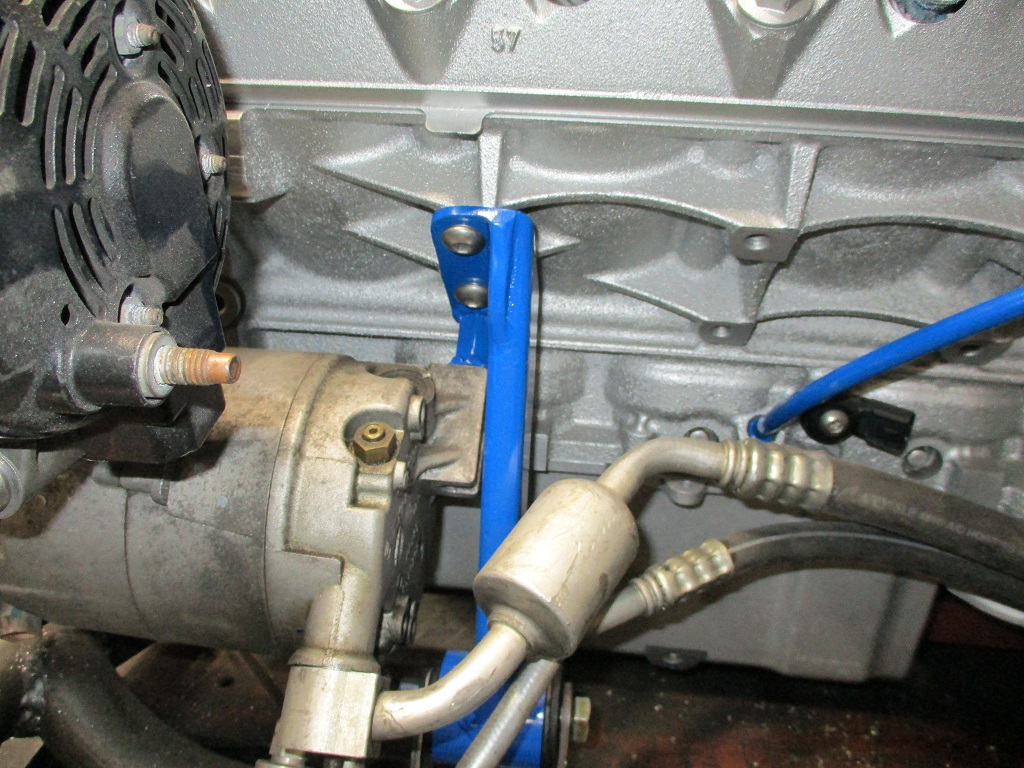
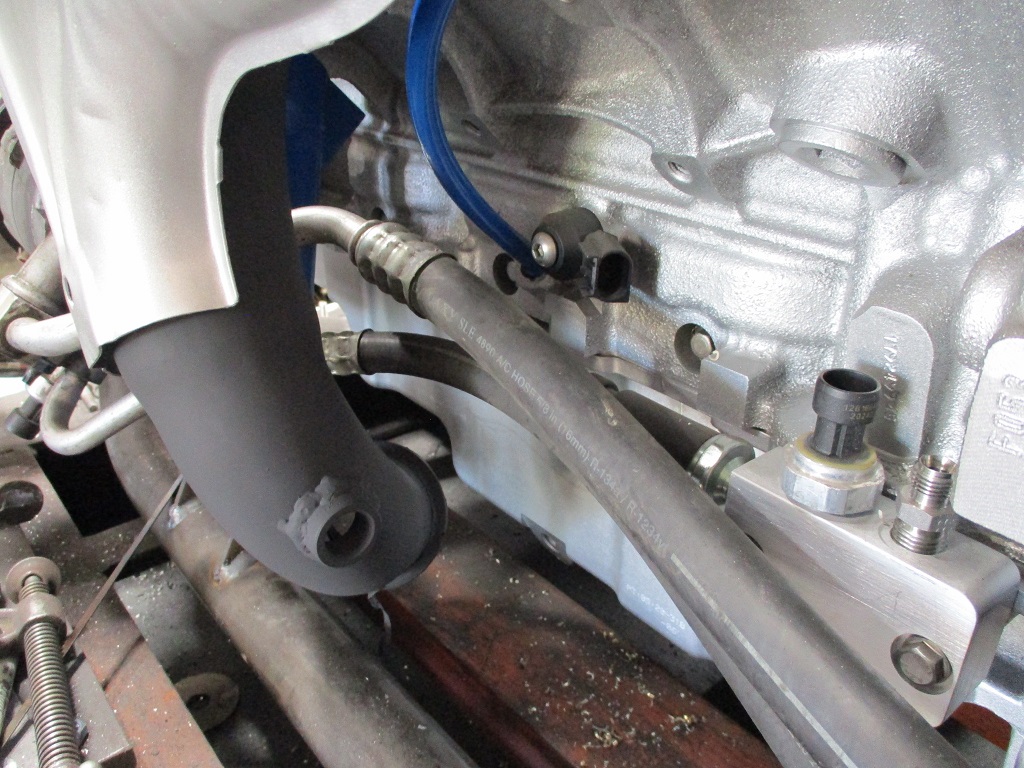
Here is the front engine mount with the integrated rear AC compressor support and the AC hose.
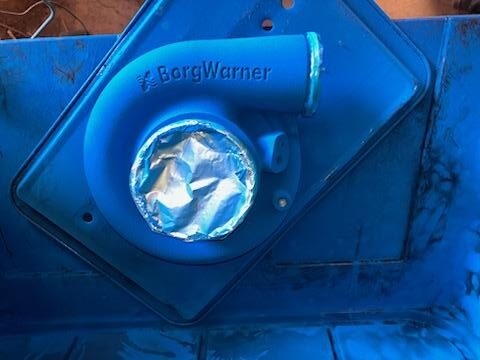
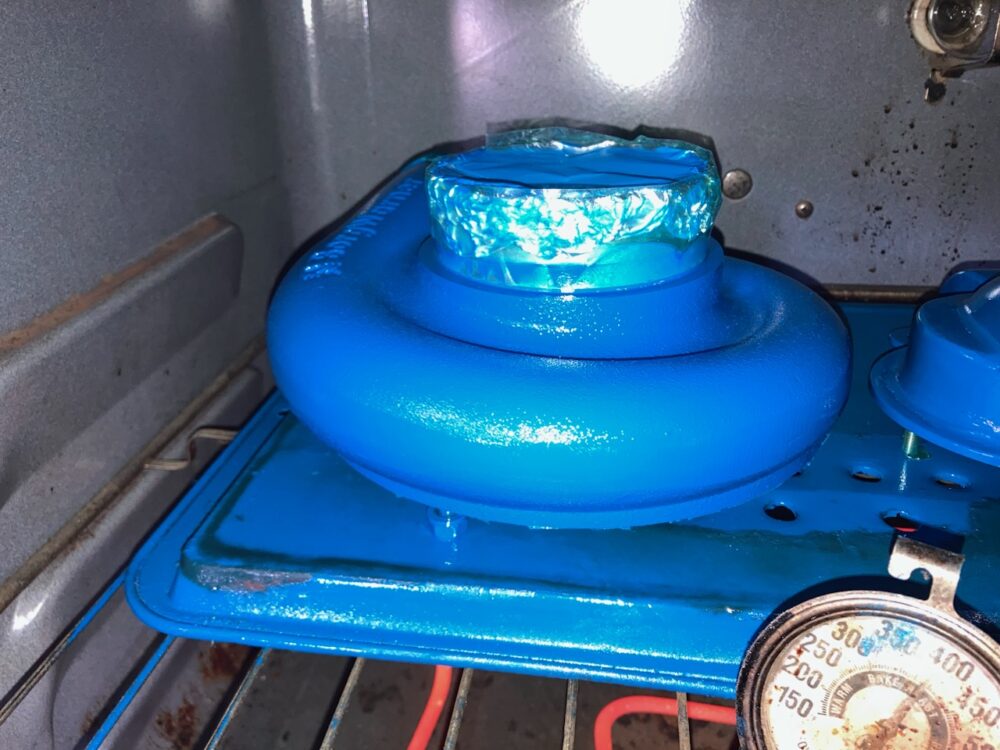
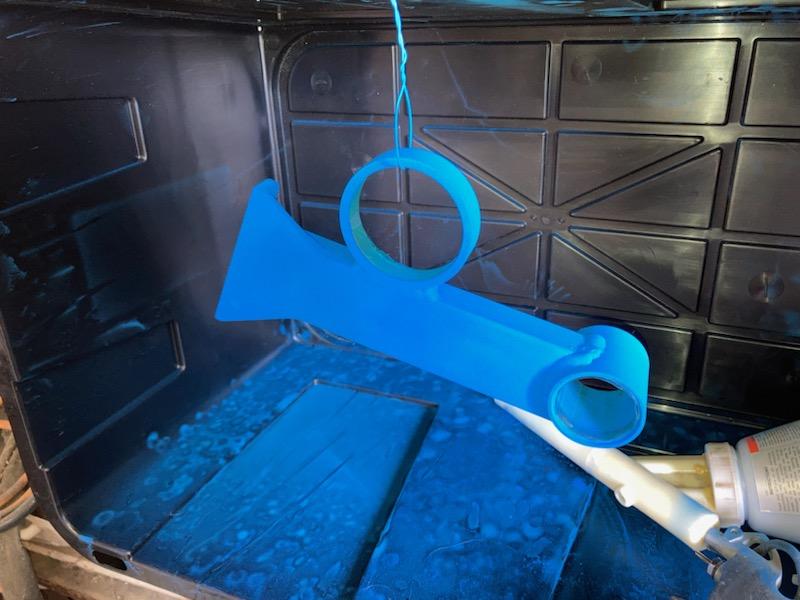
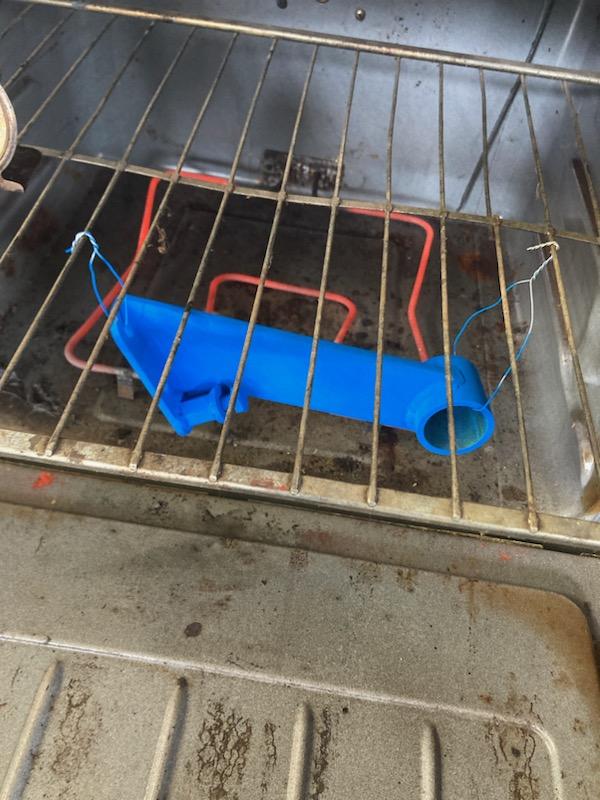
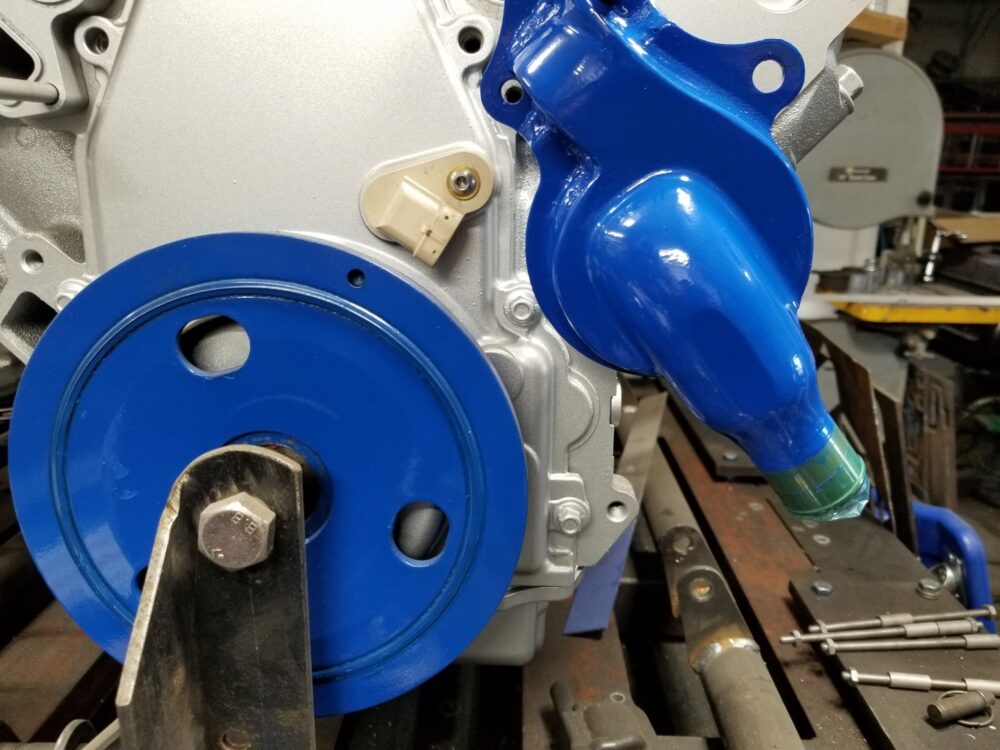
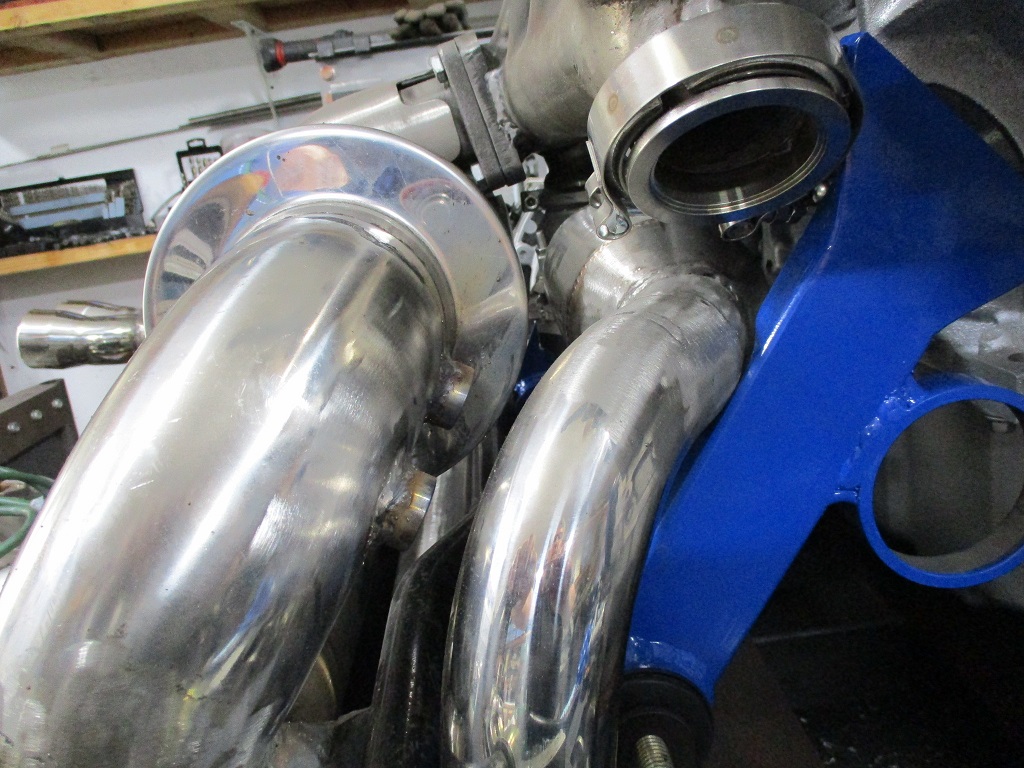
The front exhaust manifold with heat shield. This is a modified and ported LS6 exhaust manifold. I added the O2 sensor bung today, blasted it, primed and painted with some 2000 degree ceramic paint. The head shield was blasted as well and painted with aluminum engine paint. This will come off a couple more times as I will be using some exhaust wrap in a couple of locations (by the alternator and down by the AC hose).
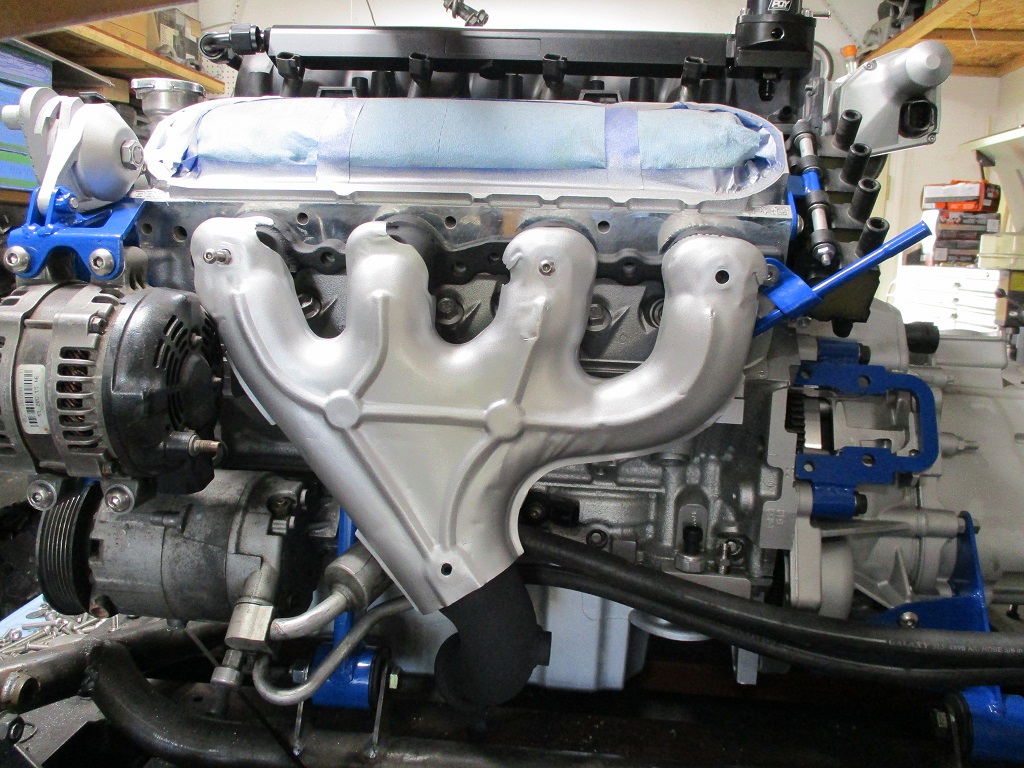
Here is the clearance of the AC hose behind the exhaust manifold:
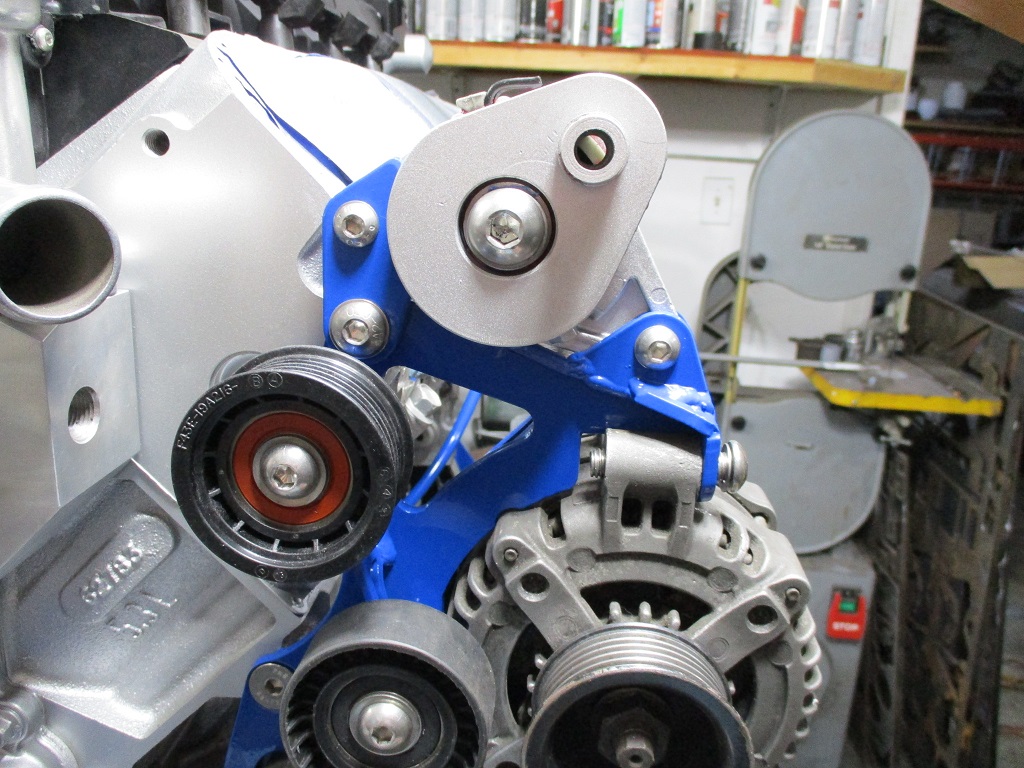
Here is the Tensioner, Alternator and AC bracket - this uses the stock LS4 alternator and LS4 AC compressor and the bracket was refined after I got the CNC plasma, so it has lots of speed holes and bracing.
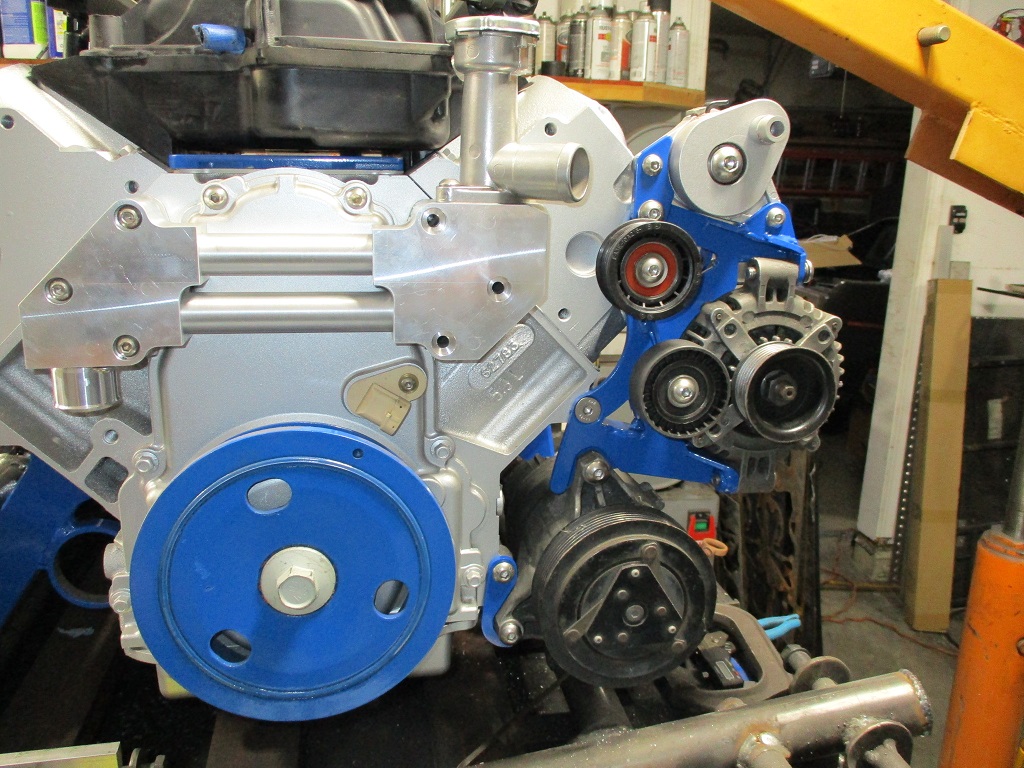
The tensioner was disassembled cleaned and painted aluminum. Still waiting for all new pulleys to arrive.
Tomorrow I will continue to work my way around the engine...
|
|
|
|
fieroguru
|
JUN 04, 08:21 PM
|
|
Spent a fair amount of time on the water manifold today.
Turned some press in plugs for the counter bored holes.
Faced the plugs and front surface to make everything smooth.
Milled the coolant passage from the water pump into to the coolant manifold.
And turned a plug to cap replace the coolant housing input port.
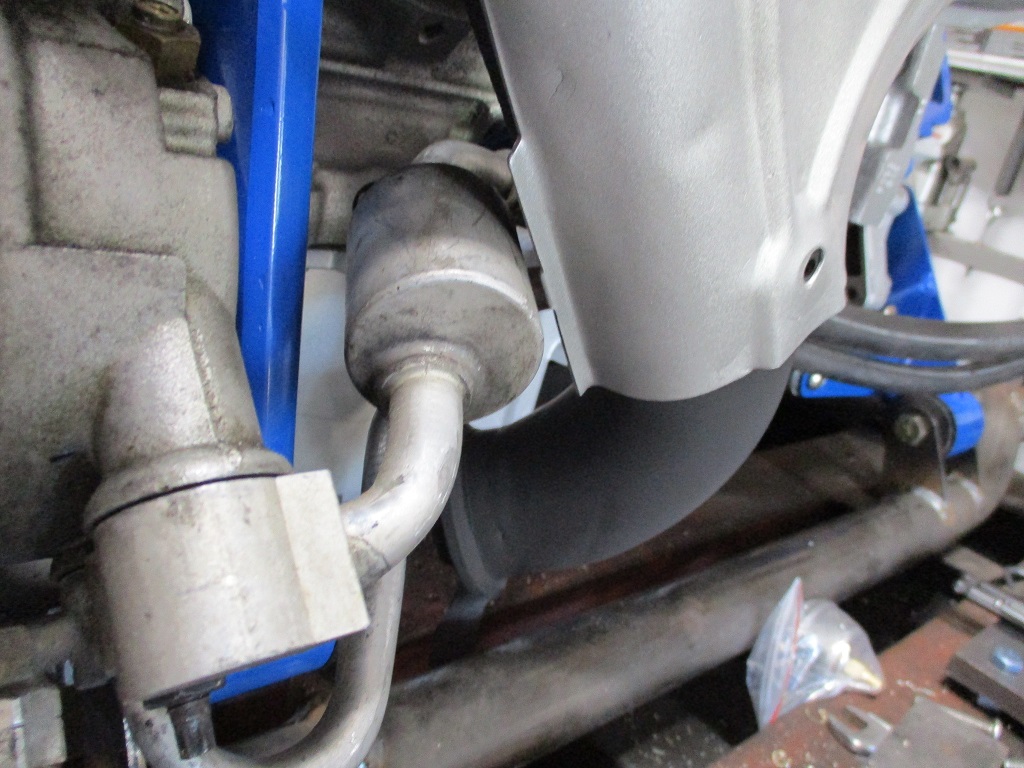
Then I did a little work on the exhaust, capped the Helmholtz tube and added in the two O2 sensor bungs.
I plan to keep knocking out tasks during the evenings this week.
|
|
|
|
zkhennings
|
JUN 06, 11:53 AM
|
|
|
Awesome, what paint did you use for the manifolds? I have been very unlucky with header paint not flaking and discoloring after a few months.
|
|
|
|
fieroguru
|
JUN 07, 06:48 AM
|
|
| quote | Originally posted by zkhennings:
Awesome, what paint did you use for the manifolds? I have been very unlucky with header paint not flaking and discoloring after a few months. |
|
https://www.amazon.com/Rust...e/dp/B003CT4AKC?th=1
I sandblasted the manifold, washed it with dawn dishwashing soap, then sand blasted again. I used the 2000 degree primer from the same brand, and followed the instructions. Time will tell if it lasts or not. I will be doing the other manifold this week.
|
|
|
|
ericjon262
|
JUN 07, 09:56 PM
|
|
FWIW, these manifolds were painted with VHT exhaust paint from Orielly's.

I applied it in March of 2019, following the instructions as closely as possible, and cured them in an oven. The truck has been driven tens of thousands of miles, literally across the country, it's been to Alaska, Key West, and almost everywhere in between, I also didn't have access to a sand blaster to get them really clean first, just wire brushes. all weather, rain, snow, sun, you name it. it's been on salted roads, and even spent the night at Bonneville once. it is worth mentioning though, it's a suburban with a TBI 350, Maybe if I'm lucky it makes 200 hp. your results may vary, but I'm pretty happy with mine.
https://www.oreillyauto.com.../flameproof/vht/vht1
Pictures of the initial installation, along with the full build are on RFT in the "other cars" section.
http://www.realfierotech.co...php?p=157628#p157628
------------------
"I am not what you so glibly call to be a civilized man. I have broken with society for reasons which I alone am able to appreciate. I am therefore not subject to it's stupid laws, and I ask you to never allude to them in my presence again."
I invited Lou Dias to trash me in my own thread, he refused. sorry. if he trashes your thread going after me. I tried.[This message has been edited by ericjon262 (edited 06-07-2023).]
|
|
|
|