|
| JohnWPB 1986 GT Fastback worklog (Page 18/71) |

|
JohnWPB
|
DEC 03, 04:32 PM
|
|
Good advice 2.5, or I am sure I would have smashed it in a million pieces... on accident of course! 
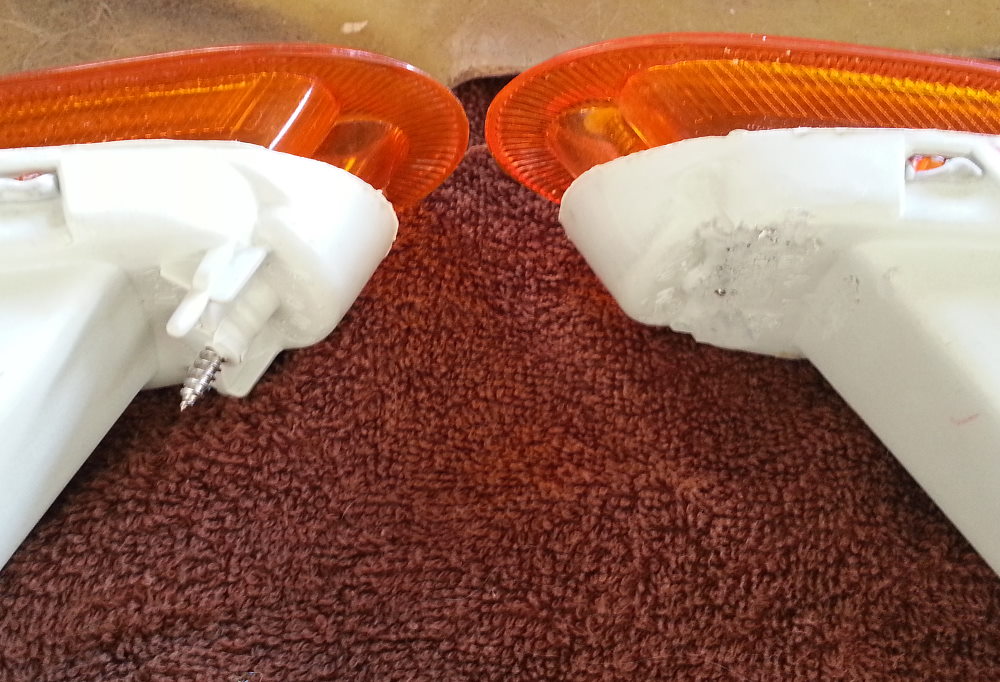
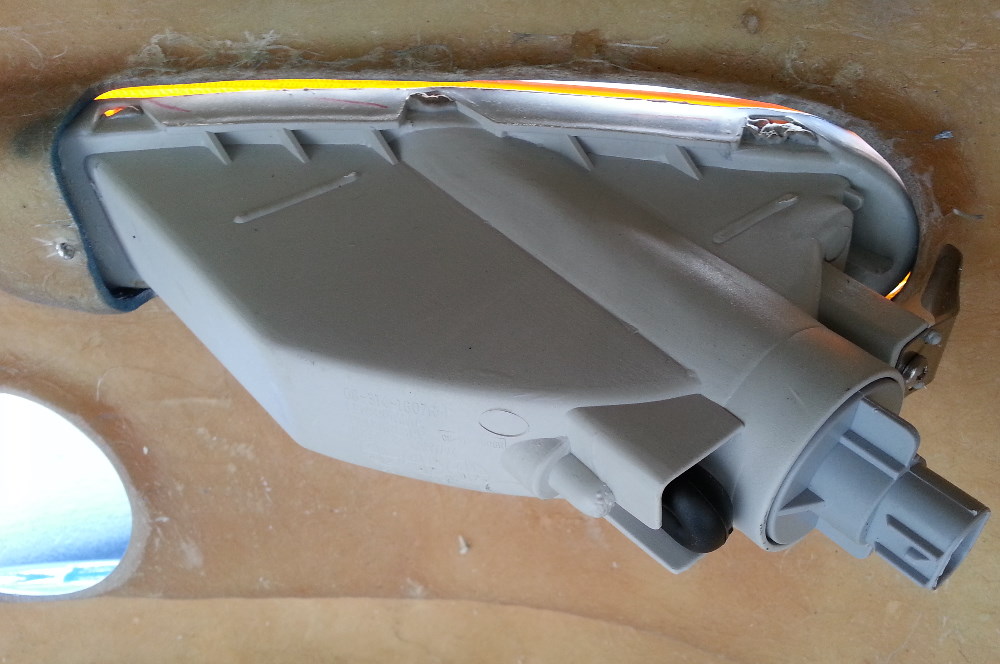
So, leaving the headliner on the back burner, I decided to go back outside the car, the front bumper specifically. I bought the F355i bumper, with a slot for the belt molding from JimmyS at Fiero Fiberglass.
The bumper is molded to fit the Chrysler Sebring front marker lights. I have seen a few posts, and talked to people how they epoxied or fiberglassed brackets inside the bumper for the lights to mount to. It was something that I kept putting off, as I know nothing about how to work with fiberglass. I decided to tackle it today, and get the measurements and an idea of what would be needed.
While I was fitting the lights, I noticed that they did not fit correctly into the bumper. The one end was being held out by the part of the hole that was not removed when they light holes were cut out. So, I grabbed the Dremmel and headed for the bumper. As I was moving the light around to see where it was hitting, I noticed it was the back of the light, with alignment pins and a screw that holds the lens on, that were preventing the light from sitting flush. Looking at the way it was designed, that alignment pin and stuff was to fit into the original Sebring bumper. I decided I sure didnt need it, and on a whim, I backed the screw out, and headed to the bench grinder to grind it down a bit, and then see if that helped. That did the trick! I could now fit the light into the opening nice and snug.
Here is one of the lights that has been ground down, and the other still untouched:
.
.
.
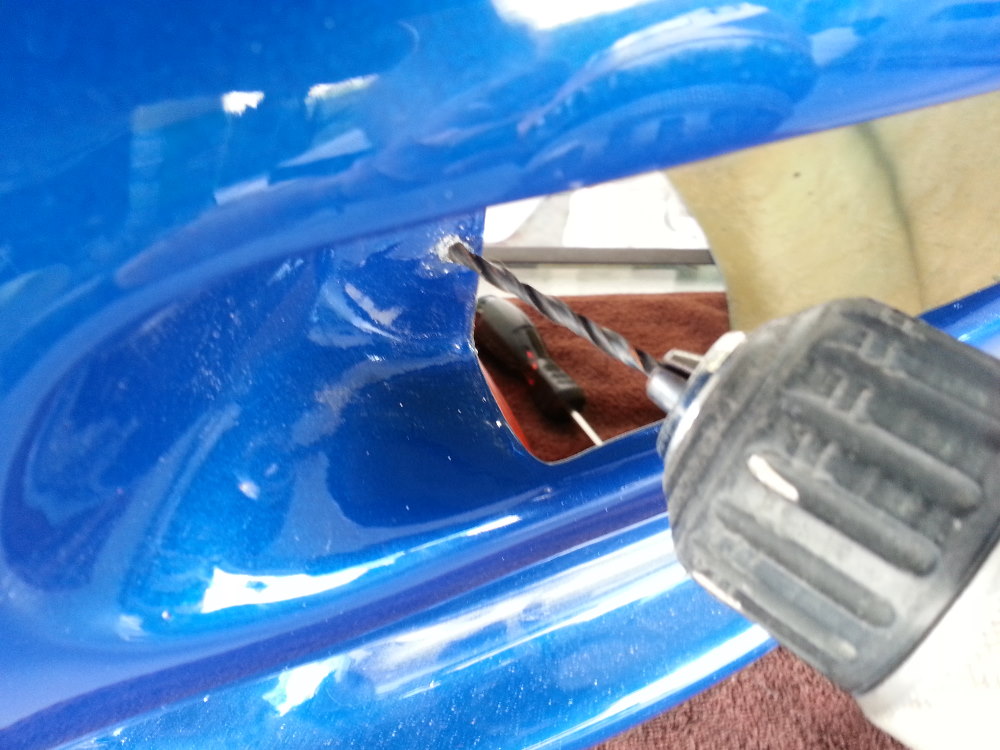
After that I was thinking about grinding down the screw, as it did not need to be so long, as I was not screwing it into a Sebring bracket. Then DING! Another though... (this could get dangerous if I keep this up)! I tightened the screw down, to where it was just the point sticking out of the back of the light, and put the light in the bumper where I wanted it. I then tightened and loosened the screw a half a turn, quite a few times to make a mark on the bumper, that I proceeded to drill a pilot hole for.
.
.
.
After drilling the pilot hole, I lined the light back up, and tightened the screw through the fiberglass:
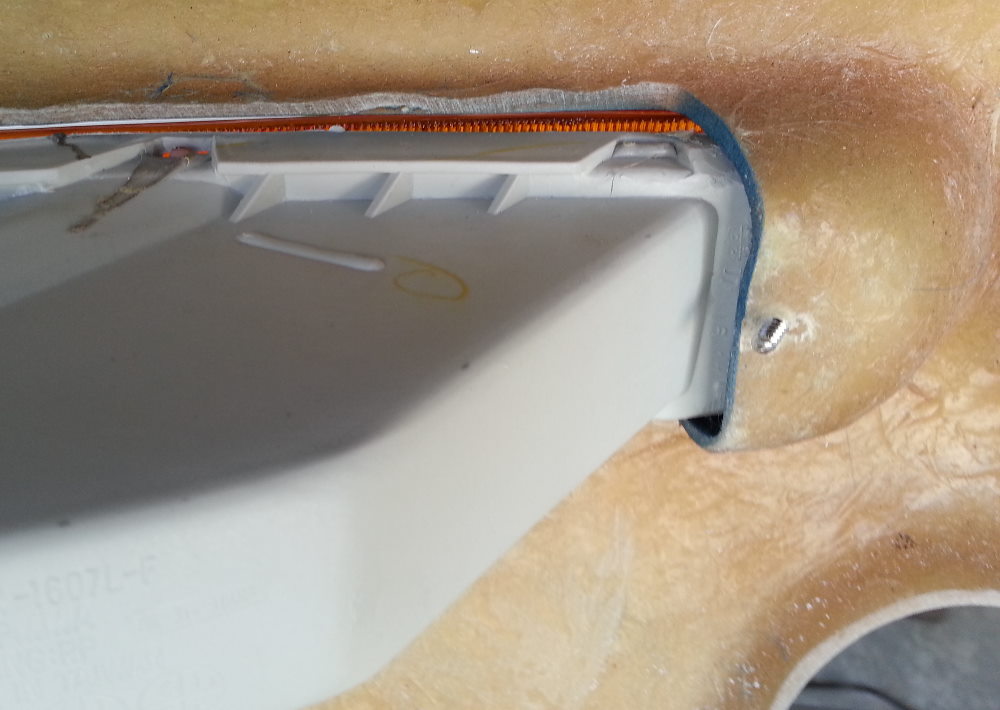
With that screw in the fiberglass, and the light all lined up, this was going to easy to fabricate a mount, as the light was held securely in place. It was then that I noticed the metal clip on the other end of the light.
Backing out the Phillips screw, I could tell that this was high tension spring like steel, and after losening it up, I could see that I could probably guide it over the lip in the bumper. I gave it a try and tightened down the screw. As the screw tightened, it pulled in the steel tab tightly against the bumper.
.
.
.
Now, with the screw in one end, and the steel tab on the other end, I started to pull and push on the light.... it was in there really solid, and not going anywhere!
.
.
.
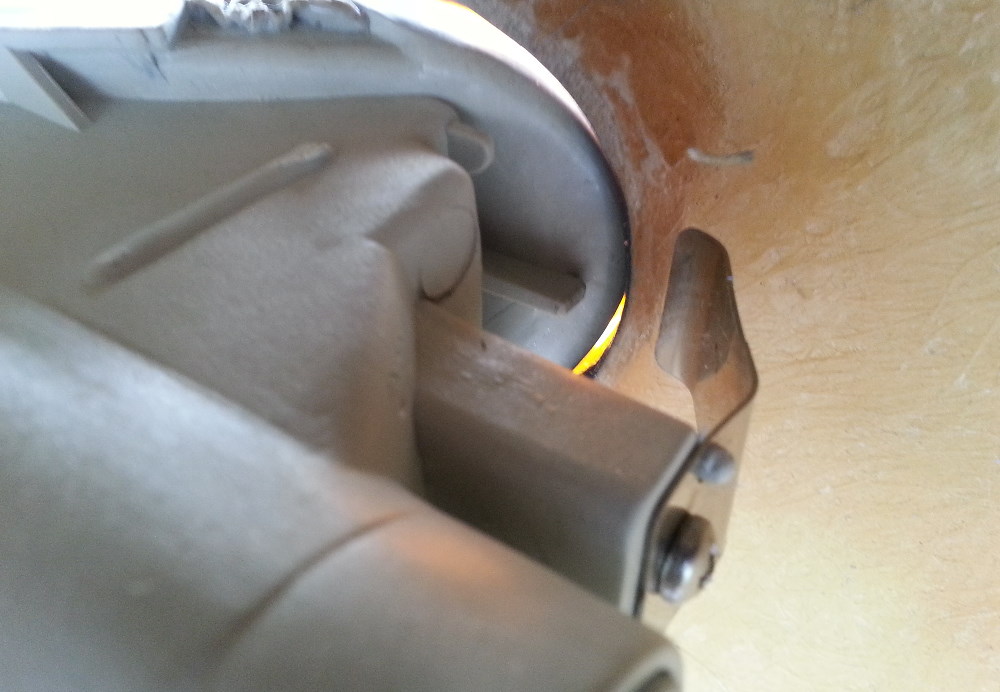
So rinse and repeat (I did the other side the same way )
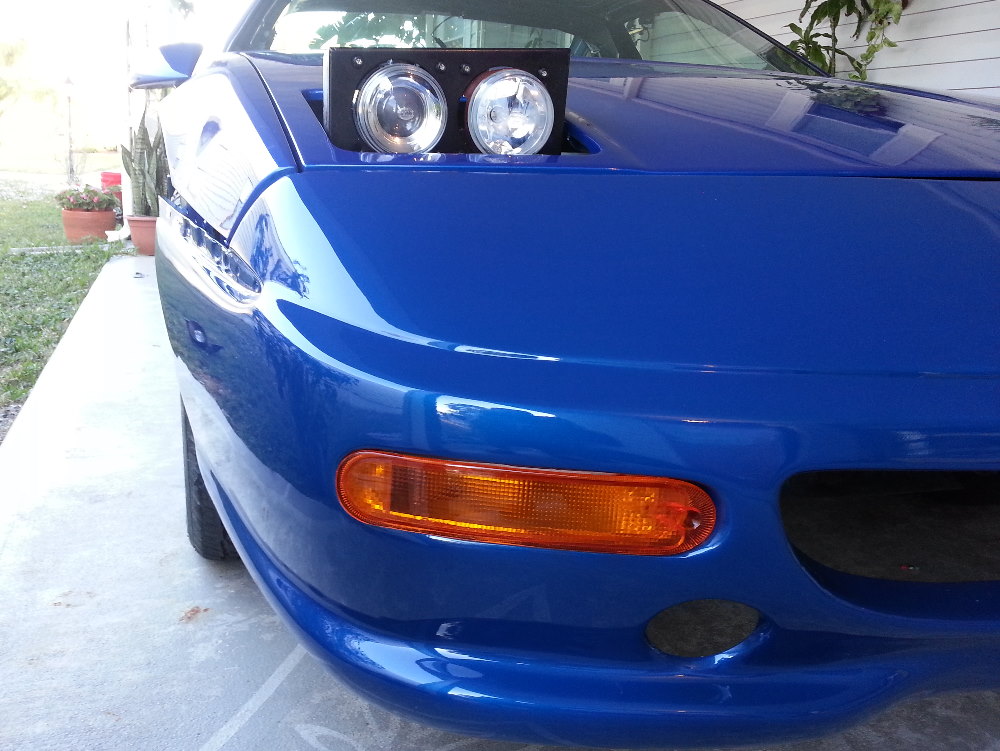
The lights are now all installed in the bumper, I'll remove the lights in a few weeks after the paint has fully cured, so I can tape up the bumper, and spray the inside of the bumper with bed liner. This way when I get the grill in, you do not see raw fiberglass through it. I also still need to find a nice set of 4" fog lights that I like to fill up the other 2 holes 
.
.
.
Here it is with the bumper carefully just resting on the car.
 [This message has been edited by JohnWPB (edited 12-03-2012).]
|
|

|
2.5
|
DEC 03, 05:29 PM
|
|
| quote | Originally posted by JohnWPB:
Good advice 2.5, or I am sure I would have smashed it in a million pieces... on accident of course!
|
|
The bumper is gonna look great
Another tip on the visors, make sure they are the right direction. I once got one in and was so happy, only to find out it now would not swing over to the side window....
|
|

|
JohnWPB
|
DEC 05, 05:28 PM
|
|
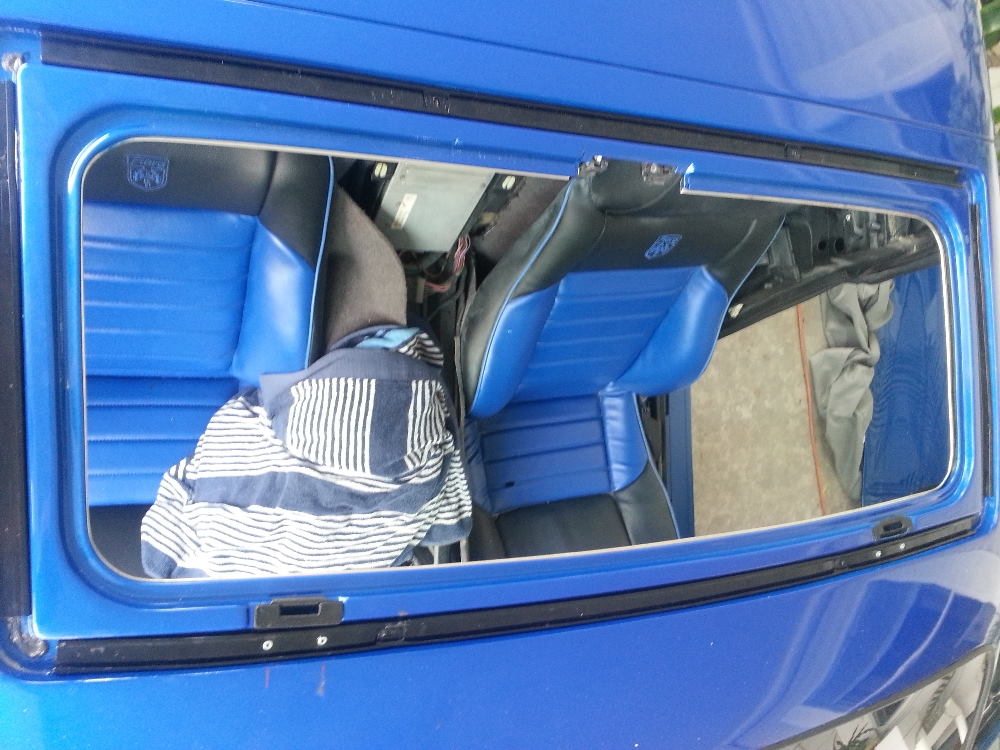
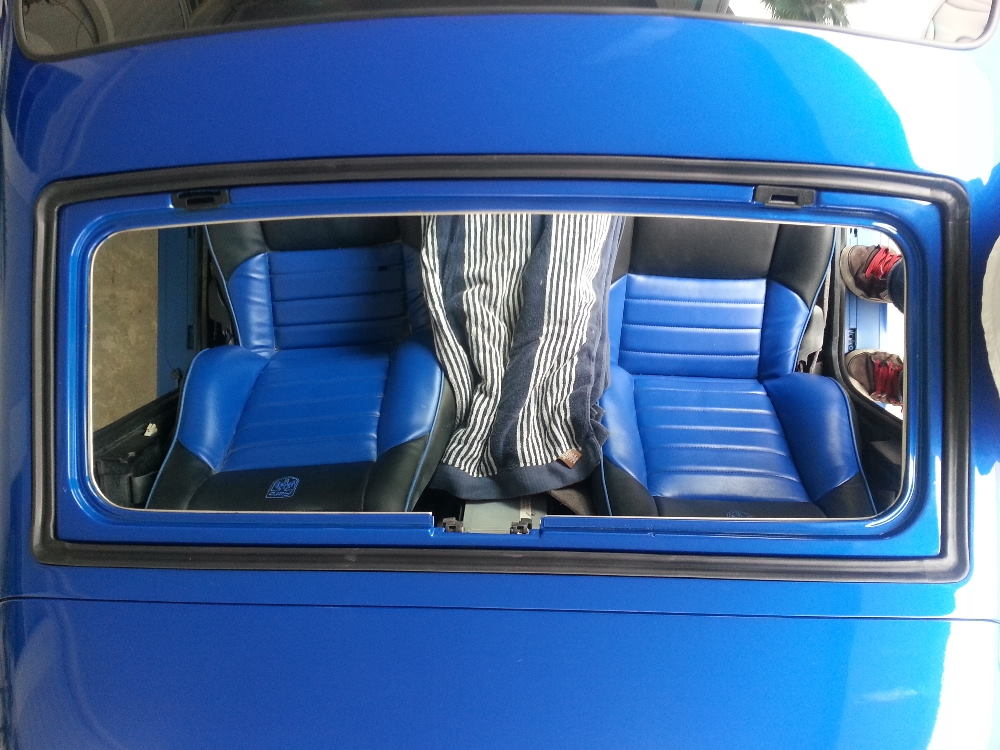
Today I decided to tackle the sunroof track installation. I bought new tracks from the Fiero Store a couple years back. When I went to install the front rail, the studs attached to the track did not line up. I could get one end in, and the other was about a quarter inch off. I finagled around, and eventually made the hole just a bit larger, and was able to get both studs through the roof.
I did not want ANY leaks, so I sealed up every hole with sealent. Even the ones that I had to pass bolts through This way there was a nice leal around every hole and bold, hopefully making everything water tight.
The first bit of sealent layed down... queezing this stuff onto a new paint job just felt so very wrong!
.
.
.
Laying down more goop as I progress around installing each section of track:
.
.
.
Here are all of the tracks finally installed:
.
.
.
Here is the Fiero Store sun roof gasket installed into the new tracks:
.
.
.
It seems to all fit very nicely! Here is a fairly close up of the left hand side:

.
.
.
Finally, a pic from above, showing the sunroof in and completed with the new tracks and gasket:
(Yes, I am missing one screw for the latch, I will be getting that from CaptnDean when they are done painting his storage unit )
.
.
.
Hmmm now what to tackle next!
|
|
|
|
rpro
|
DEC 06, 06:56 AM
|
|
|
Lookin good!! I can't wait to see it fully assembled out in the sunlight.
|
|
|
|
fierolover87
|
DEC 07, 12:09 AM
|
|
|
I'm getting all excited. I hate cliff hangers!
|
|
|
|
JohnWPB
|
DEC 07, 03:28 PM
|
|
Well. I decided to work on getting fog lights into the front bumper today. Fiero Warehouse states that they are set up for 4" fog lights. I started searching the web, and one of the ones that came up, believe it or not, was a pair at Wal~Mart for $15:
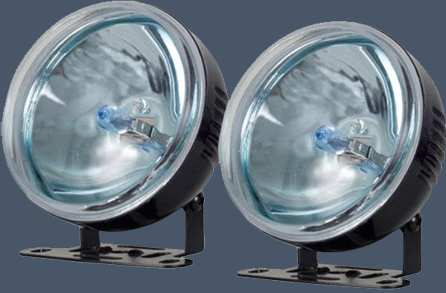
I probably will never ever use the fog lights, as I think I have seen fog here in South Florida maybe once I really just need something to fill in the holes, and look nice These are made with an ABS plastic housing but have glass lenses, that pretty much match the look of my 90mm headlights. I am not worried about the cheap mounting brackets, as they come off easily with 2 screw, and I can fabricate something that will attach on the inside of the bumper correctly.
The package says that they are 3 1/2 inches, so I figured that would be perfect, a 1/4 inch to spare all the way around to put a gasket or something. I ran up to the local Wally and picked up a pair. When I got home, I held one behind the bumper, and to my surprise, they are quite a bit too big. Looking closer at the bumper, I would not want to make the hole any larger, as then it would almost remove the raised lip that surrounds the hole. Now I am left to try to figure out what to do.... gotta think on it a bit.[This message has been edited by JohnWPB (edited 12-07-2012).]
|
|
|
|
JohnWPB
|
DEC 08, 12:06 AM
|
|
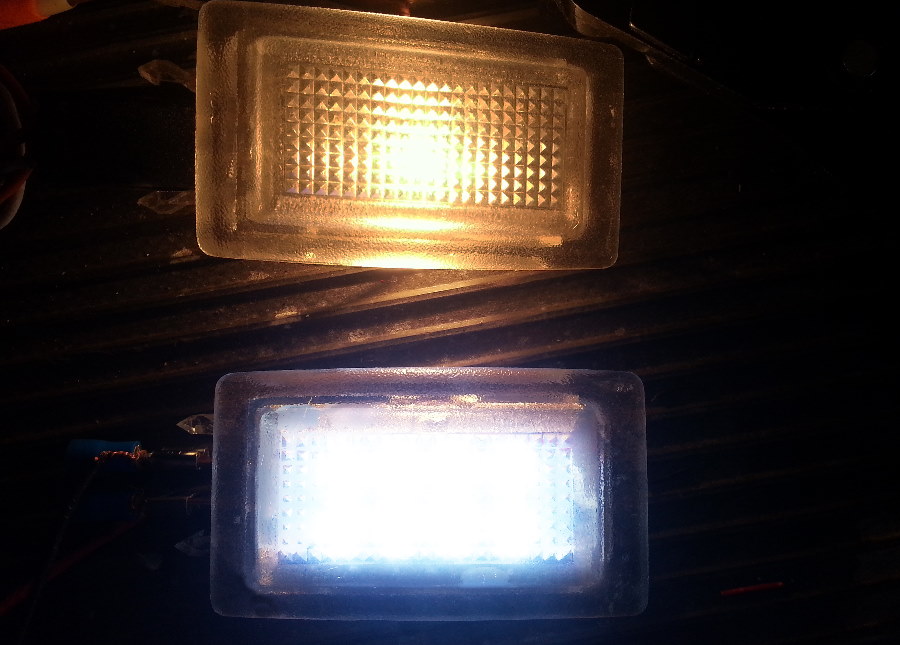
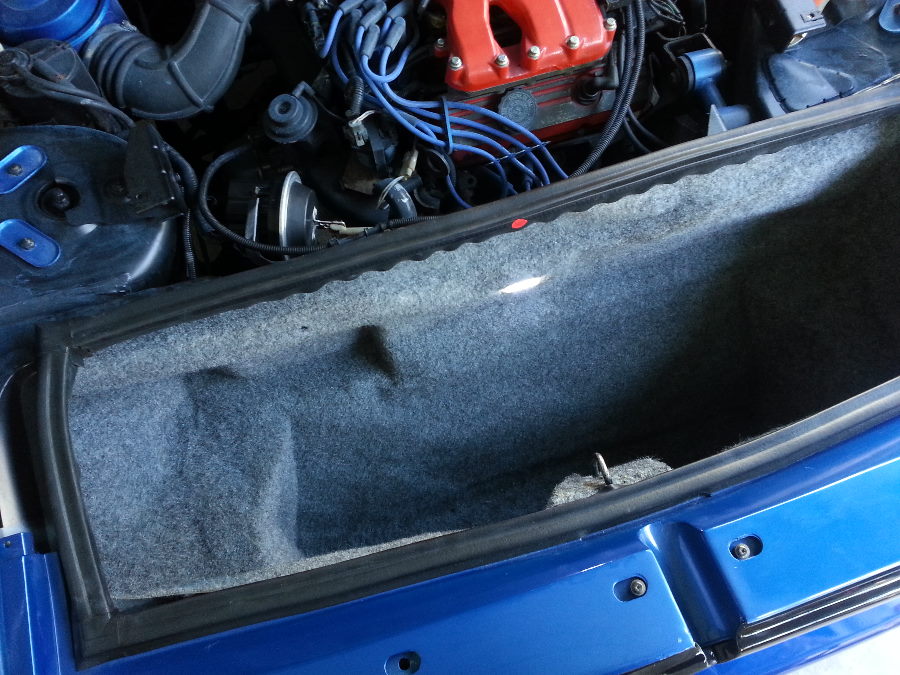
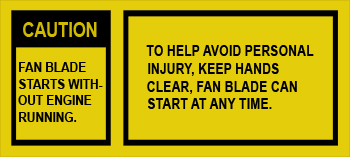
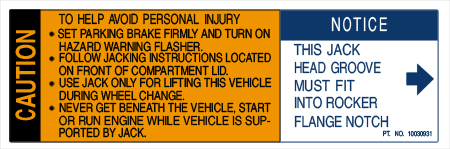
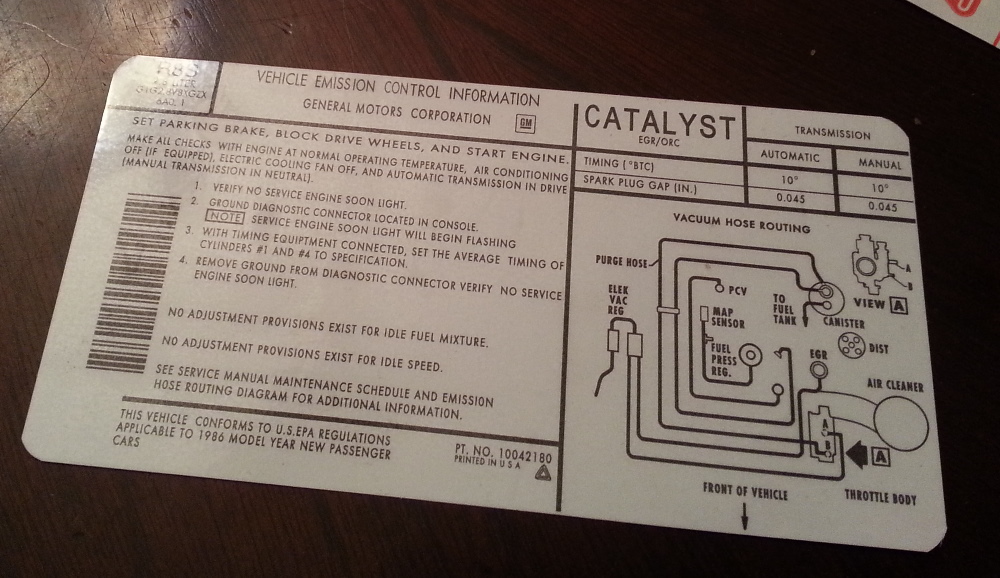
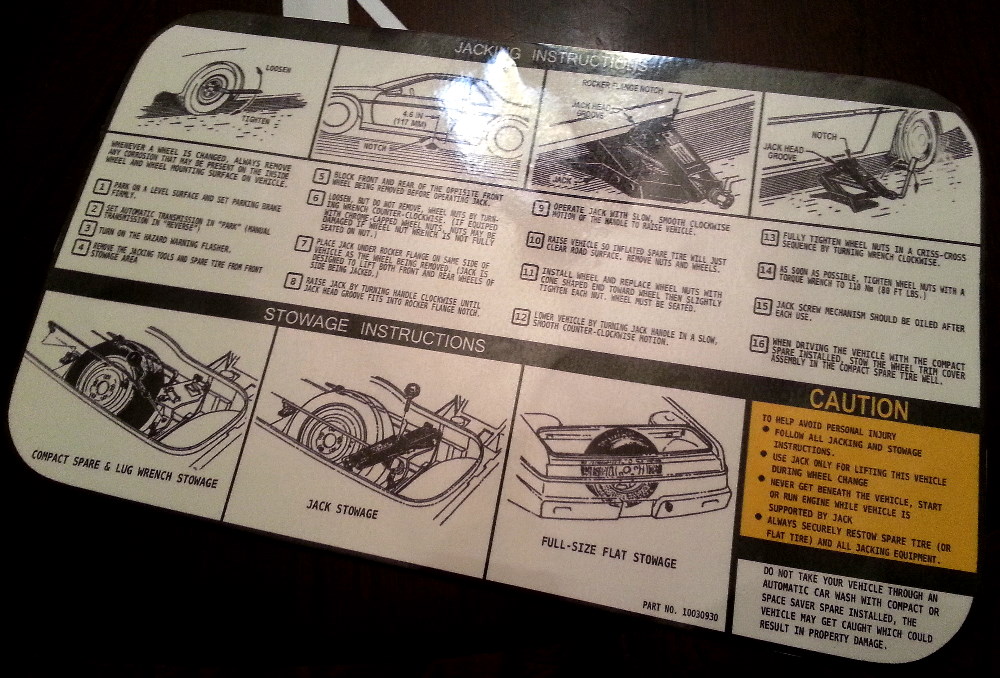
Well, on to some stuff I can do indoors Being I have painted just about everything on the car, as well as under the decklid and hood, new stickers were in order. I have spent countless hours, I honestly do not want to know how many!) re-creating just about every sticker for the car. From jacking instructions, Coolant filling procedures, Emission stickers, fan warning and on and on.
Here are a couple printed out on a vinyl that is made for ink jet printers, that has a peel off backing. I then covered that in a transparent laminate. This gives the stickers a nice gloss over them, much like the factory stickers.
Here is one that goes under the decklid:
.
.
.
And here is one that goes under the front hood:
I am most certainly not keeping the car "true to stock", but I think replacing the stickers will give it a bit of an extra touch.
Oh, I almost forgot, CaptnDean called me, and we are going to head to the junk yard and browse around. We keep looking for Fiero's, but we never find one. Anyways, he has an idea for some fog lights, available in the junkyard. He says they are a better option for the ones that I mentioned in the previous post. Better quality & cheaper, that's fine by me![This message has been edited by JohnWPB (edited 12-08-2012).]
|
|
|
|
JohnWPB
|
DEC 09, 03:44 PM
|
|
|
|
|
JohnWPB
|
DEC 10, 12:05 AM
|
|
Well, I just purchased a set of fog lights on eBay. They have aluminum housing, and glass lenses. They also have a halo ring, that can be used for daytime running lights. There are very few options when searching for a 3" fog light!
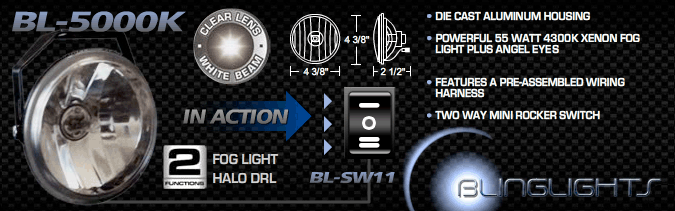

They are listed all over the place for around $70. With a Google product search, I was able to find a set for $35.
I should get them in a week or so, and hopefully they will fit, and I can check this off the very large list of things to do![This message has been edited by JohnWPB (edited 12-10-2012).]
|
|
|
|
Khw
|
DEC 10, 12:17 AM
|
|
|
According to that pick you posted it shows a drawing of the lights dimensioned at 4-3/8" O.D.. If the holes are 4", isn't that going to be to big?
|
|
|
|