
 
     |
| Trinten's SBC/F23 build - The work has begun! (Page 16/76) |

|
Trinten
|
AUG 23, 09:38 PM
|
|
|
That's frickin' sweet looking. Like it came from the factory that way! (your forte`).
|
|
|
|
fieroguru
|
AUG 24, 03:17 PM
|
|
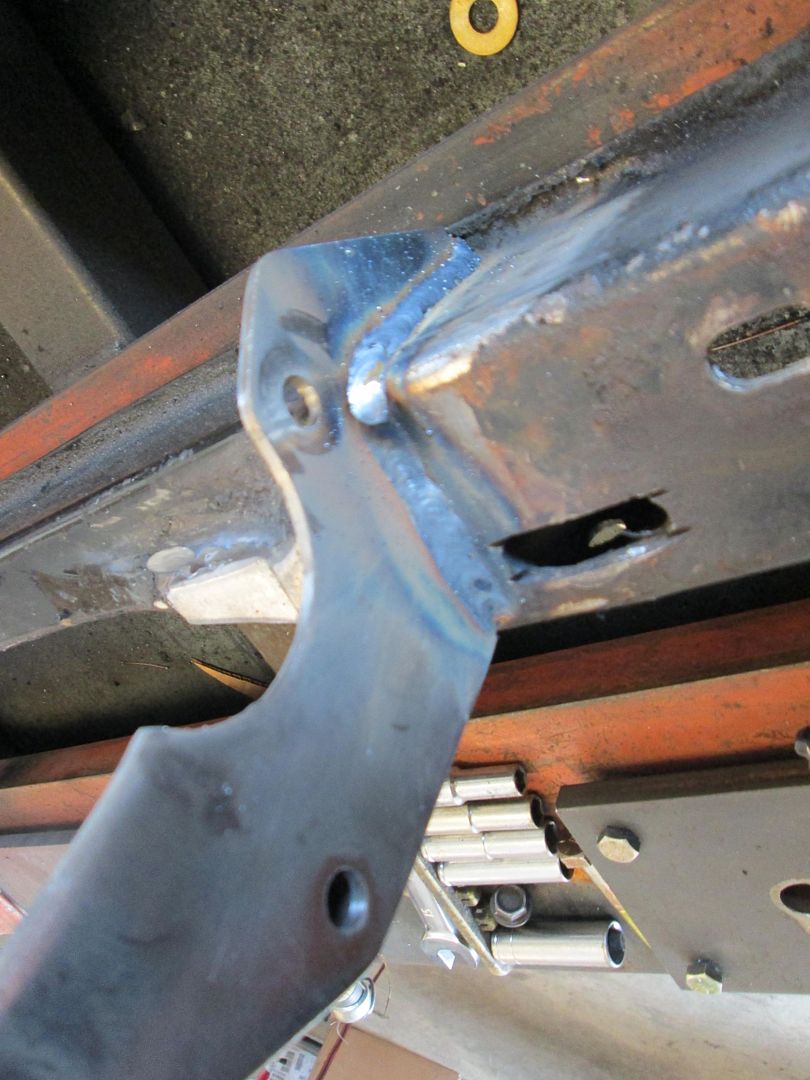
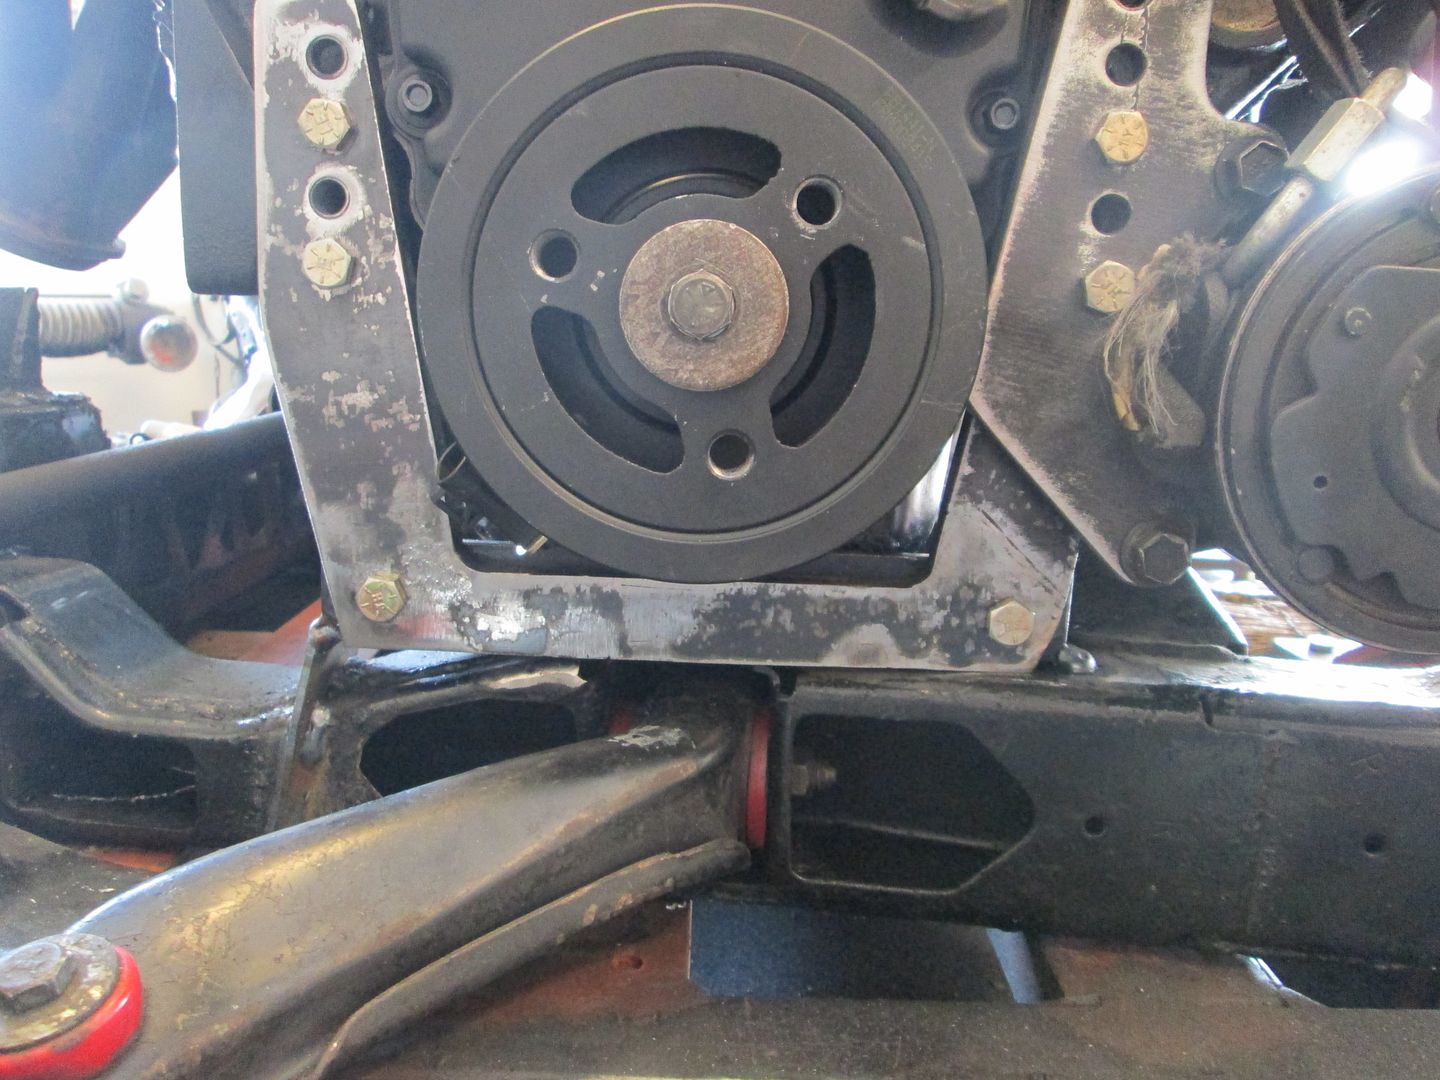
As I got ready for another test fit, I went ahead and cleaned up the weld from the original frame notch. When I checked for belt fitment last, it was hitting on some excess weld slag, so I wanted it smooth for this test fit.
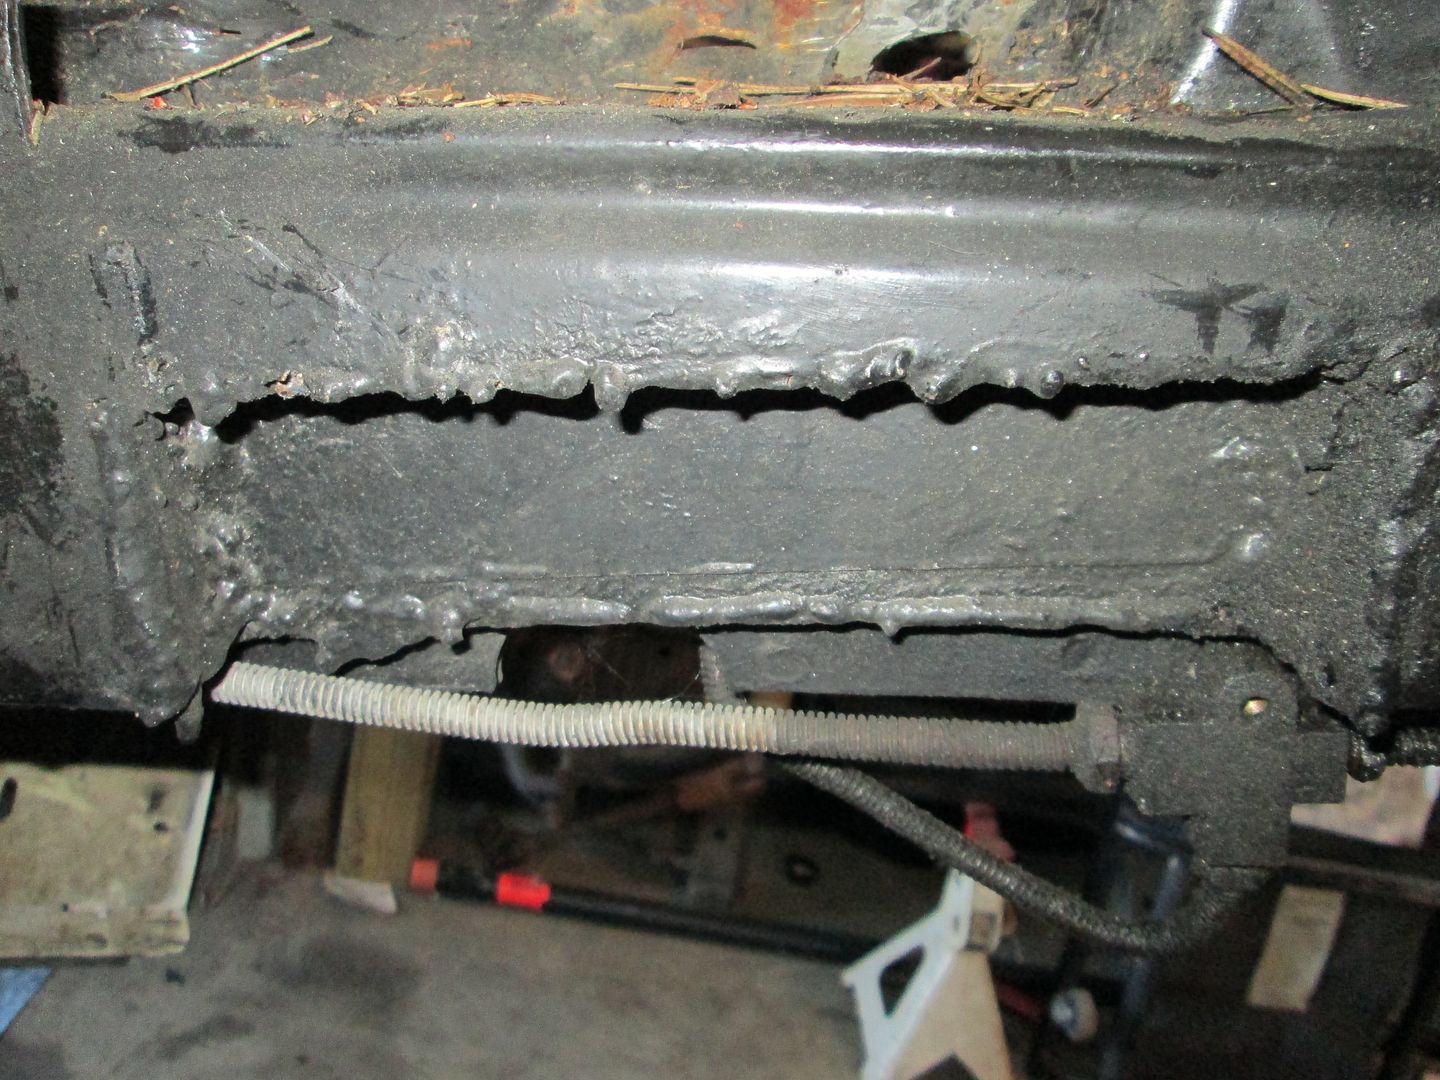
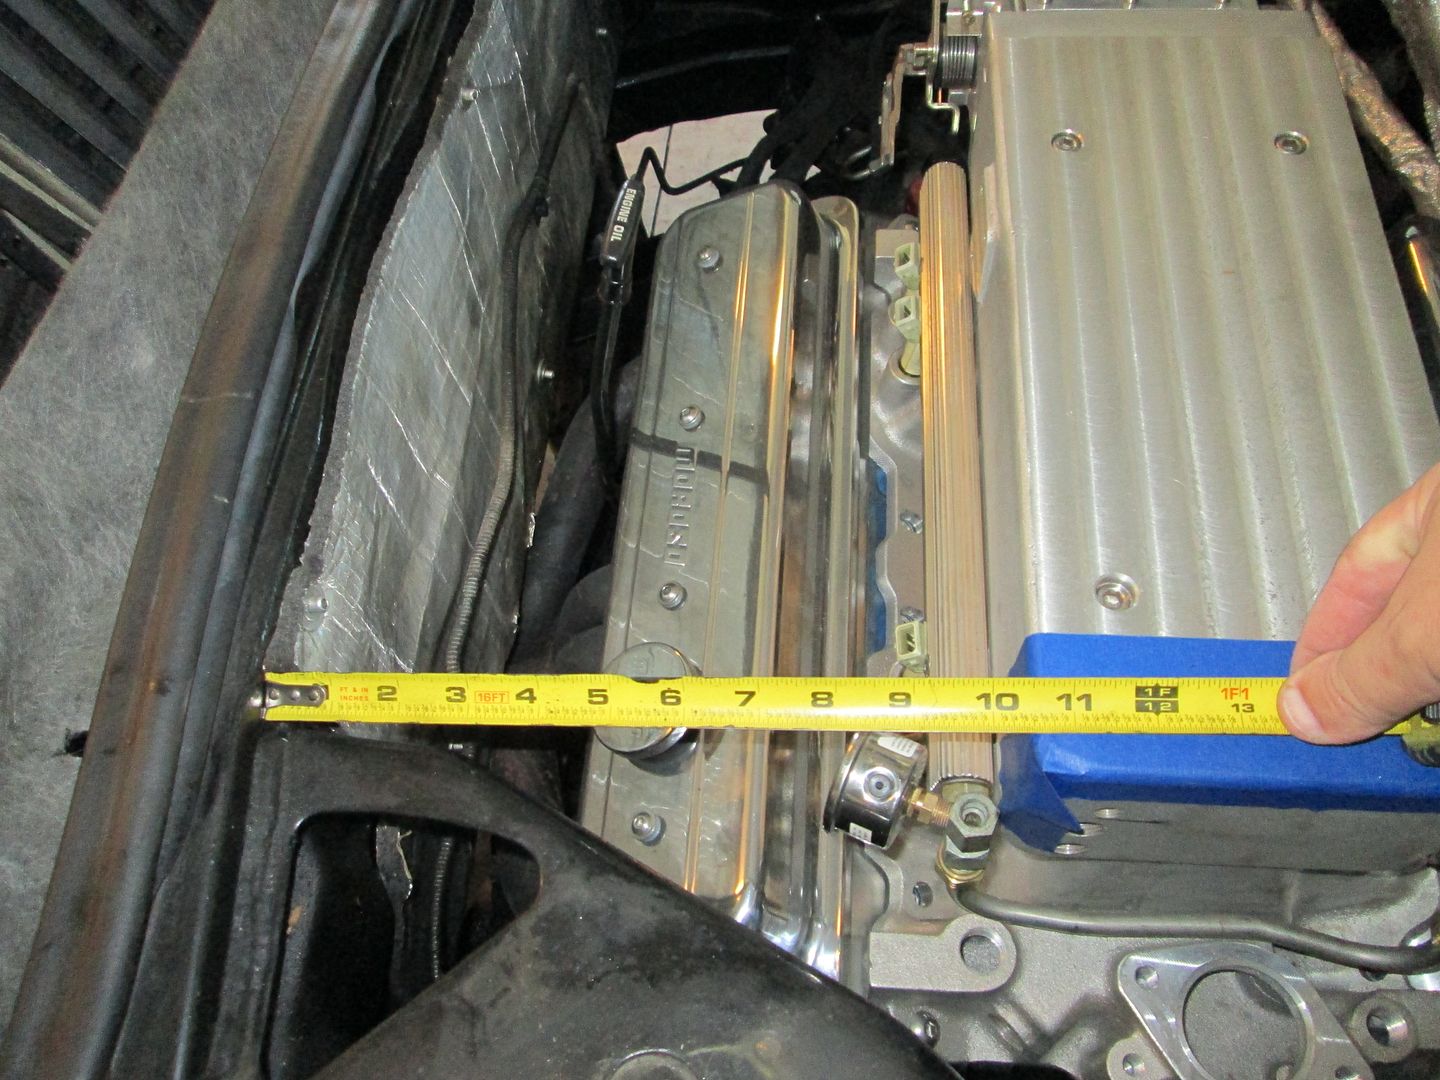
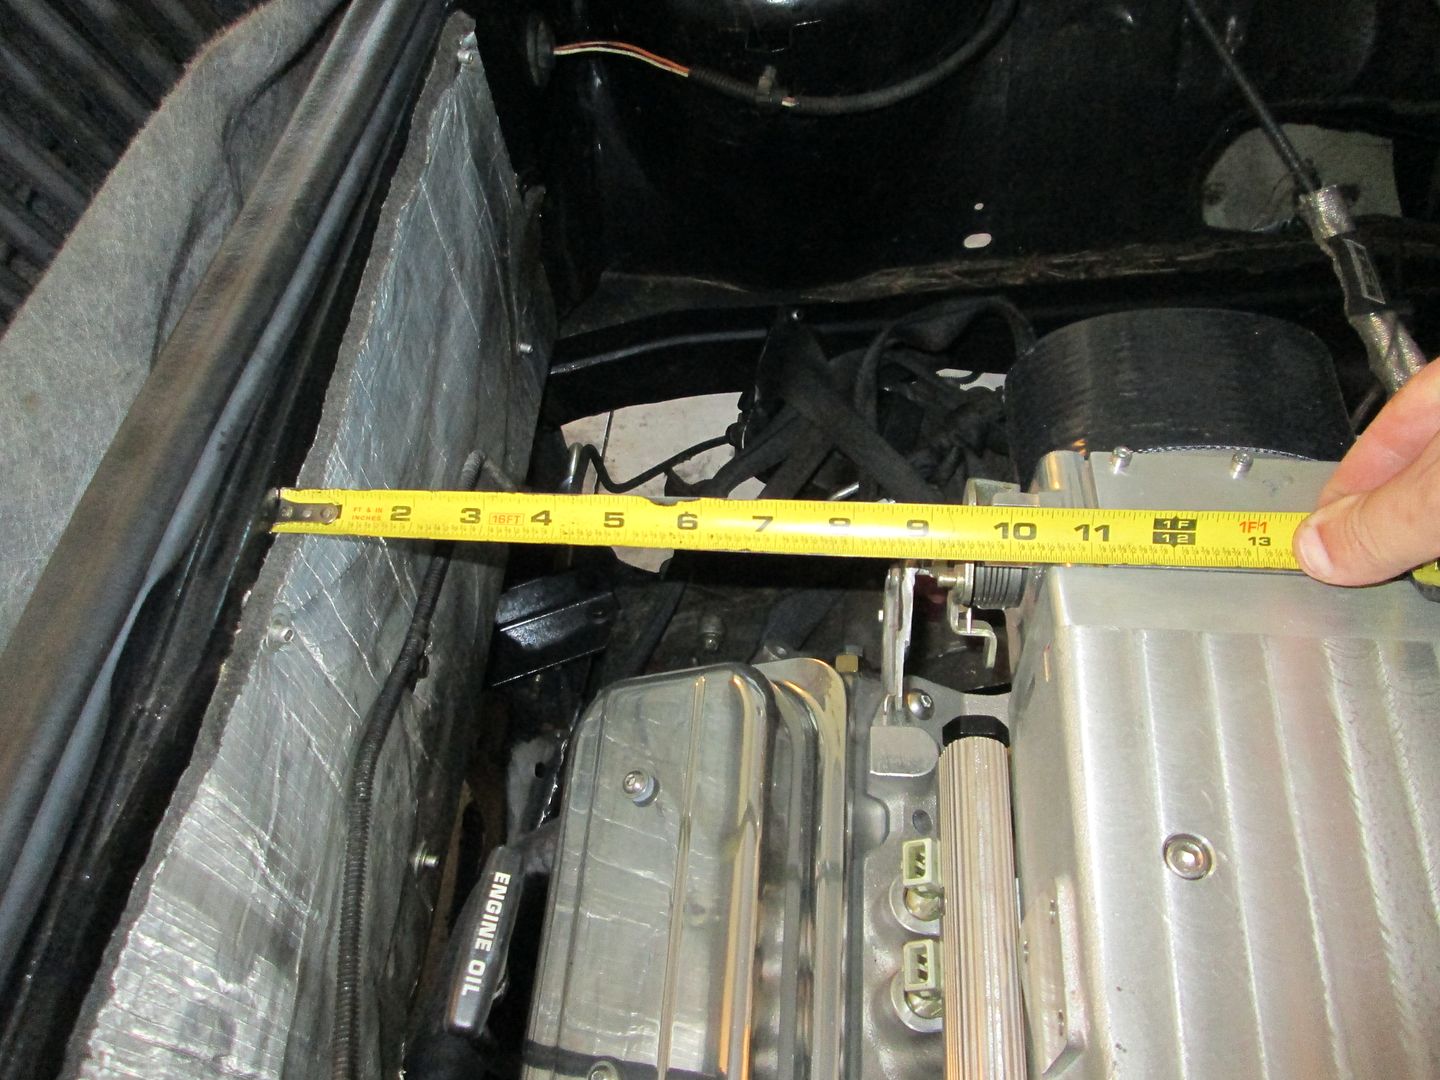
Then it was in for the test fit. Both ends of the intake are 10 1/2" from the rear firewall and the belt now clears (I shifted the drivetrain about 3/16" to the driver side from the last test fit):
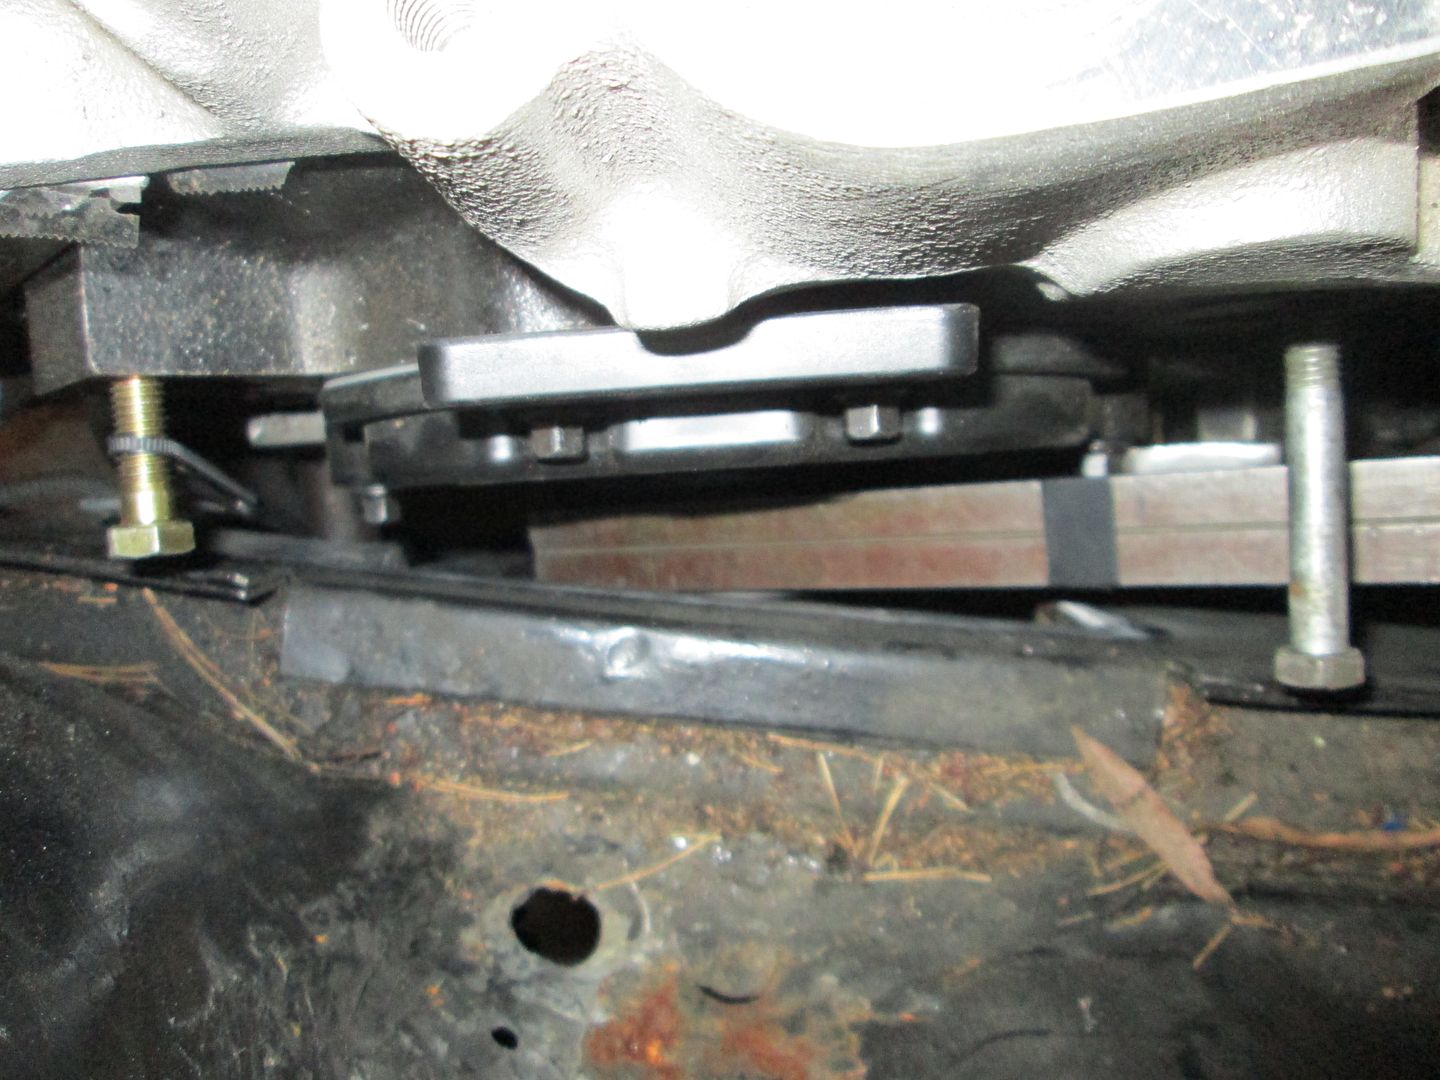
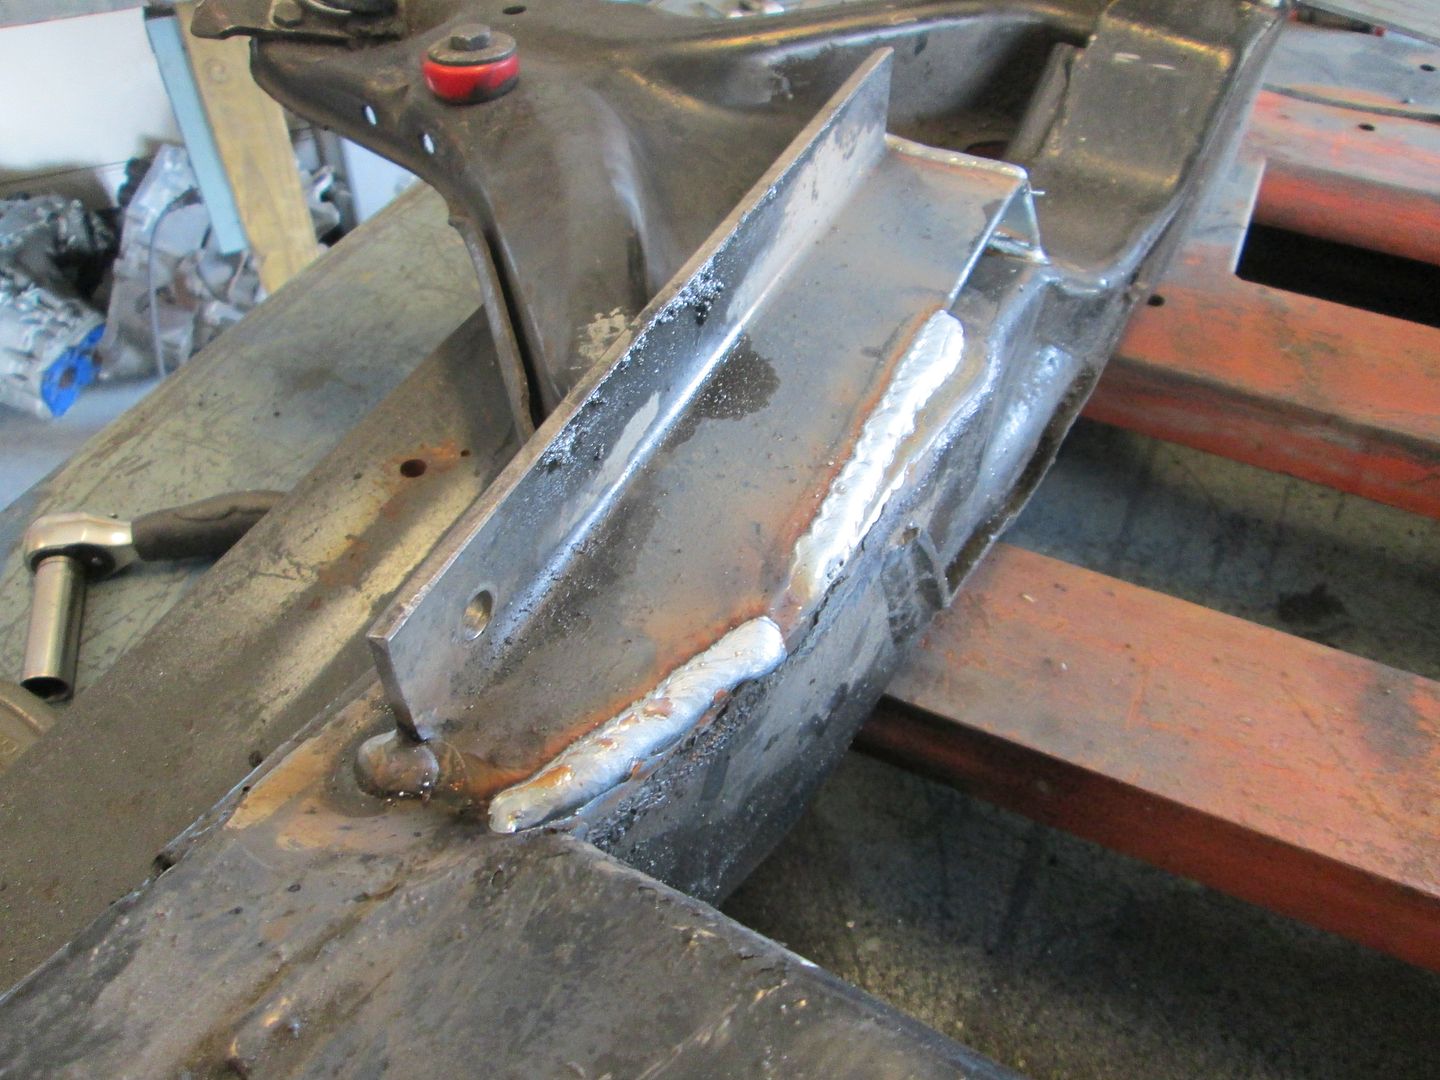
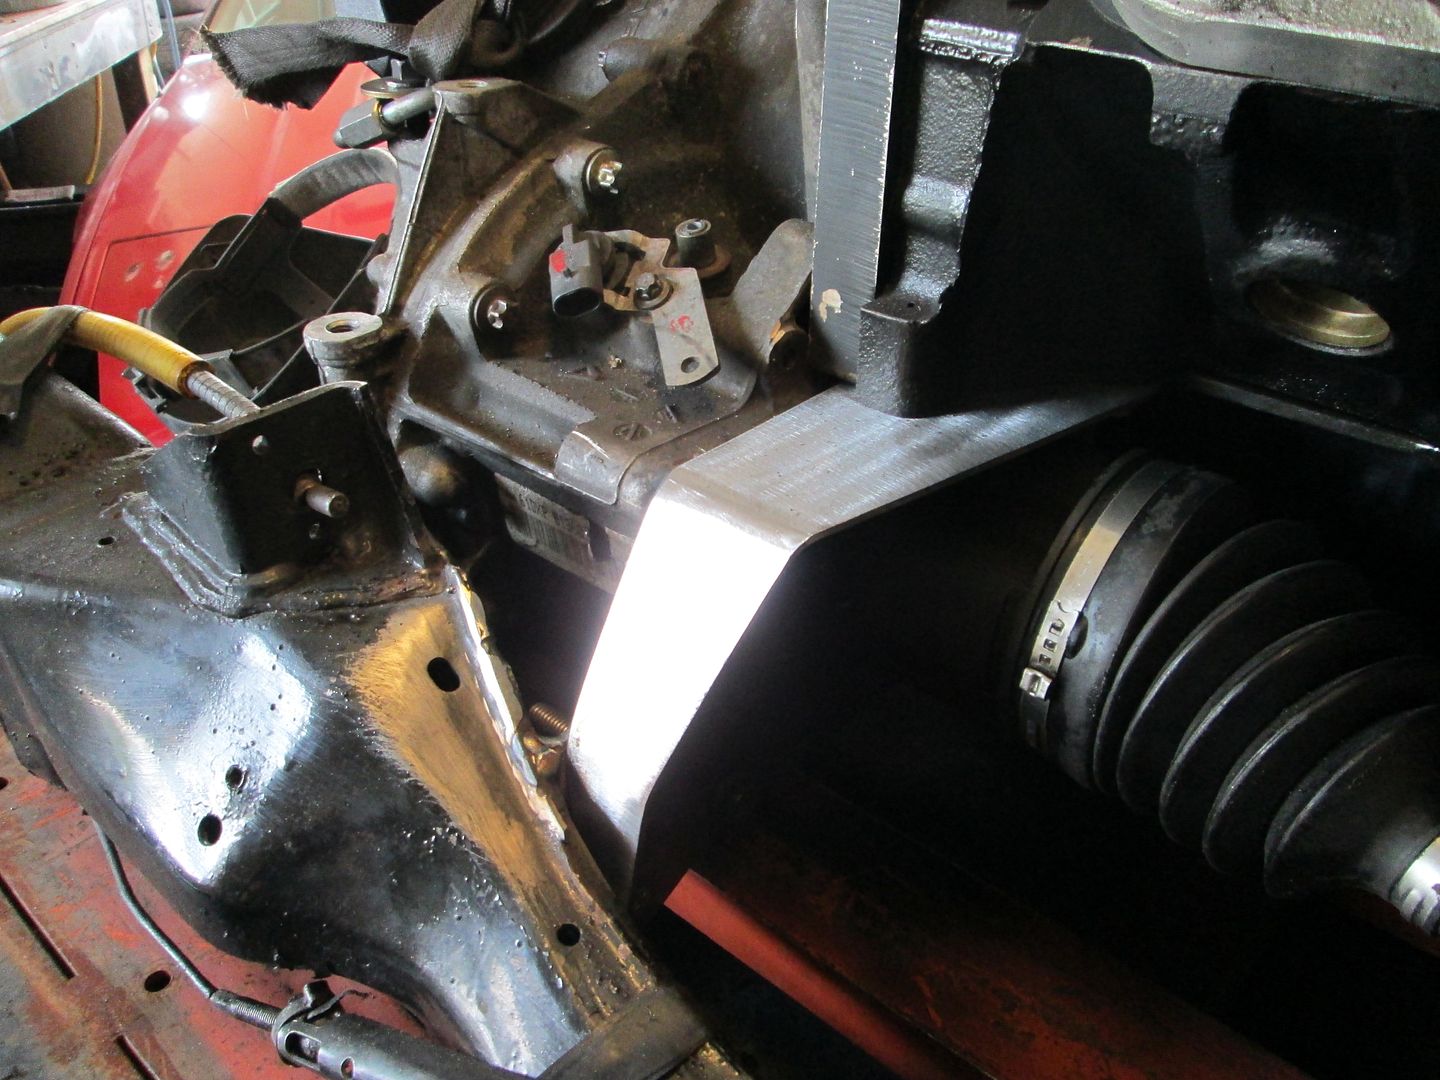
Then it was out again for welding and to finish the mounts. Unfortunately, I didn't get to the weld shop this morning, so I ran out of gas once the mounts were tacked into place. Here is the rear support for the angle that is hanging over the cradle:
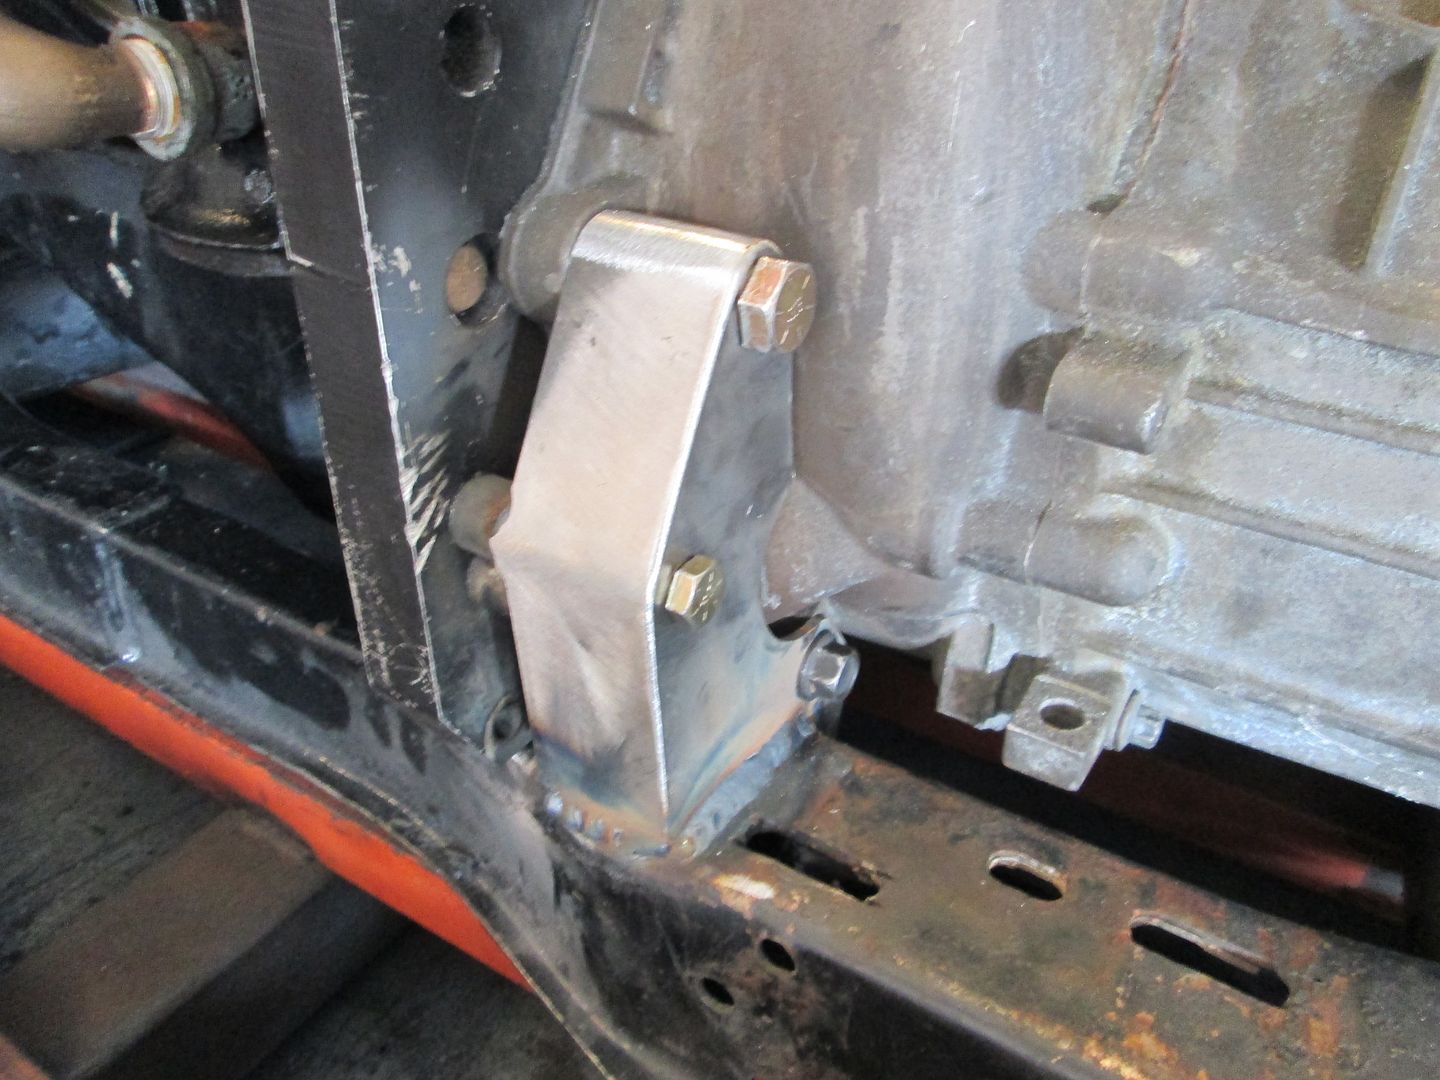
Here is the tab for the rear transmission mount. This will be welded to the cradle:
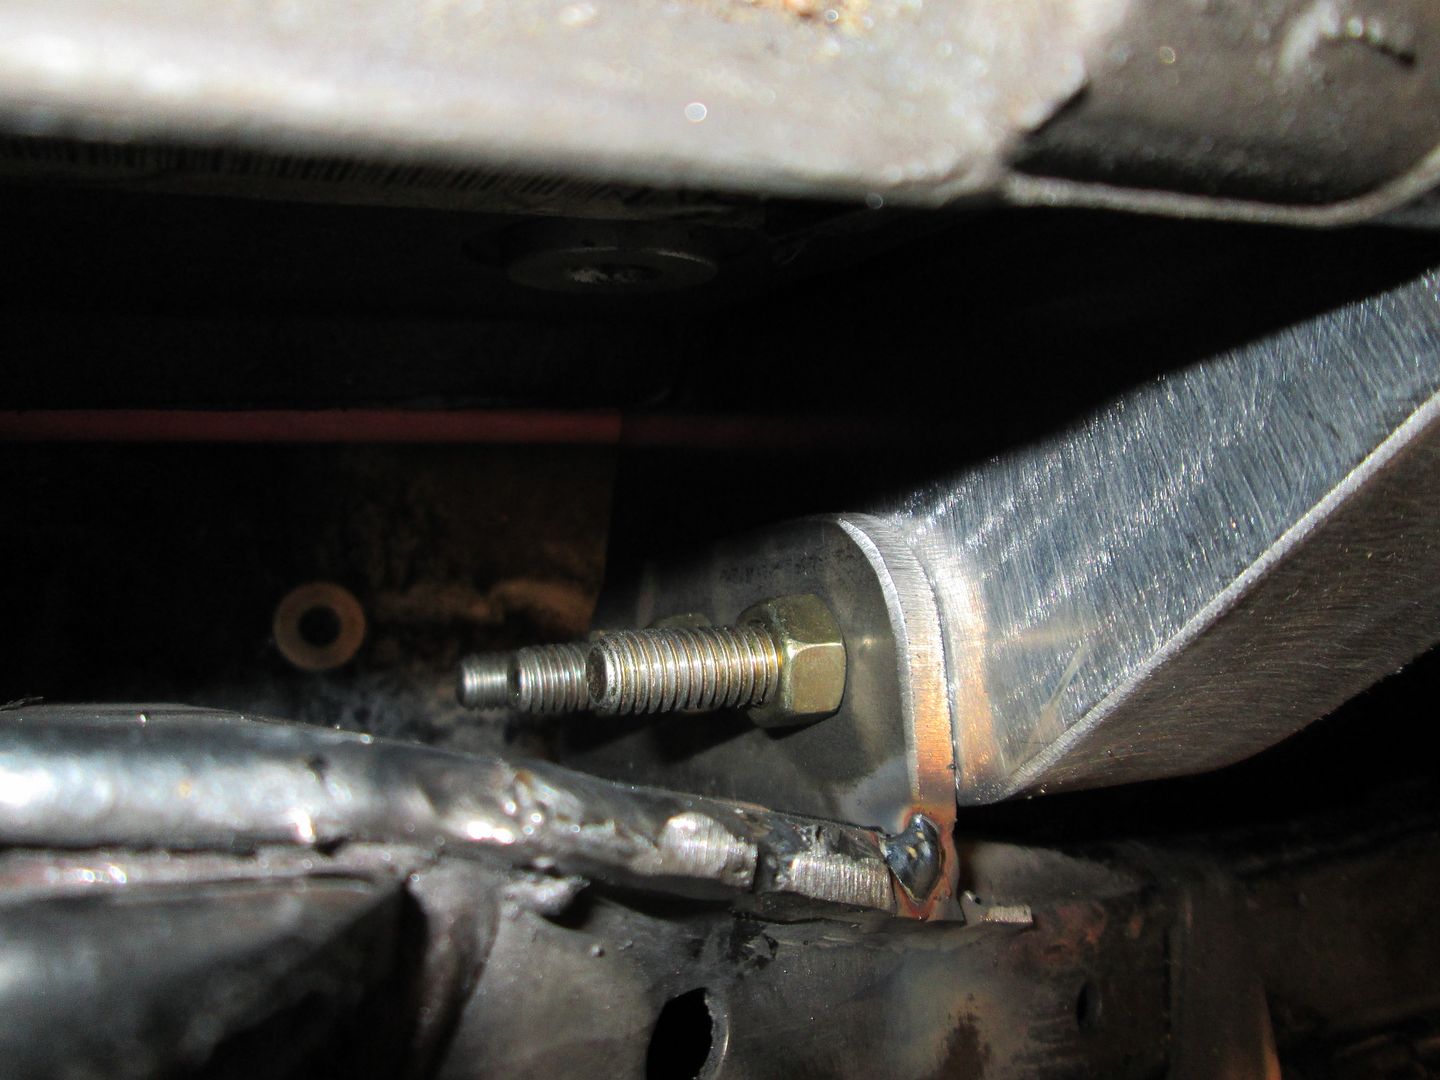
I was able to put a full section of weld on the front mount and a section of the angle to lock the drivetrain in place:
|
|
|
|
fieroguru
|
AUG 27, 06:06 PM
|
|
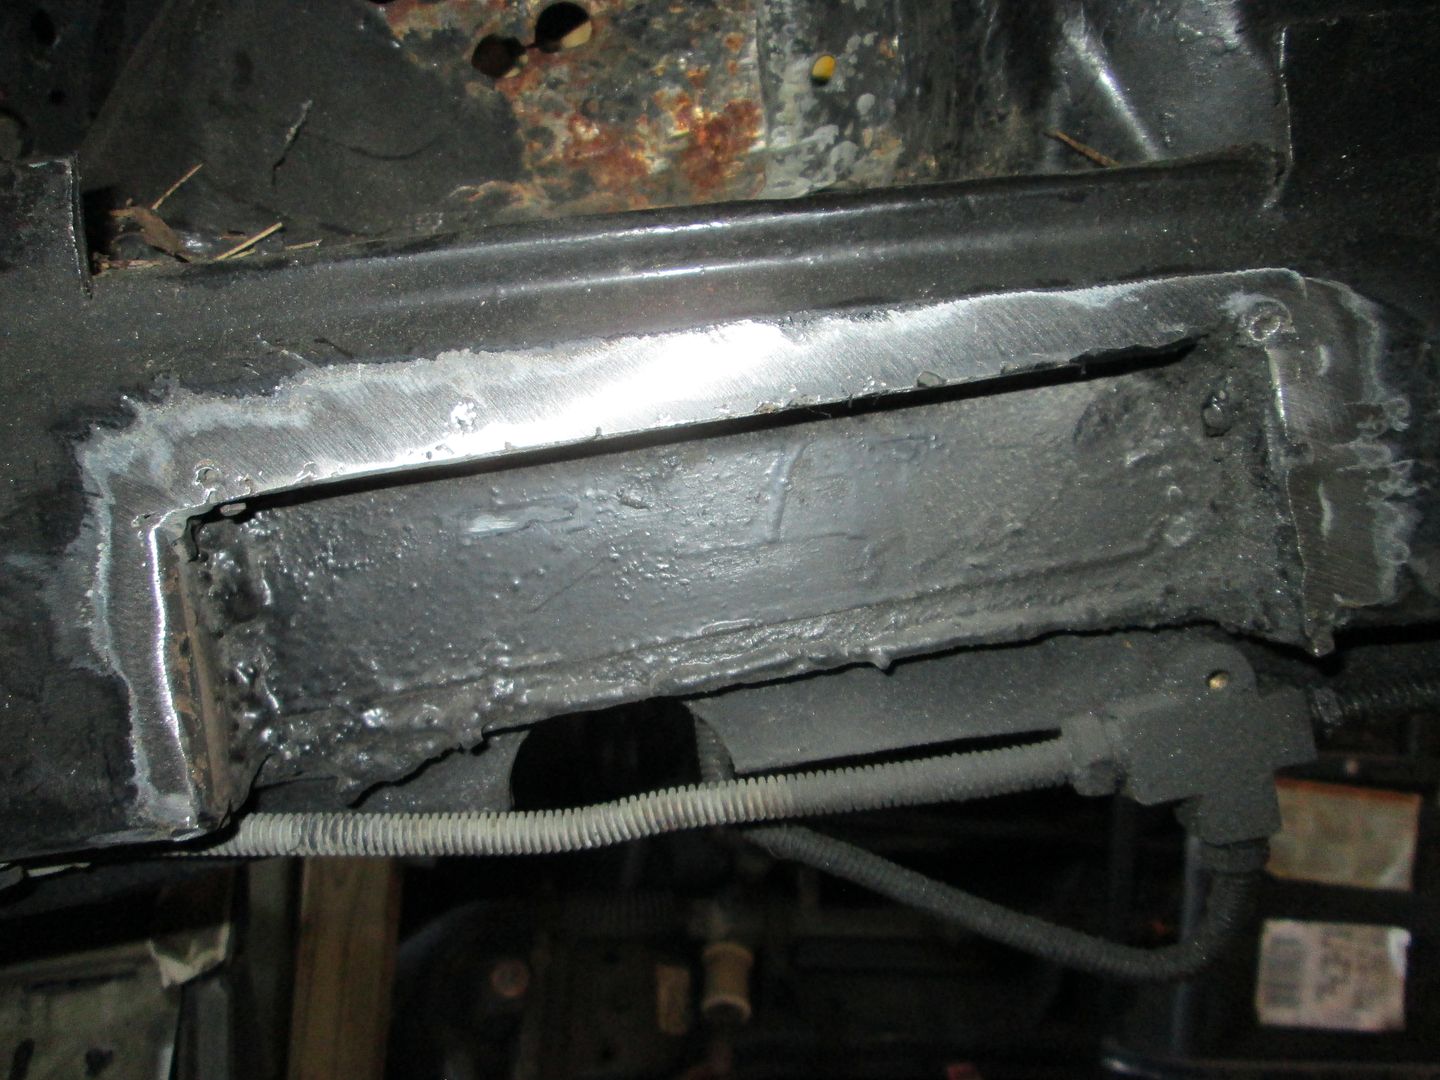
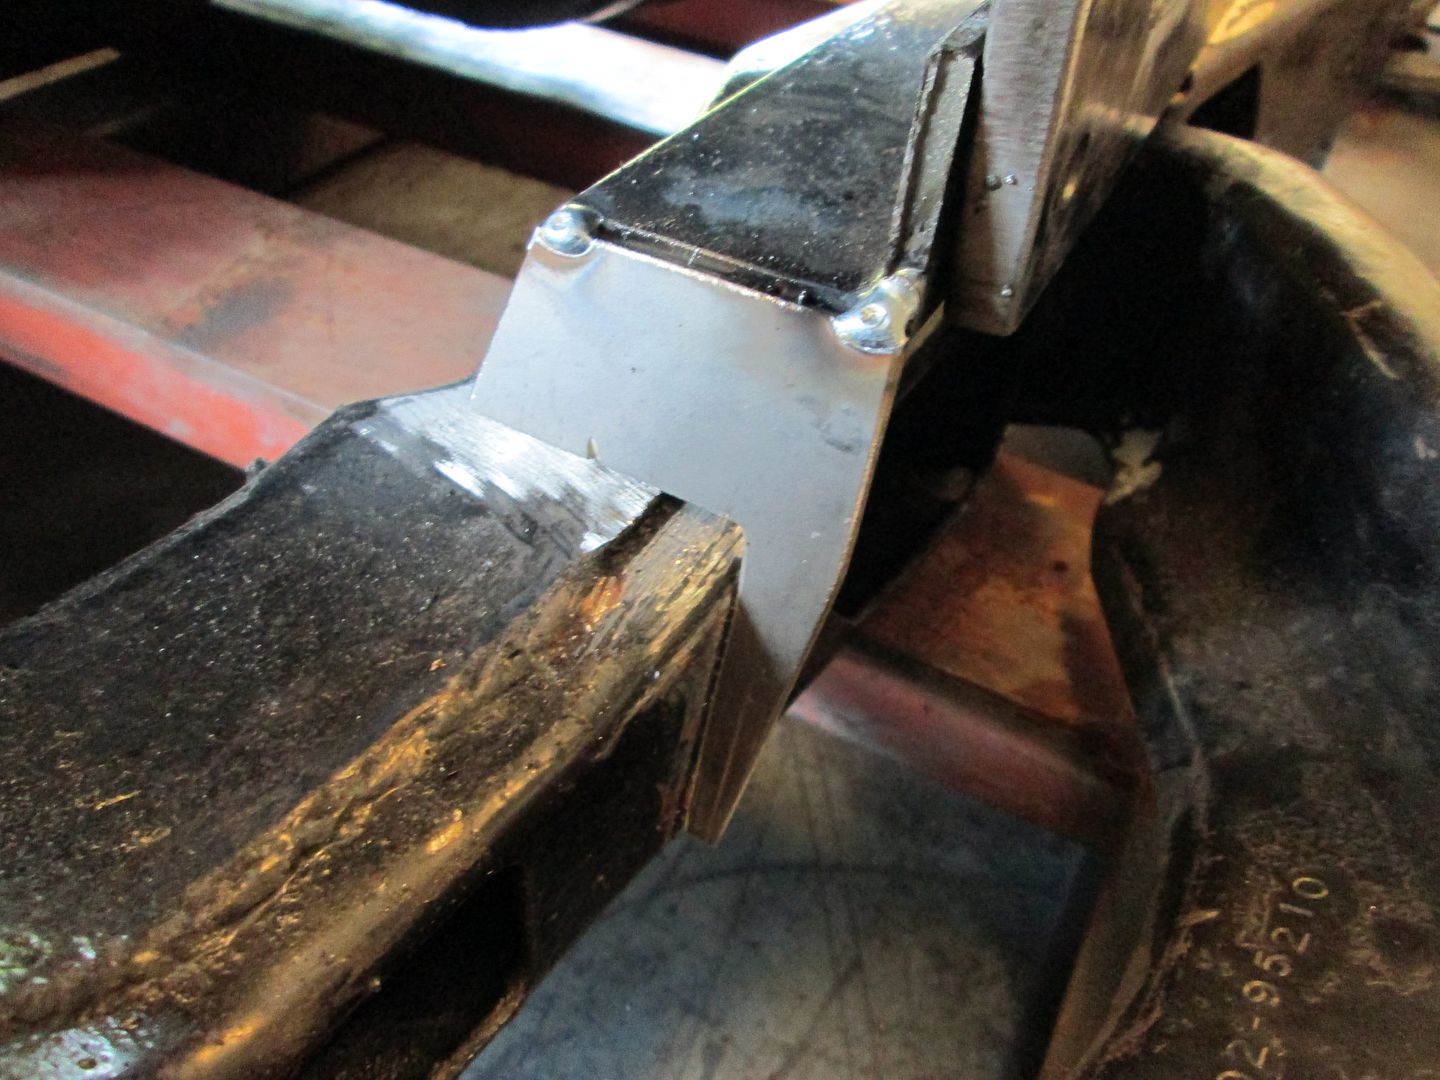
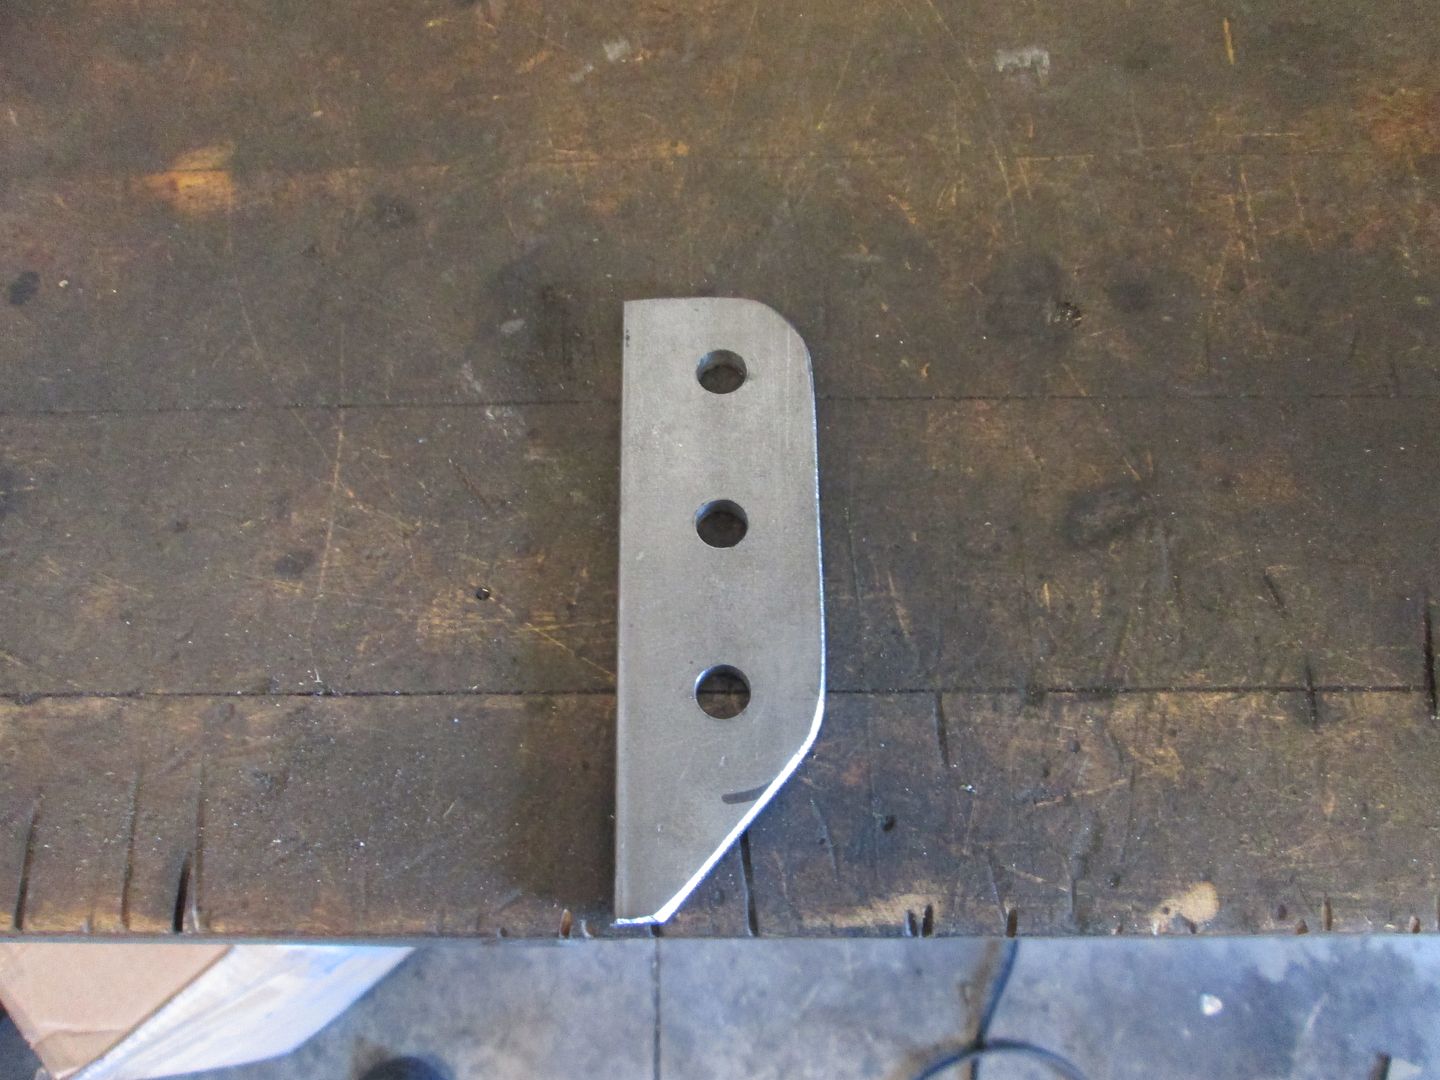
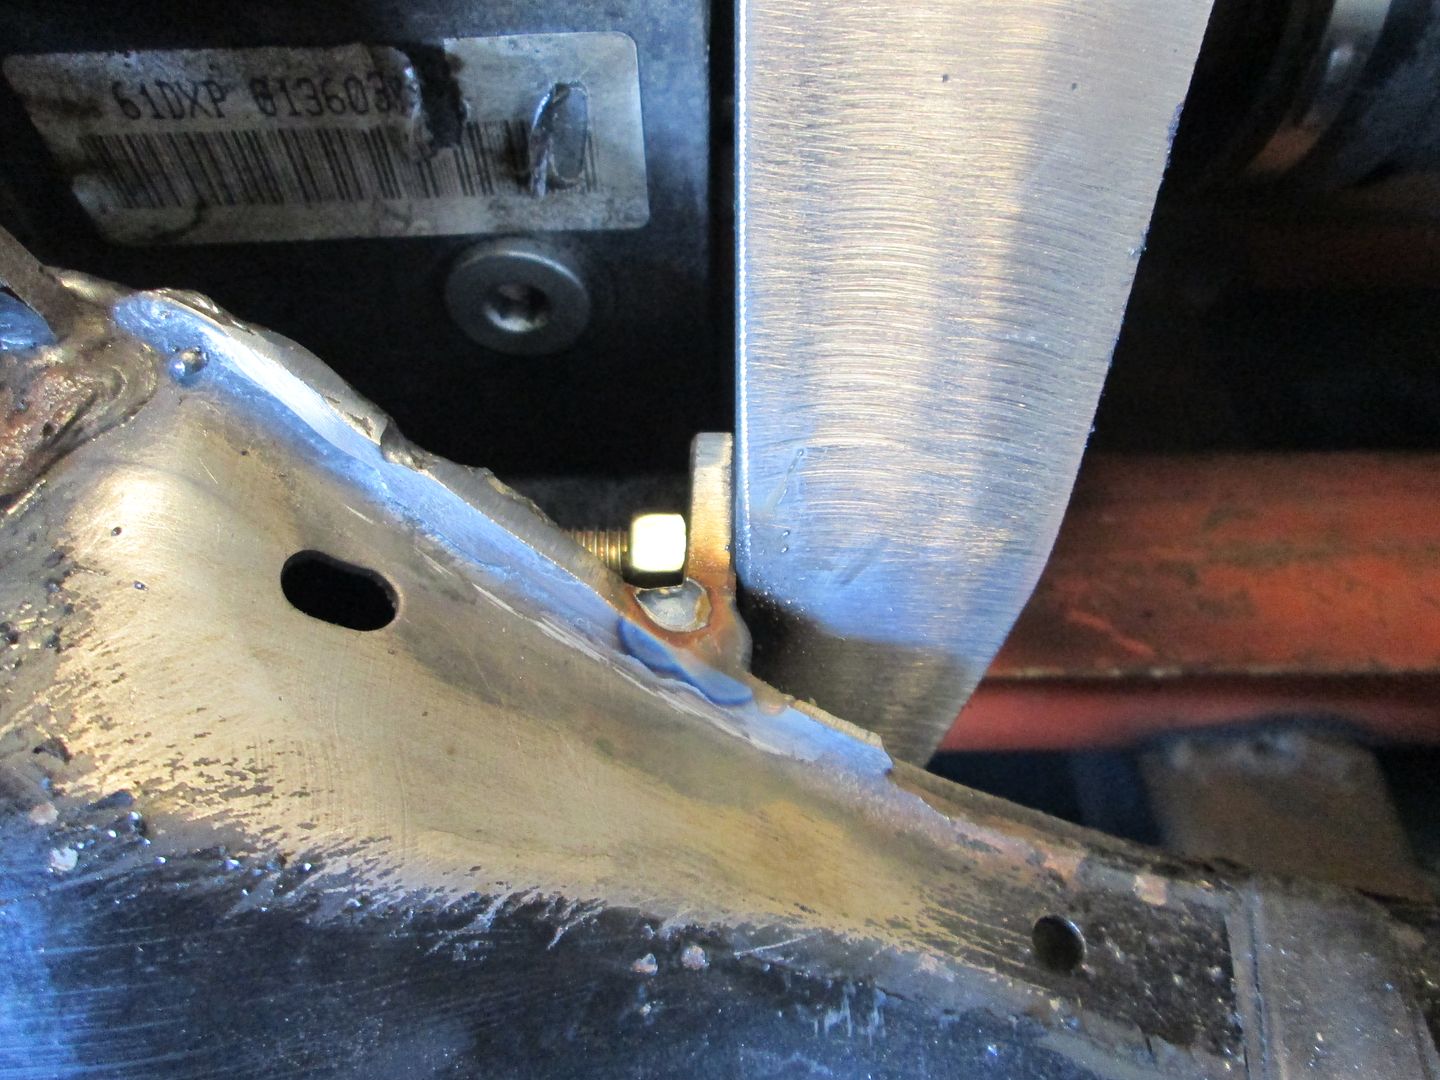
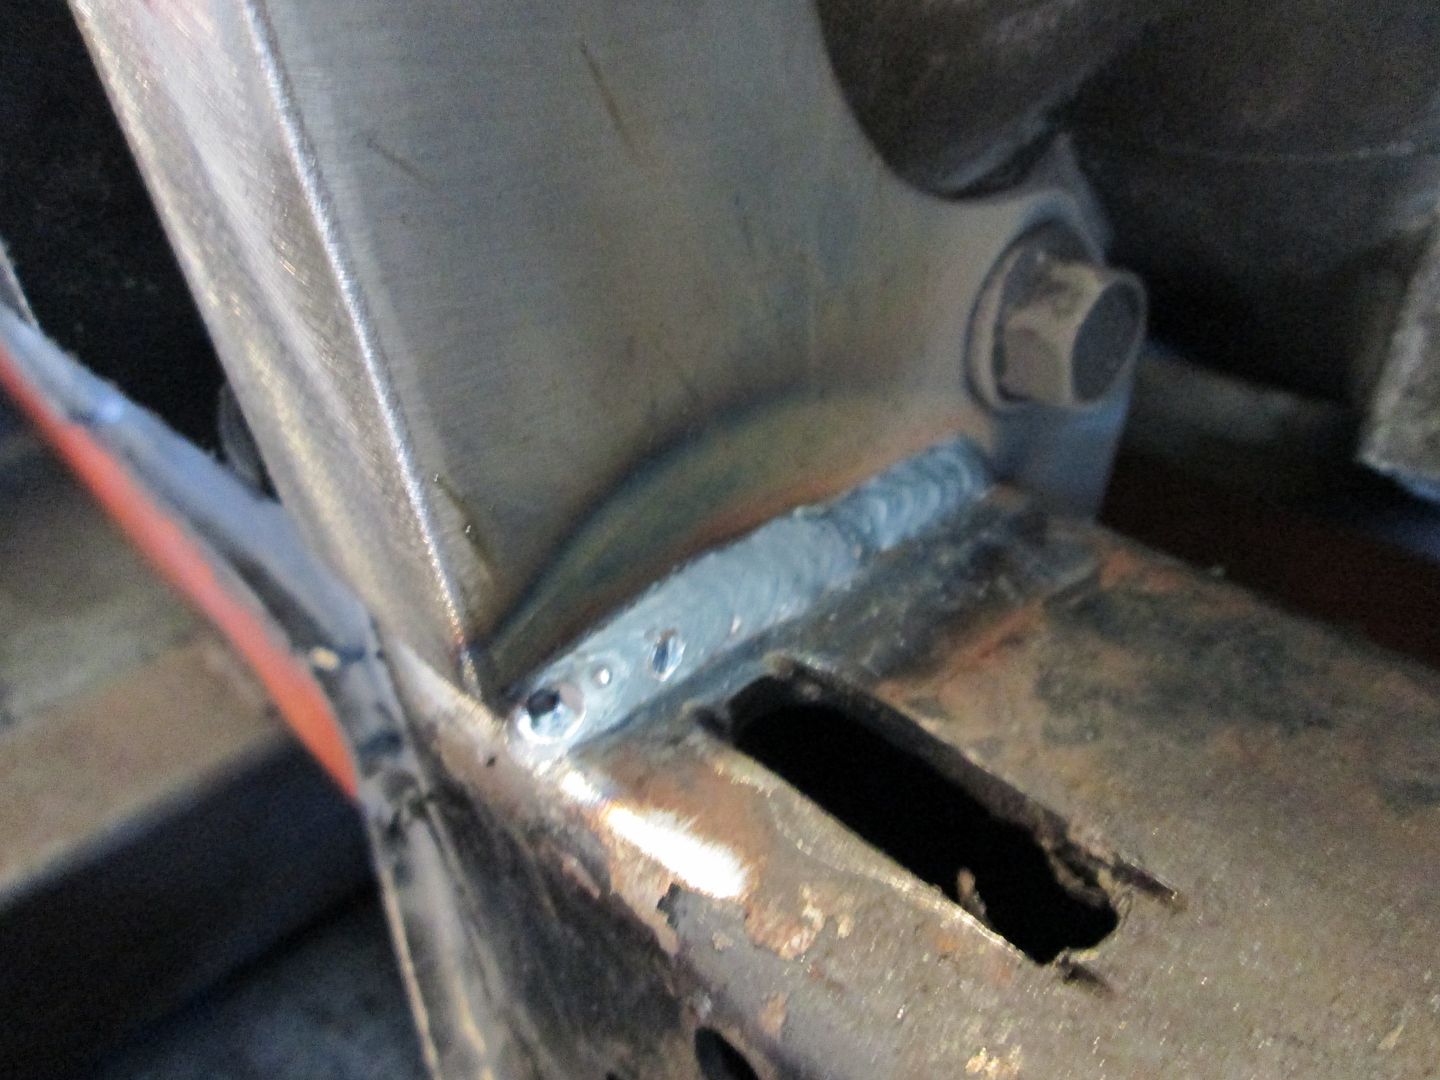
Both girls are back in gymnastics on Monday night, so not much will happen on Monday. I did manage to get another tank of shielding gas, so this evening I was able to finish the welding on the mounts:
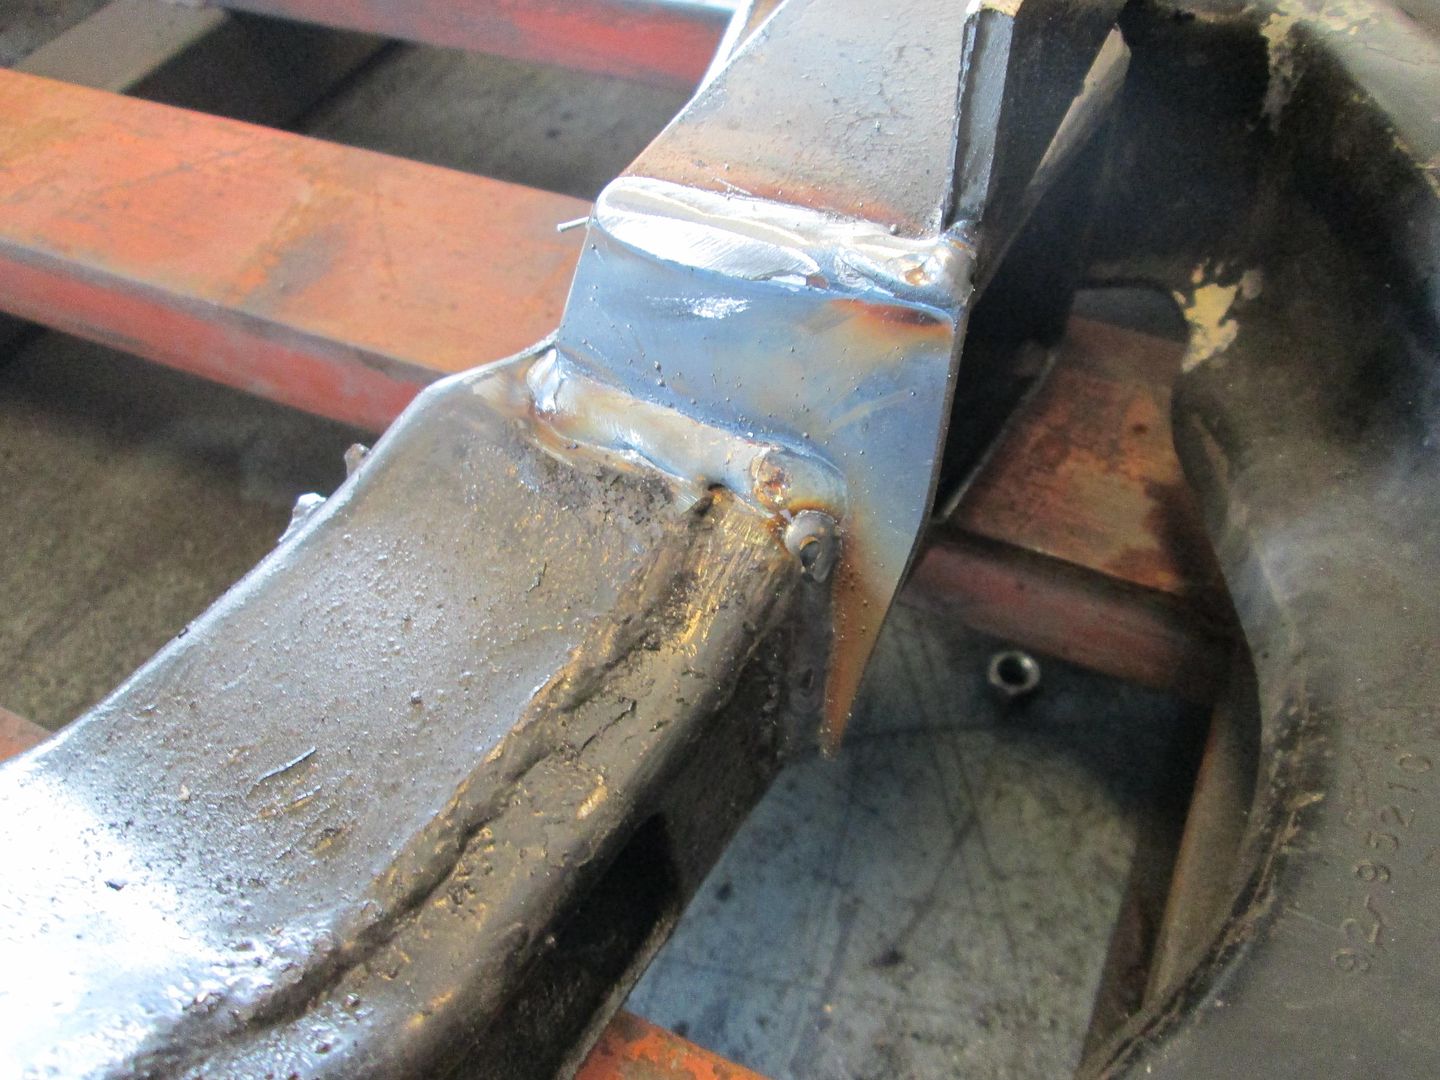
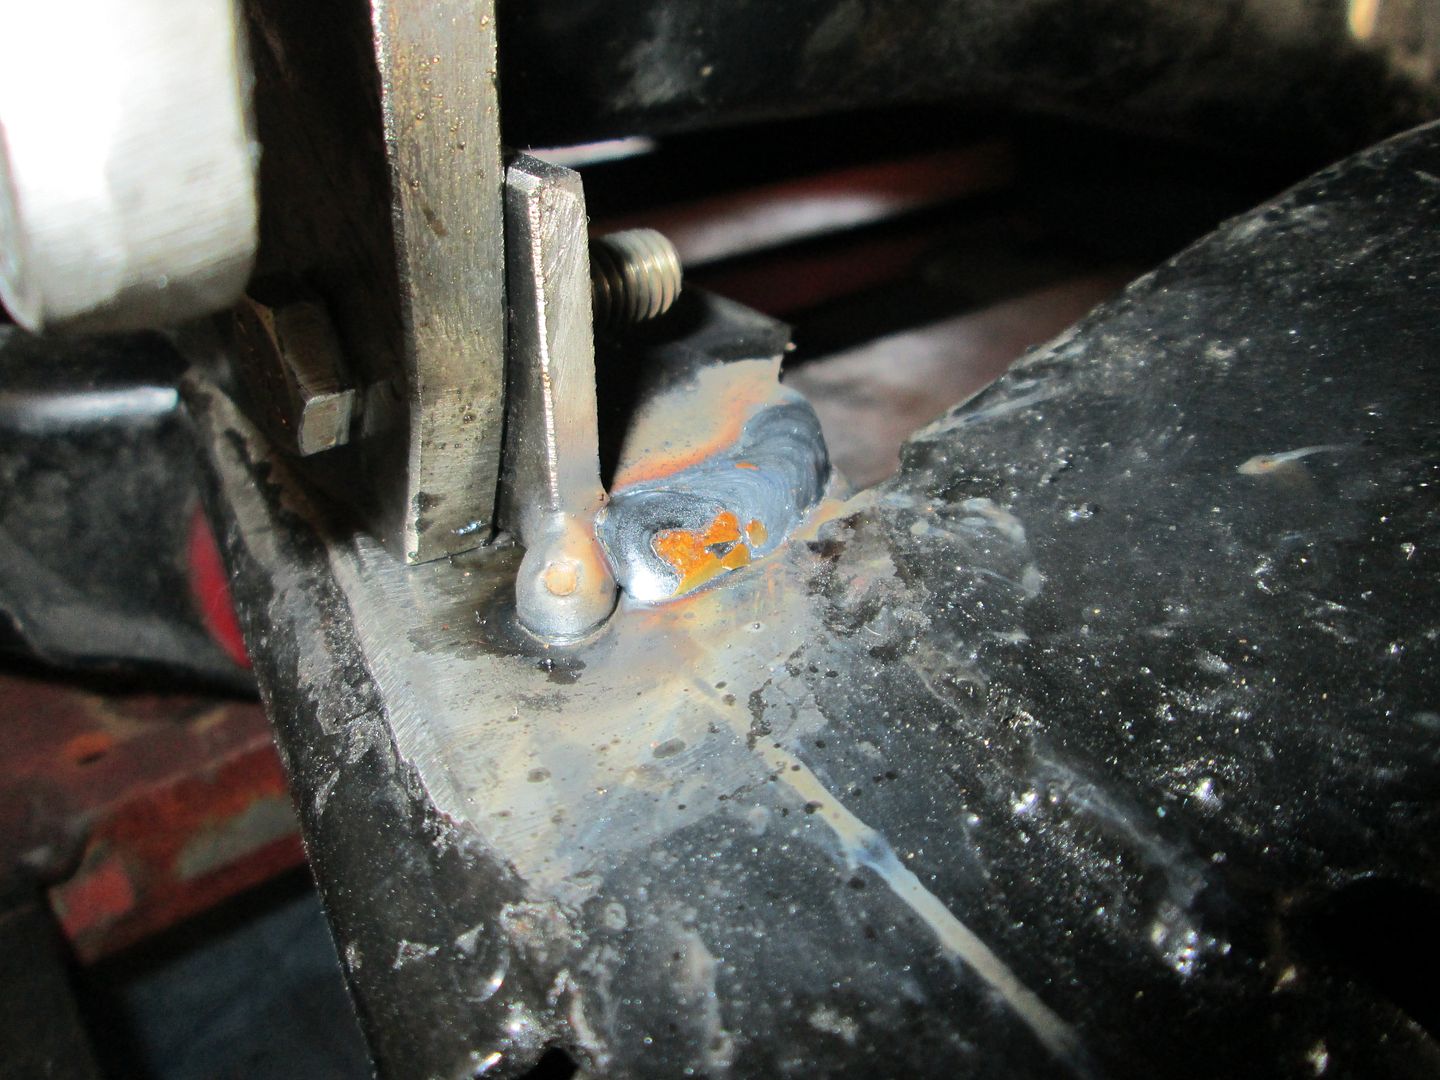
The rear bracket had another piece of steel tacked to it and the cradle to resist the pulling that the weld would have. Once the welding was done and everything was cool, I cut it back off and smoothed everything back out.
Now the engine/transmission have finished mounts!
Now I need to separate the engine/transmission and work on the starter/oil filter relocation.
|
|
|
|
Trinten
|
AUG 27, 07:41 PM
|
|
The benefits of restarting a browser. Things are appearing normally now. Thanks for the update!!
Looks pretty damn awesome. Hyped that you've got some ideas for the starter. It gave CowsPatoot and L67/EMC209i a little trouble because it could shift every-so-slightly on it's shims when being torqued down, and then be off enough to be incompatible.
Looking forward to what you cook up with that relocation and starter![This message has been edited by Trinten (edited 08-27-2013).]
|
|
|
|
carbon
|
AUG 28, 09:41 AM
|
|
|
|
|
fieroguru
|
SEP 01, 05:22 PM
|
|
Between brake work for others and prepping the my LS4/F40 Fiero for the LS Fest... hadn't made much progress on Vince's swap till today.
The starter setup on this car was pretty sad... The Archie kit uses a bolt on block that holds the starter (not really the issue here) and this car had the flywheel turned down to accept a 142 tooth ring gear vs the 153 used with the Archie kit to resolve ring gear/differential interference with the F23. So the starter block was modified to allow the starter to go in further through a combination of slotting holes and adding shims... end result is a very difficult setup to adjust and replace while keeping the proper gear mesh and all the spacers allows the starter to flex more than I think it should.
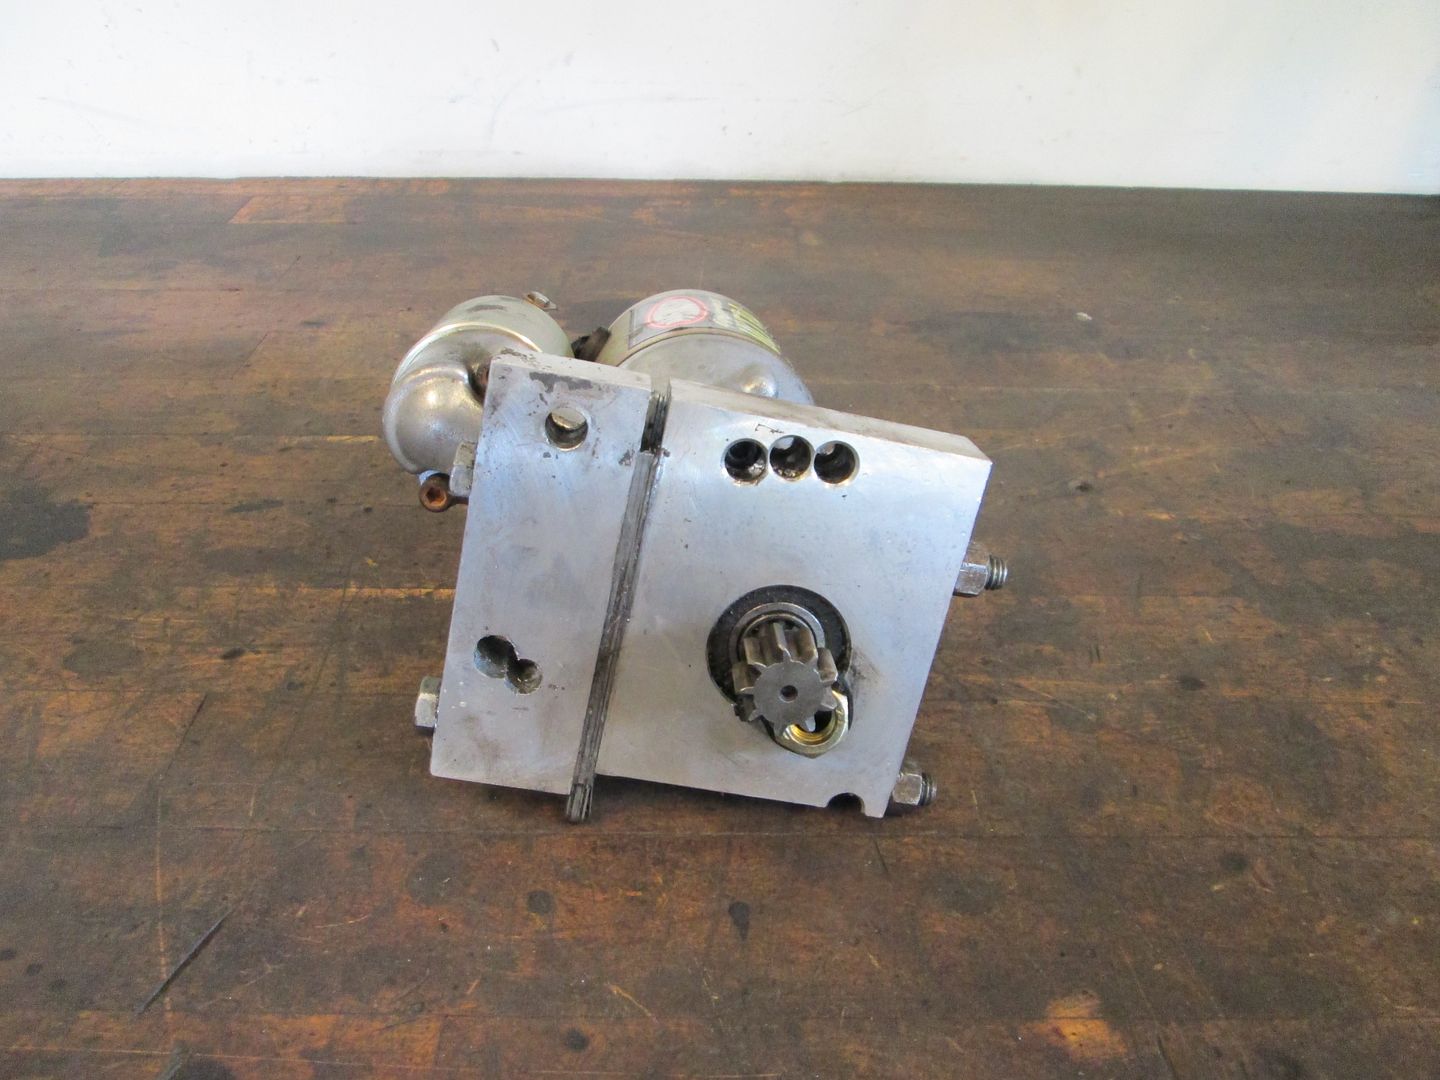
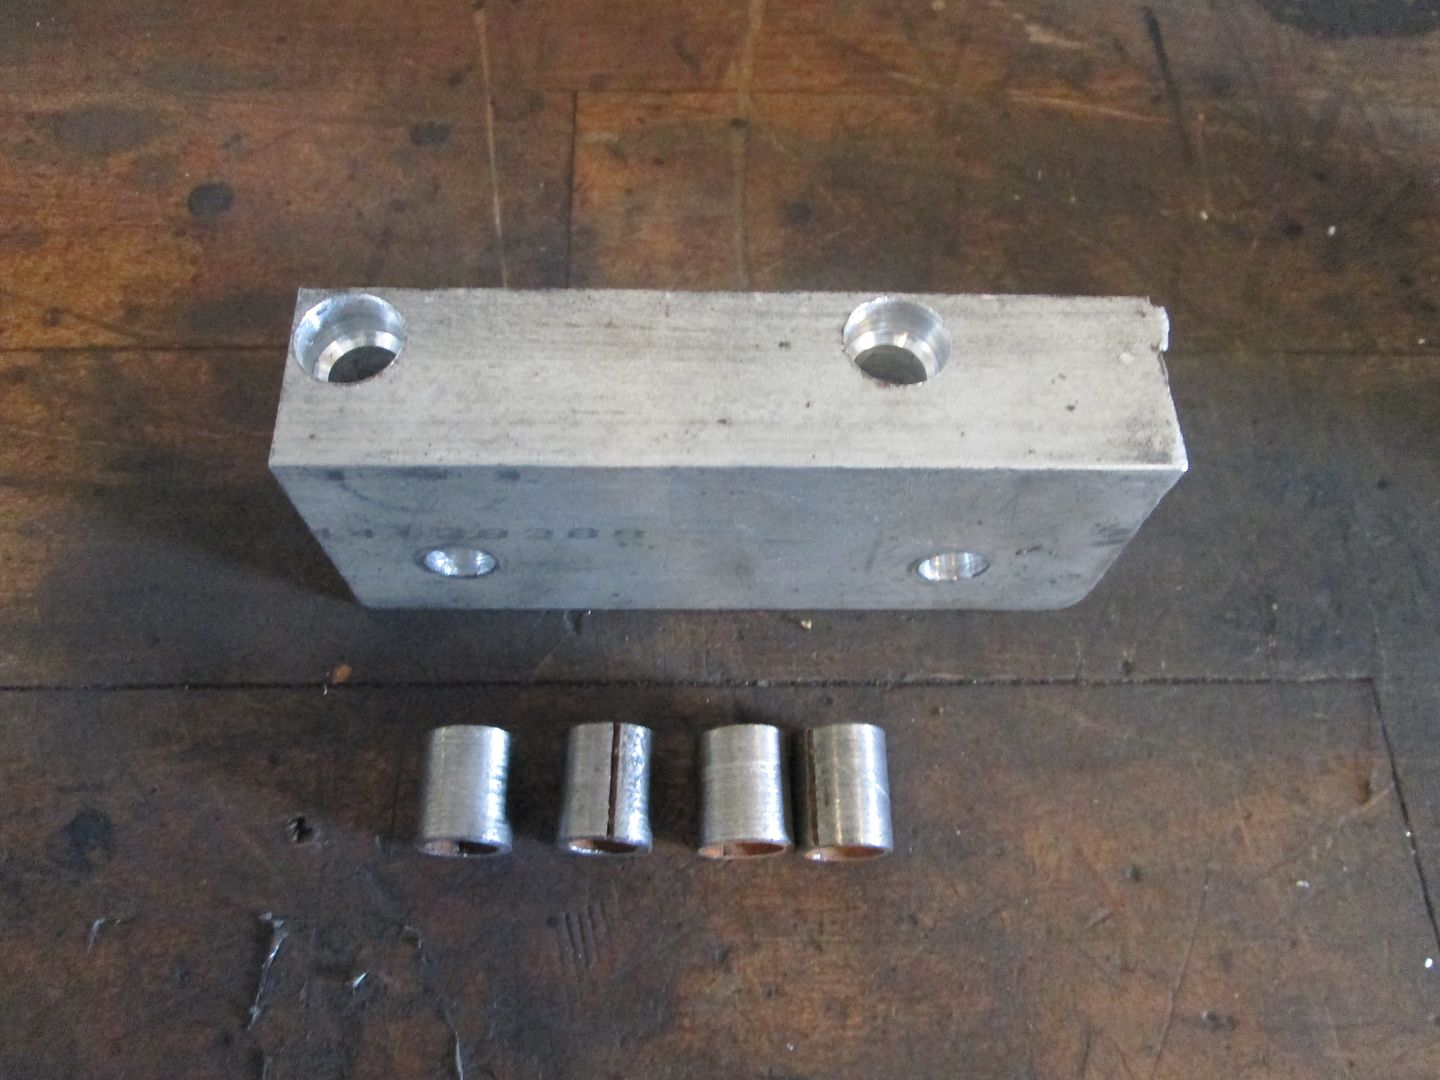
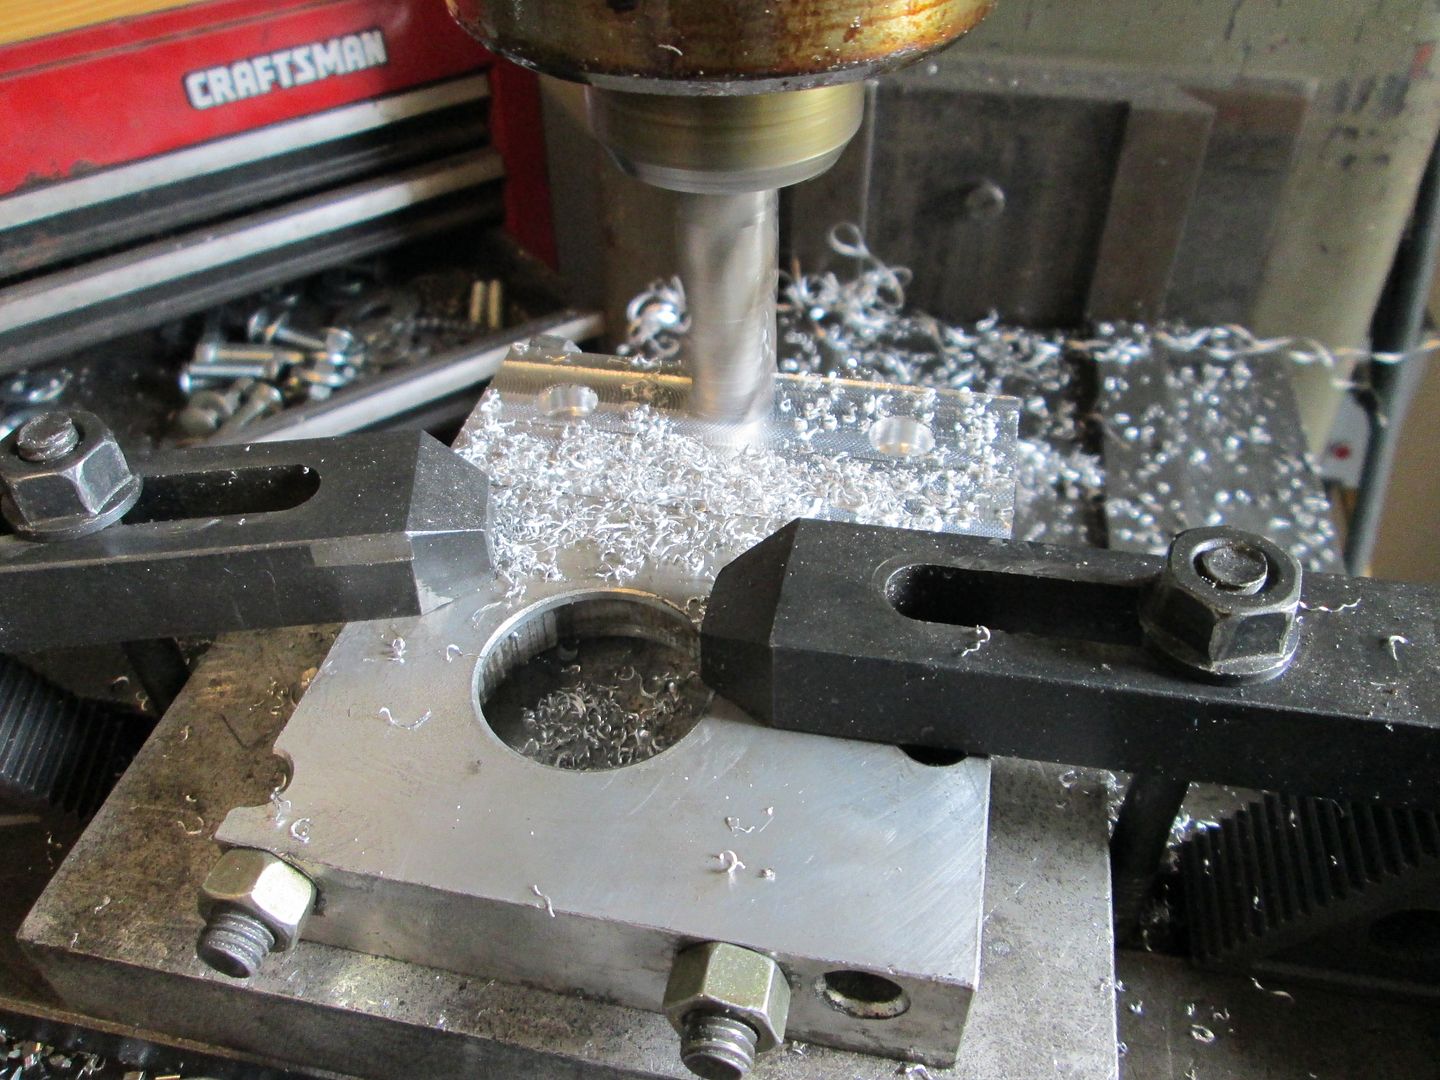
First order of business was to make a new starter mounting block. I happened to have some aluminum bar on the shelf that was slightly thicker than the starter plate on the starter, so it was cut to the right length. Then I placed it along the face of the starter making sure the face was flush, then transferred the bolt holes and drilled the first set of hole in the block. Then bolted the plate to the starter and clamped it to the adapter plate with the gear properly meshed, transferred the second set of holes, then drilled them. Put it back together and everything looked good.
Now most would have stopped right there (and many do stop right there when installing a SBC using an Archie kit), but the next time the starter comes out while the engine is in the car is going to be a chore to get it realigned because there just is too much available slop in the holes and access/visibility to the teeth mesh is very poor with the engine installed in the car.
So in this picture you can see that I counter bored all the holes in the starter block (as well as the starter plate and the adapter) to accept some 1/2" OD dowel pins (cut down from sway bar end link spacer). These pins and bores will ensure a snug starter fit w/o any visible slop, so the starter can be removed multiple times and always put back in with easy and precise alignment.
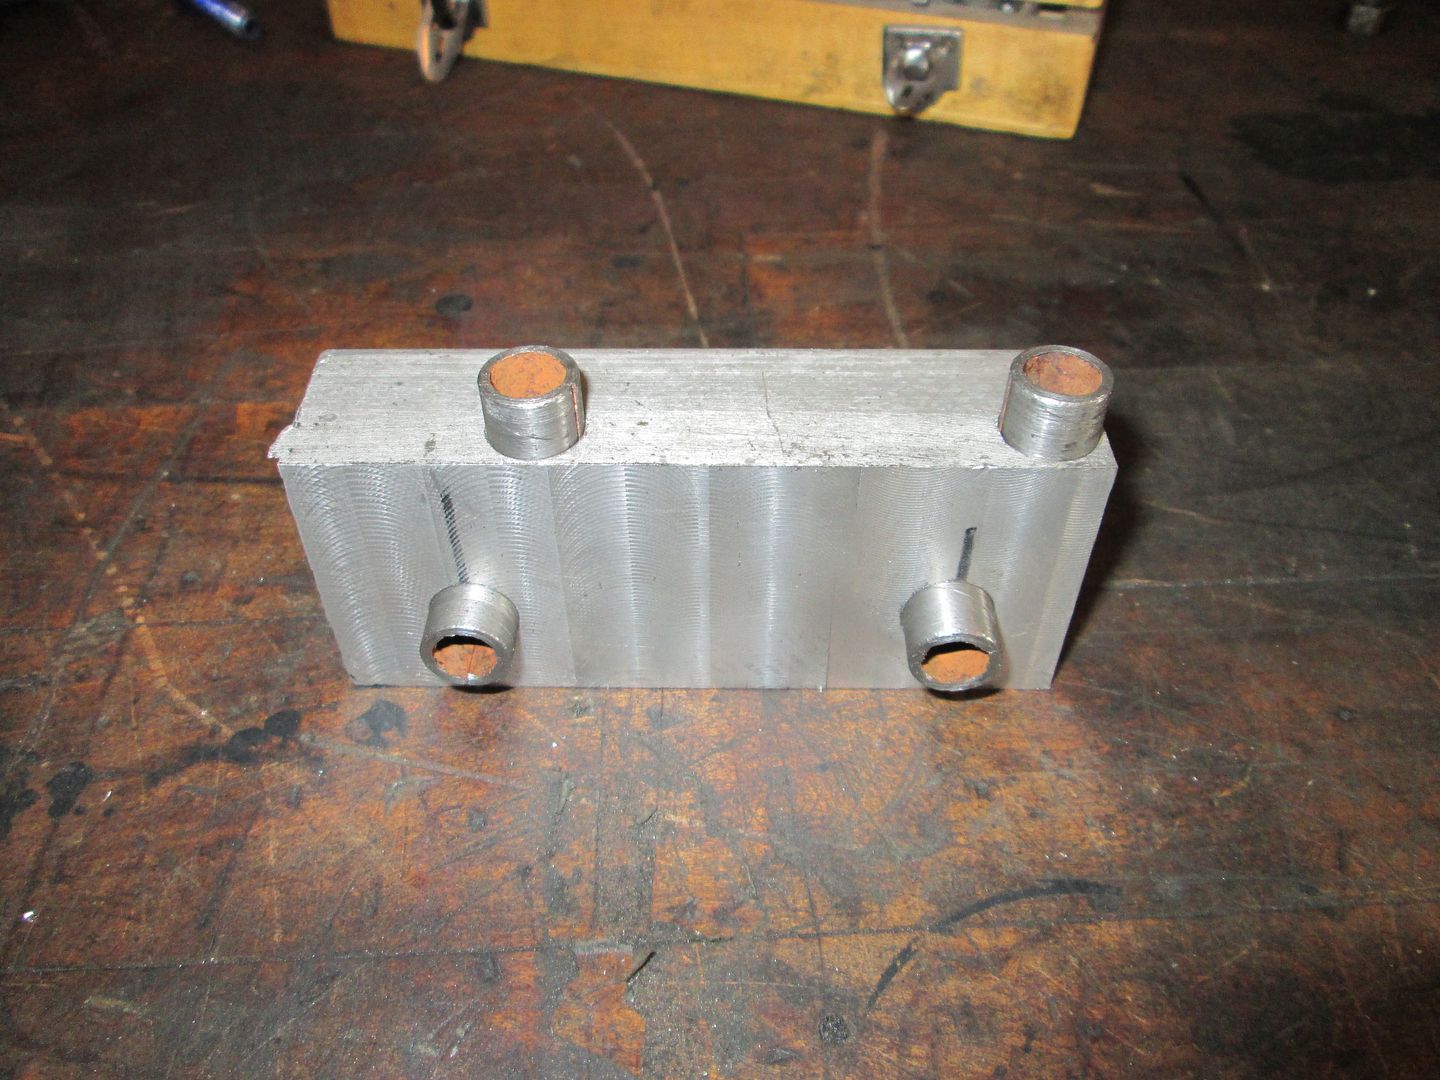
After a test fit with the dowels in place, the mounting plate was proud of the starter mount face, so I put it in the mill to make them flush and parallel:
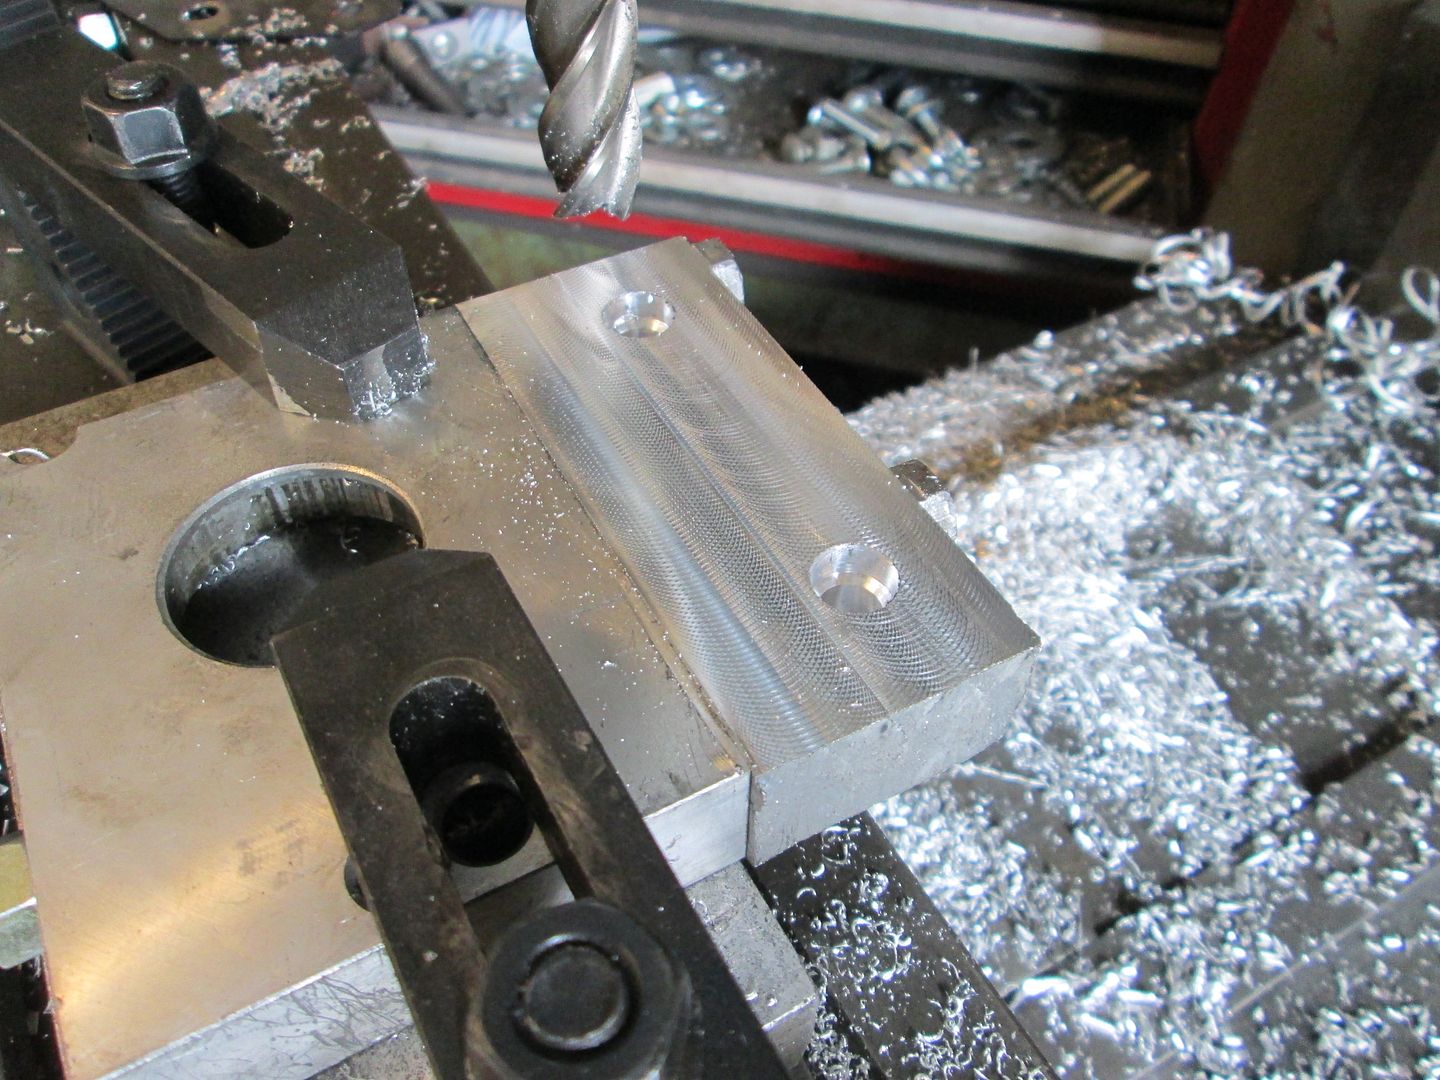
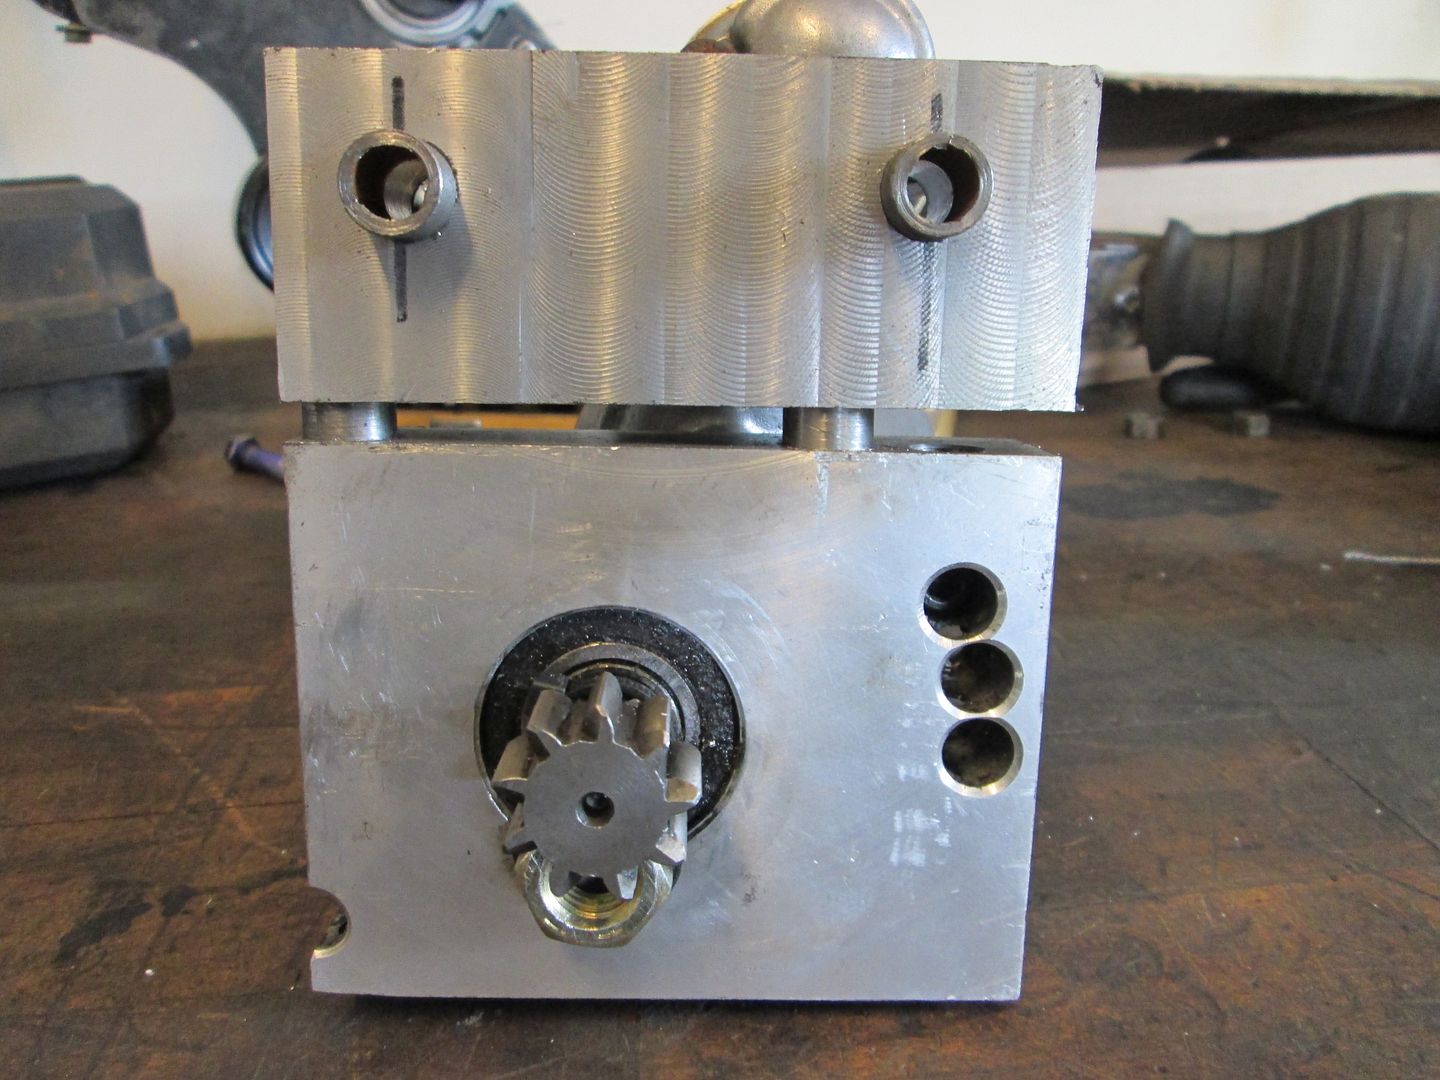
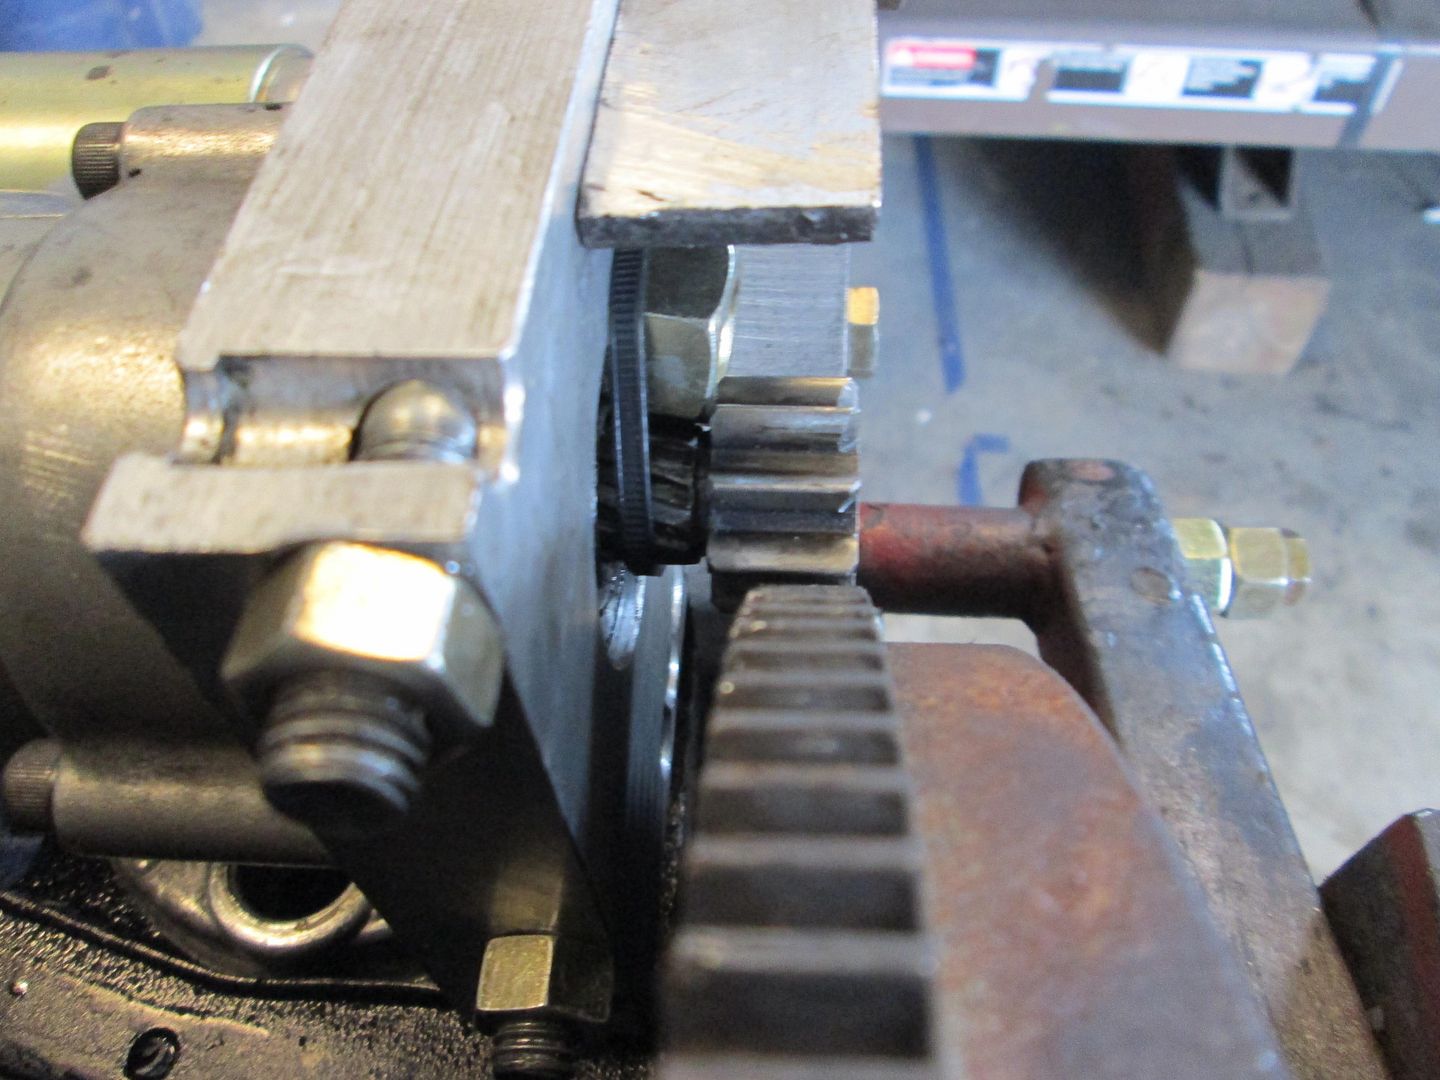
Here are some pictures of the starter installation with the new block and the dowel pins (notice the trick of using a wire tie and a 1/2 nut to keep the gear extended):
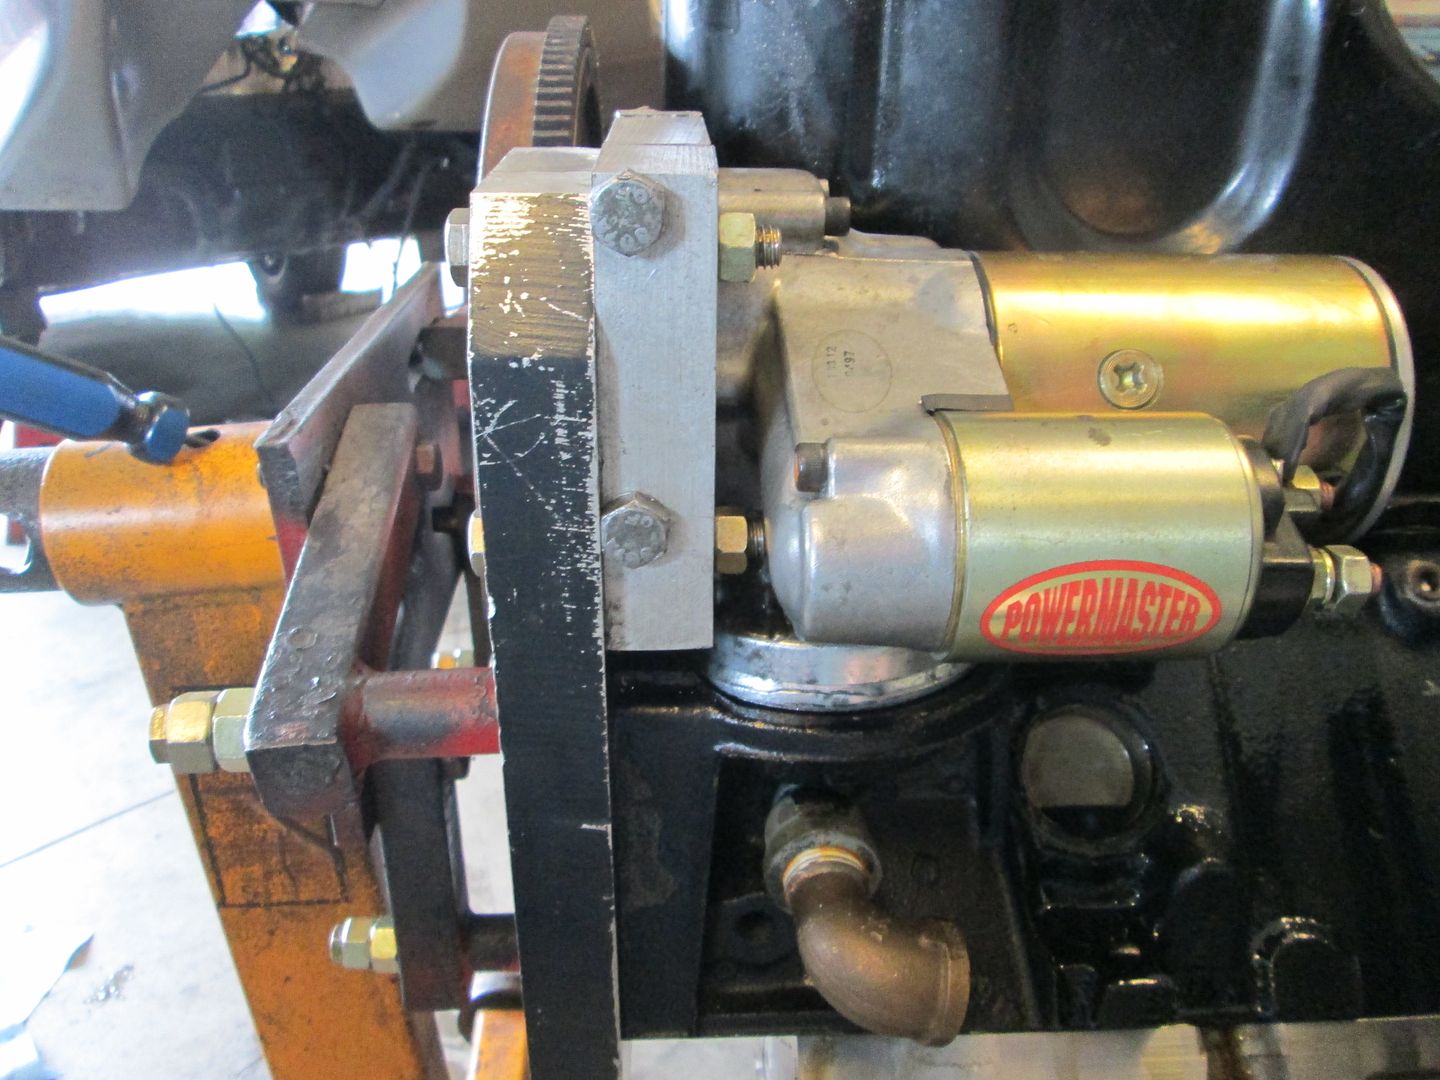
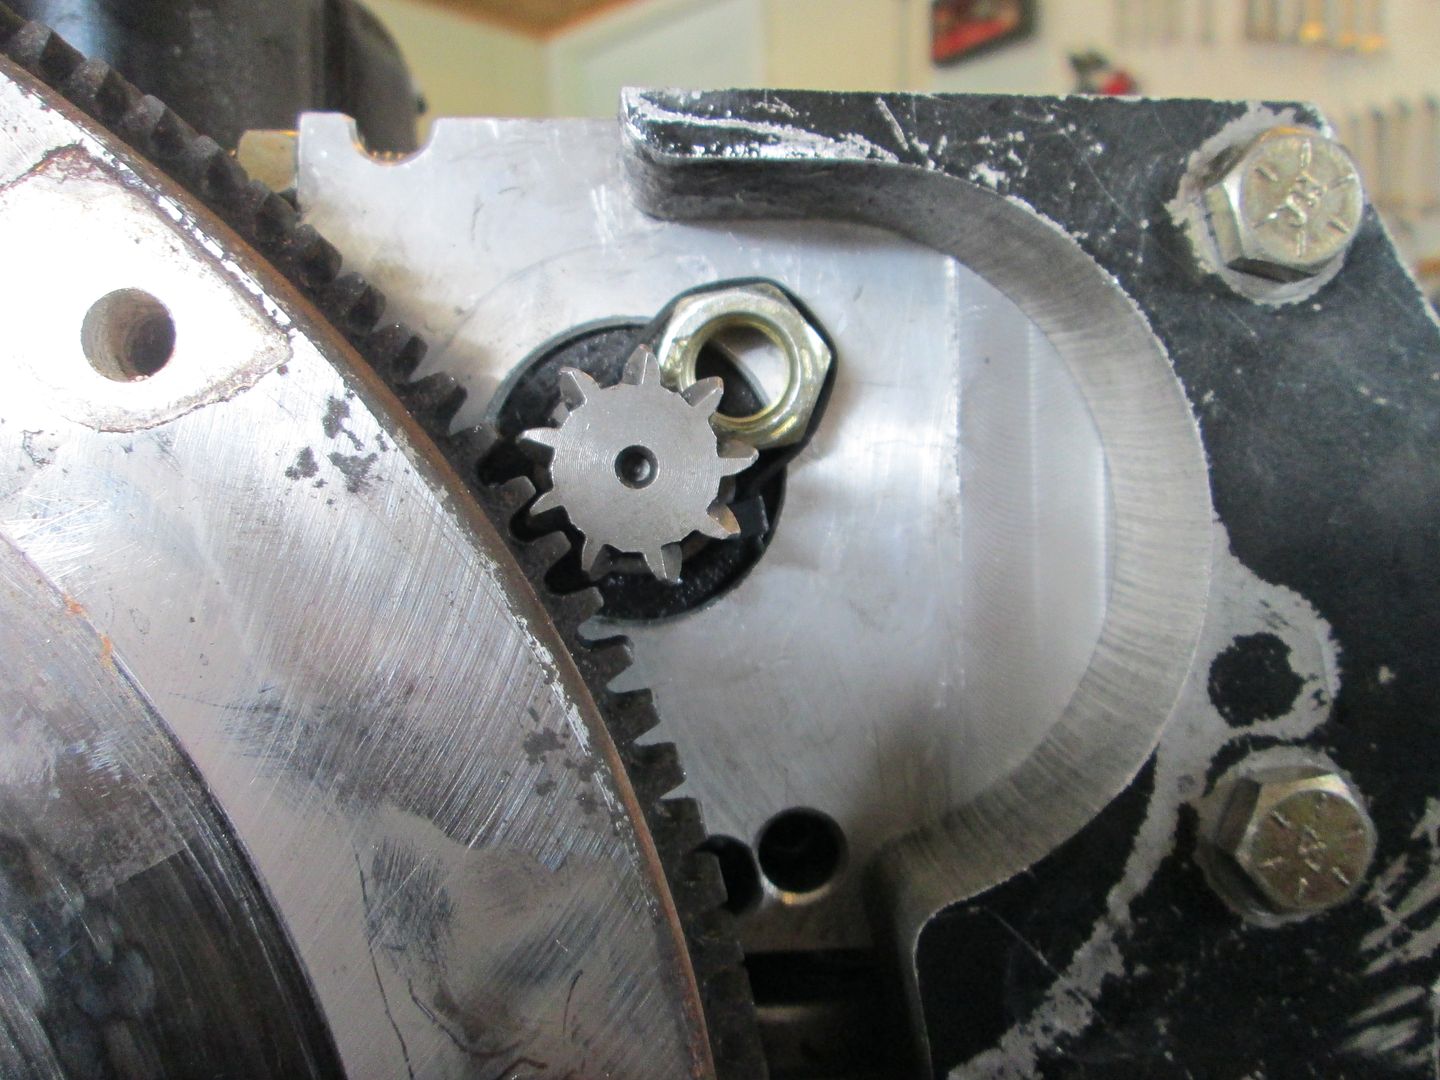
Now the only issue with this starter placement is I will have to make another slight notch in the front cradle crossmember as the starter block hangs down lower than the bottom of the adapter and the bottom of the adapter clears the cradle by 1/16". There really wasn't much option with the starter placement as the crossing bolts in the starter block and the front cradle rail really limit options. When I made the new block, I did make sure the crisscrossing bolts in the new block were as close to each other as possible.
Here is a picture of the clearance between the starter and the oil relocation plate:

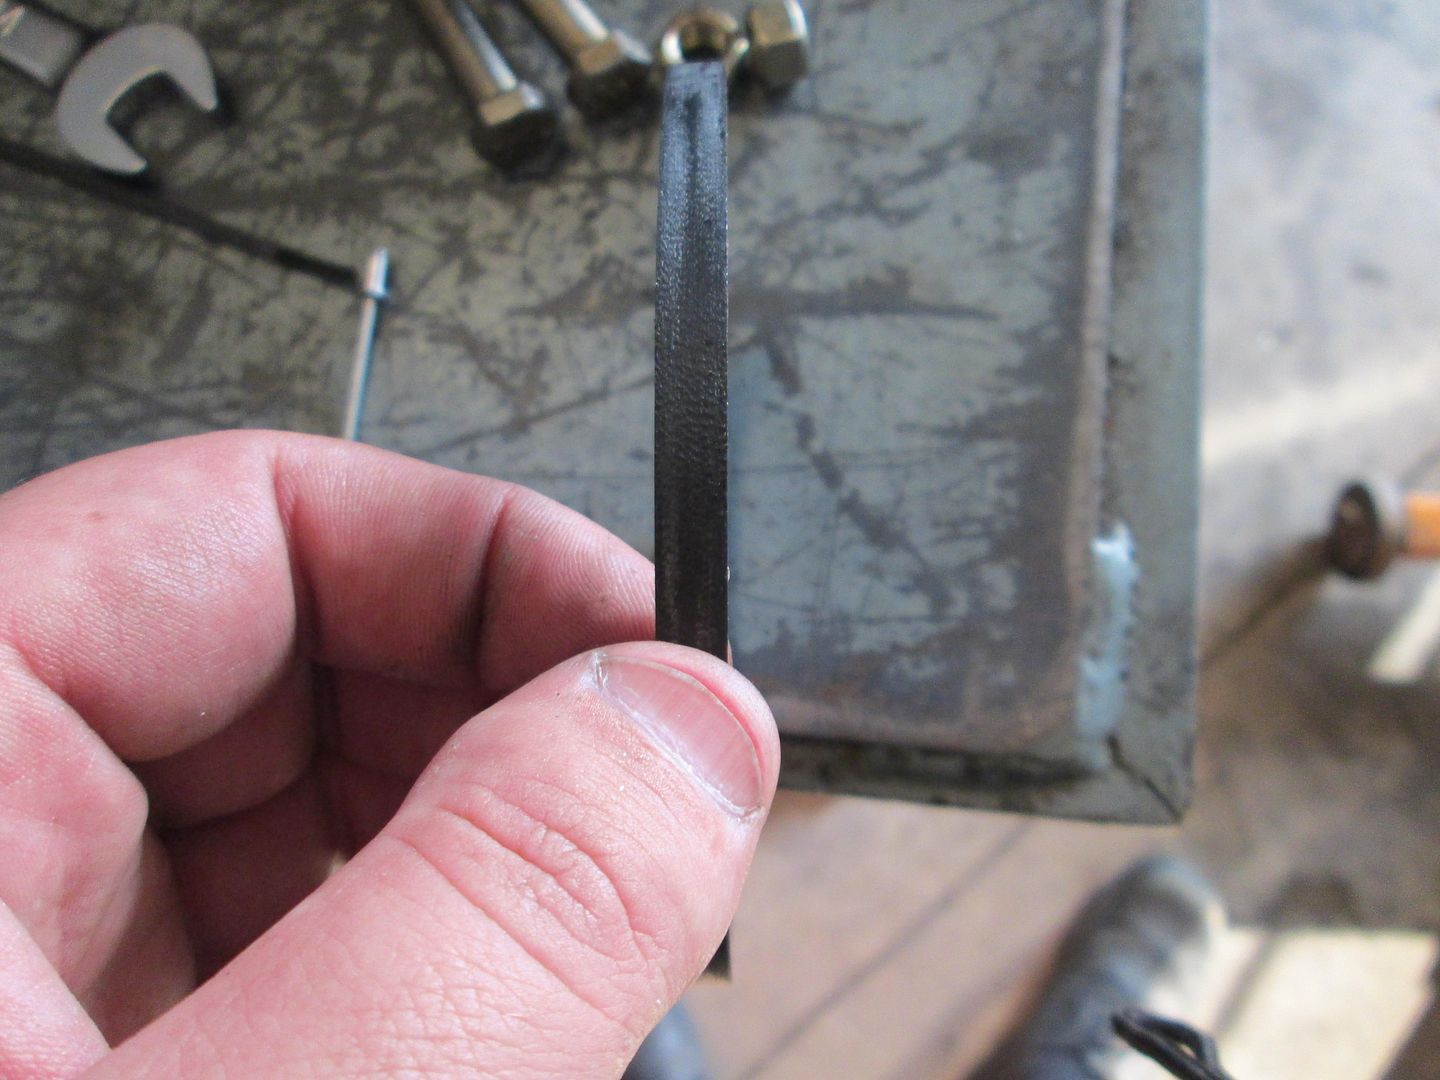
The center port gets capped off because there just isn't room in there for anything. As part of the original install, a tall pipe cap was used. This was too tall, so I replaced it with a flush cap and a recess for the allen wrench.

|
|
|
|
fieroguru
|
SEP 01, 08:56 PM
|
|
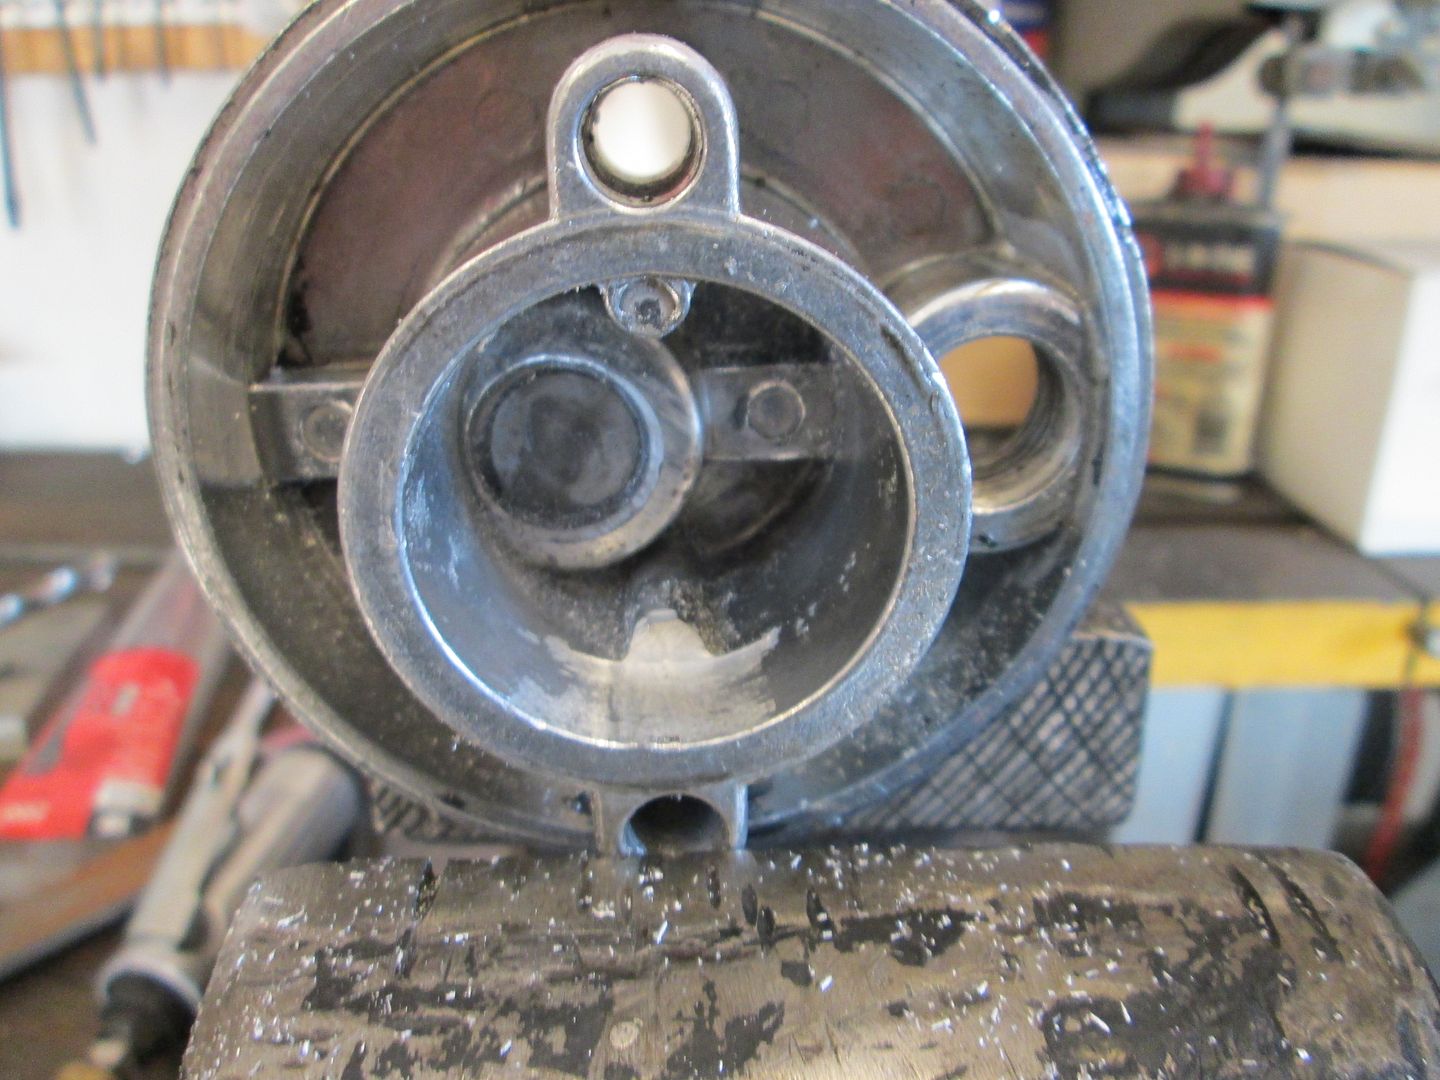
I also started working on the oil filter bypass... these things nearly always leak because its hard to get a good gasket for them. Since it is an oil bypass, I like to use oil filter o-ring gaskets. Here is the one I use, don't know the original application:
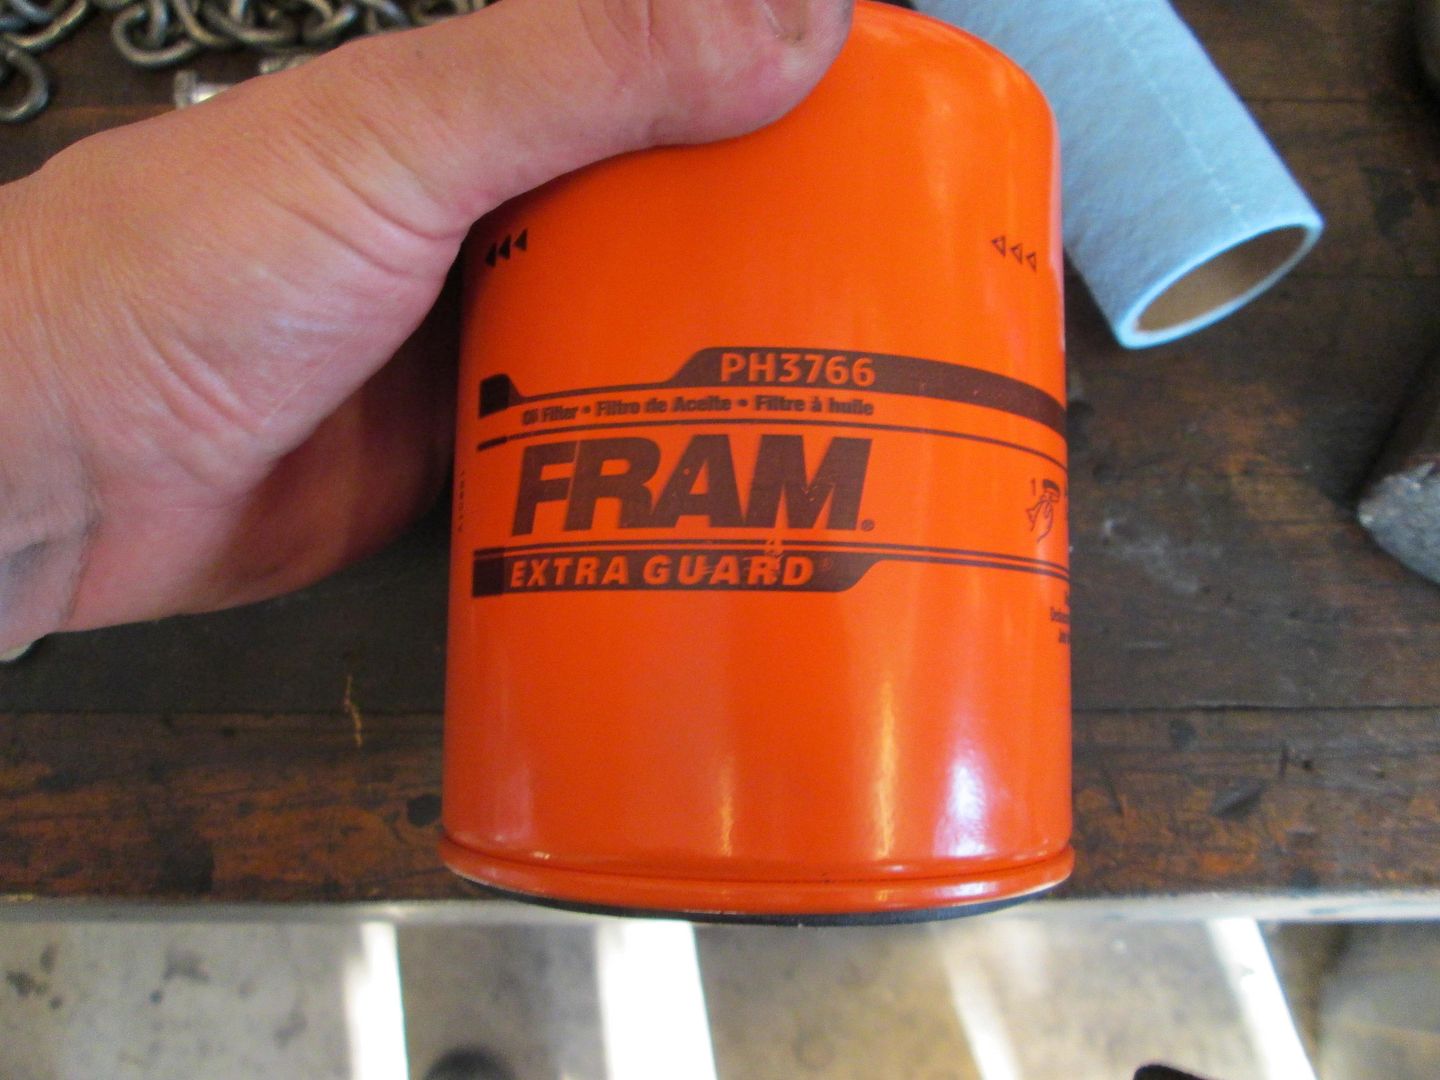
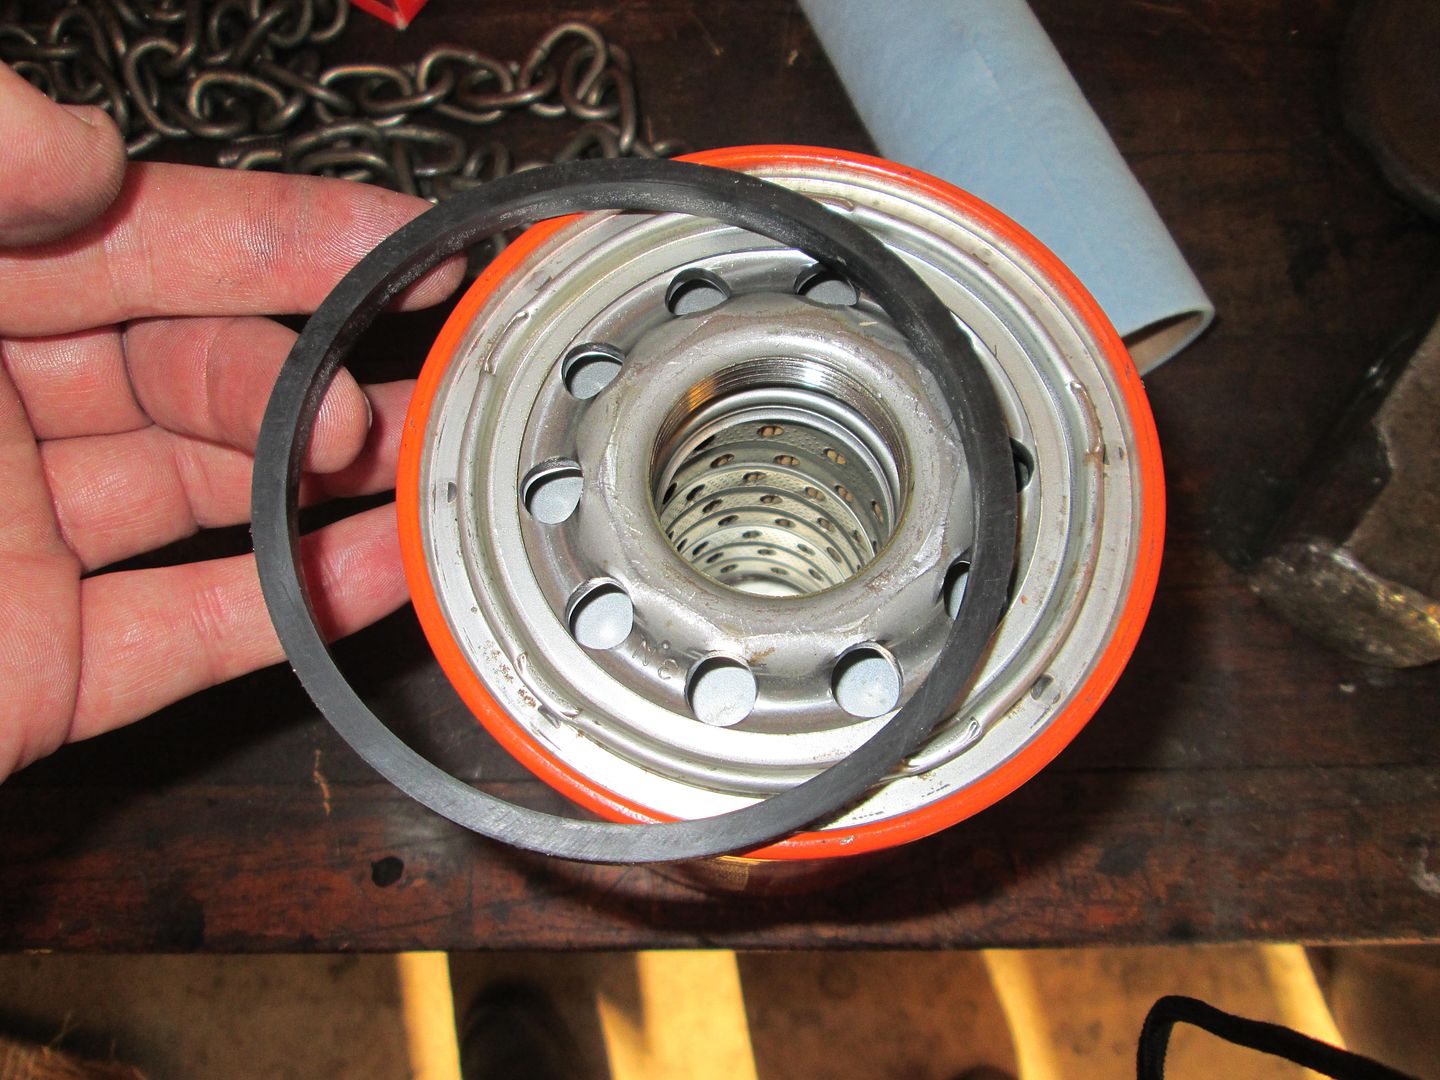
It is the perfect OD to fit in the machined pocket for the oil filter:
Its about 1/4" thick, which is a little too thick for use without modifying the relocation housing:
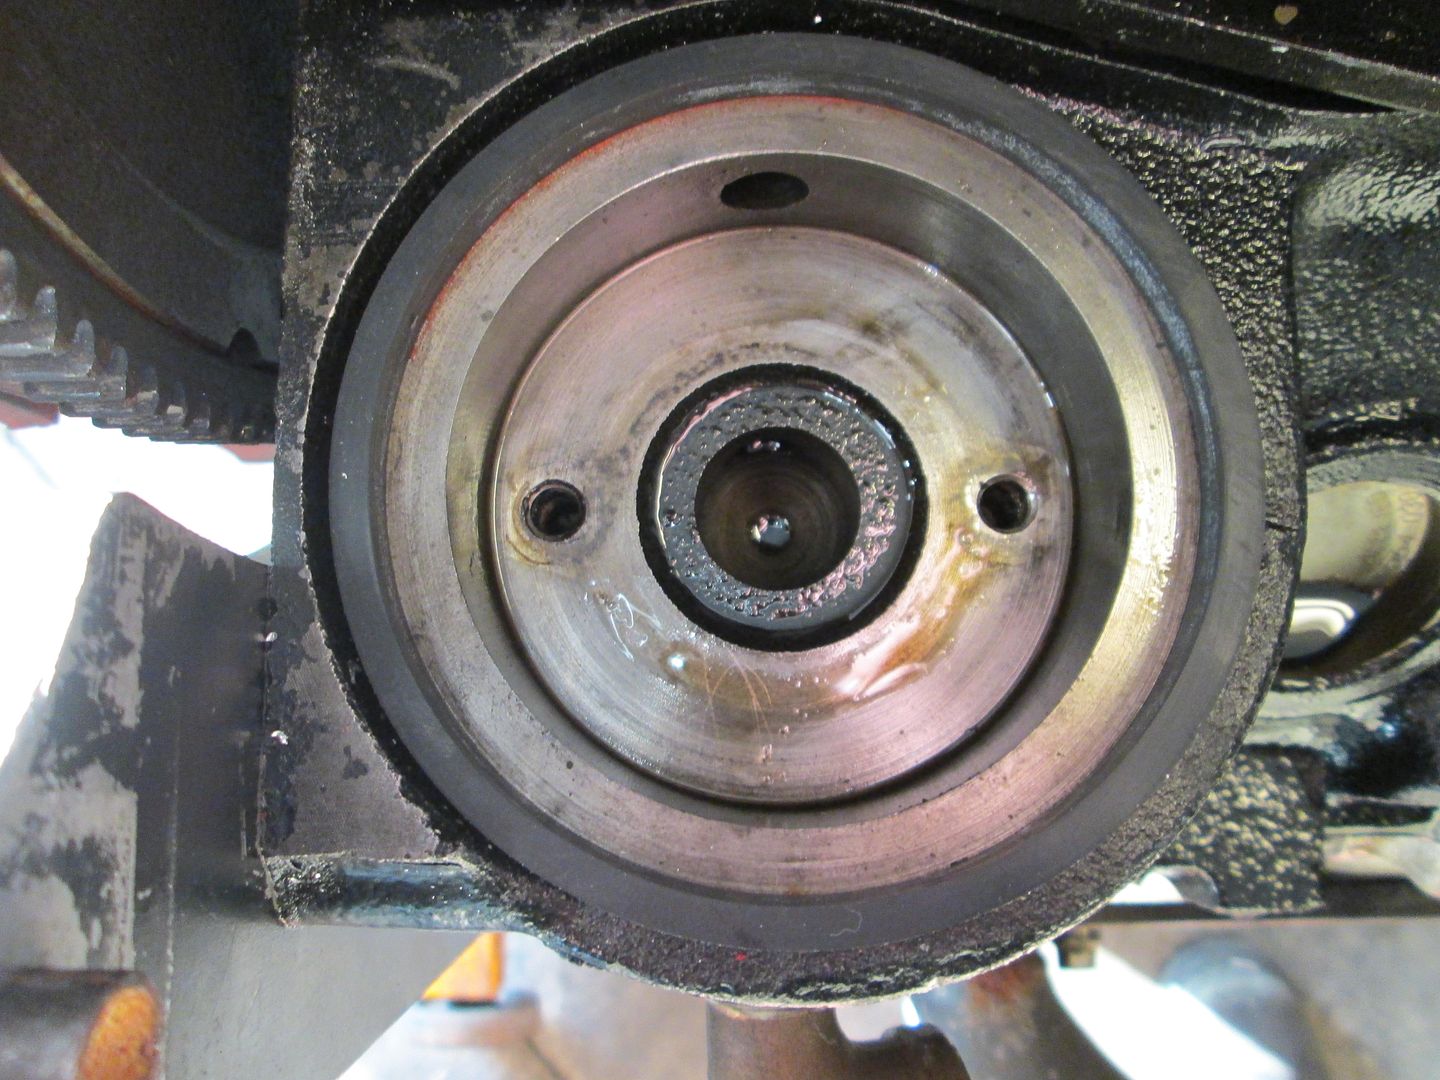
I needed to chuck up the relocation housing in the lathe, but to do so I have to remove one of the casting ports with an air grinder with burr tool.
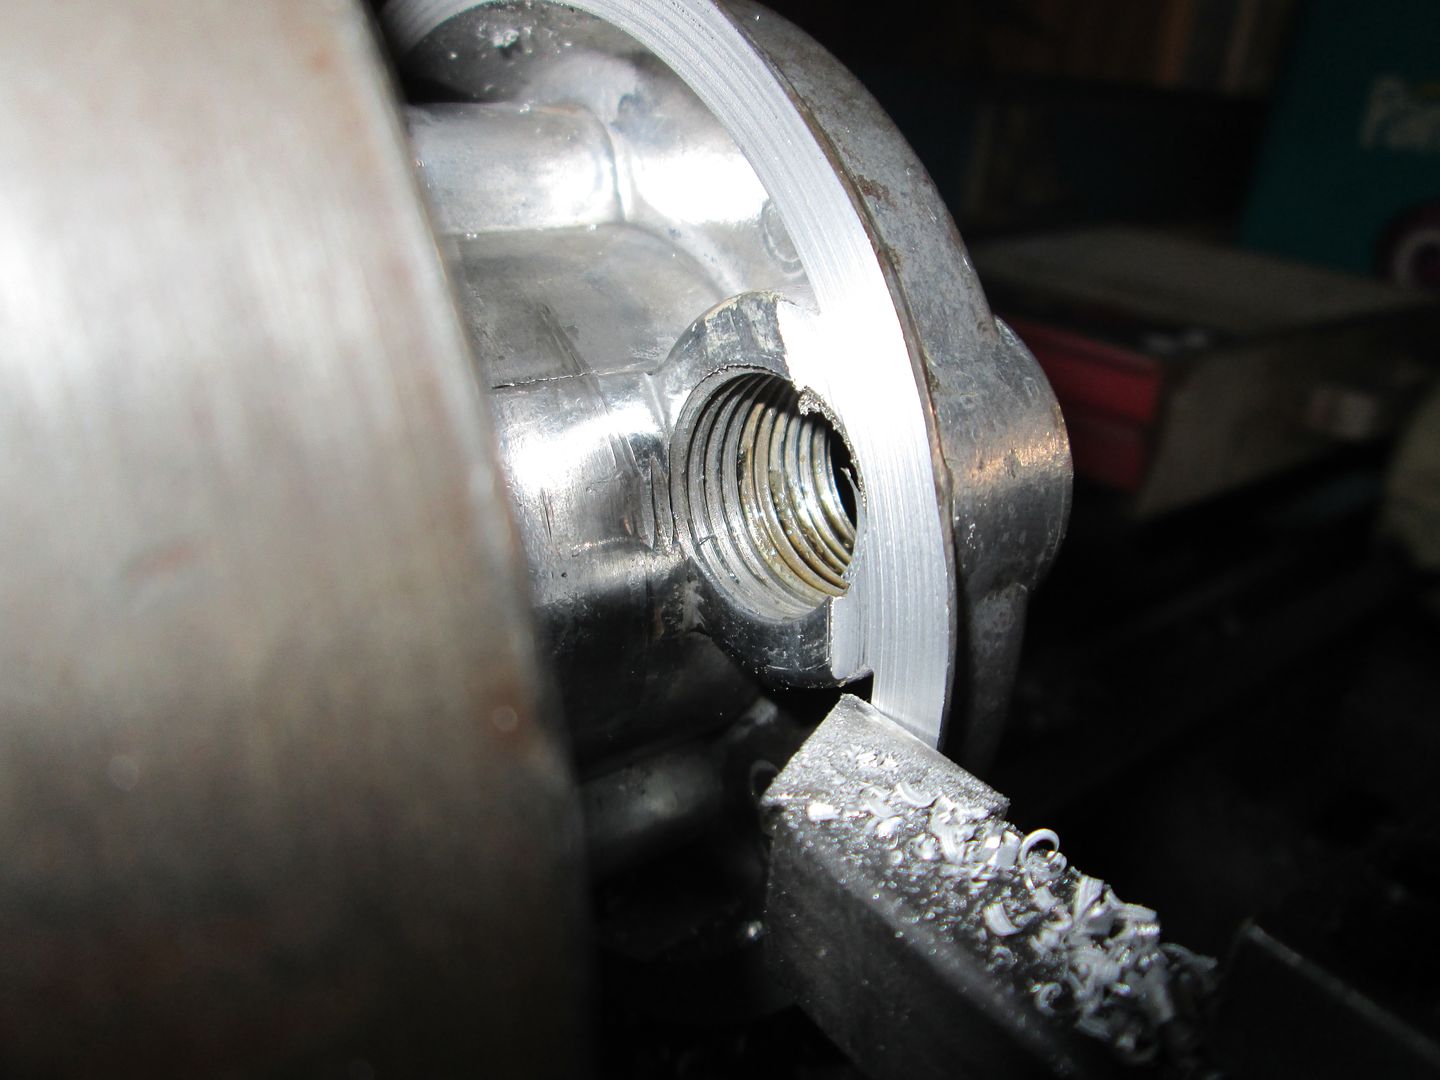
Then chuck it up in the lathe to remove the groove at the sealing surface to make more room for the seal. Here is the stock seal surface:
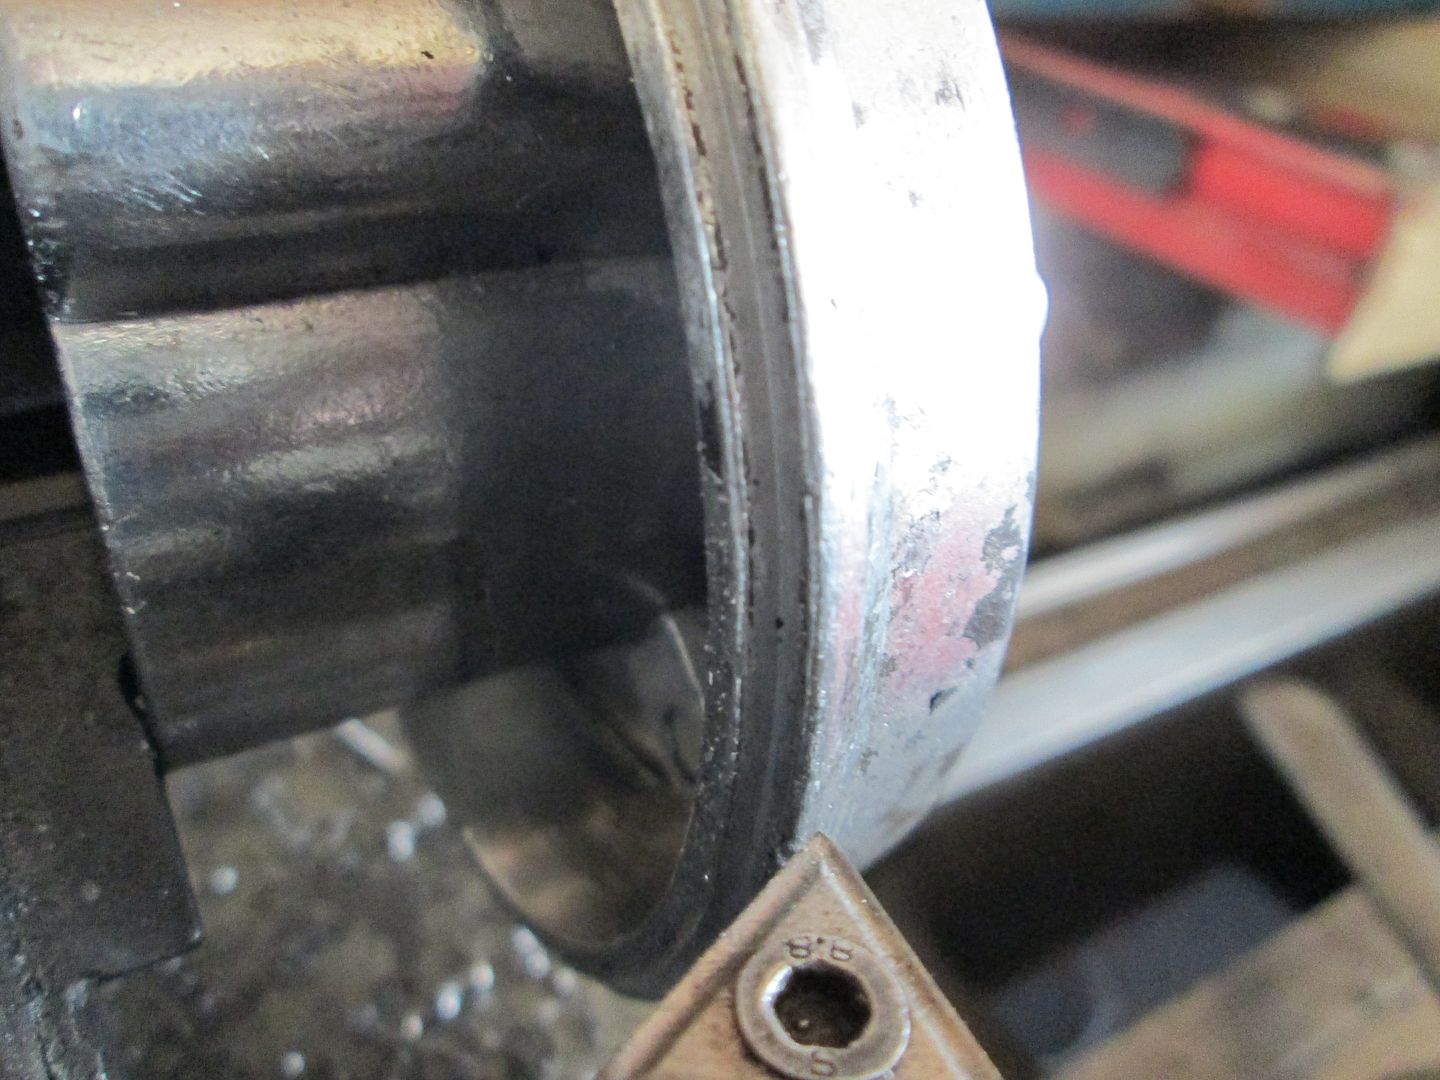
Here it is after a few passes:
|
|
|
|
CowsPatoot
|
SEP 02, 07:05 PM
|
|
| quote | Originally posted by fieroguru:
These pins and bores will ensure a snug starter fit w/o any visible slop, so the starter can be removed multiple times and always put back in with easy and precise alignment. |
|

|
|
|
|
Jims88
|
SEP 02, 08:29 PM
|
|
Nice work!
Trinten, or some one will be Thankful when they have to change that starter.
|
|
|
|
Trinten
|
SEP 03, 07:08 AM
|
|
| quote | Originally posted by Jims88:
Nice work!
Trinten, or some one will be Thankful when they have to change that starter. |
|
As easy as he made it with this setup, I'll probably be able to do it myself! Otherwise, CowsPatoot will be glad. lol
Honestly, with that starter only being about about, what, two years old? I hope it doesn't need to be replaced anytime soon.
It's an awesome solution, and so is the fix for the oil relocator!
|
|
|
|

