
 
     |
| Blooze Own: An F355 Six Speed N* Build Thread (Page 15/126) |

|
Bloozberry
|
JUN 18, 12:12 PM
|
|
Hey! You're not supposed to notice little deviations like that... just read the story and go with the flow.  (Actually, I rebuilt the starter for peace of mind... I didn't fill the scratches on it with body filler either!) (Actually, I rebuilt the starter for peace of mind... I didn't fill the scratches on it with body filler either!)
|
|
|
|
ALJR
|
JUN 30, 11:37 AM
|
|
|
|
|
LitebulbwithaFiero
|
JUN 30, 02:37 PM
|
|
|
The Northstar looks familiar to the engine I tore down and put back together in school. Mine was a V6 with the one piece main caps and had dual overhead cams. But I think it was a Ford. I don't know about the N*, but the V6 had it where only one of the intake valves per cylinder where getting air for the lower RPMS. It had a set of butterflies in the lower intake manifold that would open to let air get to the second set of intake valves, which I think was controlled by the computer with an electronic solenoid.
|
|
|
|
Bloozberry
|
JUN 30, 05:54 PM
|
|
I finally moved that '67 GTO I've been working on out of the shop and will get back to the 'Blooze-Zone' after the long weekend. More to come soon. Thanks for the interest!
Litebulb... you were probably working on a Taurus SHO engine... made by Yamaha. That was a nice powerplant while it lasted.
|
|
|
|
Bloozberry
|
JUL 12, 09:01 PM
|
|
So much for intermission… it’s back to work! I’ve been toiling over what to do with my valve covers. On the one hand I’d like to shave off all the little bosses on the “ugly” cover, pretty it up with some stick-on grooved caps (like some I’ve seen here on PFF but forget whodunit), and paint them lipstick red, or fly-yellow since the car will eventually be yellow. Orrrrrrrr… spring for a pair of those obscenely expensive cast, ball milled and polished CHRFab beauties. Maybe some of you could give me ideas on what you’ve done?
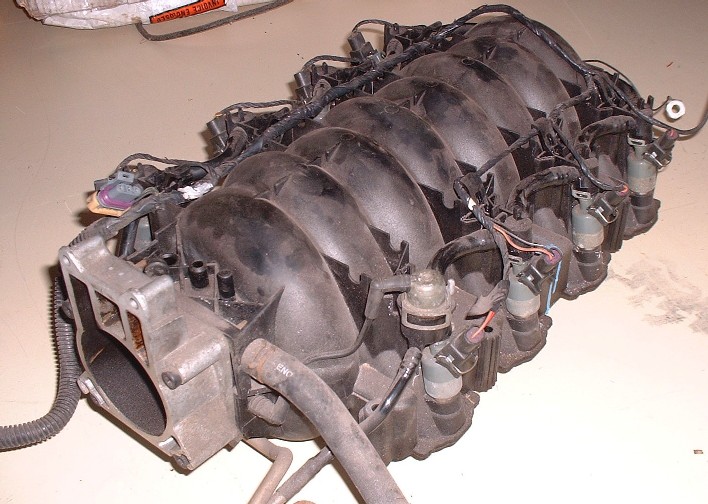
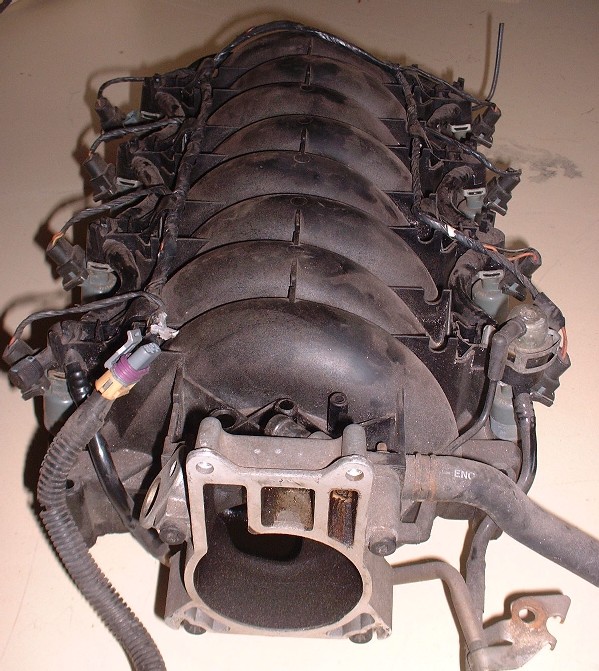
While I sit on the fence with regards to the valve covers, I’ve pretty much made up my mind that I’m not going to use the Caddy beauty cover. I may design something later to cover up the intake plenum, but for now I’ve decided to make the plenum as appealing as possible. To that end, I made a few inquiries last week here on PFF about replacing the really busy looking plastic fuel rail with the very sano-looking stainless rail. The stainless rails were installed as a result of a recall in the USA for ’95 to ’97 cars but not in Canada… so it looks like I’ll have to buy one. Here’s the stock plenum in all its complexity.
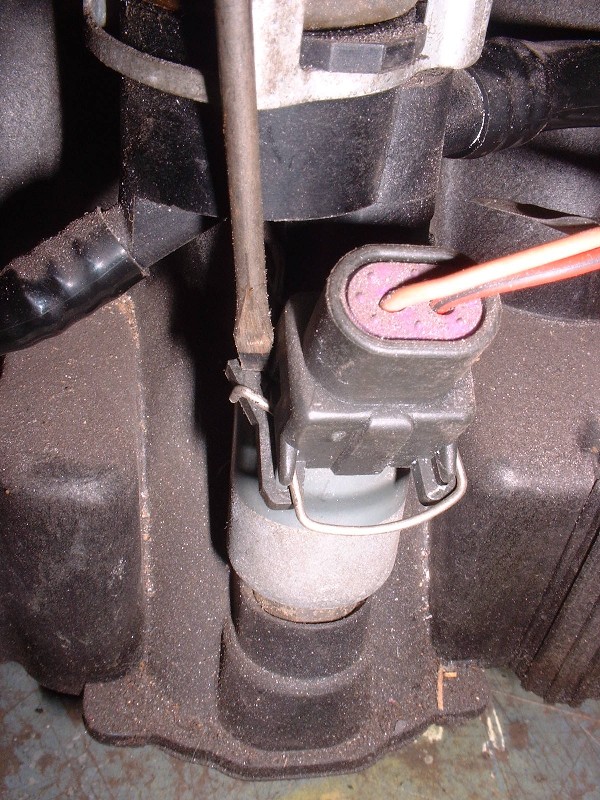
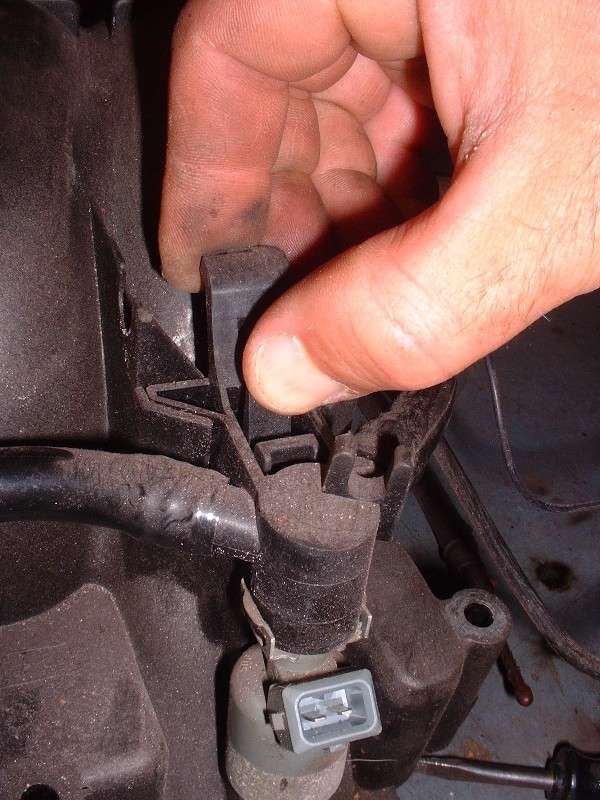
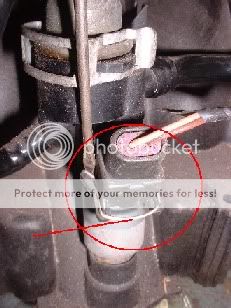
I started the dismantling process by removing the connectors on the injectors. If you’ve never done it before, they’re the same as on the Fiero V6’s… you need to take a small screwdriver to a little spring clip that wraps halfway around injector.
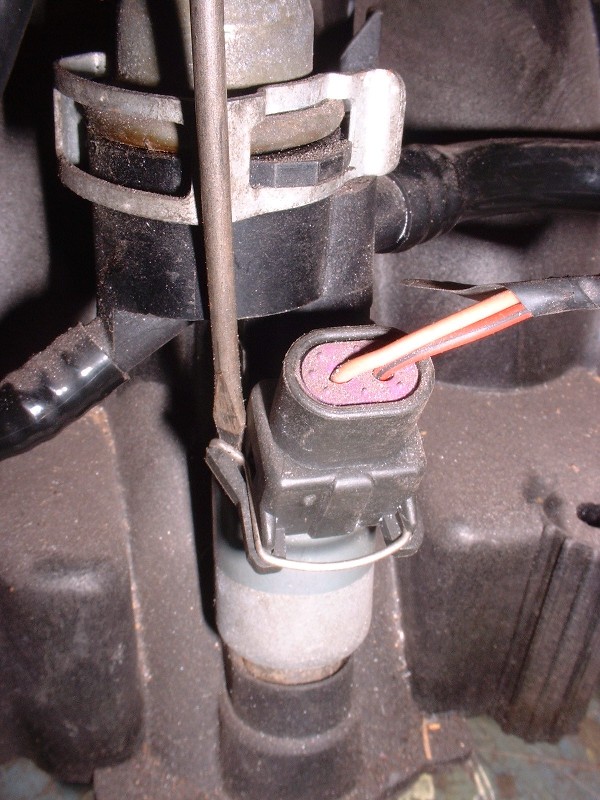
Then with a little twist, stretch the end of the clip off the plastic tooth that captures it like this.
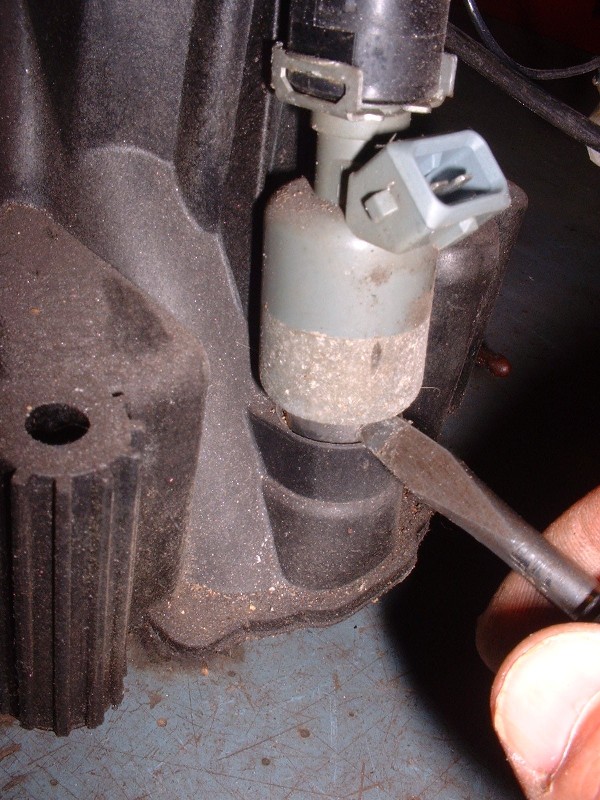
Its easier to remove the fuel rail itself once you’ve removed the electrical connectors since the wires are partly in the way. Here I’m pressing the plastic release lever on the fuel injector rail to be able to remove it from the plenum.
I found that the injector o-rings were stuck in the plenum so a gentle pry with a screwdriver broke the tight seal and got things moving.
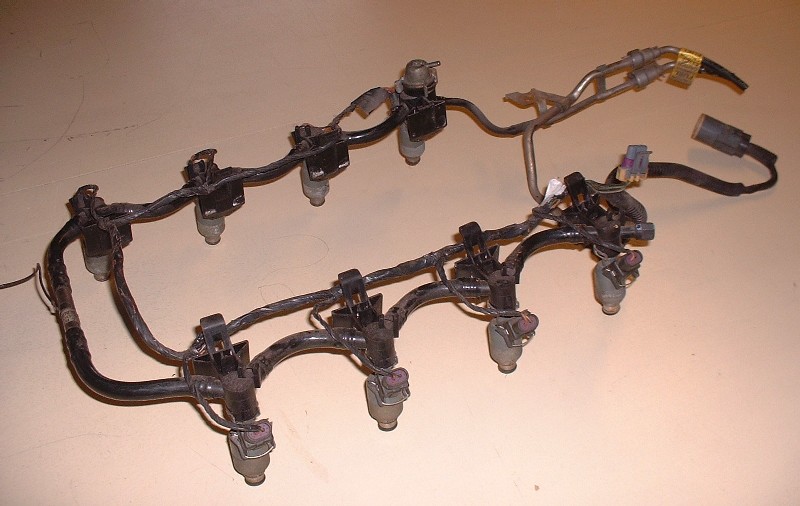
Because the plastic fuel rail is quite rigid, I had to release all four injectors on each side, working them up a little at a time before being able to lift the whole rail up and off the plenum.

So here’s the old rail. I’ll need to remove and have the injectors cleaned to get them ready for the stainless rail. To further clean up the top of the engine, I’m working out an idea to hide the injector harness under the plenum and have the connectors come up through an access hole I’ll drill for each pair through the plenum mounting area.
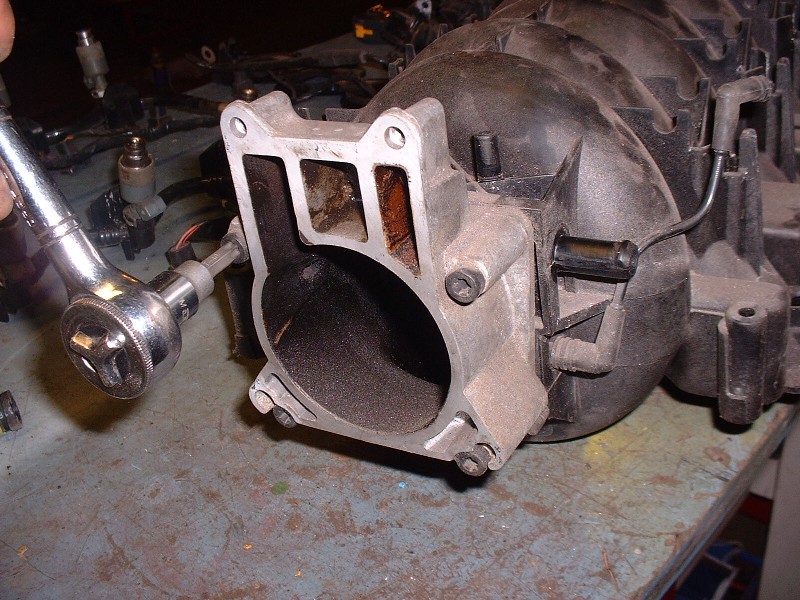
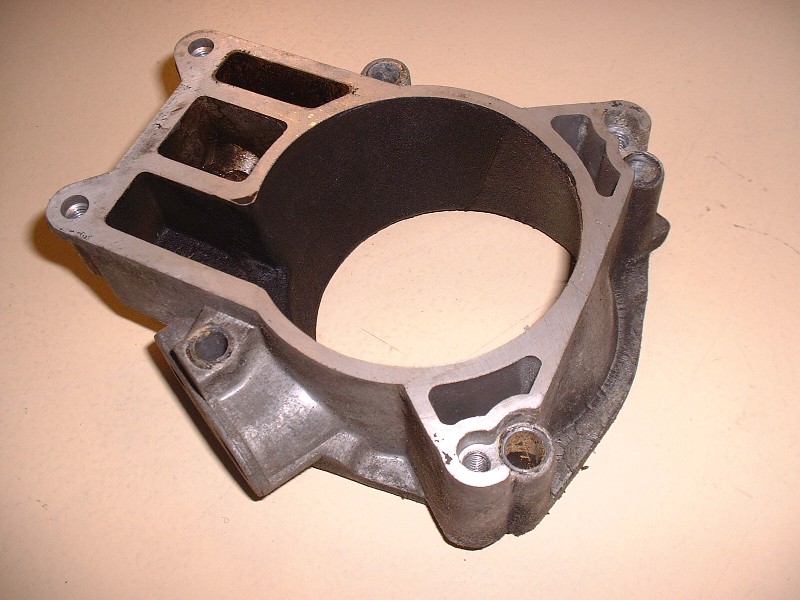
To finish stripping the plenum of hardware so I could clean it properly and assess just how many brackets and bosses I could shave off, I removed the throttle body adapter:
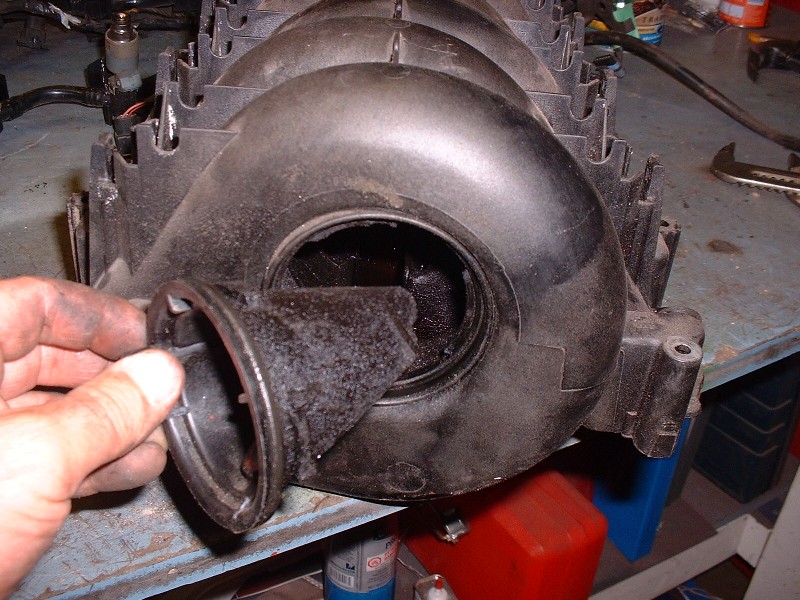
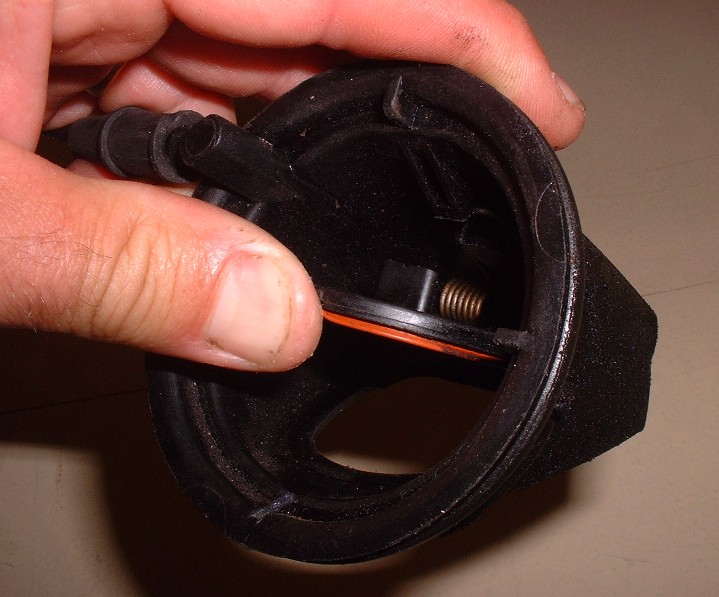
…and this spring-loaded trap door at the rear of the plenum. I would imagine this is a pressure valve in the event of a backfire. I could be wrong. It’s easily removed with a simple twist and a pull.
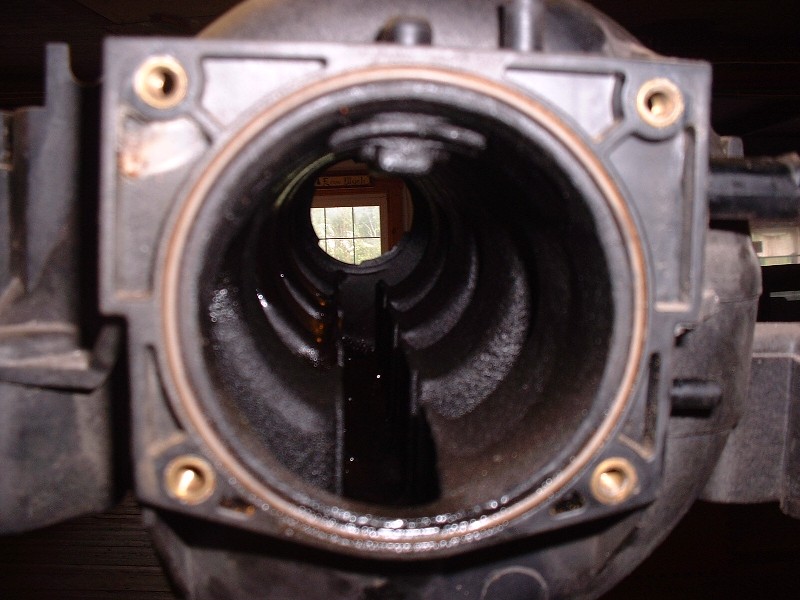
Here’s what the inside of the plenum looks like. All the runners open into the common central part of the plenum at the bottom. They curl around a total of about 270* of which the first 180* are circular, and the last 90* gradually straighten out into a flat run into the intake port. You can see from mine that there’s a fair bit of oil and carbon deposits in there. I’ll explore different ways to clean out the runners without trying to melt the PVC plastic that they’re made of! Hot soapy water in the pressure washer comes instantly to mind, but I’m open to suggestions.
|
|
|
|
katatak
|
JUL 12, 11:17 PM
|
|
Hey Blooz,
Just a tip for you. If you push on the center of the "clip" - push it toward the injector, you can pull the injector plug off - no need to pop one end of the clip out of the connector.
Pat
|
|
|
|
Will
|
JUL 13, 12:00 AM
|
|
Ditto on the injector connectors.
You'll also have to take the FPR apart and reinstall it in the stainless rail. It has little bitty parts, so be careful.[This message has been edited by Will (edited 07-13-2010).]
|
|
|
|
IXSLR8
|
JUL 13, 01:43 AM
|
|
|
I took my plastic intake plenum to an engine rebuilder for cleaning and they couldn't clean the carbon out. They tried the hot tank, everything. The shine came off but not the carbon particles. I've also read that they are supposed to be replaced instead of cleaned because of the inaccessible areas that can't be cleaned that hold carbon deposits.
|
|
|
|
Bloozberry
|
JUL 13, 08:01 AM
|
|
Katatak: "Whale oil beef hooked!" (say it with a Newfoundland accent... "Well I'll be f___"). All these years I've been painstakingly unclipping those rotten injectors with a screwdriver. Thanks for the tip!
Will: Really? The pictures of the stainless fuel rails I've seen all seemed to have the FPR installed on them. Here's one for an Aurora on ebay that's supposedly new. Is that just the mounting boss on the rail and not the FPR itself?
IXSLR8: I had read that the plenum's were to be replaced rather than cleaned in the service manual too. But I have a hard time believing anyone would do that. I haven't priced them out but I don't imagine they're cheap! Other than to make profit, for the life of me I can't understand GM philosophy (scratches head). If even the hot tank can't remove the carbon deposits, then I don't think we have to worry about them accidentally falling off into the engine, and I can't imagine there ever being enough deposits to choke off a runner. All I want to do is to get rid of the excess oil just pooled there in the bottom.
|
|
|
|
aaronkoch
|
JUL 13, 02:13 PM
|
|
Can't you just pinch the wire retainer in with your thumb? On all of mine, I just push in on the wire retainer, and it spreads out at the back, allowing you to just pinch & pull, and the connector slides right off.. Or maybe these are different than the 3800's... Sure look the same though.
Edit: Looks like somebody beat me to it.. oh well.
------------------
----------------------------------------------------
Currently in the middle of my 88 + 3800NA swap[This message has been edited by aaronkoch (edited 07-13-2010).]
|
|
|
|