
 
     |
| Fiero Argento Signora build thread w/lots 'o' pics (Page 15/21) |

|
CC Rider
|
MAR 20, 10:31 AM
|
|

These are 215/45/R17 17x7 E38 Front
245/40/R18 18x8 E35 Rear
Ebach all around with Koni's
California Kid will have them on his car this year as well[This message has been edited by CC Rider (edited 03-23-2009).]
|
|
|
|
fierofury
|
APR 08, 10:33 PM
|
|
|
|
|
fierofury
|
APR 08, 10:37 PM
|
|
|
They are 16 inch? I don't see them listed on tire rack...I only see them with 15 and 17
|
|
|
|
fierofury
|
APR 08, 10:38 PM
|
|
| quote | Originally posted by CC Rider:
These are 215/45/R17 17x7 E38 Front
245/40/R18 18x8 E35 Rear
Ebach all around with Koni's
California Kid will have them on his car this year as well
|
|
Are those stock fiero center caps that have been painted?
|
|
|
|
Fieroseverywhere
|
APR 17, 04:25 PM
|
|
| quote | Originally posted by fierofury:
They are 16 inch? I don't see them listed on tire rack...I only see them with 15 and 17 |
|
16x7 +38mm offset, 18lbs each. Look up "2007 Pontiac Vibe" and you will find them. I keep telling Tirerack that they fit a fiero also but they won't update their site. If you order a set just make sure to get the correct centering rings for a fiero. 
|
|
|
|
Fieroseverywhere
|
APR 17, 04:30 PM
|
|
This fiero is now parked in the new garage. I tried to take it down to get the wheels installed but the transmission decided that was the best time to die (grinding from differential). I managed to limp back to the apartment and get it into a spot. About a week later I called a tow truck to move it to the house. Got a bunch of work to do on the house before we move in about 2.5 weeks. I'll get back to this car as soon as possible but first I need to properly equip my garage.  [This message has been edited by Fieroseverywhere (edited 04-17-2009).]
|
|
|
|
Fieroseverywhere
|
JUN 15, 12:43 PM
|
|
Update coming very soon. Garage equipped for work on fieros. New clutch, flywheel, and trans installed. Buttoning up the rest of the reinstall. Lots of pics taken, will post them up soon...
EDIT: Oh yea. Almost forgot. Wheels are installed! [This message has been edited by Fieroseverywhere (edited 06-15-2009).]
|
|
|
|
Fieroseverywhere
|
OCT 09, 01:24 PM
|
|
Bump to keep out of the archives.
Big update coming very soon. My camera broke taking most of my pics from the last few months with it. Since I will be dropping the cradle one last time I figured I would borrow another camera and make sure to get a good update. The car has changed a ton since the last pics were posted so expect big changes. See you in a few days.
EDIT: One big thing I wanted to mention. NO HEADGASKET LEAK!!!! Ended up being some other really stupid things. I'll post details later.[This message has been edited by Fieroseverywhere (edited 10-09-2009).]
|
|
|
|
Carcenomy
|
OCT 10, 01:01 AM
|
|
Just read your thread, most impressive! All ears for the update.
Dead keen to see how the wheels look, they're very similar to the ones I've been looking at.
Oh, and the 4.9 sure sounds purdy!
|
|
|
|
Fieroseverywhere
|
NOV 07, 08:05 PM
|
|
Finally have the time to do as promised and post an update. It's time to get all you guys up to speed on where the car is now. To sumarize... Different body style, different trans, and many, many, many other changes cosmetic and otherwise. I wont list them all but lets see who is paying attention enough to catch them. 
I wanted to mention that I had a camera die in process and lost many pics. I saved what I could. There are also some camera phone pics from when I was between digital cameras. Most didn't come out well and are blurry at best. The best pics are from a borrowed camera. Most of the more current pics fall into this group.
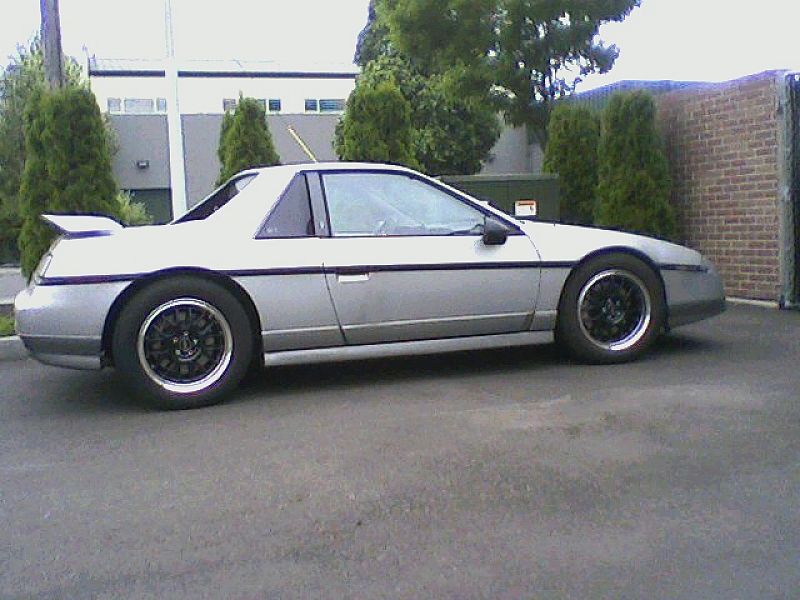
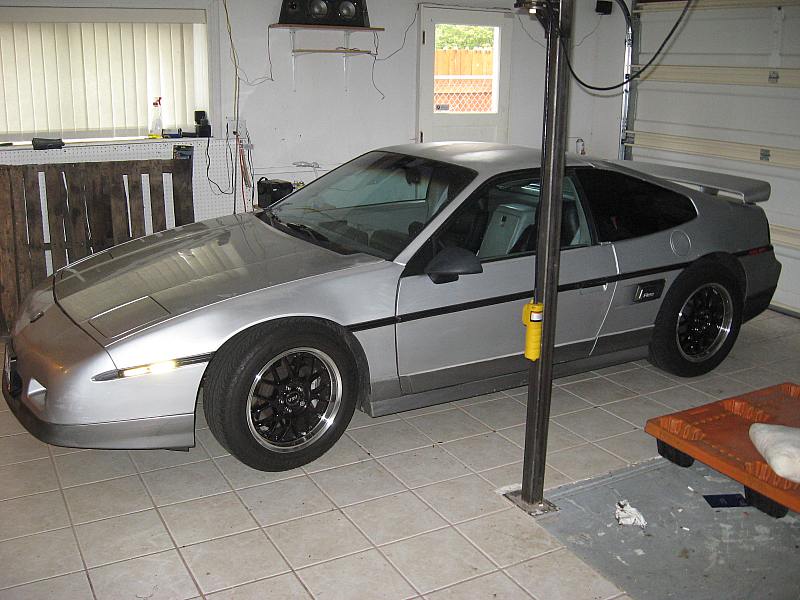
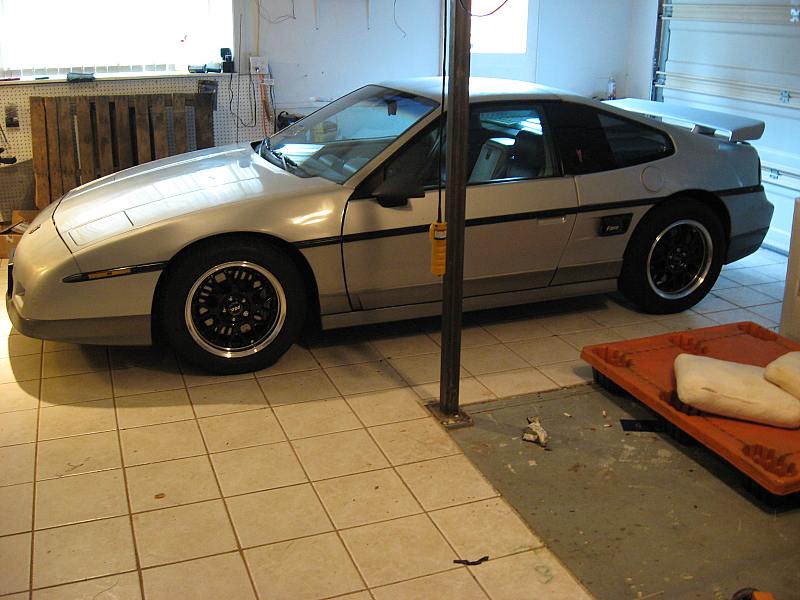
Lets go back in time a bit. Since I have had several requests I will start with pics of the wheels mounted.
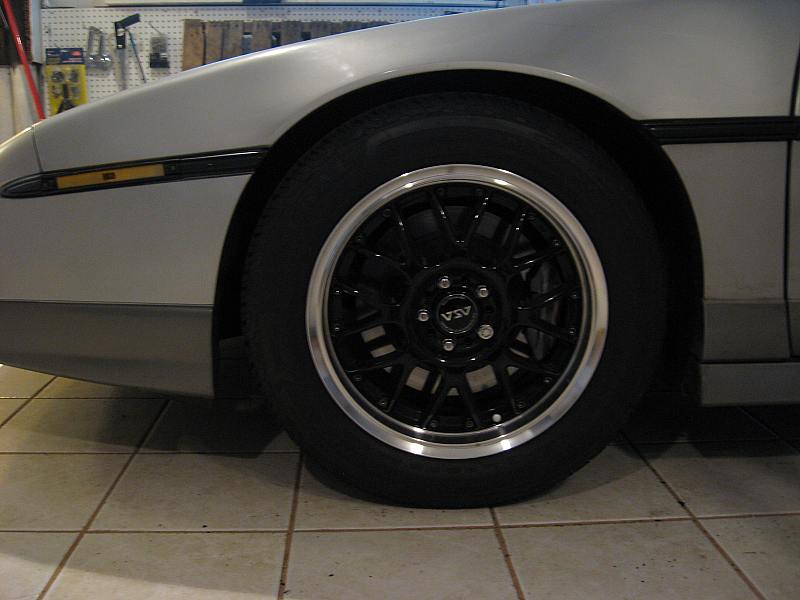
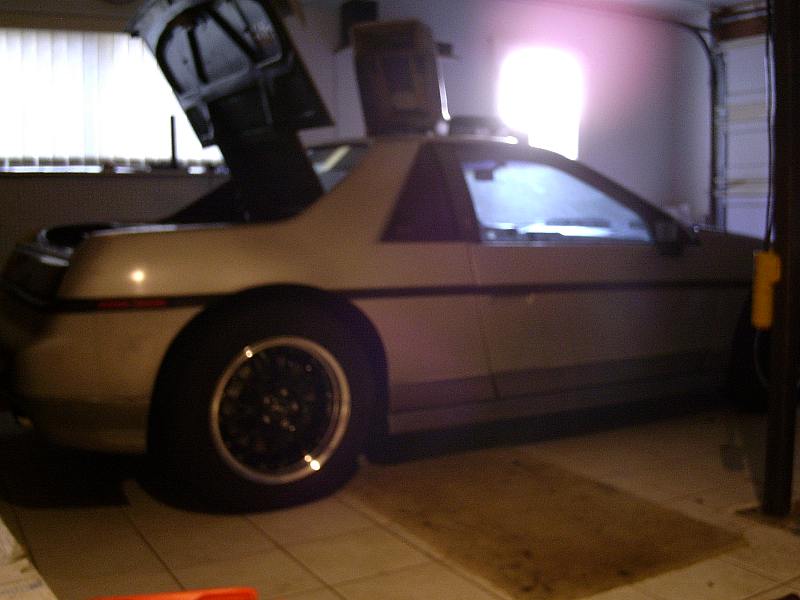
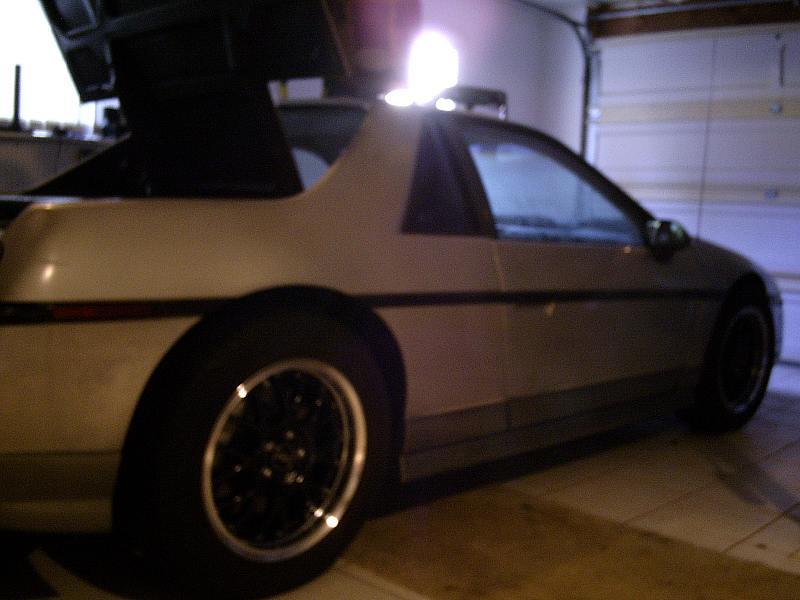
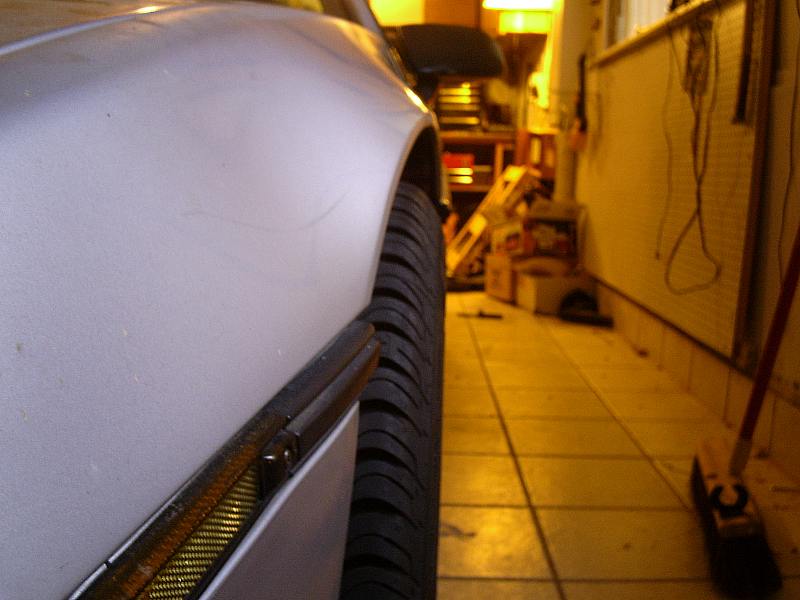
The wheel well gap is reduced by lowering springs in the front, coilovers in the rear, and larger diameter tires being used. The offset of the wheels also worked out perfectly as you can see by these next two pics.
I tired to save what I could but this is the only pic I now have of this car with the new wheels as a notchback. Too bad, I really liked the look. All others were lost thanks to the broken camera. 
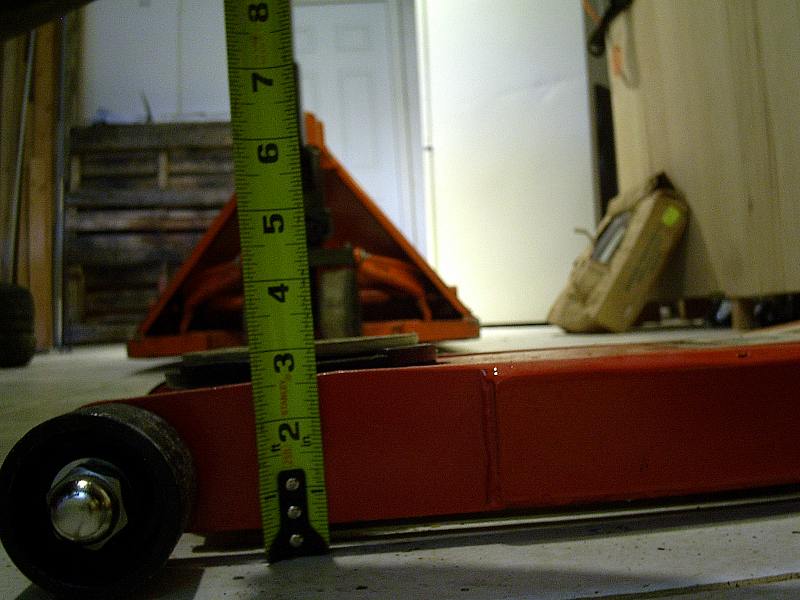
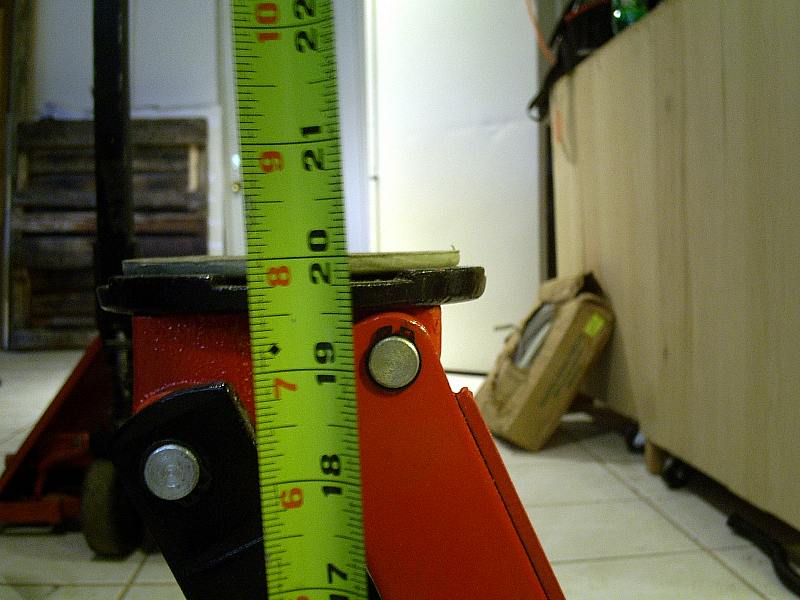
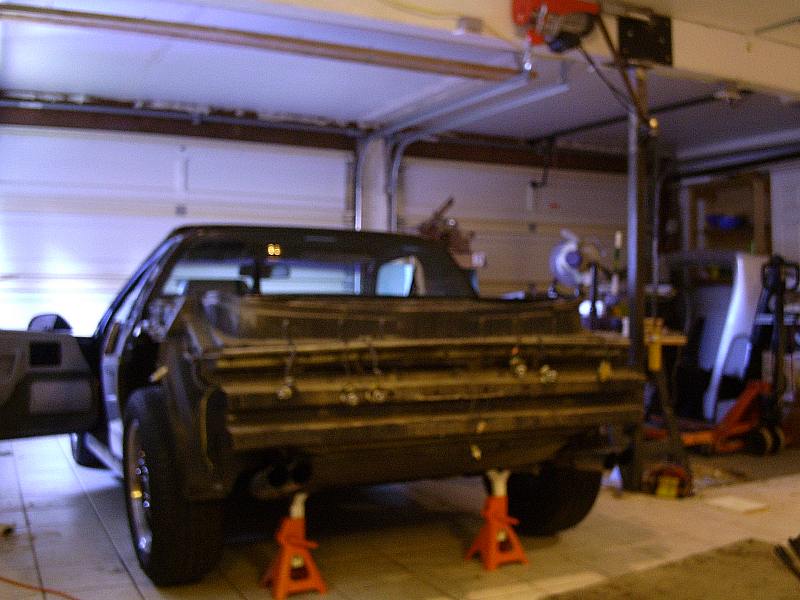
Last update we were working on getting a house with a garage. That wen't well and now we have been happy home owners for about 6 months. I needed to purchase several tools to do any further work on this car. I didn't have a floor jack or engine hoist along with several other things that I don't recall at the moment.
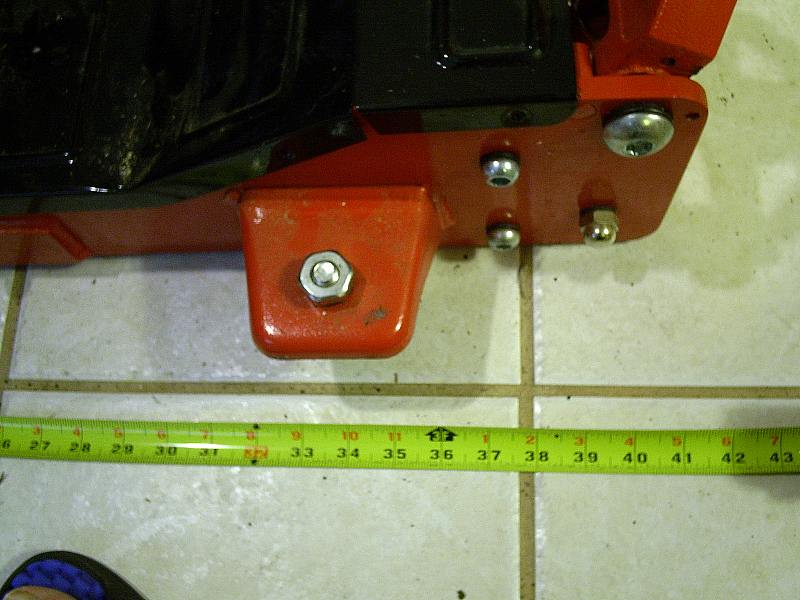
For the floor jack I was looking for something special. It took me a while but I finally found what I was looking for. Ultra low rise, long frame floor jack. 3" lowered saddle height, 20" lift, 41" long. Its one of my favorite items in the garage and works perfectly for my needs. Pm me if you would like more info. EDIT:
| quote |
This jack was a tough find. I was looking for something extra long, very low rise, but still had a decent lift to it. This was literally the only thing on the market. It is built by one manufacturer, don't recall the name at the moment. This company does not sell them to the public. They only sell to three different distributors that I have found.
All three distributors list it under their own part number and paint it their own color. The particular one I got is an Advanced tool design ATD-7325. Red as you saw in the thread. They go on sale now and again and/or sometimes ship for free. They are heavy at ~120lbs so shipping is a killer if you don't get it free. I paid $247 with free shipping from amazon.com. A search through google shopping usually finds the lowest price the fastest.
It also lists under part number Omega 29023. They call it "magic lift". This one is supposedly black but same jack by same manufacturer.
The third I was able to find has the same part number as Omega above. Its sold by Northerntool.com. They call it the "blackhawk" 29023. Usually red but I've also seen it in blue from them.
Here is the best price I currently see... 261.10 + free shipping as of 11-17-09
http://www.etoolnet.com/buy...cks-at-etoolnet.html
Even at $247 I think it was worth every penny but thats still a lot of money for a floor jack. Hope this helps those who are interested. Later
|
|
Don't forget the really expensive, super low rise creeper. I made this one custom.
I also picked up an electric hoist. Dad and I built the mount for it. Pics later in this post.
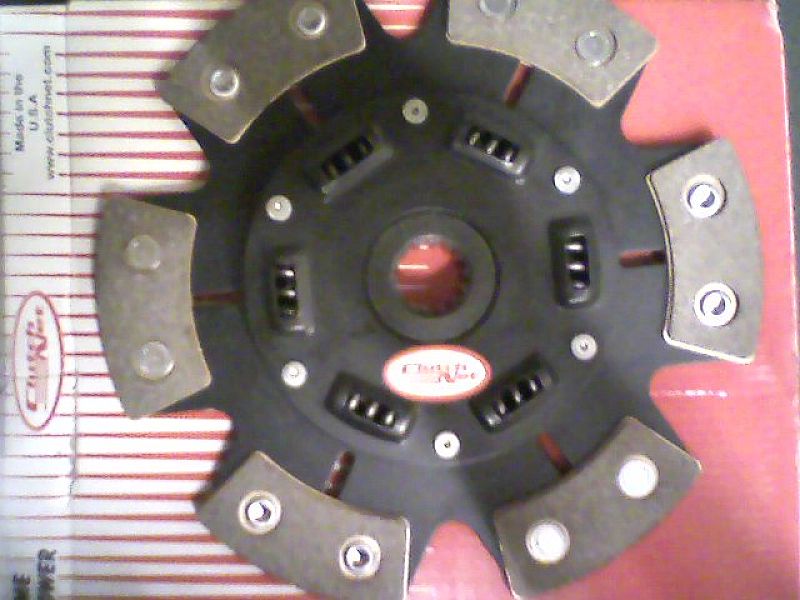
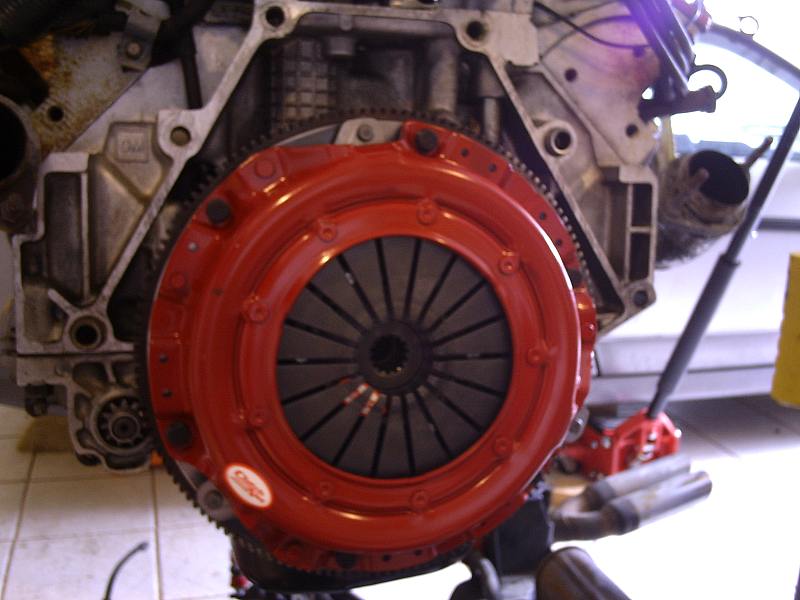
The next major project for this car was to change out the broken Isuzu transaxel. I believe the differential was stripped 180 degrees but honestly I never opened it up to check. It just wasn't that important. I ended up re-installing the original muncie 4 speed which to this day still works like a champ. Not the best gas mileage but the added strength made it worth it to install. I also wen't with a new LSC performance flywheel (Thanks Tom! ) and new clutchnet clutch. The SPEC 3 clutch I used did not hold and I wasn't going to re-install it.
Flywheel

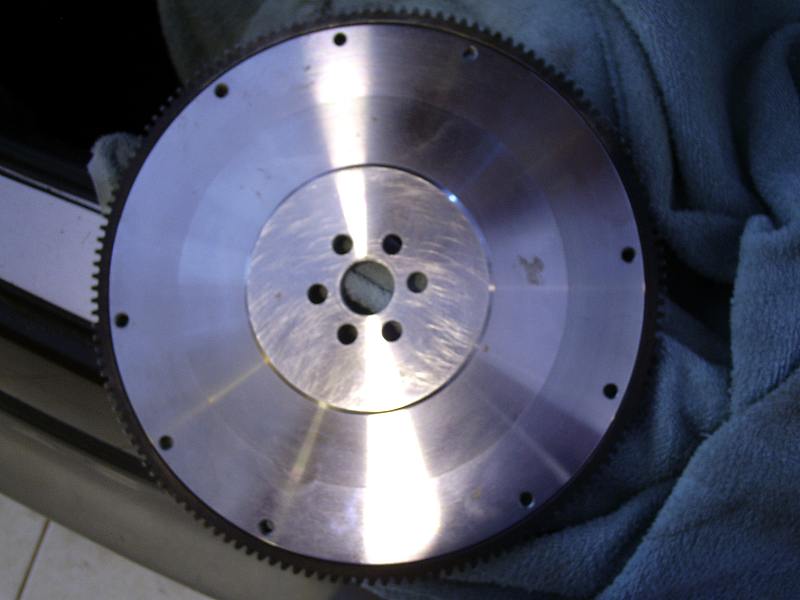
The scratches are just from it being stoned to remove the machining burrs.
Clutch : Clutchnet red level 2 pressure plate, 6 puck sprung hub ceramic disc. Stiffer then the SPEC in traffic but holds the power unlike the SPEC did.

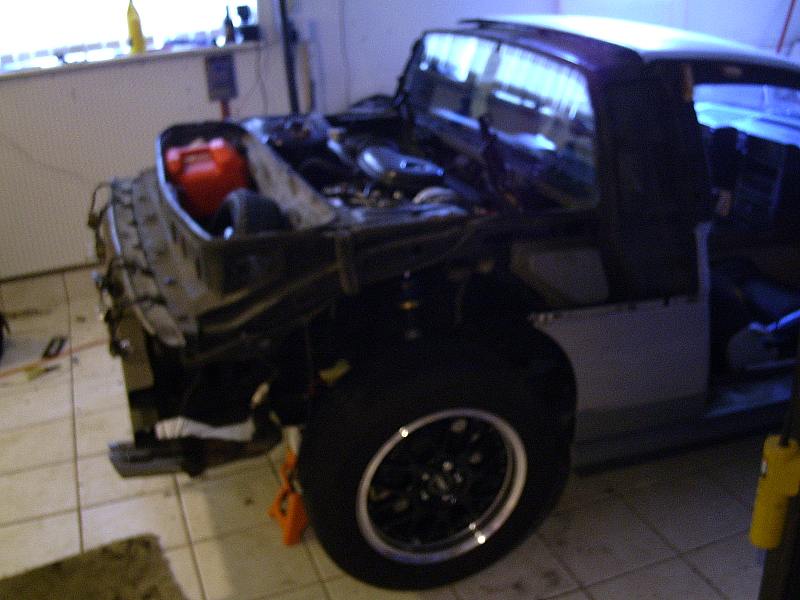
This trans swap was farily straight forward. The biggest PITA was that I had to modify my crossover pipe to clear the new shift cable location. I don't have a welder so this was done with a MAPP gas torch and lots of trial and error. I also had to remove this machining boss because of clearance issues with the 4.9 oil filter housing.

I don't have any other pics of this install remaining unfortunately. Thats OK though cause this trans is going away in the very near future. I'll post details when they are available.
I've put about 2500 miles on the car with this muncie 4 speed and new clutch/flywheel setup. It never missed a beat and I would not hesitate to use it again in another 4.9 swap.
One of the next major changes to the car was a fastback conversion. This played into my intake idea. I will post pics of that later also. These are the only remaining pics of the conversion.
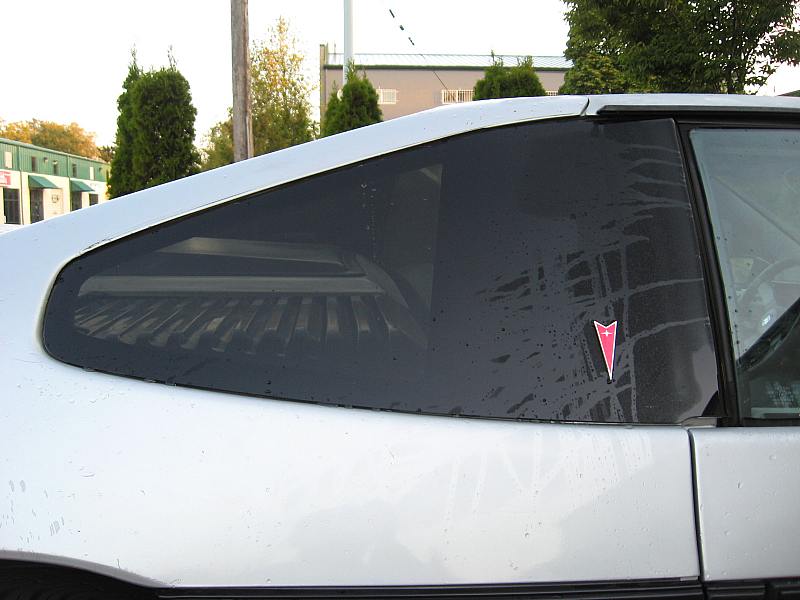
I didn't have quarter windows so I had to order up a set. I got them from kahines.com off of his ebay sale. $116 shipped to my door. never have a seem such a good price on a good quality window. I am very happy with them. The Pontiac arrowheads are from an early Grand am/prix. Don't recall the year exactly.
Once the conversion was done worked basically stopped for a while. I spent the next couple months actually getting to enjoy the car. I drove everywhere and worked out some of the bugs in the install. Long story short she runs better then she looks now.
At some point I got sick of getting the sticky stuff from the steering wheel on my hands. For the time being I removed the old leather and foam (at that point it was liquid and ver sticky). I stiched on a leather cover bought at a local auto parts store. Its nothing special but will work well til I have time to make a new leather cover. I will make a template when I do this and share it with the forum.
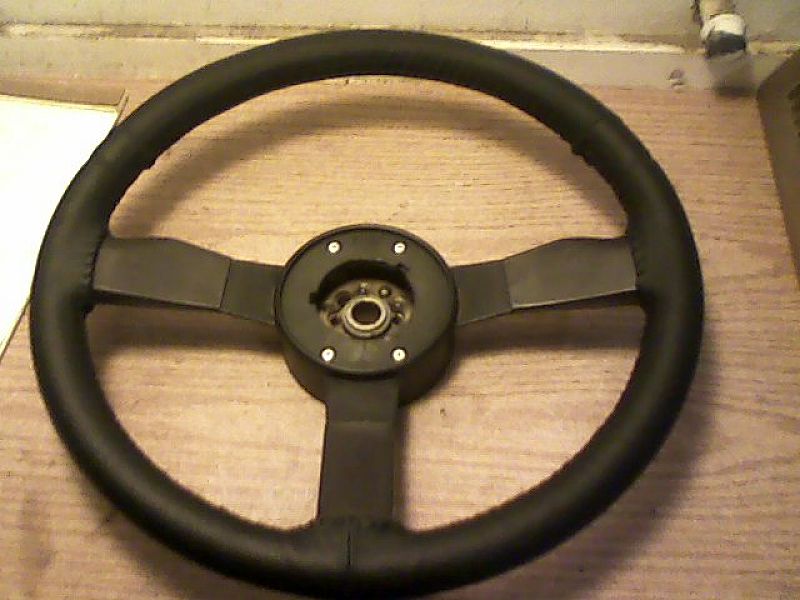
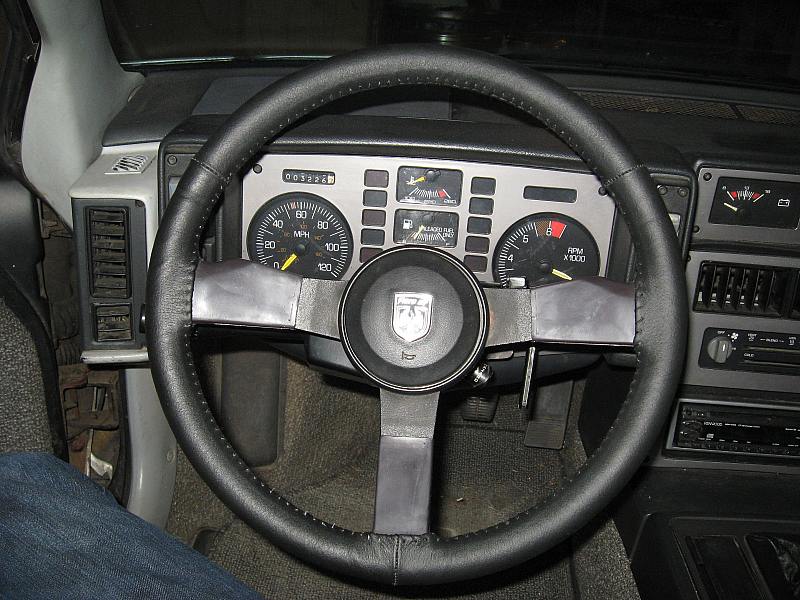
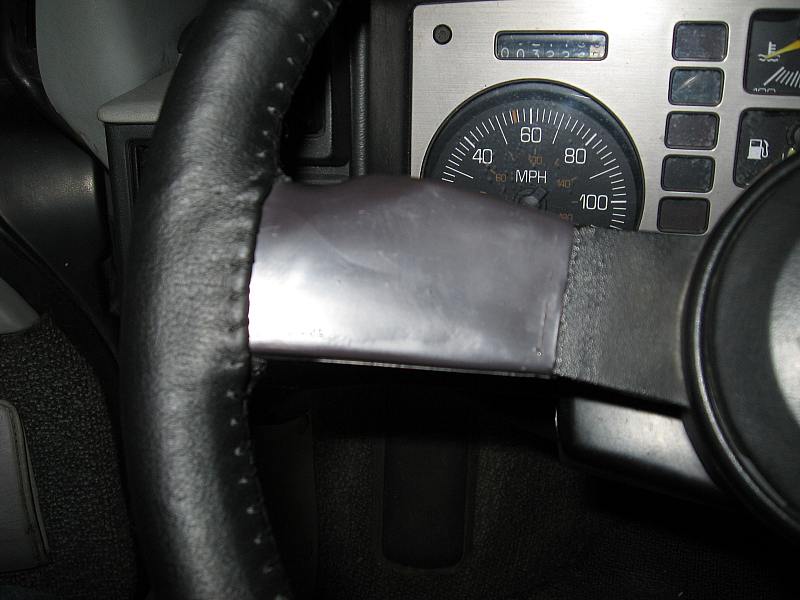
As you can see it is missing the parts that cover the spokes. This is why I will be making a new one at a later date. For now though at least my hands don't get sticky from driving.
The next big project was the repair of the fastback decklid and custom intake. This was a fun project and I love the results.
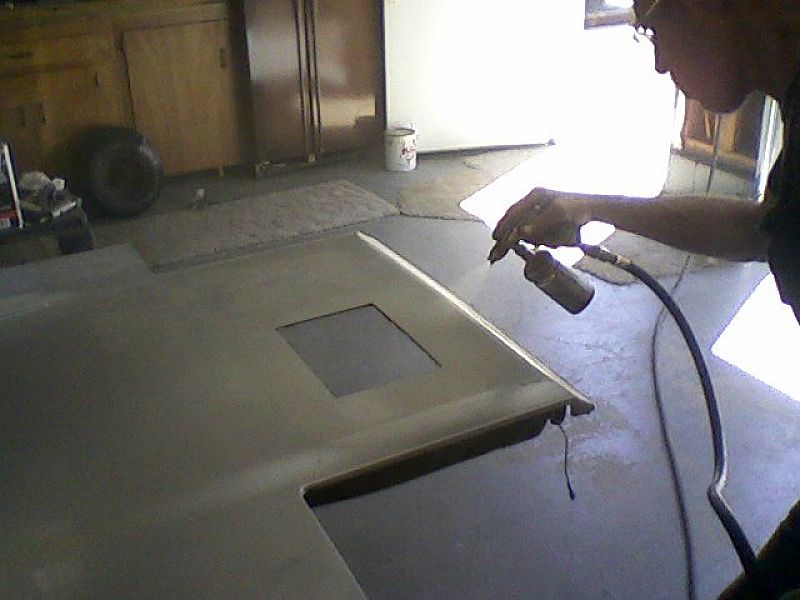
A little background on the fastback conversion pieces. They were purchased off of a california 87GT. They were already silver which was a big plus. They had some problems though. At some point when the previous owner had them the wing had been forcefully removed. This put some nasty cracks in the decklid and tore out most of the windstand mounting holes. While repairing the holes and cracks we also cut a hole in the decklid, built and installed the new intake, and did some temporary touchup work to the paint. Its not a perfect match but looks better then straight SMC. There will be many more body mods before it gets a full paint job.
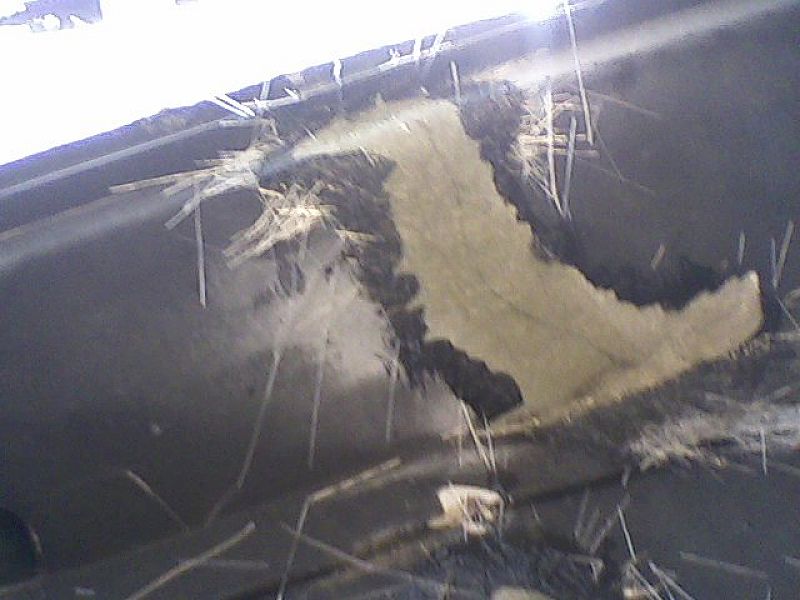
Wing mounting hole repair

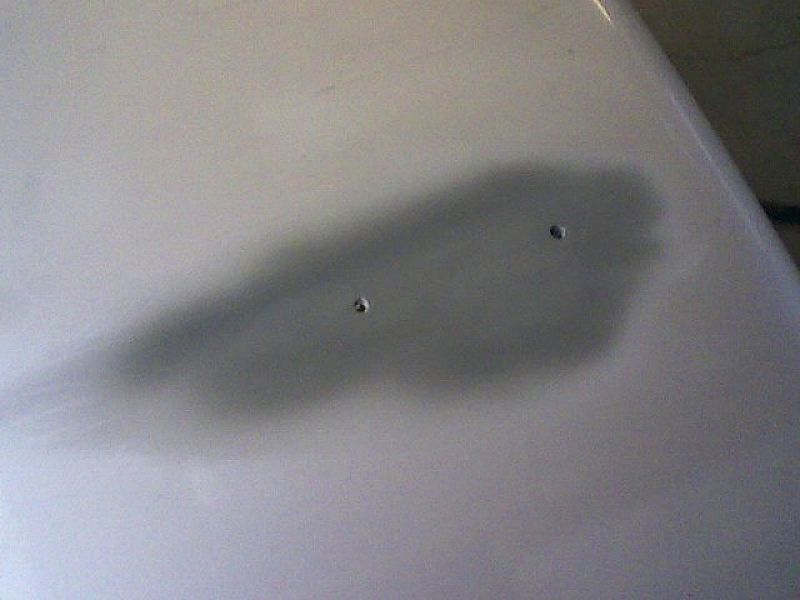
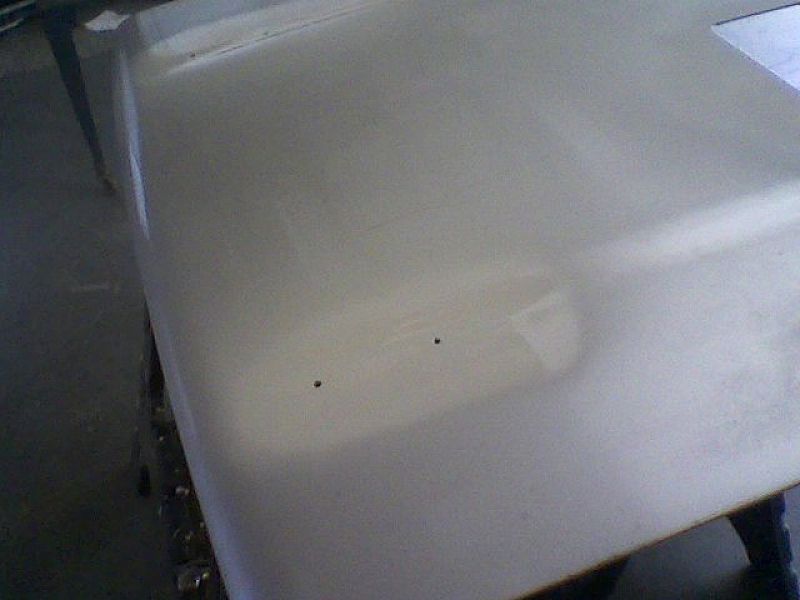
Cracks in decklid (only remaining pic)
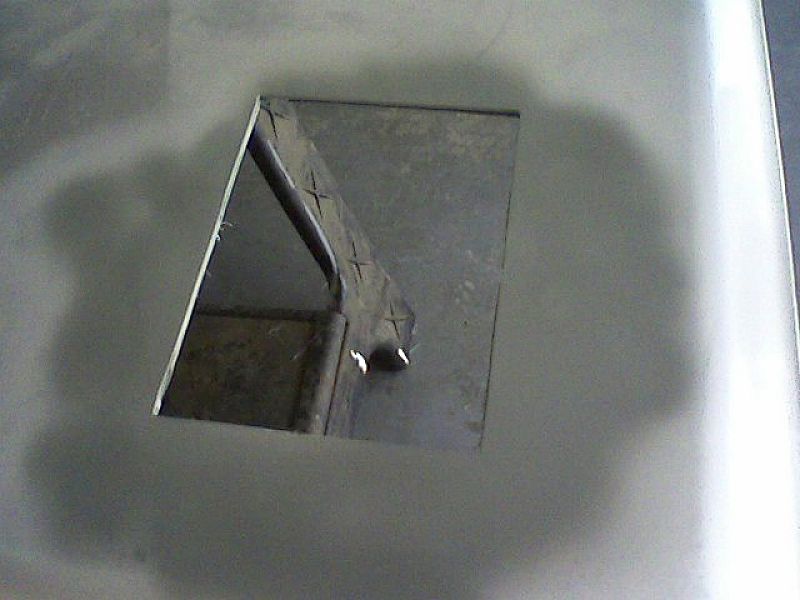
Intake build. The original plan was to use a velosity stack air cleaner and draw air direclty through the decklid. The first attempt didn't so very well. Let just say I'm a novice body guy (hehe, novice is an overstatement, I suck! ). I also decided that the velosity stack was not going to work and did a complete redesign at the last minute. This meant extra body work which I guess just gave me more practice. Dad stepped in to help which I really appreciate. He's got a lot more experiance with this kind of stuff.
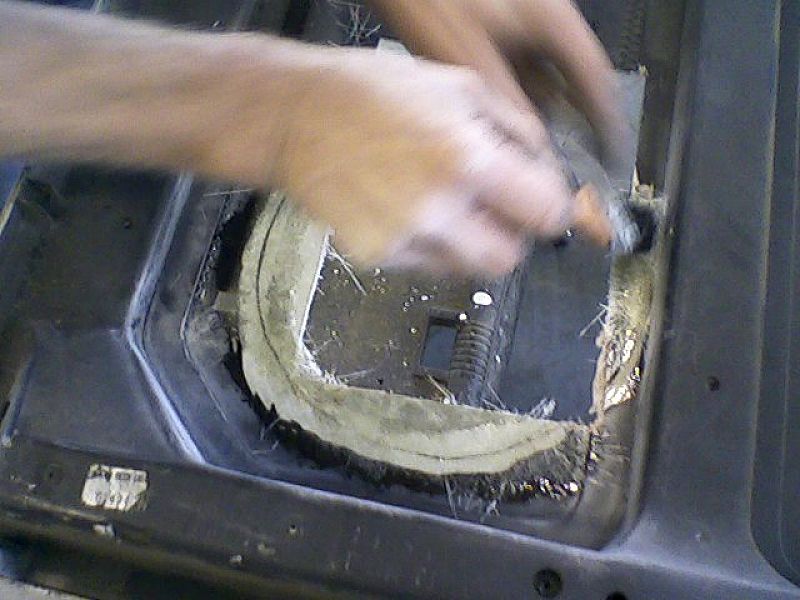

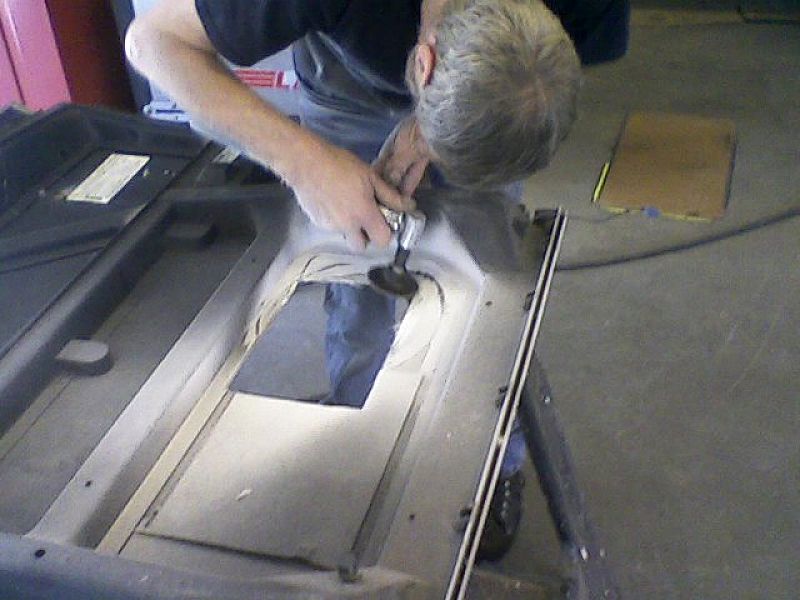
These pics of the intake are more recent. Better refined then the original setup. The air filter is an actual K&N filter for a 4.9. The intake box is slightly modified and came off of a Delta 88. I don't recall the year.
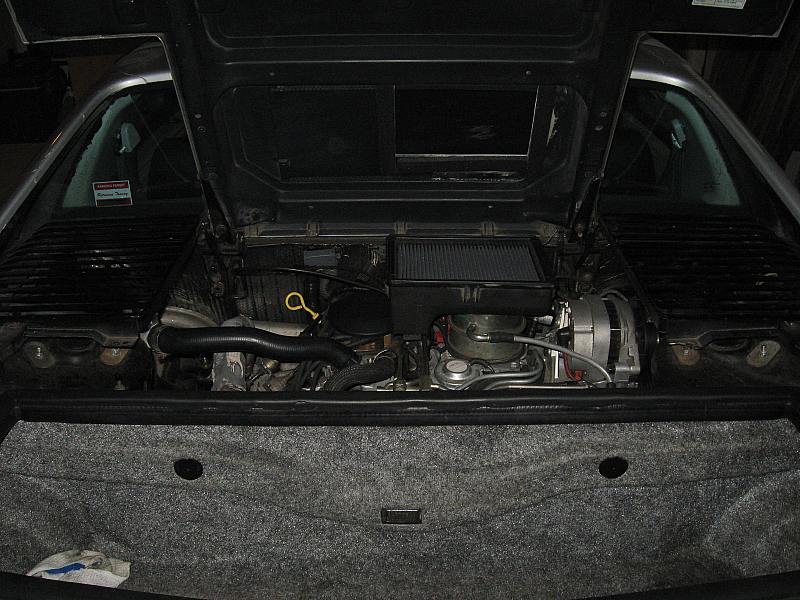
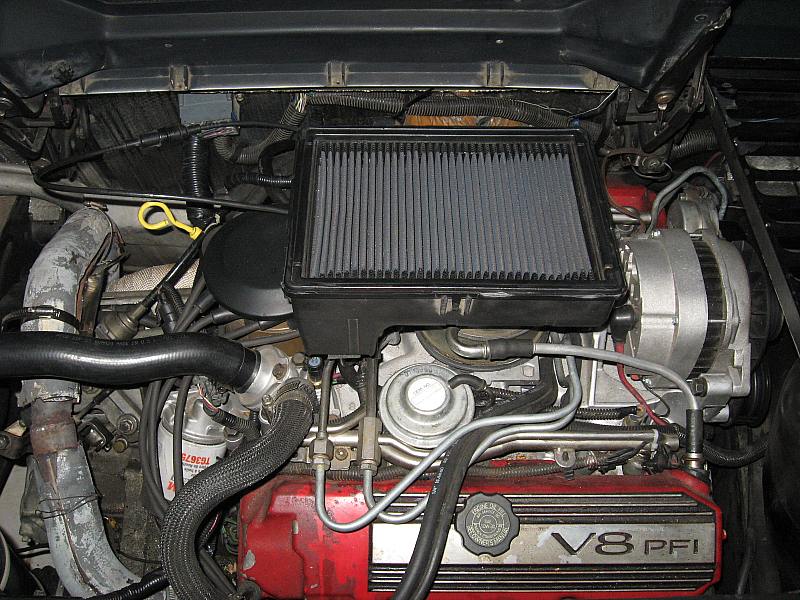
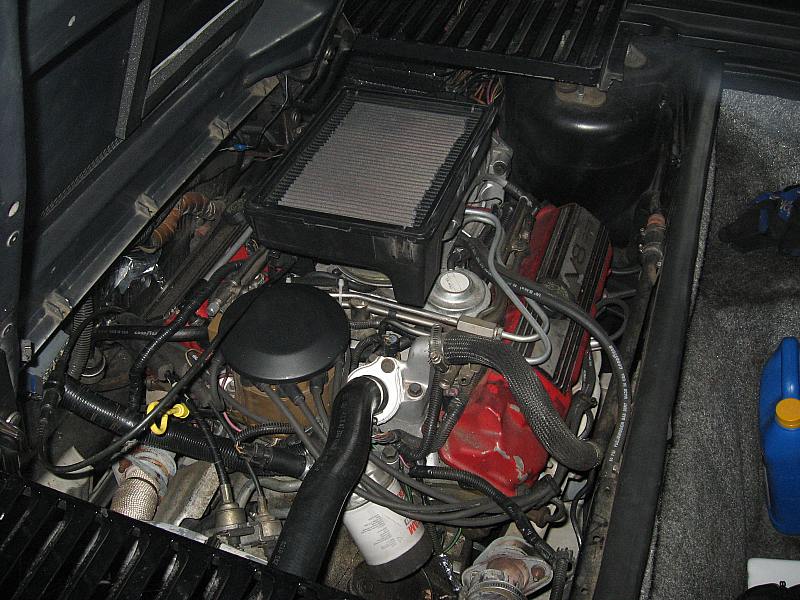
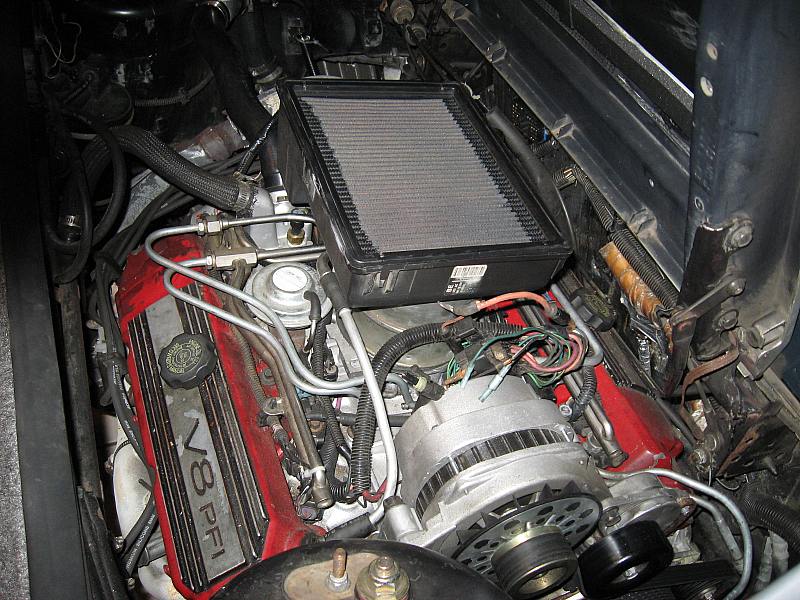
It may not be the prettiest setup but it functions and sounds fantastic so I'm happy with it for now. If I decide to do something else later I already have the hole partly cut for a decklid vent so no real loss.
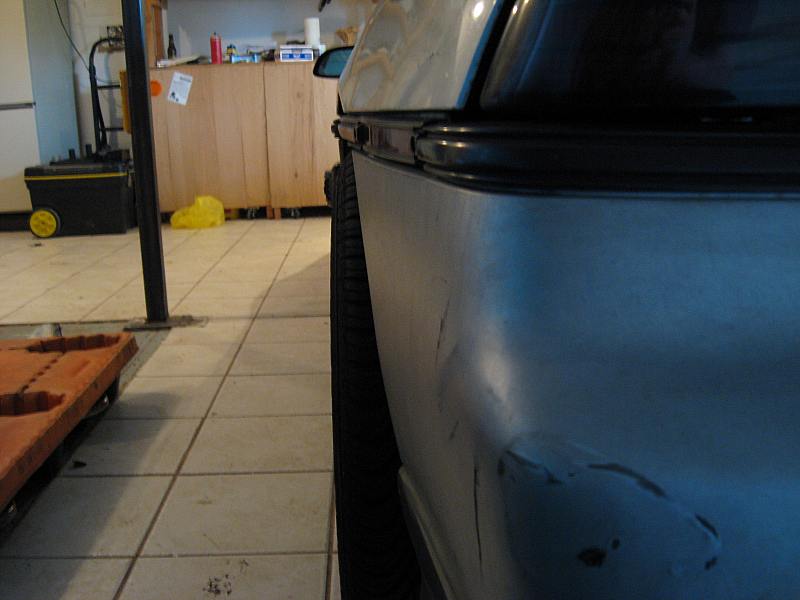
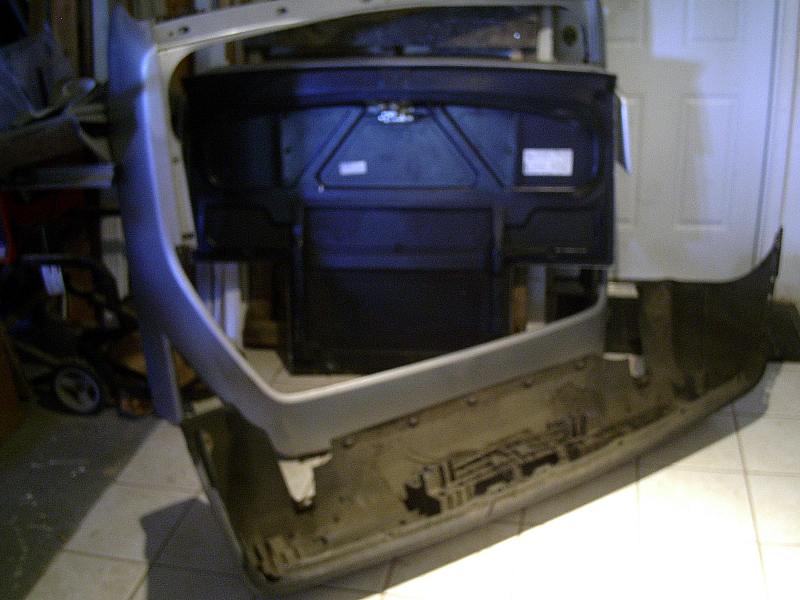
I wen't back to driving the car for a while. One day while waiting to pull out of a store parking lot some %$#%@*& lady backs into me. She did not even check her mirror and floored it to get out of the spot. There was only about 9 feet between me and where she was parked so you can imagine how fast she pulled out.
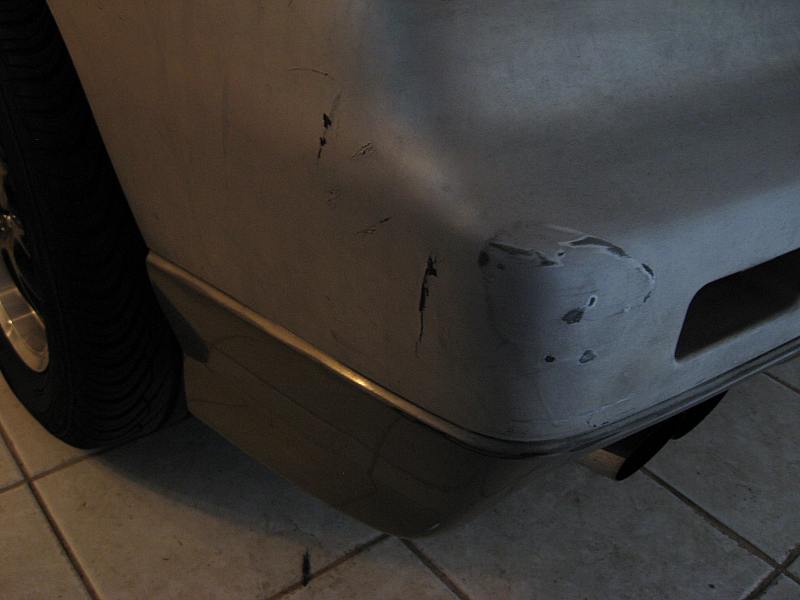
There is no signifacant damage. She just cracked the fascia and bent the support underneath slightly. Still, I was pissed!!
I have to stop for now but have about 30 more pics to post. I will get back to it tonight it I have time. Hope you enjoy. Its no mega $$ build. Just a guy with a vision, some basic mechanical/electrical ability, and the desire to do something that is my own. Later.[This message has been edited by Fieroseverywhere (edited 09-21-2024).]
|
|
|
|