
 
     |
| Trinten's SBC/F23 build - The work has begun! (Page 13/76) |

|
fieroguru
|
AUG 08, 07:46 PM
|
|
The serpentine accessory fabrication is nearly complete. The specific details about this conversion are covered in this thread:
http://www.fiero.nl/forum/Forum2/HTML/118182.html
Only significant difference with this serpentine conversion vs. the first one was the Alternator bracket is steel on this car and was aluminum on the first one. The aluminum one also had a couple of extra holes and I used one of those extra holes for the idler pulley. The steel one didn't have any extra holes, so I picked a good spot for the pulley and drilled the hole.
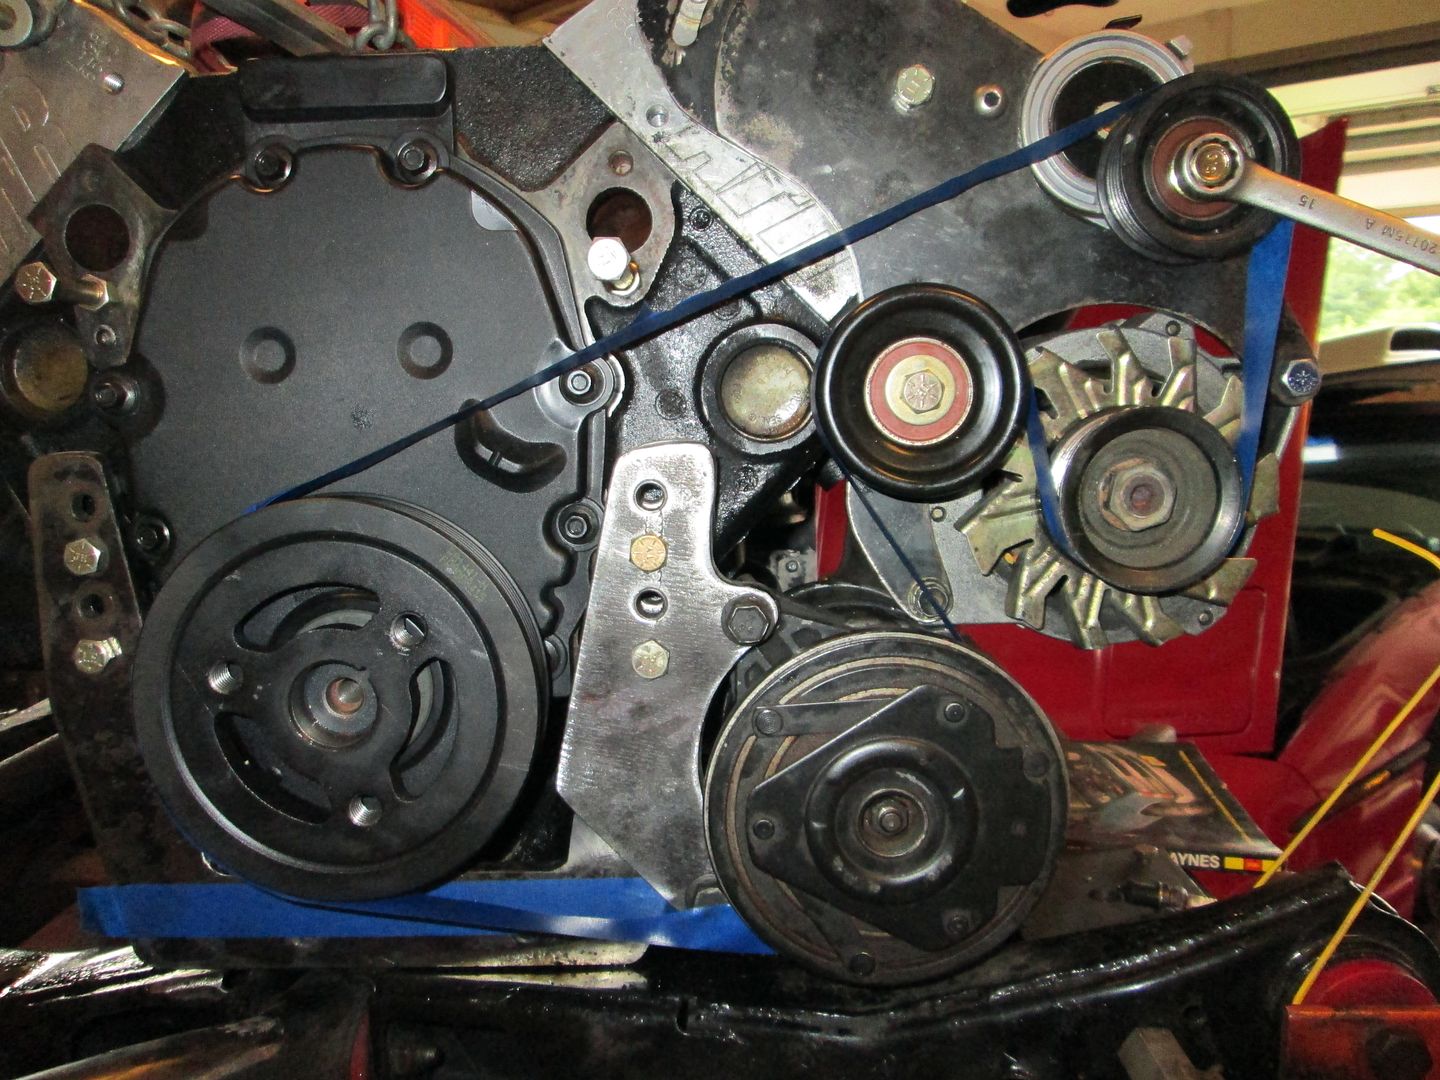
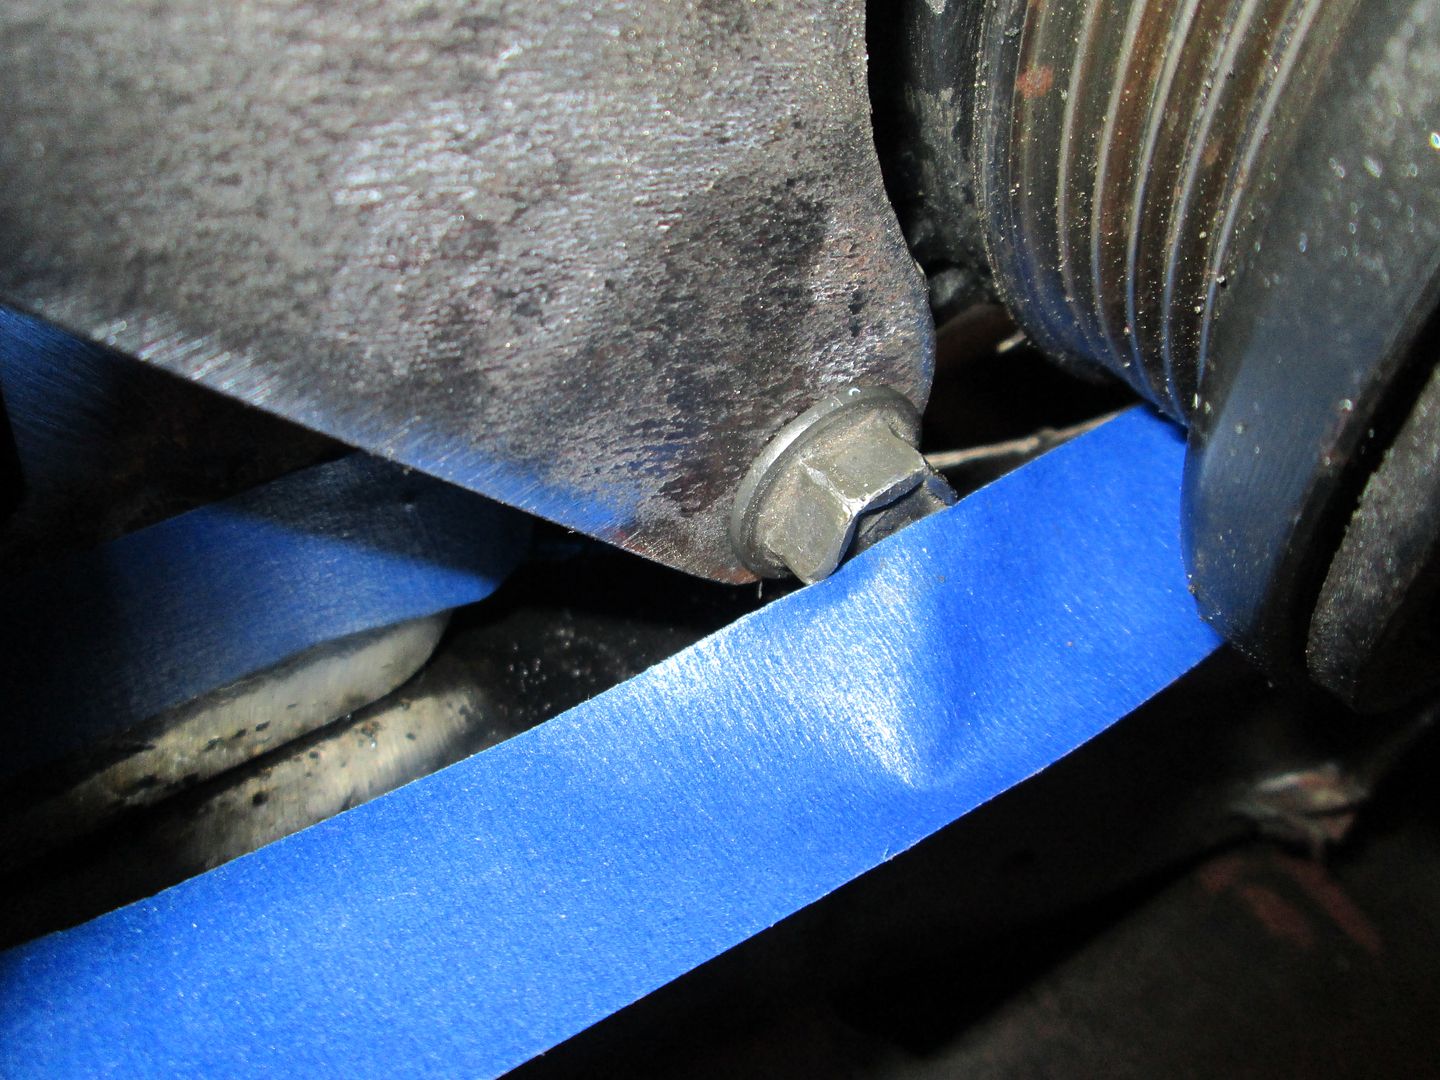
This bolt hole needs to be countersunk:
I will likely have to drill another hole in the AC bracket to allow it to be shifted up 1 bolt hole for clearance to the cradle once the Archie engine bracket is trimmed down.
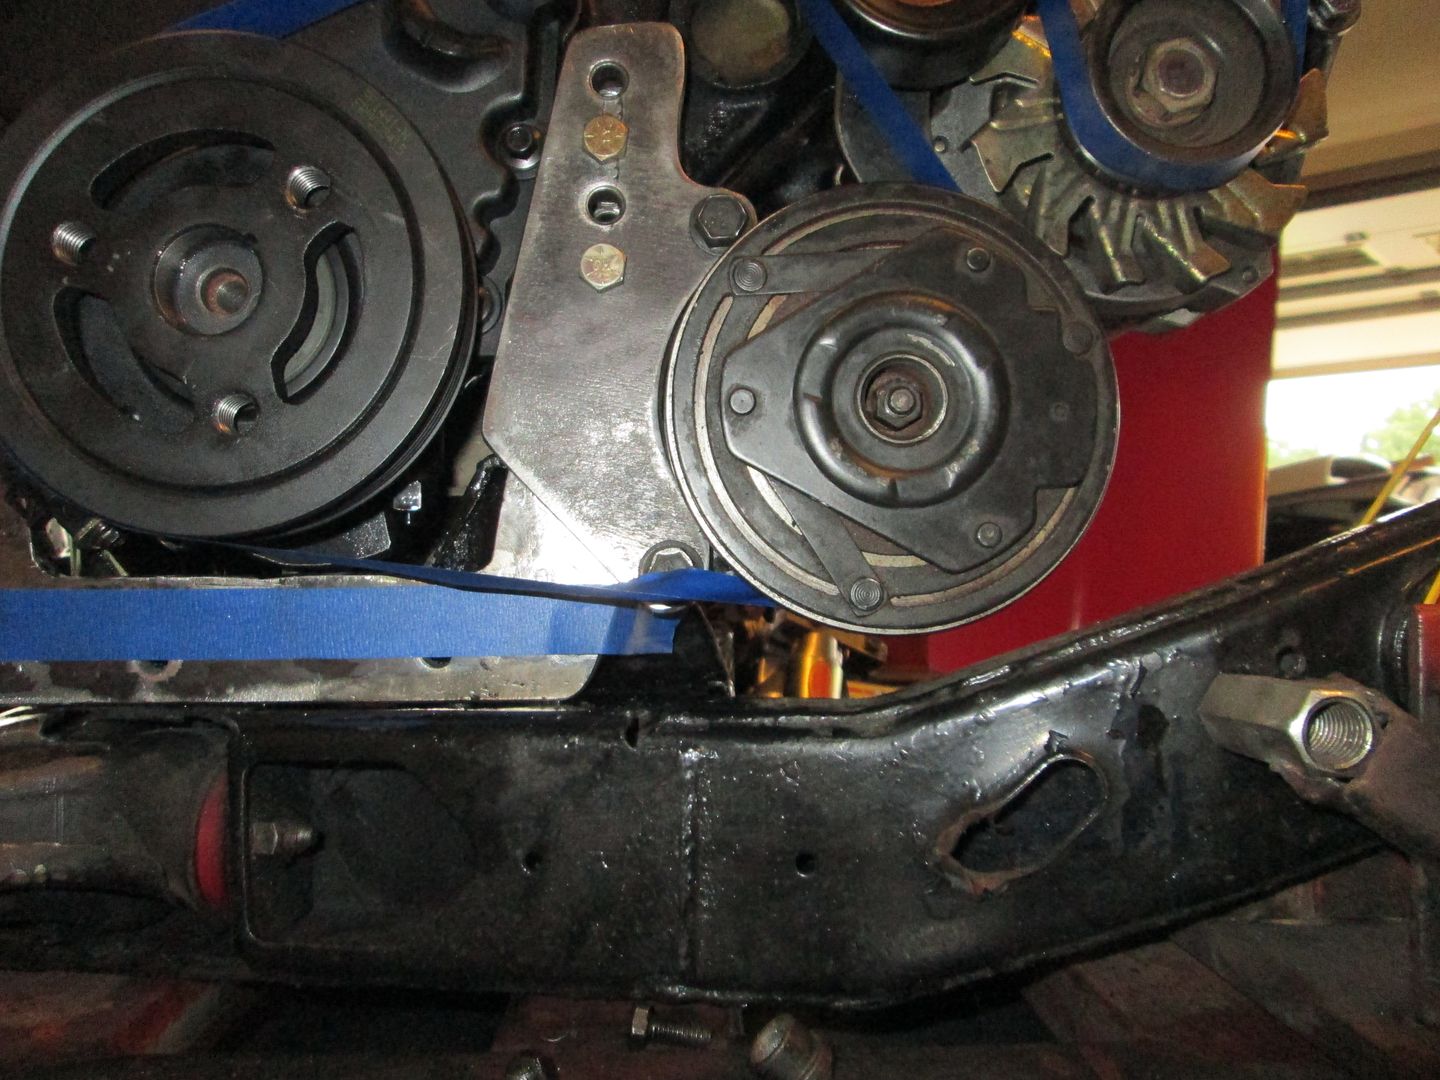
I still need to machine the aluminum spacers for the AC bracket and the Alternator bracket, right now washers are stacked to the approximate (+/- 1/32") height. Once I do the test fit and confirm proper clearances, I will go back and make the rear support braces for the AC and Alternator to reduce the possibility for deflection under acceleration.
|
|
|
|
Trinten
|
AUG 08, 08:53 PM
|
|
That looks so awesome!!! I'm stupidly excited.
I'm also oddly happy that the bracket was steel and not aluminum. In my mind I think it'll hold up better (less bending/deflection), worth the weight difference to me.
Thank you so much for doing all this!
|
|
|
|
fieroguru
|
AUG 10, 06:11 PM
|
|
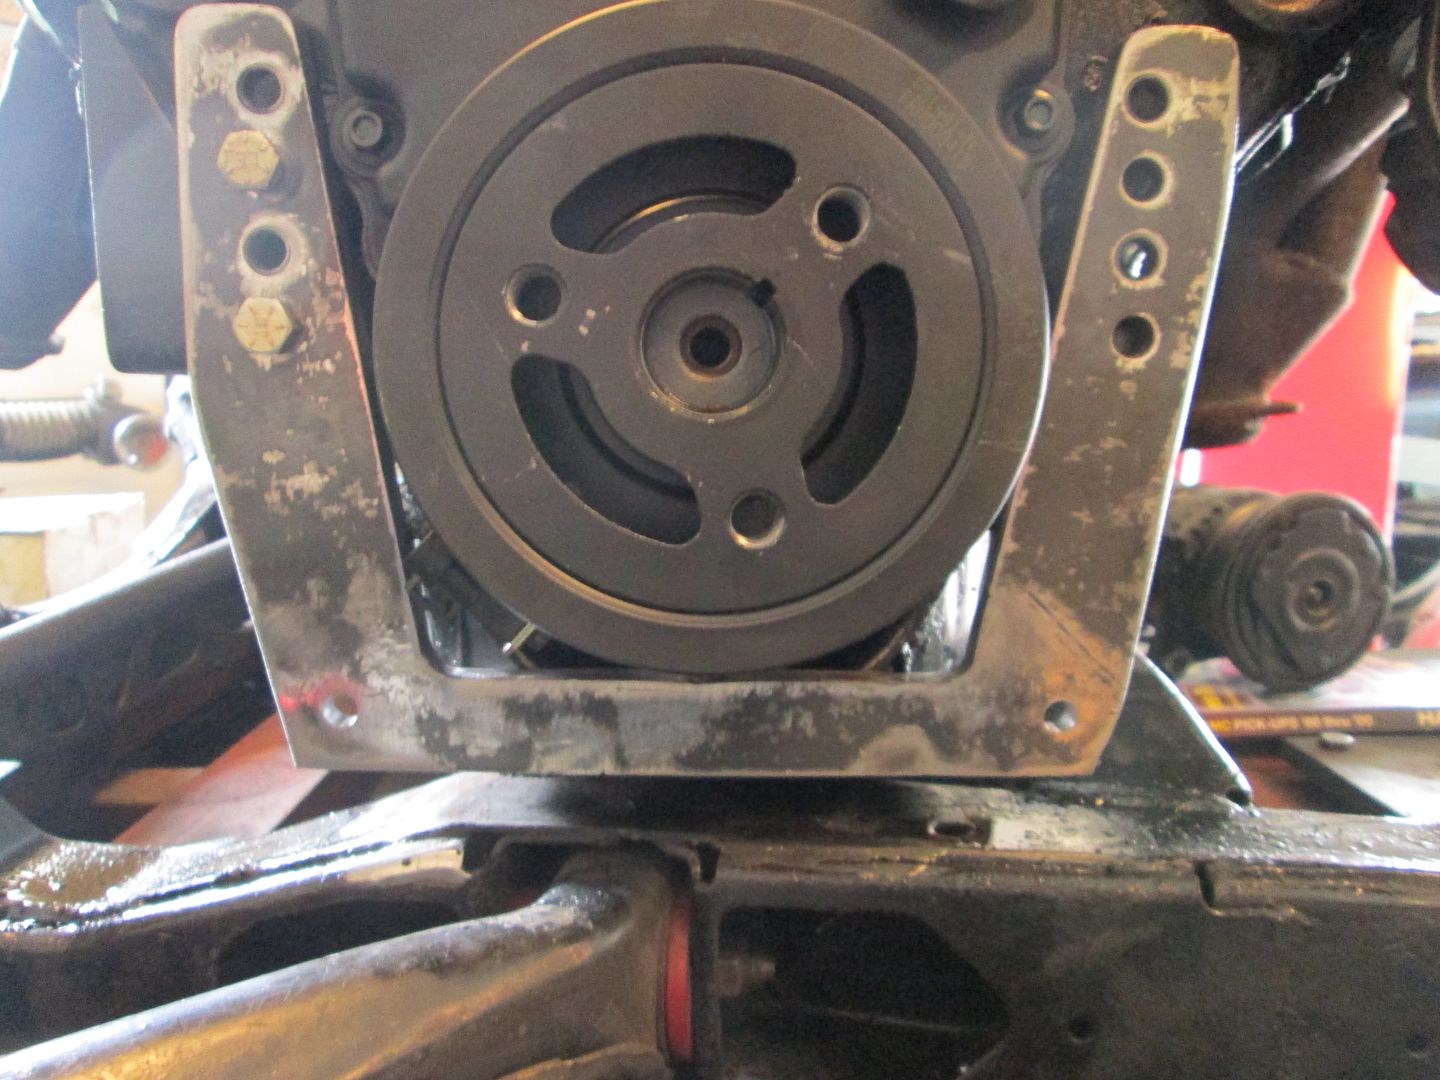
A few more mods were done to get the engine very close to the 8" mark.
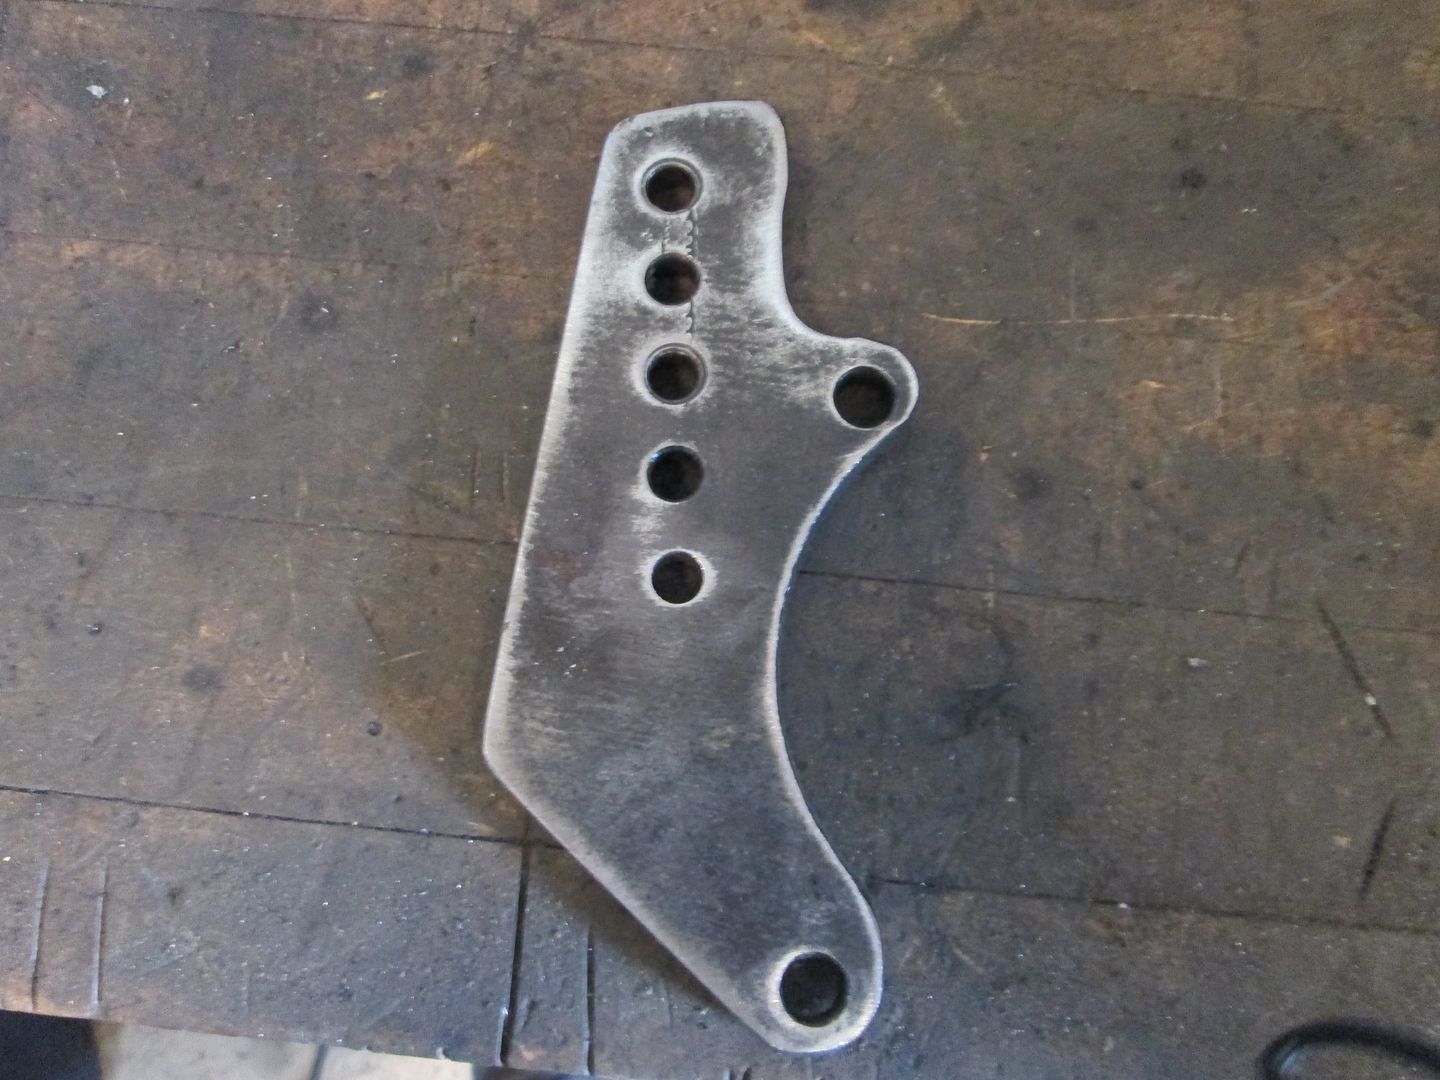
Drilled a 5th hole in the AC bracket so the compressor could be shifted upwards for clearance:
Cut 1/2" off the bottom of the Archie engine mount, welded up the remains of the original 2 mounting holes and drilled 2 new ones 3/4" in from the bottom and sides in the corners. I will likely trim off the top of the engine mount and A/C mount where the extra holes are.
Cut a new piece of angle for the backside and drilled 1 hole in it. I will drill the other side once all the mounts have been fabbed and tacked into place.
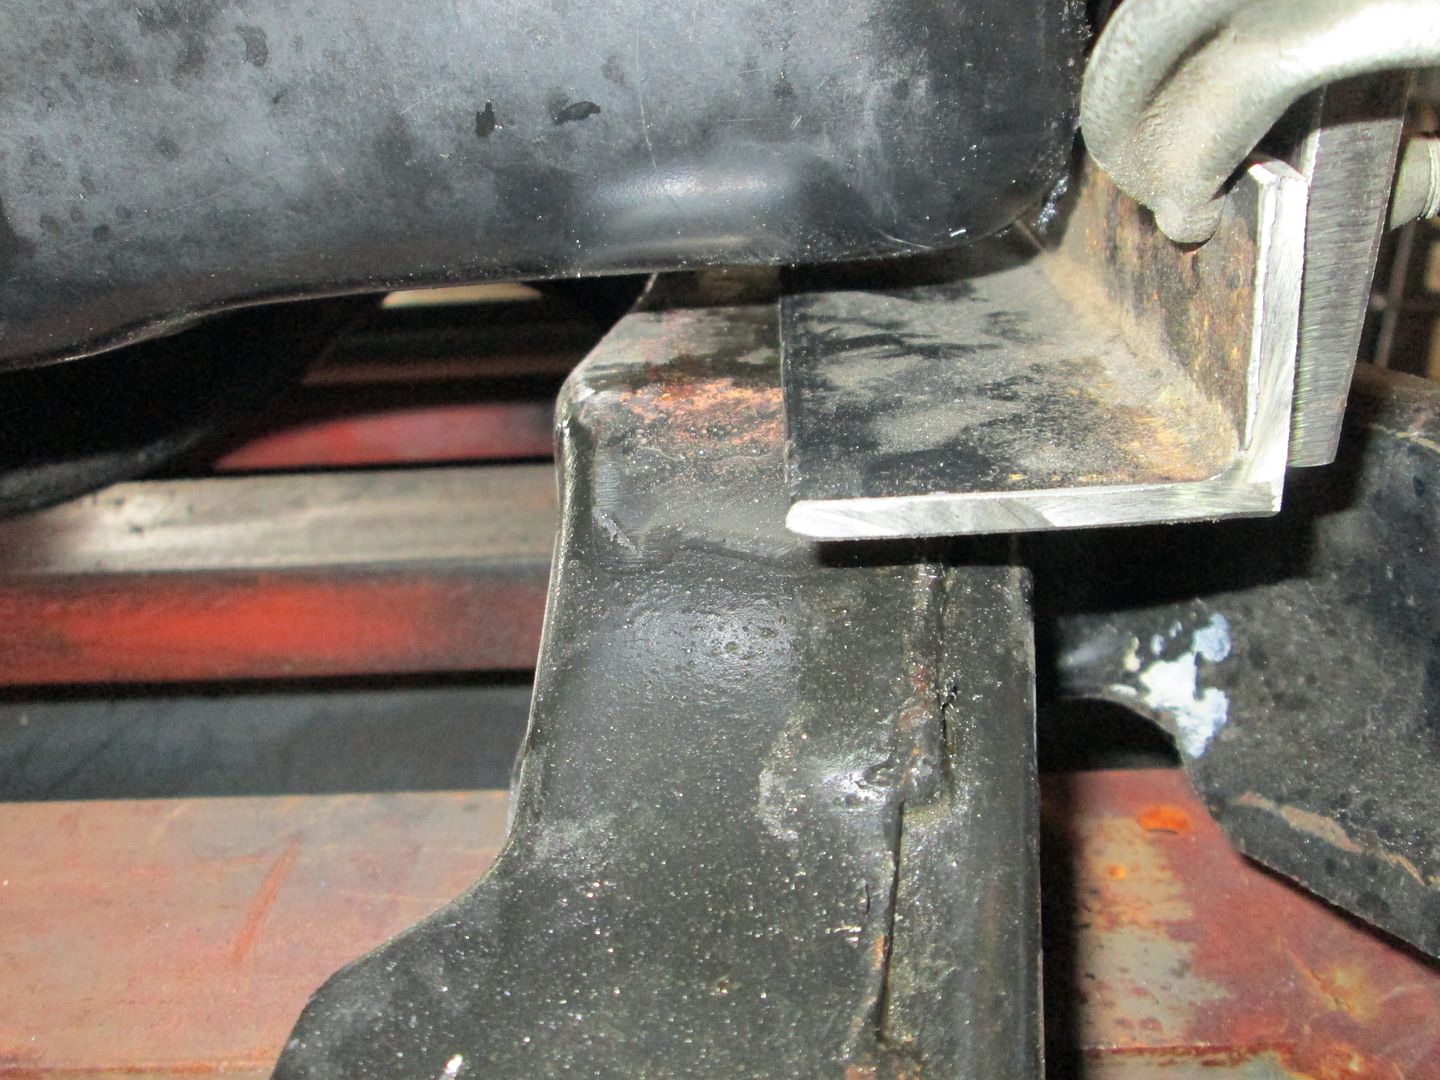
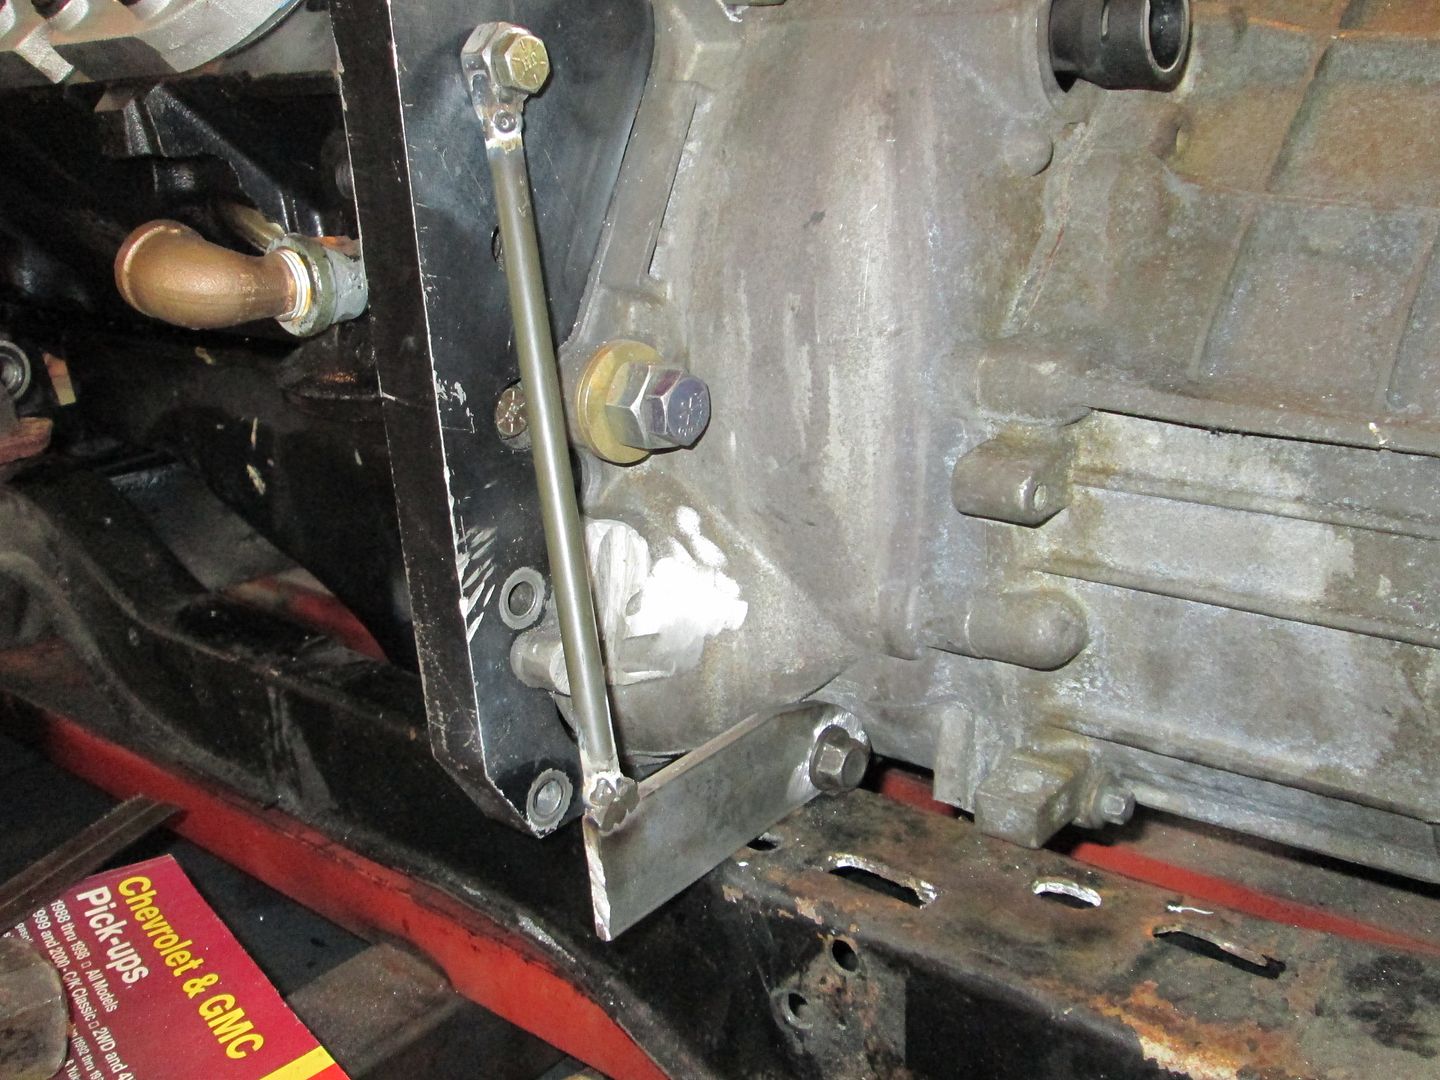
I fabbed up some temp support mounts on the transmission side so the drivetrain can sit level on the cradle and still be able to be shifted front/back and side to side during the test fit. Once the test fit is done and optimal engine placement is determined, I will fab up the real transmission mounts.

Very good chance the drivetrain and cradle will be back in the car on Sunday for the test fit to determine optimal engine placement.
|
|
|
|
fieroguru
|
AUG 11, 03:02 PM
|
|
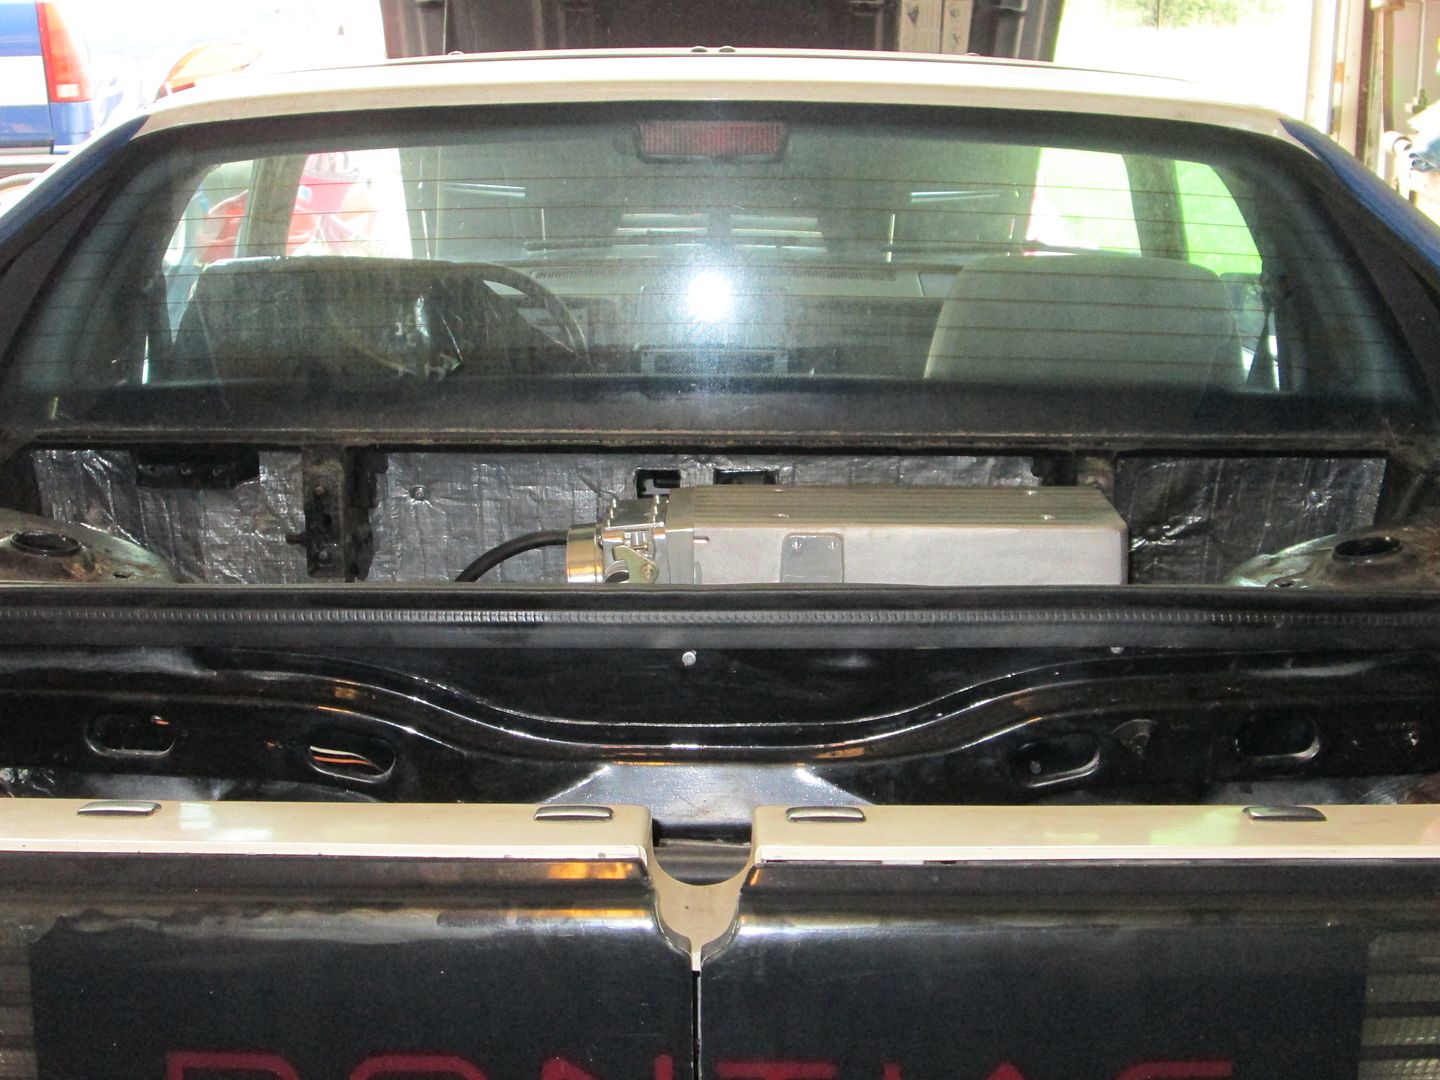
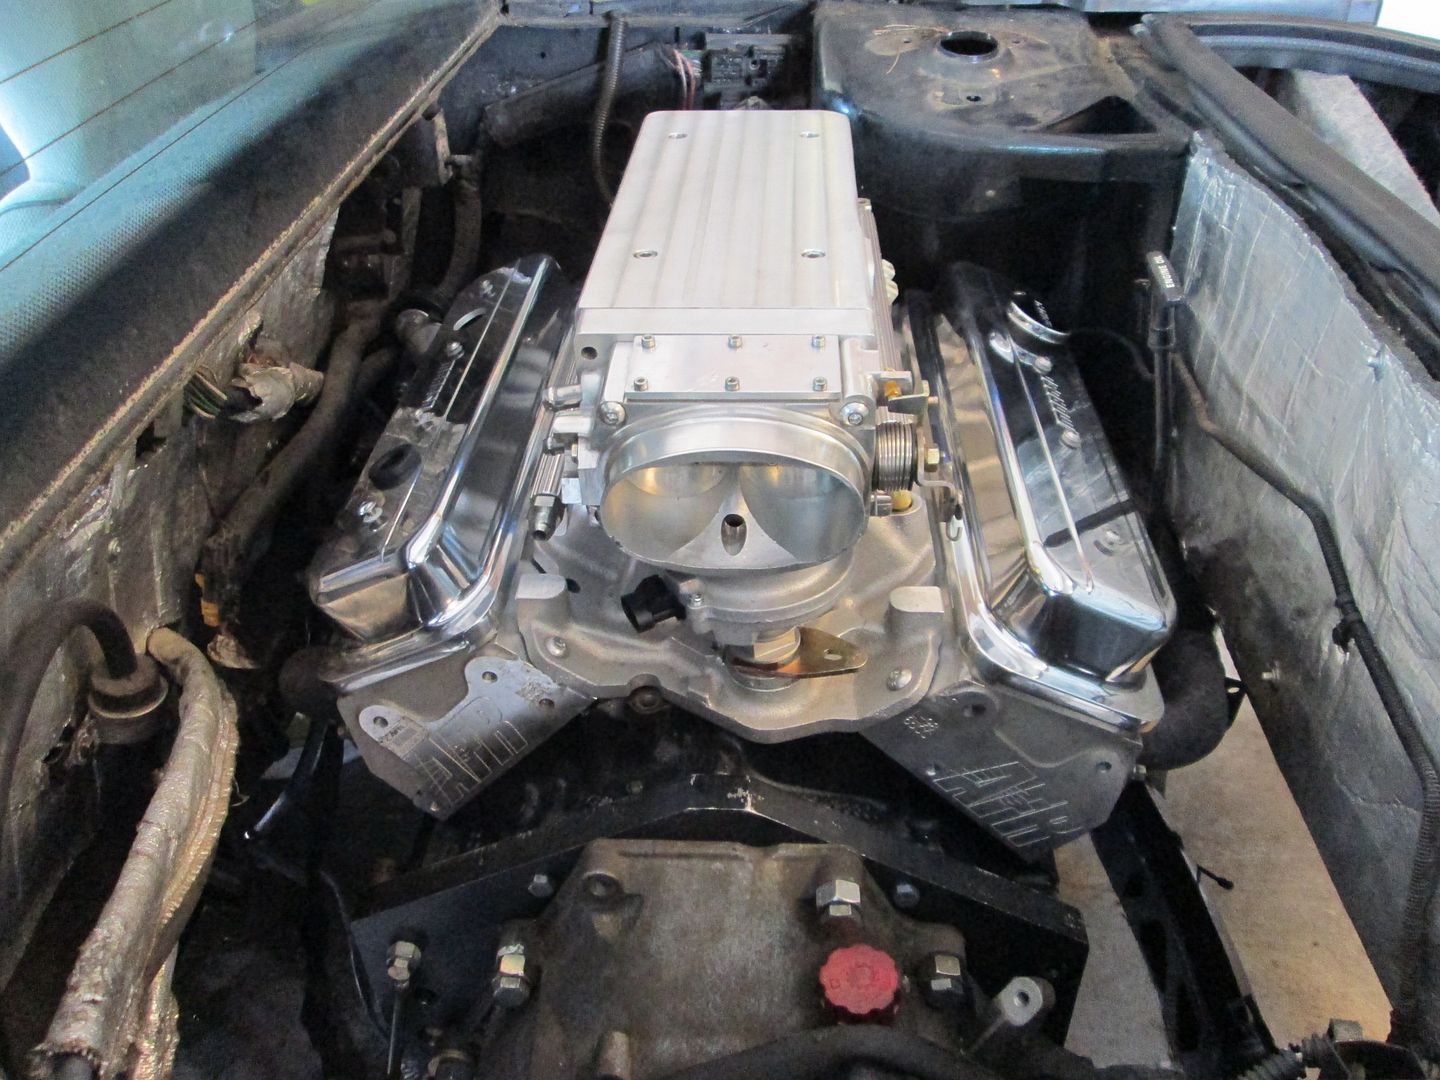
Drivetrain was put back in for a test fit today. Here are a couple of pictures of what the engine will look like with its new valve covers.
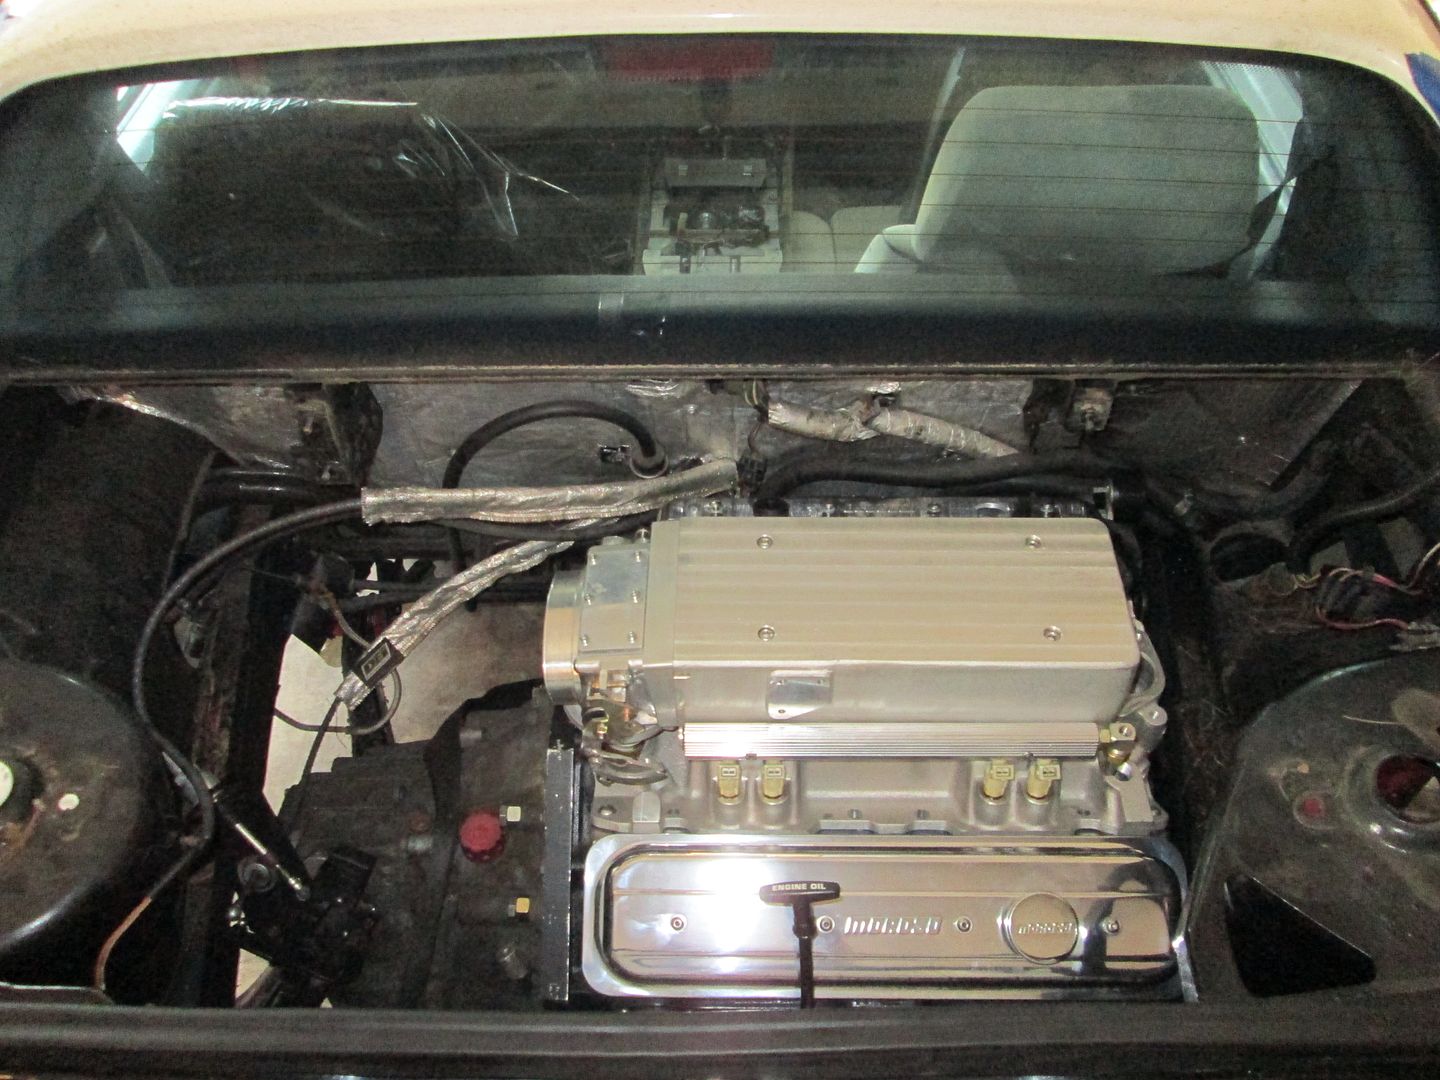
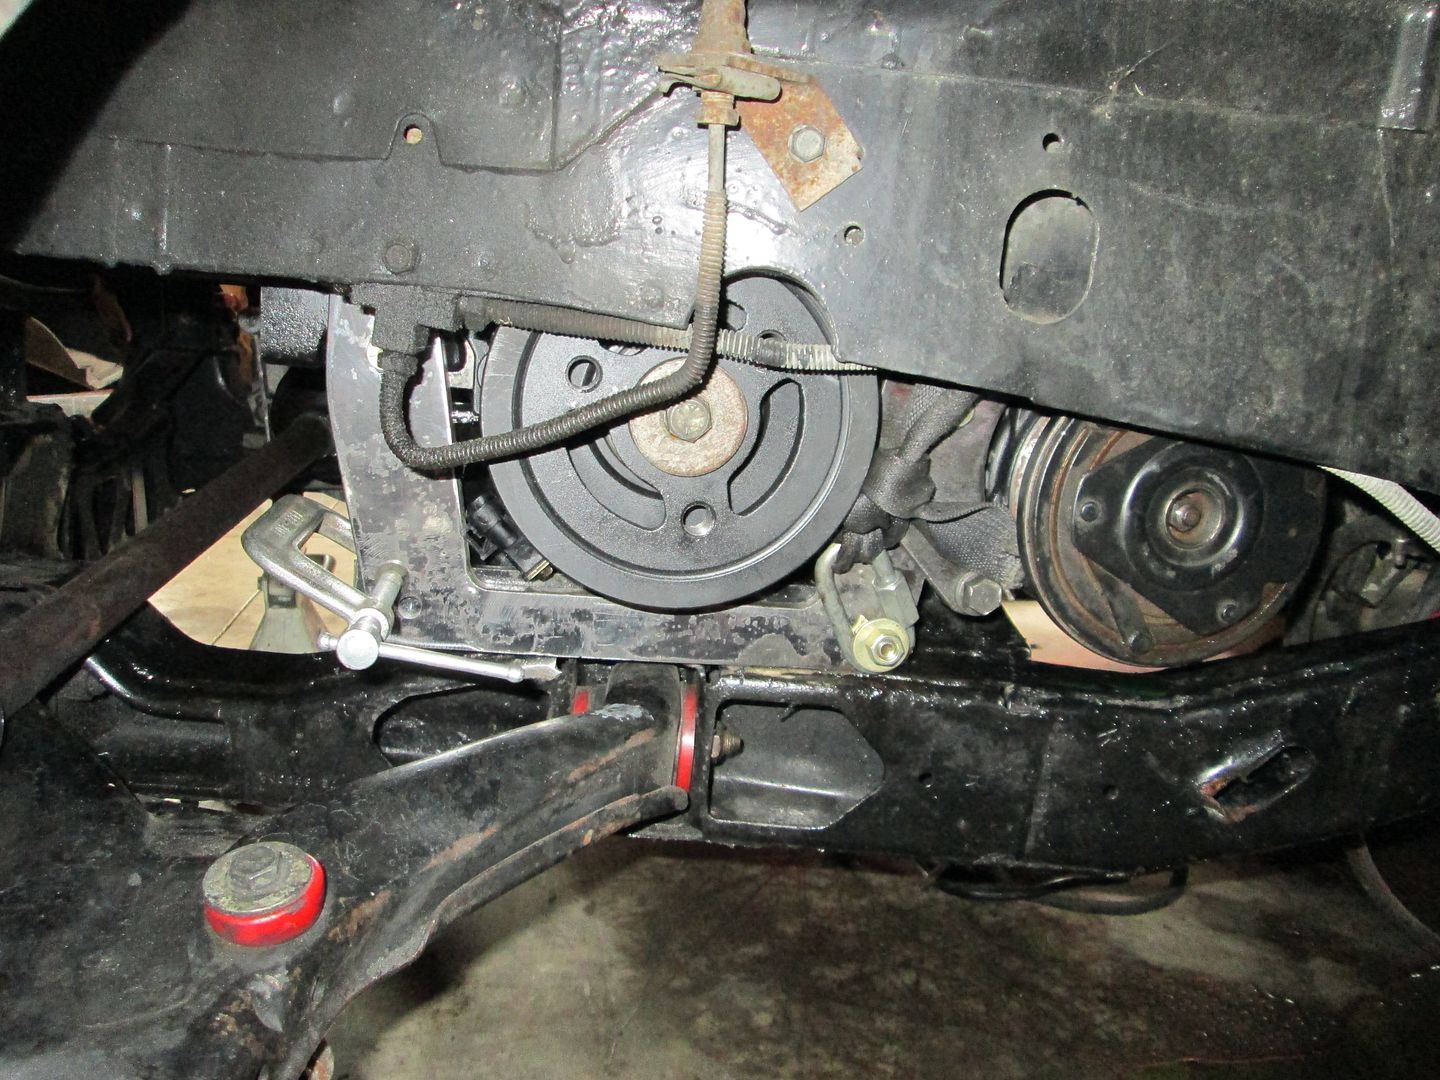
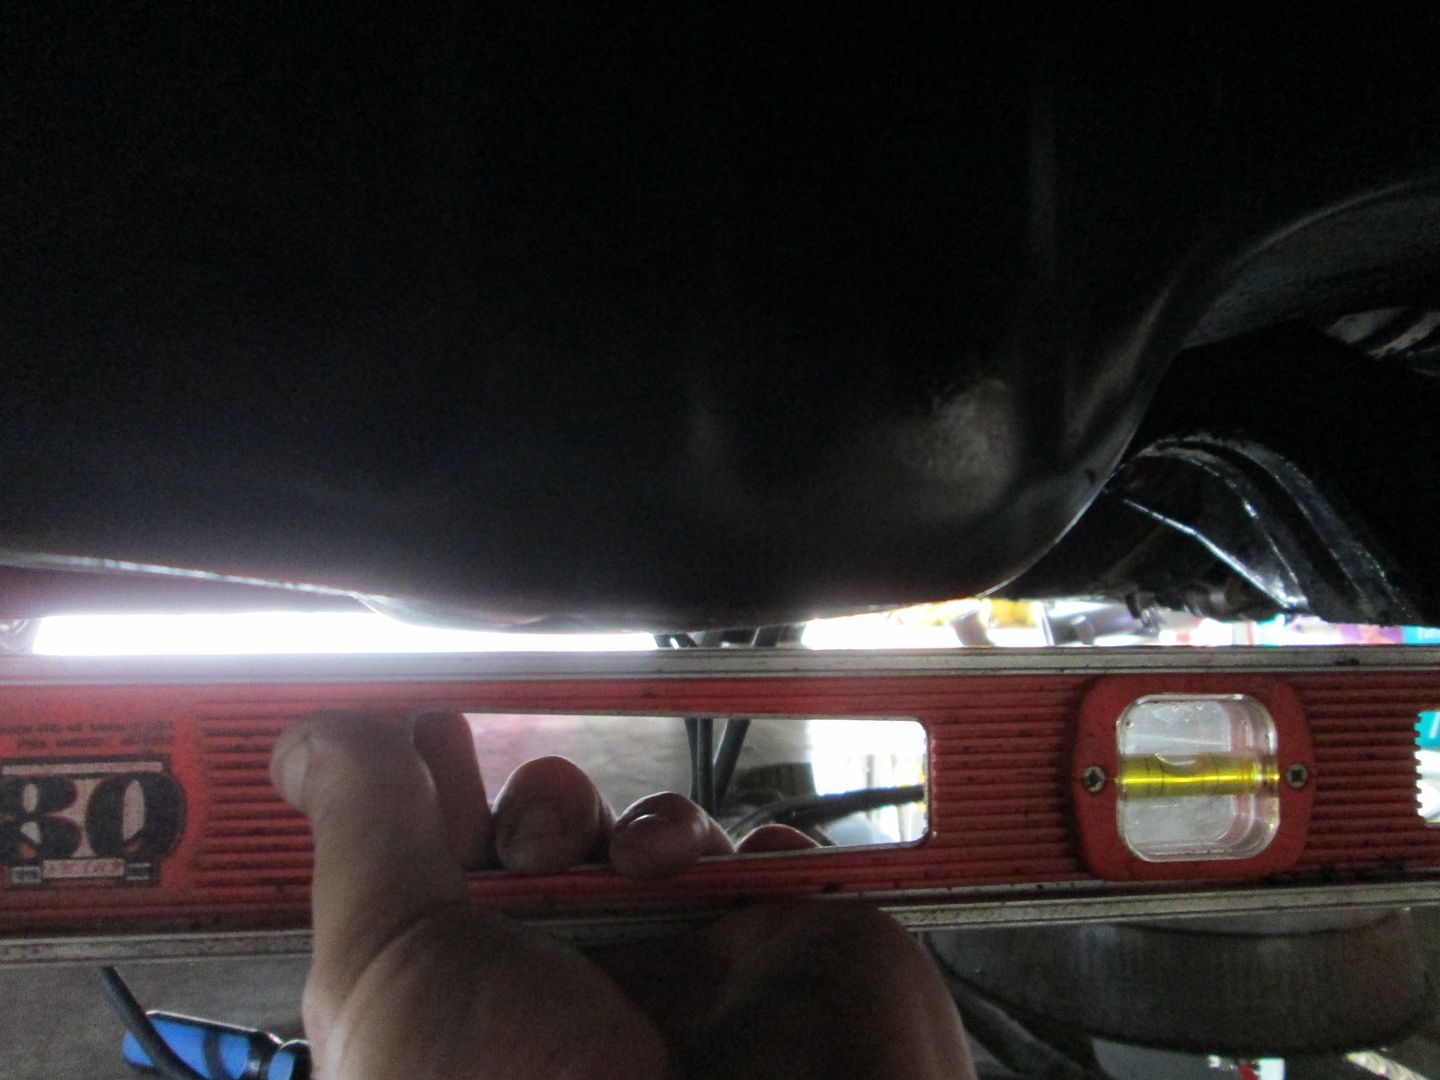
I moved the engine around some, but there isn't much available room with it in its lowered state. One of the potential interference issues is the transmission with the lower A-arm at full compression. I will install the strut w/o a spring and cycle the suspension to full compression to see if the lower a-arm needs a slight notch.
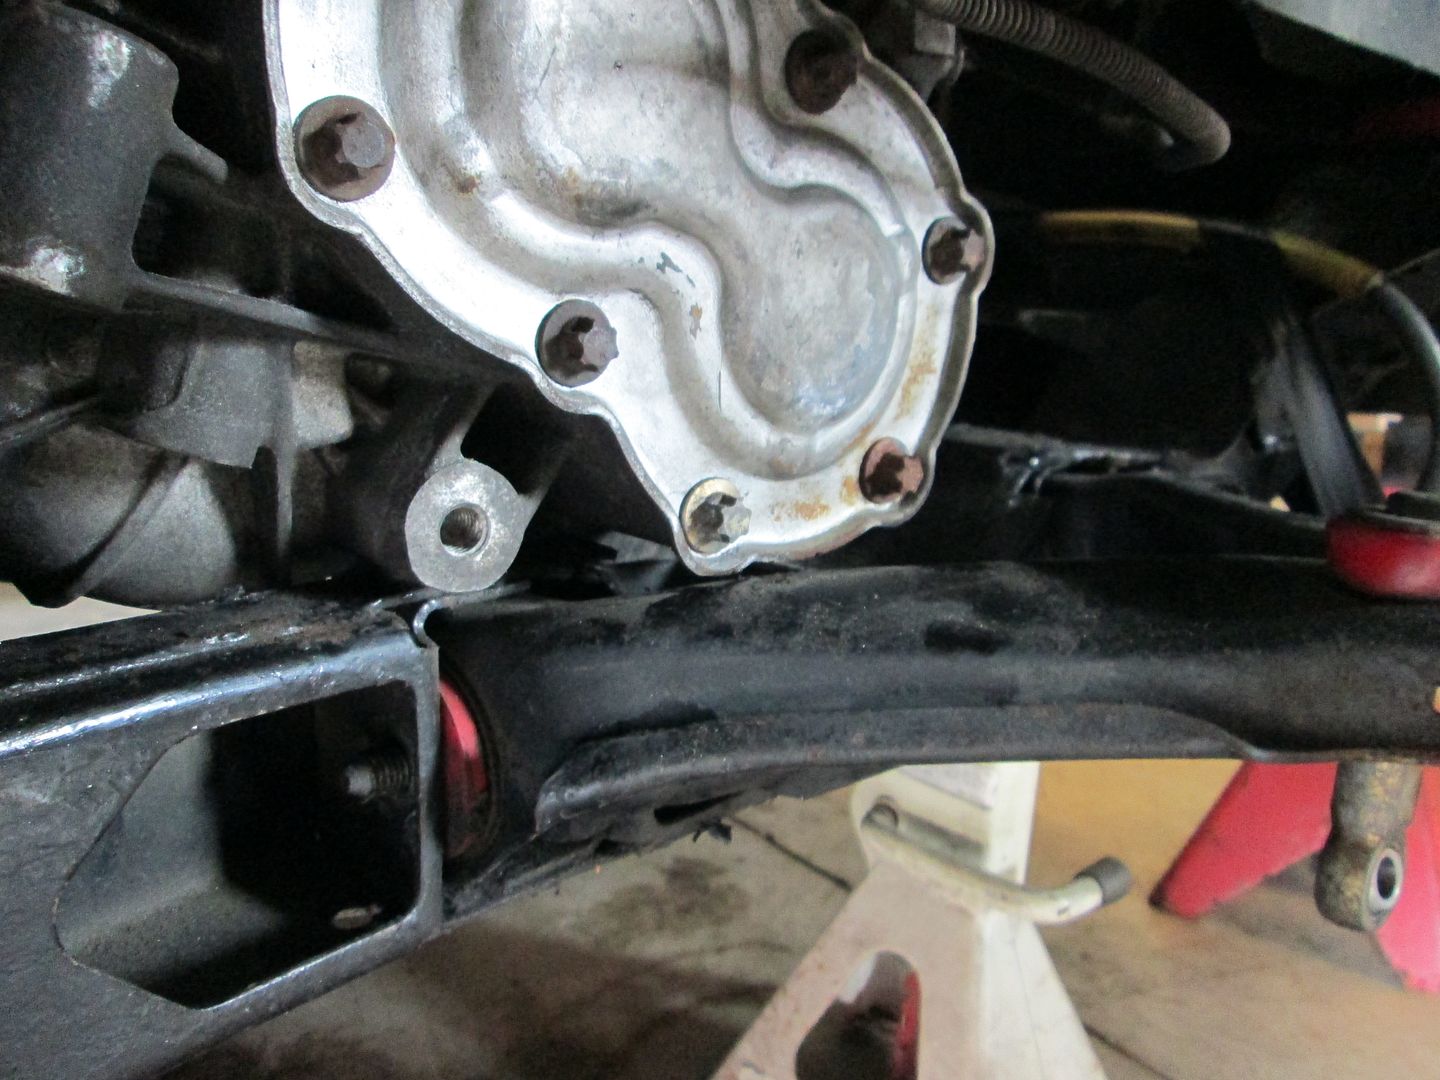
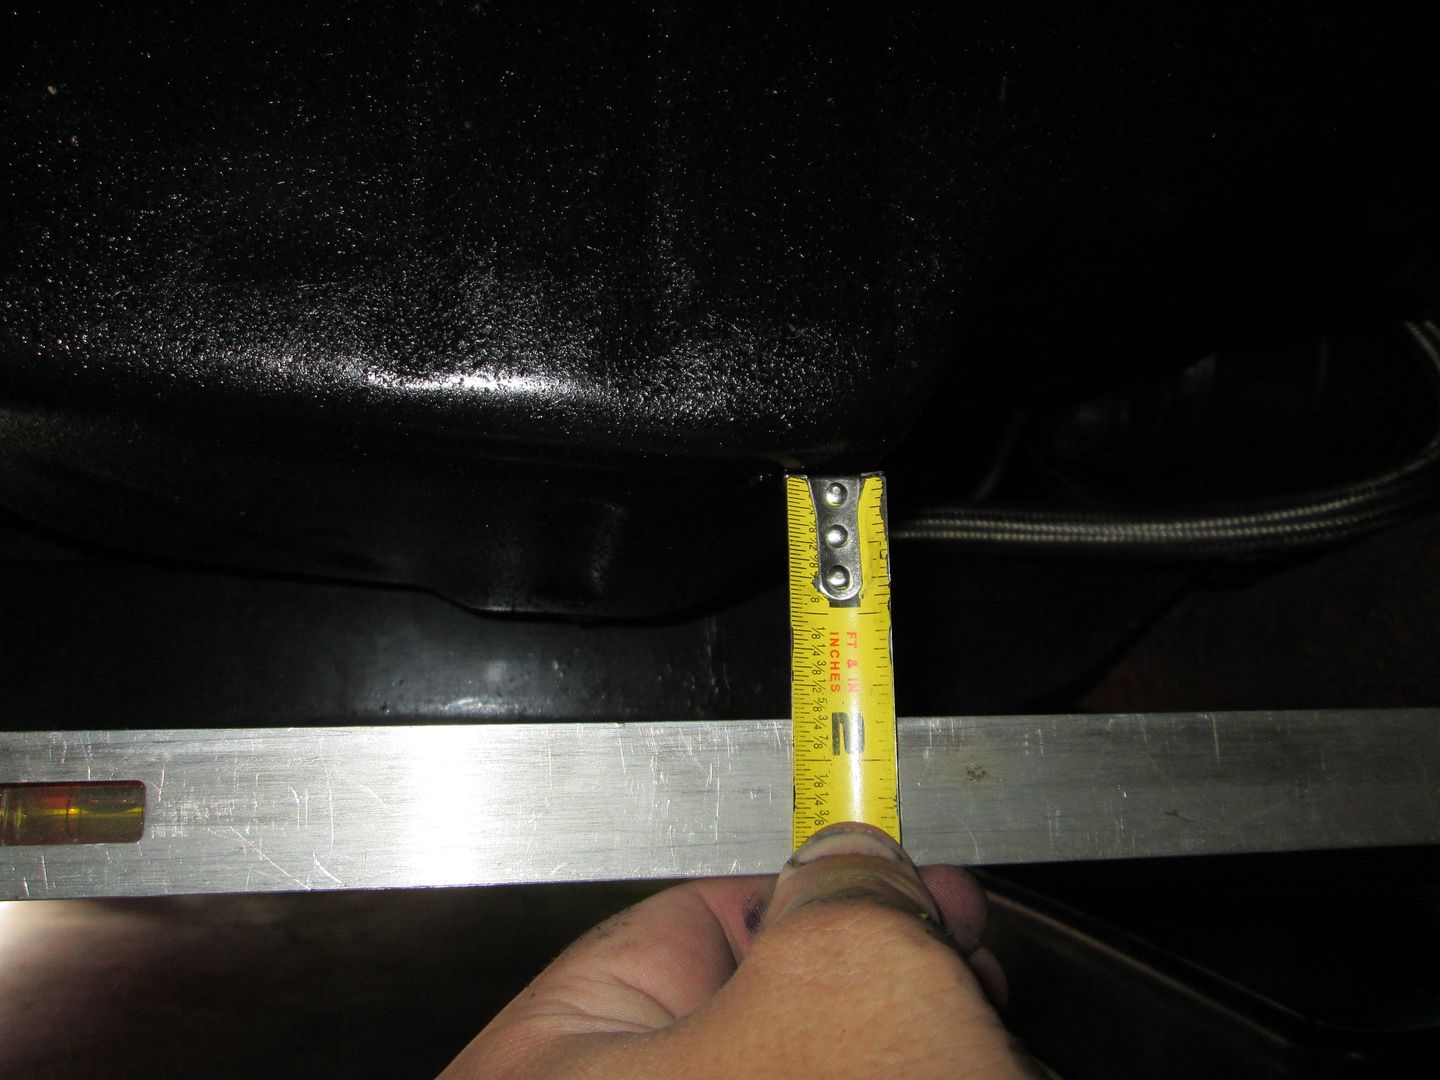
The previous installation had the balancer bolt pretty much in the center of the circular notch in the frame rail, so this picture shows how much lower the drivetrain is now (as well as how much further to the rear it had to go for alternator clearance to the double firewall panel (in the raised position, the alternator can be over the top of the double firewall panel.
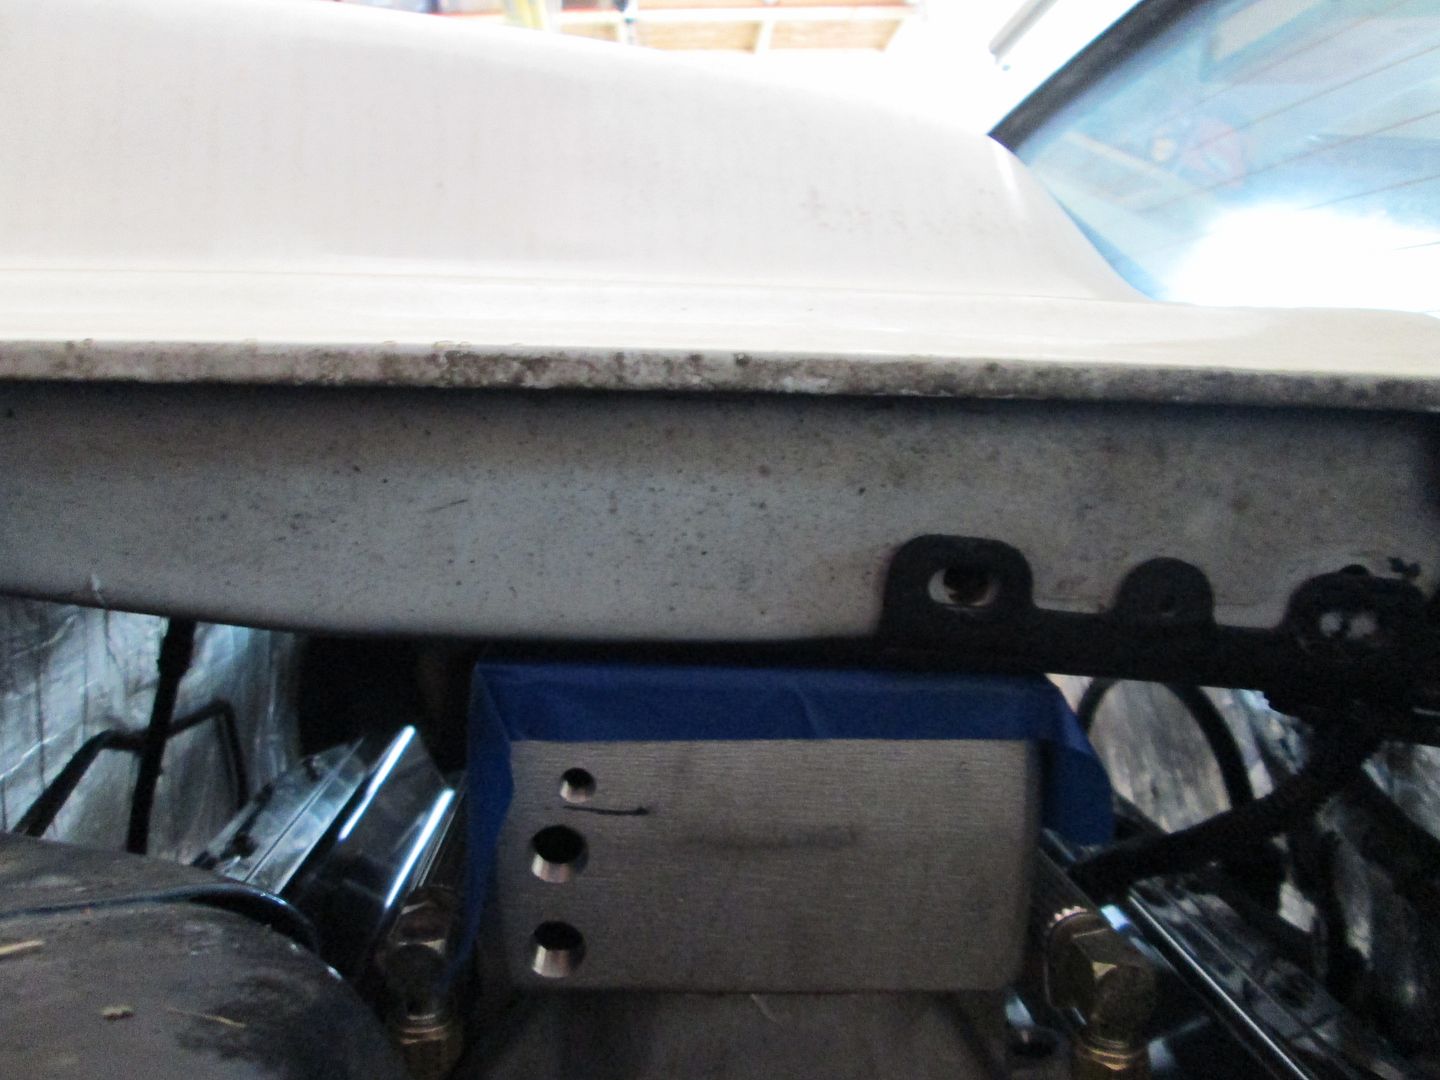
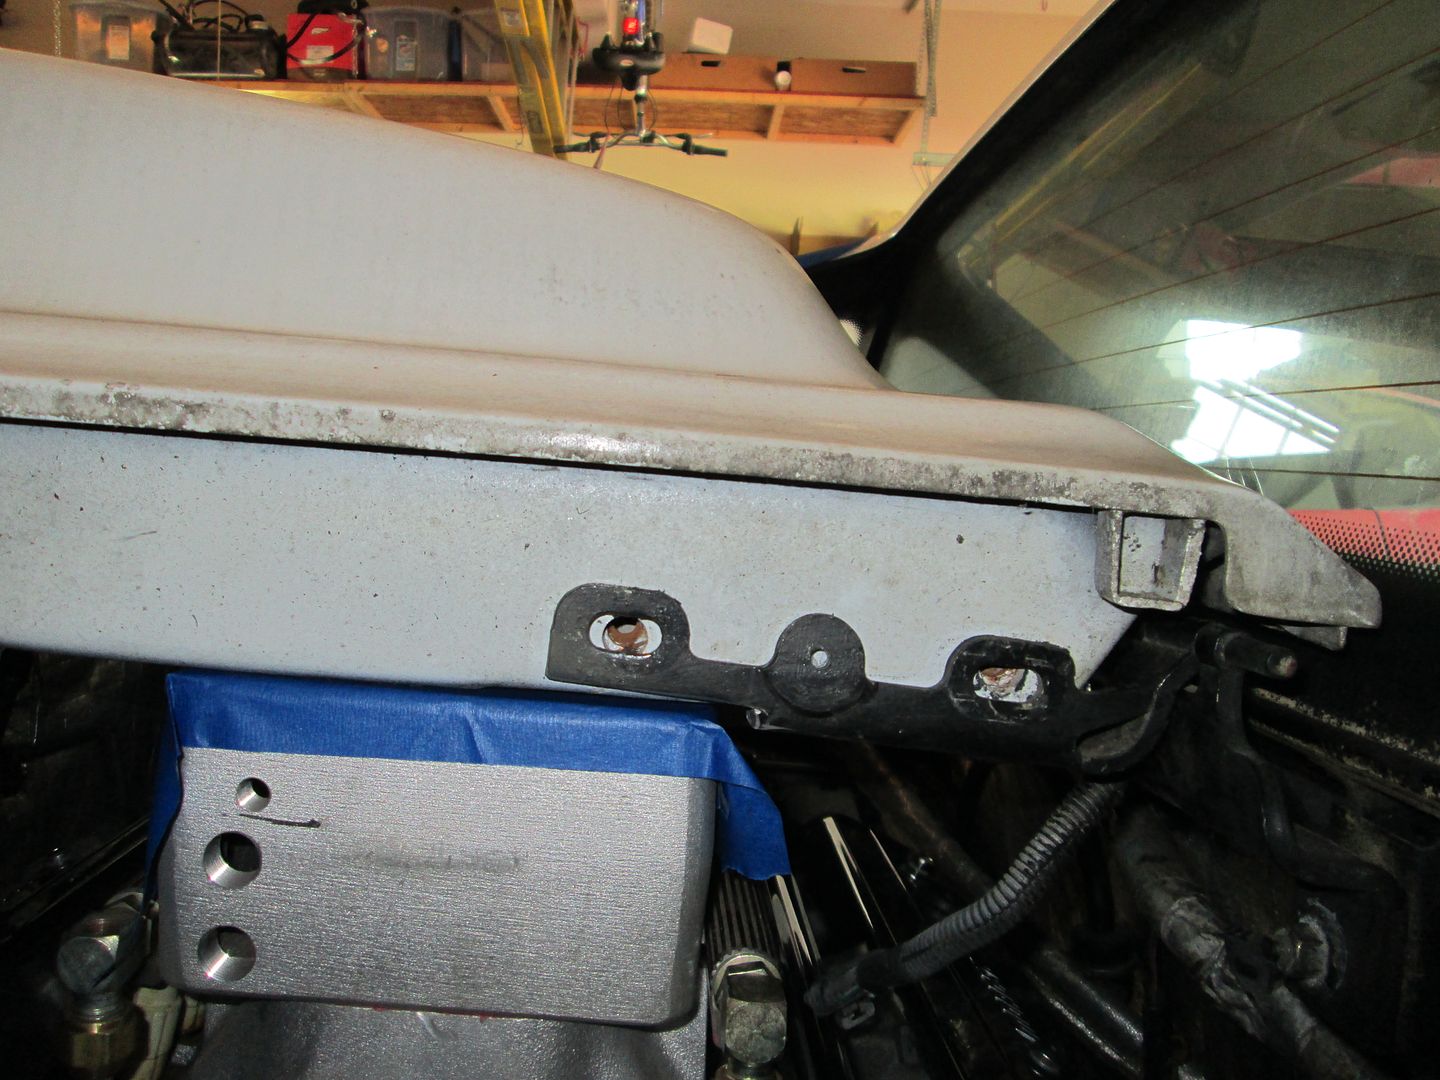
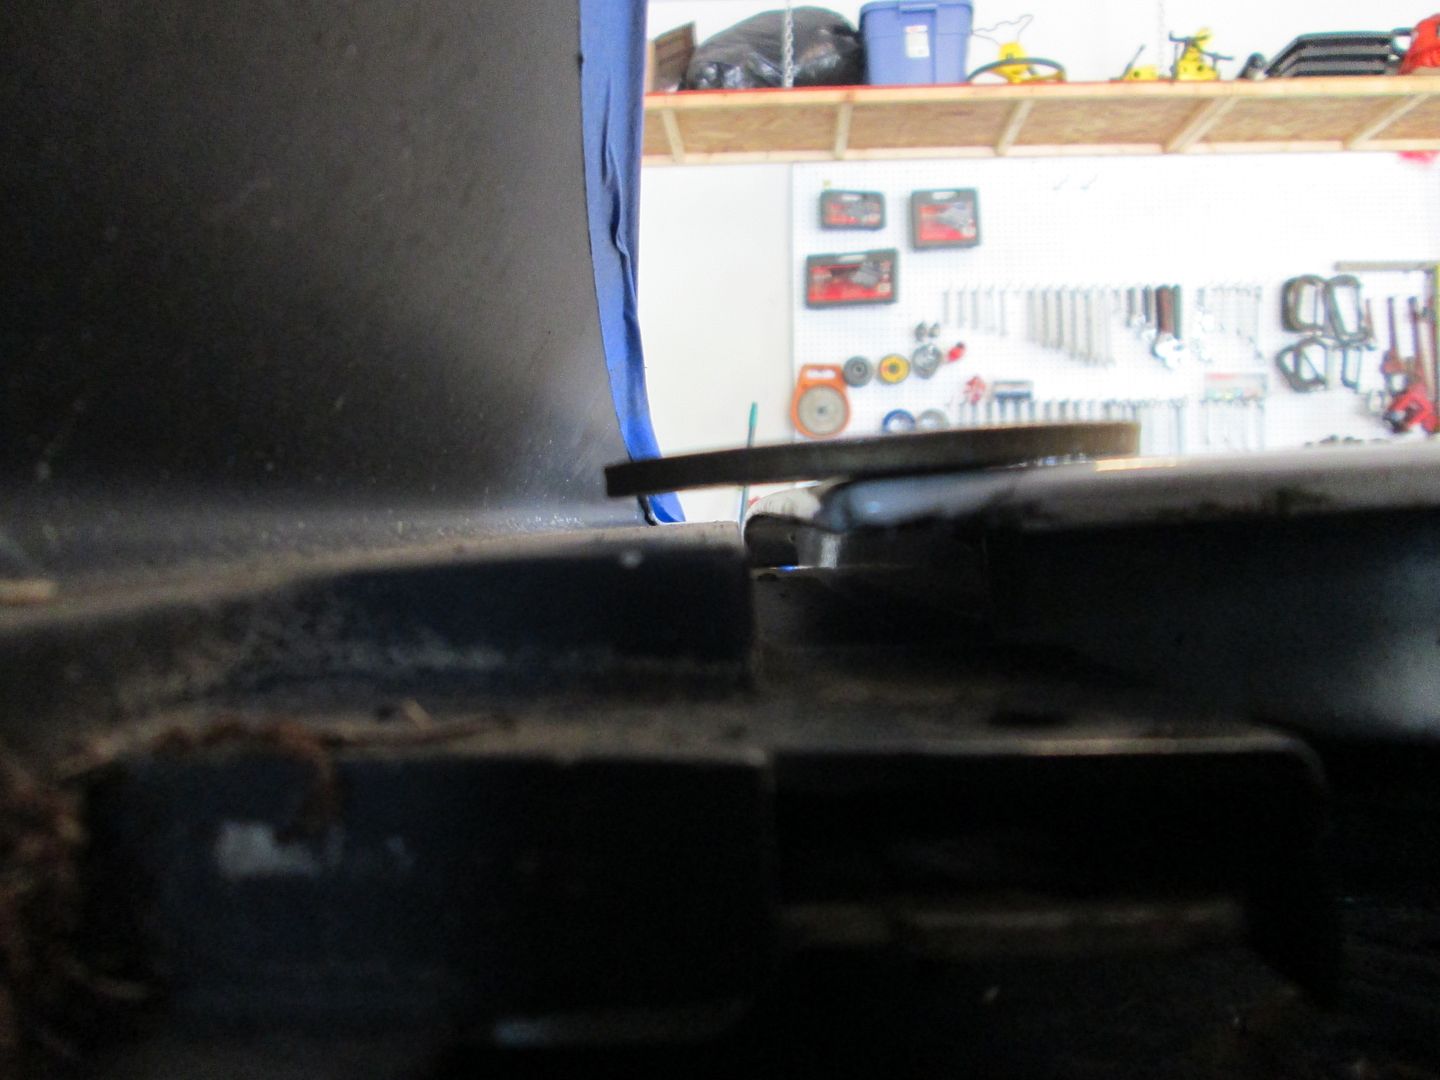
All the lowering was to try to get the intake under the support rail of the GT decklid. Here is a shot with only the hinge. This will need to be notched:
I slid the fastback decklid into place, but it is resting on the hinge which is resting on the intake. Notice the black sharpie mark on the intake, that was where the bottom of the decklid used to come:
Here I slid a washer under the decklid checking for available room:
Notched the hinge:
Decklid back on. Still need about 1/4" more clearance. So I will eventually have to trim the decklid support some, but it will be very minor.
There are a few more things I want to check and then it will come back out to start fabbing the transmission mounts and filling in the notched sections of the cradle.
|
|
|
|
Trinten
|
AUG 11, 03:36 PM
|
|
Thank you for the update and all the pictures. It's neat that in retrospect we can see things that you thought of to start with. For example, it appears you must have marked the decklid -to-intake relation when you had first taken off my old intake and set on the new one to see where things sat before you pulled the engine. I know I wouldn't have thought of that.
Last summer I drained and refilled the transmission fluid, so I hope I'm correctly remembering this -- the drain plug for that transmission used to sit parallel to the cradle, there was just enough room to slide a ratchet up there to loosen it, then unscrewing it by hand. With the repositioning of everything, I'm guessing that plug is now going to be beneath the cradle? Or was it parallel to something else?
|
|
|
|
fieroguru
|
AUG 11, 05:07 PM
|
|
| quote | Originally posted by Trinten:
It's neat that in retrospect we can see things that you thought of to start with. For example, it appears you must have marked the decklid -to-intake relation when you had first taken off my old intake and set on the new one to see where things sat before you pulled the engine.
|
|
Yes, preplanning, thinking through the mods, and getting some reference measurements when able results in fewer test fits. Nothing like having to put the drivetrain back in for 1 measurement you overlooked, or having to pull it back out because it doesn't fit... Its one of those things you learn to do after you have done several swaps.
| quote | Originally posted by Trinten:
the drain plug for that transmission used to sit parallel to the cradle, there was just enough room to slide a ratchet up there to loosen it, then unscrewing it by hand. With the repositioning of everything, I'm guessing that plug is now going to be beneath the cradle? Or was it parallel to something else?
|
|
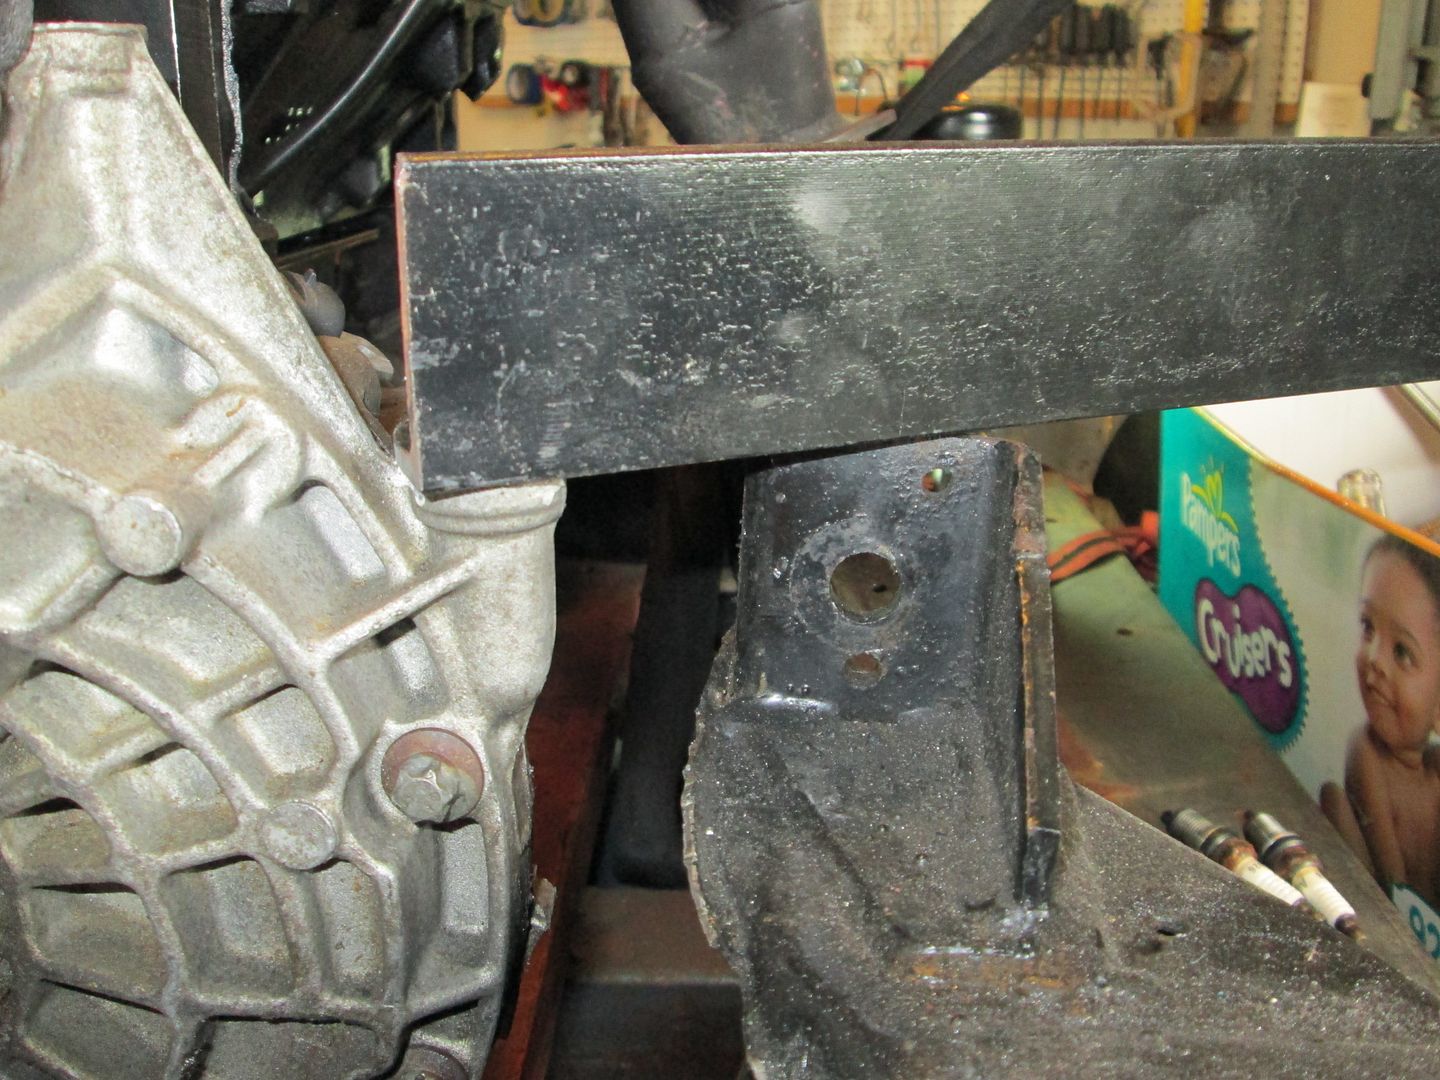
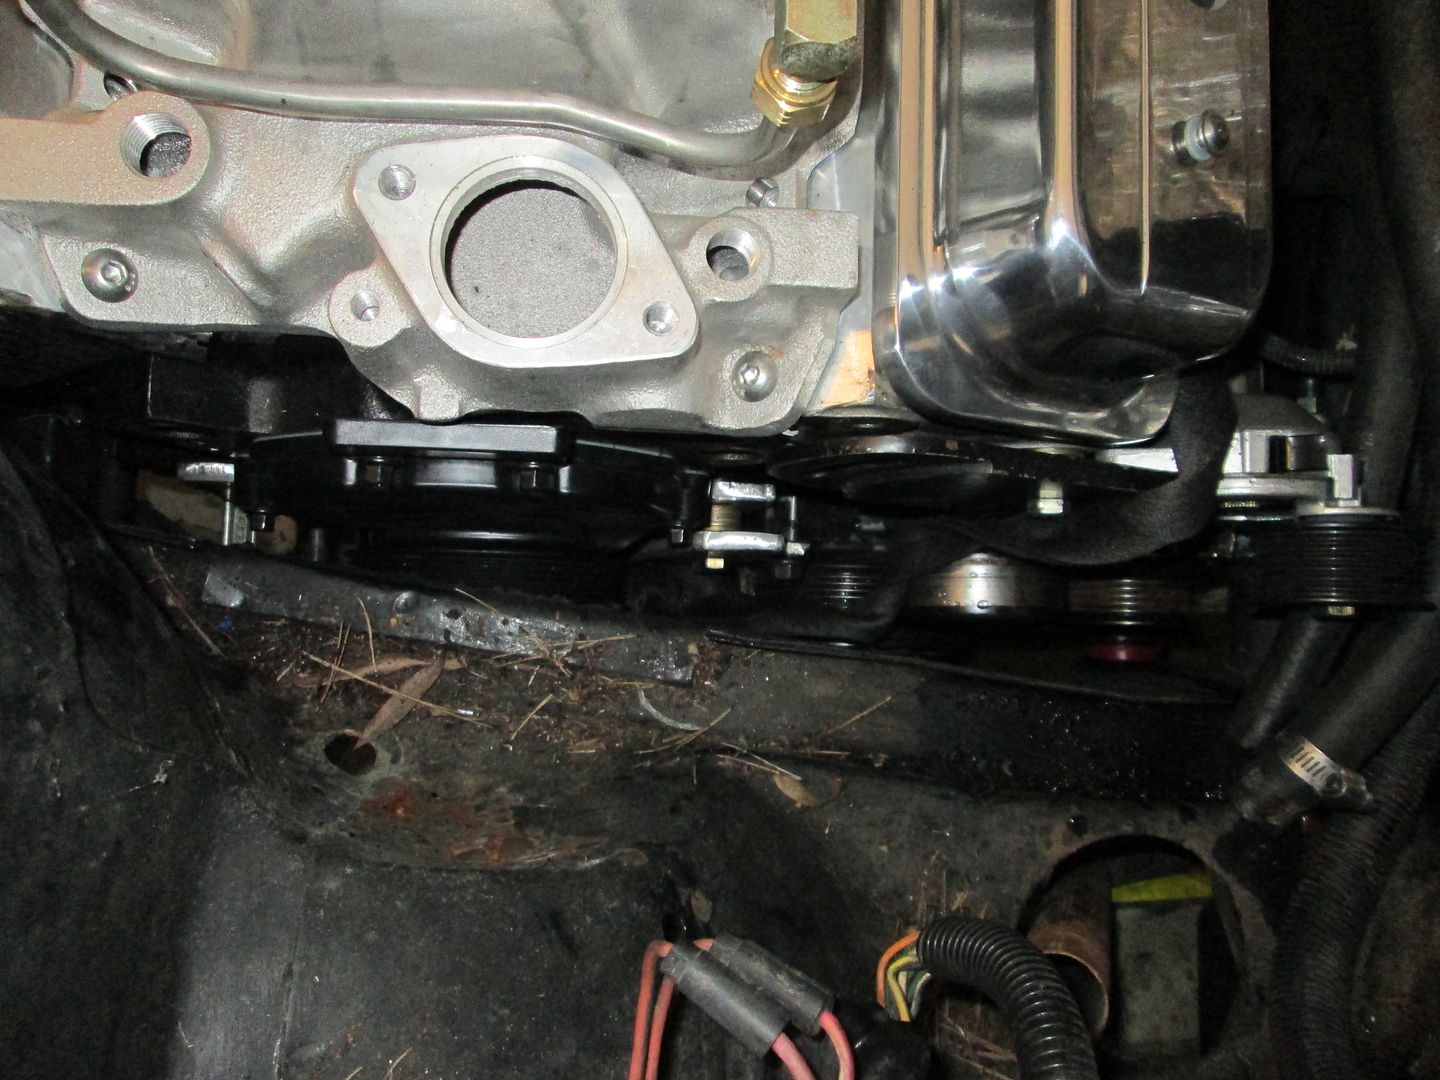
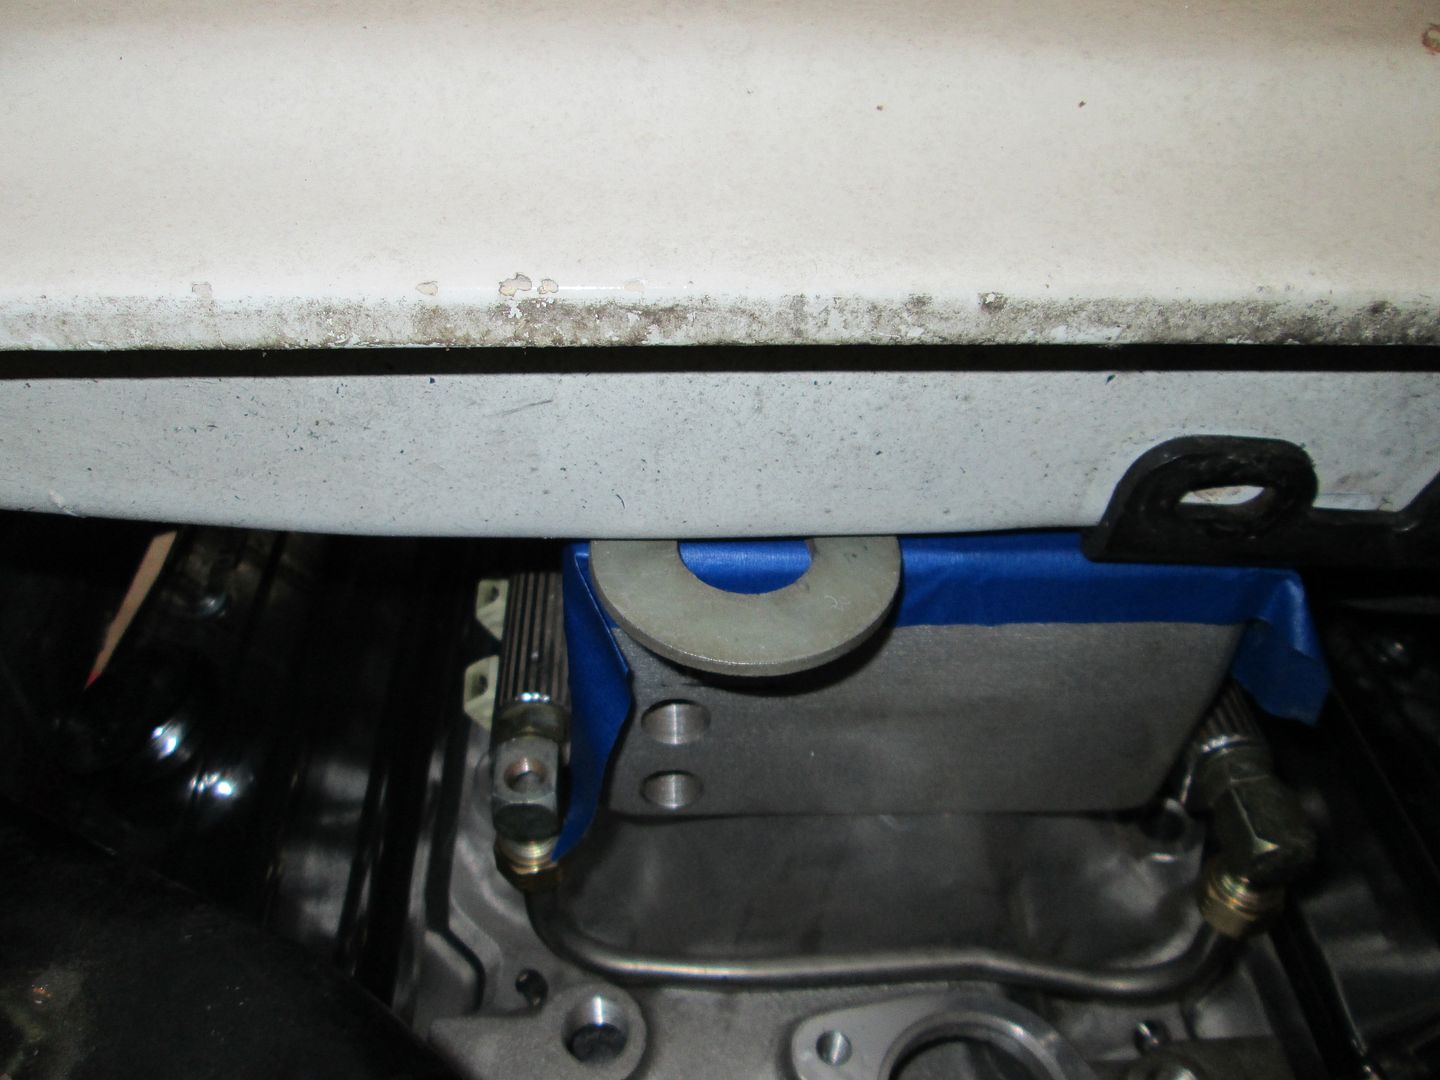
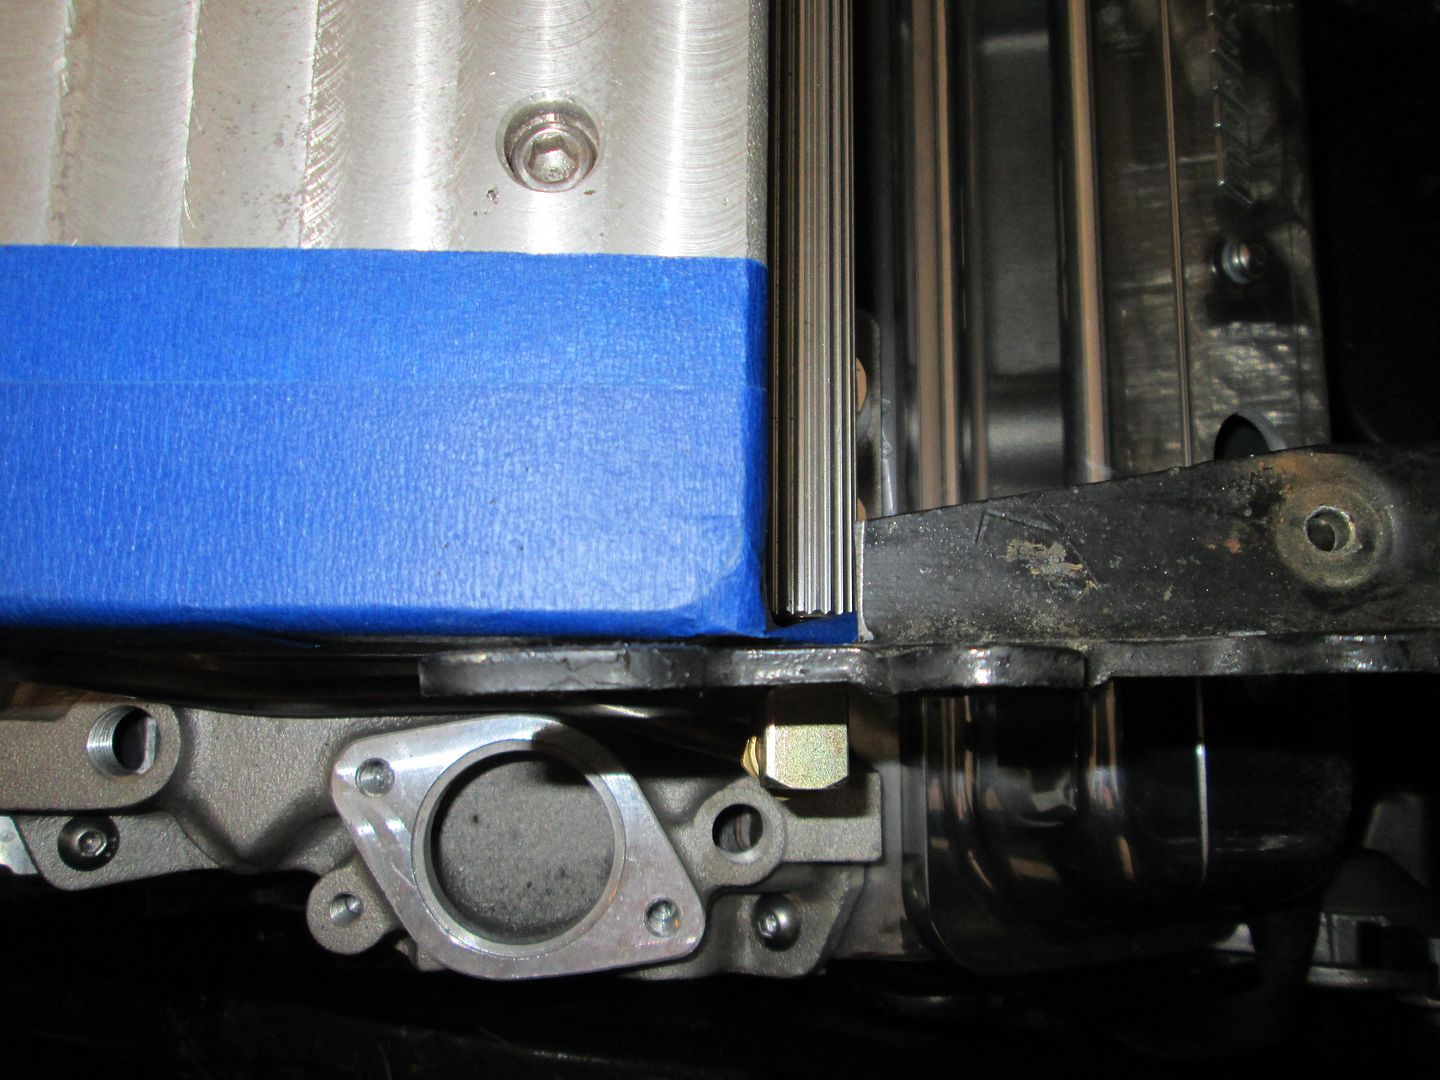
Yeah, the drain plug used to be slightly above the top of the cradle rail, but now it is about 1" above the bottom of the cradle. There is about 1 1/2" between the plug and the differential so you will likely need to use an allen wrench to remove the drain plug.
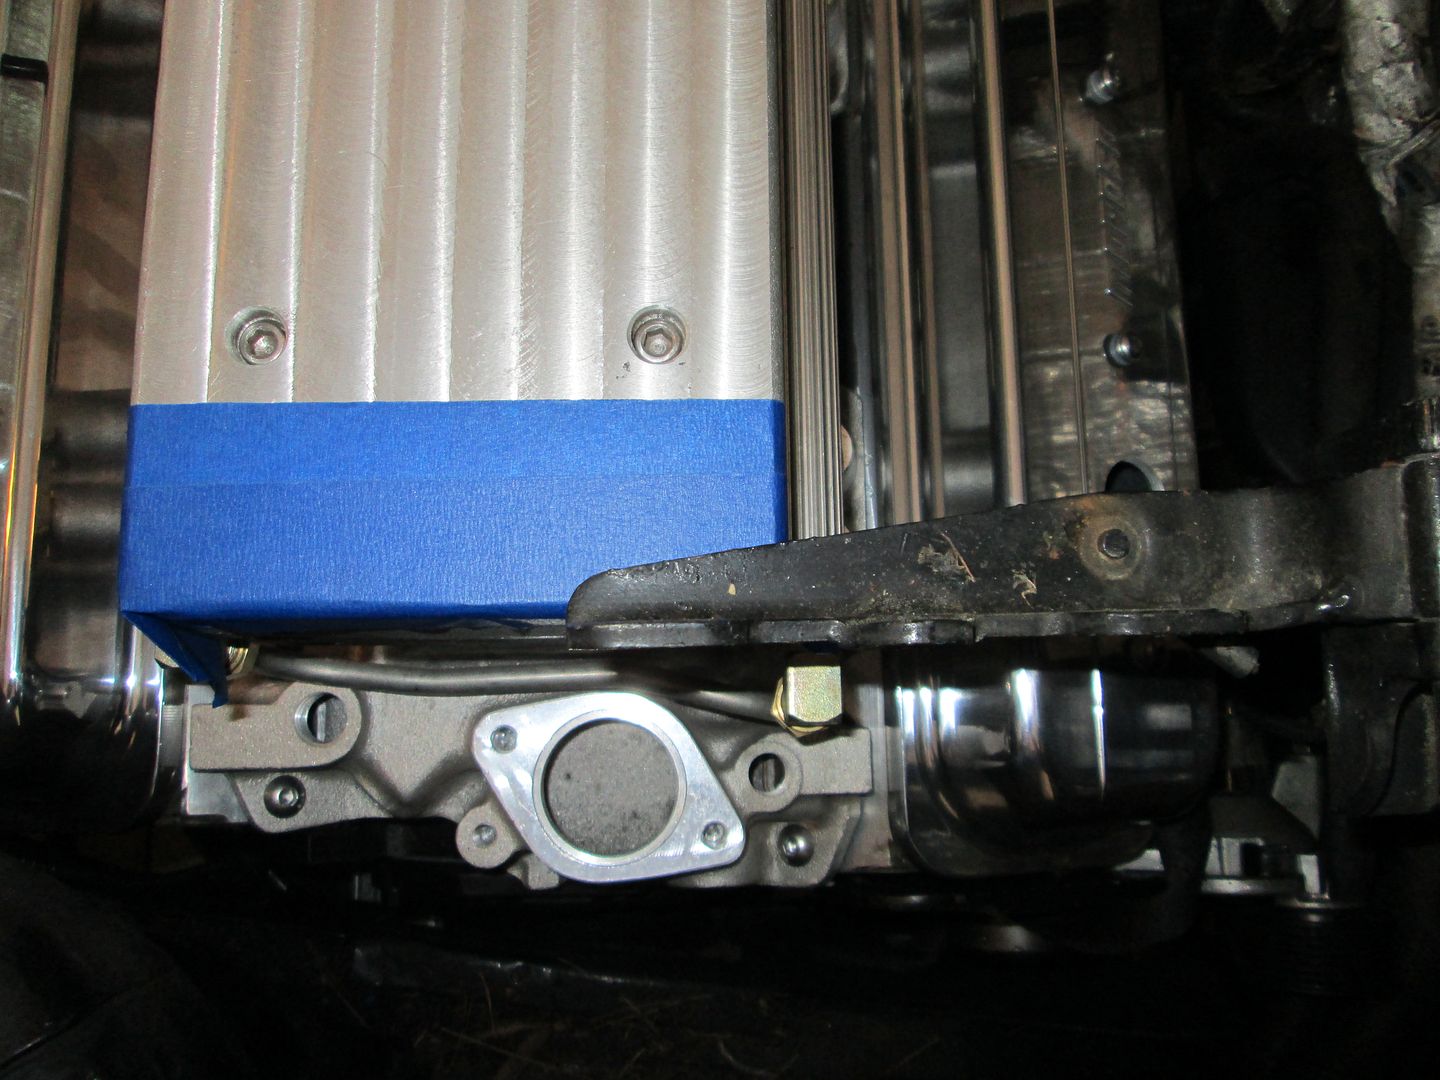
I forgot to share the picture of the bottom of the oil pan. Here is before:
Here is after:
|
|
|
|
CowsPatoot
|
AUG 11, 05:18 PM
|
|
Oooh....more automotive p0rn ....I think I need some alone time now. Looks great, Fieroguru. One question though...

Is the serpentine belt going to clear the circled section of the frame? Hard to see from these angles, but looks like it could be close.[This message has been edited by CowsPatoot (edited 08-11-2013).]
|
|
|
|
Trinten
|
AUG 11, 06:00 PM
|
|
Thanks Guru!
I don't mind if I have to use a wrench to get that plug out.
|
|
|
|
fieroguru
|
AUG 11, 09:17 PM
|
|
| quote | Originally posted by CowsPatoot:
One question though...
Is the serpentine belt going to clear the circled section of the frame? Hard to see from these angles, but looks like it could be close.
|
|
That is one of the many items I am checking with this test fit. I am planning to minimize the notch from its current state, so if I have to raise it slightly for belt clearance I can do that to. Right now the tensioner is unloaded and at its highest point. So I will place a straight edge on the pulleys and scribe the frame rail.
|
|

|
Alex4mula
|
AUG 12, 04:01 PM
|
|
|
This is a super cool upgrade.
|
|
|
|