|
| Blooze Own: An F355 Six Speed N* Build Thread (Page 13/126) |

|
17Car
|
JUN 02, 06:54 PM
|
|
|
|
|
Bloozberry
|
JUN 03, 07:36 PM
|
|
Thanks for the comments Will, Erik, DoubleC, and 17Car. It's always more encouraging to continue the thread when you get a little feedback!
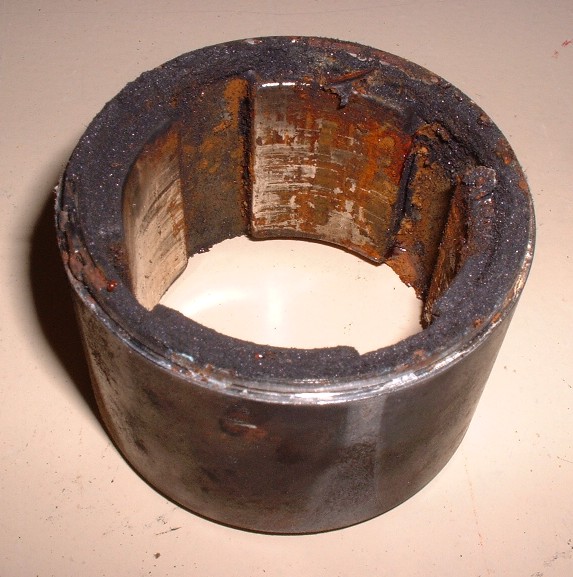
So for tonight's show, the next step was to clean up the magnet housing… here’s what it looked like before. It’s interesting to note that the magnets are fully sealed in a metal casing. Not sure why, but it’s a notch above the rest, as far as field magnets go. I wire wheeled the outside on my bench grinder and used steel wool on the inside to clean up the rusty stains. Then I spent ten minutes getting the wire wheel bristles that broke off and the steel wool lint off the magnets! With the power of these magnets, I could probably have used the wire wheel without wearing goggles!
Once it was cleaned up and painted to match what I expect to be the body color of the car (at this point anyways), I was able to install it on the armature assembly. Two things: 1. nobody except me and whoever reads this post will ever know that it was painted to match the car, but what can I say… it makes for a pretty picture…
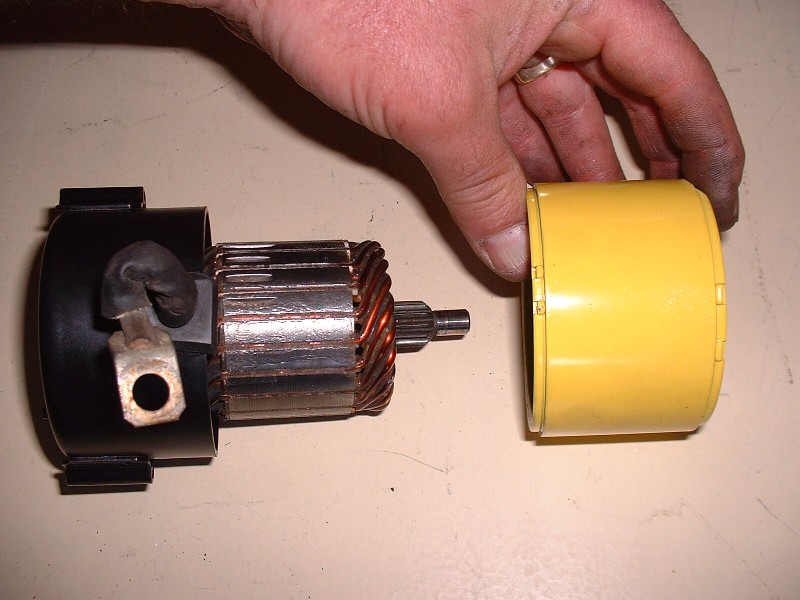
And 2. I learned the hard way that you simply can’t slide the magnet housing towards the armature and expect the armature to stay put. About two seconds after the above photo was taken, the armature whipped out of the brushes and stuck itself to the magnet housing. Of course that meant starting all over again removing the brush assembly and retracting them to be able to slip in the commutator again. But I’m a quick learner so the next time I went to install the magnet housing, I held the armature firmly in place so it wouldn’t get sucked out of the brushes housing.
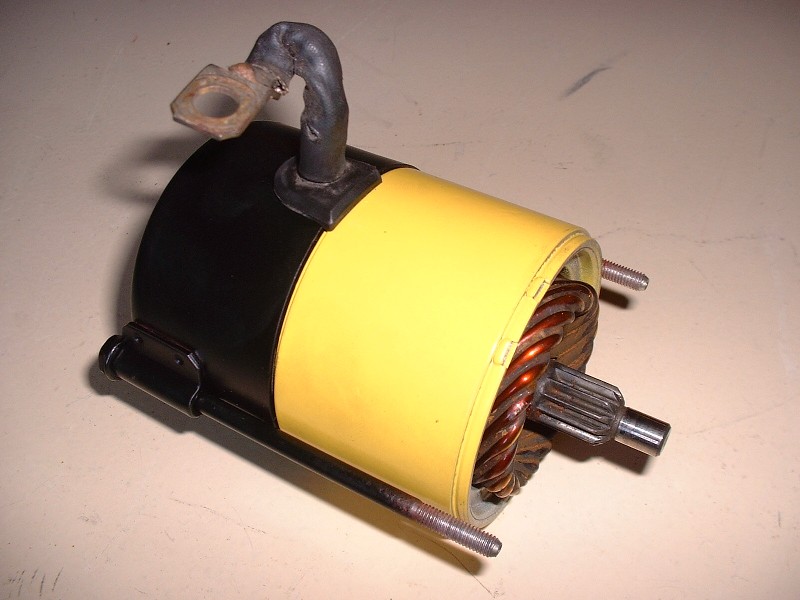
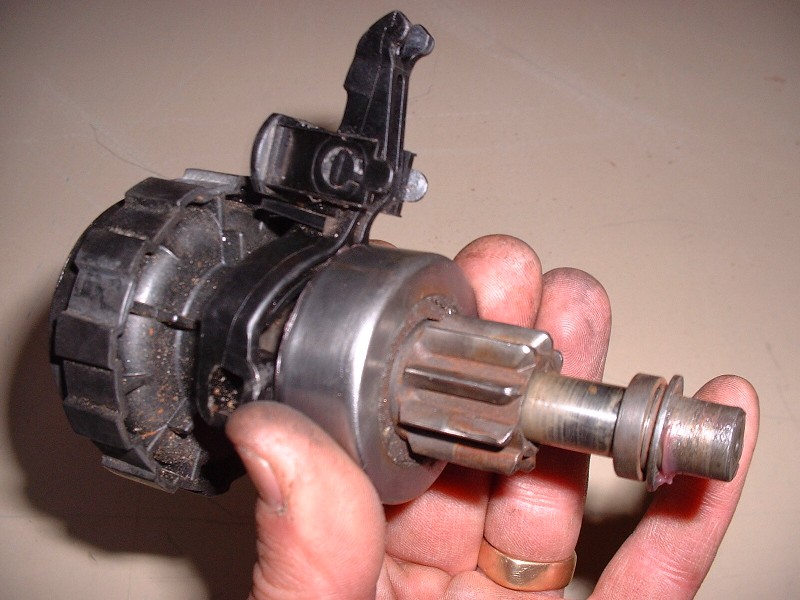
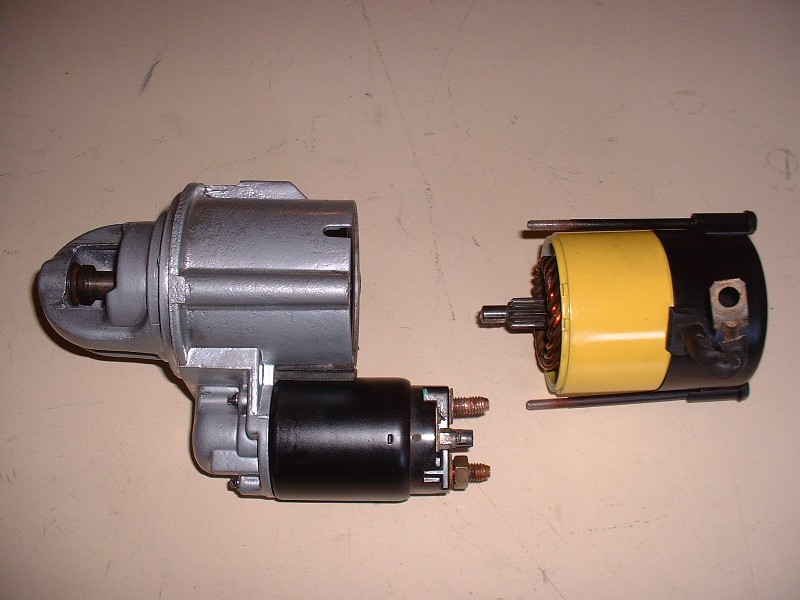
On to the gearbox half of the starter: The gearbox is separated from the motor with a plate that’s supposed to keep the grease off the motor. Mine was kinda rusty looking so I took it off and sandblasted and refinished it. Here’s what it looked like with the motor half removed.
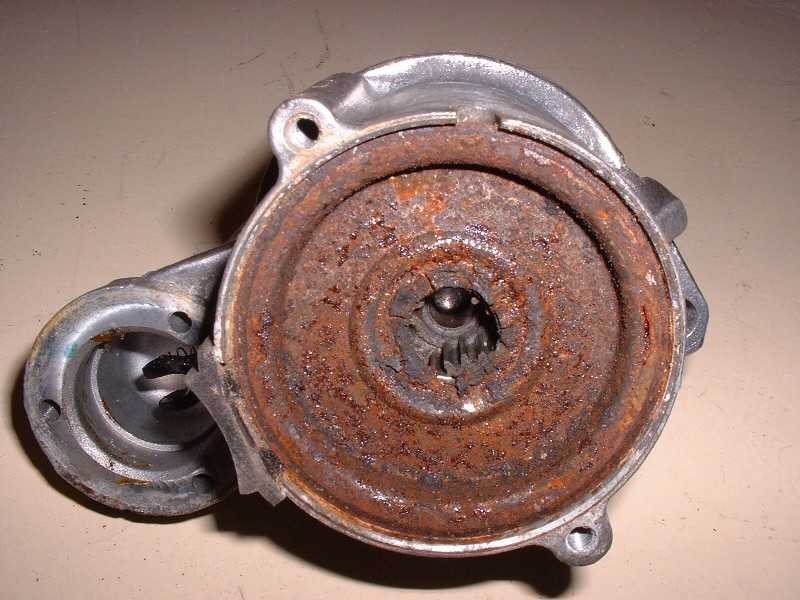
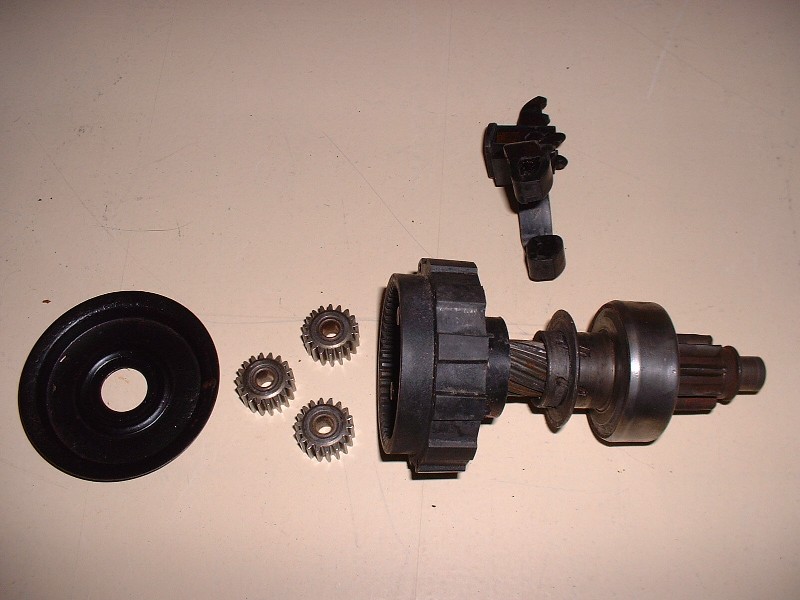
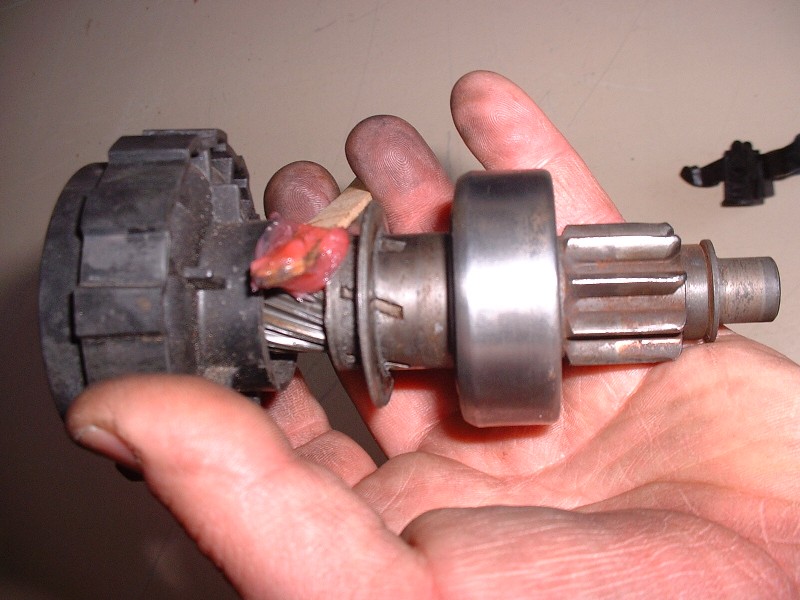
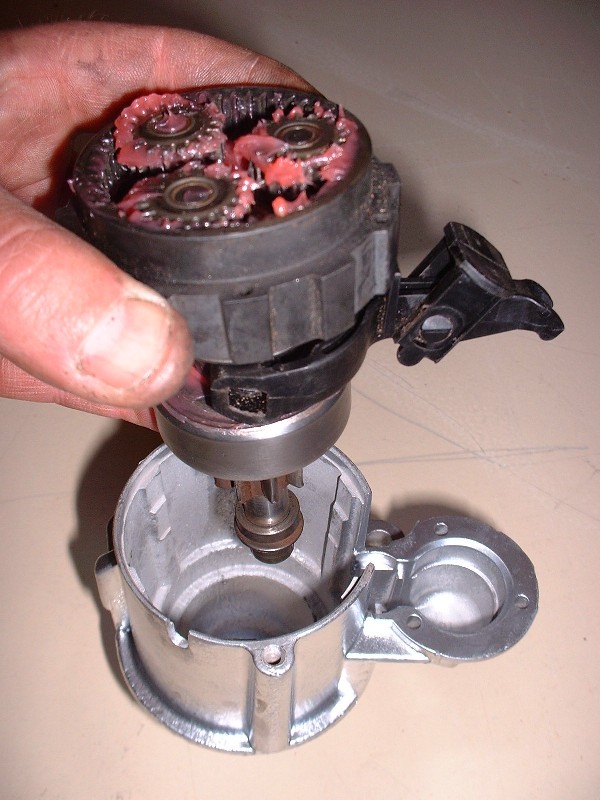
With the cover removed (it’s just held in place by a tab), you can pull three little planetary gears out, and retract the entire gearbox’s guts from the housing with a little persuasion. In this case, the sun gear is part of the armature shaft, which meshes with the three sun gears that spin on pegs that are welded to gearbox’s input shaft. This gears down the RPM of the motor and multiplies the output torque. The gearbox stator is kept from moving by having big plastic teeth or splines that engage the ID of the housing. That’s the part that needs a little coaxing to get the guts out. The other major assembly in the gearbox is the solenoid fork which acts just like a clutch fork. Here’s what the major parts look like once cleaned up:
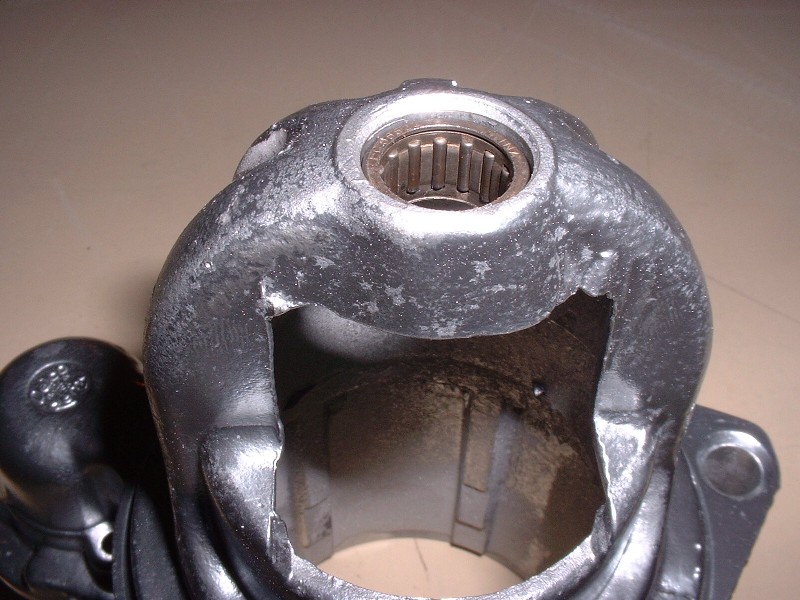
With the innards removed, I was able to examine the needle bearing in the starter snout and decided it needed to be cleaned and re-greased. I used varsol to desolve to old grease and spun it dry with shop air then used a Q-Tip to re-grease the needles. Here’s a close-up of the little guy after I cleaned it but before I decided to remove it and grease it properly.
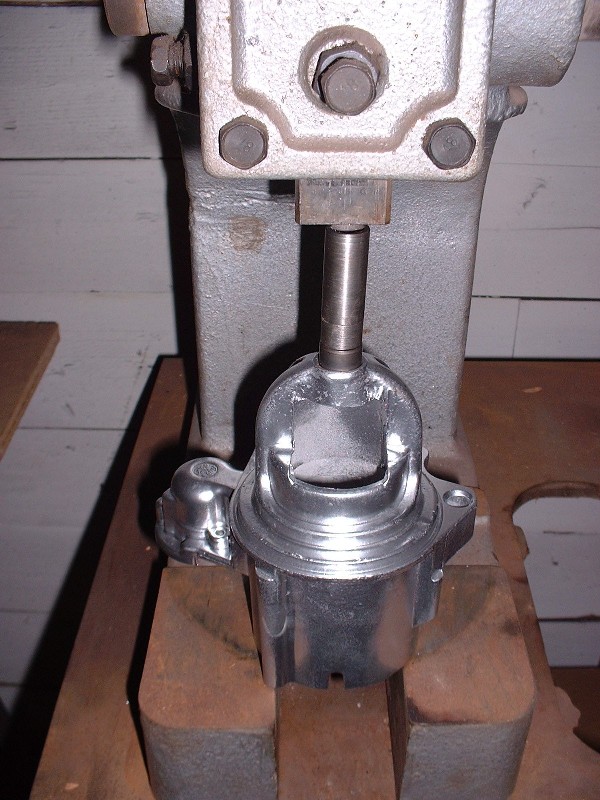
To remove and reinstall it, I used a small arbor press which made things easy, but I'm sure you could used a punch and hammer judiciously. In this picture I’m pressing it back in after cleaning and re-lubing it.
I promise to wrap up the starter rebuild in the next post, so for those of you itching for me to get back to the engine, the suffering is almost over!
|
|
|
|
fierogt28
|
JUN 04, 07:50 PM
|
|
Blooze, I've been following your swap. Nice to see the detailed info and pics. 
I love seeing cleanness in work even if its going into a fiero. That's what makes it more interesting. 
Hopefully, I'll get to see you swap someday, once I get around to NB in the next couple of years with 3 weeks vacation...lol------------------
fierogt28
88 GT, loaded, 5-speed
|
|
|
|
Bloozberry
|
JUN 05, 08:08 PM
|
|
Thanks Fierogt28. I had one of my customers tell me one day that "cleanliness is next to Godliness when it comes to building engines" and that sort of stuck with me. It's all about perceptions. It's also so much more satisfying to go to a car show and pop your decklid to a clean engine bay. Sure it takes alot more time but I think it's worth it. By the way, what's up with the line "even if it's going into a Fiero"? No disparaging remarks about Fieros are allowed here!
Anyways... cleaning and re-greasing the gearbox was pretty straightforward. The main component of the gearbox is the starter pinion assembly. The big black plastic part, as mentioned earlier, is locked to the gearbox housing but the portion in the right hand side of this picture is the part that whips out and engages the flywheel. Here I’m greasing the splines that the pinion travels on. The manufacturers of different car maintenance products are starting to get wise… make things like grease in pretty colors and even the women might take an interest in auto repair! (...apologies to the women of PFF)
Next I greased up the backside of the pinion bearing that the actuating fork contacts, and installed the fork. The fork doesn’t stay there on it’s own, it has a little yoke that gets captured by the gearbox housing once it all gets put back together.

I greased up the pinion journal that will marry up with the needle bearing in the gearbox snout too.
Then installed the three little planetary gears in the plastic housing and lubed them up good. At this point the pinion assembly was ready to be installed back into the gearbox housing.
It took a little persuasion to get the black plastic planetary gear housing to seat properly, and once it was into place, I realized why. The little yoke that the fork pivots on was binding up so I had to pull it all out again and take a little more care in aligning the yoke into it’s recess. If you take one of these apart, make sure before you close it all up that the little lever that the solenoid is connected to can actually pivot freely to slide the pinion gear back and forth.
A little grease on the solenoid pushrod and it was installed using three little screws…
… then the gearbox grease shield…
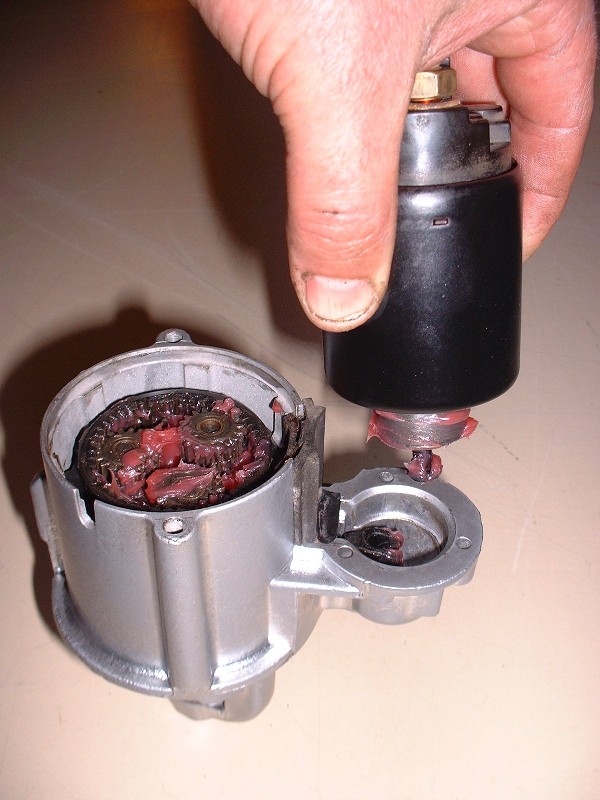
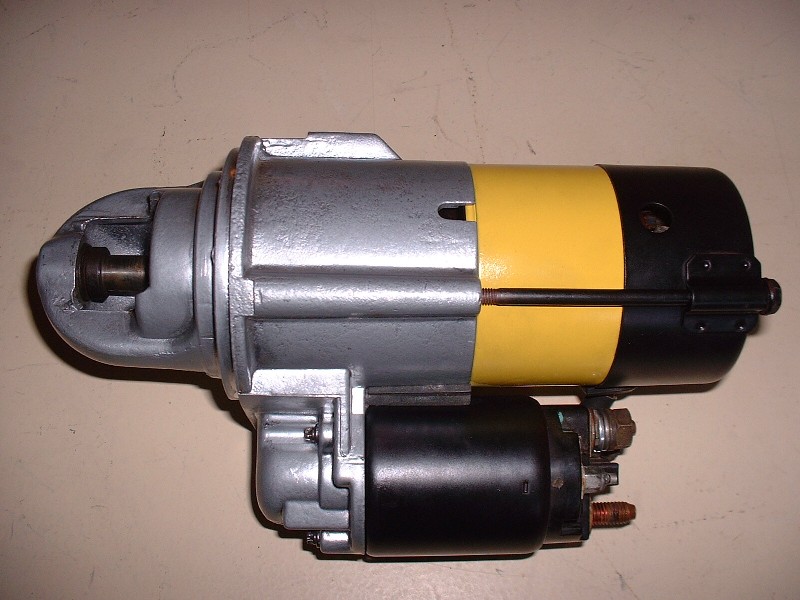
… and finally the starter gearbox was ready to be mated to the starter motor.
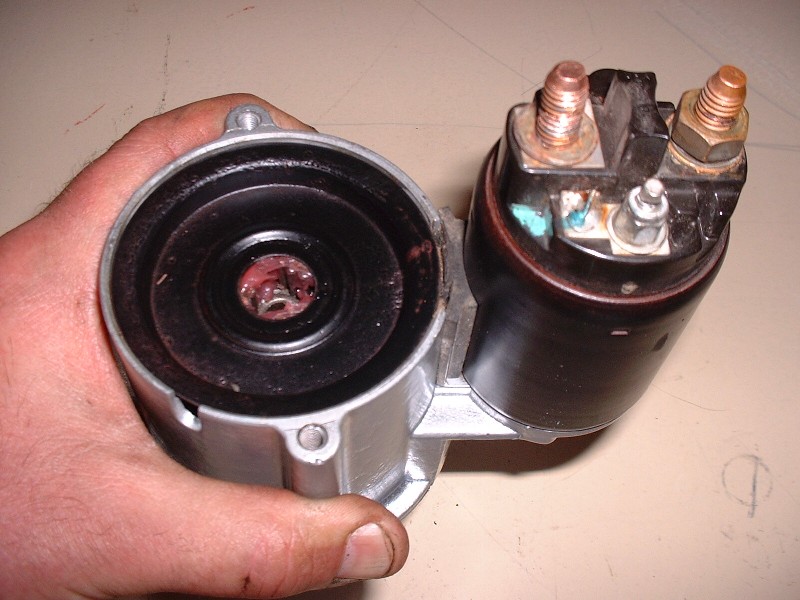
Ta-dah! One rebuilt Northstar starter. Tiny little bumble-bee-of-a-thing eh? I hooked it up to a spare shop battery and made sure it worked by cycling it about twenty times… I don’t want to have to deal with it again for a very long time.
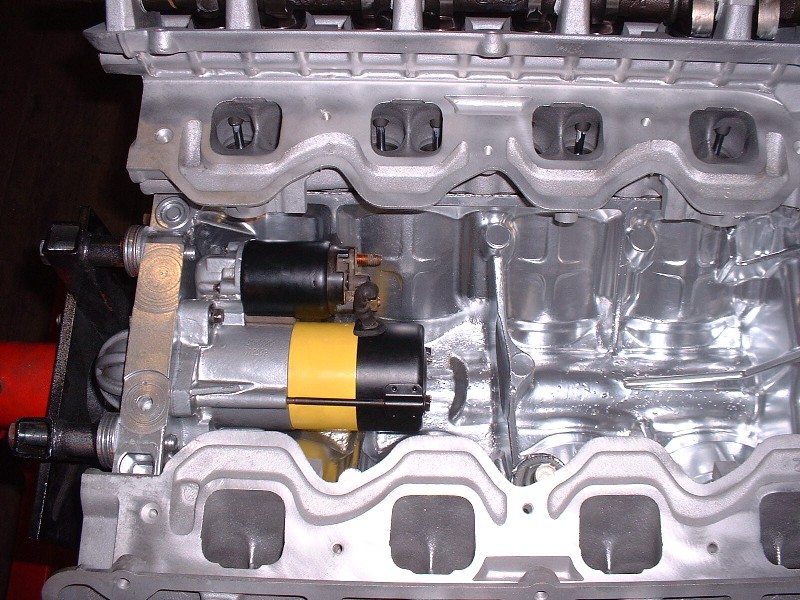
Finally, here it is mounted in place in the cylinder valley. The cables for it and the knock sensor run under the intake manifold and emerge up near the pulley end of the engine (oops, I almost said “front end of the engine”).
|
|
|
|
katatak
|
JUN 05, 09:14 PM
|
|
|
Seems a shame to do all that nice work to the starter just to cover it up with the intake! Nice work Blooz.
|
|

|
fierogt28
|
JUN 06, 02:15 AM
|
|
Blooze, what I meant was 99% of the folks that I see that own a fiero don't have a clean engine bay. They probably don't care because they aren't worth much; but that's to them. If anything, I want cleanness and new components through-out. I don't like doing a half ass job. But what your doing is exactly what I'd want, or do.
I'd like to see the car once your done. Sounds like an interesting swap and the 6-speed mated to it.  ------------------
fierogt28
88 GT, loaded, 5-speed
|
|
|
|
Bloozberry
|
JUN 06, 07:19 AM
|
|
|
That's OK Fierogt28, I was just pulling your leg.
|
|
|
|
dratts
|
JUN 06, 09:33 AM
|
|
|
Any idea how moisture got in there? Most exterior starters don't get that rusty.
|
|
|
|
Bloozberry
|
JUN 06, 12:22 PM
|
|
|
... haven't a clue... although the engine came from a big wreckers yard in Ontario called Schram's Auto Recycling (... rhymes with Scam...) and may have been pulled from the donor car a long time ago and sat outside. It's one thing to be stored outside under a hood and quite another to be left open to the rain and snow. But I'm just speculating. But Dratts, you live in California... isn't there a song about how it never rains over there? And I bet the only salt you've ever seen is next to the pepper!
|
|
|
|
dratts
|
JUN 06, 12:51 PM
|
|
|
That would be my guess too. Again thanks for all the info and pictures. Are you keeping track of the cost of your engine rebuild? I'm pretty much not in Ca. anymore. I still have an island by Antioch, but I spend most of my time in Coeur d' alene Idaho with my Murciealago replica. The N* 355 isn't getting as much of my attention until I finish the Murci. The Murci is registered and draws a ton of attention when I drive it, but needs a lot of work.
|
|
|
|