 
     |
| LS4 / F40 swap - fieroguru (Page 124/216) |

|
fieroguru
|
JUL 08, 08:52 AM
|
|
| quote | Originally posted by Bob2112:
I'll definitely be watching to see if that trans works. I've already been sticking to looking for the MT2 rather than the MU9, but this would be even better.
|
|
To clarify, this 3.09 transmission does not have the metric bellhousing, so all I will be using from it is the rear diff and the 2 final drive shafts. I plan to swap everything into the MT2 case with the MT2 1-6 gear ratios. So you will need an MT2 transmission ($400 to $1000), the 3.09 transmission ($500), and the international freight to bring it to the US ($300).
|
|
|
|
fieroguru
|
JUL 16, 11:25 PM
|
|
This weekend I started doing some modifications to my air compressor to make it better for the future painting projects. The primary concern with it is keeping the air dry for painting.
There are 3 parts to this modification.
1. Modify the tank for the inlet to be low on the tank and induce a spiral flow of air around the tank, with the outlet of the tank being in the top center.
2. Heat exchanger with 9" fan between compressor and tank to remove heat from the air and condense as much water as possible.
3. Route the outlet of the tank through a significant length of copper pipe with water traps to further cool the air and remove any water.
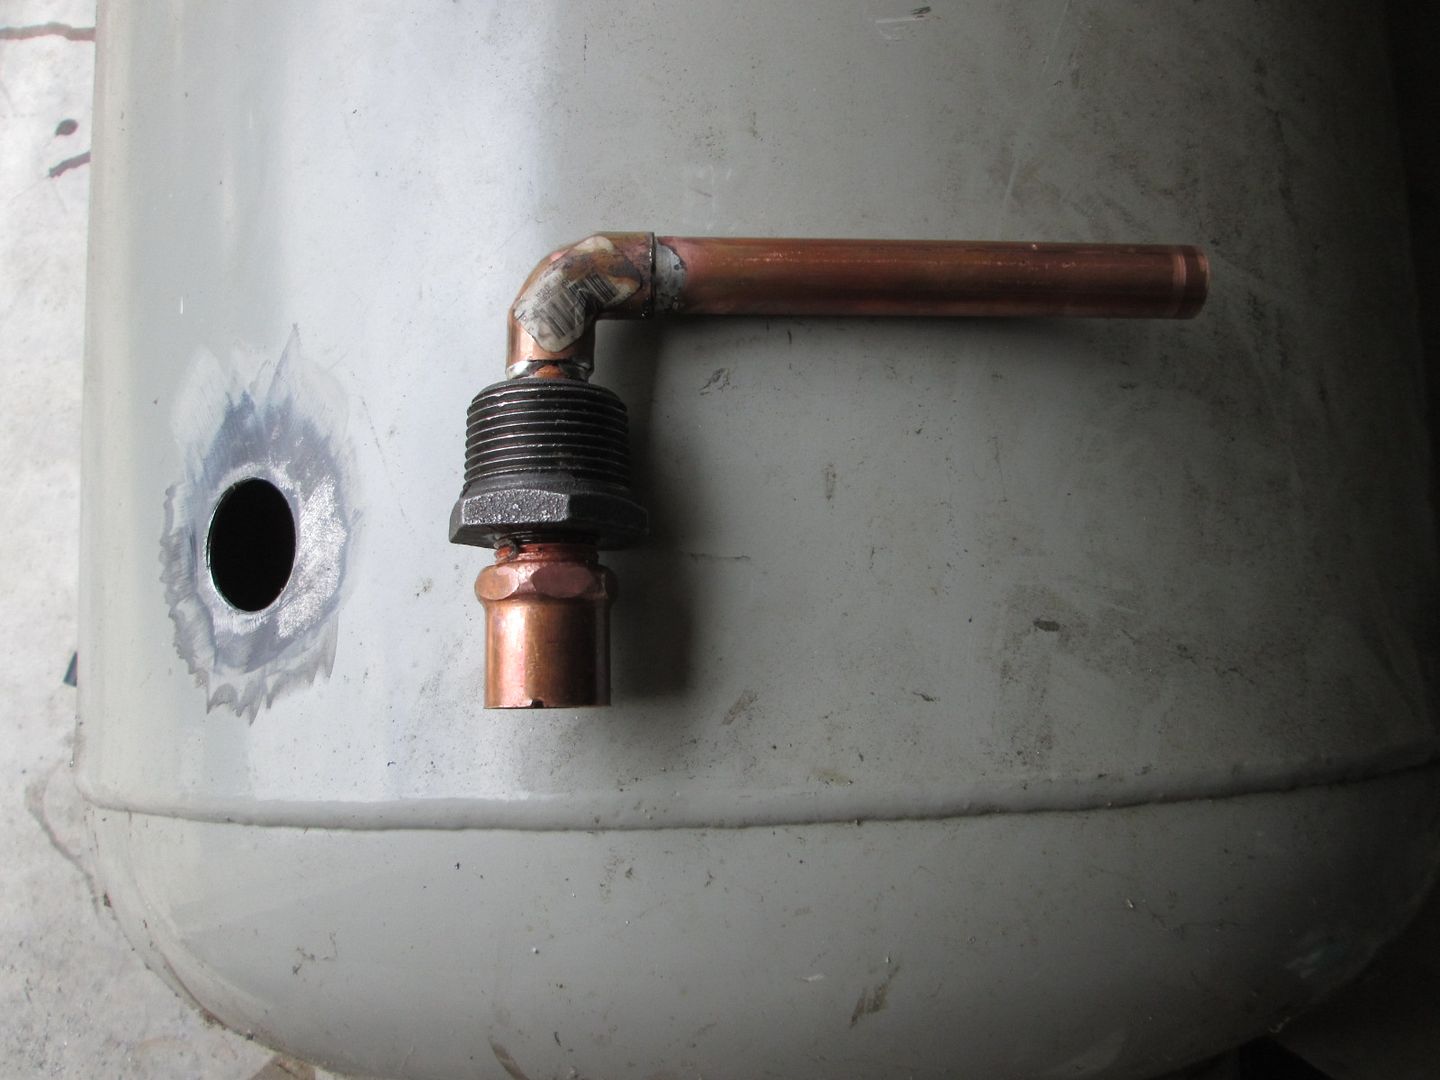
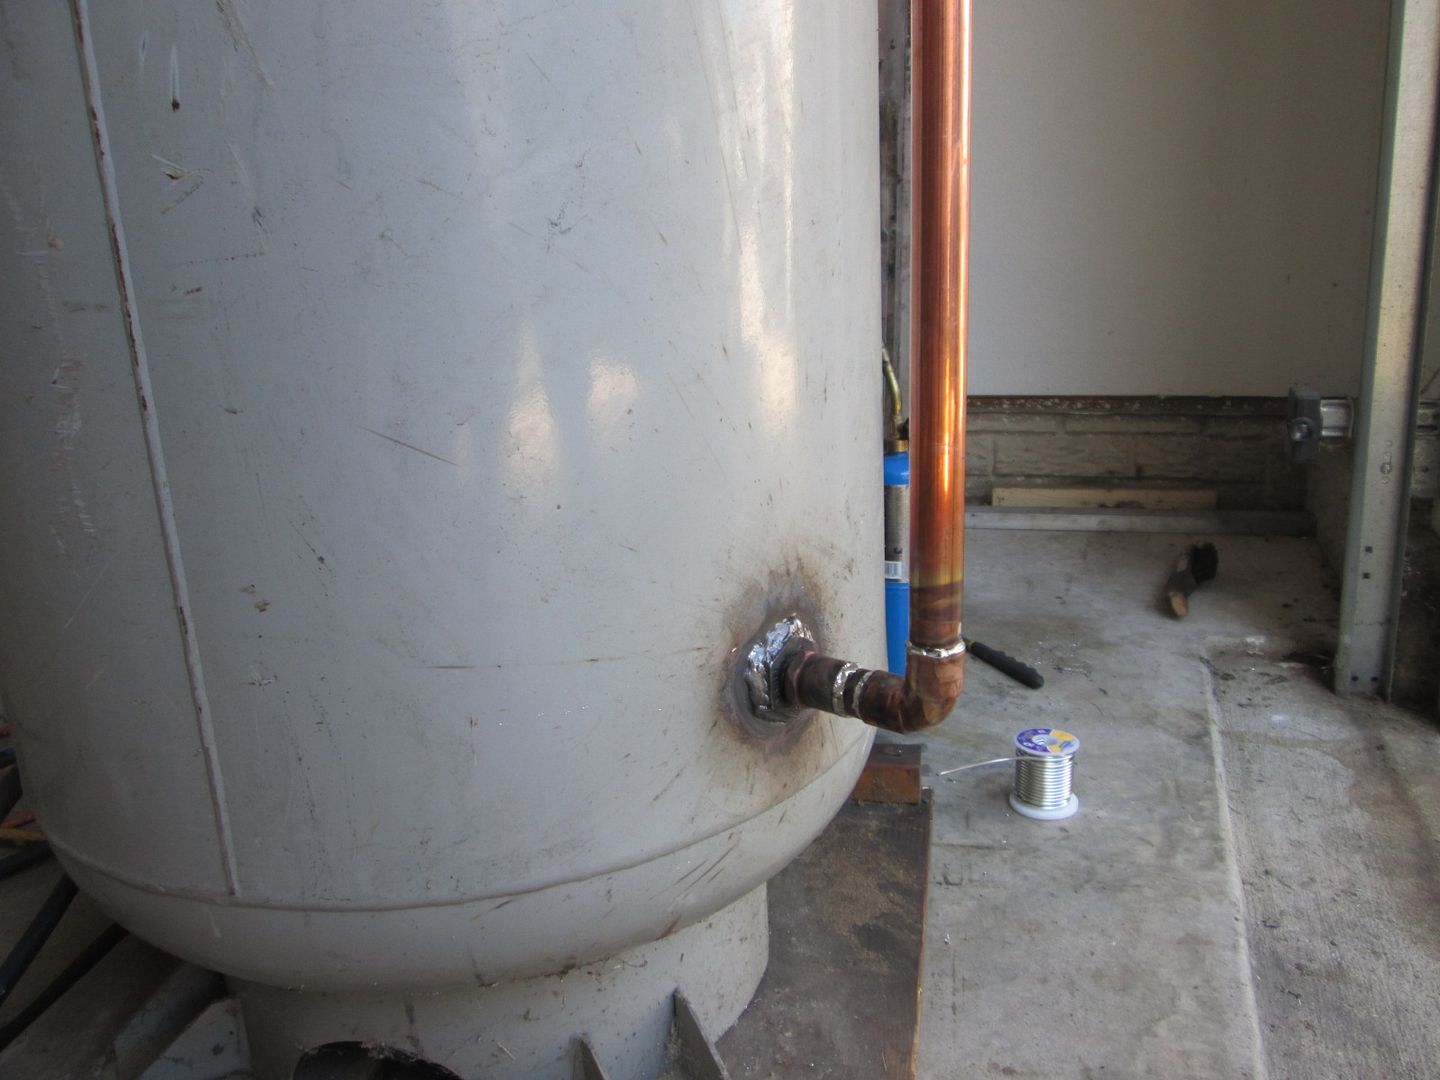
Part 1:
Here you can see a combination of cooper parts as well as steel. The steel sleeve is so I can weld it to the tank. The copper portion is made so that I can unthread it once the steel portion is welded so I can seal the threads. There is a notch on the end that is used to ensure the tube inside is pointed to the side. With this installed, as the compressor runs, the air entering the tank will now cause a slight rotation of the air around the outside of the tank tank to help with moisture condensation. It also creates about 3 feet of vertical separation between the air inlet and outlet. Before they both were at the top of the tank about 9" apart, so hot humid air went into the tank and quickly right back out w/o spending much time flowing around inside the tank.
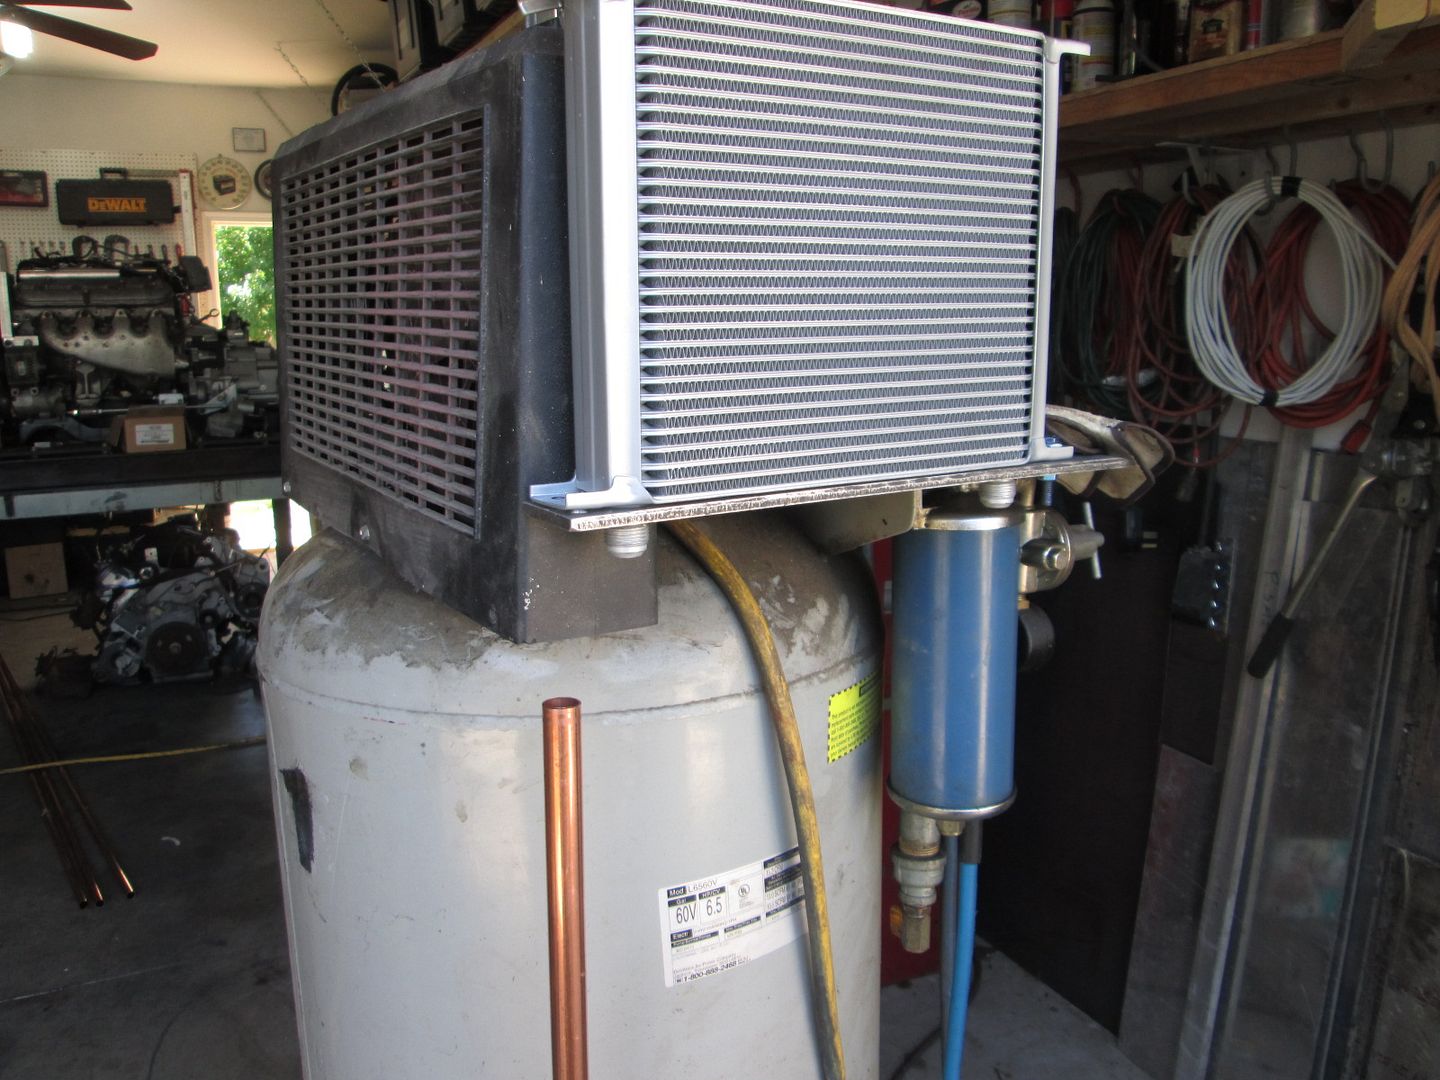
Part 2:
Here is a picture of the heat exchanger (9x10x2) mounted to the side of the compressor. I am still waiting on the -10AN fittings to finish the plumbing between the compressor and the heat exchanger as well as the 9" fan (puller type, so it will pull air off the compressor and through the heat exchange) and the power supply for it.
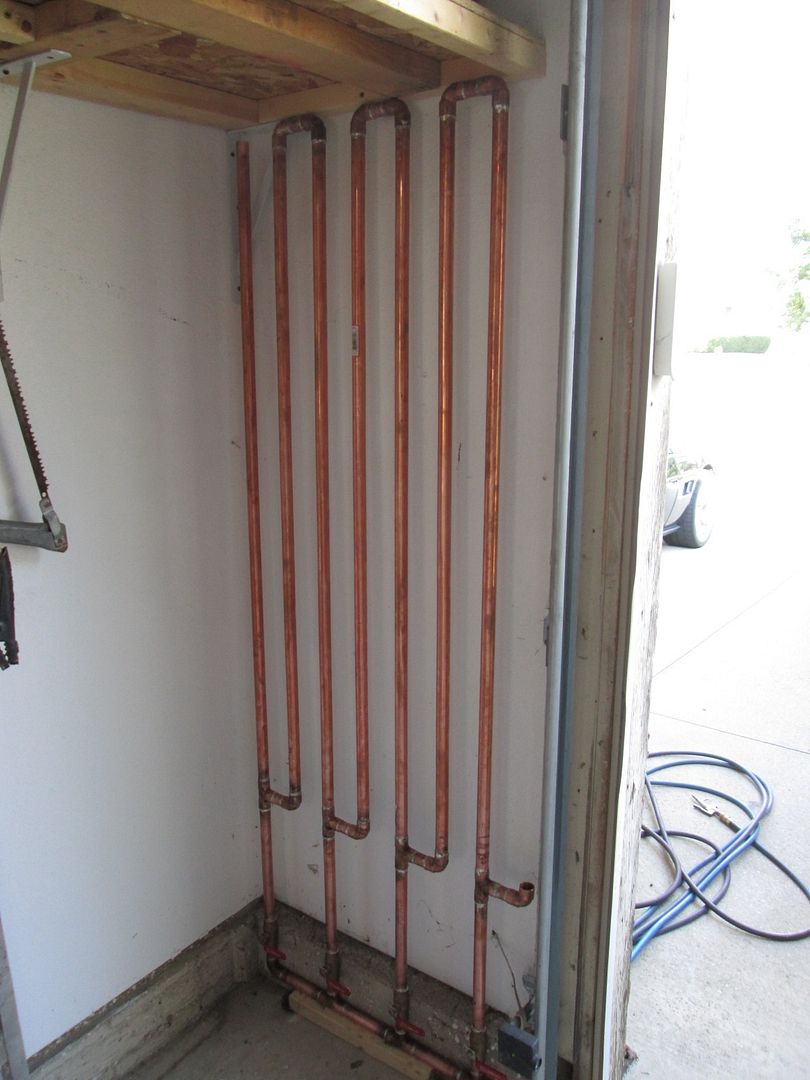
Part 3:
Here is my prison door... The outfeed from the tank will enter the top left corner of this assembly. With all the vertical drops, climbs, and water traps at directional changes, as the air flows through this assembly, it will cool and moisture will condense along the walls of the tube and drain into the traps. There are valves at the bottom of each trap to a common drain channel. I still need to mount it to some 2x4s along the wall, and finish all the connections, but you can get the general idea. All the tubing is 3/4", the main vertical portions are 48", the spacer sections between all the elbows and "T" fittings are 2 1/2" and the water traps tubes are 11 3/4". Overall height is about 67 1/2" tall and about 25" wide.
|
|
|
|
davylong86
|
JUL 17, 11:56 AM
|
|
|
Very nice work. You have one heck of a shop going there.
|
|
|
|
G-Man
|
JUL 17, 11:24 PM
|
|
Guru,
Where/what did you source the heat exchanger from? Many are using automotive condensors with good results so it will be interesting to see how much of a temp drop you get with it.
I don't paint but I lost my last compressor to moisture in the tank so I'm taking some extra precautions with the new one.
Thanks,
Gary
|
|
|
|
KissMySSFiero
|
JUL 18, 05:04 PM
|
|
|
|
|
wgpierce
|
JUL 18, 08:17 PM
|
|
| quote | Originally posted by fieroguru:
I really wanted a fan override switch that was about 10 to 25% smaller than this one, but couldn't find one I liked.
|
|
Have you looked at these sort of switches? Not sure how it compares in size:
https://www.oznium.com/waterproof-led-switch
|
|
|
|
fieroguru
|
JUL 18, 08:27 PM
|
|
| quote | Originally posted by davylong86:
Very nice work. You have one heck of a shop going there. |
|
Thanks! It continues to be a work in progress.
| quote | Originally posted by G-Man:
Guru,
Where/what did you source the heat exchanger from? Many are using automotive condensors with good results so it will be interesting to see how much of a temp drop you get with it.
I don't paint but I lost my last compressor to moisture in the tank so I'm taking some extra precautions with the new one.
Thanks,
Gary |
|
eBay: http://www.ebay.com/itm/30-...AOSwFdtXzoxl&vxp=mtr
This compressor was my first expensive tool post college, it is around 19 years old. I hope to get a few more years out of it!
|
|
|
|
fieroguru
|
JUL 18, 08:41 PM
|
|
| quote | Originally posted by wgpierce:
Have you looked at these sort of switches? Not sure how it compares in size:
|
|
| quote | Originally posted by KissMySSFiero:
Check out bocatech switches. It's the latest in marine applications.
Is your override switch running through a relay?
|
|
Thanks for the suggestions but I was looking for a more period correct type of switch. Those push button ones are a little to fancy for my basic interior setup.
The switch grounds the ECM fan output to the stock Fiero fan relay.
|
|
|
|
KissMySSFiero
|
JUL 18, 09:47 PM
|
|
| quote | Originally posted by fieroguru:
Thanks for the suggestions but I was looking for a more period correct type of switch. Those push button ones are a little to fancy for my basic interior setup.
The switch grounds the ECM fan output to the stock Fiero fan relay. |
|
maybe you can adapt a fog light switch or another GM on/off switch from an 80's or 90's era vehicle. You may get lucky enough to find something that fits the stock deck release or rear defrost opening. Obviously, It won't be labeled. If that matters.
You could also use the stock overhead light console. There's space to mount a 3rd switch in the middle. You could use an extra light switch from the console, but in the middle where the performance sound slider would be. Unless you have a perf. sound slider. But you could use the switch anywhere in the car and it would fit the era. I think the early cars had a 3rd switch in the middle from the factory. ------------------
SSFiero@Aol.com
|
|
|
|
KissMySSFiero
|
JUL 18, 09:52 PM
|
|
|
|


