
 
     |
| LS4 / F40 swap - fieroguru (Page 12/216) |

|
dobey
|
FEB 23, 06:09 PM
|
|
| quote | Originally posted by fieroguru:
The button heads showed up today, so the madness began:
A couple of my bags were mis-labeled and were 3/8" not M10, so I need to order them again. I still need to replace all the bolts in the valley cover, front timing cover, and all the ones holding the sensors in place... yes it is a sickness.
March 23rd - 31st Sara and the girls will be out of town, so I am targeting that week to paint all the parts for this swap... Then the button heads will really stand out!
|
|
You care enough to change the ones that aren't visible too? I think that is a bit much with the button heads. 
What all are you painting on the engine? And what colors?[This message has been edited by dobey (edited 02-23-2011).]
|
|
|
|
fieroguru
|
FEB 23, 06:55 PM
|
|
| quote | Originally posted by dobey:
You care enough to change the ones that aren't visible too? I think that is a bit much with the button heads.
What all are you painting on the engine? And what colors?
|
|
Guilty as charged!
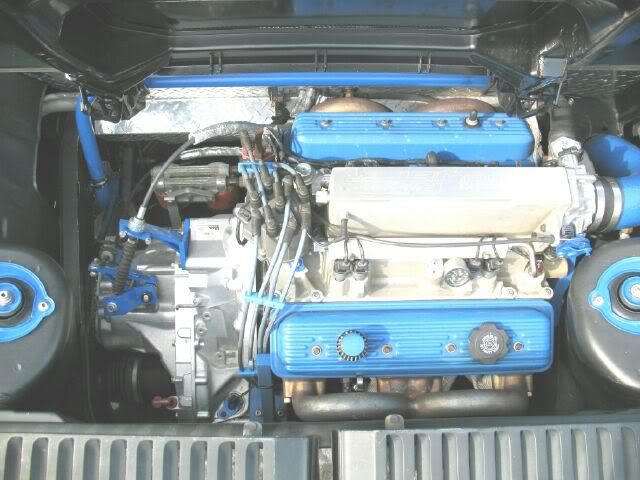
I am thinking the block, heads, valley cover, and transmission will be a silver/alumunum color (to keep oxidation down). The Intake, valve covers, timing cover, coil brackets, engine/transmission mounts and transmission shifter bracketts will all be my signature blue. The fuel rail will either be left stock or painted satin black (to help hide the injector harness).
The water pump might end up being satin black so it, the accessory belt and everything on the passenger side of the engine will blend with the engine compartment and keep the intake/valve covers the focal point. Or it will be silver/aluminum... still haven't decided yet.
Some what similar to my old setup, but with a colored intake manifold:
 [This message has been edited by fieroguru (edited 02-23-2011).]
|
|

|
Raydar
|
FEB 23, 07:59 PM
|
|
| quote | Originally posted by KissMySSFiero:
...
The more I read about LS motors, the more Impressed I am. I want to get an S10 to do a 5.3/T56 swap.
|
|
I almost did a 5.3 into my S10, before I sold it.
I have an LM7 (5.3) in a Silverado. It's head and shoulders above the "old" SBC, IMHO.
Back to the topic at hand. Certainly don't want to hijack.
Button heads? I love it! That's going to be a work of art, Paul. Not unlike all of your other installs.[This message has been edited by Raydar (edited 02-23-2011).]
|
|
|
|
Isolde
|
FEB 23, 10:01 PM
|
|
I test-fitted my LM7 into my S-10, then yanked it for the 350. The 350 fits better, will blaze the tires to illegal speeds, and costs less than a new H3A oilpan to get the LM7 into the S-10.
Now back to our regularly scheduled thread.
|
|
|
|
fieroguru
|
FEB 24, 06:43 PM
|
|
Remember this part:
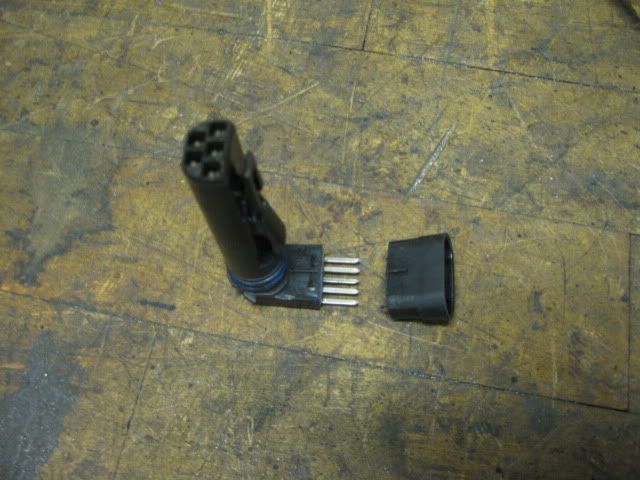
The other half came in today from a guy on LS1 tech. Free since it was broken and I walked the guy through how to remove it. I asked him how much he wanted for the broken one and he just mailed it to me! Pays to be helpful!
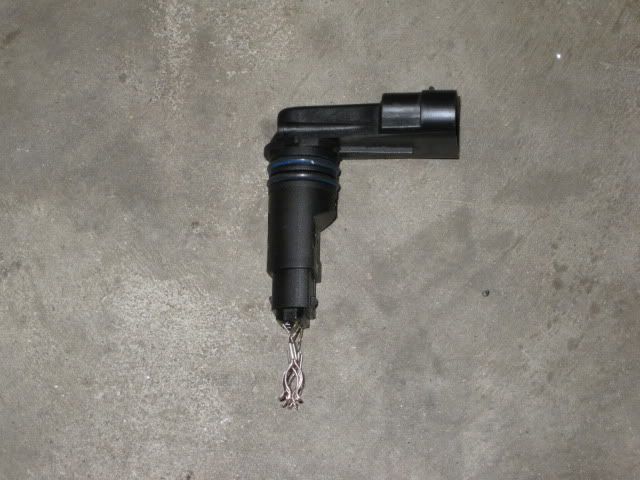
So I just had to cut it up to get down to what I need it for.
This end will be attached to the wires from the other half under the intake. This will allow use of the factory connector to this sensor.
My stainless steel button heads for the valve covers had been MIA for a couple of weeks, but I found them today (in my LS4 parts box of all places). The factory spacer/seal sleeve needed to be retained, so I cut the head off the old valve cover bolt.
When I first checked in these bolts, I noticed the washer wasn't large enough and the center hole had too much slop. After the test fit, the washer needs to be replaced (and I already have other ones on their way). The new ones (still stainless) have the same OD as the stock bolts and are tighter on the ID.

Last thing for tonight was to drill the new pressure plate pattern. My clutch/pressure plate setup is a raised flange style, so I have an OEM flywheel on its way so I can confirm the proper elevation for the standoffs I need. Once I have that height and choose a diameter for them, the bolt holes will be counter bored to place the standoffs on the aluminum sureface below the steel friction surface. Plus I will look at possibilities to make them shorter to further increase the clamp load, but need to make sure the release fingers will not come in contact with the clutch disk. It will probably be a week before all my parts show up to continue on the flywheel...

|
|
|
|
fieroguru
|
FEB 27, 02:18 PM
|
|
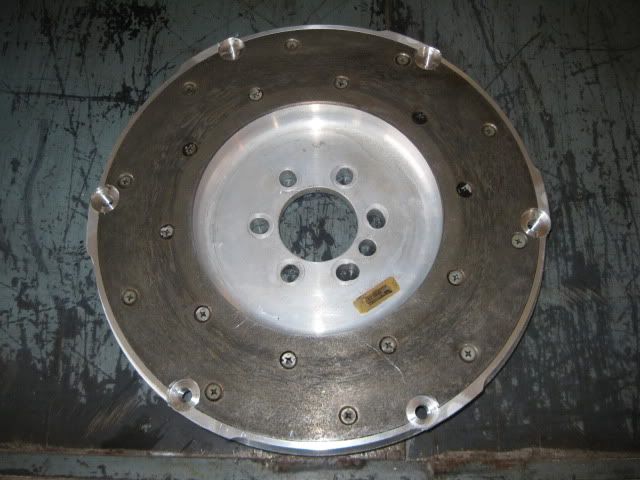
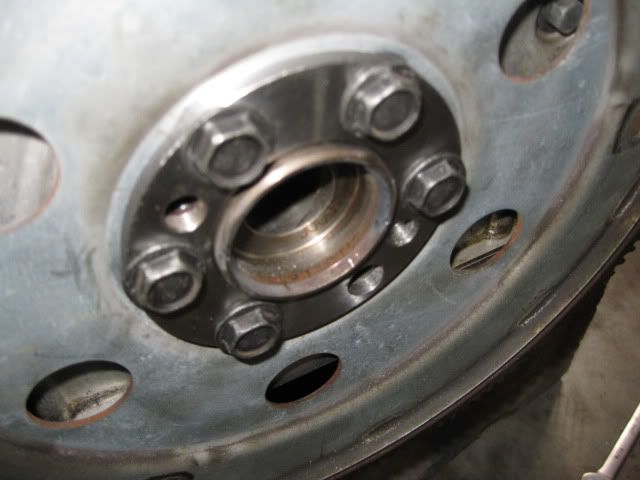
I purchased a used OEM flywheel for my specific clutch so I could confirm the lenth of the spacers needs for my flywheel setup. To place everything like it was in its original application, the spacers need to be .820" above the clutch face of the flywheel.
The flywheel was tapped for 3/8-24 bolts and then a 3/4" counter bore was done for all the holes.
This will allow the spacers to sit on the aluminum flywheel, not the friction material. McMaster sells 3/4" diameter x 1" long aluminum spacers for 3/8" bolts, so I have those on the way. I am planning to mill them down to have a .750" installed height of the pressure plate. This will increase the pressure plate clamp load slightly and make the overall flywheel/clutch/pressure plate package shorter.
Here is the flywheel with the pressure plate installed at the .820" height:

My particular clutch disk is setup very similar to the G6 with the entire hub offset to the transmission side of the clutch disk. This helps ensure proper spline engagement to the clutch disk.
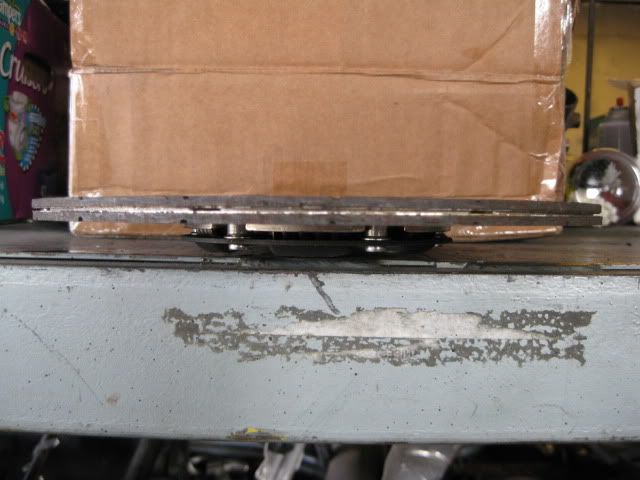
This pressure plate is thicker than a stock fiero pressure plate, so with the .400" crank spacer the total stack height of the flex plate, .400 spacer, flywheel, clutch, and pressure plate was about .100 too tall to fit inside the transmission. So the .400 crank spacer became a .200" crank spacer:
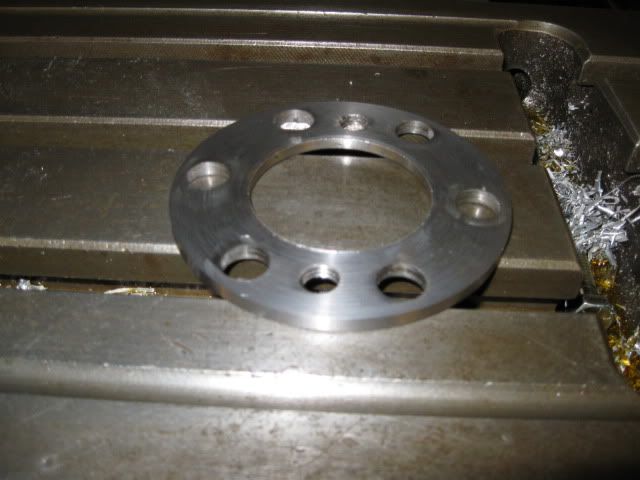
The .400" crank spacer had a boss to support/center the flywheel, but when I made it thinner, the boss went away.
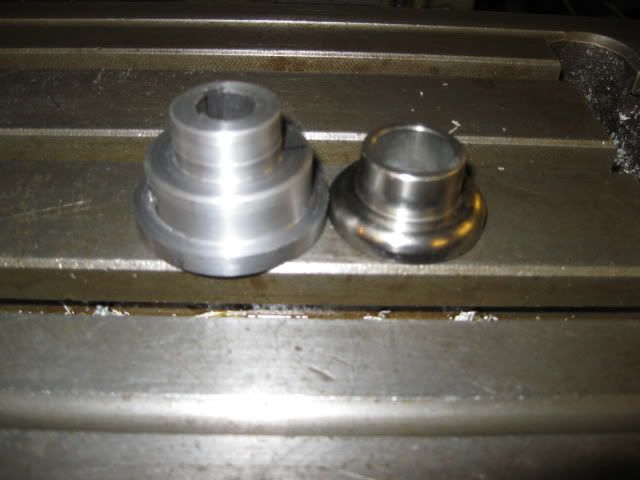
The end of the crankshaft is stepped down as well as the back side of the flywheel, so they no longer had a snug fit to properly center the flywheel, so the cranks flange needed to be extended. The LS4 came with a pilot bushing to support the torque converter, so I removed it and use it to make a new larger pilot bushing to extend the crankshaft flange. The LS4 one is on the right, the one I made on the left:
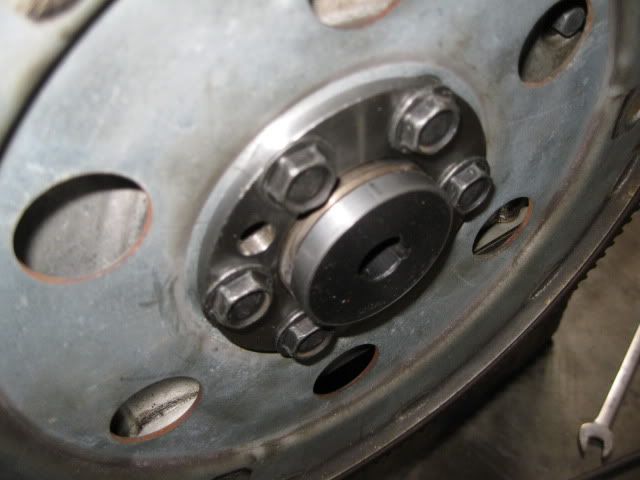
Then it was pressed into the end of the crankshaft:
The pressure plate spacers and the longer crank bolts should be in sometime this week. Once they are here, I can test fit the assembly and make sure it fits w/o any clearance issues and double check the overall depth of everthing with the range of motion of the HTOB.
|
|
|
|
Isolde
|
FEB 27, 06:21 PM
|
|
"The .400" crank spacer had a boss to support/center the flywheel, but when I made it thinner, the boss went away."
I can't believe YOU F'd up so badly. Sooner or later, you WILL be doing it again, and you WILL be milling the OTHER side next time.
|
|
|
|
Jefrysuko
|
FEB 27, 06:52 PM
|
|
| quote | Originally posted by Isolde:
I can't believe YOU F'd up so badly. Sooner or later, you WILL be doing it again, and you WILL be milling the OTHER side next time |
|
Look closer at the pictures. I think the guru is one step ahead of you yet again.
|
|
|
|
fieroguru
|
FEB 27, 07:21 PM
|
|
| quote | Originally posted by Isolde:
I can't believe YOU F'd up so badly. Sooner or later, you WILL be doing it again, and you WILL be milling the OTHER side next time. |
|
You can't mill the crank side. The original spacer has a recessed pocket for the crank flange to slide into, then it steps down to allow for the crankshaft flange extension on the other side. The crank flange is somewhere around .380" deep and the spacer was .417 thick (not counting the flange extension). If you take material off the back side, the crank flange will bottom out before the spacer is seated. Take it off the front side and there will only be a couple of thousandth's of material left...
The use of the pilot bearing based flywheel flange isn't anything new, GM has used them before.
|
|
|
|
fieroguru
|
MAR 02, 06:14 PM
|
|
| quote | Originally posted by fieroguru:
Been tracking down and purchasing some needed odds and ends...
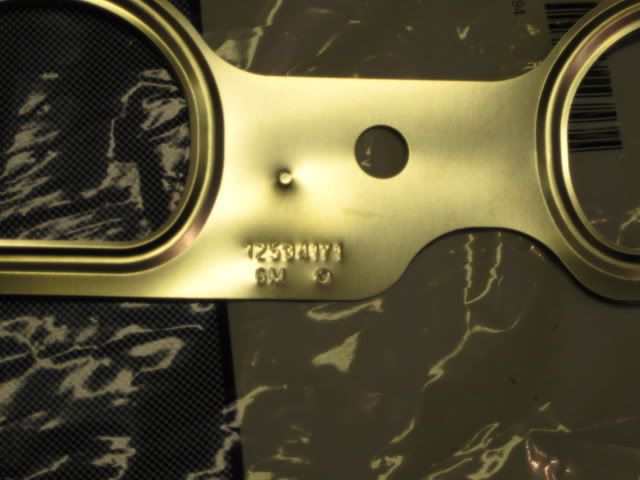
LS7 MLS exhaust gaskets (manifold to head) - 2 required: GM# 12594171
Longer crankshaft/flywheel bolts M11 x 1.50 - 6 required: GM# 12563533
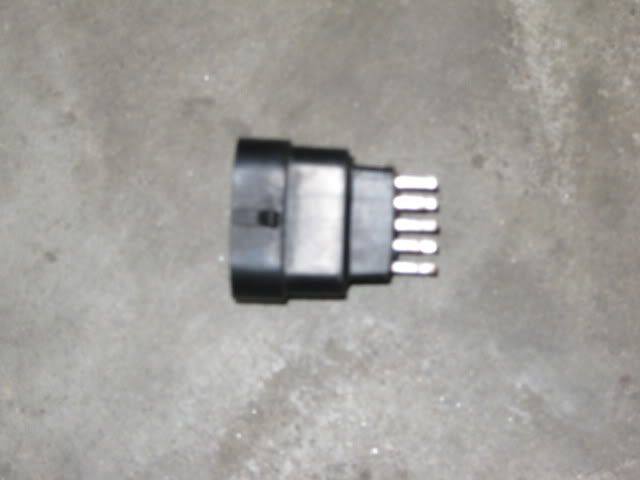
LS2 Throttle body 6 pin connector: GM# 13504128
2002 Z06 MAF 5 pin connector: GM# 12167121
DBW accelerator pedal 6-pin connector: GM# 88988944
|
|
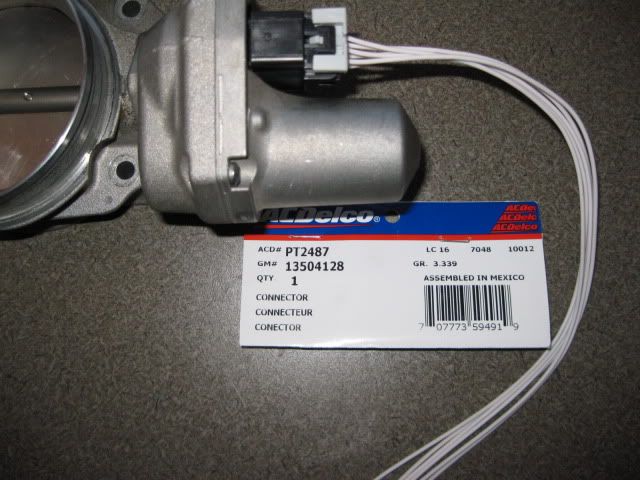
Everything from the above list is now here, Except the crank bolts.
LS7 MLS exhaust gaskets (manifold to head) - 2 required: GM# 12594171

LS2 Throttle body 6 pin connector: GM# 13504128 - Correct!
2002 Z06 MAF 5 pin connector: GM# 12167121 - WRONG... I screwed this up when researching it and found the 6 pin connector. I am pretty sure the right # is 15305932, but I need to order it to confirm.
DBW accelerator pedal 6-pin connector: GM# 88988944 - Correct!

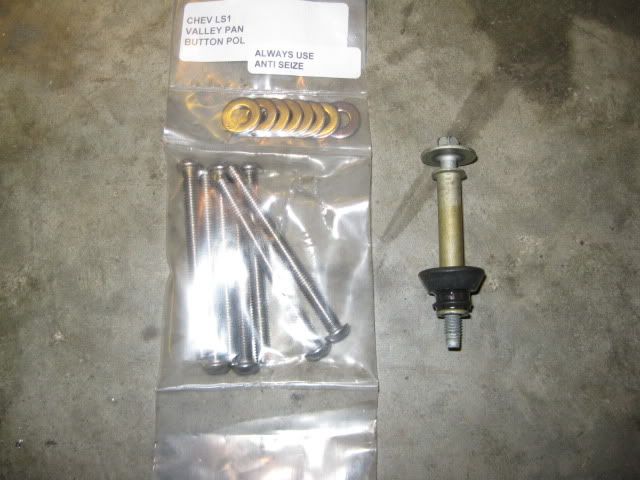
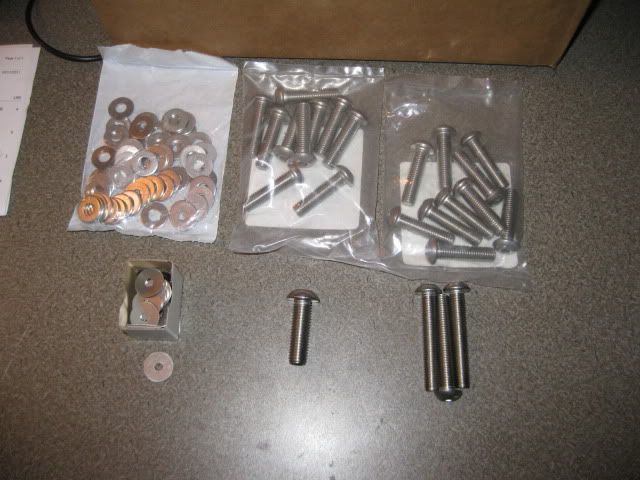
Also had a collection of stainless steel button heads and washers show up:
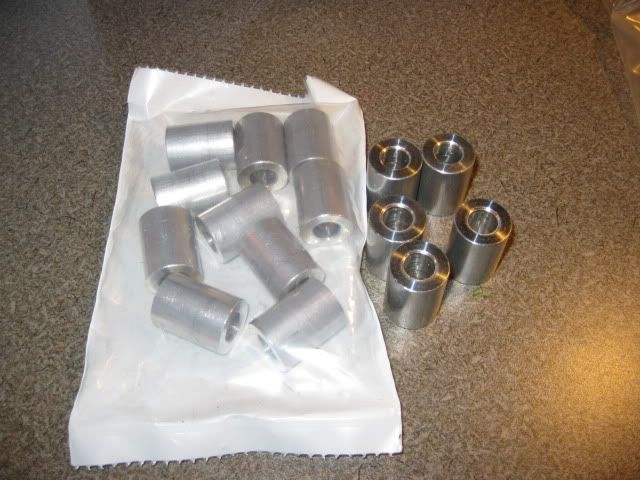
And the aluminum spacers for the pressure plate and remote coil brackets:
Maybe on Thursday I will get home from work in time to play around with these parts before the girls go to bed!
|
|
|
|