
 
     |
| Another Katatak Fiero Adventure! (Page 11/72) |

|
katatak
|
NOV 20, 08:02 PM
|
|
One other thing I did today was to trim up the glass work I did the other day on the back console. I sanded is with 50 grit and my mouse sander. I have a lot of low spots and some areas to fill but i am happy with it so far. I used the left over resin I had mixed for the AC suround so I sued it to "fill" in some low spots. Still a long way to go.
Trimmed the edges:

Lots O Sanding:

Fillin in the low's:

It got dark so I had to quit. More tomorrow after I clean out my work shop so I can move the operation indoors - it will give me more time to work on the parts plus my shop is a huge mess and needs cleaned up. Lots of Fiero parts to go through. Maybe I'll find some treasures I forgot I had........
Pat
|
|
|
|
Frizlefrak
|
NOV 20, 09:28 PM
|
|
Pat....your skills never cease to amaze me.
You up for lunch tomorrow (Saturday)? Jeff and Jan are wanting to get together. I'll call you in the AM.
|
|
|
|
katatak
|
NOV 20, 09:34 PM
|
|
| quote | Originally posted by Frizlefrak:
Pat....your skills never cease to amaze me.
You up for lunch tomorrow (Saturday)? Jeff and Jan are wanting to get together. I'll call you in the AM. |
|
I'm ready to go when you guys are!
|
|
|
|
Sofa King
|
NOV 21, 07:06 PM
|
|
Pat,
Fantastic work. Now I understand what you meant about the lip. The dowls were a perfect solution. Keep up the great work! And if I haven't mentioned, wear a mask! Having fiberglass dust on your skin is one thing, but breathing this stuff in? oh man! I'm really looking forward to seeing this build. Keep up the great work! Now get back to work!
|
|
|
|
katatak
|
NOV 21, 09:50 PM
|
|
Big plans today....But went in a different direction. Some may know but I am also rebuilding a 70 Chevy Monte Carlo. I am in the process of putting the front end back together - have the whole front clip off and the motor out. Anyway, I was just going to reseal the motor and stuff it back in but I decided to rebuild it. In the mean time, I have a freshly rebuilt 383 Stroker Motor that I was going to put in another one of my projects - my 47 Chevy Rat Truck. Well my local Fiero buddies have talked me into putting the 383 in the Monte. So this morning after I finished work, I went to the storage garage to get the motor. After 2 hours of digging, I was still 10 feet away from the motor. I got more junk than any 5 men should be allowed to have. So I loaded a bunch of Fiero parts in the truck and decided to call it a day at the storage garage. About that time, The Far West Texas Fiero guys called to invite me on a field trip and lunch.
We go to lunch then head over to a shop where one of the guys has a Vette in the middle of a rebuild (thats' a whole nother story). Anyway, this shop happens to be "Don Davis'" shop. If you know anything about NHRA Pro Gas drag racing, you have most likely heard the name. He builds high end custom chassis for the Pro Drag Race community. They have also branched out into custom street rods and altering street rods and drag cars. They also build complete fiberglass bodies for race cars and street rods. Mostly Corvette bodies but I believe thay will do anything for a price. Needless to say, if you are a hot rodder, drag racer or a car fanatic, this place was like a candy store. Carbon fiber parts laying around, custom brakets, body parts, ect. etc. We spent a couple hours there drooling and wandering around in a car induced coma. It was great. I had vision of stretched tube chassis Fiero Super Cars, custom fiberglass body panels and carbon fiber interior pieces. It was the biggest project booster I could ask for. Thanks to Jeff, Jan, Dan and Reggie for dragging me along.
When I got home, it was time to get busy and clean up the shop so I could really get busy on the interior project. So here's what I did this afternoon until I ran out of gas about a half hour ago.
The Mess: Barely enogh room to walk in the door.

I took everything out and then started organizing:


After digging through all the boxes of Fiero parts, I ran across this top secret Fiero Tunnel Ram Proto Type:

Getting cleaner:


My shop blew up:


V8 Coupe with some of it's new interior pieces:


And this where I left it for the night:

More later
Pat
|
|
|
|
katatak
|
NOV 22, 01:05 PM
|
|
Well I was up till 5 am watching the Tyler build. Completely overwhelmed by that. I was glad I got to be a part of it. Anyway, No sleep so when the sun came up, I went out to finsh the shop clean up. Man I got a lot of junk. I can't bring myself to toss it though. So I had to "stack" it. I got all the Fiero stuff out of storage snd into the shop - at least now I know what I have - kinda! Onto the Interior Work.
The stack begins:


Fiero parts everywhere

Running out of room

And my new work area for the console project:

Pat
|
|
|
|
katatak
|
NOV 22, 10:43 PM
|
|
Lots of progess today. First off, I needed to make another "parts" panel. The first one I made, I used masking tape on the glass and the resin soaked through the tape and made a mess. This time I used packing tape and then put a coat of wax on the tape and glass. It worked out pretty good this time.
Glass is prepped and ready for glass:

First mat layer:

Fun with resin:

Second mat layer:

Third mat layer:

Lay on some wax paper and roll away the air bubbles:

Roll, roll, roll your resin.......

A couple hours later and presto:

Smooth as "Glass":

Now if you noticed that each layer I layed was a little smaller than the previous one, there is a reason. I need a strip of glass that is tapered so each layer of mat is a few inch's shorter than the last. When cut to size, the part will be "wedge" shaped. I love this stuff!
More to come!
Pat
|
|
|
|
katatak
|
NOV 22, 10:56 PM
|
|
|
|
|
katatak
|
NOV 22, 11:23 PM
|
|
Alright....Last installment of the day. The other day, I started the lip on the AC surround. I made a "parts" panel and cut it up to make parts for the lip. Once that was done, I had a problem. The side of the AC surround was not flat. I had to build up the rest of the side area. If I had a little "vision", I would have made these parts the same shape as the side of the AC surround. Then I would not have had this "step". After sitting and looking at it for a long time, the idea of the "tapered" part came to me. If I had made these parts for the AC surround in a wedge shape like I did with the panel today, I would not have this problem either.
I still had this step problem. I could tear it apart and start over or I could "fix" what I had. Here's what I did. Now again, before you start telling me what a goof I am, remember that I do not know what I am doing here. The only reason why I am even attempting this is due to some "inspiration" I got from "Sofa King". I started reading his interior thread and was pretty impressed with what his vision was and how he was getting it done. While reading his thread, I gained more inspiration from "Revin" and "Archie's" Miura build. There is truly some incredible glass work going into that build.
So anyway, to fix my problem was simple - just build up the low area and blend it all together. I cut 2 pieces of cloth and 1 piece of mat for each side in the same shape as the low area on each side.

I prepped the plastic and glass with some 50 grit.

I layed a layer of cloth, a layer of mat and then a layer of cloth. Then I layed a sheet of wax paper on top and rolled out the air bubbles.

After it setup but was still a little soft, I pulled off the wax paper and with a razor knife, trimmed the edges. No dust this way!


And the other side.


There are a few "low" spots still but nothing I can't fill with some more resin and glass. Once the sides are leveled and smoothed out, I will put 2 more layers of cloth over the entire surround and build up the lip some more. Then smooth it out, fill the little holes and ?????
So far so good. More to come.
Pat
|
|
|
|
Sofa King
|
NOV 23, 08:34 AM
|
|
| quote | | Keep in mind that I have absoluely no clue of what I am doing. |
|
P,
LMAO! I want to thank you for making me spit my drink all over the monitor and keyboard. That was too funny. As we work our projects at the same time, most of what you're posting, the trials and tribulations, are mirroring my own efforts. I too have no idea what I'm doing and just praying to god everything works out.
On a different note, I found a huge piece of glass in the attic over the weekend and I'll be using it to create panels - similar to what you're doing. In the past I've been putting waxpaper on the smooth garage floor but the glass makes so much more sense.
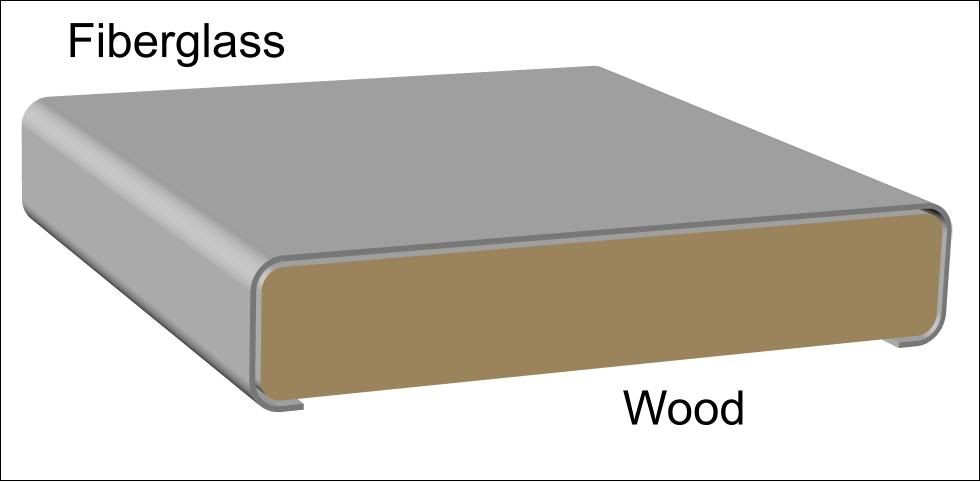
I'm still tossing ideas around for the glove box. My idea for the armrest still remains the same. I think I'm going to create the armrest from wood first. I'm going to get a 2" x 8" and maybe a 1" or 1/2" panel and glue them together (the height will depend on the cup holder). I'll then cut the basic shape of the armrest to match the console and then route the edges with a roundover bit . I'll sand down smooth, cover with waxpaper and then take a mold of the armrest.
If I plan this right... I can wrap the piece of wood all the way around creating a "sleeve" where, once the glass dried, I should be able to slide the fiberglass piece off because the shape of the console tapers at one end. This shape then will give me the edges I want and have the edges curl under the armrest where I can then attach the armrest through the top of the console.
Your console is looking great! Nice smooth edges and fantastic work. Keep going. Did you think anymore about those grab handles?[This message has been edited by Sofa King (edited 11-24-2009).]
|
|
|
|


