|
| '88 Fiero Build "War Hammer" (Page 10/24) |

|
War Hammer
|
APR 08, 08:46 AM
|
|
|
|
|
War Hammer
|
APR 09, 07:17 AM
|
|
|
|
|
whadeduck
|
APR 09, 09:57 AM
|
|
Really looking kewl.  ------------------
Whade' "The Duck Formerly Known As Wade" Duck
'87 GT Auto
'88 Ferrario
'84 Indy
|
|
|
|
doctorclu
|
APR 09, 02:23 PM
|
|
|
Looking interesting so far.
|
|
|
|
sjmaye
|
APR 10, 04:39 AM
|
|
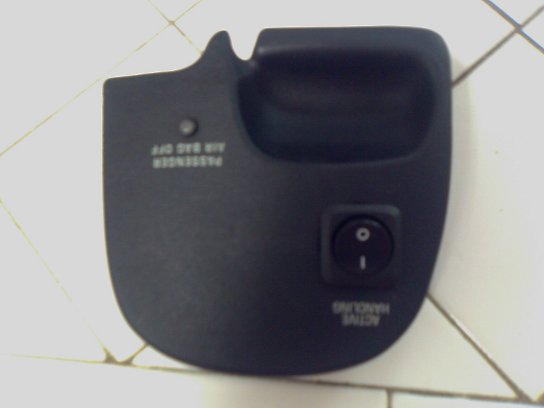
| quote | Originally posted by War Hammer:
Does anyone know of a way to remove the lettering on the Corvette switches and dash without hurting the plastic.
|
|
You may want to try "Purple Power". I was cleaning my door lock/unlock buttons on the Fiero and it stripped them clean. Did not harm the plastic.
|
|
|
|
War Hammer
|
APR 10, 08:42 AM
|
|
Thanks I will.
Paul
| quote | Originally posted by sjmaye:
You may want to try "Purple Power". I was cleaning my door lock/unlock buttons on the Fiero and it stripped them clean. Did not harm the plastic.
|
|
|
|
|
|
War Hammer
|
APR 11, 11:33 PM
|
|
|
|
|
War Hammer
|
APR 12, 03:01 PM
|
|
HAPPY EASTER!!! I am taking the day off in honor of our lord, Jesus Christ. He is risen!!
Paul------------------
1988 Fiero
3800SC Series 1 w/5spd
Lowering Springs
18's w/Pirellis
Corvette Dash Mod
1985 GT
1986 Notchie
1987 Notchie
|
|
|
|
War Hammer
|
APR 15, 01:37 PM
|
|
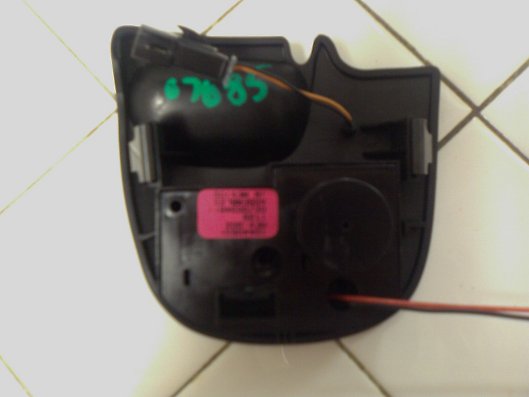
Hello,
The weather here has been bad. I have been limited to working inside the house so far this week.
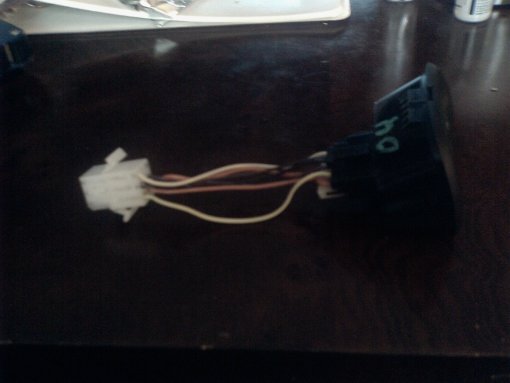
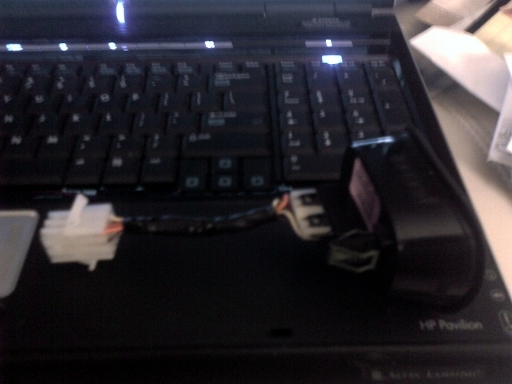
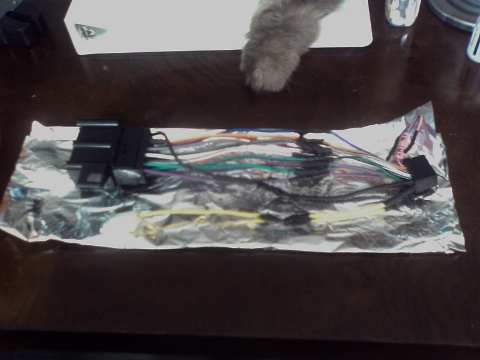
All I have done for the car is wire together a radio harness for Fiero to Alpine CD. I cut the wires to a reasonable length, soldered them, heat shrinked, and now I'm going to wrap the harness with electrical tape. The wiring is very straight forward. The Scosche harness and the Alpine harness are color matched to the GM wiring. Very easy to hook up indeed. I wanted to just repin one of the connectors but the wire on the Alpine side is too fine. I know I could have used bullet connectors and had it done in 15 minutes but I like to know that there is no chance of connector failure. Took me an hour.
This is something anyone can do themselves and save a lot of money. All you will need is a harness adapter (I got mine at Walmart for 7 bucks) for the Fiero, the harness for your radio, a soldering iron or gun (I prefer the gun), some heat shrink tubing, a lighter or heat gun for the heat shrink, zip ties, and electrical tape or wire loom.
Read the radio manual and harness adapter manual and make sure they match.
1. As long as they do, just shorten them to the appropriate length
2. Strip the wires
3. Place the heat shrink tubing over one of the wires and move it as far away as possible from the solder joint (use the heat shrink 1 up from the size of the largest wire - the joint will be
thicker than 1 wire)
4. Lay the wires end to end with an overlap
5. Place the gun tip across both wires
6. Solder the connection
7. Slide the heat shrink over the connection
8. Heat the tubing using a flame or heat gun and the connection is finished.
9. After you complete all the connections either tape it up or zip tie and cover with loom.
More than likely you will have a wire or 2 left over on the radio harness. I had 2 - one for the remote amp turn on and another one. Just tape them up and out of the way.
I will add photos of the completed harness before and after wrapping with tape if you like.
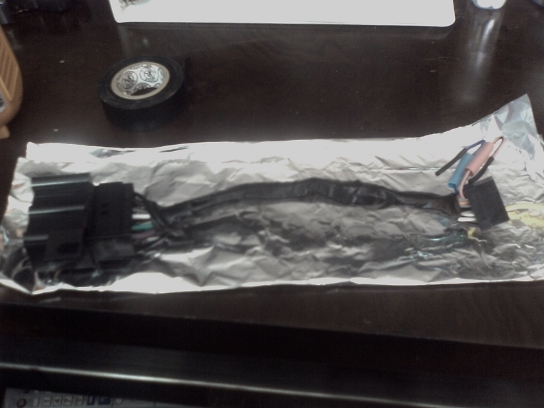
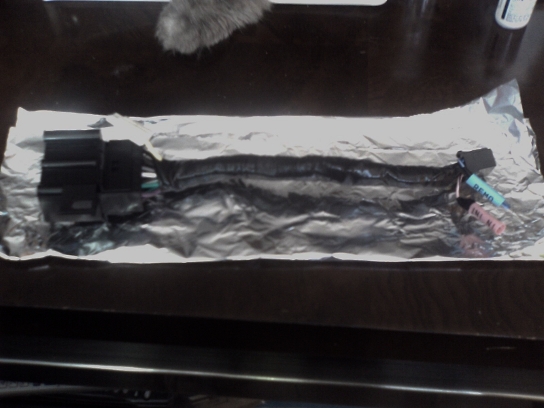
Here are the pics 
The harness after soldering.
The harness after taping up the wires that go to the large Fiero connector.
The harness after wrapping the wire that goes to the small Fiero connector.

The finished harness after taping up the 2 remaining wires.
You can see the hand of my little helper . He is my 14 year old son. (Sherry and I couldn't have children  ) )
If you paid a stereo shop or someone like me it would cost you around $50 labor. Save the $50 and learn something new. If you mess up you can either try again or have a shop do it then. 
Paul
edit for pictures.
------------------
1988 Fiero
3800SC Series 1 w/5spd
Lowering Springs
18's w/Pirellis
Corvette Dash Mod
1985 GT
1986 Notchie
1987 Notchie[This message has been edited by War Hammer (edited 04-15-2009).]
|
|
|
|
War Hammer
|
APR 16, 12:54 AM
|
|
|
|

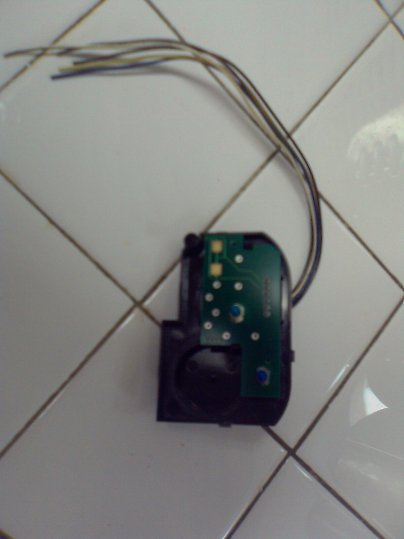
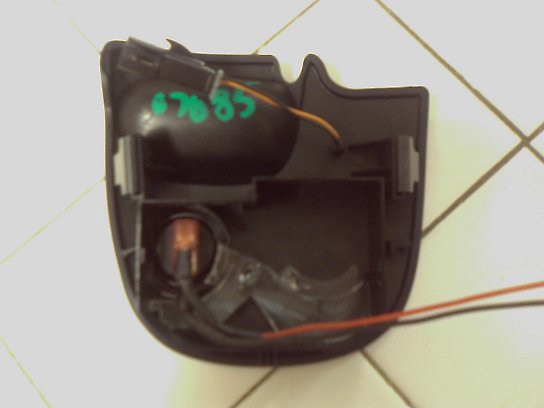
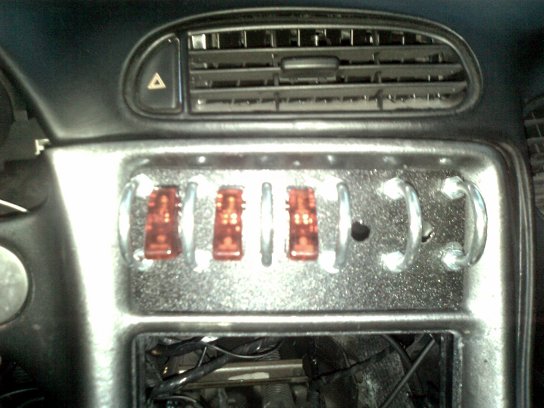
 I also added a led next to the the old dimmer / new push button in the dimmer housing. And lastly I installed some micro momentary switches in the Corvette control center on the right side of the dash.