
 
     |
| 2025 Review: The Fiero Store ABS Headliner {Than Repairing-Recovering the OEM Board} (Page 1/1) |

|
Vintage-Nut
|
OCT 14, 12:34 PM
|
|
This post is an unconventional approach for the few members who might be interested…
Like many things in life, a person has priorities when redoing the headliner:
*Spend time and effort on the factory board or purchase the convenience of a ‘ready to go’ product?
*Does the focal concern centers on finances or quality?
*Can a low-cost DYI project compete with professional merchandise?
*Are any consequences or risk for failure to restart on a second attempt?
*What is the ‘real cost’ of all the expenditures including energy from start to when it is finally ready for installation?
These are a few of the questions an individual really needs to answer honestly before jumping in...
In my circumstances, I wasn’t worried about spending less money; I wanted a first-class headliner with no muss, no fuss and no frustration – period.
If you search, the majority of TFS headliner threads are a decade old and members reported it as positive; I saw only one member who grumbled.
Obviously, not many spent {or will spend} the coin, though I’m a believer now as I got a nearly ‘plug and play’ high-quality headliner from the experts.
TFS gets their ABS headliners from Acme Auto Headlining Company which has been in business since 1948 and specializes in top quality automotive soft trim restoration. Sadly, nowadays their products are manufactured in China which isn’t a surprise.
http://www.acmeautoheadlining.com/
Compare
Of course, the DYI procedure starts with ‘usable’ backing boards which aren’t known for their strength and durability; very often they aren’t in decent shape.
If the decades old factory board is beyond repair or missing; ‘local’ replacements can be difficult to find and shipping a brittle ‘potato chip' afar is a big gamble, especially if it has the sunroof option.
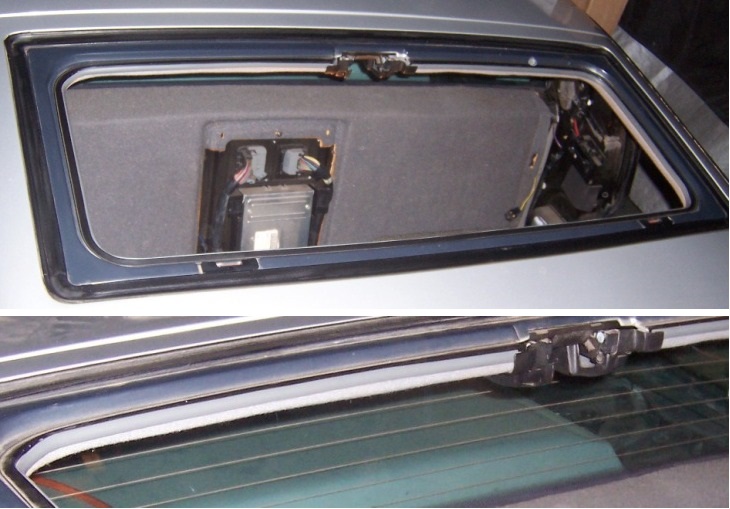
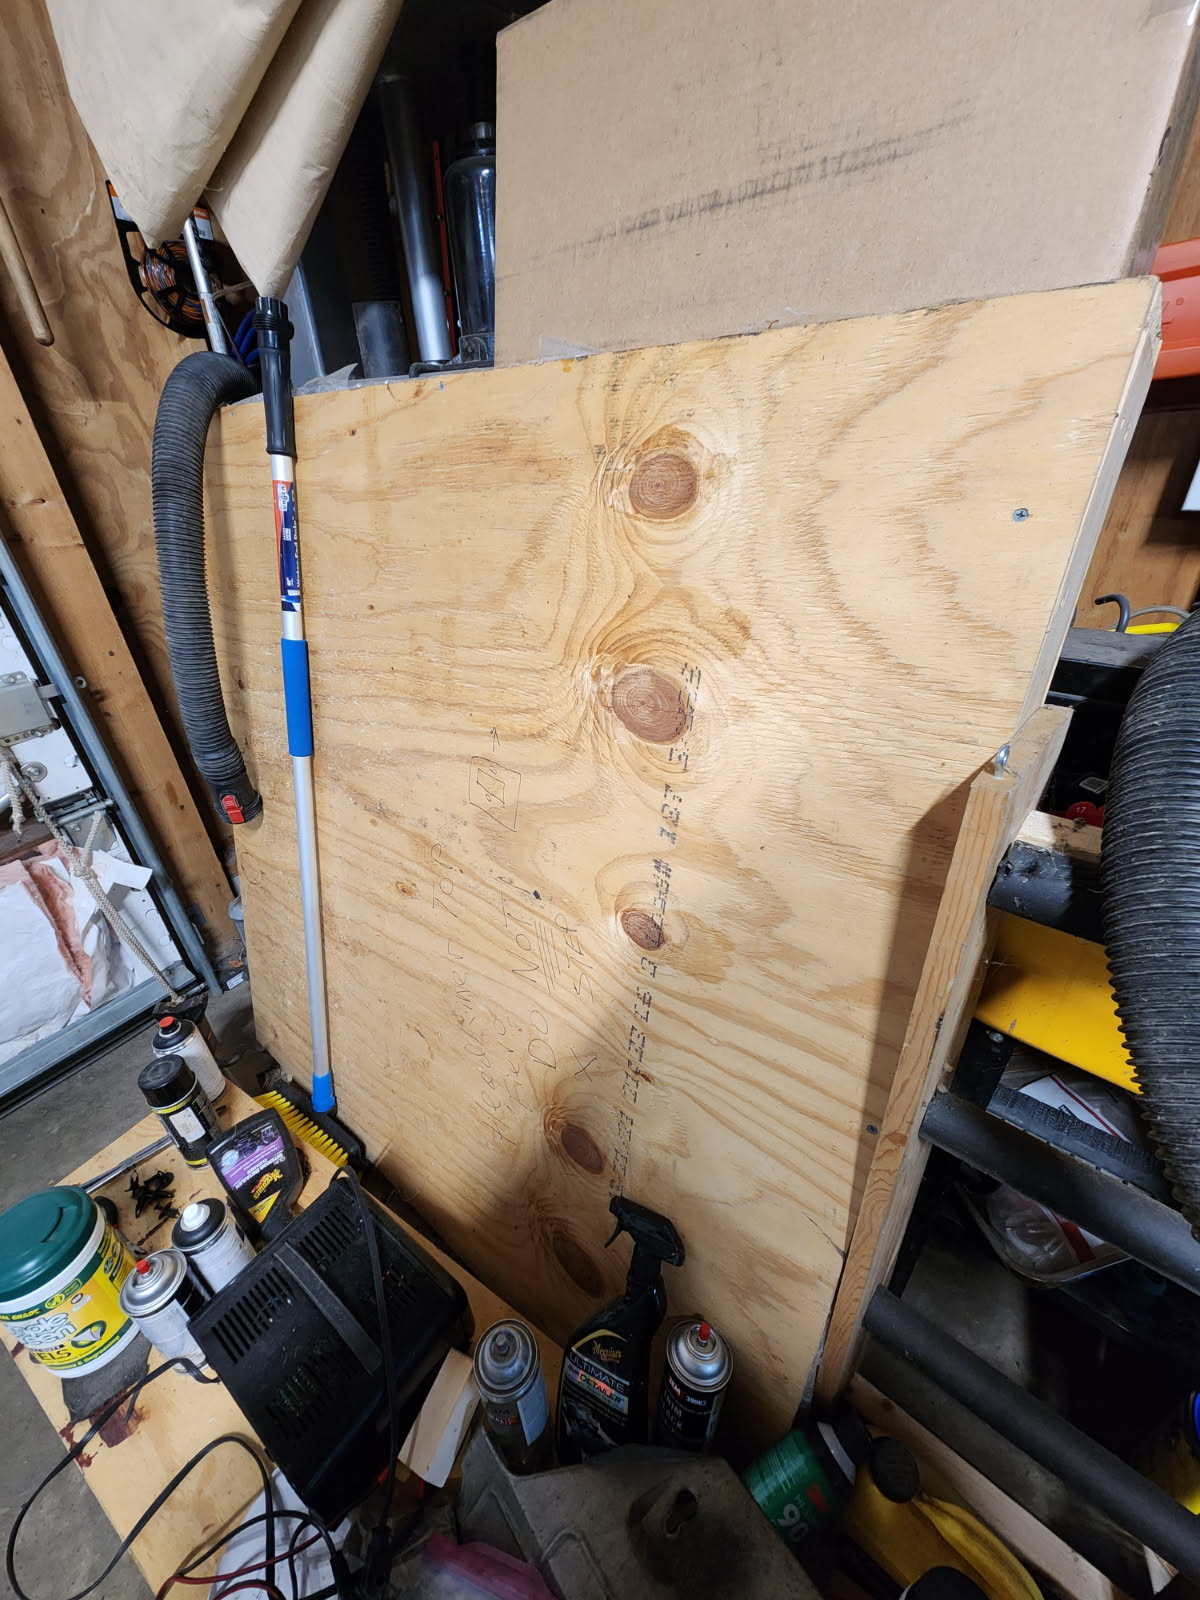
My OEM sunroof backing board was still in one piece with a few fractures, but I got mental pain when thinking about to repair and recover it. Perhaps worse, breaking it when installing it in the car as they’re so stiff and fragile!
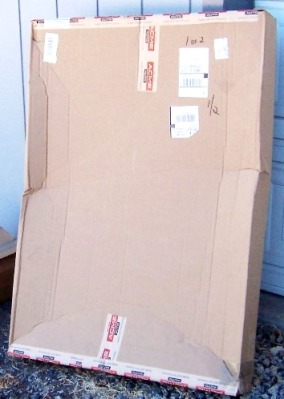
Contrary, these pliable ABS headliners are robust and very forgiving when handling them. The product can be shipped without any worries about getting broken or damaged, which for me had the worth in peace of mind alone.
The DYI procedure also entails acquiring the correct headliner material and the proper adhesive; plus the skills; the space; the energy; and very important, two good hands or perhaps even three…
Sadly, that last requirement was the real showstopper as I have only one functioning hand. I refused to compromise on the quality, and I knew I was better off by purchasing a pre-covered product than attempting it on my own. 
ABS Headliner
TFS offers four versions of the ABS headliners with four colors of fabric or a plain uncovered backing boards for custom DYI projects.
All ABS headliners comes with pre-cut openings in the board for the dome light, sun visor brackets and coat hook hangers; you order by the sunroof and/or 3rd brake light options, otherwise without.
I ordered the sunroof with the 3rd brake light version in ‘dark gray’ early on a Monday. TFS printed the shipping label the same day; UPS picked up the package on Tuesday, and I got it on the next Monday.
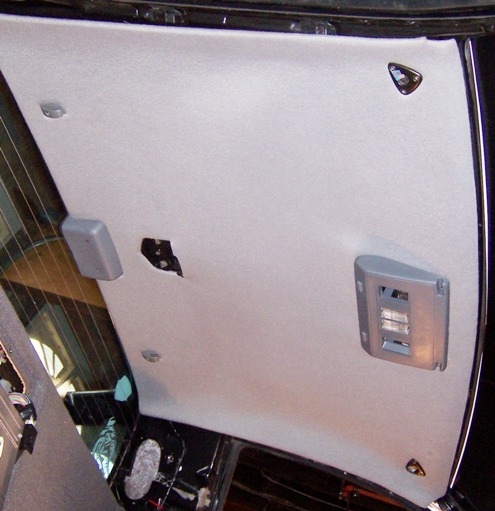
It has the original appearance, and the fabric/padding had been expertly installed covering the entire board with the outer edges folded on the back.
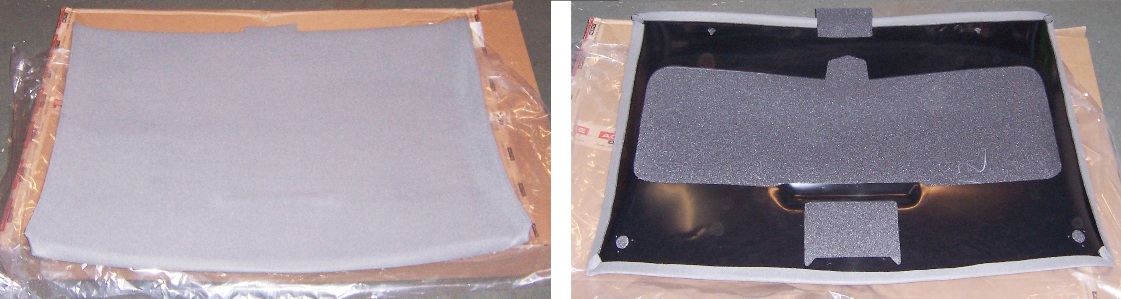
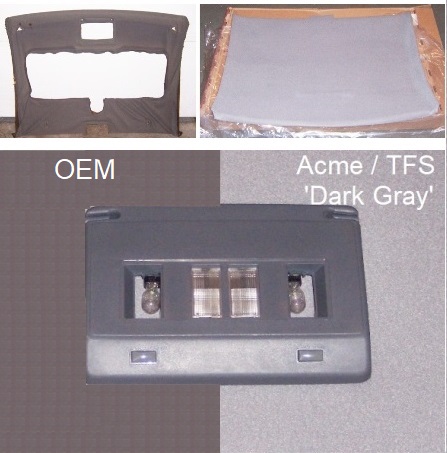
The ‘dark gray’ color is lighter than the OEM fabric, which I like the new look better. 
The factory cloth was darker which 'blended' with the plastic trim, while the newer color has more contrast to the other roof items.
My first check was a visual inspection by placing my factory headliner board on top of the ABS panel to see if the openings aligned, which seemed accurate.
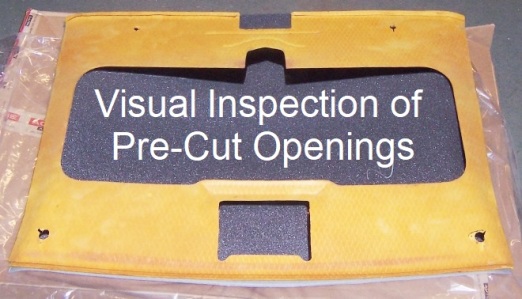
The only tasks before installation are to trim or cut the fabric/padding which had been applied over the pre-cut openings. TFS has ‘Headliner Installation Instructions’ on their site; however, their document spent more time about removing the old headliner with a quick rundown to install the new headliner lacking specific directions.
https://www.fierostore.com/.../Default.aspx?Id=186
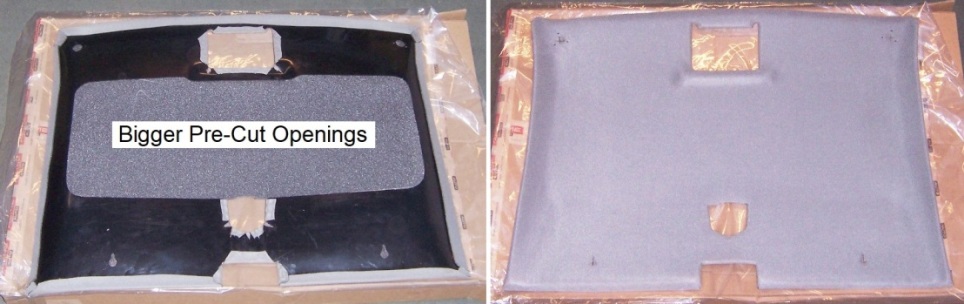
Bigger Pre-Cut Openings
Trim off around an inch of the excess material from the edges, I made wedge-shaped cuts in the corners and then folded the excess fabric/padding on the back as mentioned in TFS instructions. I secured the excess material with polyurethane adhesive.
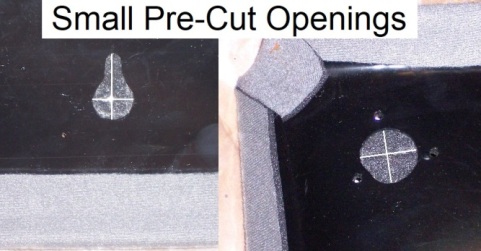
Smaller Pre-Cut Openings
Either cut the material around the openings with a sharp knife, or like I did, simply cut it with two slits, front-to-rear and side-to-side in the center of each pre-cut openings to allow these items in.
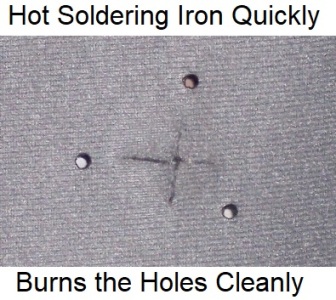
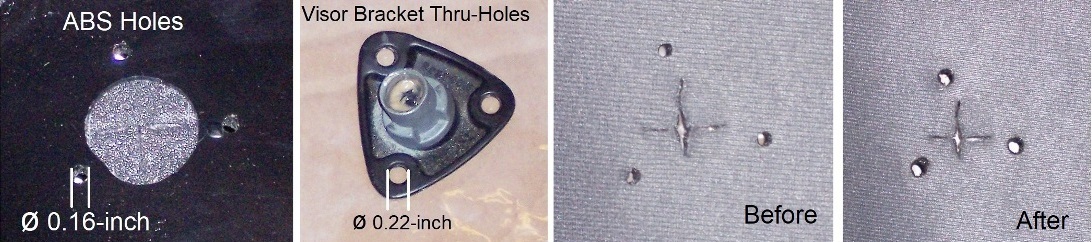
Tiny Holes
The six screw holes for the sun visor bracket screws are better cleared with a hot soldering iron to quickly ‘burn’ the holes cleanly. I don’t recommend to attempt of cut, poke or ‘drill’ the screw areas as you might tear and damage the fabric.
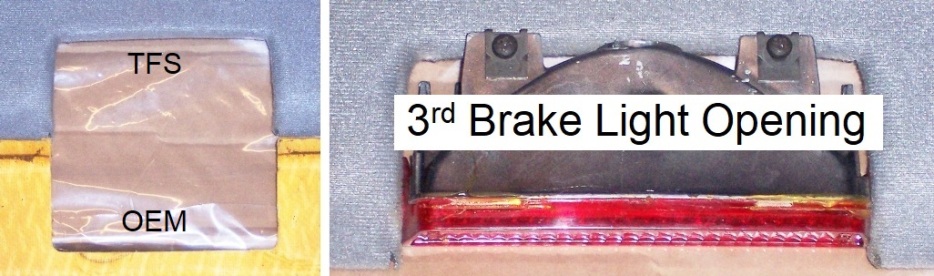
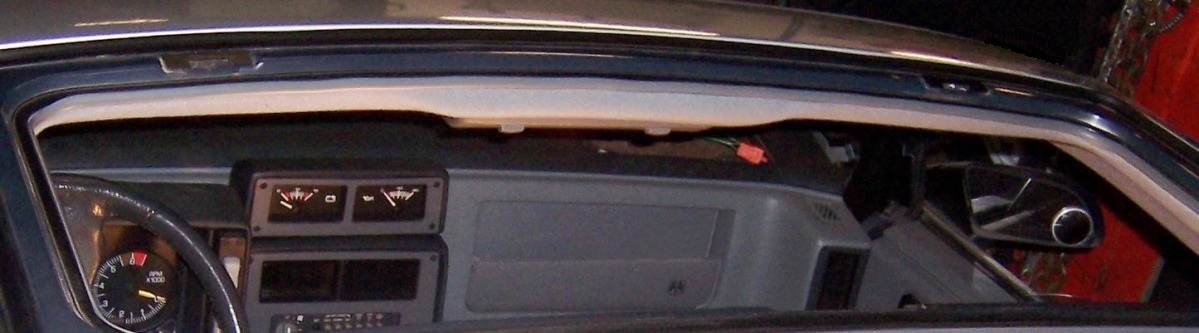
I measured the thickness of the ABS which is 2.4mm and also measured the 3rd brake light opening to the OEM since old threads reported that this was an issue. However, my opening was ‘perfect’.
Please Note:
I did not cut the sunroof excess material at this moment believing that it was better to wait until the headliner has been installed in the vehicle. First reason, the pliant ABS panel will be easier to handle into the car with the sunroof excess material on. Second was my installation plan by making use of this excess material and propping the headliner up to the roof.
With these tasks done, the new ABS headliner is ready for installation.
Preparation
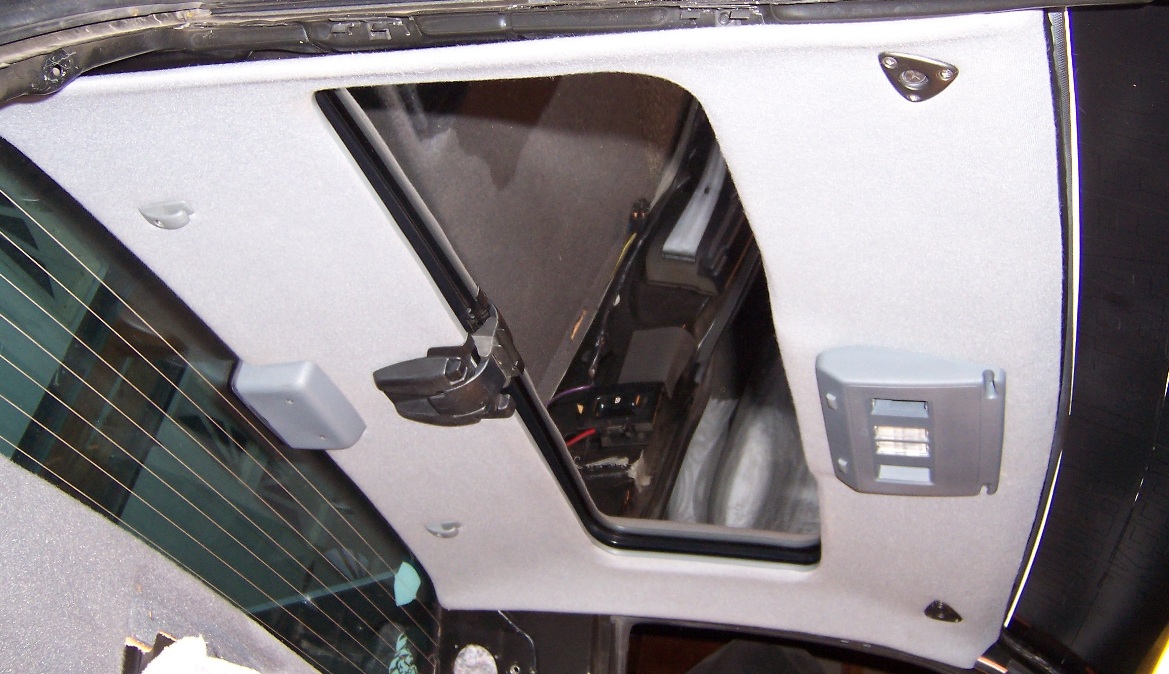
I’m expecting that installing the visor bracket screws will be the most difficult part of the installation.
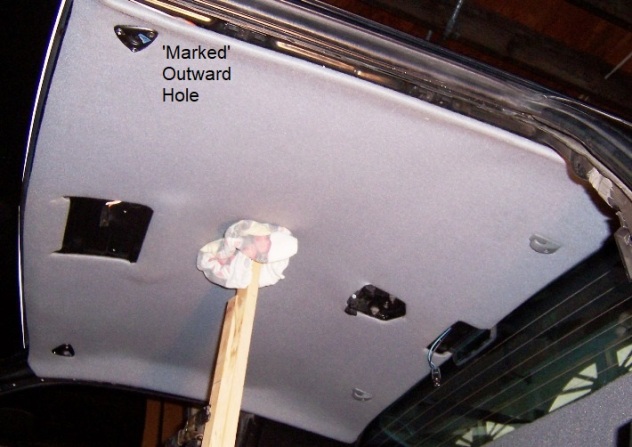
Since the three holes of the visor bracket only fit one way; I aligned the bracket holes to the roof holes, and then ‘Marked’ the outward hole of the bracket with tape. Later when I’m wrestling with the headliner, I won’t be ‘guessing’ on the alignment.

I also threaded each screw into the roof to check the female threads that they ‘felt right’ and lightly lubed them. As a note, these female threaded holes in the roof sheet metal are thin, and they’re very easy to cross-thread them.
Installation
My plan was the coat hook hangers first; visor brackets second; next the 3rd brake light, ending with the dome light.
I pushed the headliner up in the roof and propped the sunroof excess material with a stick as the corners droop down. Then loosely installed the coat hook hangers, which were so easy to find the threads, and next attempted to install the visor brackets.
However, it got obvious that the ABS screw holes were undersized and lacking ‘wriggle room’ as I blindly struggled in vain to search for the roof threads…
With the headliner on the floor, the diameters of the six ABS holes measured ~0.16-inch but the diameters of the visor bracket thru-holes measured 0.22-inch.
Hence, I enlarged the ABS holes to the same diameter to get more workspace with the screws.
Second Run: Worked like a charm and no problems at all! 
With the coat hook hangers and visor brackets loosely installed; the 3rd brake light was next and finished with the dome light.
If your headliner doesn’t have the sunroof option, then tighten all the screws. However, I left the screws lose until the sunroof latch trim is installed.
Sunroof Option
Using a small piece of extra material, I tucked the material into the metal sunroof filler strip to see how much material can be shoved in the cavity which is around one inch.
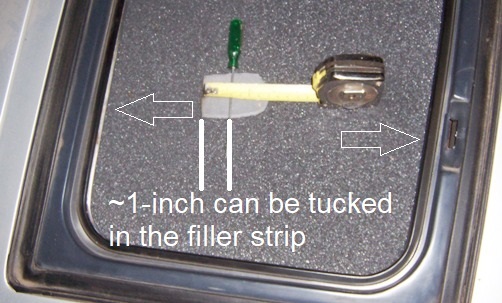
To be safe, I cut the sunroof extra material two inches from the filler strip and made wedge-shaped cuts in the corners ~1/4-inch to the filler strip.
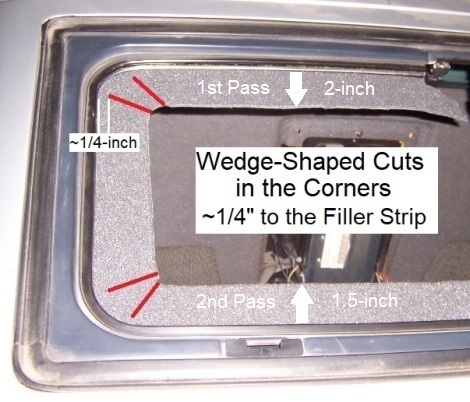
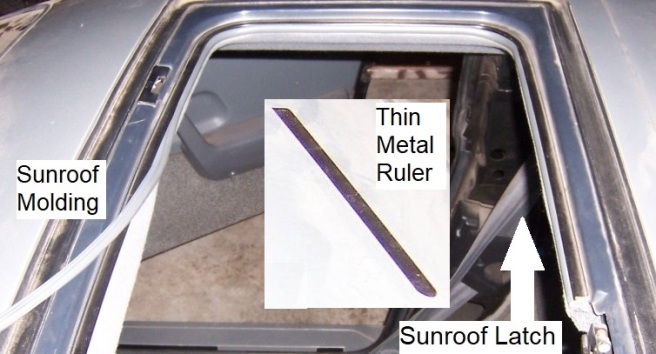
Using a thin metal ruler, I started tucking the extra material into the filler strip around the sunroof and found that I had too much extra material…
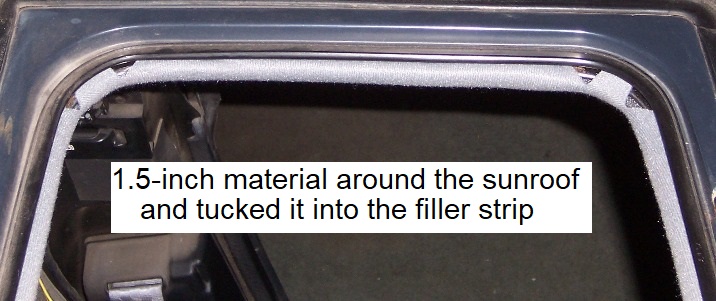
I cut ½-inch off of extra material for a 1.5-inch strip around the sunroof, and in the second pass, the material tucked in nicely into the filler strip.
Starting at one side of the sunroof latch and using a thin metal ruler, I tucked the extra material into the filler strip and at the same time, pushed the sunroof molding into the filler strip, which pushed more material in until the molding was seated on the filler strip.
Repeat again over and over; tuck the extra material and push in the molding….
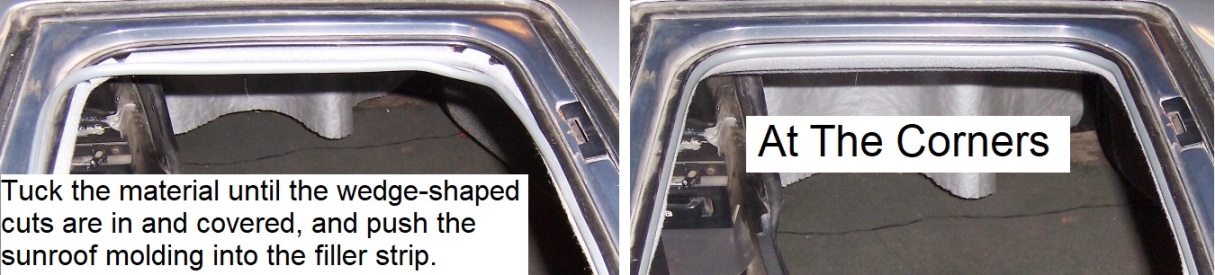
At the corners, use the same rhythm except it is more difficult as the material won’t tuck-in as nicely as the straight areas.
Tuck the material until the wedge-shaped cuts are in and covered and push the sunroof molding into the filler strip.
Sunroof Molding Sidebar:
I brought TFS Sunroof Molding Part # 50157 and I like the OEM molding better because the width. The OEM ‘bead’ measures 0.36-inch wide while the TFS ‘bead’ measures 0.260-inch wide. Since my factory molding is still very good, I reinstalled it and kept TFS molding for the future if I need it.
When the sunroof molding is fully into the filler strip; install the sunroof latch trim, then tighten all the roof screws in the coat hook hangers, visor brackets, 3rd brake light trim, and dome light.
Replace your pillar trim moldings and you’re done!
Last Words
Clearly, this isn’t an option on a strict budget, however to me, the ABS headliner was a ‘bargain’ by eliminating the muss/fuss/frustration and in my view; it was very worth every penny.
Highly Recommend: as a ‘ready to go’ product or a custom DYI project.
------------------
Original Owner of a Silver '88 GT
Under 'Production Refurbishment' @ 136k Miles
|
|

|
82-T/A [At Work]
|
OCT 14, 12:44 PM
|
|
This is a really good write-up.
The big mistake that we (my daughter and I had) is that the very first thing we did was cut out the center and attach the sunroof weatherstripping, and then did everything else. We realized quickly that this did not make it easy as the sunvisors didn't line up just right (we fixed it, but it didn't go over well). I notice you did that dead last, which is definitely how I would do it if I have to do it again.
|
|
|
|
Vintage-Nut
|
OCT 14, 02:47 PM
|
|
|
Thanks for the compliment!
|
|
|
|
css9450
|
OCT 16, 04:01 PM
|
|
| quote | Originally posted by Vintage-Nut:
Contrary, these pliable ABS headliners are robust and very forgiving when handling them. The product can be shipped without any worries about getting broken or damaged, which for me had the worth in peace of mind alone.
|
|
How think is the plastic? I've never seen one of them.... Just the original fibrous ones which are always one small bend away from cracking or creasing.
I recovered my original headliner board, and chalked it up to being a learning experience because I made a lot of rookie mistakes, complicated by it being in bad shape to begin with. It took me a couple of years before I located another board in suitable condition so I could redeem myself!
|
|
|
|
82-T/A [At Work]
|
OCT 16, 06:57 PM
|
|
| quote | Originally posted by css9450:
How think is the plastic? I've never seen one of them.... Just the original fibrous ones which are always one small bend away from cracking or creasing.
I recovered my original headliner board, and chalked it up to being a learning experience because I made a lot of rookie mistakes, complicated by it being in bad shape to begin with. It took me a couple of years before I located another board in suitable condition so I could redeem myself!
|
|
Maybe 1/16th of an inch thick? It's pretty flexible, but short of actually bending it in half and stepping on the fold, it'll immediately snap-back into form. It would take a lot to screw up these headliners.
|
|
|
|
Vintage-Nut
|
OCT 16, 07:39 PM
|
|
| quote | How think thick is the plastic? |
|
| quote | | I measured the thickness of the ABS which is 2.4mm |
|
|
|
|
|
fieroguru
|
OCT 16, 07:44 PM
|
|
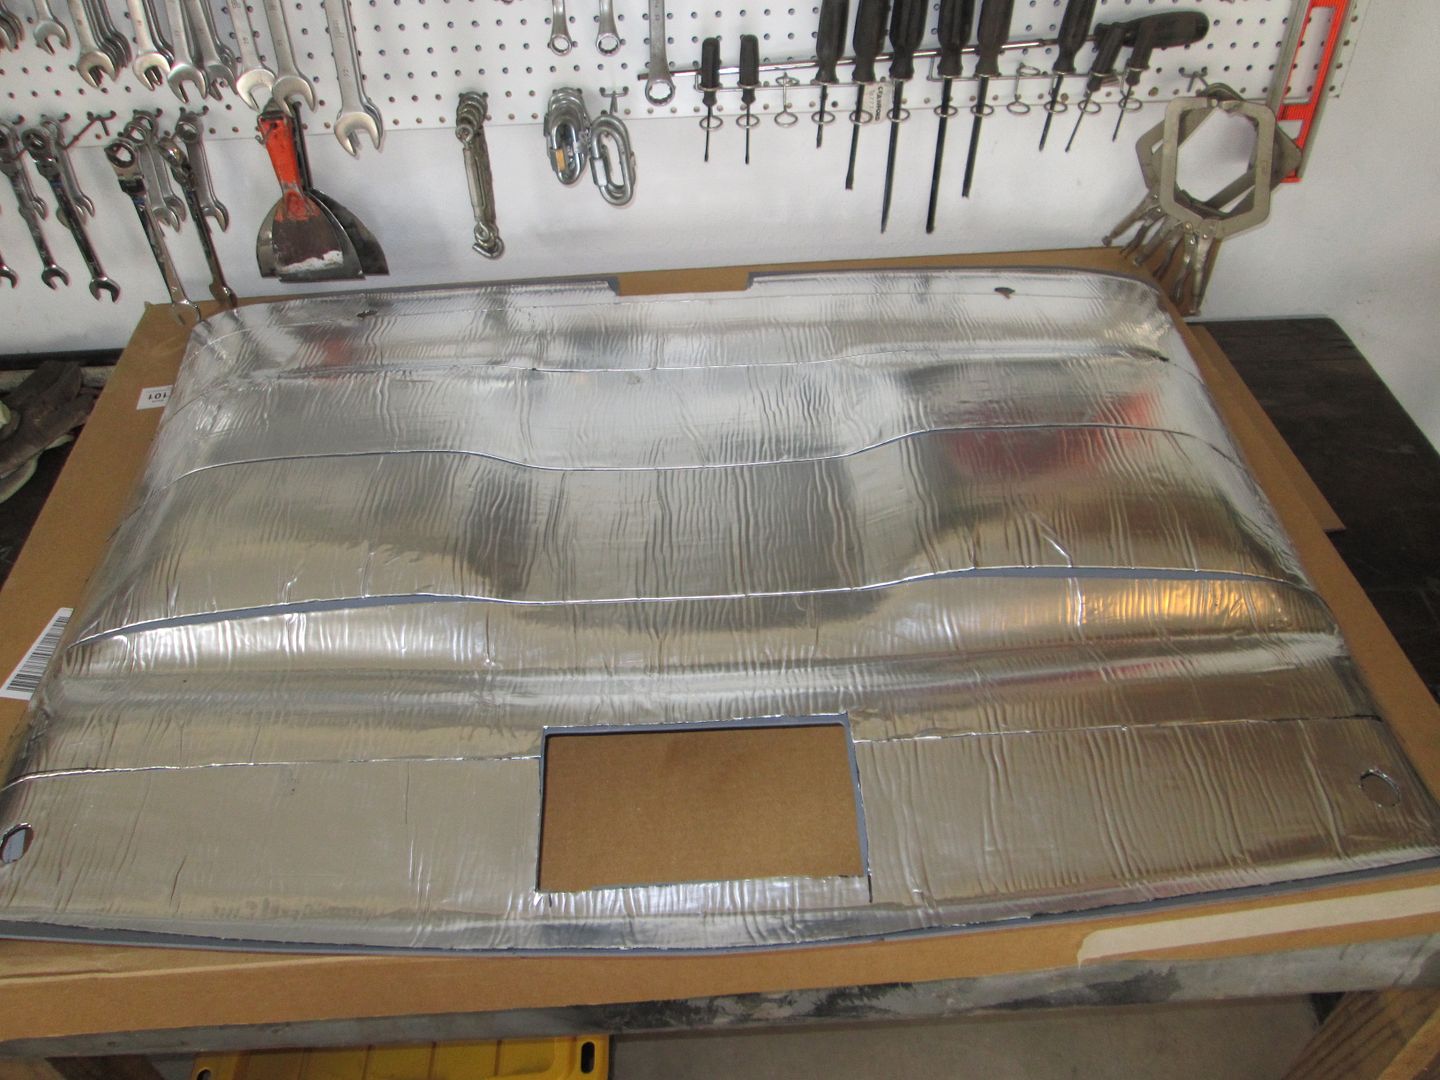
I have had the non-sunroof version installed for 10 years now. Great value and installed it w/o any fabric. First is was just the plastic color as shipped, last year when I was refinishing the interior, I went ahead and color matched it to the medium grey interior color.

Probably less of a concern with the sunroof car, but prior to the initial install, I took the opportunity to put sound deadening on the top side:
|
|
|
|
sleek fiero
|
OCT 16, 09:29 PM
|
|
Nice job Vintage. I did mine with the fiero store dark gray for sunroof but it was different in that the sunroof hole was pre cut. The gray material matched my original perfectly and I reused the original lock strip.
My 85 didn't have the 3rd taillight to worry about.. sleek
|
|
|
|
Stingray92
|
OCT 16, 10:00 PM
|
|
Thanks for posting Vintage
I am one of those DIY types and have been contemplating this for a while. My headliner as like many was intact but needed handled with care.
I'm not ready to reinstall yet but if you don't mind I'll post the progress as I get started on mine in this thread.
Shh, it's sleeping
|
|

|
Vintage-Nut
|
OCT 16, 10:35 PM
|
|
Thanks Guys!
If this old, crippled man can 'do it' - I bet all abled bodies can do it too!
|
|
|
|