
 
     |
| Taillight REFLECTOR: Don’t Paint, Light Reflects BRIGHTER on Polished Aluminum Tape ! (Page 1/2) |

|
Vintage-Nut
|
JAN 31, 09:36 PM
|
|
Reflection: The Process of Light Bouncing Off a Surface
The amount of light reflected from a bulb depends on the nature of the reflector surface; a smooth and shiny mirror can reflect almost all the light hitting the surface, while dark or dull surfaces reflect less.
The Problem
Many PFF members have found the OEM ‘chrome’ plating on their taillight reflectors in terrible condition; especially if brighter/hotter bulbs were used. Only one of my GT reflectors was ‘bad’ with a few black areas…

To rejuvenate the reflectors, the first step is Surface Preparation, which is critical for a long-lasting finish.
* Strip the Factory ‘Chrome’ the Easy Way - Oven Cleaner!
Yes, a foaming aerosol oven cleaner will dissolve the plating in minutes without hurting the plastic; rinse the cleaner off with water and then dry. Next scrub or lightly sand the bare plastic {I used 3M Scotch-Brite pads} to remove all glossy and put a ‘tooth’ for better adhesion. Clean the reflectors again with mild soap and water, then rinse and dry…

Paint
GM likely used a multi-layer ‘chrome’ process which will be very pricey IF you can find a professional service to re-plate the reflectors.
DIYers on a tight budget don’t have many options to renovate the reflectors and the majority uses paint.
I have watched videos on the internet of ‘Spray-On Chrome’ products showing a 3-step procedure: it starts with a smooth surface; applying gloss black paint as the base coat; then is a light mist of ‘chrome’, followed with a clear topcoat as the finish will easily scratch.
The ‘cheapest’ 3-step paint gun/airbrush product I found was ‘Eastwood Liquid Chrome’ kit at around $200, which is very expensive {to me} and a lot of painting…
I don’t recommend the ‘chrome’ paints intended for injection plastic model kits which also use a gloss black base coat too; but these ‘silvery’ paints are for decorative use only with no clear protection. Lacking a hard topcoat; these will not hold-up in a taillight.
And of course, you’ve seen the real ‘chrome’ plastic caps of aerosol spray paints in the store; but these products are actually silver flake paint which are far from ‘chrome’.
*Aerosol Metallic Paints
If you really want to use these metallic paints; pay attention on the label as many are for interior use only. Select the proper primer and ensure all the products are for plastic and exterior use.
⚠ I highly recommend practicing on test pieces BEFORE spraying your reflectors!
If the metallic finish rubs-off fairly easy when dry, the taillight reflectors need a durably topcoat, which might be a big problem. Many metallic paints are very sensitive to clear paint, and the ‘wrong’ topcoat will react negatively by turning the silver paint into a ‘dull’ grey color, which ruins the reflective quality!
If this is the case; high-gloss white will be better as in general, white paint can provide 80-85% reflectivity which will be more than a dull grey paint.
Aluminum Tape
My normal routine of restoring vintage taillights has been applying shiny aluminum foil tape; then hand polish and buff the finish, as it can provide approximately 90% reflectivity or more.
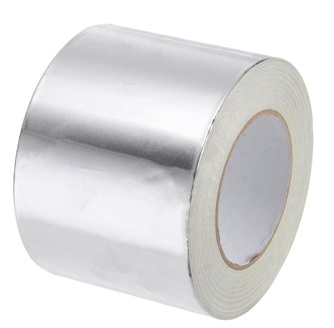
For my GT reflectors; I brought a roll of 4-inch wide, 3.9 mil thick aluminum foil tape for $12
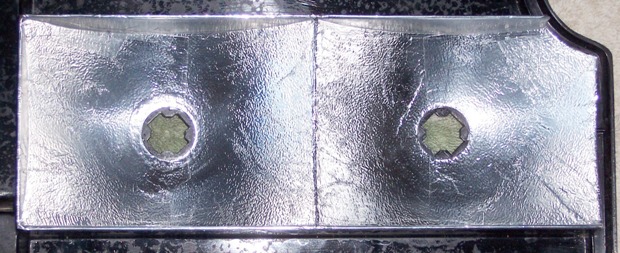
I started with the flat areas first which are easily than the concave areas.
Make a pattern with thin paper including a ‘fold over’ area at the top
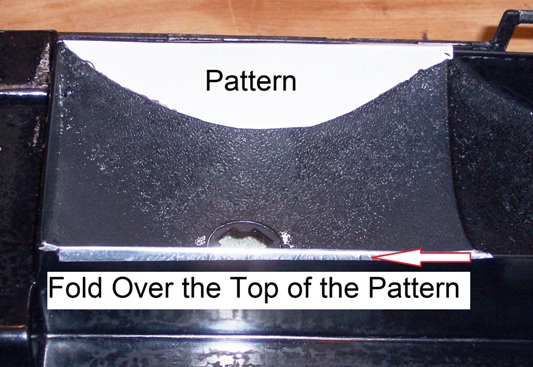
Trace the pattern onto the aluminum foil tape including the fold over area at the top
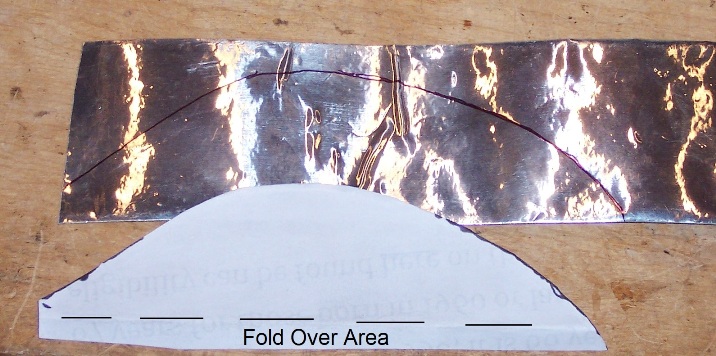
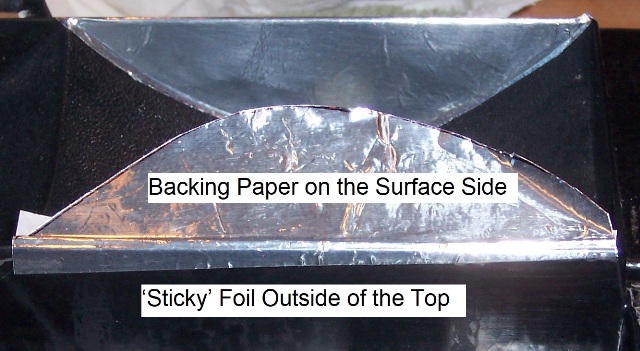
Cut out the aluminum foil tape on the line; fold over the area at the top, and then separate the foil from the backing paper only at the top.
Wipe the surface with isopropyl alcohol to clean the area.
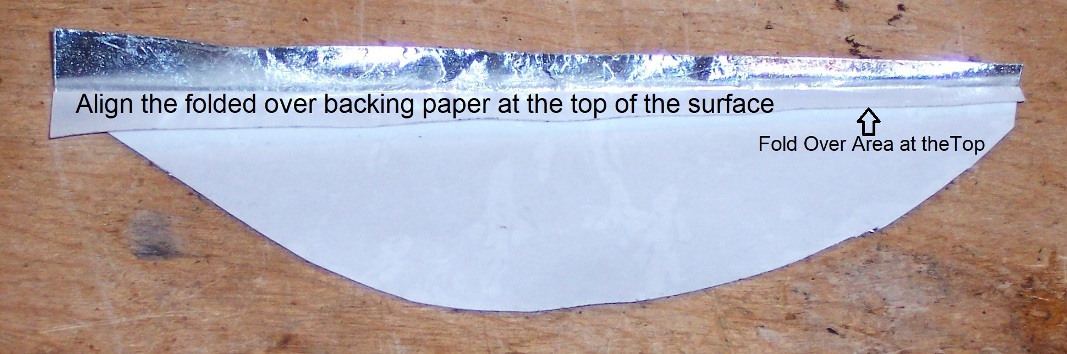
Hold the folded over backing paper with the ‘sticky’ foil at the top; place the tape onto the surface without touching the sticky foil.
Align the folded over backing paper at the top of the surface, then holding the tape in place, roll over the ‘sticky’ area outside of the top.
The foil is now aligned at the top with the backing paper still inside of the surface.
Remove the backing paper from the tape
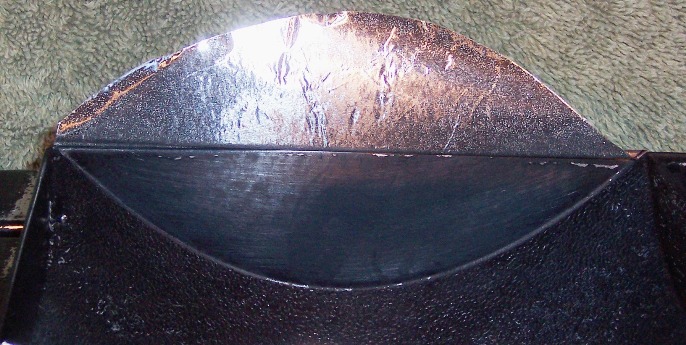
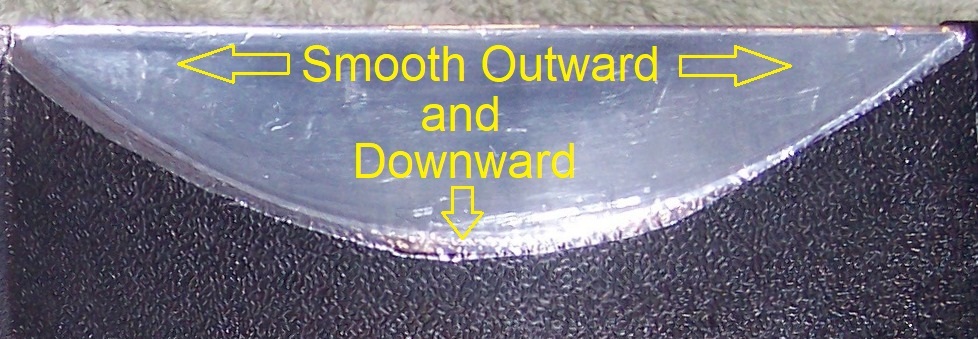
Start pushing the foil at the center top outward and downward, smoothing the tape as you go down, and at the bottom, crease the foil on the surface before sticking it any further.
Any air bubbles which are trap under the foil; use a small razor blade to slit the bubble and then smooth the foil flat.
Repeat until all the flat areas are covered with foil
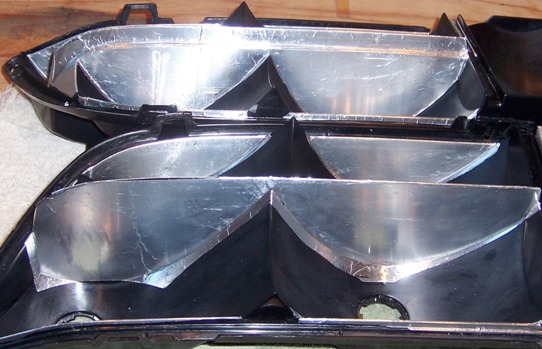
Next, install the foil in the concave areas with the same ‘outward and downward’ method.
One wide piece is more difficult to smooth out as it will scrunch up; two narrow strips are easier to smooth out with fewer wrinkles.
When all areas are covered with the foil, the last steps will be hand polish and buff the finish, a final cleaning, and then protect the aluminum from oxidation.
Protect the Aluminum
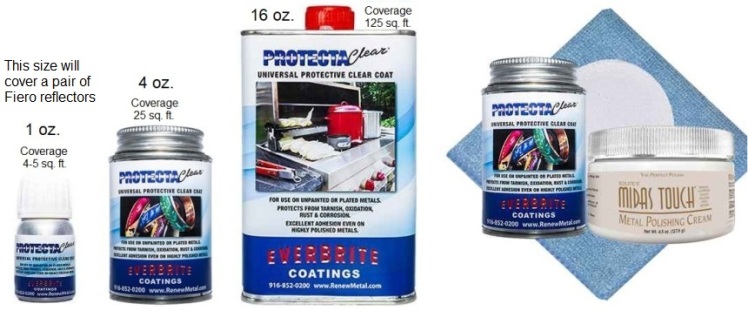
When I was researching protective coatings for aluminum, I came across ‘Everbrite ProtectaClear’
It’s a very thin, UV stable clear coating, formulated for clarity and hardness on polished metals, which also can withstand temperatures up to 500* F.
ProtectaClear can be purchased alone in many sizes or in several different types of kits.
https://shop.everbritecoatings.com/
If you have aluminum polish in your garage, check your product to see if it contains any type of acid; if so, you must NEUTRALIZE the surface before applying ProtectaClear!
Because I’m out of aluminum polish and have other projects; I brought the 4-ounce kit which included the non-acidic Midas Touch polish.
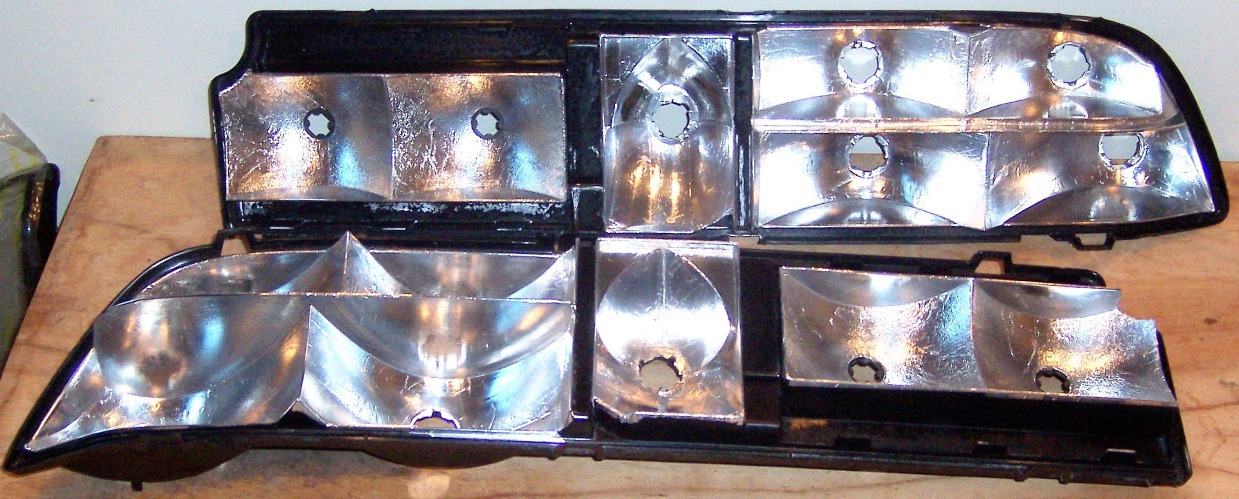
After polishing, buffing and two coats ProtectaClear…
Voilà – the Final Results!
------------------
Original Owner of a Silver '88 GT
Under 'Production Refurbishment' @ 136k Miles
|
|

|
Mike in Sydney
|
FEB 01, 12:37 AM
|
|
|
Good Job. Excellent write up.
|
|
|
|
olejoedad
|
FEB 01, 10:00 AM
|
|
The process used on the plastic reflectors to make them shiny is called vapor deposition.
Very nice write-up, the results look great![This message has been edited by olejoedad (edited 02-02-2025).]
|
|

|
Vintage-Nut
|
FEB 01, 11:25 AM
|
|
Yes, the process
| quote | | will be very pricey IF you can find a professional service to re-plate the reflectors. |
|
Edit: Thank-you for the compliment and the positive support!  [This message has been edited by Vintage-Nut (edited 02-02-2025).]
|
|
|
|
Dennis LaGrua
|
FEB 02, 11:29 AM
|
|
Nice job and good post. When I installed the rear C4 taillight panel I painted the reflective surfaces with chrome paint. Then used direct plug in 1157 LED lamp replacements each one having 4 COB light strips.
------------------
" THE BLACK PARALYZER" -87GT 3800SC Series III engine, custom ZZP /Frozen Boost Intercooler setup, 3.4" Pulley, Northstar TB, LS1 MAF, 3" Spintech/Hedman Exhaust, P-log Manifold, Autolite 104's, MSD wires, Custom CAI, 4T65eHD w. custom axles, Champion Radiator, S10 Brake Booster, HP Tuners VCM Suite.
"THE COLUSSUS"
87GT - ALL OUT 3.4L Turbocharged engine, Garrett Hybrid Turbo, MSD ign., modified TH125H
" ON THE LOOSE WITHOUT THE JUICE "
|
|

|
cliffw
|
FEB 02, 12:05 PM
|
|
I am ignorant on LED lights. I am thinking they do not need a reflective surface behind them.
Vintage-Nut, excellent post. Your method of application reminds me of applying tint film to windows and applying stickers to my hard hats.
|
|
|
|
ericjon262
|
FEB 02, 12:28 PM
|
|
|
I used gloss white paint on mine, the lenses need to be replaced, but the light transmission is very good. ------------------
"I am not what you so glibly call to be a civilized man. I have broken with society for reasons which I alone am able to appreciate. I am therefore not subject to it's stupid laws, and I ask you to never allude to them in my presence again."
I invited Lou Dias to trash me in my own thread, he refused. sorry. if he trashes your thread going after me. I tried.
|
|
|
|
Vintage-Nut
|
FEB 02, 01:40 PM
|
|
| quote | cliffw:
I am ignorant on LED lights. I am thinking they do not need a reflective surface behind them. |
|
LED Bulbs STILL Needs Reflective Surfaces
LED Strips won't
|
|
|
|
Dennis LaGrua
|
FEB 03, 04:10 AM
|
|
| quote | Originally posted by Vintage-Nut:
LED Bulbs STILL Needs Reflective Surfaces
LED Strips won't |
|
Truth to that but allow me to elaborate, I believe that it all depends on the way the LED's are mounted and pointed. The LED lamps that I use employ 4 COB strips in a glass envelope. The shape is just like 1157 light bulbs and they are a direct fit in the rear Fiero tailight sockets. I believe that design benefits from being in a cavity that is reflective. Now if you are using LED lamps where the individual LEDs are arranged to all face out the back of the vehicle then the reflective surface may not help much..------------------
" THE BLACK PARALYZER" -87GT 3800SC Series III engine, custom ZZP /Frozen Boost Intercooler setup, 3.4" Pulley, Northstar TB, LS1 MAF, 3" Spintech/Hedman Exhaust, P-log Manifold, Autolite 104's, MSD wires, Custom CAI, 4T65eHD w. custom axles, Champion Radiator, S10 Brake Booster, HP Tuners VCM Suite.
"THE COLUSSUS"
87GT - ALL OUT 3.4L Turbocharged engine, Garrett Hybrid Turbo, MSD ign., modified TH125H
" ON THE LOOSE WITHOUT THE JUICE "
|
|
|
|
82-T/A [At Work]
|
FEB 03, 08:10 AM
|
|
I kind of wish I had done this. I had my daughter paint it with chrome paint... which still made an ENORMOUS improvement (even just cleaning the inside of the taillights and polishing everything was huge). But this definitely would have made a difference.
It's a shame you didn't get any before and after "night" pictures.
That's the problem with people like us who "get it done," is that we often don't take before pictures... we just tear into it.
|
|
|
|