|
| Another Way of Mounting Accessory Gauge (s) (Page 1/1) |

|
V8Steve
|
JUN 05, 08:48 AM
|
|
|
|
|
claude dalpe
|
JUN 05, 09:01 AM
|
|
|
Nicely done, I like the shape with the angle and the way to close the angle.
|
|
|
|
V8Steve
|
JUN 05, 09:23 AM
|
|
Claude,
Thank you.
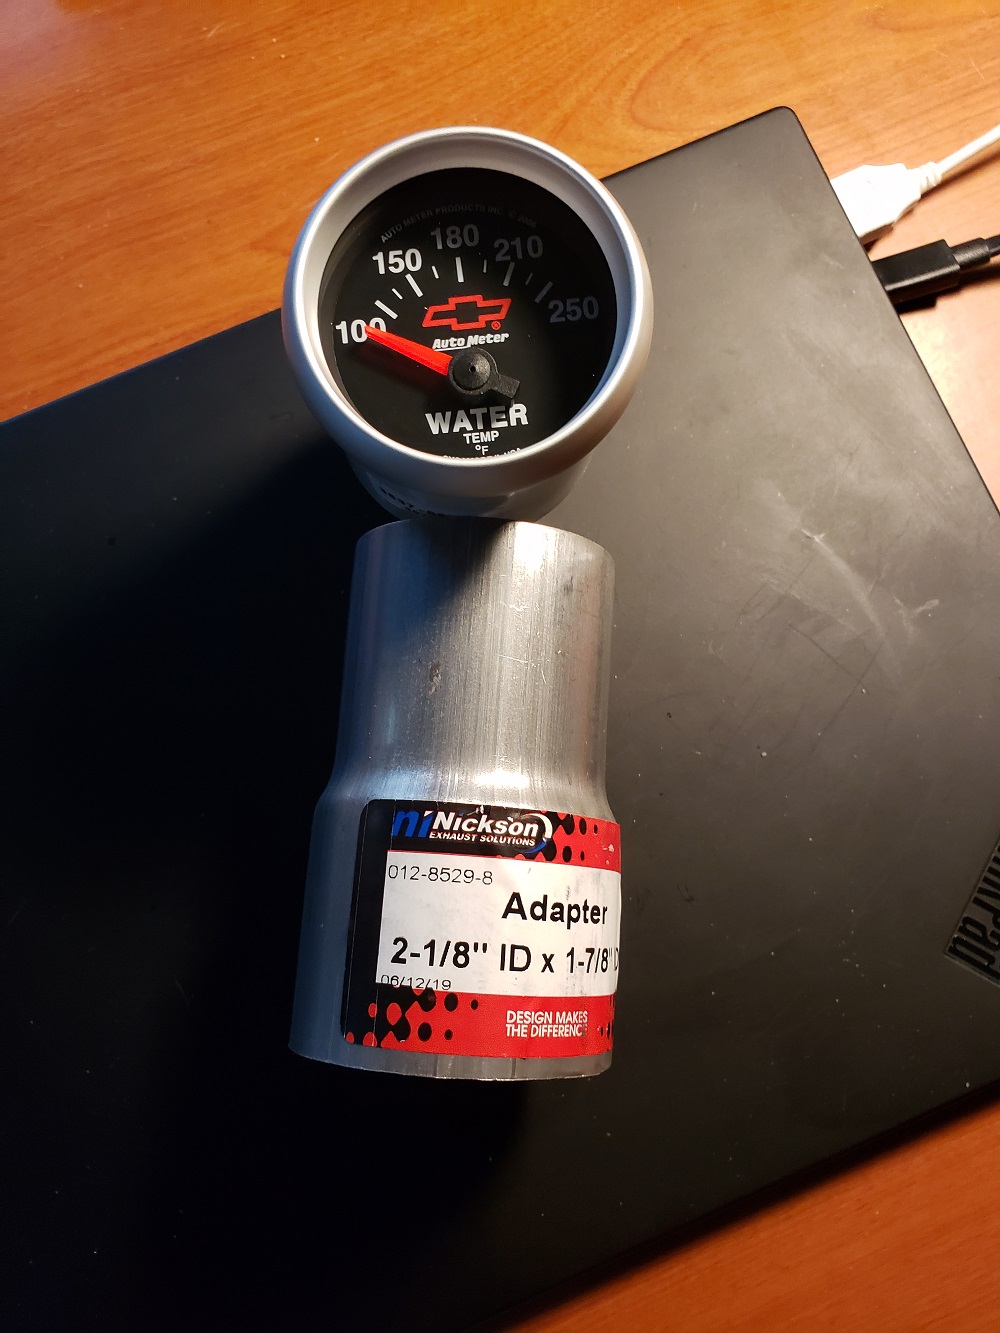
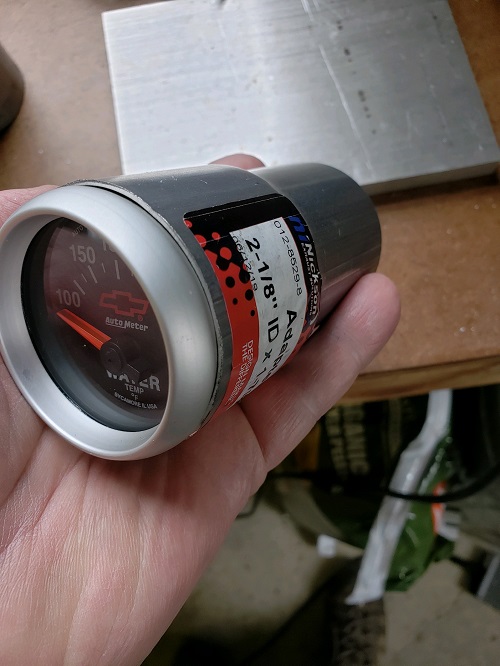
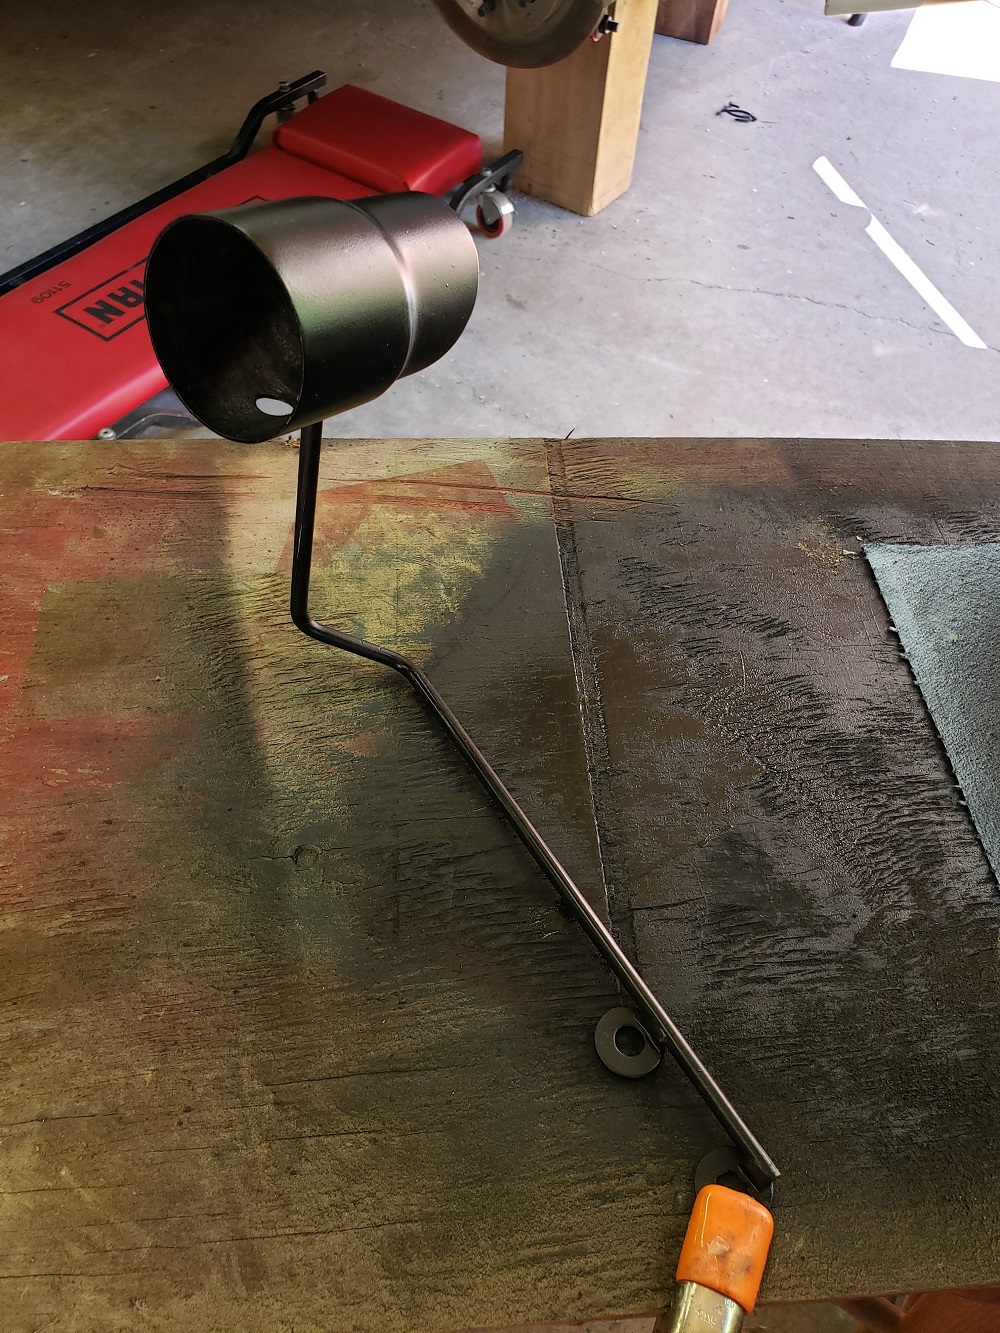
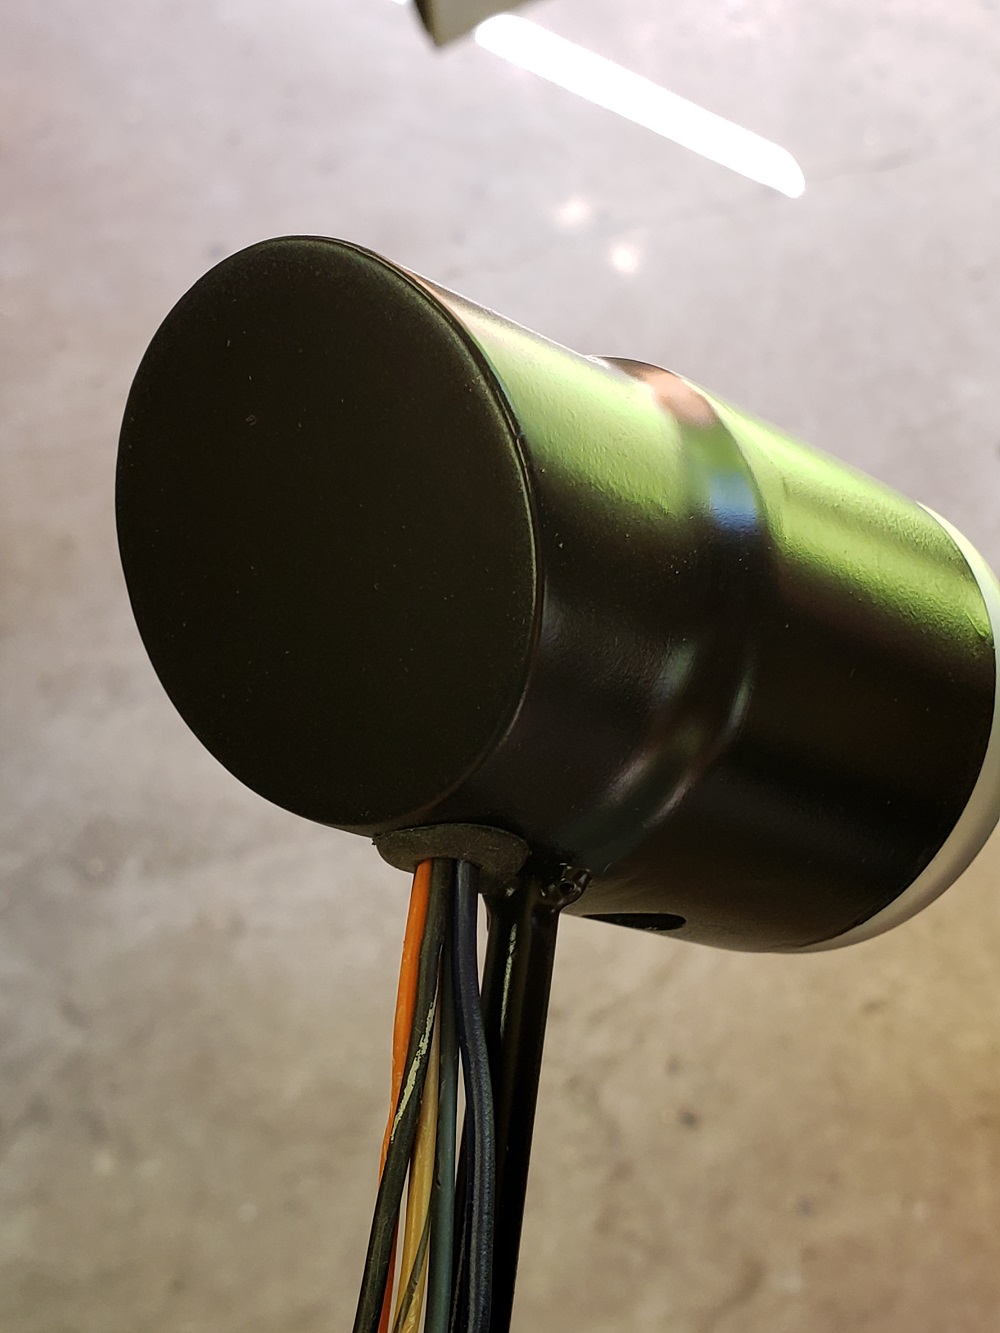
I'm new at mig welding so I made a test piece first from some old but larger tubing to see if it was possible with my limited experience. It worked out OK so then I went forward with the actual gauge fabrication.
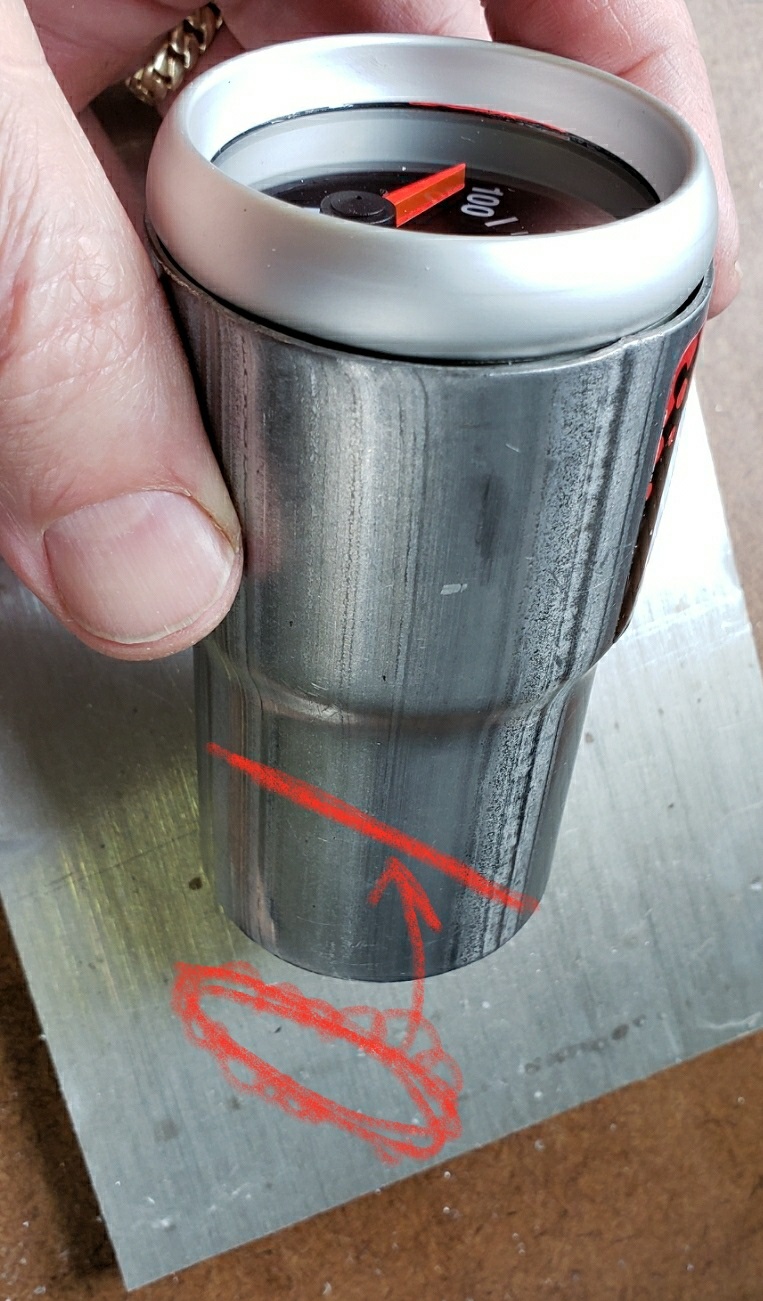
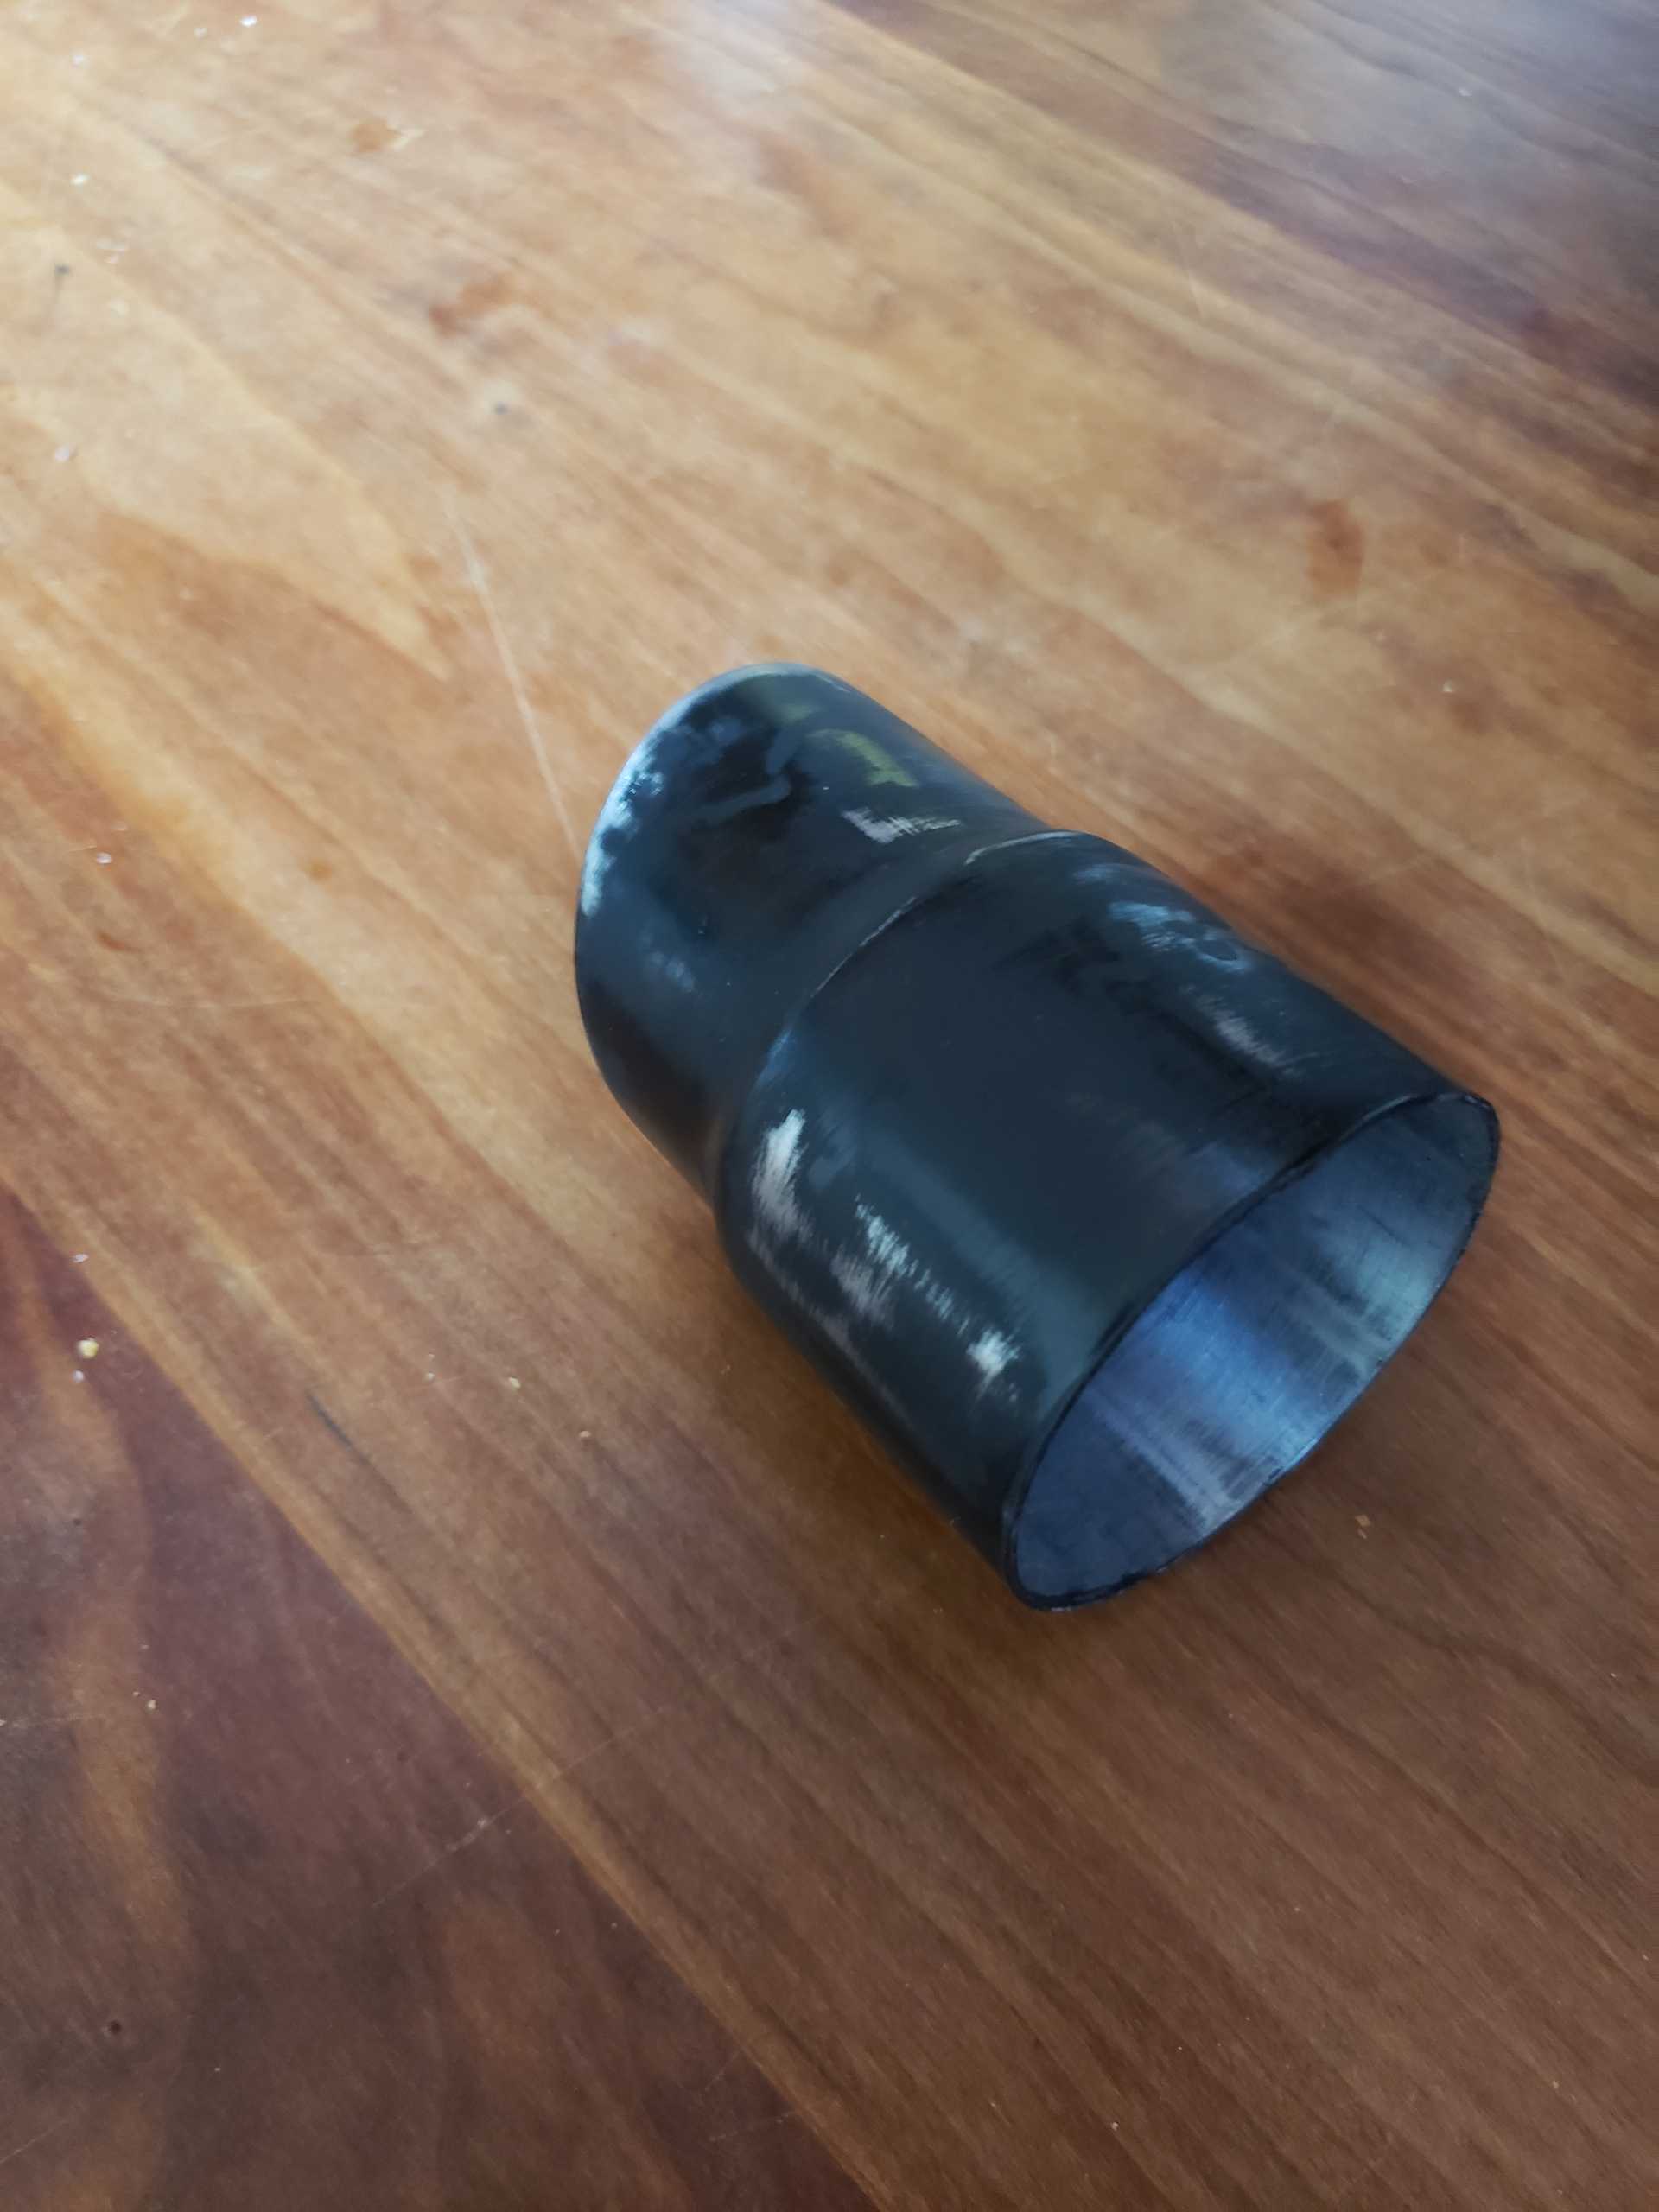
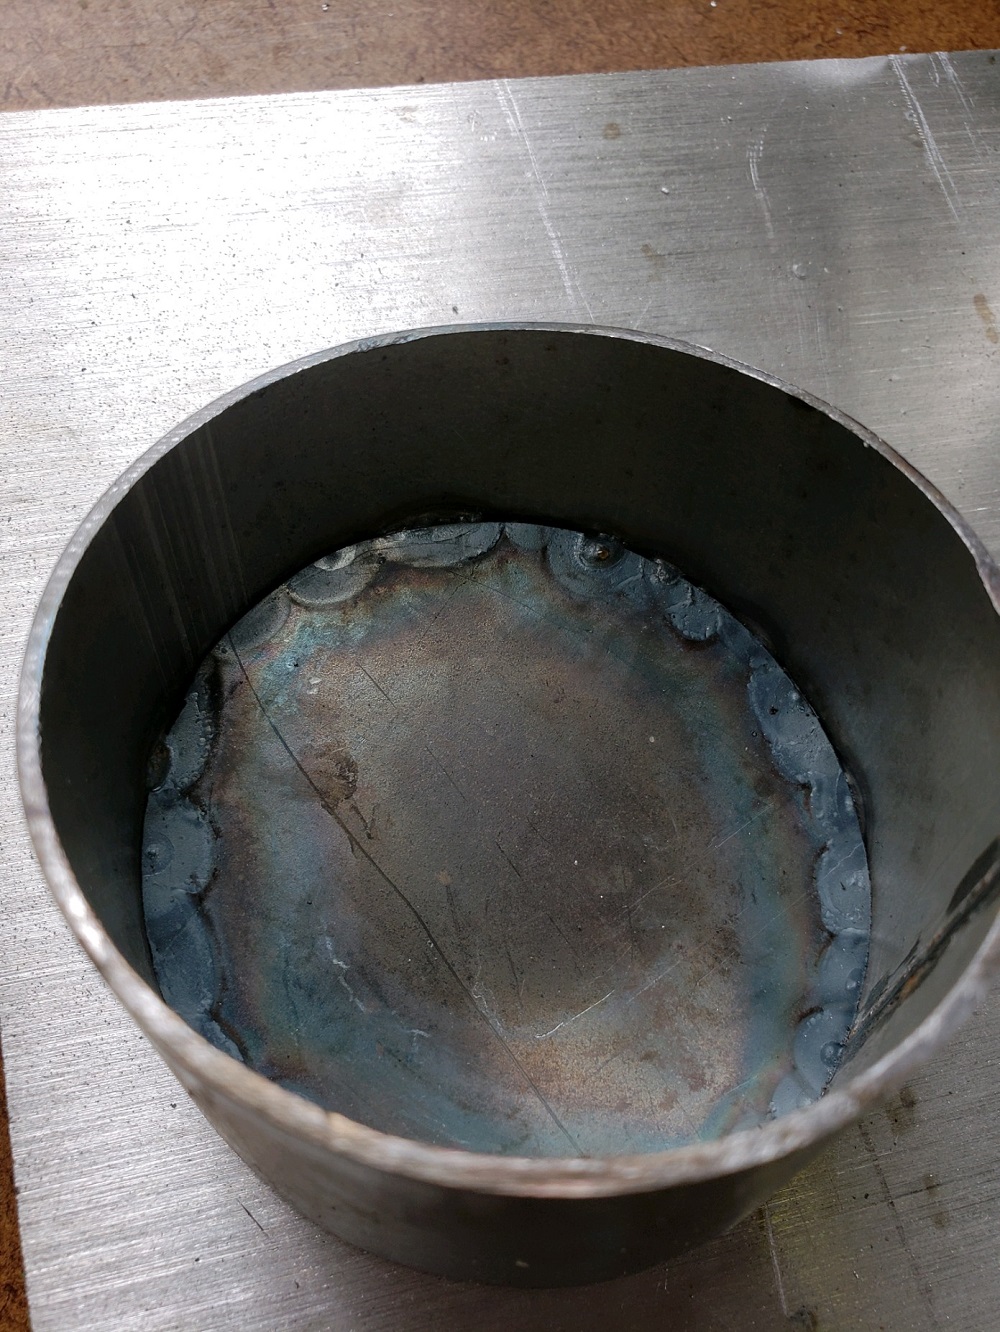
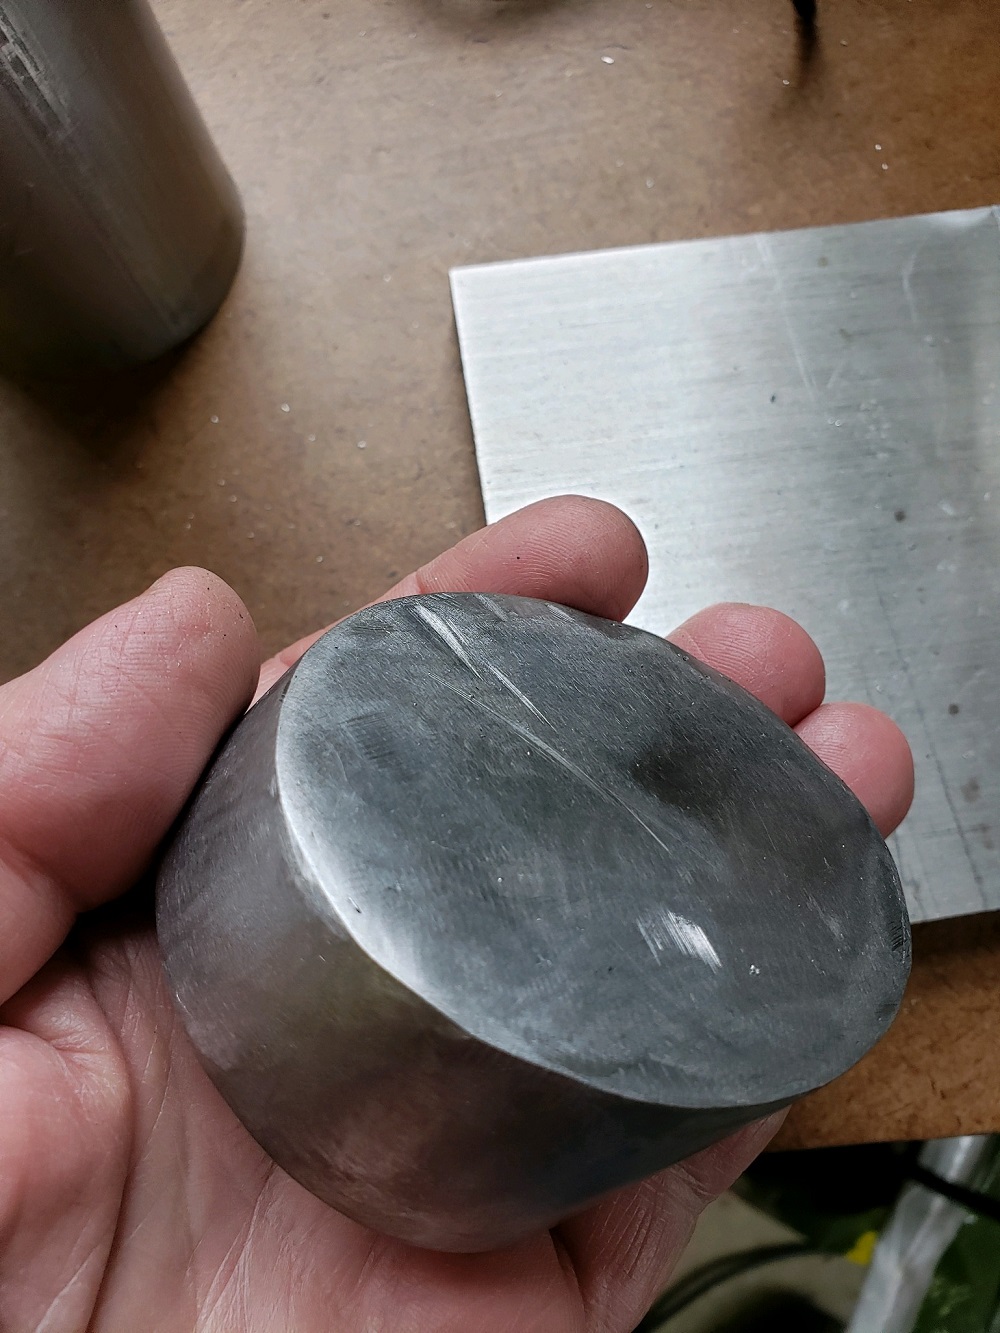
Below is the test piece. One problem with using an exhaust tubing reducer is that there are longitudinal ripples in the metal due to the forming process. I tried to fill it in with body filler and then make them disappear. There's enough rattle can paint on it now so it's barely noticeable.
|
|
|
|
Archie
|
JUN 05, 12:26 PM
|
|
Good Job Steve.
Very nicely done & documented.
|
|
|
|
longjonsilver
|
JUN 05, 06:21 PM
|
|
Your gage looks real good. Nicely done!
------------------
Astronomy says we will find a coded signal from outer space. Then we'll KNOW that life exists there, for coded signals aren't by chance.
Biology says there are coded genetic signals in every cell, but we KNOW that no intelligence created life.
I'm the original owner of a white ' 84 2M4 purchased Dec 10, 1983 from Pontiac. Always garaged, no rust, 4-wheel drifts are fun!
|
|
|
|
pmbrunelle
|
JUN 05, 07:51 PM
|
|
Having a bunch of mass at the end of a stick, I'd wonder if the gauge pod could start vibrating with engine vibration. Have you driven much with this setup?
Can you share a bit of information regarding the type of V8 you have, and the type of engine mounts (solid, poly, rubber) you have?[This message has been edited by pmbrunelle (edited 06-05-2020).]
|
|
|
|
V8Steve
|
JUN 05, 08:57 PM
|
|
My experience since 1999 is that the V8Archie kit is well proven, trouble free, and bullet proof.
Engine and F40 mounts are all solid.
It's been a long road to restore this car to the current generation and I'd be glad to correspond via PM or email. It's not really suitable for this thread and there are other threads with my progress on this project
First, I've not yet driven the car and it's still up on blocks although it's been run extensively. You are astute with your question about vibration. So far, no noticeable vibration of the rod that contains the assembly. If necessary, I'll stick some sort of shim behind it. For anyone who decides to mount more than one gauge this way, if it were me, I'd use a larger diameter rod and mount them the same way. Worst case is to add a shim down where it's not noticeable.
The original V8 Archie swap by me was in 1999 and I drove it trouble free until 2007 when the OEM GM ZZ4 seized. It sat in my shop until 2015. I've worked on this for 5 years
I expect to put this car back on road in the next few weeks.
To answer your question, it's a custom build 355 cube SBC with AFR milled heads, Holley Multiport Sequential EFI, 427 Dyno HP, F40 Archie kit, etc. This motor has custom baffles in the sump to control oil wash during launch with a cross mounted motor. Oil lines and remote filter are Canton Racing. You can search on the Forum on the details or PM me.
------------------
88GT 355 CI Sequential Holley Multiport , AFR milled 180, Dyno'd at 427 HP, 320 WHP
anderson@gdsconsulting.com[This message has been edited by V8Steve (edited 06-05-2020).]
|
|
|
|
pmbrunelle
|
JUN 07, 12:20 AM
|
|
The idea wasn't to go off on a tangent about the powertrain, but knowing what it is and how it's mounted gives thread viewers an idea of the vibration transmitted to the chassis.
Then, people could know (pending test driving) that this gauge mounting method is known to work with vibrations from a solid-mounted 355 V8 with a manual trans.
|
|
|
|
Dennis LaGrua
|
JUN 07, 02:54 AM
|
|
|
Very nice job and a good location for a gauge. Your budget gauge cup is also impressive ------------------
" THE BLACK PARALYZER" -87GT 3800SC Series III engine, custom ZZP /Frozen Boost Intercooler setup, 3.4" Pulley, Northstar TB, LS1 MAF, 3" Spintech/Hedman Exhaust, P-log Manifold, Autolite 104's, MSD wires, Custom CAI, 4T65eHD w. custom axles, Champion Radiator, S10 Brake Booster, HP Tuners VCM Suite.
"THE COLUSSUS"
87GT - ALL OUT 3.4L Turbocharged engine, Garrett Hybrid Turbo, MSD ign., modified TH125H
" ON THE LOOSE WITHOUT THE JUICE "
|
|
|
|
V8Steve
|
JUL 09, 08:07 PM
|
|
| quote | Originally posted by pmbrunelle:
Having a bunch of mass at the end of a stick, I'd wonder if the gauge pod could start vibrating with engine vibration. Have you driven much with this setup?
Can you share a bit of information regarding the type of V8 you have, and the type of engine mounts (solid, poly, rubber) you have?
|
|
PMBrunelle is correct. I finally got the car on the road and the gauge vibrates more than what I am willing to accept. A spare rubber exhaust hanger piece wedged in place solved the problem.
|
|
|
|