|
| Twin Disc clutch in an F23/Northstar (Page 2/13) |

|
RCR
|
MAY 27, 02:57 PM
|
|

Bob
|
|
|
|
OH10fiero
|
JUN 04, 08:05 PM
|
|
|
Interested in how this turns out, any updates?
|
|
|
|
1986 Fiero GT
|
JUN 07, 11:40 AM
|
|
|
|
|
1986 Fiero GT
|
JUN 11, 11:01 PM
|
|
|
|
|
Will
|
JUN 14, 10:31 AM
|
|
Does the F23 have a deeper bellhousing than the 282?
In looking at all the measurements for the Tilton 7.25" into to the 282 bellhousing, I found there wasn't enough available clearance to stack a button flywheel on top of a flex plate.
The limitation was contact between the inner ring of screws--where it looks like you now have flat heads--and the output shaft bearing boss. I was expecting to turn the screws over so the heads were on the outside instead of the nuts. That bought me some clearance. Switching to flat heads as you've done would buy more. I'd have to have the unit in my hands to evaluate how good an idea I thought that would be, however. I'd probably be more inclined to counterbore the pressure plate cover and keep the hex head screws instead of going to flat heads. I might even slot the counterbores on a mill to keep the screws from turning. Interesting idea.
|
|
|
|
1986 Fiero GT
|
JUN 14, 01:35 PM
|
|
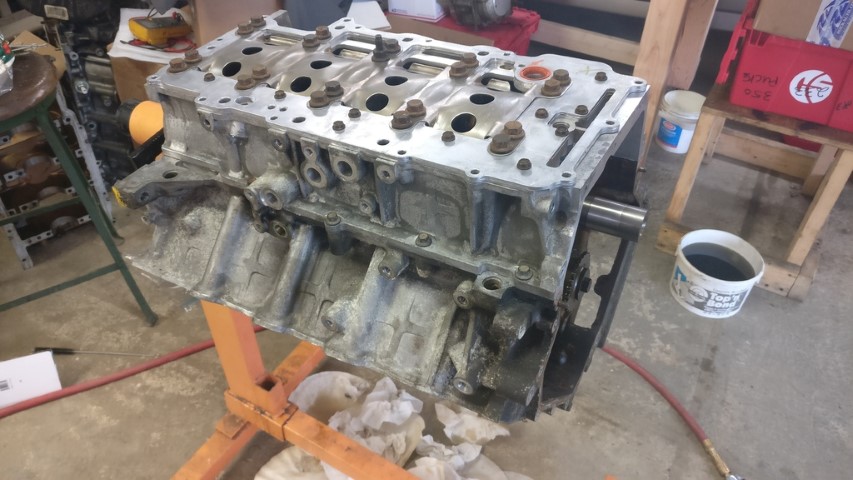
There's something like .500"+ more bellhousing depth in the F23 than the 282. My F23 is split again right now because it was leaking after I reassembled it, so I took the opportunity to tap just the bellhousing onto the motor and visualize the depth from the HTOB bore to the diaphragm fingers. With the HTOB fully compressed, I've got an almost .500" gap between the bearing and the fingers. Enough room for the thickness of the 44mm adapter and the .170" - .230" initial clearance for wear that Tilton recommends.
Hoping to head back over tonight to reassemble my South Bend and take some more measurements for all of this. I'll try to take a few more pictures.
|
|
|
|
1986 Fiero GT
|
JUN 14, 03:24 PM
|
|
| quote | Originally posted by Will:
The limitation was contact between the inner ring of screws--where it looks like you now have flat heads--and the output shaft bearing boss. I was expecting to turn the screws over so the heads were on the outside instead of the nuts. That bought me some clearance. Switching to flat heads as you've done would buy more. |
|
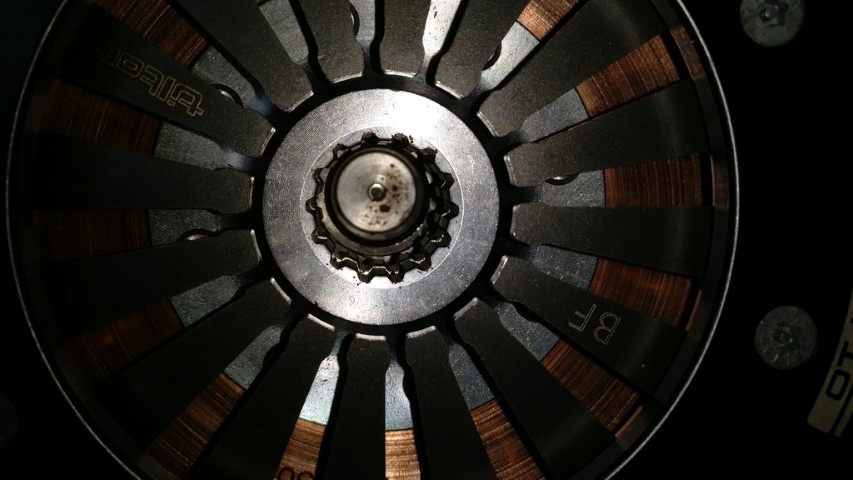
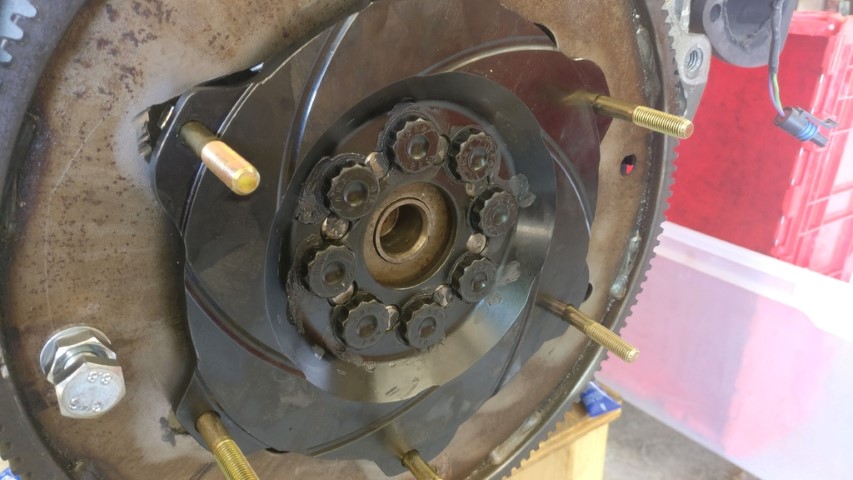
Just realized this, but I'm guessing you're talking about the 8 screws along the interior diameter that hold the diaphragm spring? For what it's worth, that's the way my clutch cover came directly from Tilton. I didn't have to change any hardware. They look like countersunk security pentalobe screws. They really don't want you to take it apart yourself, apparently.
|
|
|
|
Will
|
JUN 14, 11:00 PM
|
|
| quote | Originally posted by 1986 Fiero GT:
Just realized this, but I'm guessing you're talking about the 8 screws along the interior diameter that hold the diaphragm spring? For what it's worth, that's the way my clutch cover came directly from Tilton. I didn't have to change any hardware. They look like countersunk security pentalobe screws. They really don't want you to take it apart yourself, apparently. |
|
Yes, those are the screws to which I was referring.
It's been a few years since I did my work; I guess they updated the design. That's great, as it gives me an extra 3/32" or so to add to the button thickness since I won't have to allow for those bolt heads.
It'll still require me to hollow out a flex plate and weld it to the OD of the button, but now I won't be pushing minimum thicknesses for the flywheel bolt head clamping locations or the threaded bosses for the PP cover bolts... at least not pushing them as hard as I was.
|
|
|
|
1986 Fiero GT
|
JUN 16, 10:20 PM
|
|
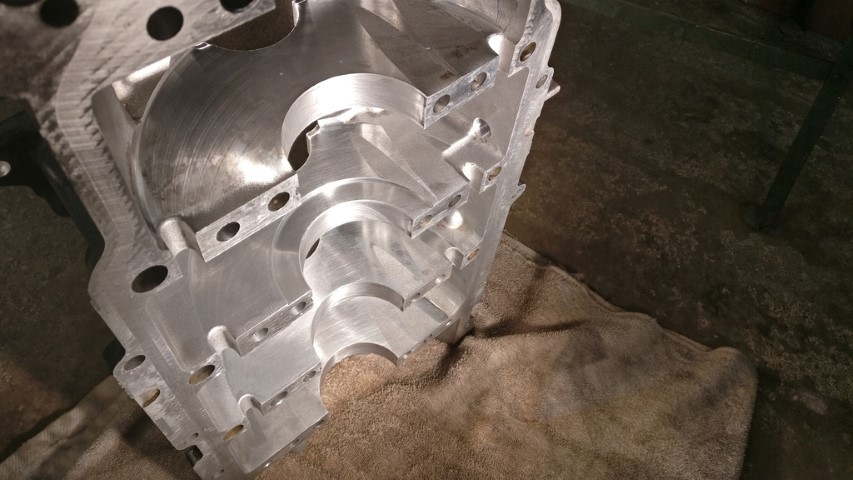
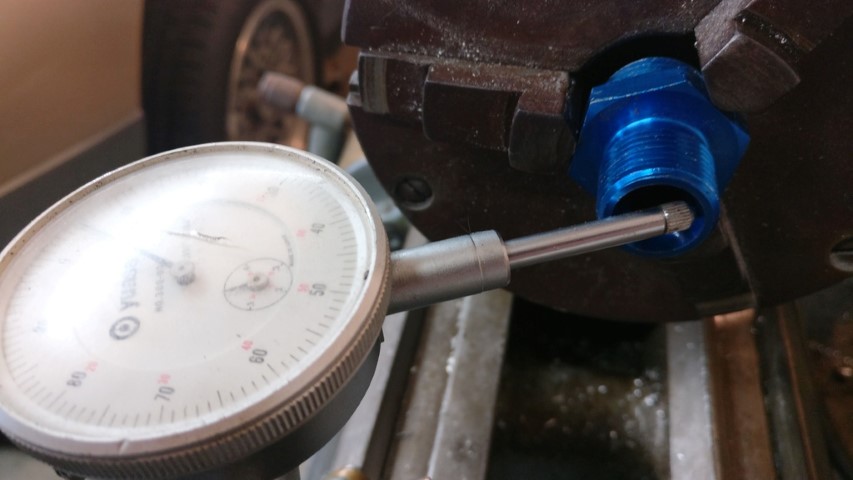
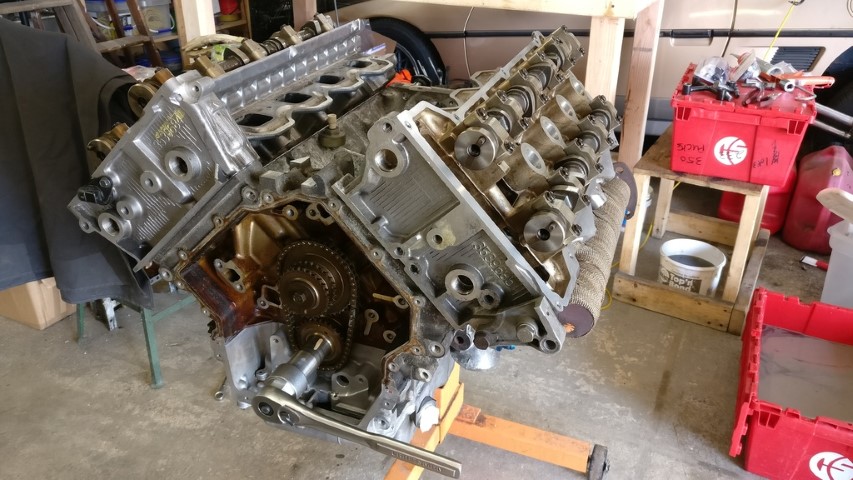
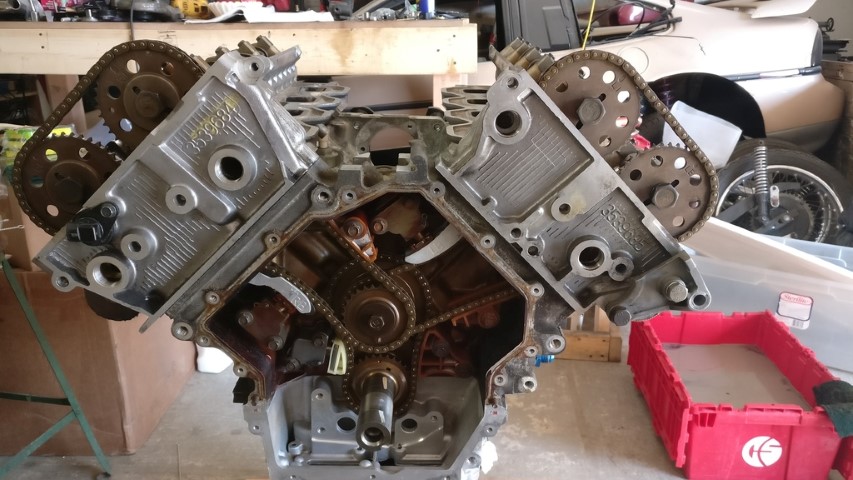
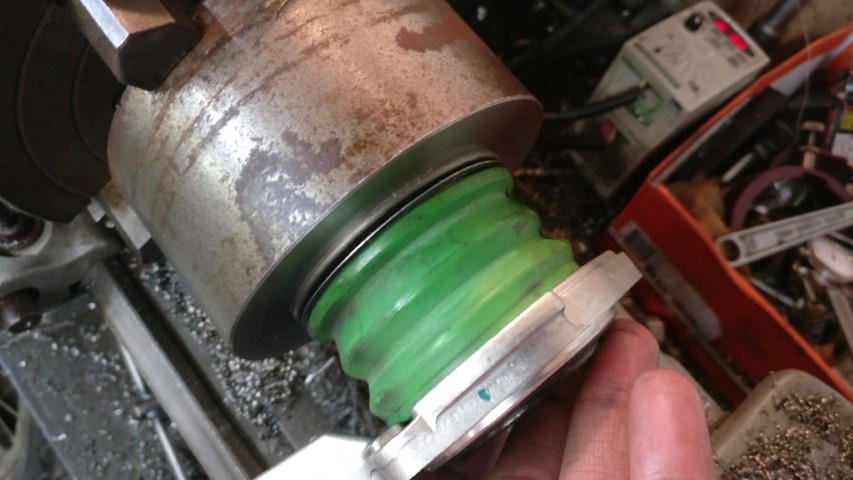
I put that lathe back together the other day and started working on that throwout adapter.
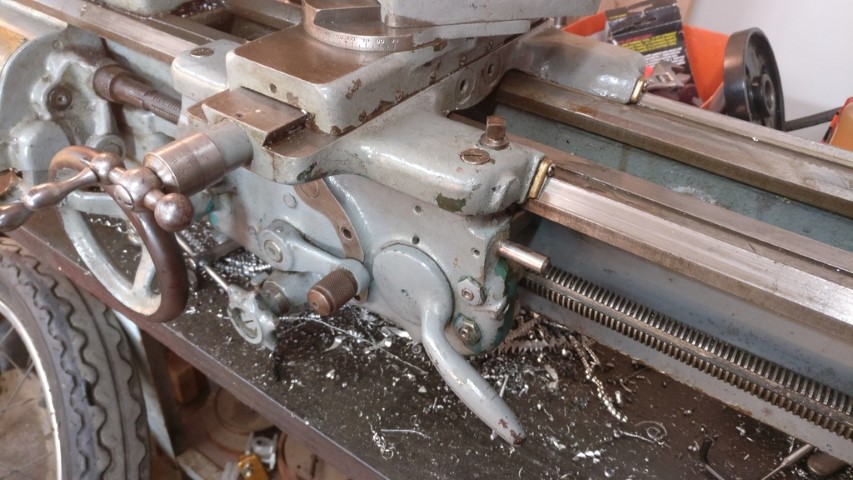
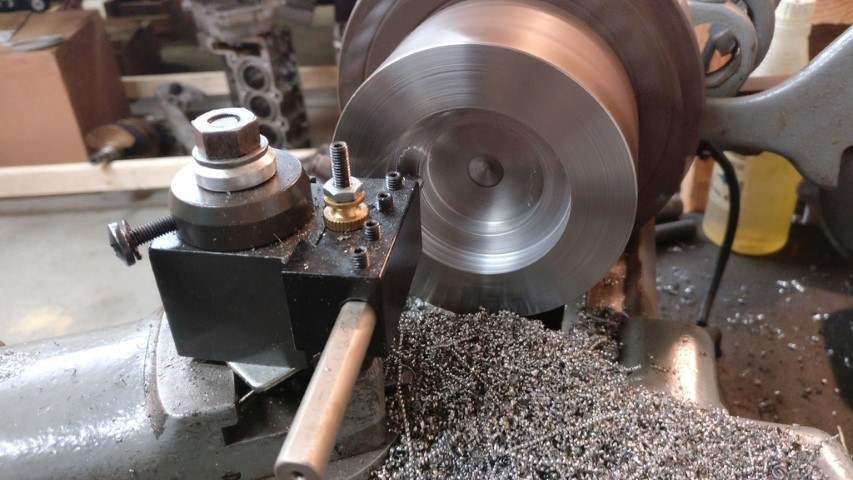
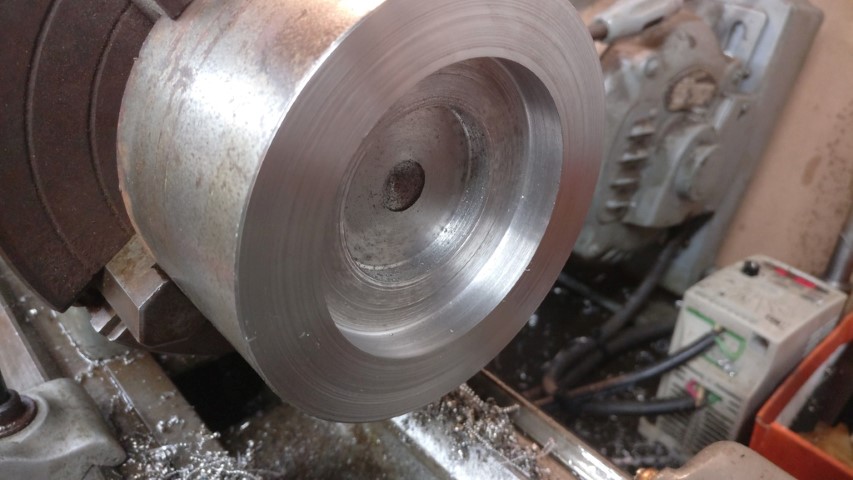
I was struggling to get further. Turning the ID and counterbore the other day wasn't too bad. Today when trying to turn the OD, the machine didn't seem to have much power, surface finish was gummy and it chewed up the three inserts I had left right away. I ended up doing some research and discovering that I was spinning the spindle too slowly to get the recommended ~600SFM for 4140PH, which is like 30-32rc and I wasn't cutting as quickly as recommended. At this point all that I had left was a boring bar with CCMT inserts and I started using that. Actually worked pretty well, until the ancient leather belt snapped.
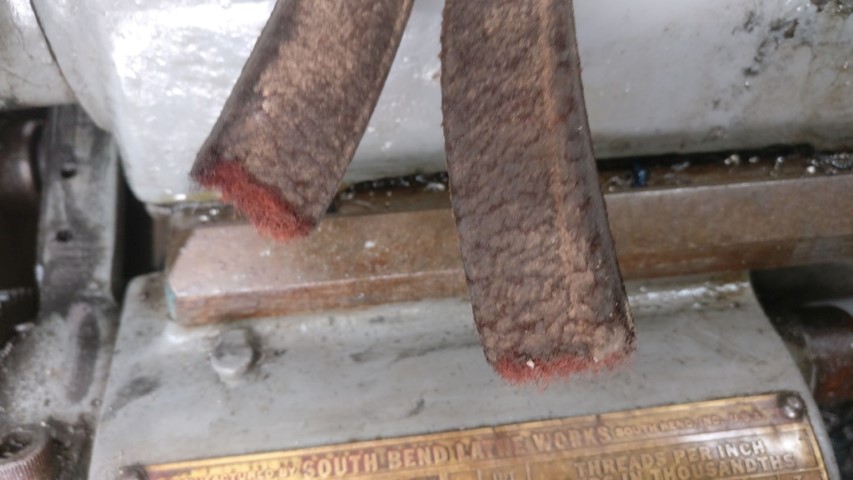
So, I measured for a new belt and set out to PepBoys for the belt and some bypass caps. They seemed to be the only local-ish store to stock them. Anyway, belt was too long. Hah. Great. So, I cut it and stitched it together with fishing line. Now, when I tried to tension the belt with the lever, it kept spring back and relieving tension. I couldn't understand why, until about the third time I applied the lever and the tensioning rod snapped.
Damn. Guess that's what I get for trying to actually use a 65 year old lathe.
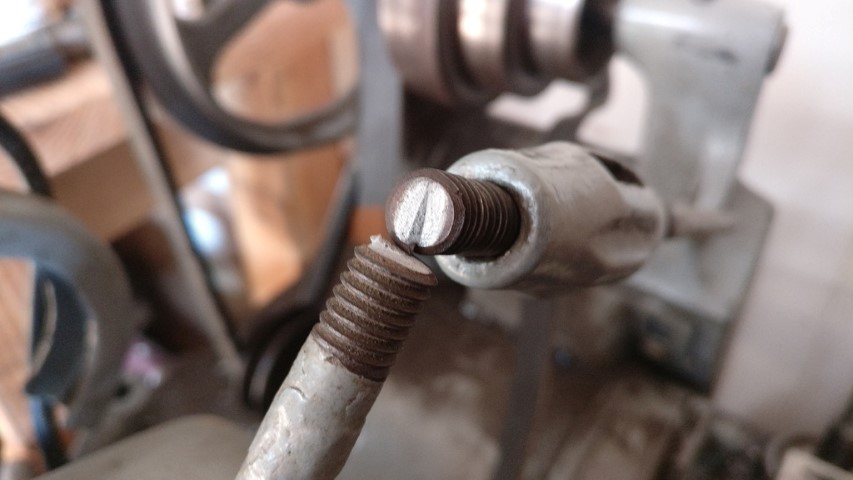
So, I think I'll get some 3/8" rod in the morning, then bend and thread it to replace at least the broken portion. I do have a 3/8-16 right hand die; I do not have a 3/8-16 left hand die. That'll have to wait until I can get a hold of one. Then hopefully I can fix the belt and get it back up and running. I need this machine to finish this throwout adapter and injector bungs for my new rails.
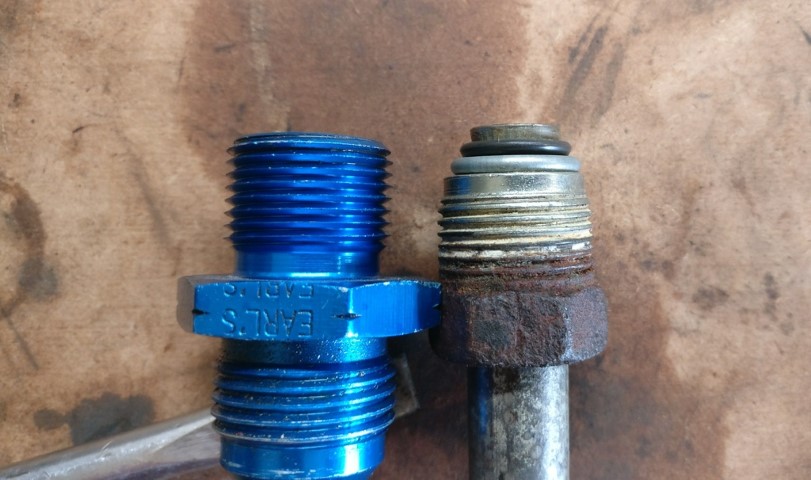
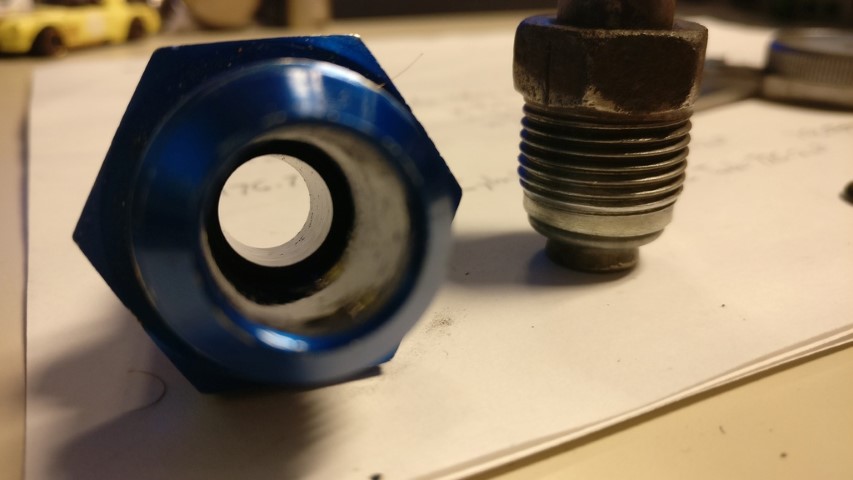
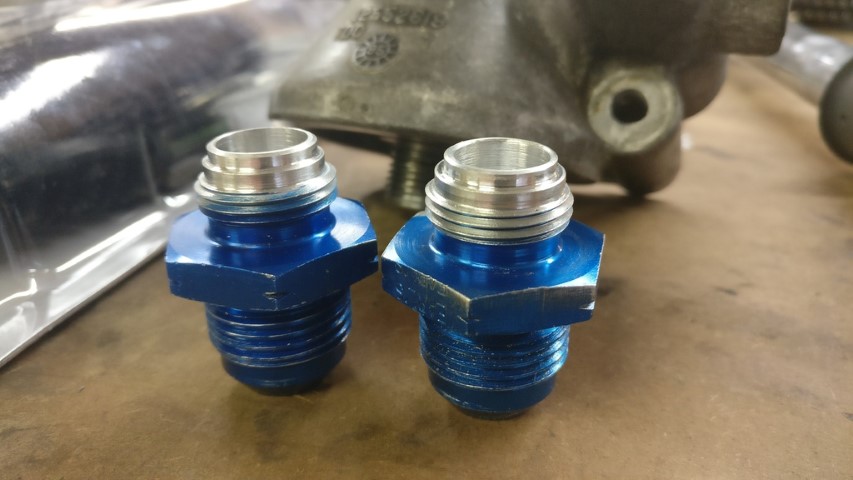
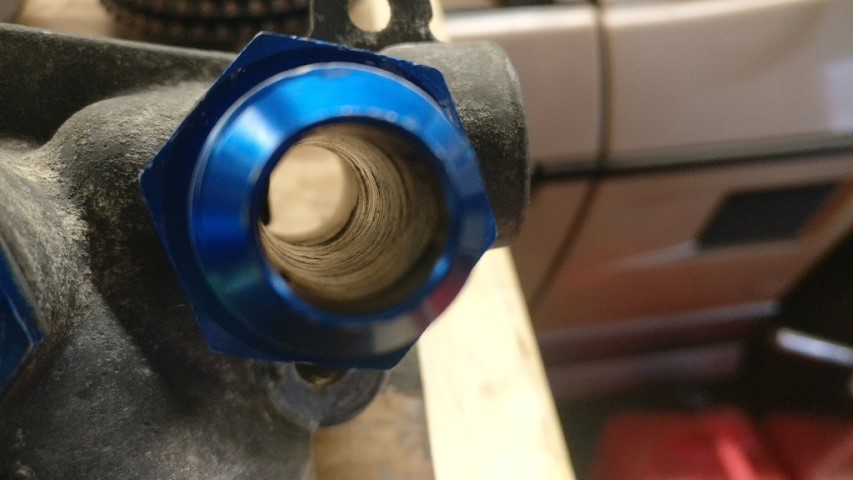
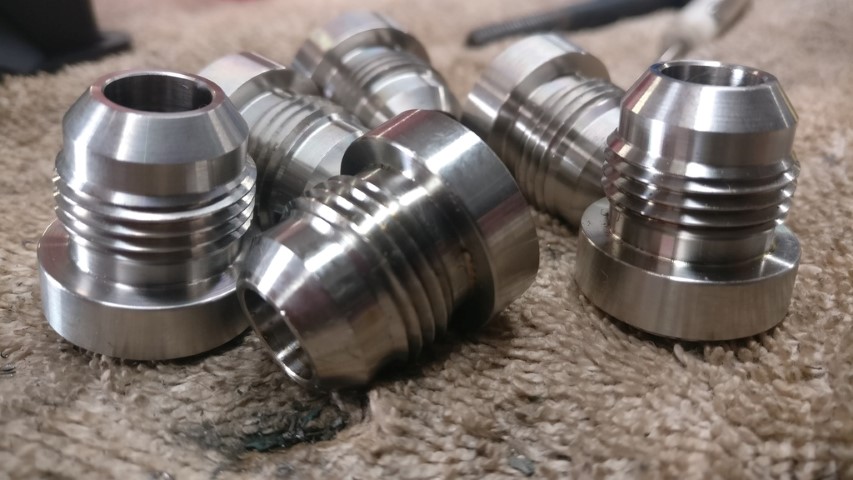
Speaking of bungs, check these beauties out. They were like $3 apiece shipped. Couldn't make 'em for that.
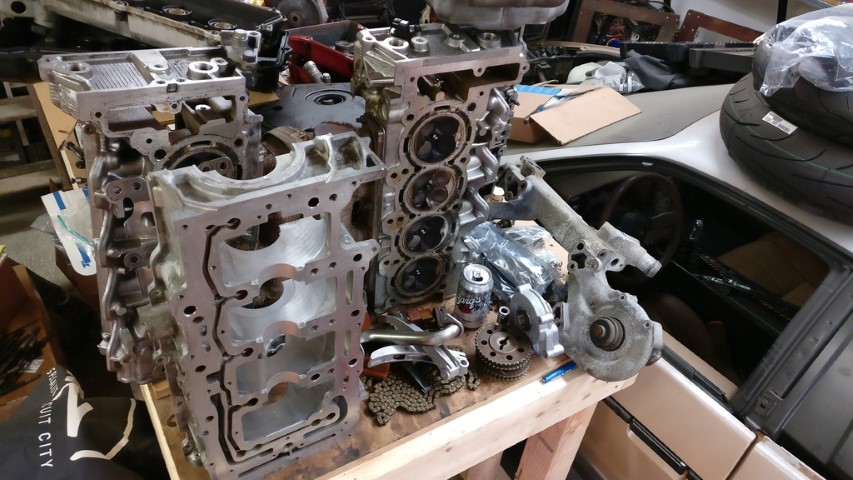
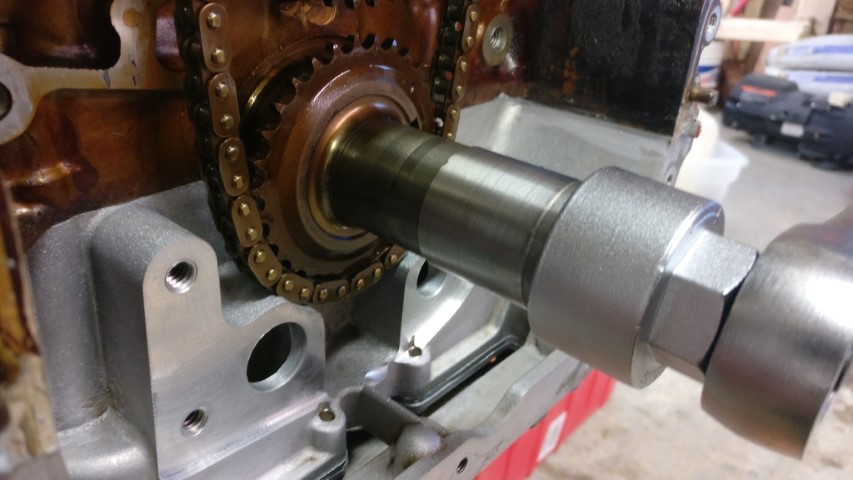
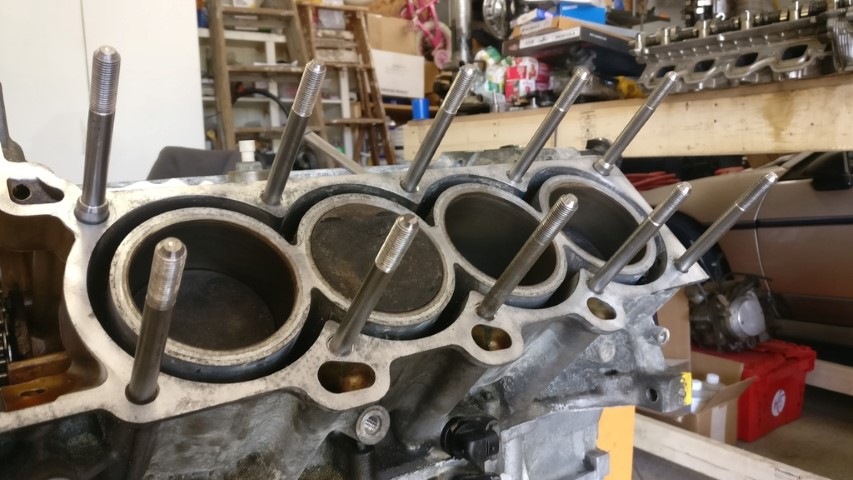
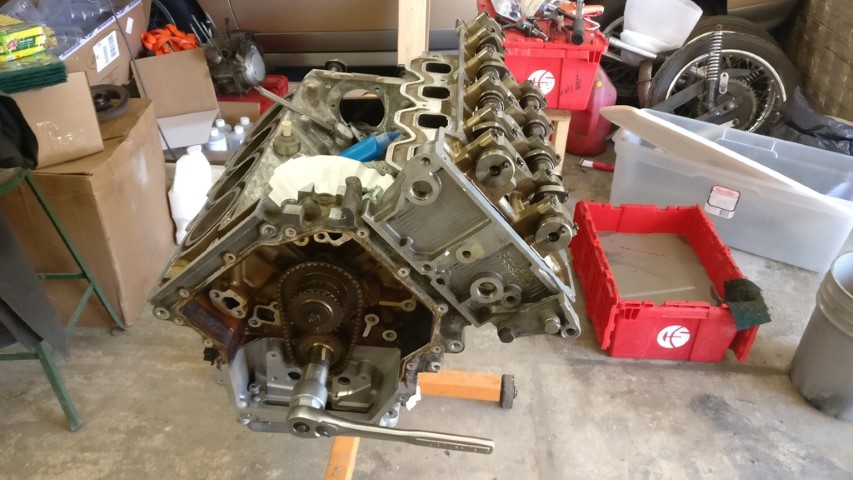
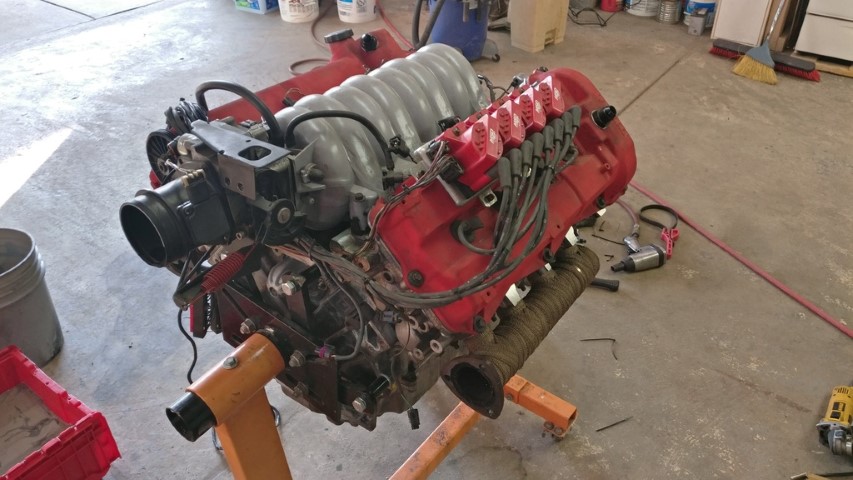
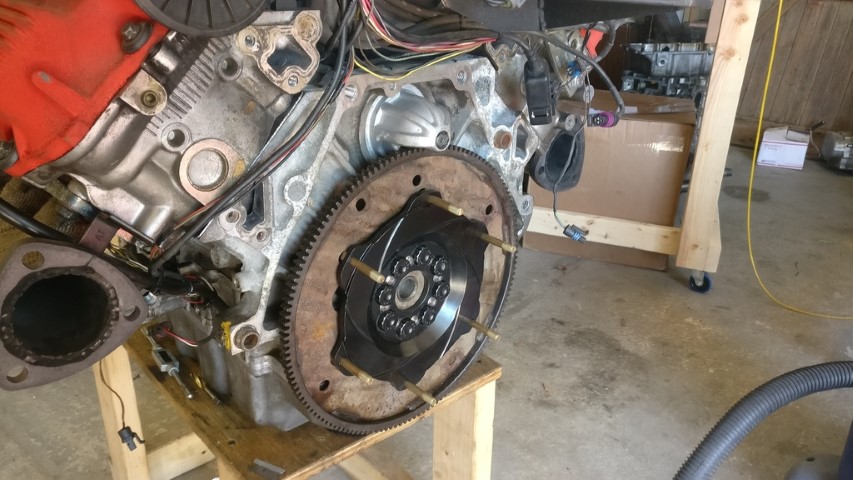
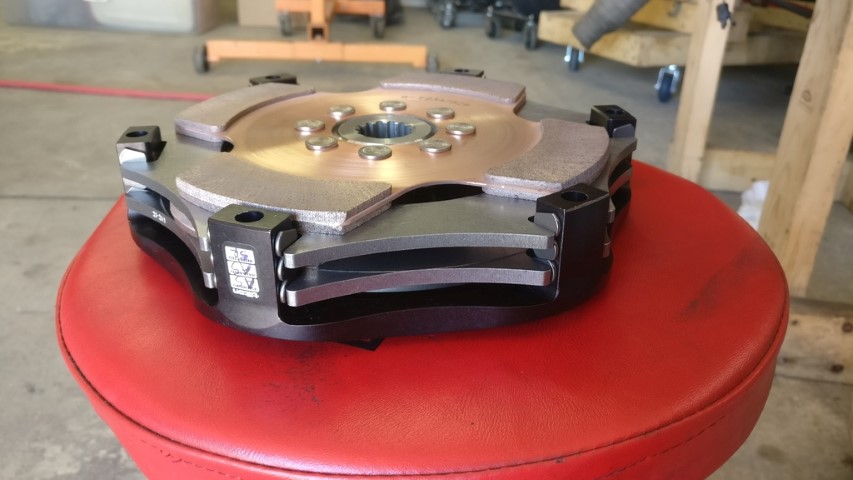
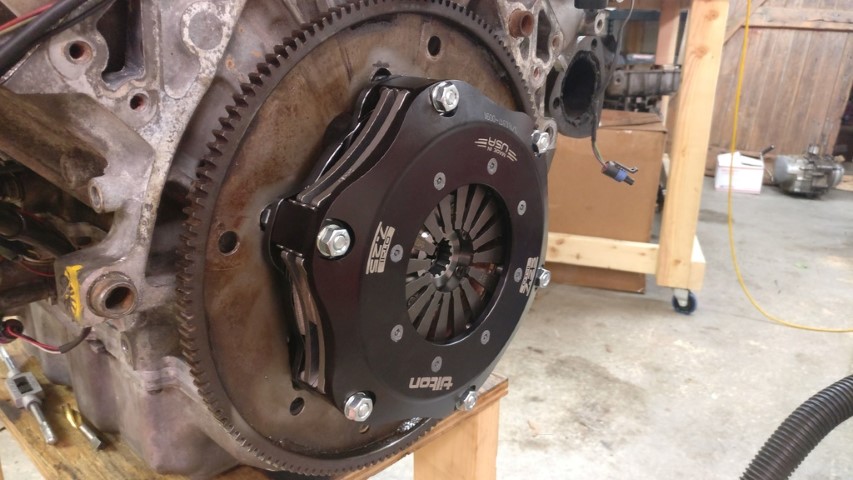
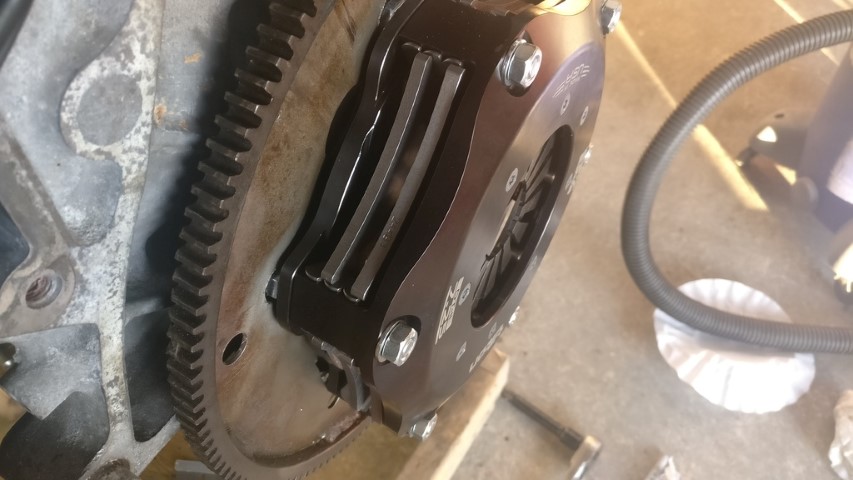
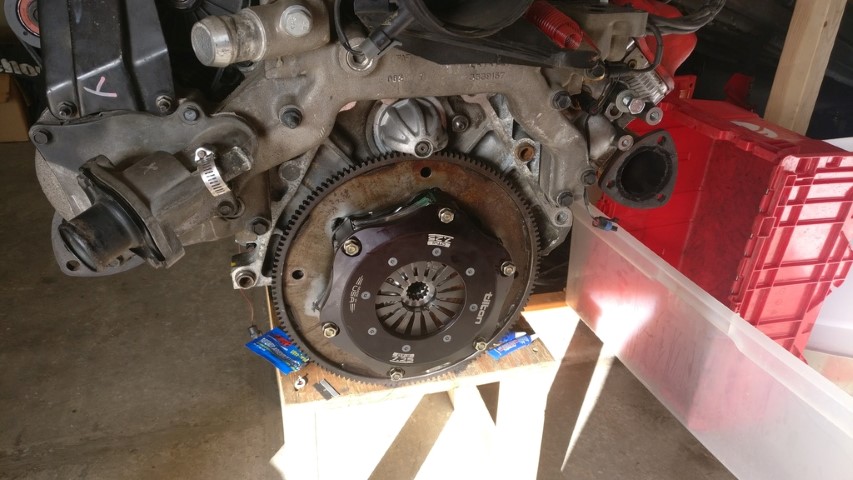
Anyway, I managed to get the flywheel and clutch fully assembled and torqued down with LocTite, ready to go.
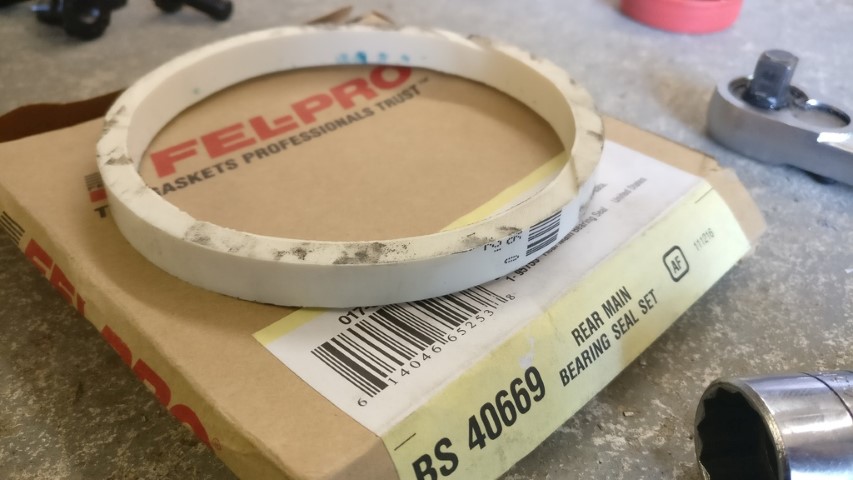
Nice, new rear main seal went in first with that fancy white tool.
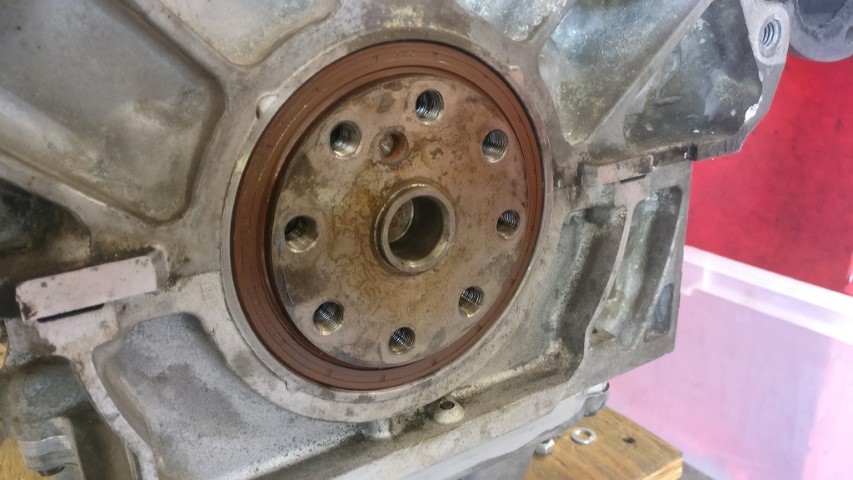
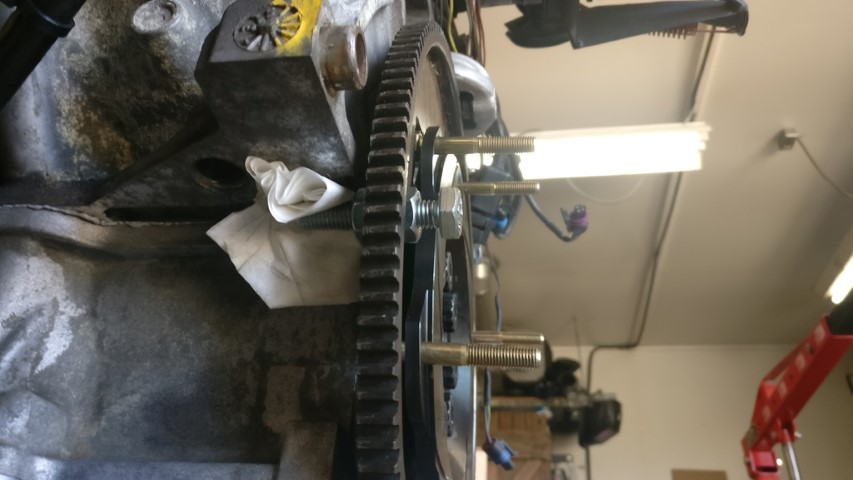
Then I assembled the flexplate and flywheel with the ARP hardware, red LocTite on the threads and UltraTorque lube under the heads. I finagled a pretty decent crankshaft locking tool and put the flywheel bolts at 70ft/lbs, the clutch cover.bolts went to 18ft/lbs.
And everything all torqued down with the water crossover back on the heads and block.
If I can get that lathe back together tomorrow, I might still have the motor back in the car this weekend.[This message has been edited by 1986 Fiero GT (edited 10-02-2021).]
|
|
|
|
Will
|
JUN 17, 06:58 AM
|
|
|
Did you wipe the excess lubricant off the bolt heads before you assembled the clutch?
|
|
|
|