
 
     |
| Neil's Aventador build (Page 65/74) |

|
shemdogg
|
MAY 06, 08:00 PM
|
|
If u didnt say anything about the exhaust I woulda never noticed. Its barely off. U wanna see "off" look at my car lol
shem
|
|
|
|
Neils88
|
MAY 06, 09:27 PM
|
|
| quote | Originally posted by shemdogg:
If u didnt say anything about the exhaust I woulda never noticed. Its barely off. U wanna see "off" look at my car lol
shem |
|
Unfortunately my OCD takes over... now that I've seen some mistakes I probably won't sleep until they are fixed lol (... and I pointed out a slight misalignment in Car-lo's exhaust so I know he'll never let me get away with one lol  ) )
|
|
|
|
shemdogg
|
MAY 06, 10:02 PM
|
|
Im ocd too- but lazy. When I see something I go work on something else. Productive procrastination. ill get to it eventually lol
shem
|
|
|
|
355Fiero
|
MAY 21, 01:23 PM
|
|
All the way back on page 3 already.
Any updates Neil?
Cheers
Don
|
|
|
|
Neils88
|
MAY 22, 12:04 AM
|
|
| quote | Originally posted by 355Fiero:
All the way back on page 3 already.
Any updates Neil?
Cheers
Don |
|
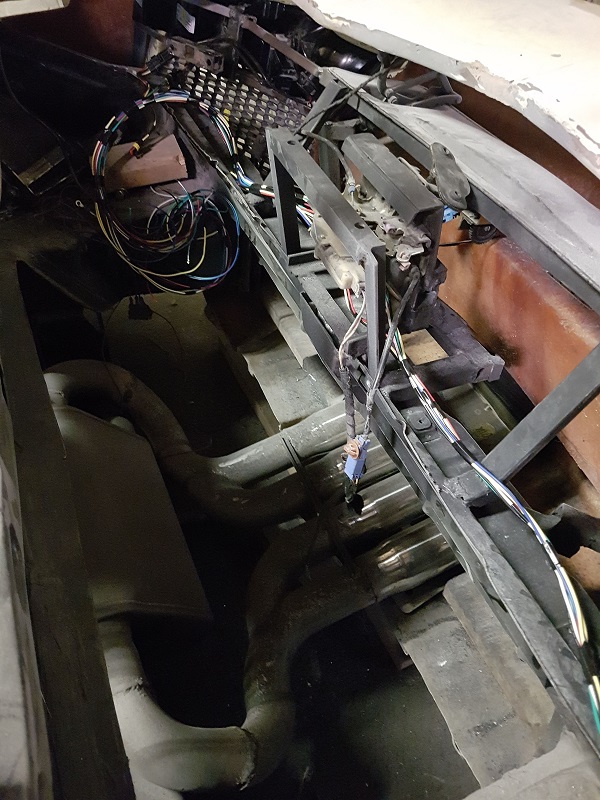
I'm currently wiring the rear end. I've built a wiring harness for the rear brake lights, turn signals, reverse lights, fog lights, license plate lights, active vent actuators, spoiler motor, spoiler position sensor and rear camera power connections. I'm using watertight automotive connectors. The harness will run into a rear control unit (Arduino based) that will operate everything as required. The microcontroller might seem like overkill but it's great for running things like the vents and spoiler which have timing requirements and pwm dimming control of LEDs. We'll see how things go once I prototype the system.
|
|
|
|
RCR
|
MAY 22, 12:11 PM
|
|
Sounds pretty cool (hi-techie), Neil. 
Bob
|
|
|
|
Neils88
|
MAY 27, 08:43 PM
|
|
The new rear end wiring harness is nearing completion.
| quote | Originally posted by RCR:
Sounds pretty cool (hi-techie), Neil.
Bob |
|
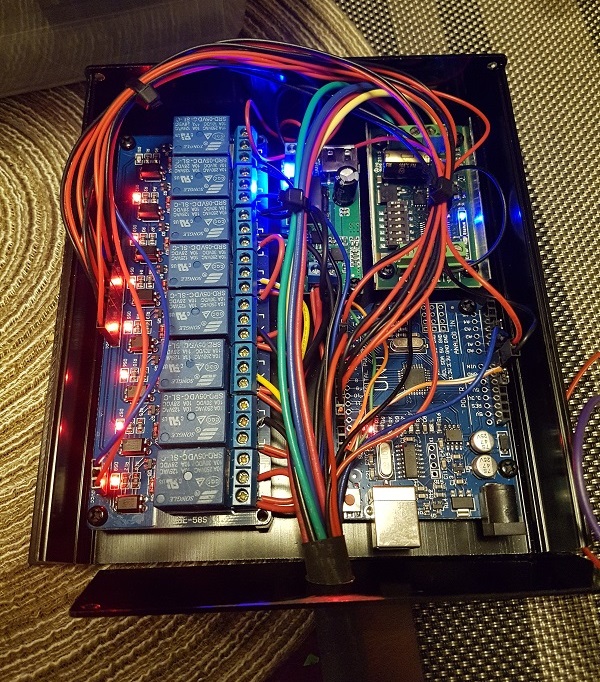
Here's the hi-techie components... (the controller is about 50% wired up right now, and the LED controllers aren't installed yet. The orange/green wires are also just a temporary serial communication line that ultimately will connect to the main on board computer...sort of a poor-mans CAN Bus system. For testing, I'll just use my laptop to send the control commands).

The only part that isn't sitting in the control box is the controller I'm using for the active vents, though control of the controller will still come from the control box..(I just had to say that...) 
Mindy is inspecting my work. I'm sure the cat will come by shortly to ensure that the wiring harness meets the correct standard in chewability.... 
|
|
|
|
RCR
|
SEP 03, 06:05 PM
|
|
Hey Neil,
It's been three months. Hope all is well.
Bob
|
|
|
|
Neils88
|
SEP 04, 09:10 PM
|
|
| quote | Originally posted by RCR:
Hey Neil,
It's been three months. Hope all is well.
Bob |
|
Hi Bob!
Unfortunately, I've been taking a long health break from the project. I did get a few things done...but not much. I was never in a rush to get finished so I'm happy to leave it sitting until I have a little more energy. 
The pics below don't really represent that much work, but I guess it counts as a little progress...
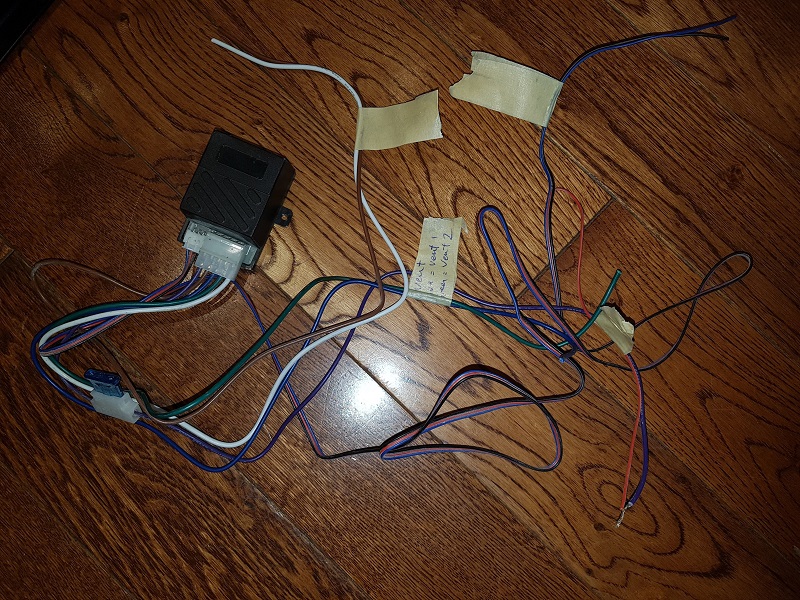
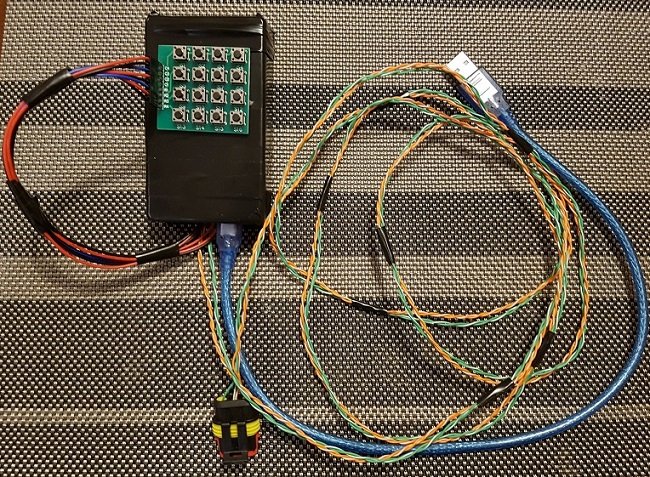
As mentioned a few times before, I am using a microcontroller to drive all the body and light functions in the rear of the car (as I will do for the rest of the car later). The first pic below shows the hand-held microprocessor used for testing. When a button is pressed on the hand-held controller, a serial message is sent to the rear-controller to relay instructions. The hand-held unit (which allows me to stand behind the car while testing functions) will ultimately be replaced by the main processor installed under the dash.
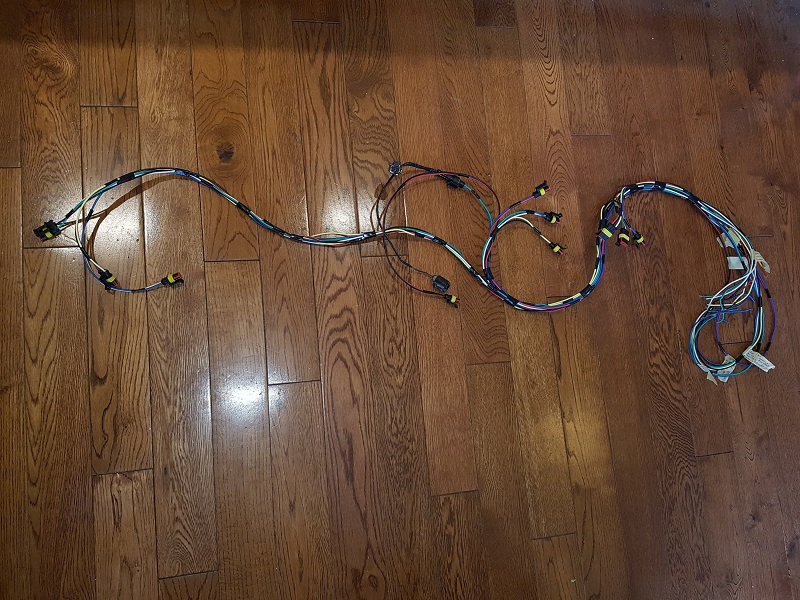
Here is the rear-controller with all internal connections completed.
One problem I quickly ran into was the number of connectors (obviously I want the ability to unplug and remove the rear-controller if required. As you can see below, that many connectors can make quite a mess...
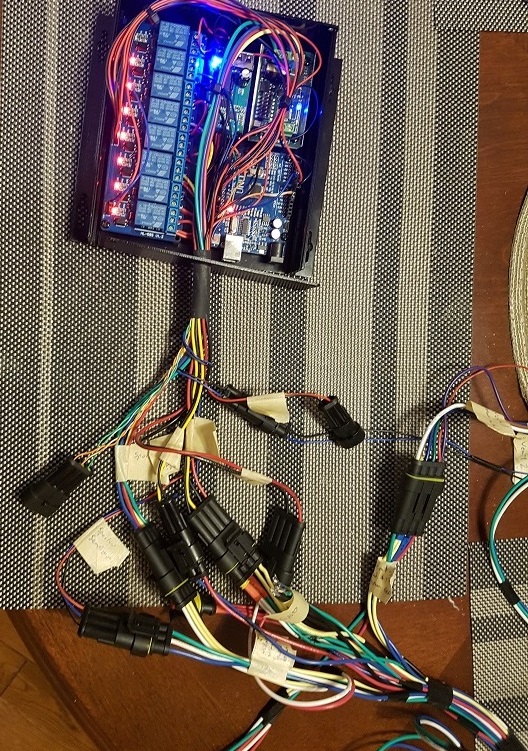
I have "temporarily" replaced all the connectors with a single connector (black connector with all the white wires). I ensured each connection was properly soldered and wrapped with heat-shrink tubing....because "temporary" components often get forgotten and become permanent... 
.jpg)
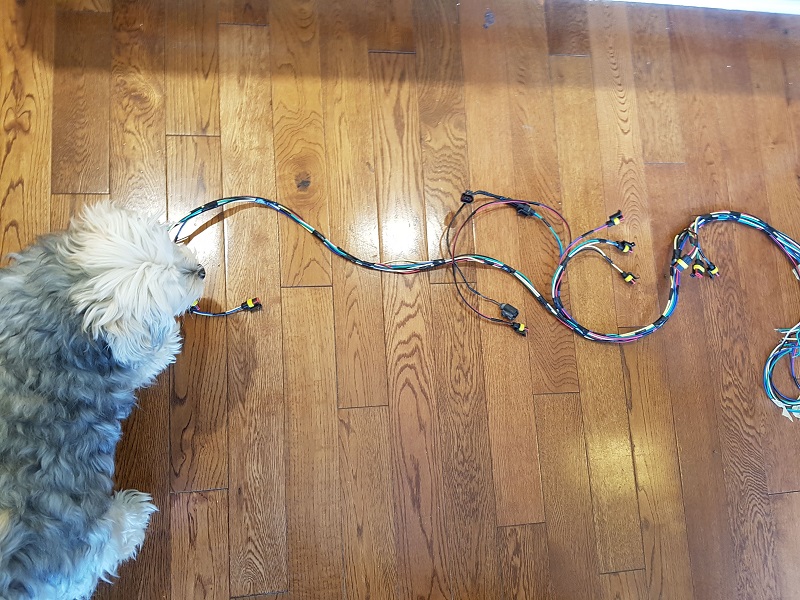
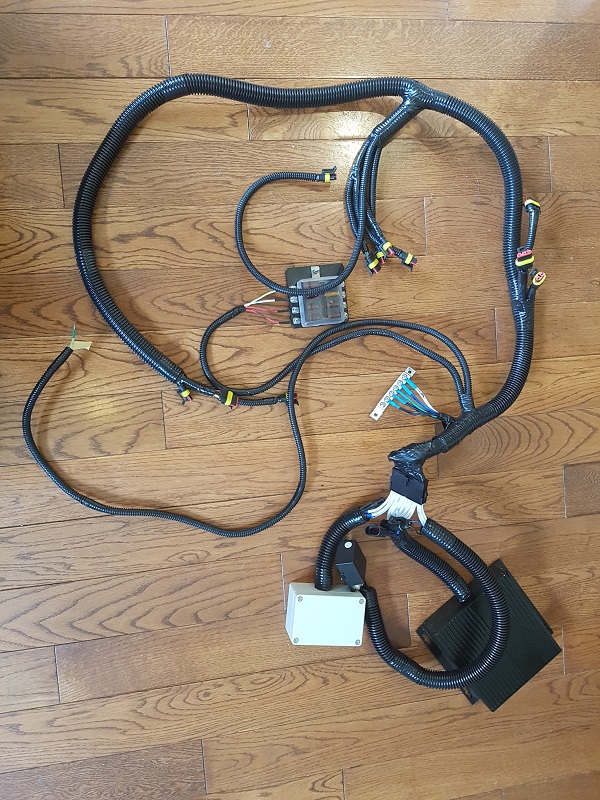
Finally...I have completed the harness and added the split plastic protector. Also note that I have added a small fuse panel and a ground bus bar to the harness. This is now ready for installation. 

Neil
|
|
|
|
pmbrunelle
|
SEP 04, 09:56 PM
|
|
| quote | Originally posted by Neils88:
I was never in a rush to get finished so I'm happy to leave it sitting until I have a little more energy. |
|
How much are you doing this project for the process of doing it, versus doing it for the end result?
Did you not want to implement a normal CAN bus?
Is it just that the Arduino has a UART, but not a CAN peripheral?
I suppose that the benefit of a modified car for personal use is that you're free to do whatever non-standard thing you like.
To make the UART a little more "automotive grade", I would implement a CRC, and possibly a sequential message counter.[This message has been edited by pmbrunelle (edited 09-04-2018).]
|
|
|
|