 
     |
| Neil's Aventador build (Page 52/74) |

|
Neils88
|
MAR 19, 07:26 PM
|
|
| quote | Originally posted by RCR:
Really cool, Neil. You've got me wanting to get back out in the garage.

Bob |
|
Thanks Bob. Spring is coming...hopefully we'll all be more inspired soon, lol.
|
|
|
|
RCR
|
MAR 20, 06:06 AM
|
|
That looks like a complex motion. Could you show a second picture with it opened up to the raised position. It looks way more complicated than my decklid hinges. Just curious.
Bob
|
|
|
|
Neils88
|
MAR 20, 07:40 PM
|
|
| quote | Originally posted by RCR:
That looks like a complex motion. Could you show a second picture with it opened up to the raised position. It looks way more complicated than my decklid hinges. Just curious.
Bob |
|
Bob, yes...it is complex motion. Unfortunately, simple trunk hinges won't work for this application since they need to be too long in order to get the correct motion and height. Basically, a simple four bar linkage would sit about 3 inches past then end of the car. I couldn't get any pics of the hinge in motion since it's clamped inside the car right now, lol. But I did the next best thing and cut and paste clips from the linkage simulation I made... Hopefully this shows how the linkage functions. 

(each square represents 0.5"...and is pretty close to exactly the same lengths as the links in the actual mechanism.)
|
|
|
|
RCR
|
MAR 21, 05:57 AM
|
|
Cudos to your ingenuity. Having farted around with stock hinges, I know the effort it took to get everything to line up and operate like you did.

Bob
|
|
|
|
Neils88
|
MAR 21, 04:57 PM
|
|
| quote | Originally posted by RCR:
Cudos to your ingenuity. Having farted around with stock hinges, I know the effort it took to get everything to line up and operate like you did.
Bob |
|
Thanks Bob. As I mentioned before, building the first one was easy...the trick will be building the second one to exactly match it...
|
|
|
|
pmbrunelle
|
MAR 21, 09:17 PM
|
|
Since you have two DOF, then you need two actuators (per side)?
Why did you modify the Mazda hinges, rather than starting from virgin flatbar? Did you want a pre-done solution to the pivot points?
The duplication aspect (for left and right) should be easier if making brand-new parts.
Edit: I see it's one DOF upon looking closer at the sketches. I thought it was two, because you mentioned using two hinges to make one.[This message has been edited by pmbrunelle (edited 03-21-2017).]
|
|
|
|
Neils88
|
MAR 21, 10:08 PM
|
|
| quote | Originally posted by pmbrunelle:
Since you have two DOF, then you need two actuators (per side)?
Why did you modify the Mazda hinges, rather than starting from virgin flatbar? Did you want a pre-done solution to the pivot points?
The duplication aspect (for left and right) should be easier if making brand-new parts.
Edit: I see it's one DOF upon looking closer at the sketches. I thought it was two, because you mentioned using two hinges to make one.
|
|
Good questions. I do have some limited machine shop capabilities here, but from experience I can tell you that making solid pivot joints is tough. It works out significantly simpler to use the existing hinges and simply cut and weld the sections as required (I could have used any similar trunk hinge, I just happen to like the Mazda hinges). If the pivots are at all loose then the whole assembly will have lots of play. That play can increase dramatically when more pivot joints come into play. I can tell you that there is absolutely no play at all in the hinge that I created. The last thing I need is to have the spoiler rattling around. I needed two hinges since there are 7 pivot joints per spoiler hinge and the trunk hinges only come with 4 pivot joints. I will take some time to clean them up and make them look nice.
As you noted, these hinges have a single DOF. The spoiler assembly will be driven by a single motor connected to the "purple link" (one per hinge) in the schematic drawing. The distance between the hinges isn't that far since they both sit in between the tail lights (same as the oem hinges).
|
|
|
|
Neils88
|
MAR 24, 07:20 PM
|
|
Not much accomplished this week, but I did get the pieces cut for the other spoiler hinge. I'll fine tune them this weekend and hopefully get it all welded together.

|
|
|
|
Neils88
|
MAR 25, 05:47 PM
|
|
Two matching hinges built. Next job will be to connect a motor drive bracket to each of them (point that physically pushes the hinge into the different positions), then I'll clean them up properly and give them a nice coat of paint.
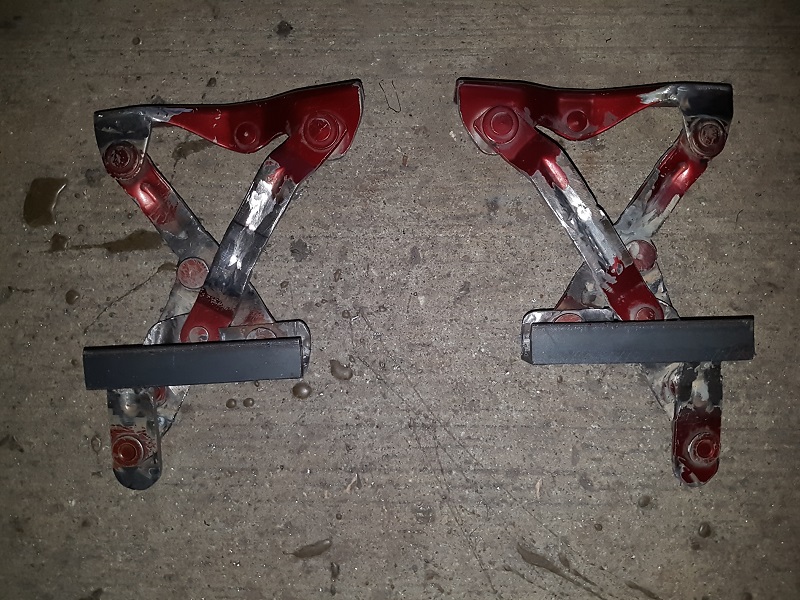
It took a lot of tweaking to get them to follow identical paths. I tack welded the pivot joints to the frame bracket, tested it against the other hinge, then ground off the tack weld and adjusted as required. Eventually I got it right. Of course actually mounting hinges to the frame so the spoiler sits perfectly where it needs to be should be tons of fun....
|
|
|
|
Neils88
|
MAR 26, 09:22 PM
|
|
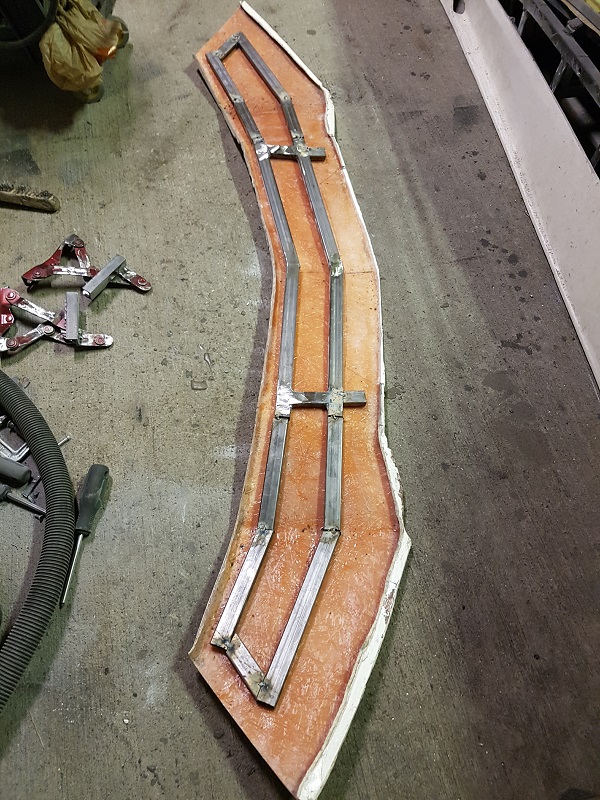
I was planing on creating the motor drive brackets next, but didn't have the right materials handy. I'll have to go do a little shopping this week. In the meantime, I began putting a spoiler frame together. Using light gauge metal to keep the weight down. The brake light will be embedded along the rear edge of the spoiler.
|
|
|
