|
| My DIY rear Coil-over conversion (84 model)... play by play (Warning many pics) (Page 4/11) |

|
Greenmeansgo
|
SEP 15, 05:42 PM
|
|
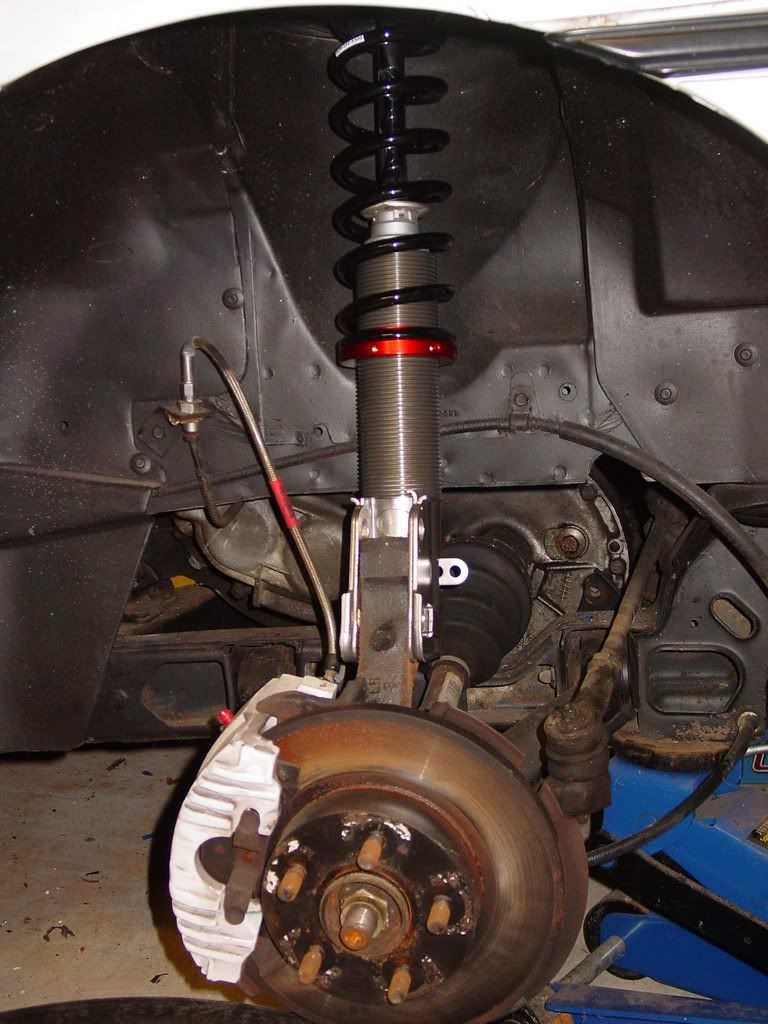
Just so everyone knows if you dont want to use a dremel. I used a hacksaw and cut both welds were the weld meets the plate. I went 90% thru and hammered until the weld cracked and it took me only 15 mins.
Still have to cut off the actual weld with something tho
|
|
|
|
redraif
|
SEP 16, 03:43 PM
|
|
| quote | Originally posted by Greenmeansgo:
All of your parts are black so I can tell what order you put it all back together and which side is up on them |
|
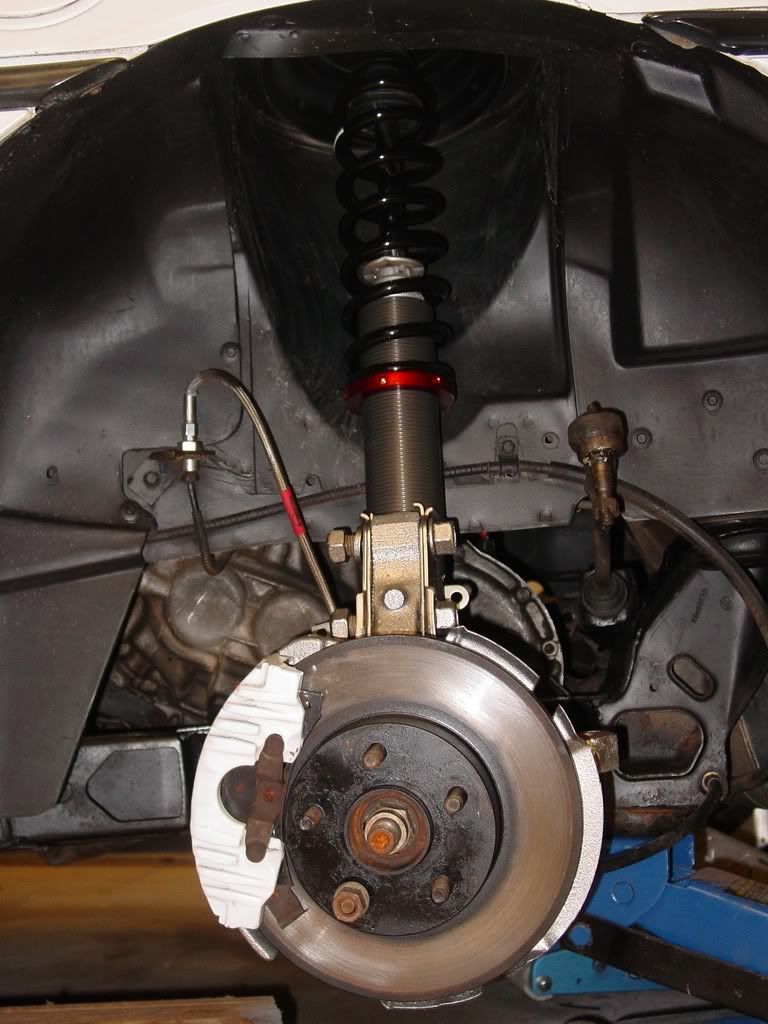
Ok I got everything edited and more pics to referance orrientation for "Greenmeansgo"! Hope that does the trick! Wheels should be mounted on tires Saturday and when I sort out all the control arm and tie rod bushings and painting I will have FINAL pics of the install!
Green... let me know if that has cleared everything up![This message has been edited by redraif (edited 09-16-2011).]
|
|
|
|
Greenmeansgo
|
SEP 16, 05:08 PM
|
|
|
Thats alot better thanks!
|
|
|
|
americasfuture2k
|
SEP 17, 12:01 PM
|
|
very good sir! 
|
|
|
|
redraif
|
SEP 20, 01:13 PM
|
|
|
|
|
redraif
|
OCT 04, 03:10 PM
|
|
|
|
|
redraif
|
OCT 25, 03:02 PM
|
|
|
|
|
nitroheadz28
|
OCT 25, 03:42 PM
|
|
Looks great! I only took out 1 coil from the front and can fit 3 fingers comfortably, I think I'll go back in and cut another half off next time I'm fiddling in there. Definitely a big difference with new bushings/ shocks and struts/ rear coilovers/ ball joints/ tie rods. My only complaint is that one of my bushings started squeaking in the front after only 500 miles on the poly install  . I bought a whole tub of poly grease and they were coated with obscene amounts of grease and they still squeak!! Next year I'm going back in and doing a rubber bushing conversion, forget poly. . I bought a whole tub of poly grease and they were coated with obscene amounts of grease and they still squeak!! Next year I'm going back in and doing a rubber bushing conversion, forget poly.
|
|
|
|
redraif
|
OCT 25, 05:22 PM
|
|
Thank you!
As far as the height... I need to measure what my new gap is now that the car has 20 miles on it. I wanted to go 2 coils, but I knew that right now I could not get the bump stops cut down. So the plan is, with all the hard stuff done, take things partially apart.... get a mobile welder, or take the car to someone's place. Take apart only what I have to to mod the stops and take another .5 off the front coils, or get lowering ball joints to go that extra little bit in front.
With all my control arms I added greasable fittings. I also added them to my swap bar. I hope they work as well as planned to prevent sqeaks and premature wear in the poly.[This message has been edited by redraif (edited 10-25-2011).]
|
|
|
|
redraif
|
OCT 27, 07:43 PM
|
|
|
Hopefully I can get the pics up soon of the greasble fittings maybe it can help.others avoid the squeaks.
|
|
|