
 
     |
| Any recommended universal coolant reservoir tanks? (Page 3/4) |

|
theogre
|
MAR 28, 11:48 AM
|
|
No surprise to me... been there just last year.
⚠️ Warning: Heater pipes are Aluminum tube.
Very likely other bracket &/or metal under gas tank have issues and damage to plastic on the tube at minimum.
cut at the leak, install 3/4" rubber hose. Non stock item @ most local store but most can order same or next day w/o shipping charge.
Likely the bracket won't fit w/o mod or replace w/ other metal.
Only need 2 clamps on hose. Can't "blow out/off" because other things stops the tube section moving.
See Hidden Fuel and Coolant Leaks... https://www.fiero.nl/forum/Forum2/HTML/146198.html
|
|

|
Patrick
|
MAY 05, 03:36 AM
|
|
I finally got around to dealing with this coolant leak. I'll blame my delay on the wet weather we've been having here for weeks. 
The biggest hassle was getting the car up high enough, and safe enough, for me to be working under it. I had a bit of trouble determining where the leak actually was. It was always a very slow leak, so I knew I'd have to get the coolant good and hot, and under pressure, to find it. It seemed to me that the foam covering over the heater core inlet tube under the car was damp. I figured I'd start from the front, and open up the foam with an incision down the length of the pipe... but starting with just the first six inches from where it connects to the heater core inlet rubber hose. There's a plastic bracket that holds both tubes (inlet and outlet) to the underside of the car. This is what the bracket looks like (although this one is from a different area).
 | | CLICK FOR FULL SIZE |
The bracket was clamped onto the two tubes, and was immediately adjacent to where the rubber hoses connected to the tubes. It seemed a little damp around the inlet tube when I took the bracket off... and sure enough, this is what I eventually saw after waiting about ten minutes.
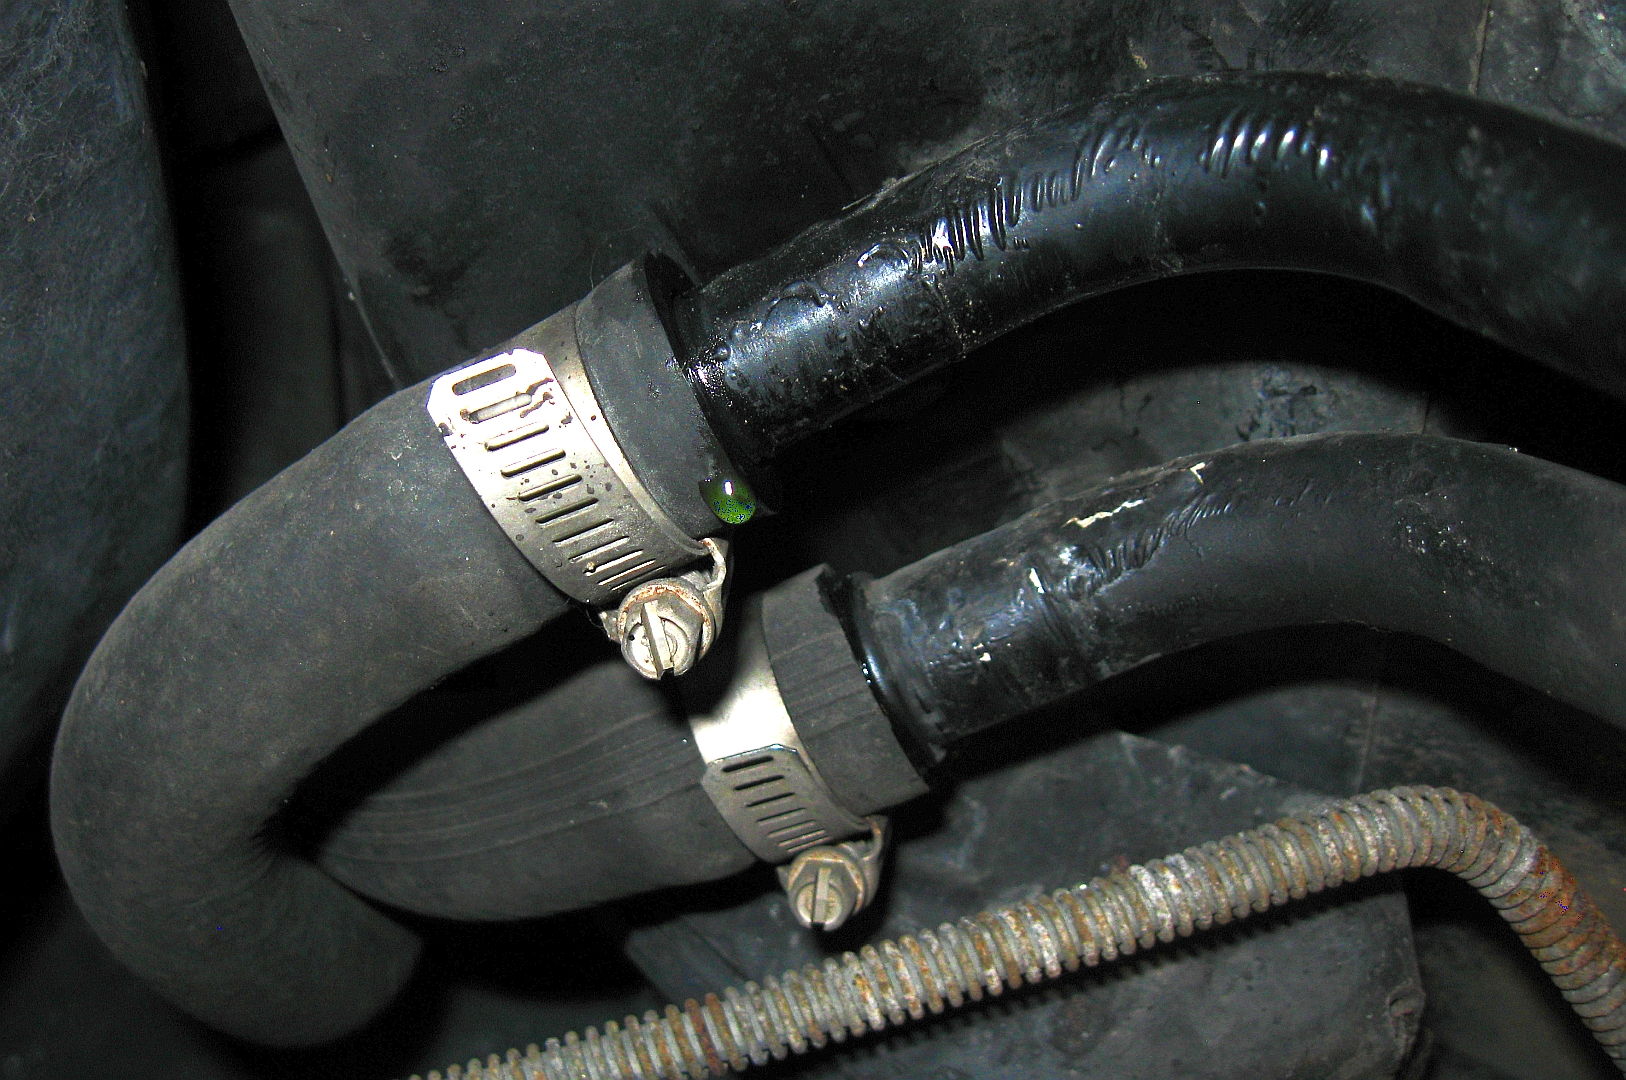
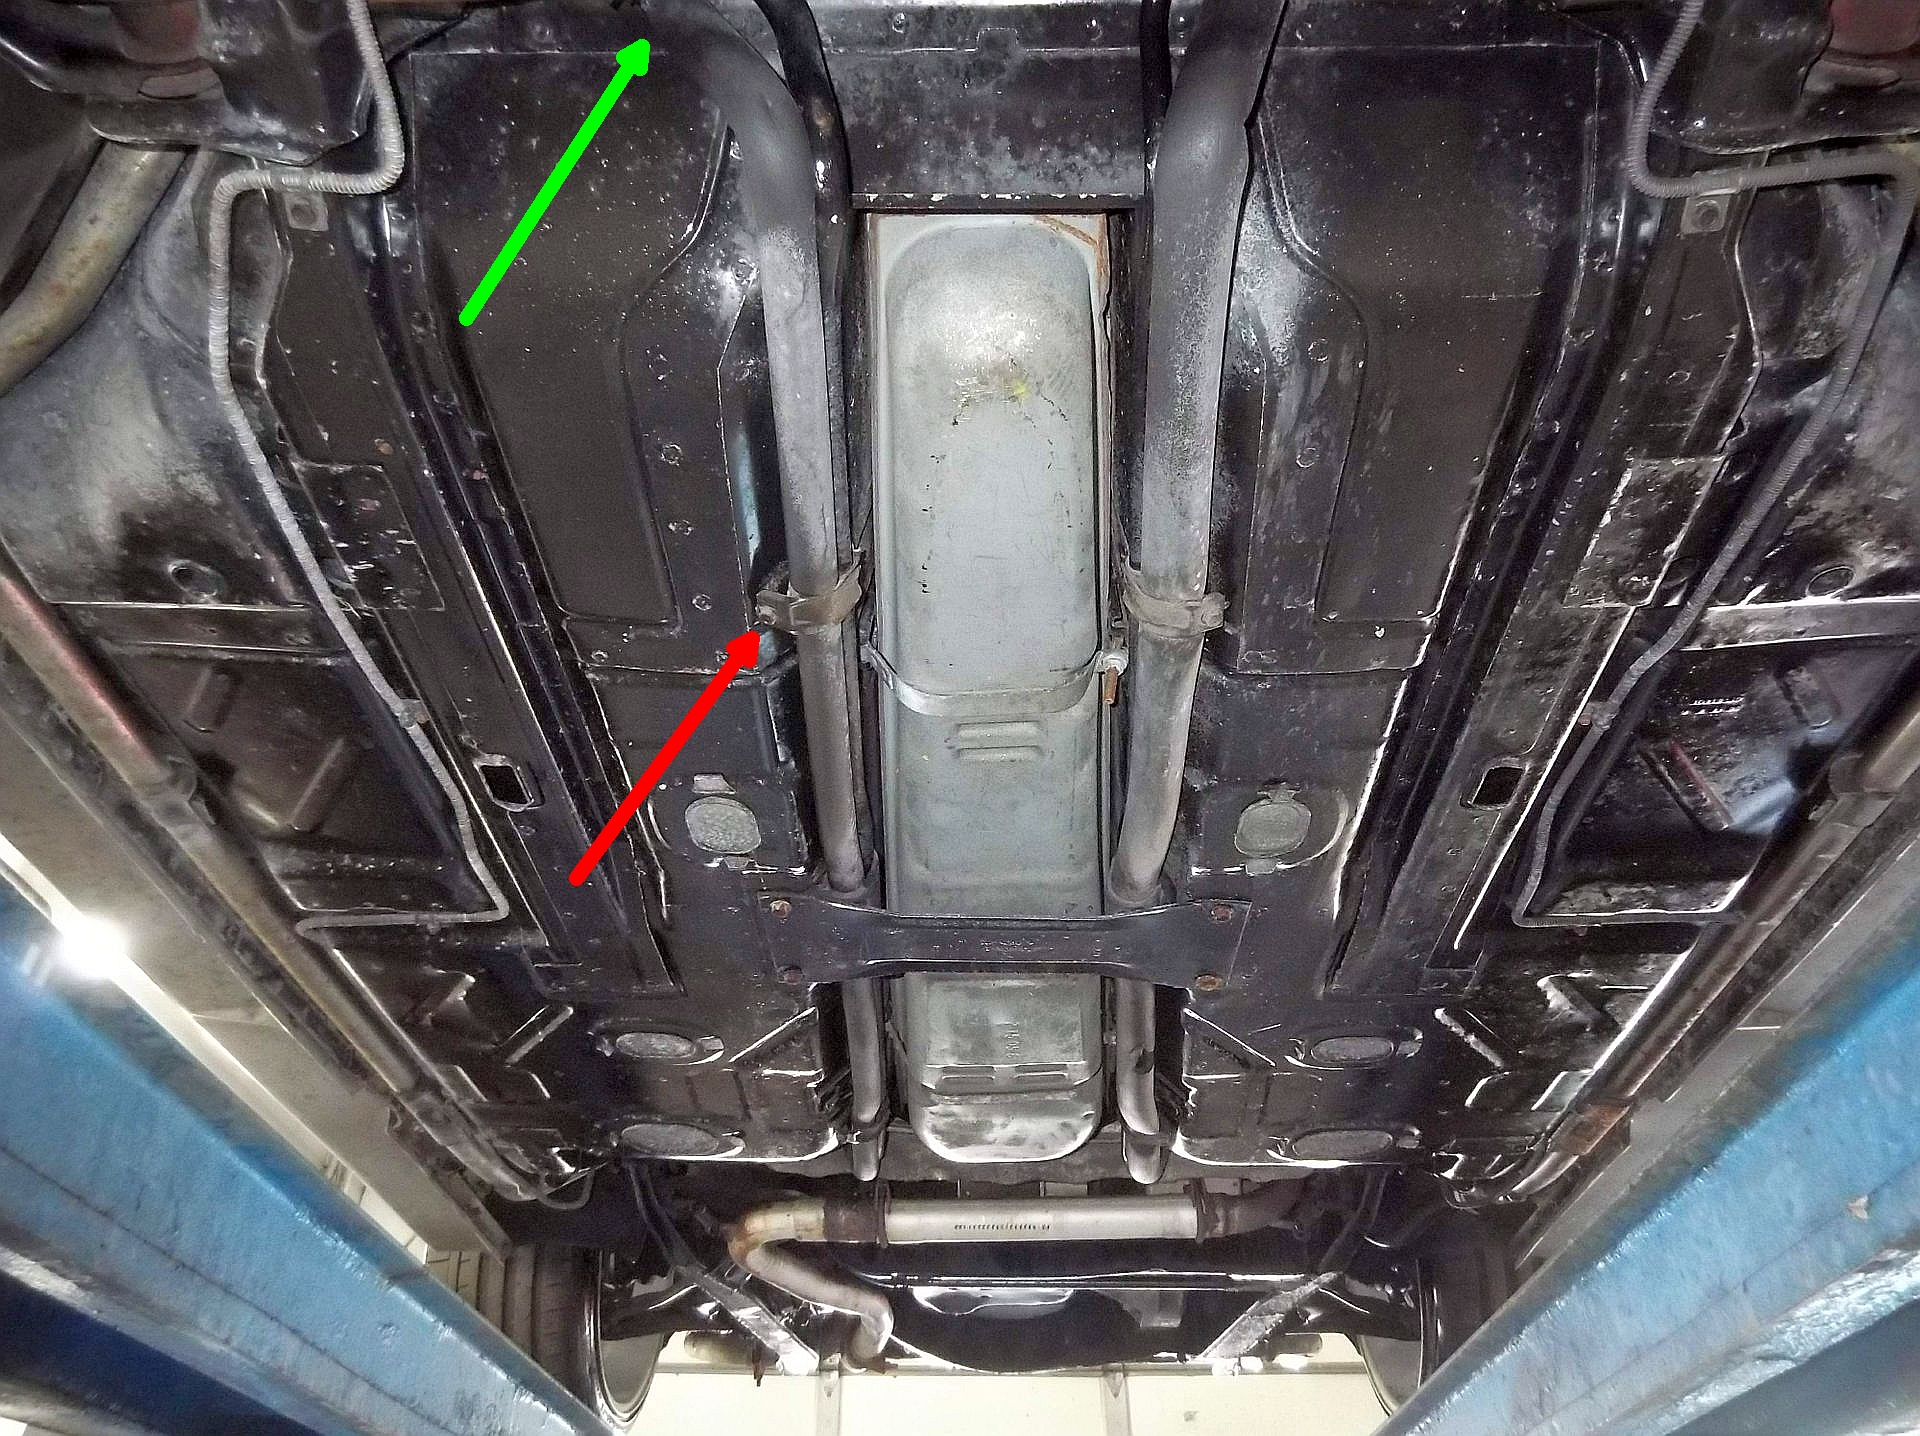
I tried just tightening the clamp, but it still leaked very slowly. So I moved the clamp closer to the edge of the hose, and put a second clamp on for good measure right next to it. I let the engine run for several minutes so that the rubber got a bit softer, and tightened all the clamps a little bit more. I believe it's okay now. I added a green arrow to the shot from my previous post pointing to the area where I was working.
If the leak is now resolved, I think I got off pretty easy. I feel very fortunate. 
|
|

|
theogre
|
MAY 05, 12:56 PM
|
|
If you didn't remove the hose(s) then will leak again there and likely soon.
Again, heater pipes are Aluminum.
Can rot at support brackets and anywhere touches other metal as cover in above link.
Can also rot at hose connections like T-stat tube too. More so if has weak/no coolant.
At minimum, need to remove that hose to clean the joint.
Get proper hose pinch tools and pinch hoses at both ends of pipe. You don't need to empty the system and likely loose ~ 1 quart of coolant if pipe fully drains.
Example now in leak link above.
I would do all hose joints w/ clamps on heater loop after 1 was leaking.
At least the ones under the car.
|
|

|
Patrick
|
MAY 05, 04:02 PM
|
|
| quote | Originally posted by theogre:
Get proper hose pinch tools and pinch hoses at both ends of pipe.
|
|
I've never felt comfortable "pinching" older rubber coolant hoses or fuel lines. I'll only pinch a brand new hose.
| quote | Originally posted by theogre:
If you didn't remove the hose(s) then will leak again there and likely soon.
|
|
I feel pretty confident that with two clamps (one flipped around from the other's orientation) on the connection, both in slightly different locations than where the original single clamp was located, that the seal will be fine. The hose itself is not rotten. I've done this many times on previous cars over the decades and not had a problem. However... IF a leak develops... I will post about it here!
|
|
|
|
Spadesluck
|
MAY 05, 04:32 PM
|
|
|
Glad you found it. I can relate to this type of ordeal for sure and I am sure most of us can. Seems coolant like to travel a bit before actually dropping making it a mystery sometimes to find where it came from. lol
|
|
|
|
Patrick
|
MAY 05, 05:05 PM
|
|
| quote | Originally posted by Spadesluck:
Seems coolant like to travel a bit before actually dropping making it a mystery sometimes to find where it came from. lol
|
|
Very true! What made this even more challenging, was that the coolant appeared to be travelling inside the foam rubber sheath on the "hot" heater core tube. The coolant was entering the forward end of the sheath where it angles up (green arrow in previous post) and running down towards where the clamp is (red arrow) and escaping the sheath at that location (due to an opening in the foam sheath where the clamp attaches).
|
|
|
|
theogre
|
MAY 05, 05:20 PM
|
|
| quote | Originally posted by Patrick:
I've never felt comfortable "pinching" older rubber coolant hoses or fuel lines. I'll only pinch a brand new hose. |
|
Old hoses never had problems w/ pinching if you follow the "rules." IE use something w/o shape edges and only pinch to stop flow. Also have to be far enough from joints to so rubber just bends not stretch on edges whatever inside.
For the rear, find an area to pinch maybe harder because short hoses and w/o pipes in it.
Above tool has no sharps but also pinching parts "floats" some to stay parallel w/ hose in them so doesn't pinch 1 area too much.
If this tool "cause" old hose to fail is very likely already "dead" and fail very soon.
Example: "Top" Coolant hose on Engine end goes very weak because of engine heat and "bad" coolant. If that hose is pinch, just pushes over the edge to fail sooner but was going to fail regardless.
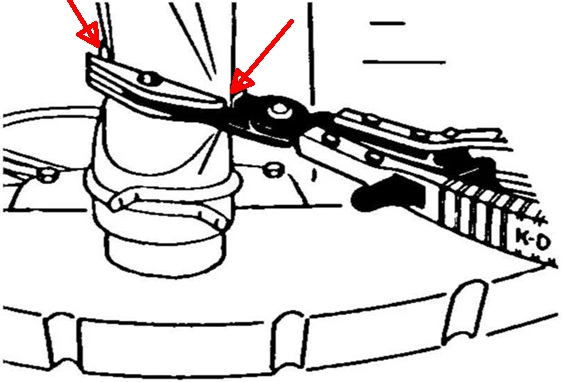
But even KD and GearWrench shows pic's like this and way to close to the end...

|
|
|
|
Patrick
|
MAY 05, 06:51 PM
|
|
| quote | Originally posted by theogre:
Above tool has no sharps but also pinching parts "floats" some to stay parallel w/ hose in them so doesn't pinch 1 area too much. If this tool "cause" old hose to fail is very likely already "dead" and fail very soon... just pushes over the edge to fail sooner but was going to fail regardless.
|
|
I wouldn't disagree that I perhaps keep hoses on my cars well past their prime... but I've never had one catastrophically fail while in use... possibly because I never "pinch" them during any kind of maintenance. I just feel it's (potentially) too damaging to a hose to completely flatten it, even with the "proper" pinching tool. It puts a helluva lot of stress on the two edges that are bent over 180° and compressed. This is not how a hose is meant to be manipulated in normal use.
 [This message has been edited by Patrick (edited 05-05-2023).]
|
|
|
|
Kitskaboodle
|
MAY 08, 11:23 AM
|
|
Patrick, glad you were able to find the leak.
Back to the coolant tank…..
I wanted to make a few comments:
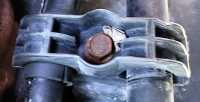
1) From my experience, 99% of the leaks are from the bottom outlet nipple and of these it’s not the nipple that is leaking. It’s the hose clamp! (it ain’t tight enough) And yes, the design of the nipple is poor and kind of fragile. 😕
This is why they provide that brass ferrule, so you don’t crush an already fragile tube. Anyways, this is why I ALWAYS use two hose clamps on this nipple. Otherwise, your chances of a leak here are much greater.
2) Never tried it myself but there are a few videos on YouTube showing how you can repair coolant overflow tanks with epoxy resin.
3) Here’s a great tip on how to clean out the “muck” inside a coolant tank: Buy a small box of BB’s, plug bottom of tank nipple, create a mixture of cleaning liquid, soap, hand cleaner, etc., pour into coolant tank with the bb’s, put on top cap, “shake tank until your arms fall off” and presto you got yourself a clean tank. 😀
Kit[This message has been edited by Kitskaboodle (edited 05-08-2023).]
|
|
|
|
theogre
|
MAY 08, 01:00 PM
|
|
| quote | Originally posted by Kitskaboodle:
Back to the coolant tank…..
I wanted to make a few comments:
1) From my experience, 99% of the leaks are from the bottom outlet nipple and of these it’s not the nipple that is leaking. It’s the hose clamp! (it ain’t tight enough) And yes, the design of the nipple is poor and kind of fragile. 😕
This is why they provide that brass ferrule, so you don’t crush an already fragile tube. Anyways, this is why I ALWAYS use two hose clamps on this nipple. Otherwise, your chances of a leak here are much greater.
2) Never tried it myself but there are a few videos on YouTube showing how you can repair coolant overflow tanks with epoxy resin. |
|
1. Hose between OF Tank and Rad or whatever never needs a tight clamp to seal because no pressure to deal with.
That's why GM and others very often have no clamps or have "Weak" clamps like plastic pinch-on type on this hose like 90+% of Vacuum hoses.
Main problem the hose goes very soft, hard or other problems and won't seal right even w/ metal clamps. Bad/no coolant attacks from inside and oil etc attacks it from outside.
Is also similar problems w/ chain saws etc plastic fuel lines that need to be replace because line shrinks etc causing tank leaks and more problems.
Another issue is Rad Out Tube for OF hose is often made iffy and defects like mold flash on plastic rad tanks not removed or filled and cause a leak.
2. Plastic Weld Epoxy and other "Glues" available to the public won't work on most or all plastic tanks. Doesn't work on many other plastic items for long either. More so when is made of Polypropylene and Polyethylene that close = to Teflon that very few things stick to it. (Even Krylon Fusion paints have issues and its made for painting plastic.)
You can Weld PP PE and some others but very thin line between melting and burning. Burned plastic many hold for a while and "blow apart" w/o warning.
But If been expose to UV and other things causing plastic to break down, Welding can fail too. Weld may actually hold but plastic just fails anywhere else under load in short term.
I'm always surprise Fiero OF Tank w/ brass fitting work so long because again most glues "hate" PP and PE. Even if "Welded" the metal and plastic have different thermal specs and heat cycle stress can make them fail over time.
Side Note: First version of the "Beer Ball" was PE before switch to PETE.
|
|
|
|