
 
     |
| Back in the Fiero Game after a few years (Page 3/5) |

|
86FieroCentPa
|
JAN 08, 07:25 PM
|
|
A Happy New Year to everyone!
I don't have much in the way of photo updates. Since my last post I've:
-De-loomed the factory Ecotec Harness and labeled all the wires
-Powered up my Haltech for the first time
-Ordered and received a full set of Ecotec Motor Mounts and Late Model F40 Transmission mounts from Roger Thelin. I've only eyeball fit everything, but it all looks to fit great
-Ordered a 2.2L Ecotec oil pan to accommodate the Thelin mounts
I'm excited to get the motor and transmission in place so I can keep making progress.
|
|
|
|
Spoon
|
JAN 10, 07:47 PM
|
|
Nice project you have going although I'm not familiar with the LSJ conversion. I completed my 3800sc swap last year. Some years ago before I had a lift I needed some exhaust work done and found a place in Oxford called Jenning's Muffler Shop. Just up the street from there was a Fiero for sale at the Sunoco station. I did check it out and now I'm wondering if that was the 1986 Pontiac Fiero you used to have.
Good luck on your project.
Spoon
------------------
"Kilgore Trout once wrote a short story which was a dialogue between two pieces of yeast. They were discussing the possible purposes of life as they ate sugar and suffocated in their own excrement. Because of their limited intelligence, they never came close to guessing that they were making champagne." - Kurt Vonnegut
|
|
|
|
86FieroCentPa
|
JAN 24, 06:06 PM
|
|
Progress has been slow, especially this past week while I was down for the count with a fever of 104. However, I try to get a few small tasks done here and there.
I got a jackshaft from a Buick Regal bolted up to the Ecotec block, as well as the 2.2L oilpan test-fitted so that the Thelin front engine mount can go on. As best as I can tell the Thelin mount was designed for the Cobalt SS Jackshaft, which I haven't had any luck coming across at a reasonable price. Saab/Ecotec jackshafts are a dime a dozen, but I settled on the Regal one for the time being since that's where my transmission came from. The mount required a bit of grinding to accommodate the different shape of the support bearing


If you're of a weak constitution or are disturbed by an 88 cradle being cut up, avert your eyes 
The Thelin Ecotec brackets require the use of a weld-in cradle reinforcement and the partial removal of the forward crossmember. I went ahead and tacked a length of angle in the middle of the cradle to keep it from flexing too much during the surgery. I'll need to spend some quality time trimming the new crossmember to fit before burning it in.

| quote | Originally posted by fierobear:
Wait, so is the half shaft rust-welded to the bearing at the splines?? |
|
Sorry; missed this before. You've got the size of it, that thing was not going anywhere. The local tire shop was able to press it out using their hydraulic press
|
|
|
|
86FieroCentPa
|
JAN 30, 09:40 PM
|
|
Tonight I made some big (for me) progress. It was time to undertake my biggest welding project to date; the new cradle crossmember. When I settled in to work this evening I figured I'd just work on the fitment


The box section didn't quite fit the side rails of the cradle the way I liked

So a bit more massaging was in order


Now was the moment of truth; did I want to burn it in tonight? I hadn't really been planning on it, but there was really no time like the present

And as they say, a grinder and paint make me the welder I ain't

In all honesty, the cradle is just being stored outside for the moment so I wanted to get something on the welds before they rusted. Before final assembly I think I'll have the cradle media blasted and coated. I've got a few steps between here and there though; starting with test fitting the LSJ and F40 to my modified cradle. Hopefully I'll have time to take a stab at that this weekend.
|
|
|
|
FieroJimmy
|
JAN 31, 06:34 PM
|
|
|
Before you go much further, I would recommend test fitting the cradle back under the car. There have been several people who did N* swaps who braced their cradles before welding and still found they pulled the front mounts inwards. It'll be easier to correct it now, before you have it refinished and have the driveline on it.
|
|
|
|
86FieroCentPa
|
FEB 21, 07:33 PM
|
|
Progress has been slow but steady; I’ve done some test fitting of the cradle assembly into the car and ran into issues. The next goal is to have the engine/transmission mounted and 4 bolts mounting the cradle to the frame.
Here’s just a little teaser from one of the test fits

|
|
|
|
86FieroCentPa
|
FEB 23, 06:50 PM
|
|
This weekend I managed to get everything tweaked and adjusted so that the cradle can be reattached to the chassis. While I did use a "bolt-in (with minor welding)" set of mounts, I couldn't find a way to get everything lined up so that all the mounting points were tight and the engine and transmission fit in the engine bay. The issue was the entire assembly seemed about an inch too far to the drivers side. Note the contact in the lower left part of the image

I figured I'd just need to create some additional movement to the passenger side, so I extended the rear transmission mounting slots about 1/2"

After another test fit this showed promise; now I could get the cradle down to the mounting points. However, I was doing this with the engine front mount supported by wood blocks and not on the weld-in crossmember. It would appear to me that the mounting pad on the crossmember needed to be about 1 inch or so further to the passenger side. So out came the cutoff wheel 

While I was making this modification I figured there was no sense in constraining my options, so rather than clean up and re-weld the old bracket I made a new mount out of two pieces of structural steel welded together. I made it a bit longer in case I needed to relocate the mounting holes.
After another test fit it became apparent that the snout of the supercharger would be precisely in the same place as the passenger side hinge box. I did some clearancing to get it to fit for the moment. I think I'll need to make a few more cuts before making it final. I'll probably end up changing to a gas strut system, or maybe even a prop rod. I like the FieroGuru hinge box elimination too. A few options to consider down the road.

Now for the payoff; it fits!


I did cheat a little, the rear cradle mounts are lined up but the fronts need to come up about 1" in order for them to be "in place". The only place this might be an issue is the supercharger snout which as I said I plan on addressing in the near future. Part of the reason the front cradle mounts don't slide right in are these:

When I did the initial engine removal the front air dam was starting to touch the ground. Knowing that I'd have the car up and down quite a few times I knew I needed to lift the front end to keep from damaging anything.
Up next will be a day sandblasting parts, then I can start assembling the suspension to start figuring out what to do with axles. I could also start piecing together the engine harness now that it's located pretty much in its final location.
|
|

|
SteveMushynsky
|
MAR 06, 02:09 AM
|
|
I just found this thread. Good skills you have,there, 86FieroCentPa
Thank you for posting this. I am in the 'cleaning out my garage to make room' & gather materials phase of a planned swap of an Ecotec Turbo 2,0 into an '84 2M4 with an '86 SE parts donor car. I intend to use an F35 5-sp MT.
I look forward to seeing your future updates.
------------------
Steve Mushynsky
1984 Fiero 2M4
34K miles
1986 Fiero SE I4 (donor now)
Lots of good miles. One very bad mile.
1987 Fiero
Tried to kill me (gone to a 'better place')
Prior owner failed to tighten a bolt. Trailing arm separated at 70 mph
|
|
|
|
86FieroCentPa
|
MAR 15, 06:30 PM
|
|
A few updates to share....
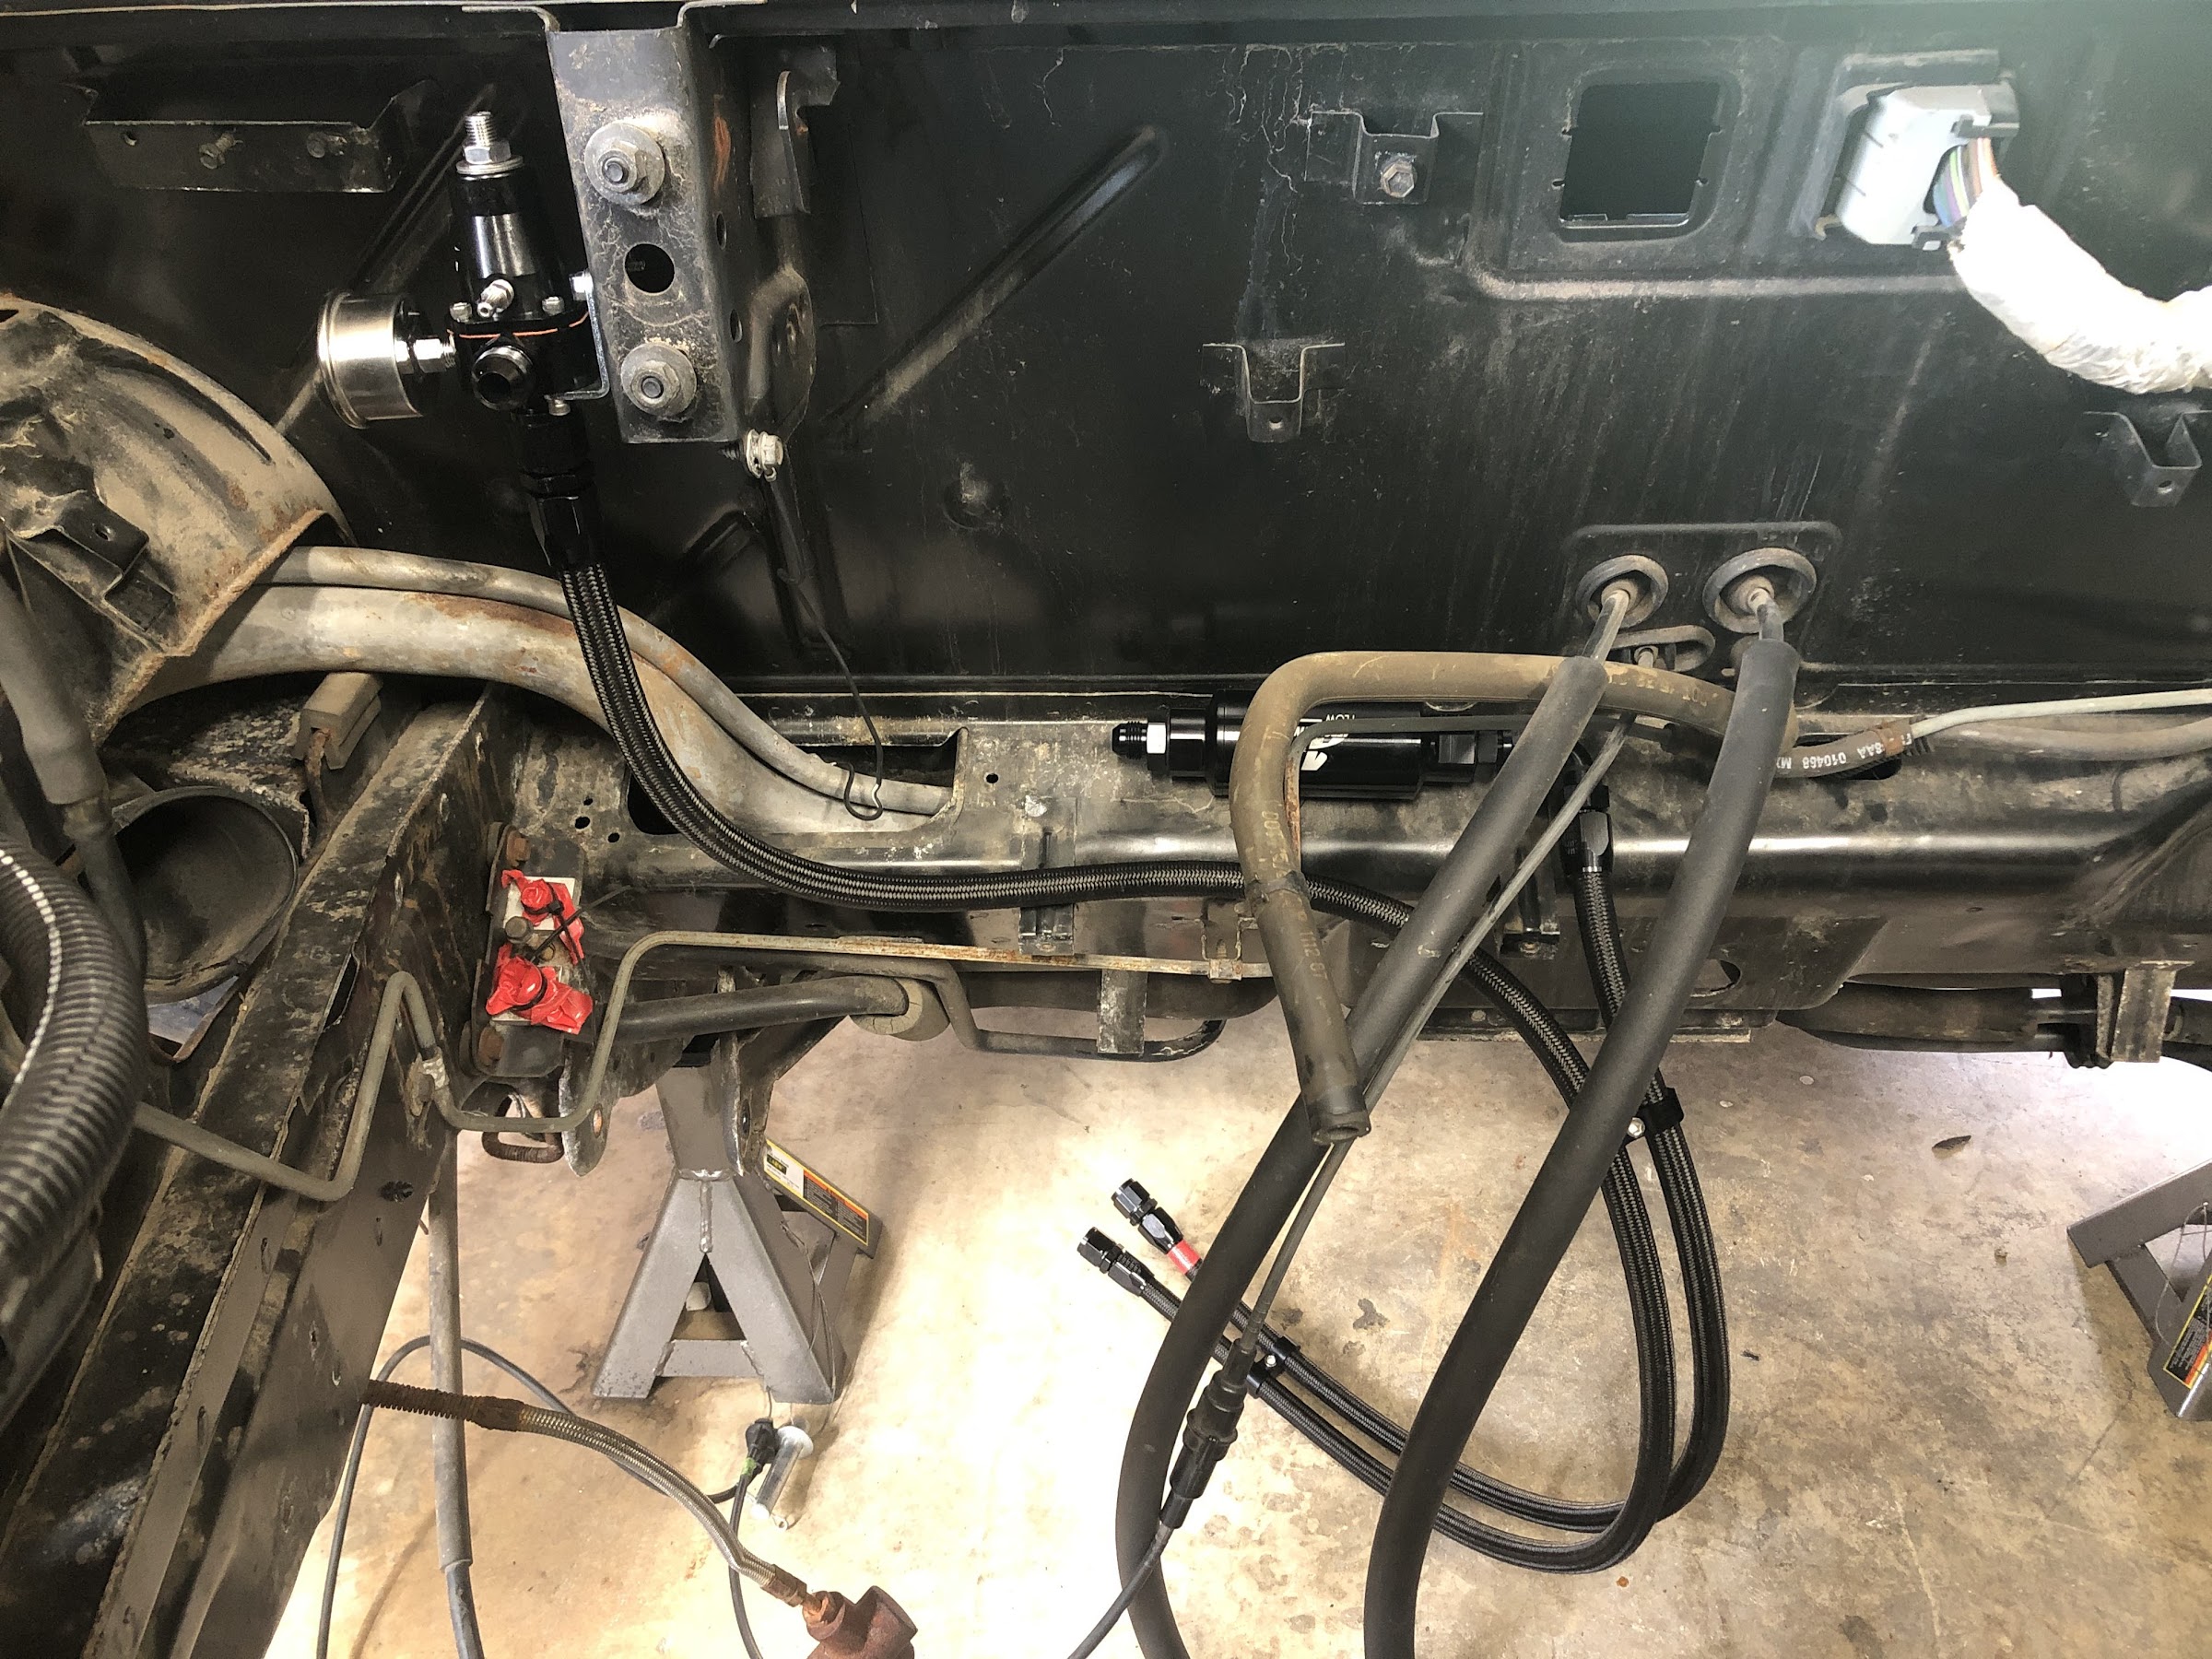
Fuel System
I ended up going with a fully custom fuel system. Aeromotive 340LPH fuel pump mounted in a new Fiero Store sending unit. Earls -8AN line and fittings to an Aeromotive fuel filter. From there it goes to a OTTP Billet fuel rail and then onto an Aeromotive Compact regulator. I started some of the plumbing this weekend

Intercooling
The LSJ intake manifold utilizes 4 Laminova heat exchangers for intercooling. From the factory they run the cores in series which under high load/heat is known to make the last exchanger fairly inefficient. ZZP offers a new endplate that sets the system up as 2 sets of 2 parallel paths. I've cleaned the the Laminova cores and installed the endplate, but that's fairly easy. As anybody that wants to add an intercooler to their Fiero knows, the hard part is where to mount the heat exchanger. I'm not saying this is the best solution, but its the one that I've come up with.


I have to say, I think I've achieved one of of my favorite looks. The exterior will look completely stock, but if you look closely in the grill you'll see a big honking air to water heat exchanger; hinting at what's going on. In this case I went with Frozen Boost Type 101 (26x7x3.5). I'll be plumbing it to the back with Earls -10 hose along the heater and A/C lines. To be detailed in a future post.
The list of systems to get in order keeps shrinking. The next big one will be the clutch. I opted for a Spec Stage 3+ for a 2011 Buick Regal. Mounting the Clutch and Flywheel won't be that big of a deal, but deciding how I want to get the F40 Hydraulic Throwout Bearing plumbed to the clutch pedal might be. I'll also have to check the TOB height and make sure I wont be over extending it. I know I'm not the first to attempt an F40; if anybody out there has experience or a good thread for me to read be sure to post it.
|
|
|
|
turbo86se
|
MAR 17, 06:32 AM
|
|
|
|
|