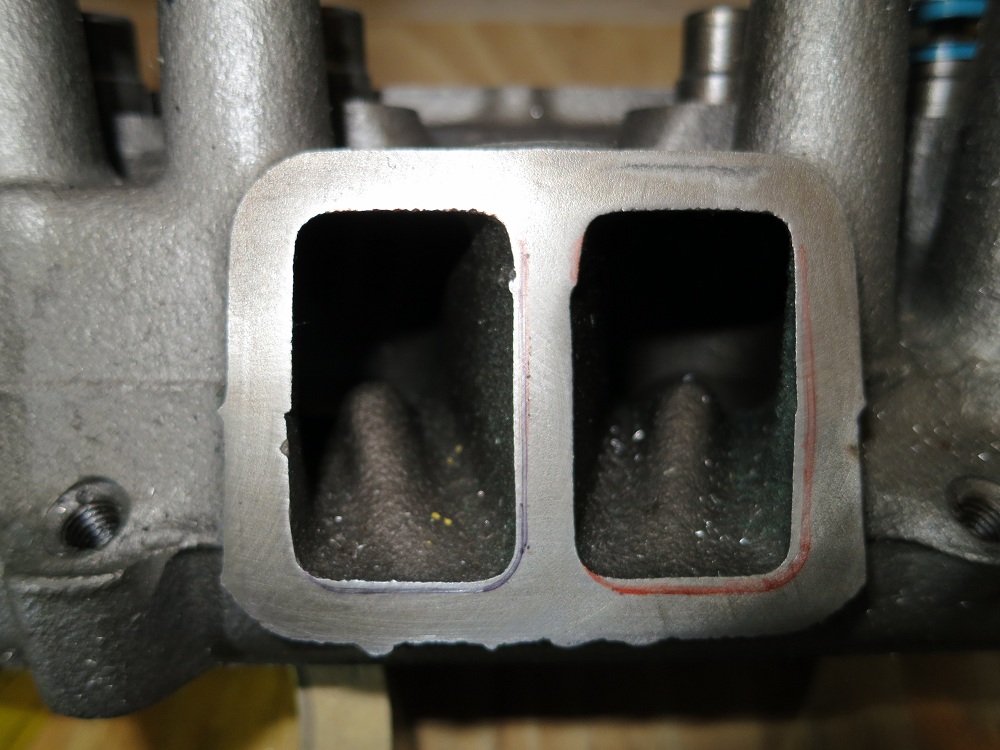
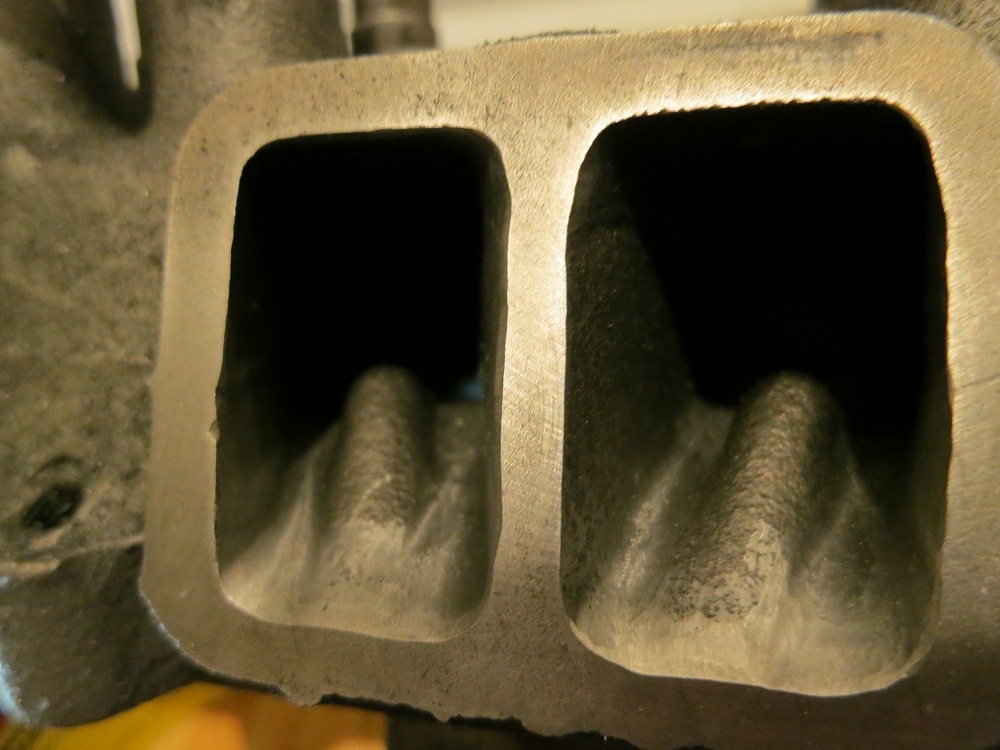
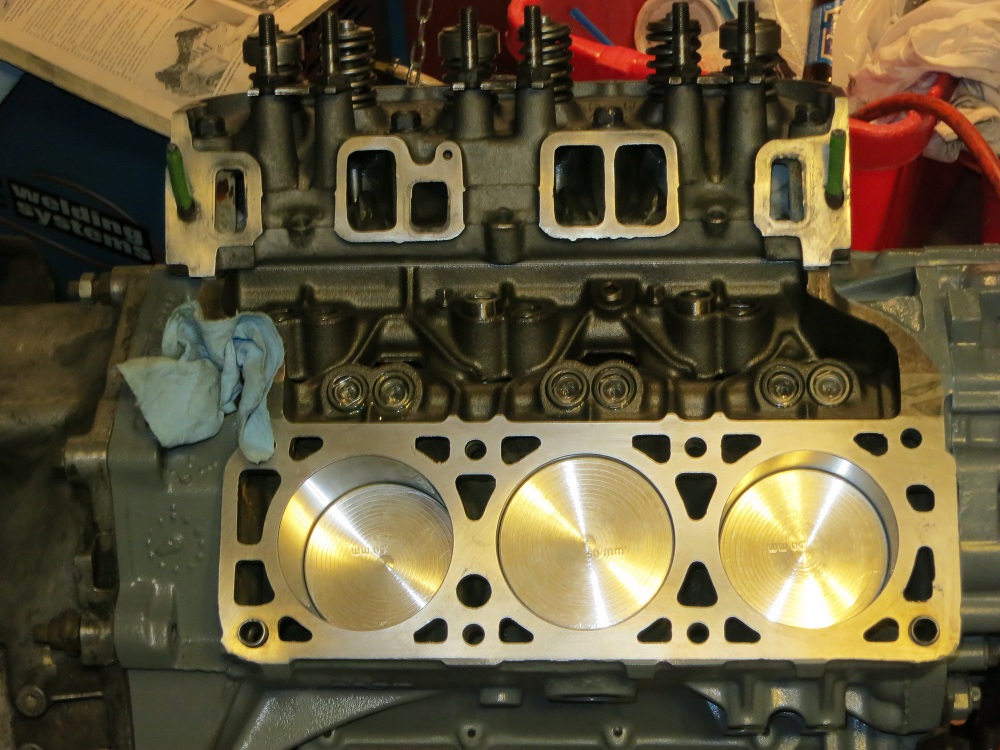
Ok I did some porting work on the intake side of one of the heads. I just gasket matched to an intake gasket. Tell me what you guys think. BTW this is not done, this is after only the carbide burr marked
Gasket matched
Basically I opened them up to the size of the gasket then used around an inch to feather the increase in volume smooth
zkhennings
JAN 15, 02:55 PM
Well my build has not died, I just spent a term in Cape Town South Africa, which was pretty awesome. If anyone wants to read about what I did there, here is a link to my group's website...
I will have to post pictures soon, they are on my computer and camera. I did not take a ton of pictures because I was working really fast over the three weeks I had left of winter break when I arrived back in America.
But - I will list off the things I have done -
Exhaust manifolds are ported and flanges are welded on the outside. Y pipe was ported, and I welded them back up. Had to be so fast with my mig on the lowest setting or it just burned right through the y pipe.
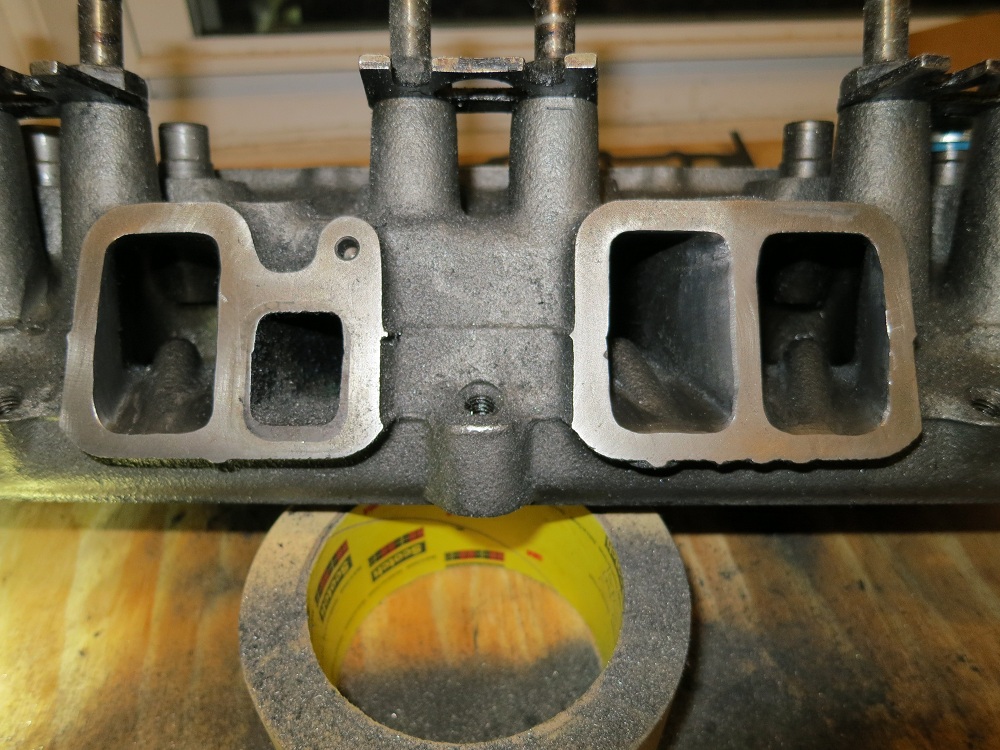
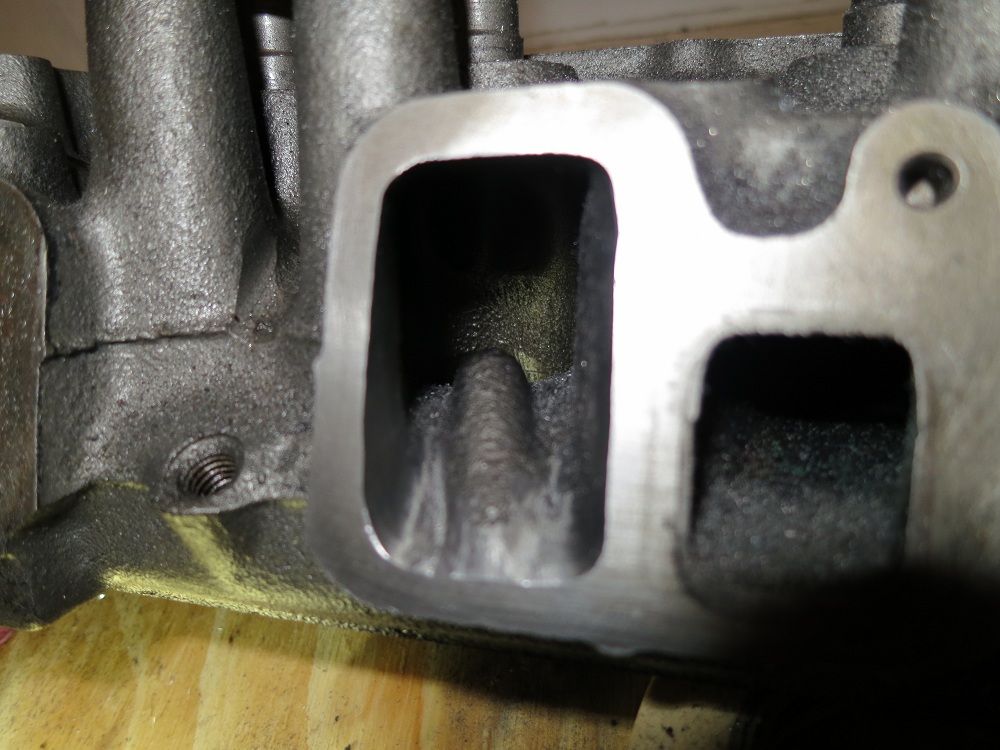
Heads have been ported, I opened up intakes to the size of the gasket and roughed them up, I did not change the size of the exhaust because your exhaust ports should be a little smaller than your exhaust manifold ports to stop pulses from entering the head. So I polished the exhaust ports and removed the spark plug hump. I opened up the bowls to almost the size of the valve seat, and I rounded any sharp edges from where the valve stem exits. I then cleaned the heads very well in a big bucket of hot soapy water to get all the metal shavings out. I reassembled them after cleaning the valve seats and valves with green scotchbrite pads, and I cleaned the heads and painted them. I used severe duty felpro headgaskets and torqued them in three steps to 90 ft lbs
Intakes are somewhat ported at the moment, I still have to work on these
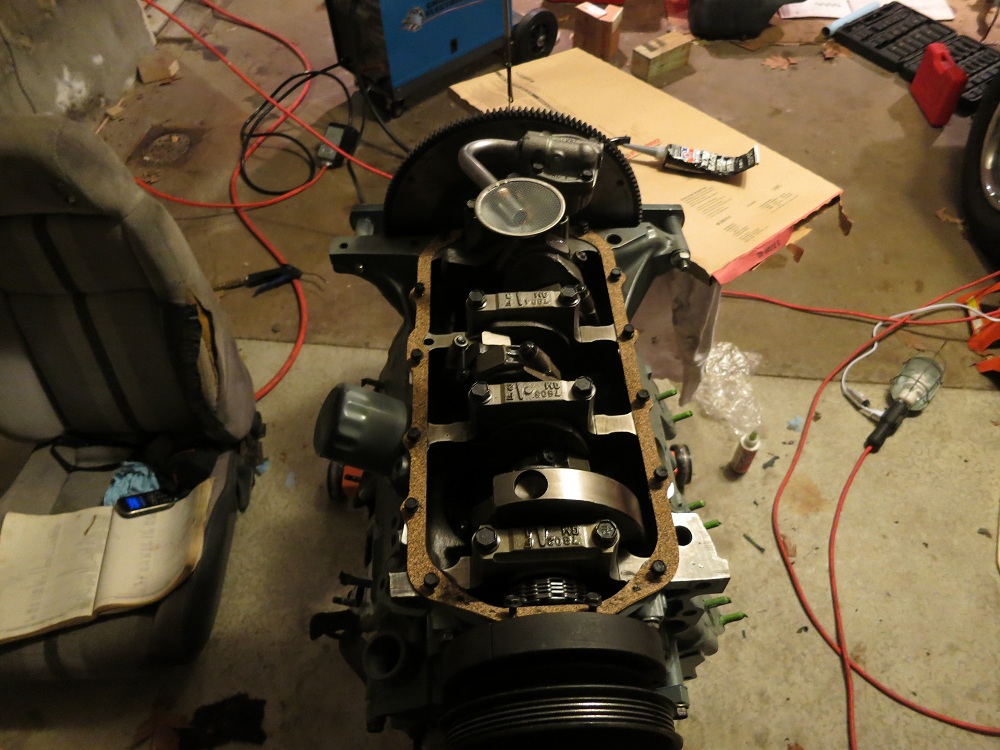
I got a new timing cover and water pump, because why not on the water pump, and the timing cover had a few stripped holes for the water pump and the timing cover was just.... not nice, one of the edges was suspect from when I heated it up red hot with oxcyacetalene removing it from the original engine which it came from. So I removed the timing cover and water pump I had installed, painted the new parts, and installed everything. I used a permatex gasket sealer this time and trimmed the gaskets this time because last time I did not.
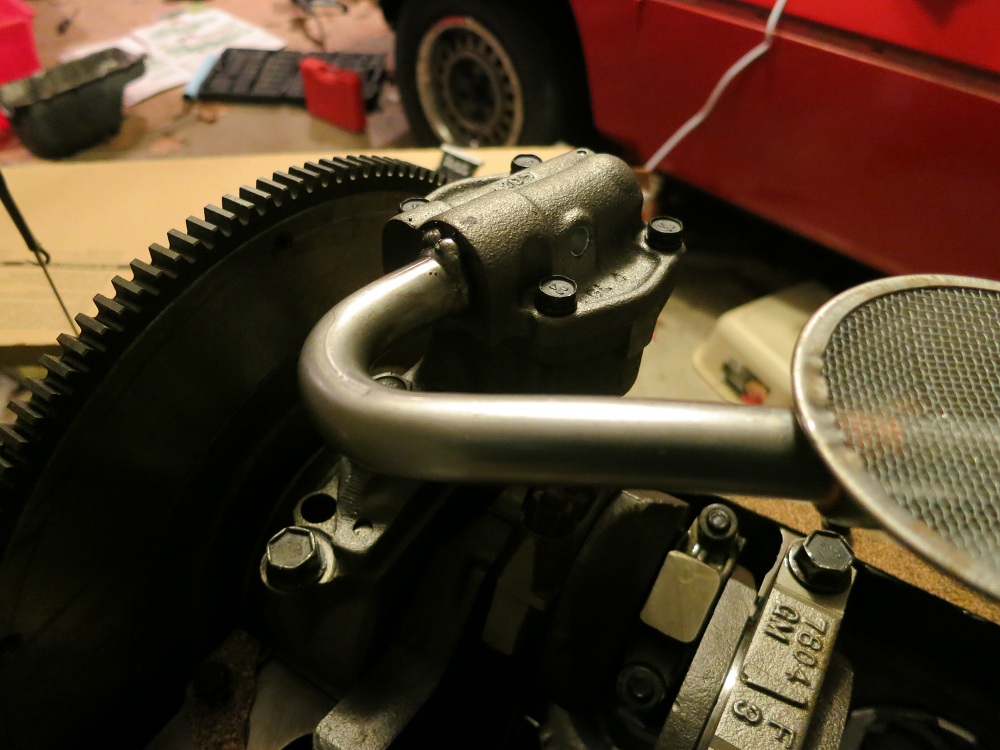
I took the engine off the cradle and put it back on an engine stand, removed the oil pan and cleaned and painted it, removed the oil pump, and replaced it with a new one. The reason being, I have these rubber jaws on my vice that have a circular slot which fit the new oil pump pick up tube perfectly, so instead of renting an oil pump screen installation tool WHICH I RECOMMEND THAT EVERYONE THAT INSTALLS A PICKUP TUBE USES I just mounted the tube in the vice which was fine, but then I hammered just the bottom half of the pump on to the pickup tube, and this messed up the bottom half of the pump a little, and I sanded everything down and made it sit flush again.... but I did not want to risk the life of my new engine and all this work with a possibly messed up oil pump, so I bought the new one and did it proper. I killed the clutch with brake parts cleaner (in a good way) because it used to get transmission fluid on it when my output seals leaked on the tranny. So hopefully the clutch will feel better than before.
So I remounted the pump with screen after measuring pan depth properly and using white grease and a 3/8 drill bit taped to the screen checked the clearance of the screen to the bottom of the pan, and then I gave it a nice tack weld.
I bolted everything back together and installed the exhaust manifolds and y pipe and then I installed the lifters with lots of assembly lube and I installed the rocker arms and pushrods (after the intake manifold gaskets) and adjusted the valve lash by spinning pushrods as I tightened them until the first sign of resistance. Then it was 1.25 turns from there, and each rocker stud has the same amount of threads showing on each one so I am confident they are all correct. On the previous engine some of them were different due to stuck lifters, which also probably attributed to my low oil pressure.
Once that was finished I poured oil all over the cam and lifters as I filled the oil pan. I ground off the gear from my old distributor and used to prime the engine. If anyone is wondering, when you prime it you have the drill spinning to the right. Due to the beveled gears on the cam and distributor shaft you second guess yourself as to which way it is spinning. I ran the pump until oil came out of the end of every pushrod.
I then re installed the oil pressure sensor tube to the block, which meant that oil poured out everywhere, which I should have expected but didnt since it is above the top of the pan. I used black rtv on the threads when I re installed it. I will tighten it up when I next see my car. Hopefully it wont leak. I also used rtv black on the plugs in the water jackets on the block and tightened those to 30 ft lbs because I could not find the torque spec for them.
I then dressed the engine a little and installed the alternator and serpentine belt, A bunch of the threaded holes in the head needed to be cleaned out a whole bunch which was annoying because the stupid high temp engine enamel is not chemical resistant until it has been heat cycled at like 200 deg F. Which means brake parts clear takes it off like it was never painted. So repainting was in order.
Once I had everything installed that would be hard to install with the engine in the car, I installed the cradle and engine into the car, and that is how she will sit until this weekend when I go home from school to work on her a little.
I also relocated the fuel filter. It sits at a 45 degree angle behind the heat shield for the Cat and it came out prefect. There was a preexisting hole which I welded a nut in front of, and then made a new bracket with some 22 gauge steel which now that I think about it, I really should paint. It fits perfectly and looks so nice, it is well protected, and the fuel lines are as short as possible with no weird bends so I am very happy about how that turned out.
I will post pictures within a week, I know pictureless threads are boring so I will post soon!
[This message has been edited by zkhennings (edited 06-05-2014).]
zkhennings
JAN 16, 08:05 PM
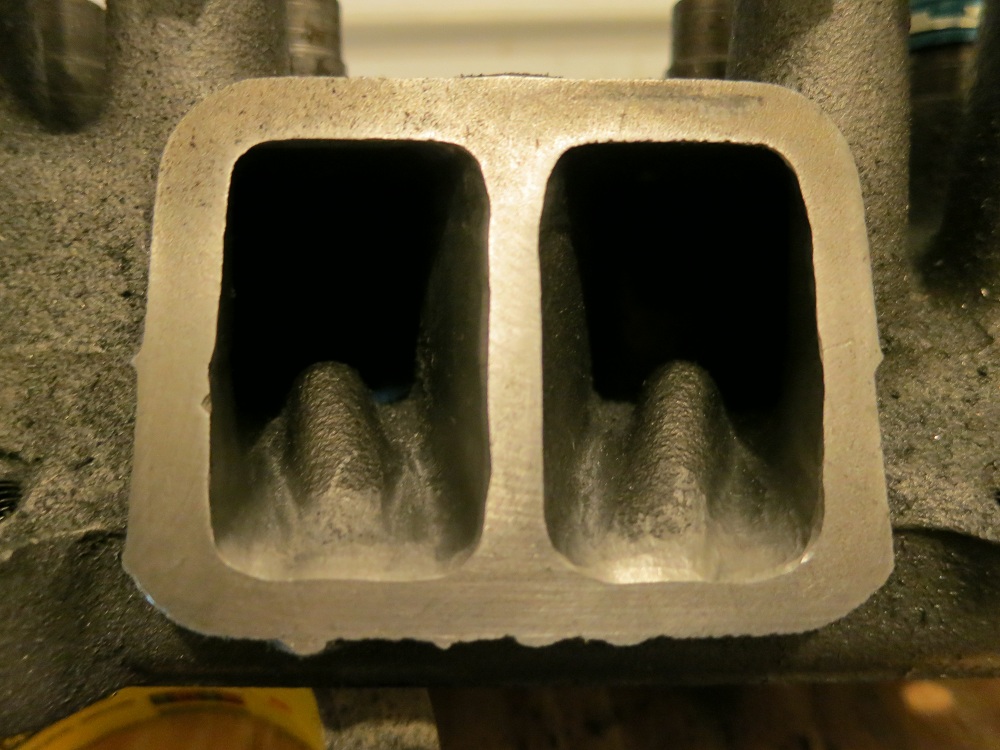
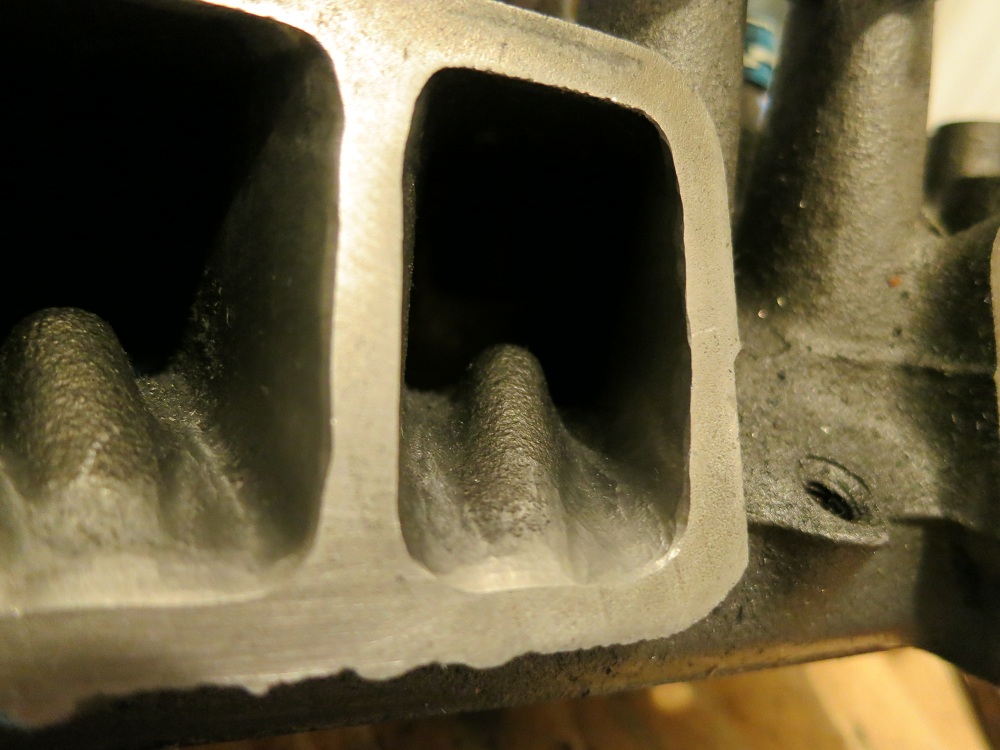
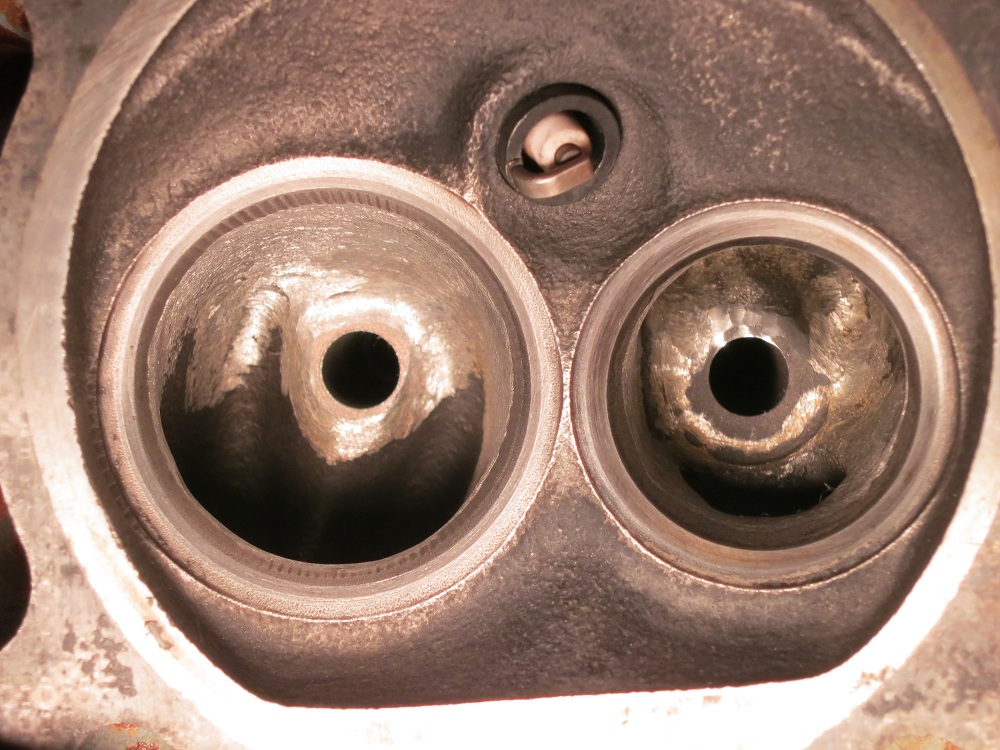
Here are some pictures for now!
One of the ported bowls. The flash makes them look all uneven and stuff but they are really smooth
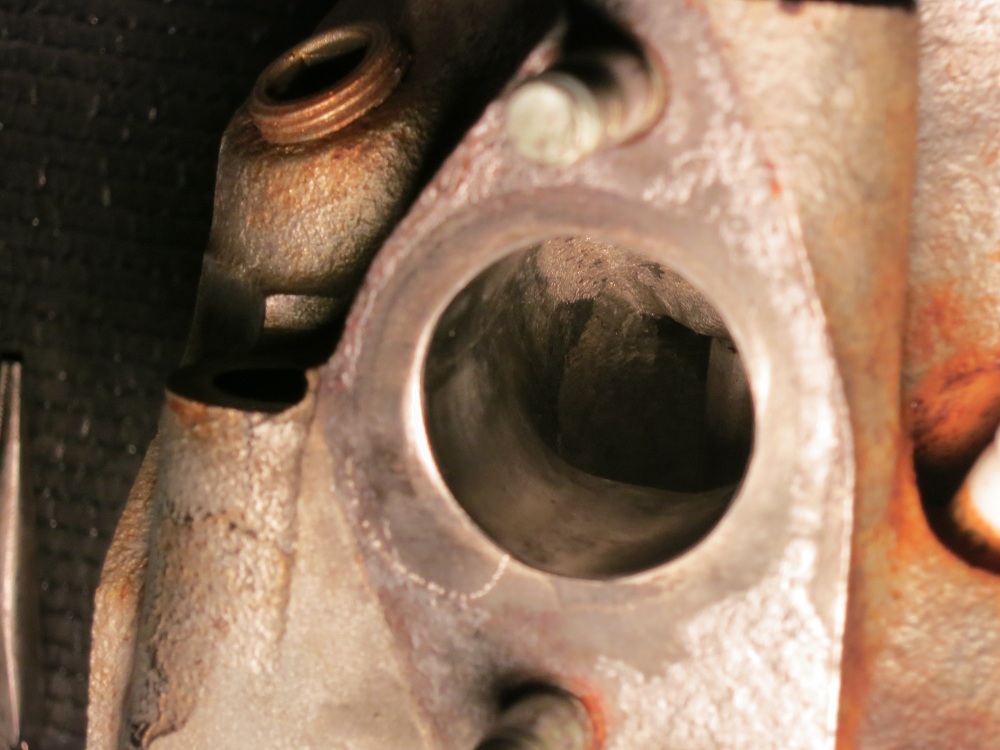
Very smooth exhaust
pontiacfierokid1985
JAN 16, 11:16 PM
Hey a fellow masshole good to see that ur saving this fiero i sent u a pm on maybe u might be interested in let me know an im definitely gonna follow ur build looking really good so far
zkhennings
FEB 28, 01:00 AM
Can't wait to get home this Saturday for a week and finally finish her up!
zkhennings
MAR 04, 02:27 PM
Home! And about to start work later today. Just picked up some break in oil additive made by Lucasoil with added zinc specifically designed for racing cars with flat tappet cams. You can get it at Advance Auto.
I have to...
Finish porting lower intake and other intakes Paint valve covers Get rid of charcoal canister Plug cold start on intake and fuel rail Fix up wiring harness (need to get electrical tape and heat wrap) Figure out coolant line Put rest of engine together Finish welding in bolts on drivers side Clean up passenger side Fix seat tracks Put washers on front suspension Weld Exhaust Put body back on
Hope to get it all done by before Sunday, wish me luck
Delta_32-1
MAR 04, 05:05 PM
Good luck! Looks wonderful so far!
zkhennings
MAR 17, 05:37 PM
Worked so hard and fast recently havent provided any updates so here is one!
[This message has been edited by zkhennings (edited 03-19-2013).]
Down the road, with this car, when you want more power than the 2.8 can give, just start a 3800SC build. You have done a very good job, a ton of work. BUT! do all that work on a 3800SC and you will get 2 times the power for your money. And you just might run with that porch.


 Good luck with her.