
 
     |
| 85 Notchie Build (Page 20/23) |

|
zkhennings
|
NOV 09, 01:08 AM
|
|
Thanks Eric, the motor mount bolts will not be the lowest point as the mount on the cradle has that downwards protrusion.
Had a really long day and still did not manage to get powertrain in car.
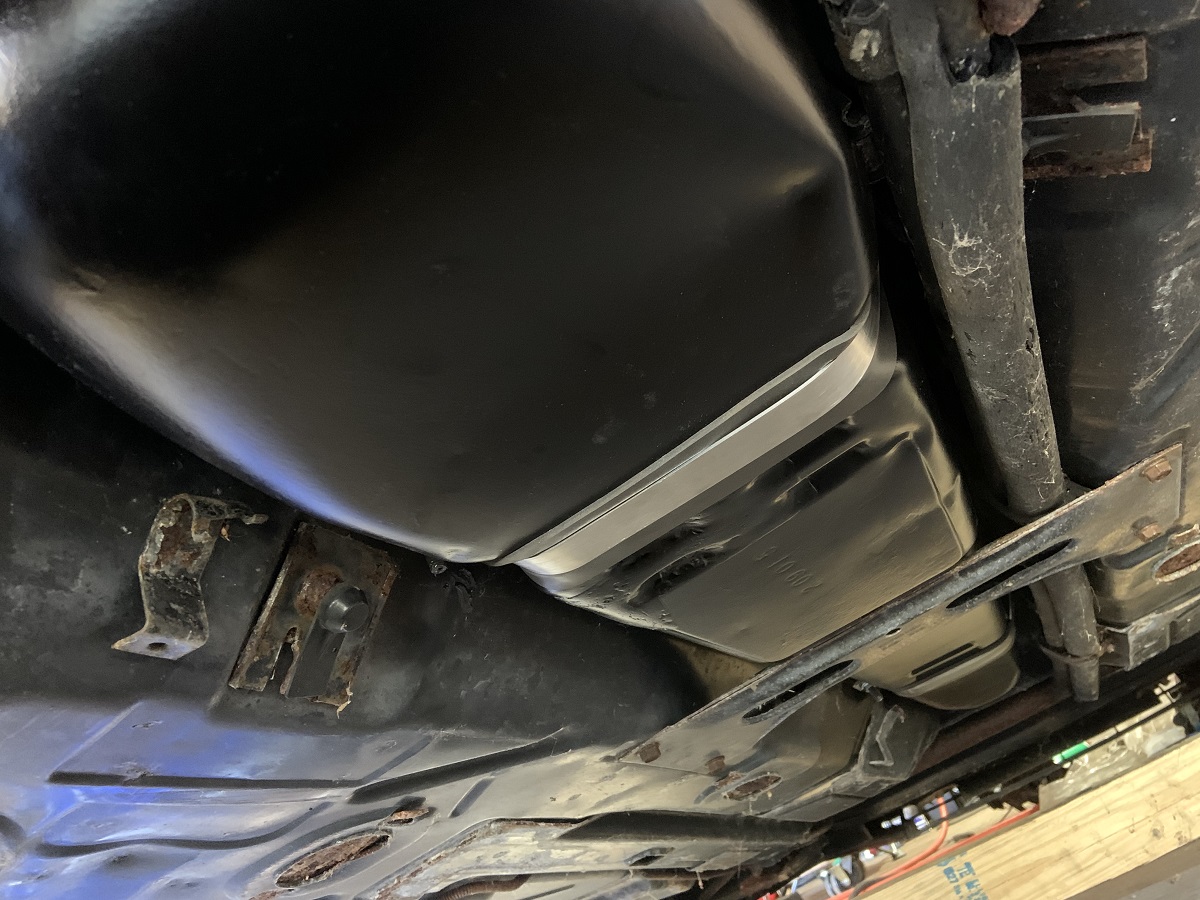
Got the gas tank removed and cleaned up, pulled the sending unit out. Found some pin holes in one localized area at the bottom that had been JB welded. Gotta deal with that.
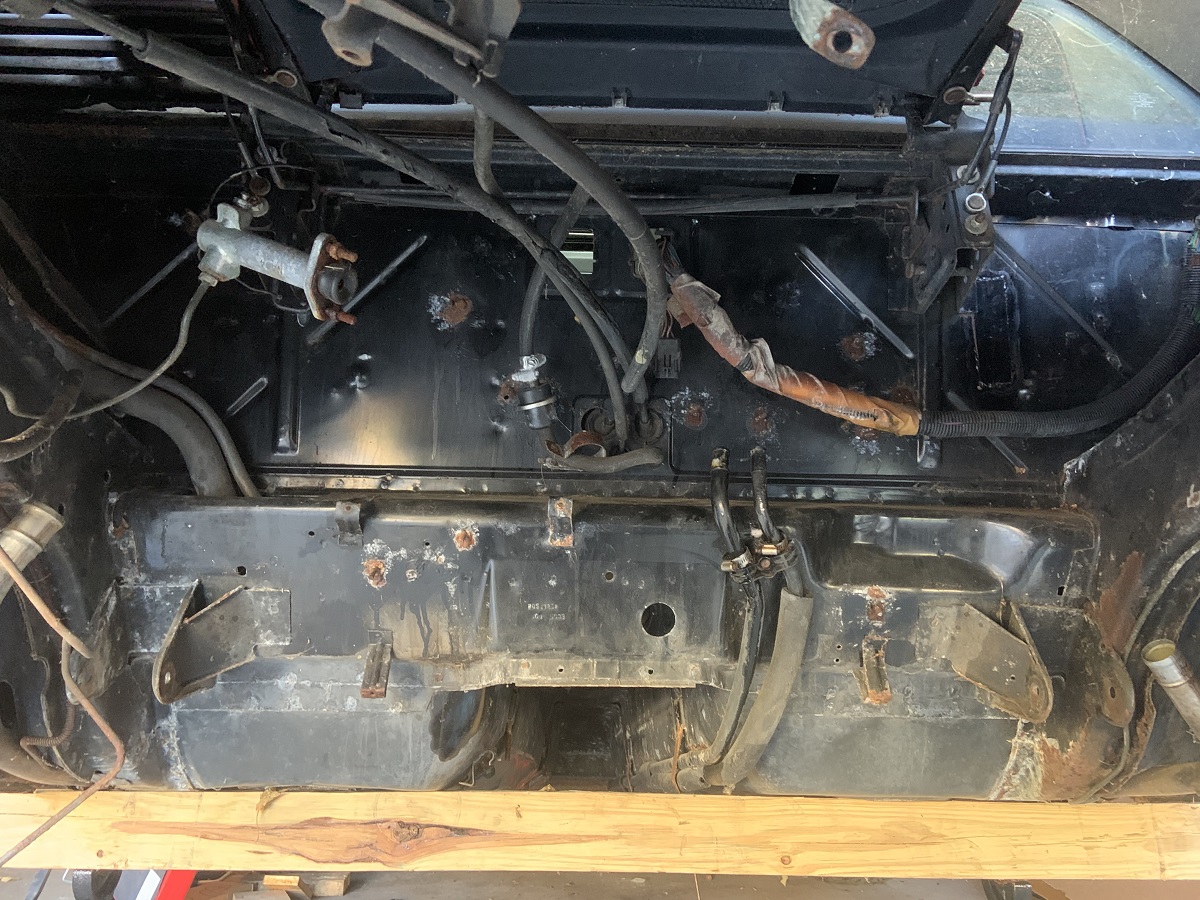
Removed the battery tray and pulled the solid heater line out that wraps around the bay as I do not need that. Removed all the cushion clamps and the heat shielding I had installed previously. Ready to run fuel lines and wiring now as well as paint the engine bay.
Prepping the cradle for paint took hours, I gave it a quick wire brushing and did not like how much paint was peeling off, and after a lot of wire brushing and sanding, eventually the cradle ended up basically bare metal. I could not find POR15 anywhere so I ended up using a Rustoleum rusty metal primer for the areas that had a little rust. I have been watching Project Farm’s Youtube channel and I have been very impressed with how Rustoleum paints perform at such a cheap price point. Had to get tricky to paint the inside of the cradle properly this time.
Pics tomorrow (today).
|
|
|
|
zkhennings
|
NOV 09, 04:01 AM
|
|
Thanks Eric, the motor mount bolts will not be the lowest point as the mount on the cradle has that downwards protrusion.
Had a really long day and still did not manage to get powertrain in car.
Got the gas tank removed and cleaned up, pulled the sending unit out. Found some pin holes in one localized area at the bottom that had been JB welded. Gotta deal with that.
Removed the battery tray and pulled the solid heater line out that wraps around the bay as I do not need that. Removed all the cushion clamps and the heat shielding I had installed previously. Ready to run fuel lines and wiring now as well as paint the engine bay.
Prepping the cradle for paint took hours, I gave it a quick wire brushing and did not like how much paint was peeling off, and after a lot of wire brushing and sanding, eventually the cradle ended up basically bare metal. I could not find POR15 anywhere so I ended up using a Rustoleum rusty metal primer for the areas that had a little rust. I have been watching Project Farm’s Youtube channel and I have been very impressed with how Rustoleum paints perform at such a cheap price point. Had to get tricky to paint the inside of the cradle properly this time.
Pics tomorrow (today).
|
|
|
|
zkhennings
|
NOV 09, 11:04 PM
|
|
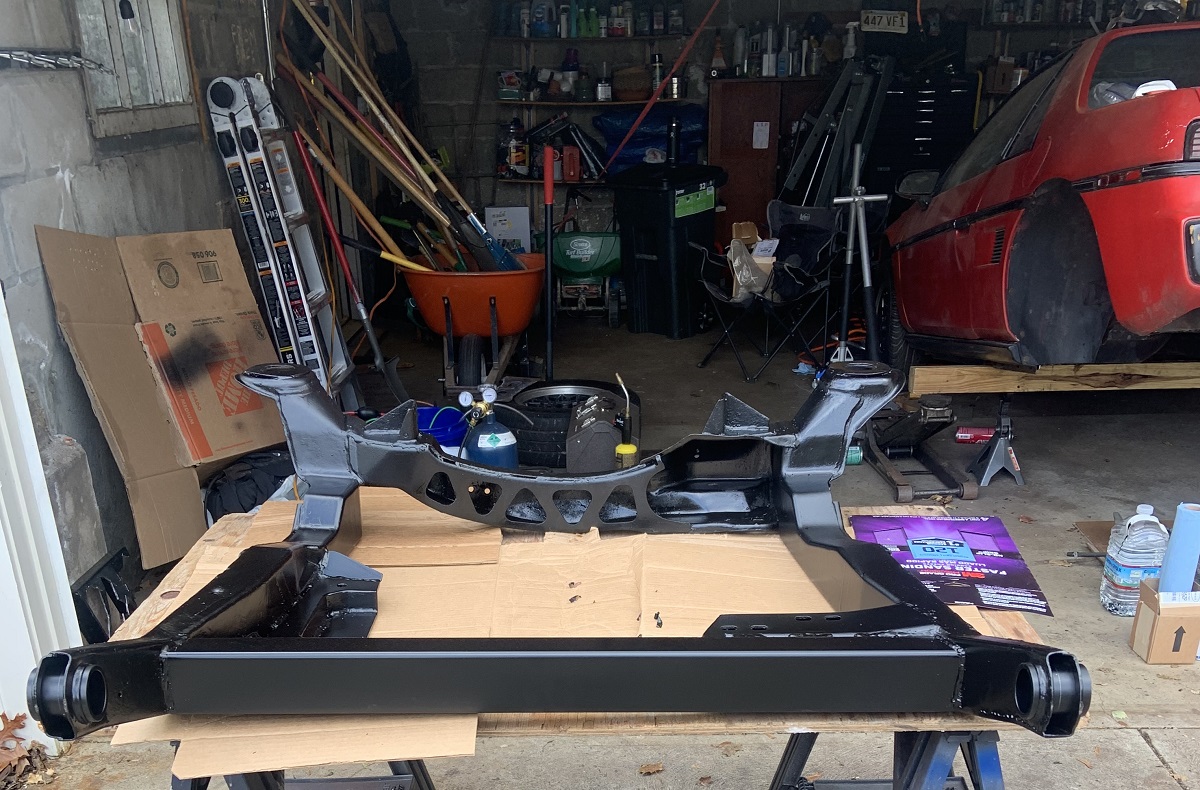
Spent a long time cleaning the cradle up and really removing all the rust.
Used rust converting primer over the areas that were not clean metal.
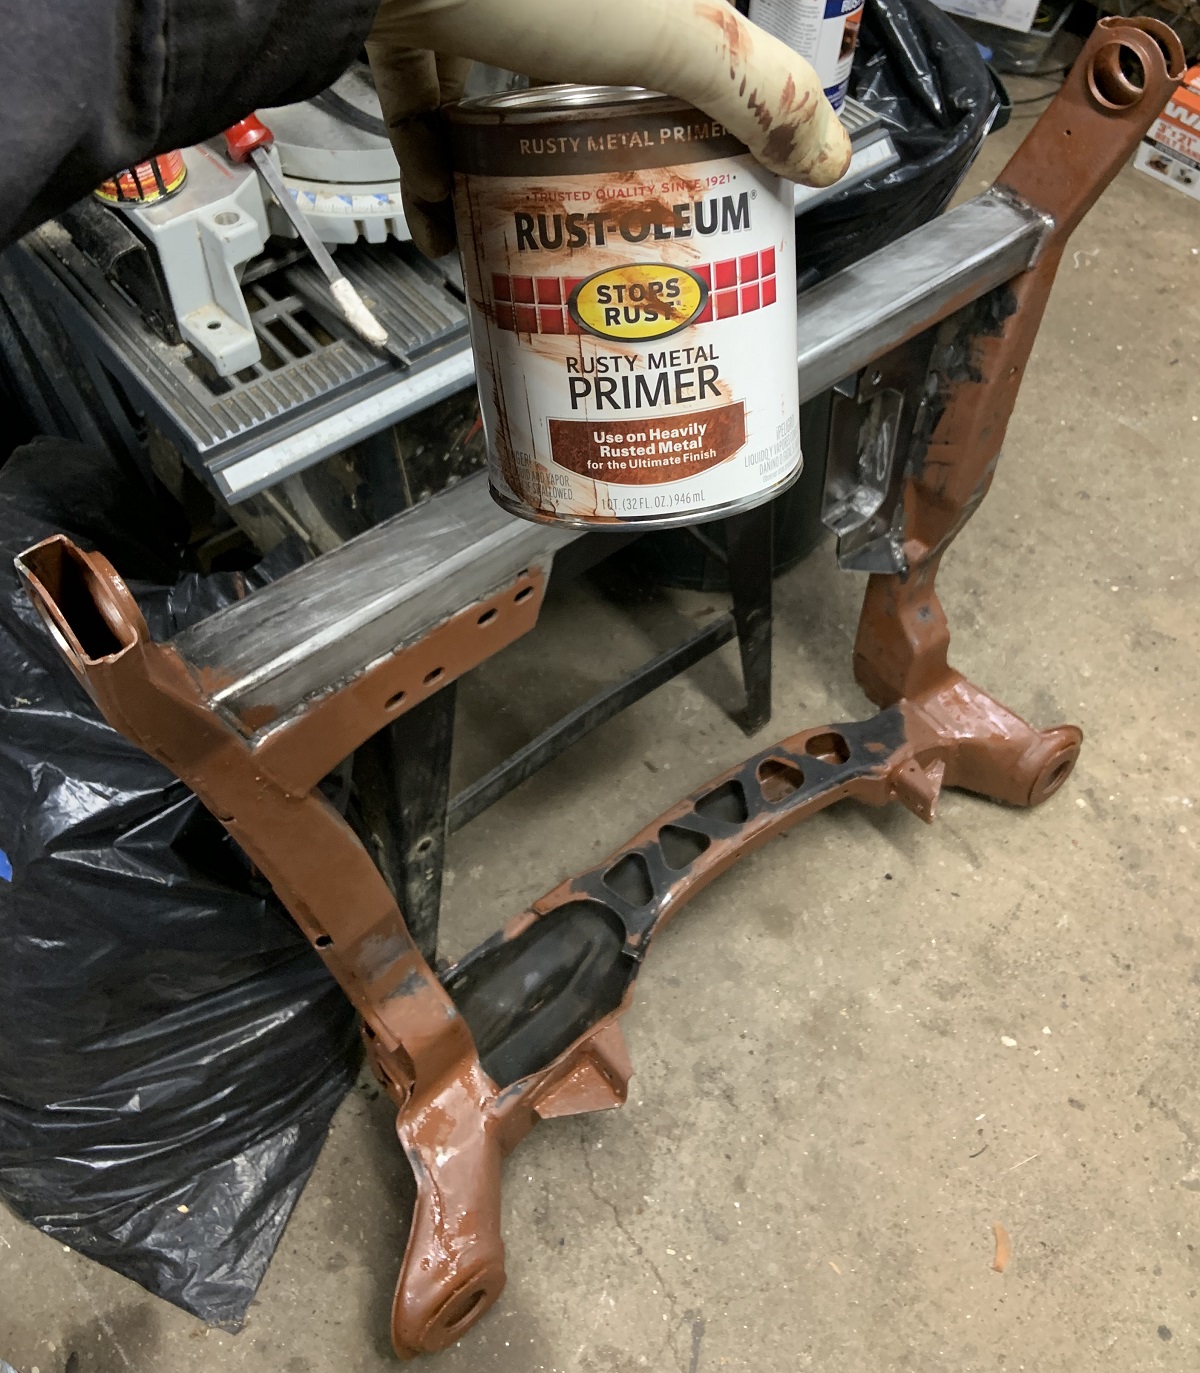
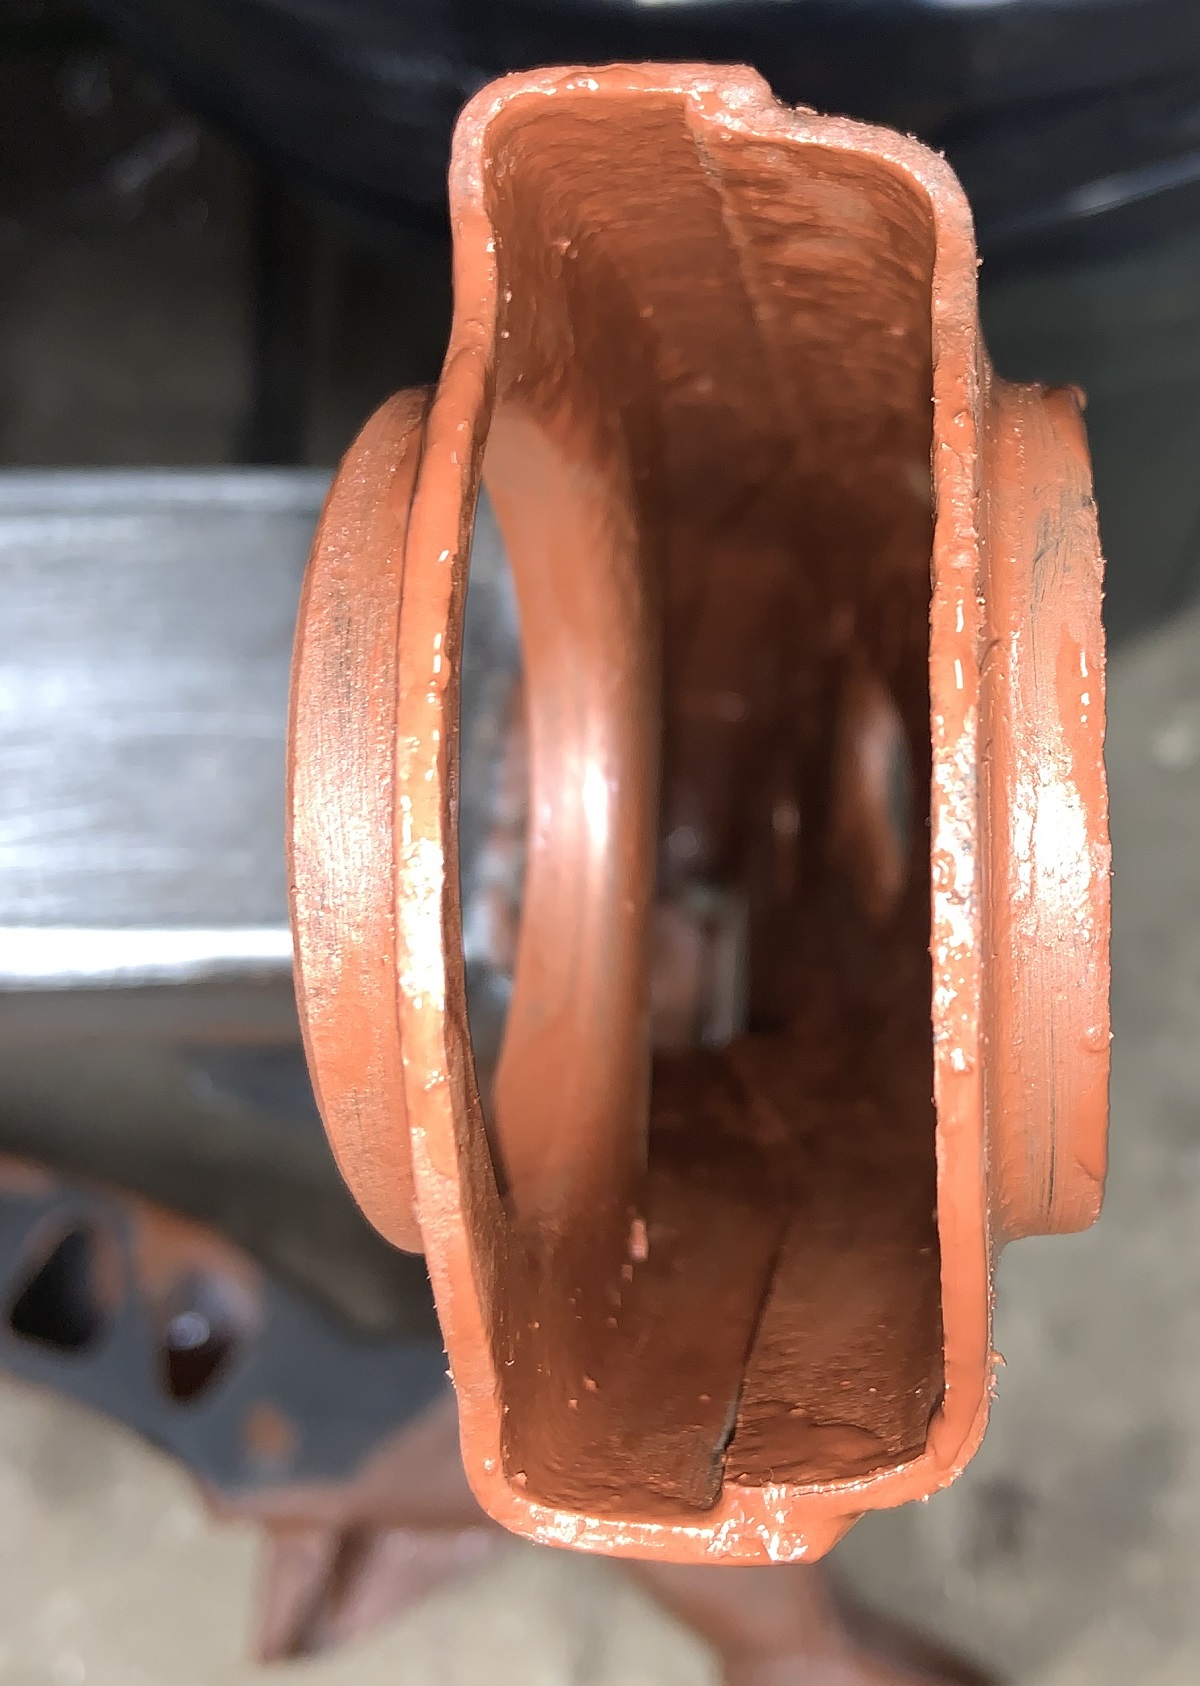
Attached a brush to a wire to fully paint inside the cradle legs.
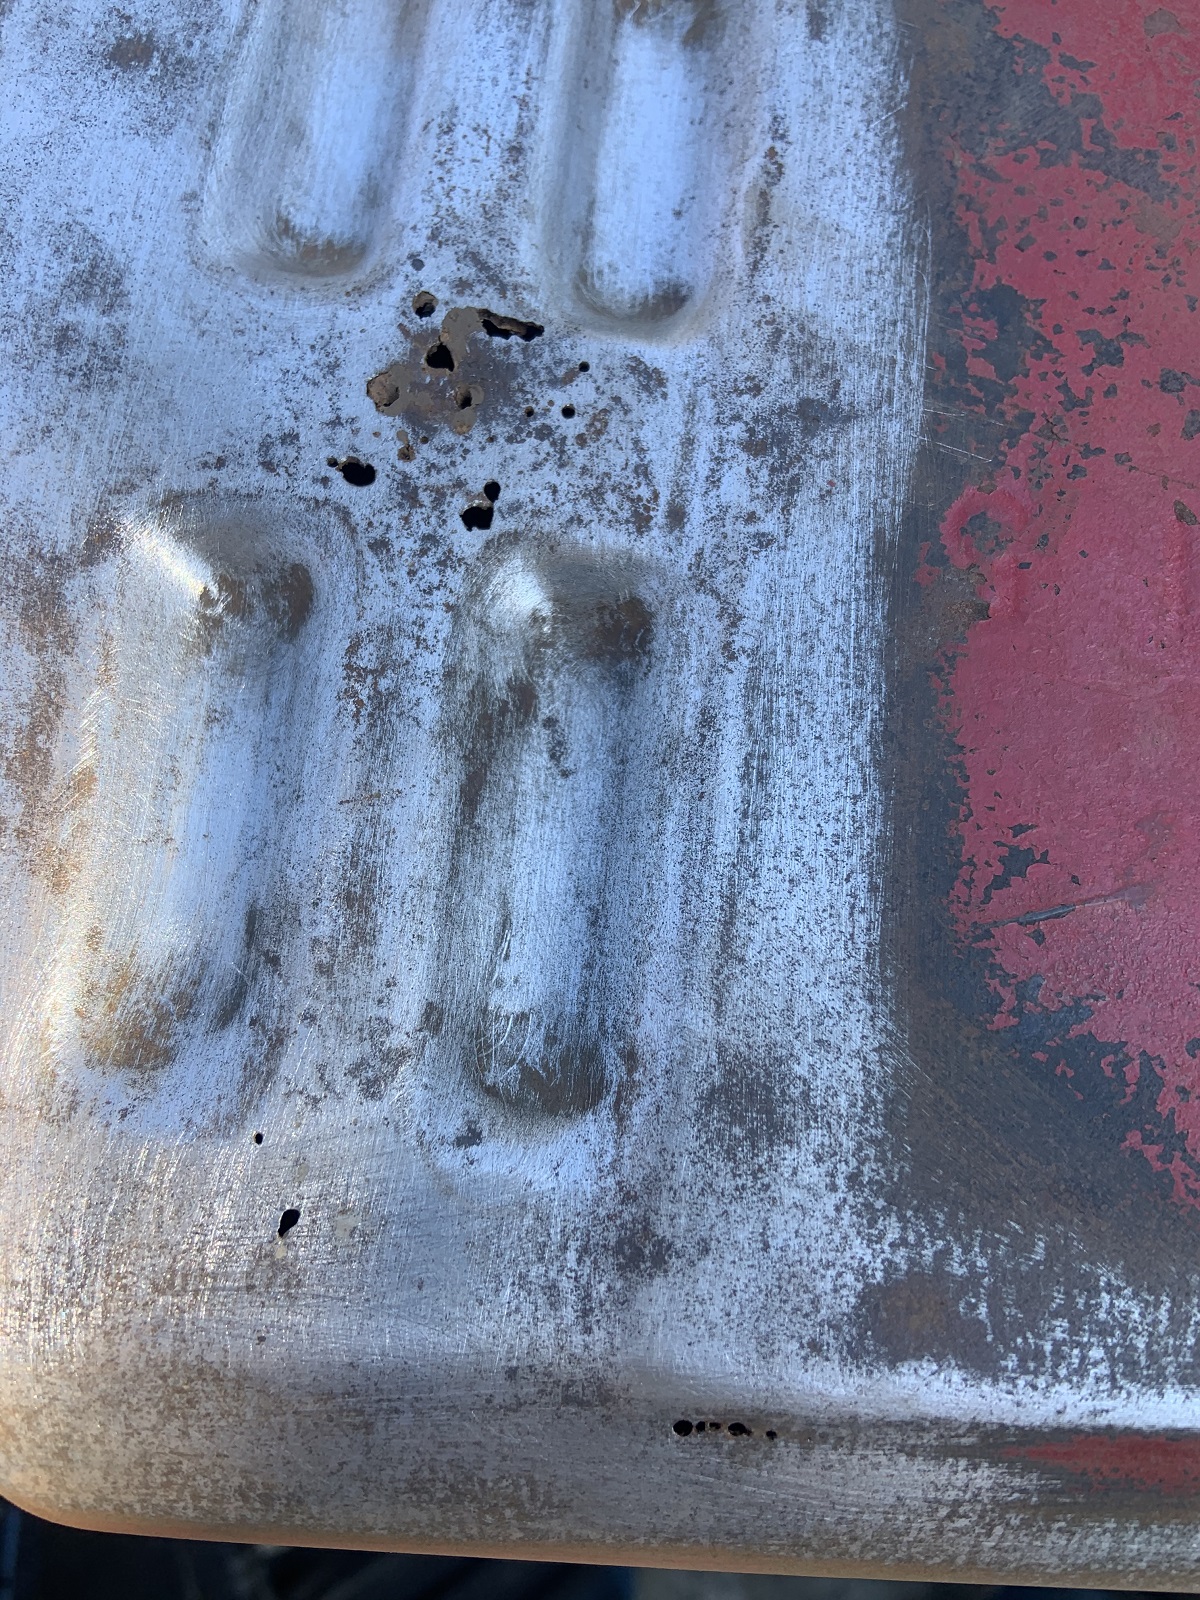
Tank and sender.
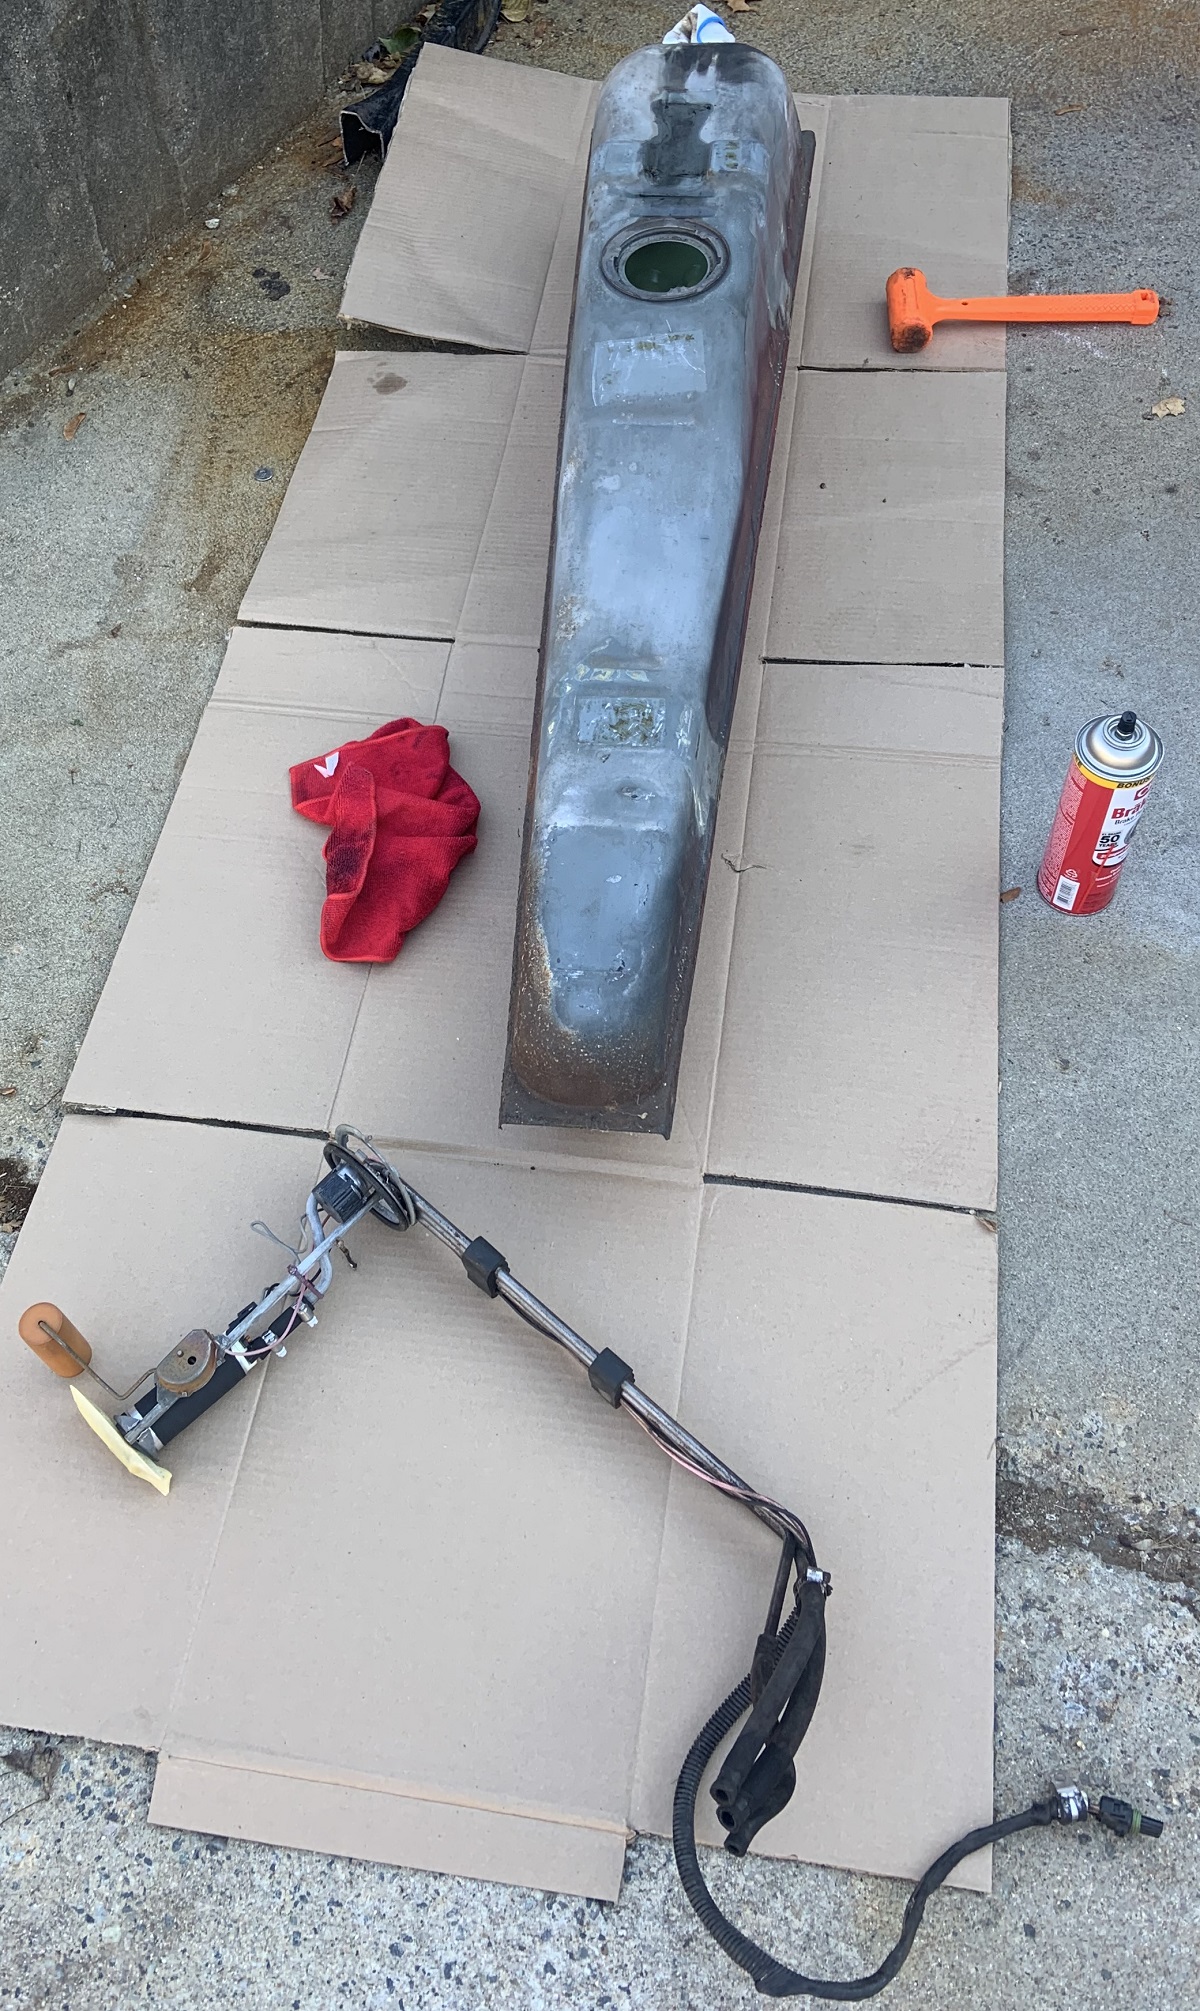
Thought it was strange the tank was completely dry, started looking for pin holes or patches. Saw a patch on the bottom and it looked leaky.
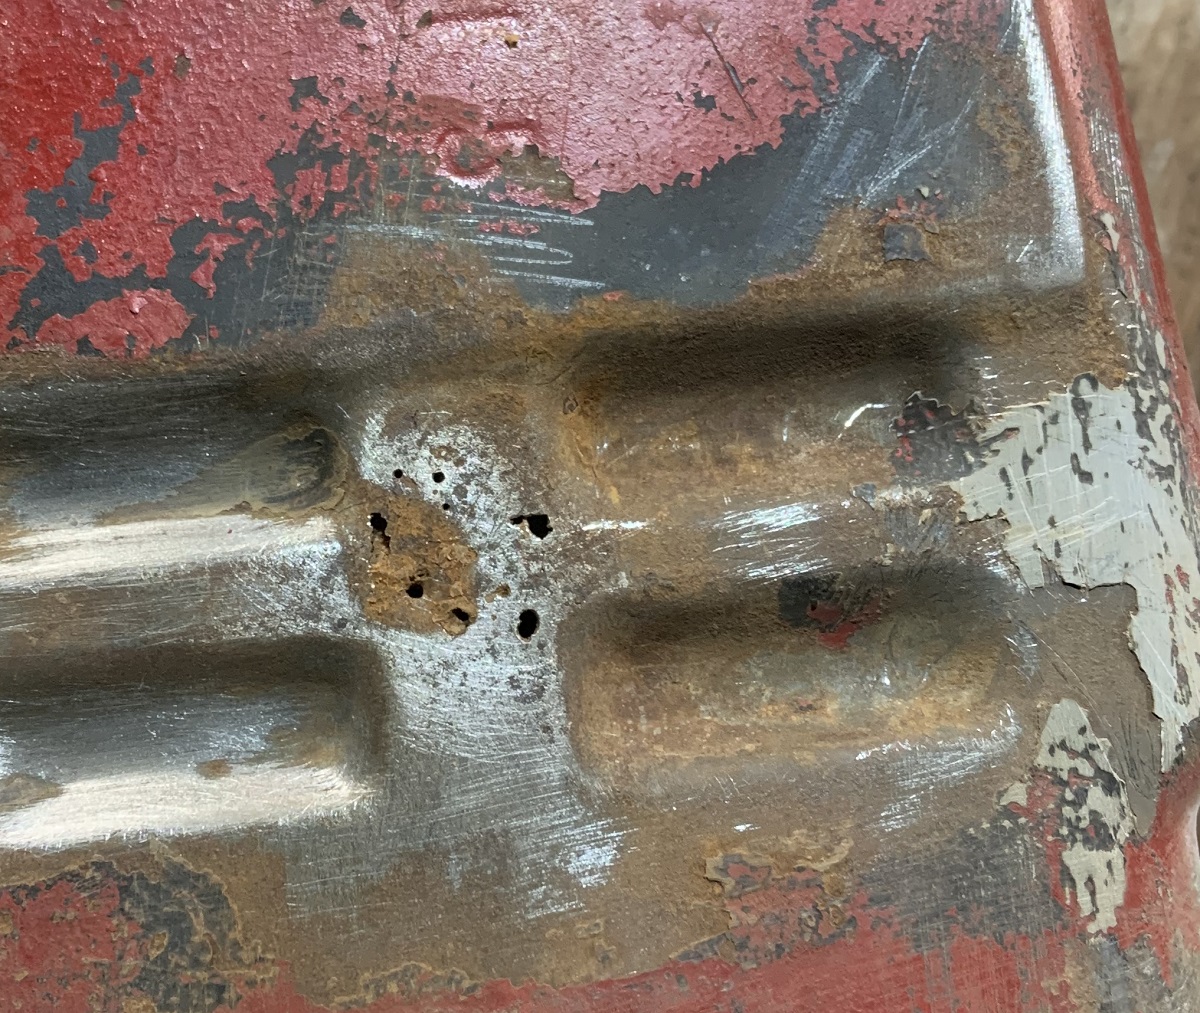
In cleaning it up fully to patch it I found some more spots when I went around stabbing the tank with a pick.
Patched.
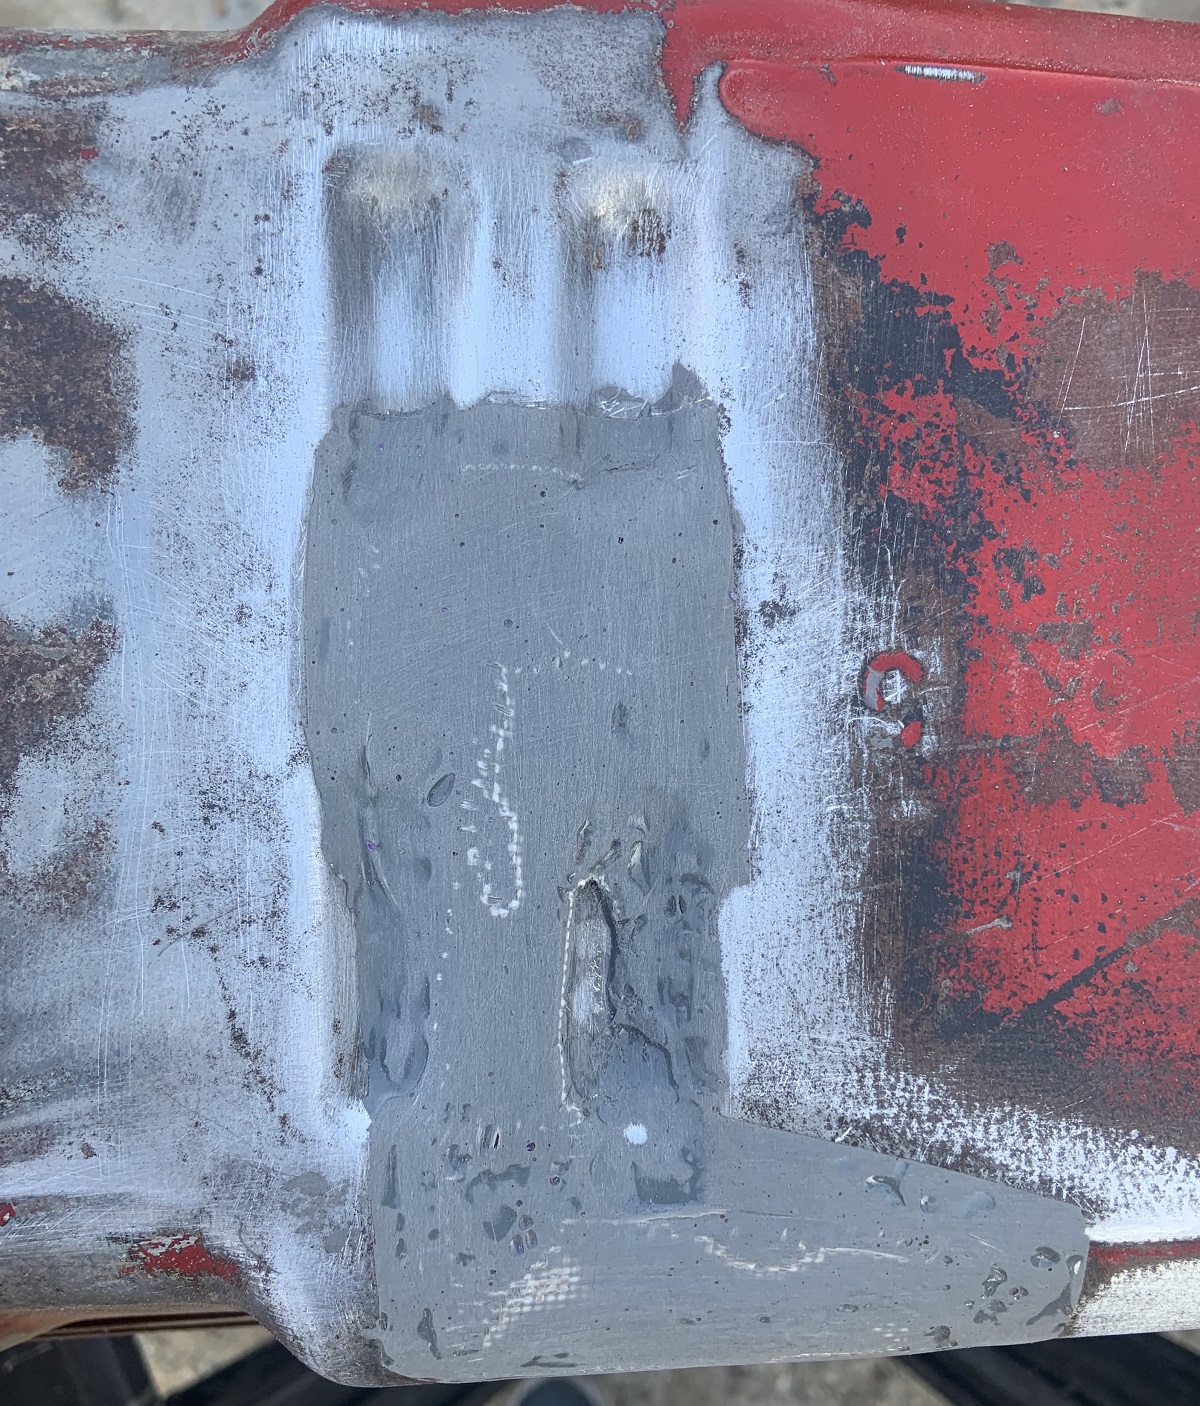
I just missed the window for the epoxy being workable in the final step and trying to spread it around pulled some epoxy off. I don't think it matters. I used the JB weld kit which comes with fiber glass. I cut it into smaller pieces, stuck it to the epoxy, put a layer of epoxy over that, then a second layer of fiberglass, and then a final layer of epoxy. The double fiberglass was to make the repair more robust, but it took too long. I hope the fiberglass prevents the patch from cracking over time.
The tank really is not rusty and the inside is perfect too, not sure why that area has gotten thin in places.
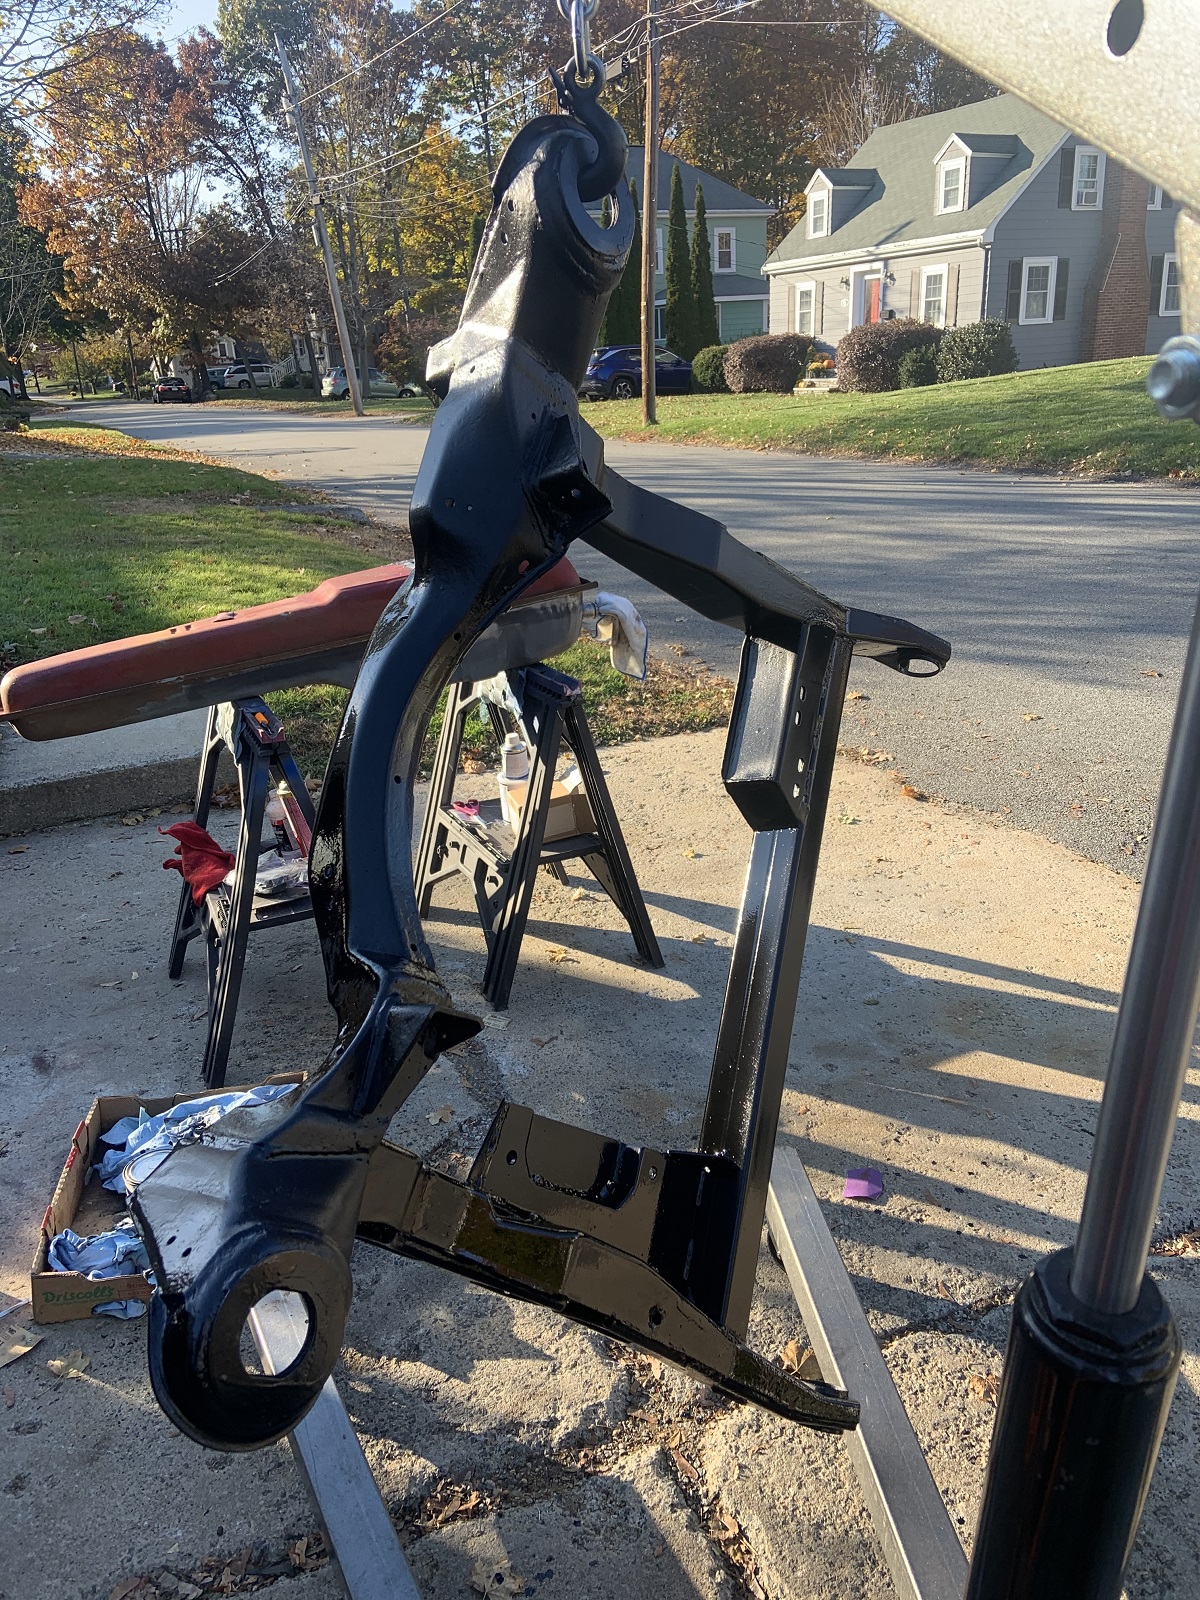
I painted the cradle with Eastwood Chassis Satin Black with an HVLP gun. I was going to epoxy prime it first, but I did not realize it used a special activator that I did not have. Luckily the chassis paint can be applied to bare metal so I wiped it down with acetone and painted it.
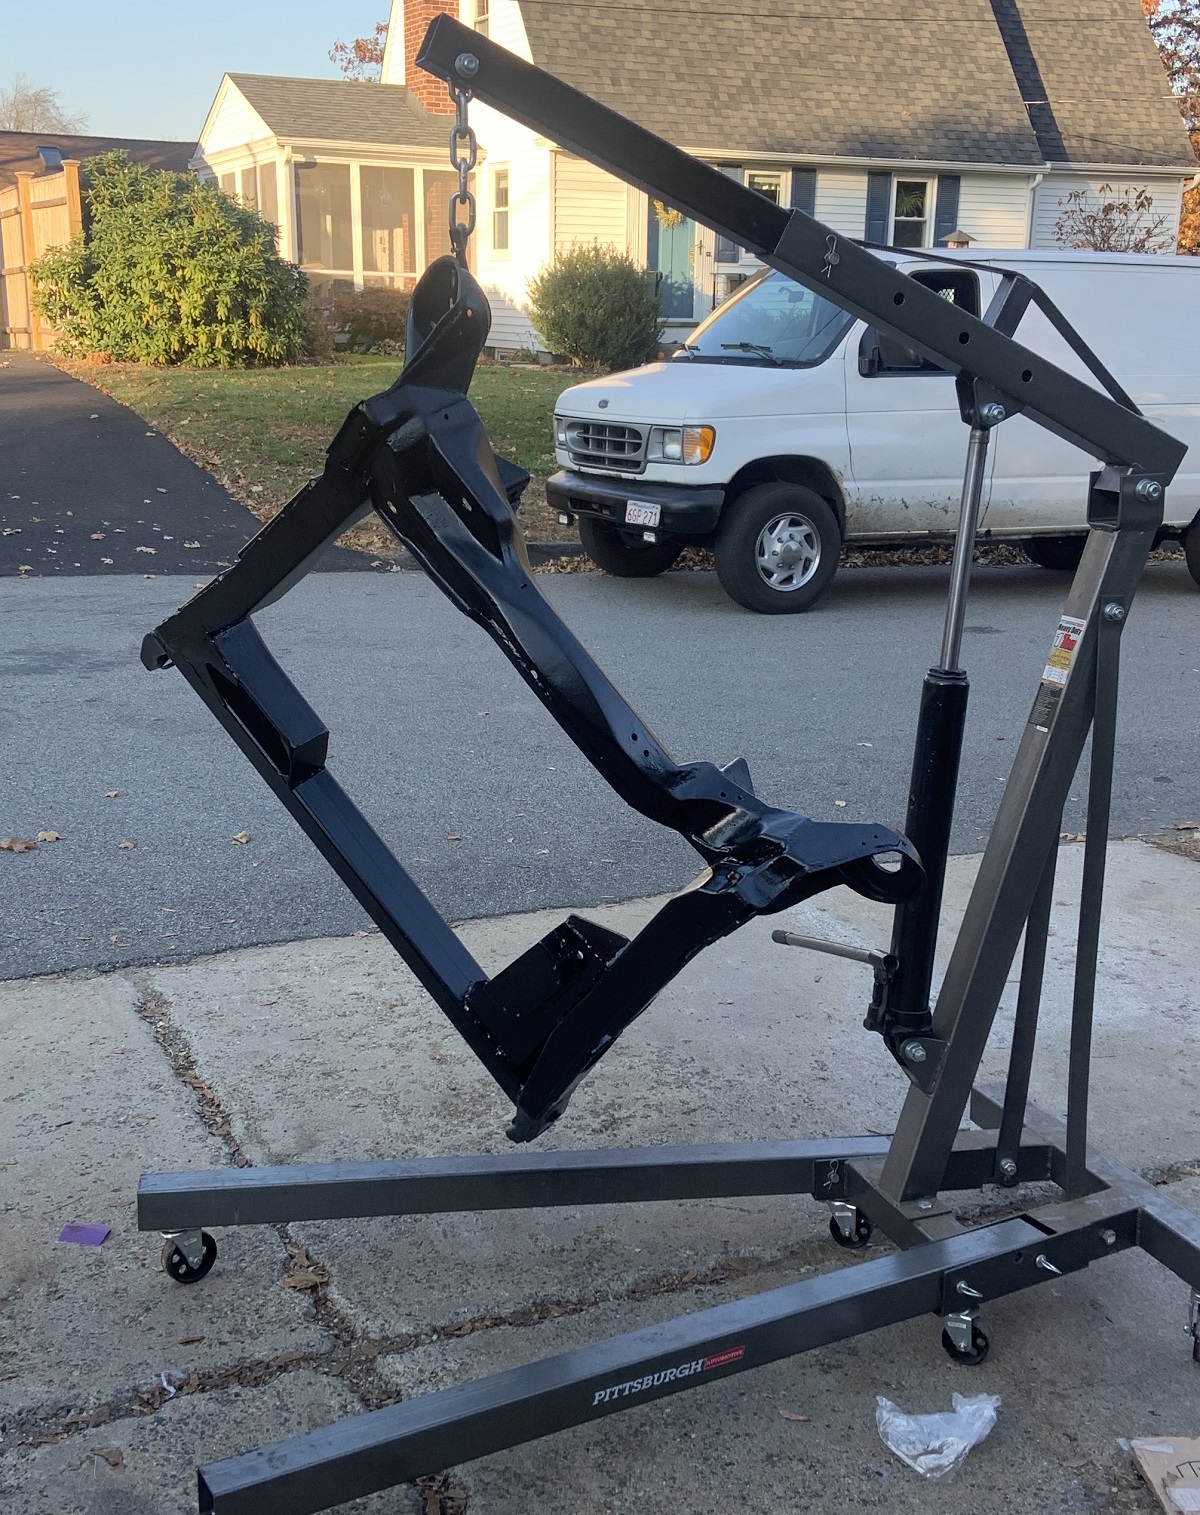
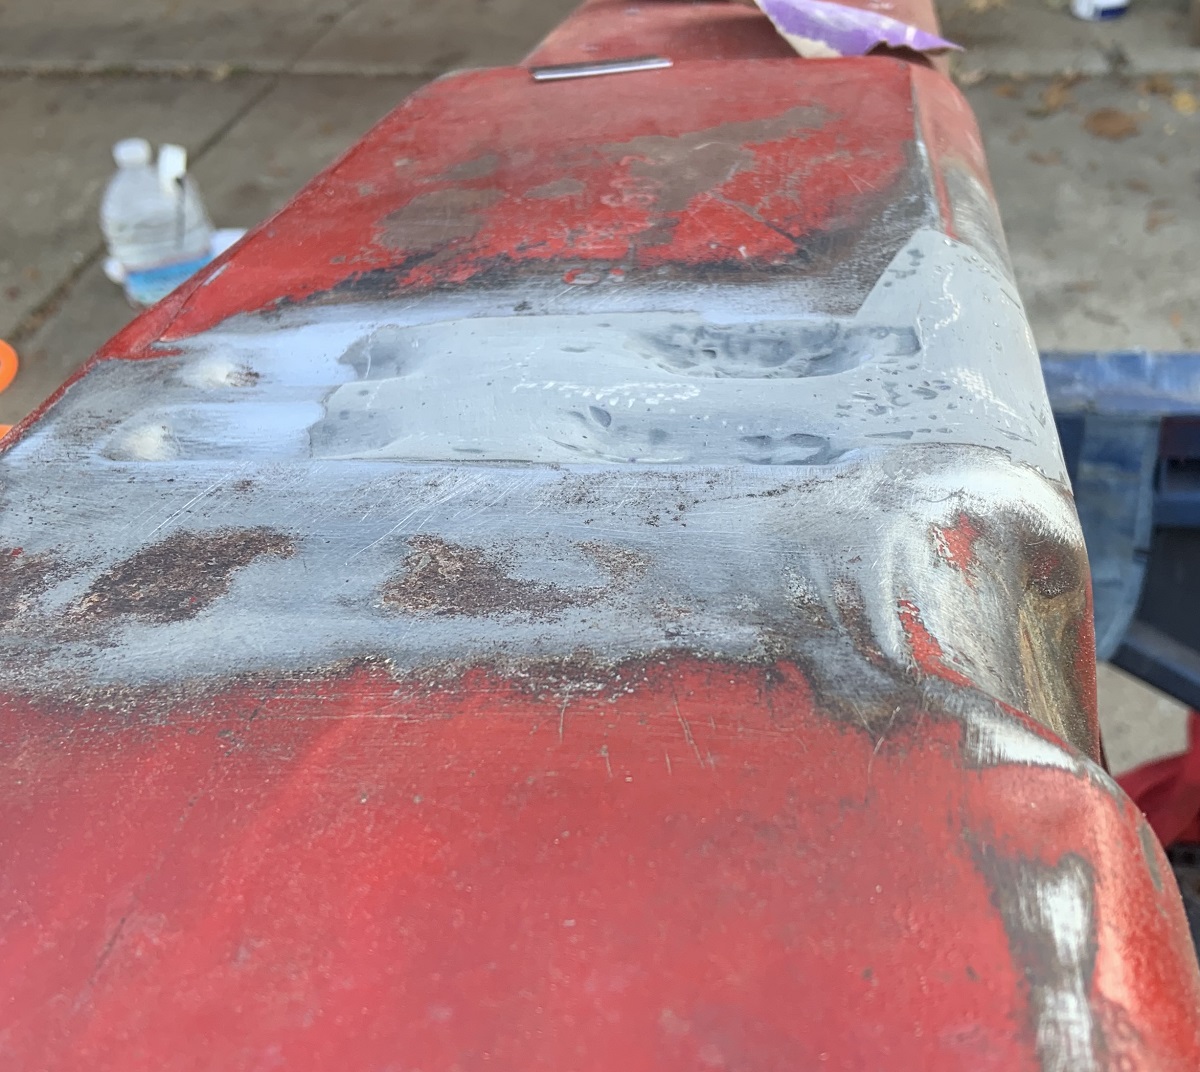
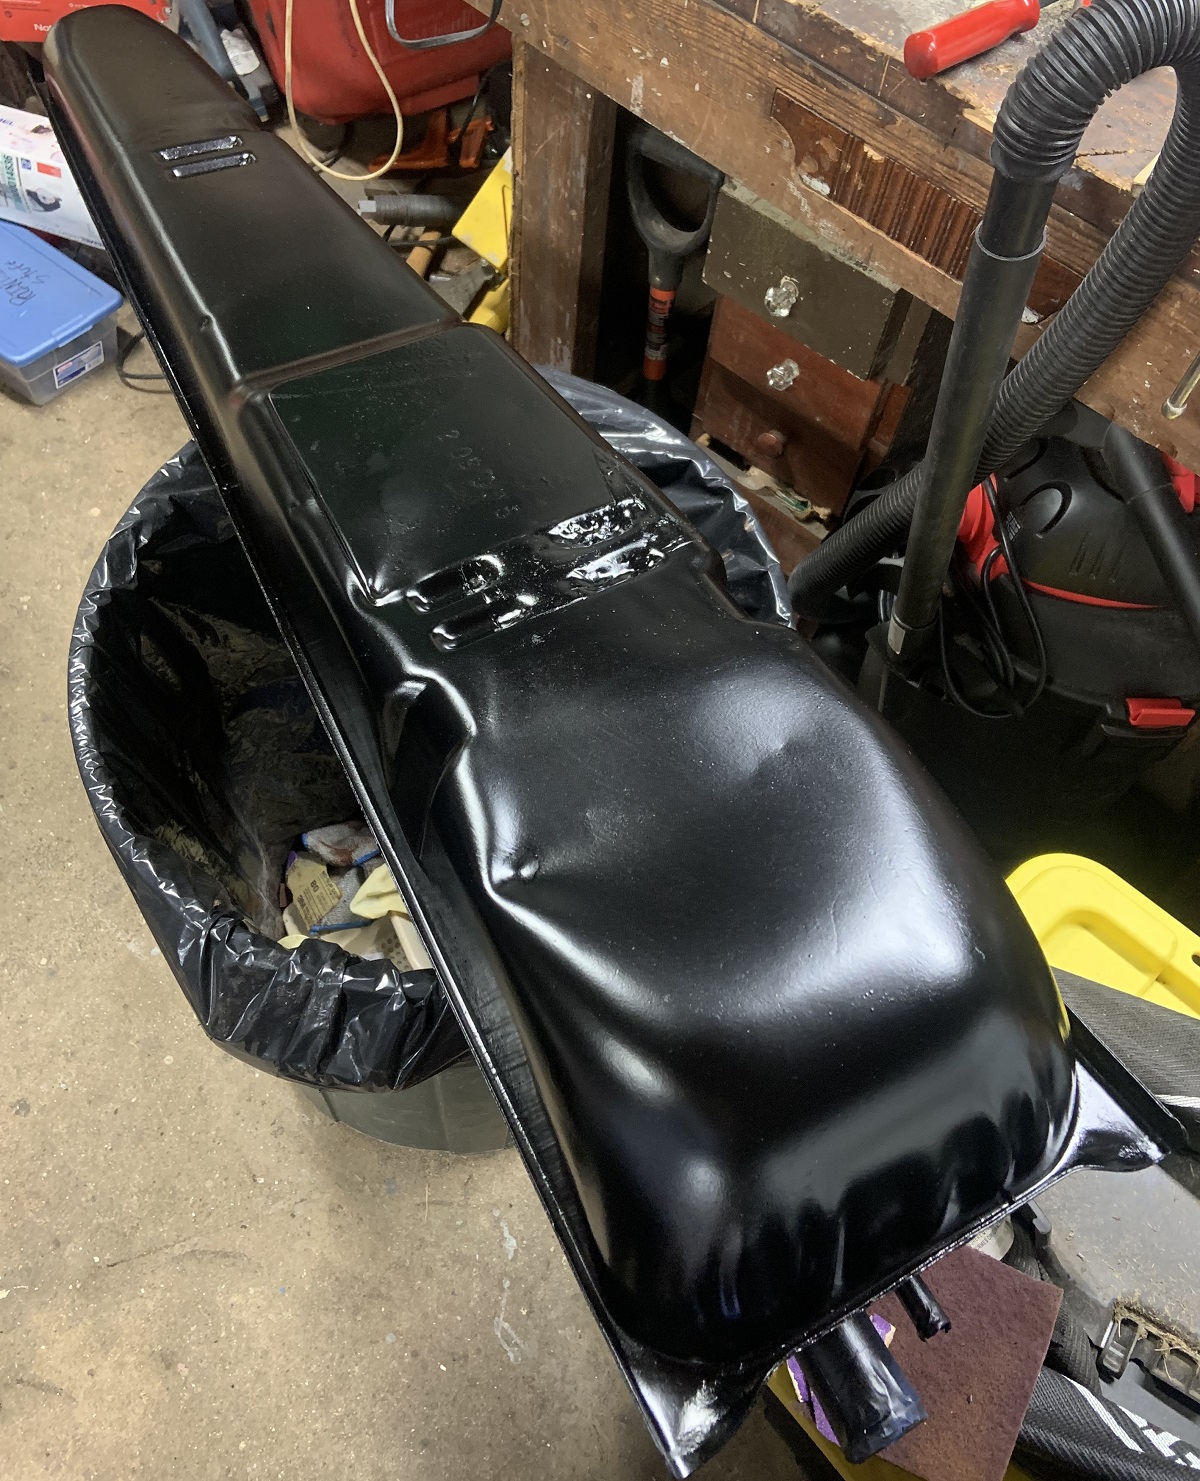
I prepped the gas tank for paint.

And painted it. The angle is making that dent look massive.
I also cleaned up the engine bay and took out lines I don't need etc. Here it is ready to run the fuel lines and test fit the motor.
Hopefully the paint is pretty dry tomorrow, the can says it can take up to 72 hours.
I have lots of things I can do tomorrow/upcoming days:
- Run fuel lines which includes bending the line, installing fittings, mounting the regulator, mounting the fuel filter, and making a braided line.
- Install the fuel pump and gas tank with new tank straps.
- Figure out a coolant crossover solution that utilizes some standard size hoses.
- Mount the engine and transmission and not forget the new throw out bearing. Install the exhaust.
- Work on the alternator bracket and belt routing.
- Install the motor and transmission in the car for the final(?) time
- Fabricate Battery Tray, coolant fill, and VVT cover
- Wire the car.
I have 4 days to try and do everything.[This message has been edited by zkhennings (edited 11-09-2021).]
|
|
|
|
zkhennings
|
NOV 15, 02:24 AM
|
|
Got the cradle finished, installed the sleeves, welded them, and painted them
Installed the new engine mounts, transmission, motor, and pieces of the motor that I wanted to check for interference in the engine bay

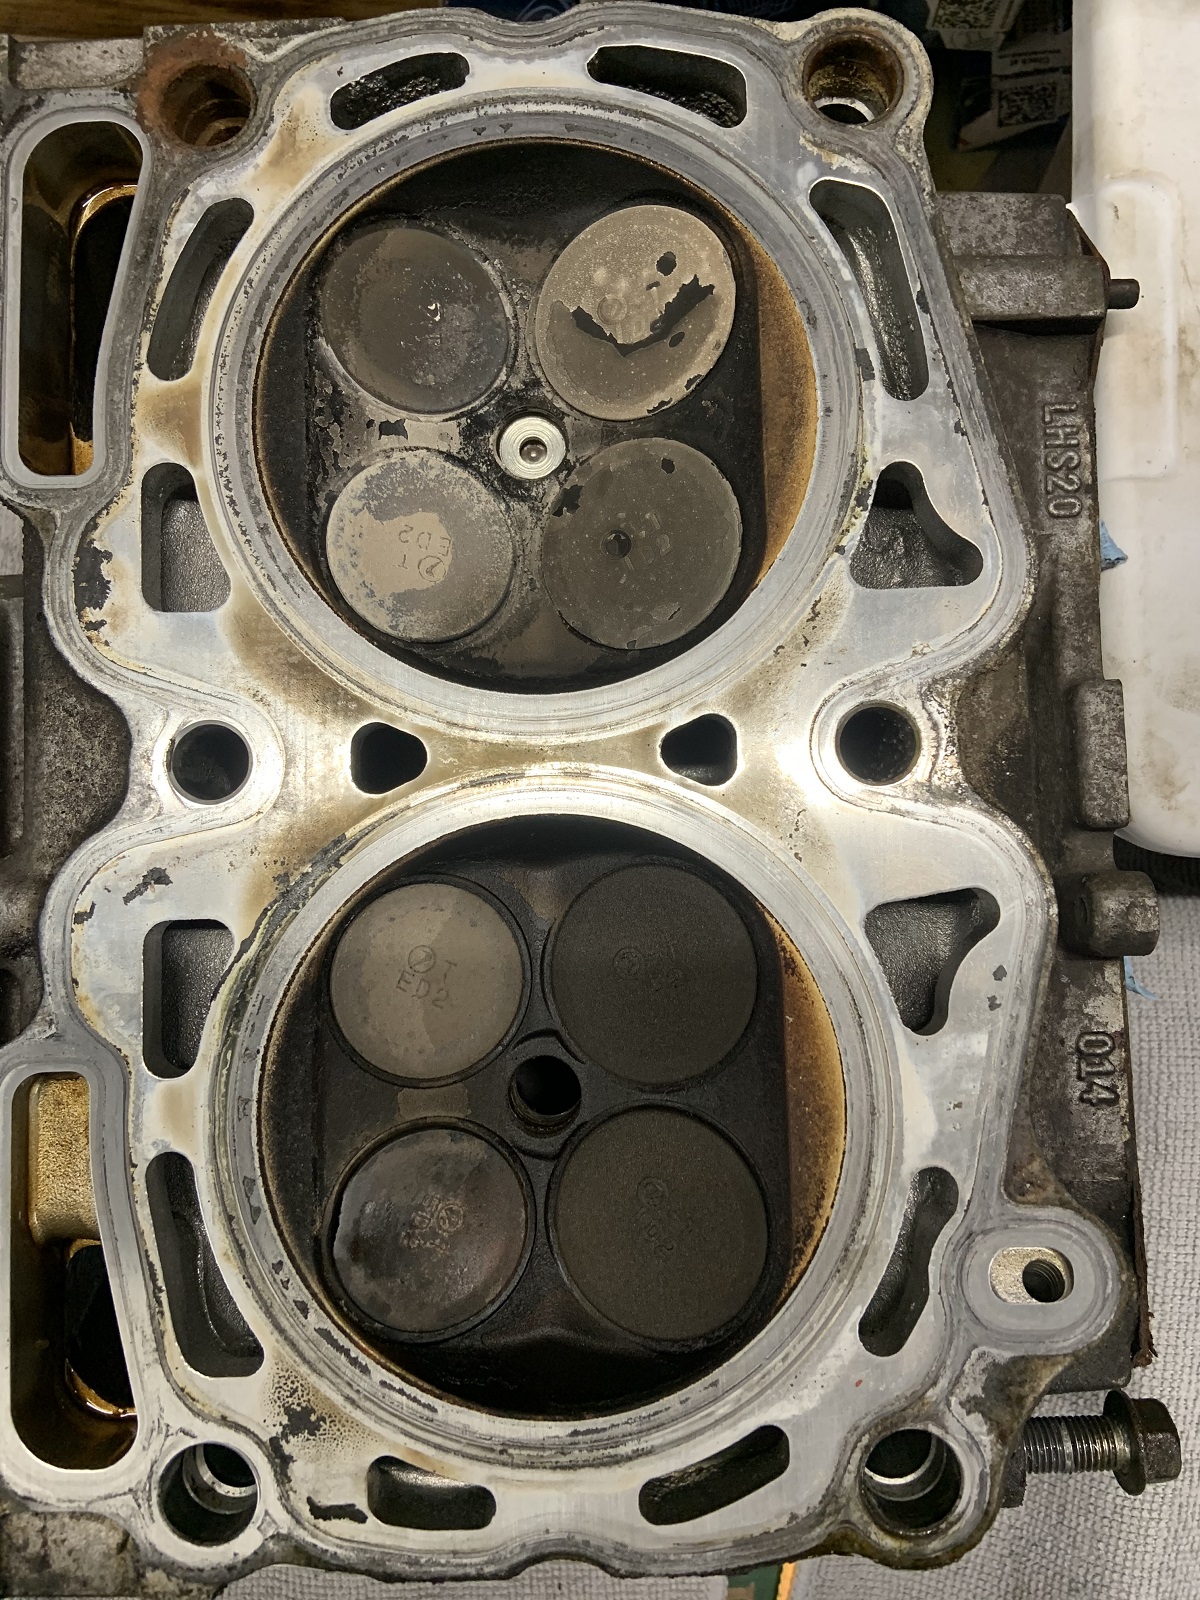
And then the WRX started running on 3 cylinders... Checked compression on the first three cylinders, a measly 90psi, but then a whopping 0 psi on the final cylinder. Out comes the motor.
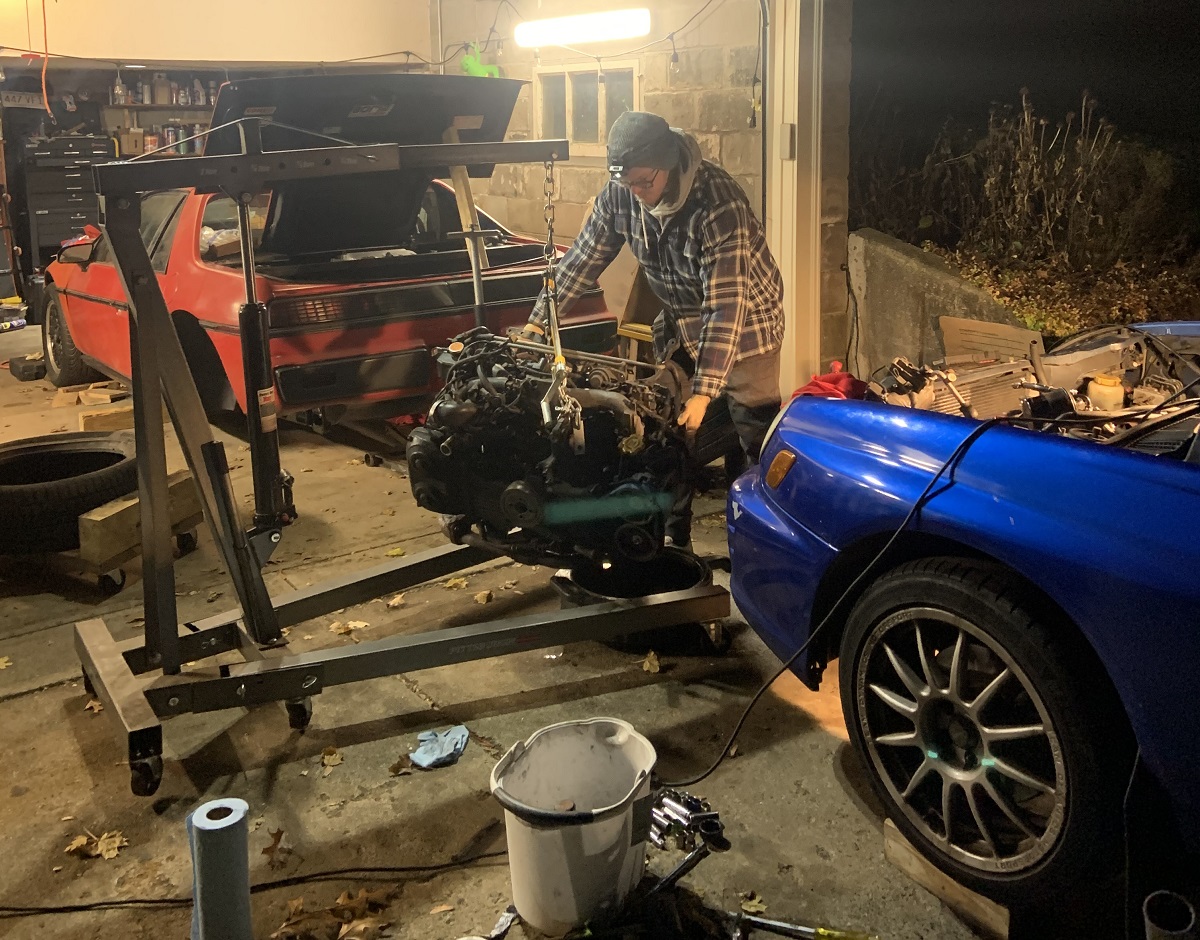
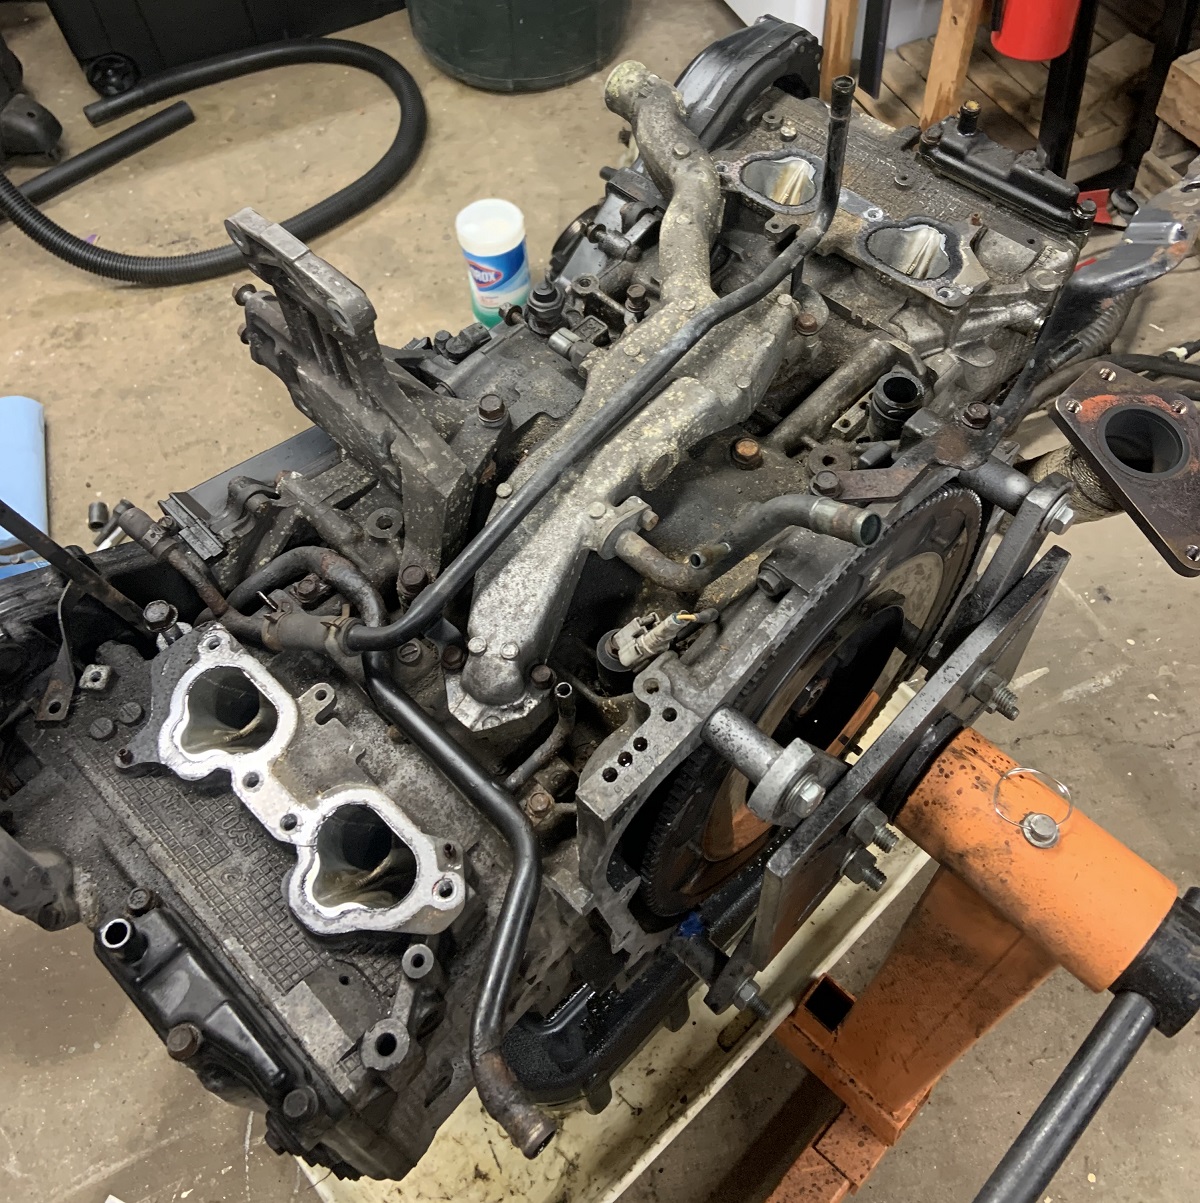
Found it
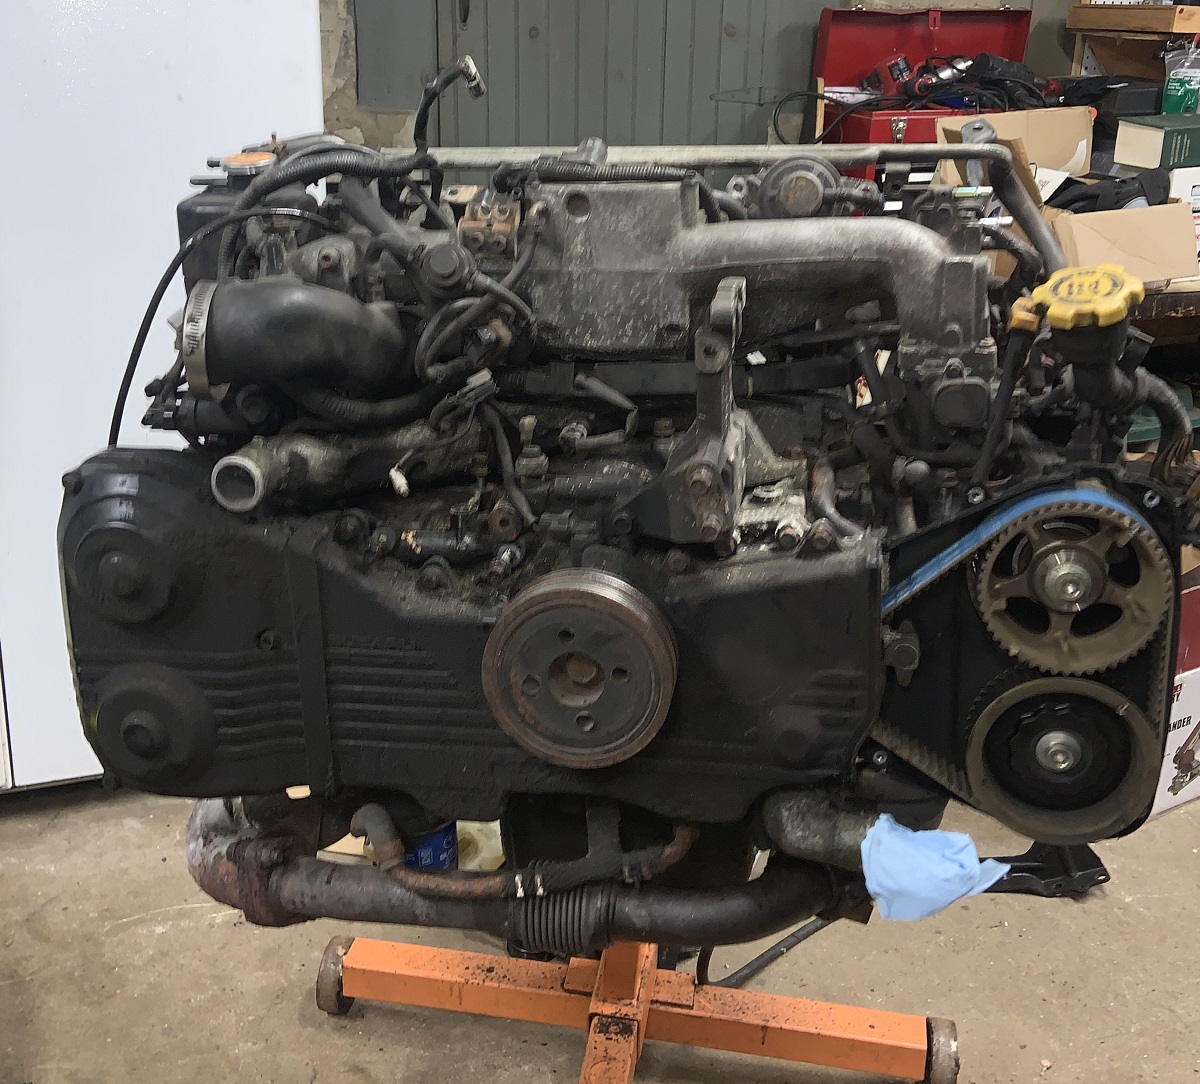
Switcharoo with a fresher bottom end
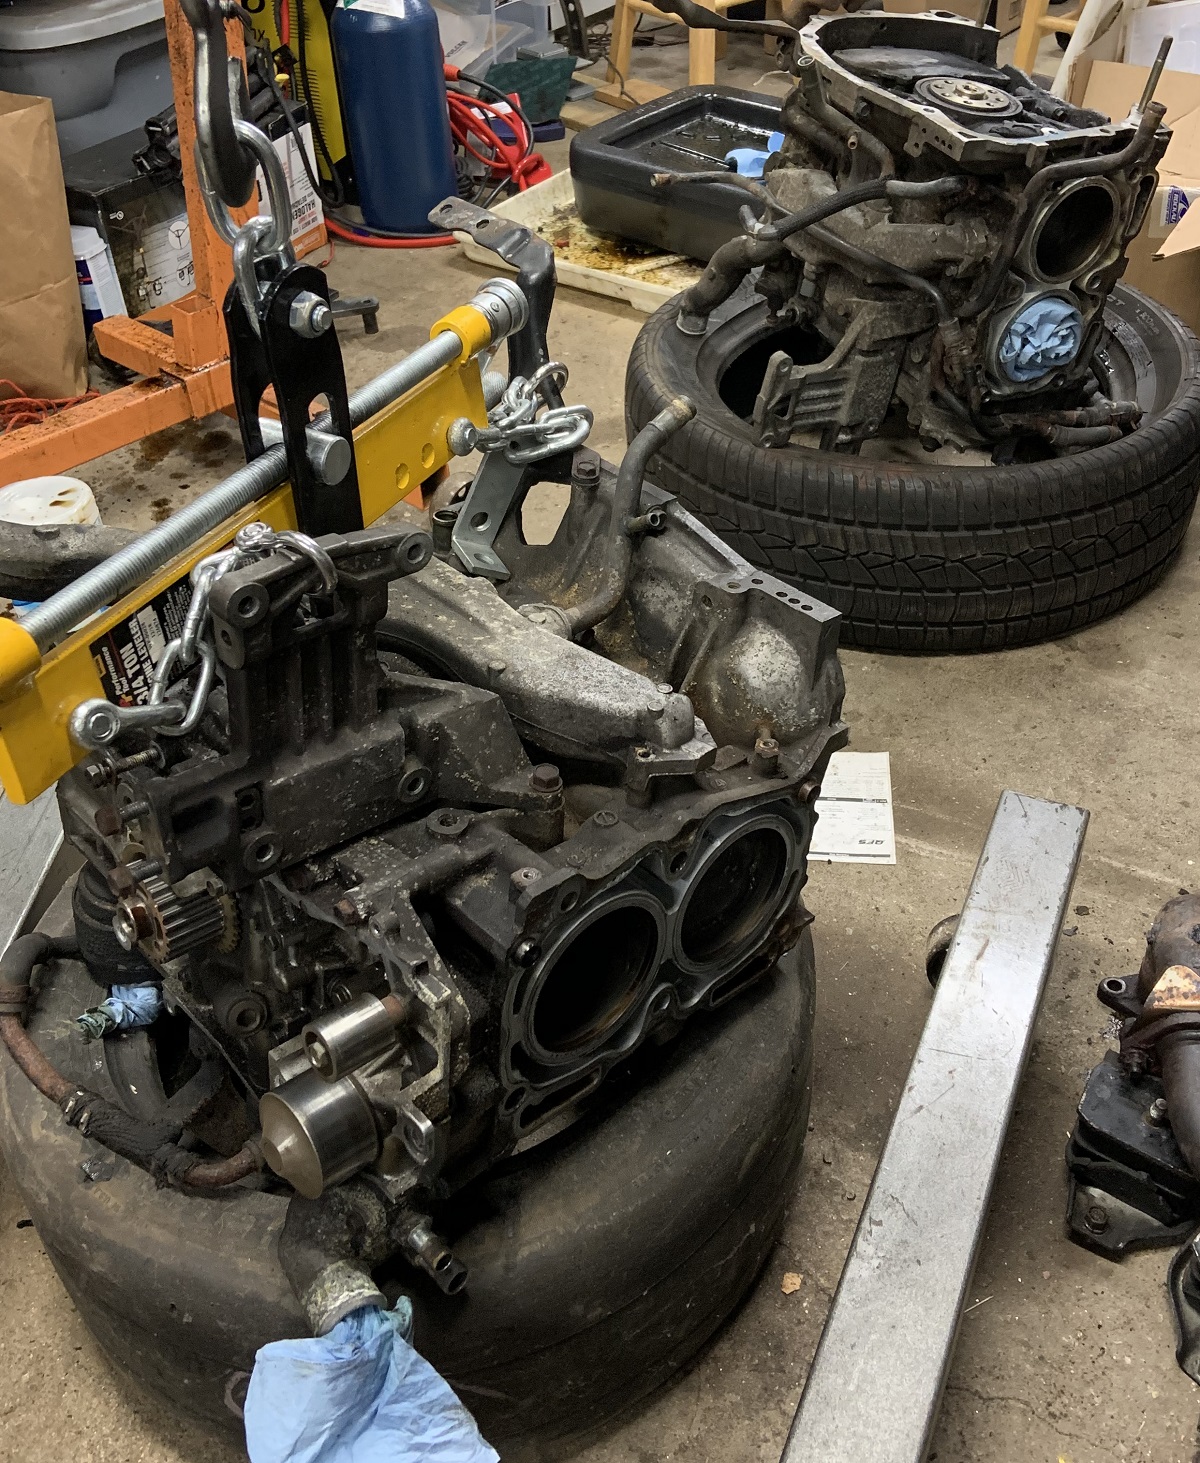
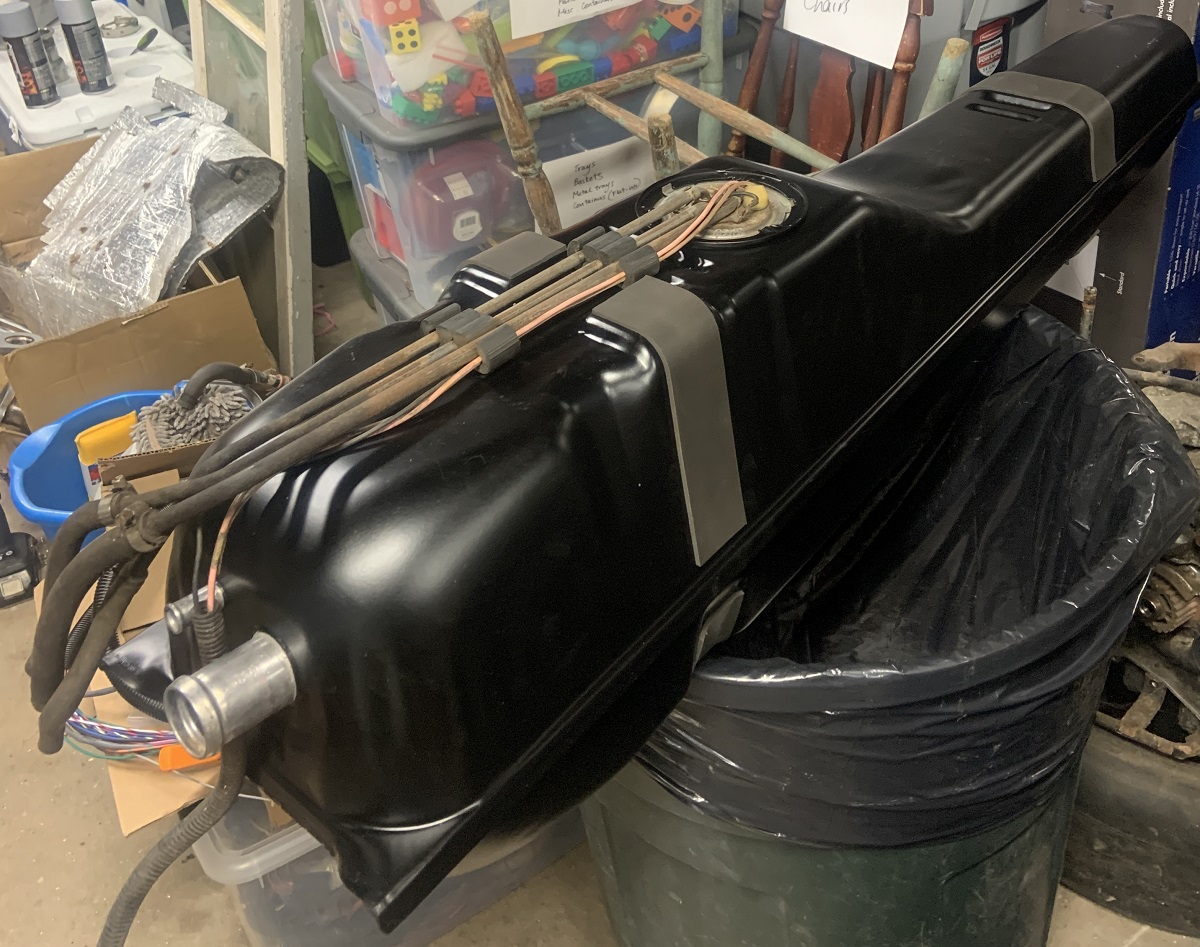
Waiting on parts for that. Back to Fiero. Added new padding to the gas tank.
Installing it with new hardware, did not get a pic of the fuel pump going in

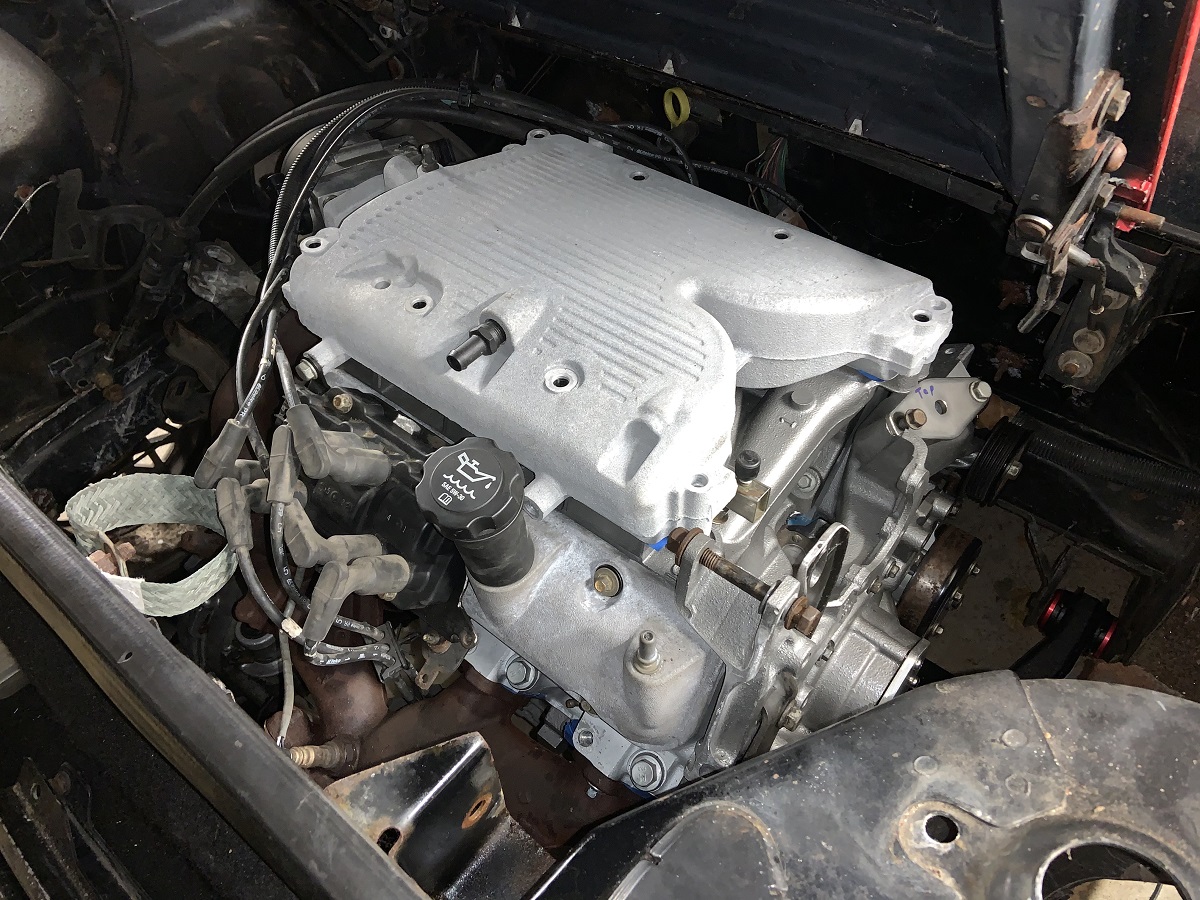
Milestone


Needed to get the rear valve cover installed but the alternator bracket aspect of the coolant crossover interfered, so I chopped it off.
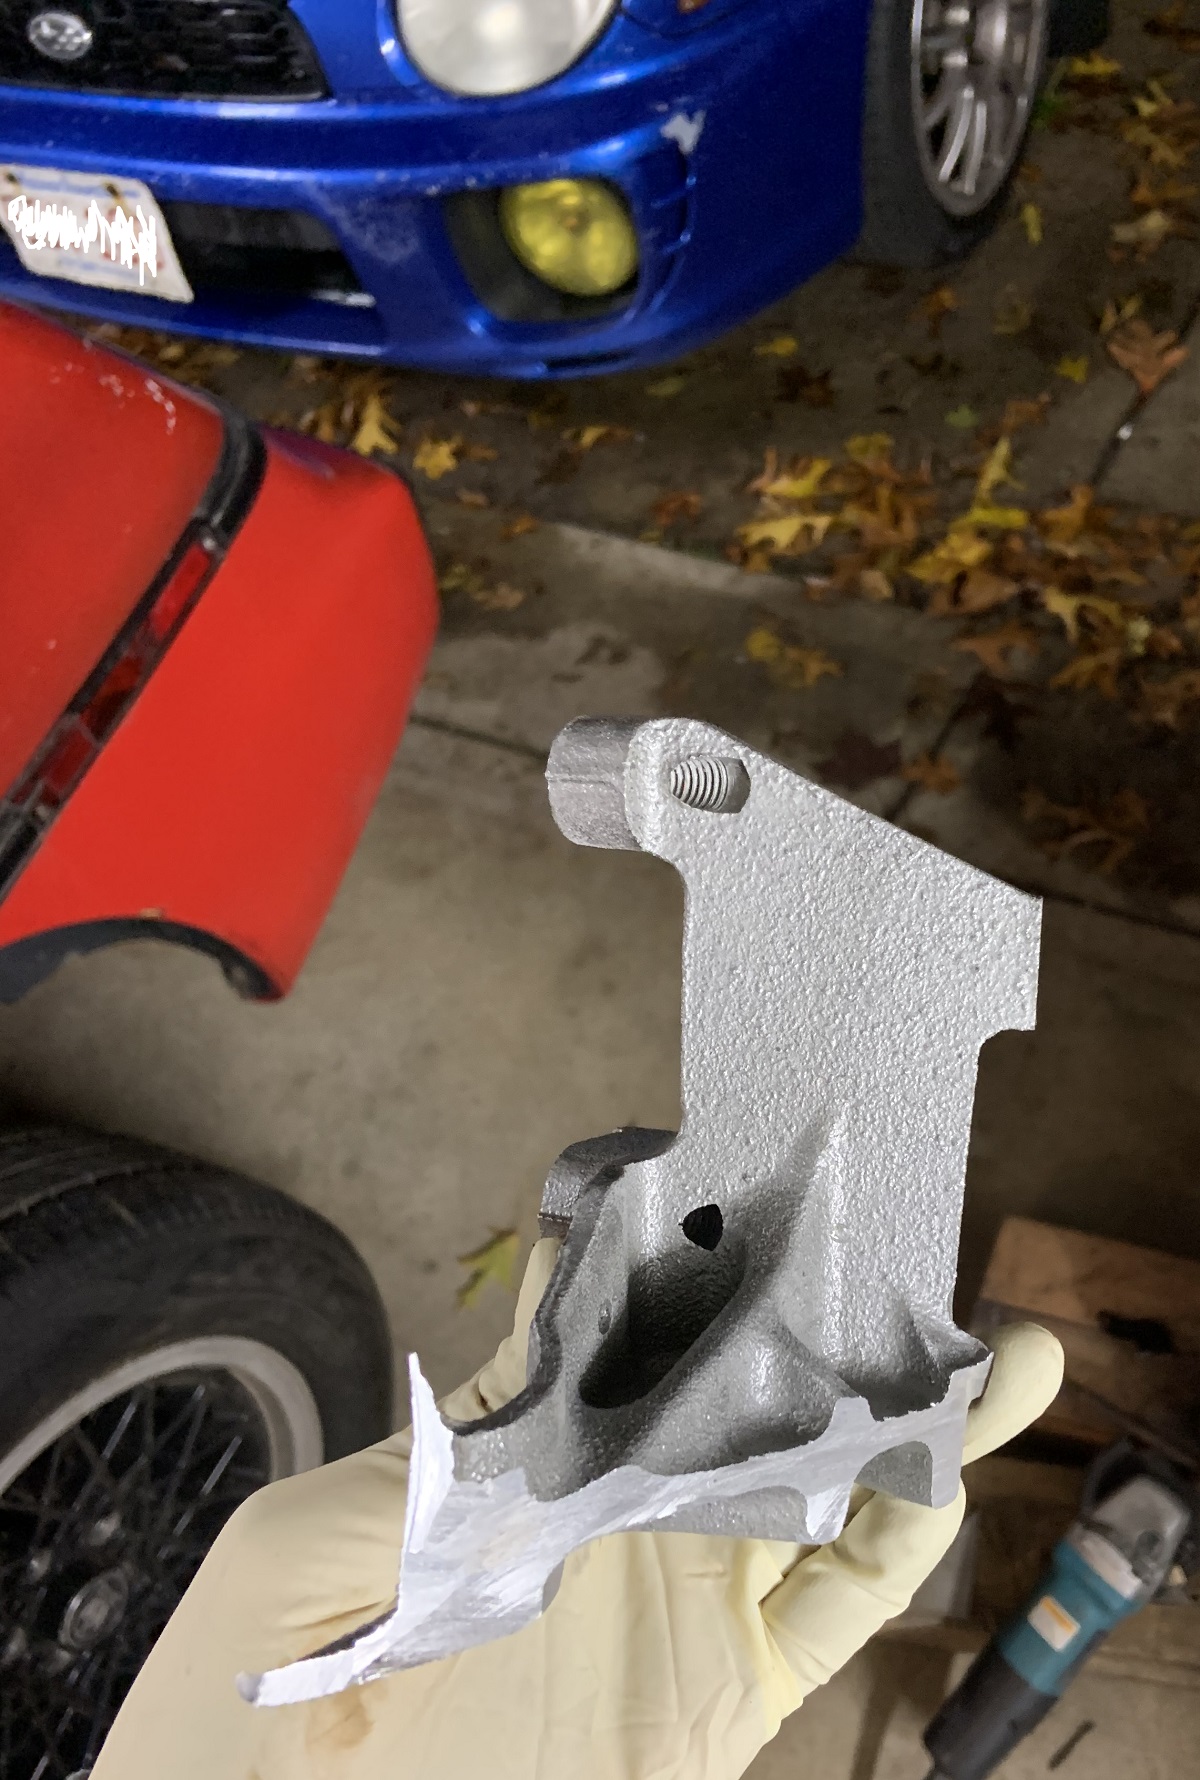
I kept the top portion for a dog bone bracket. It has a steel support bracket that ties into one of the upper intake manifold bolts
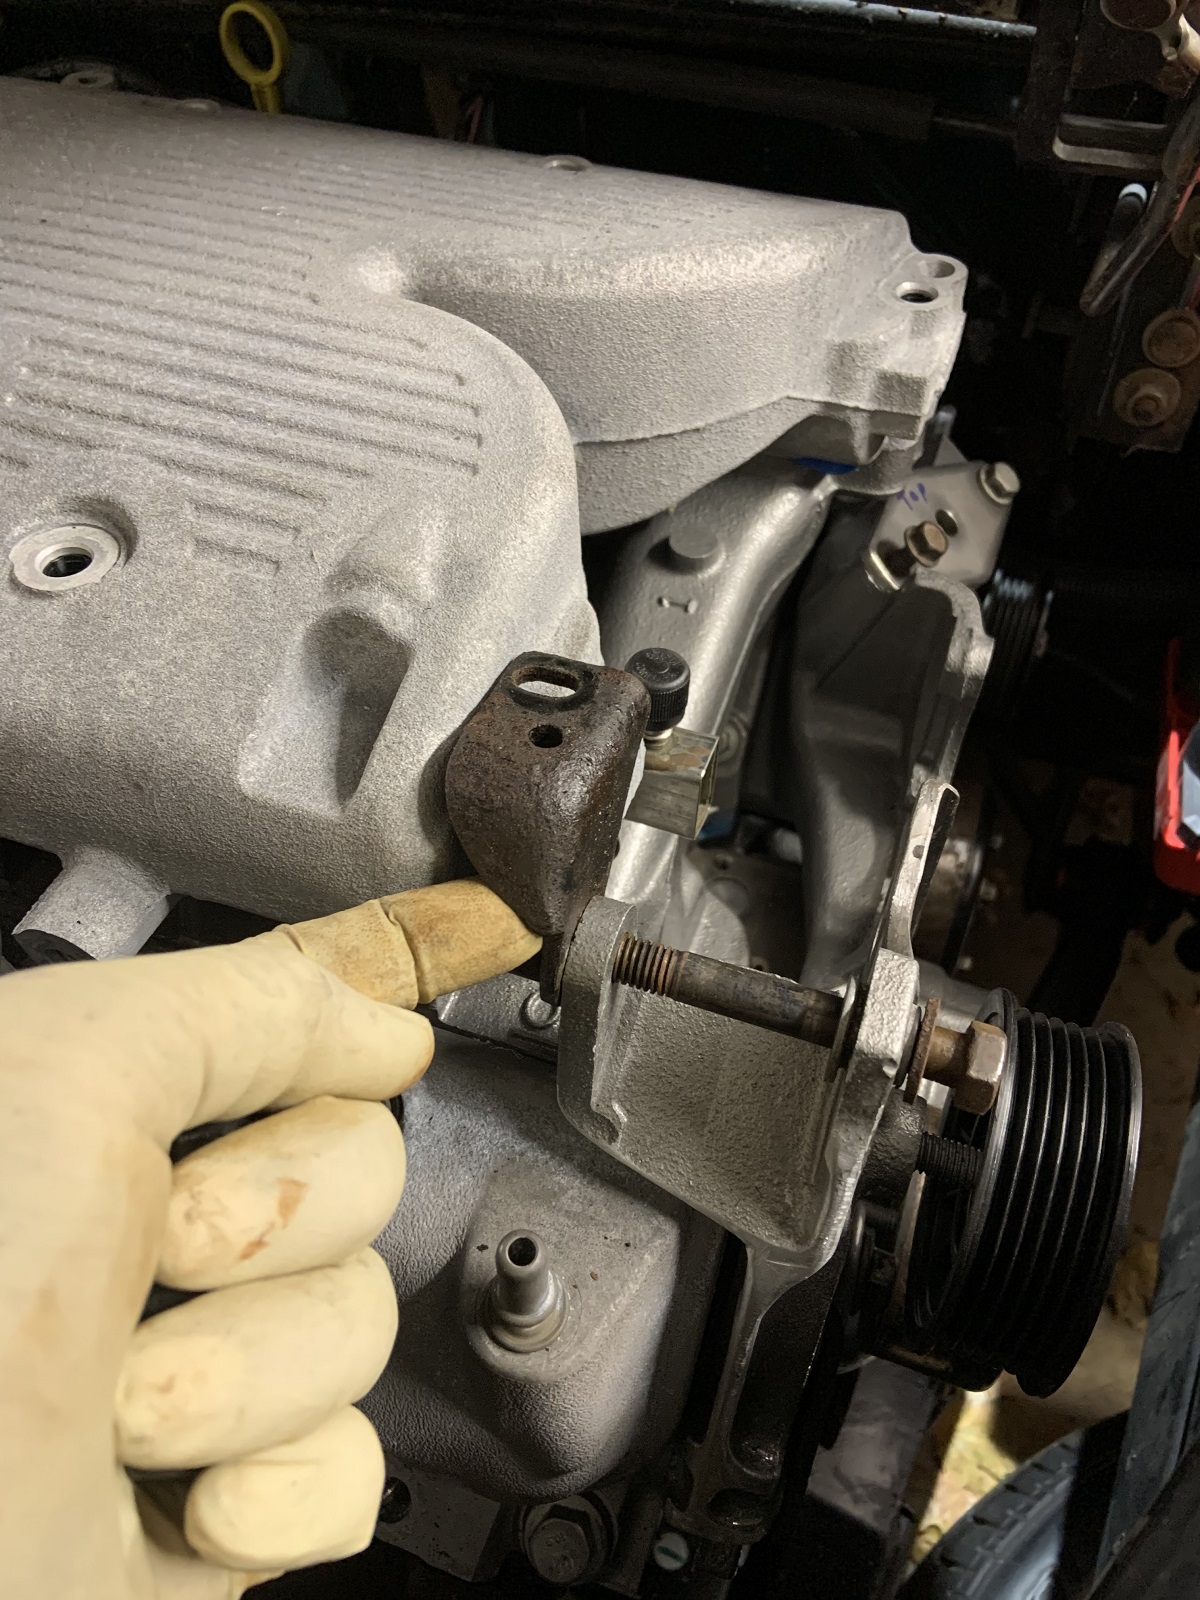
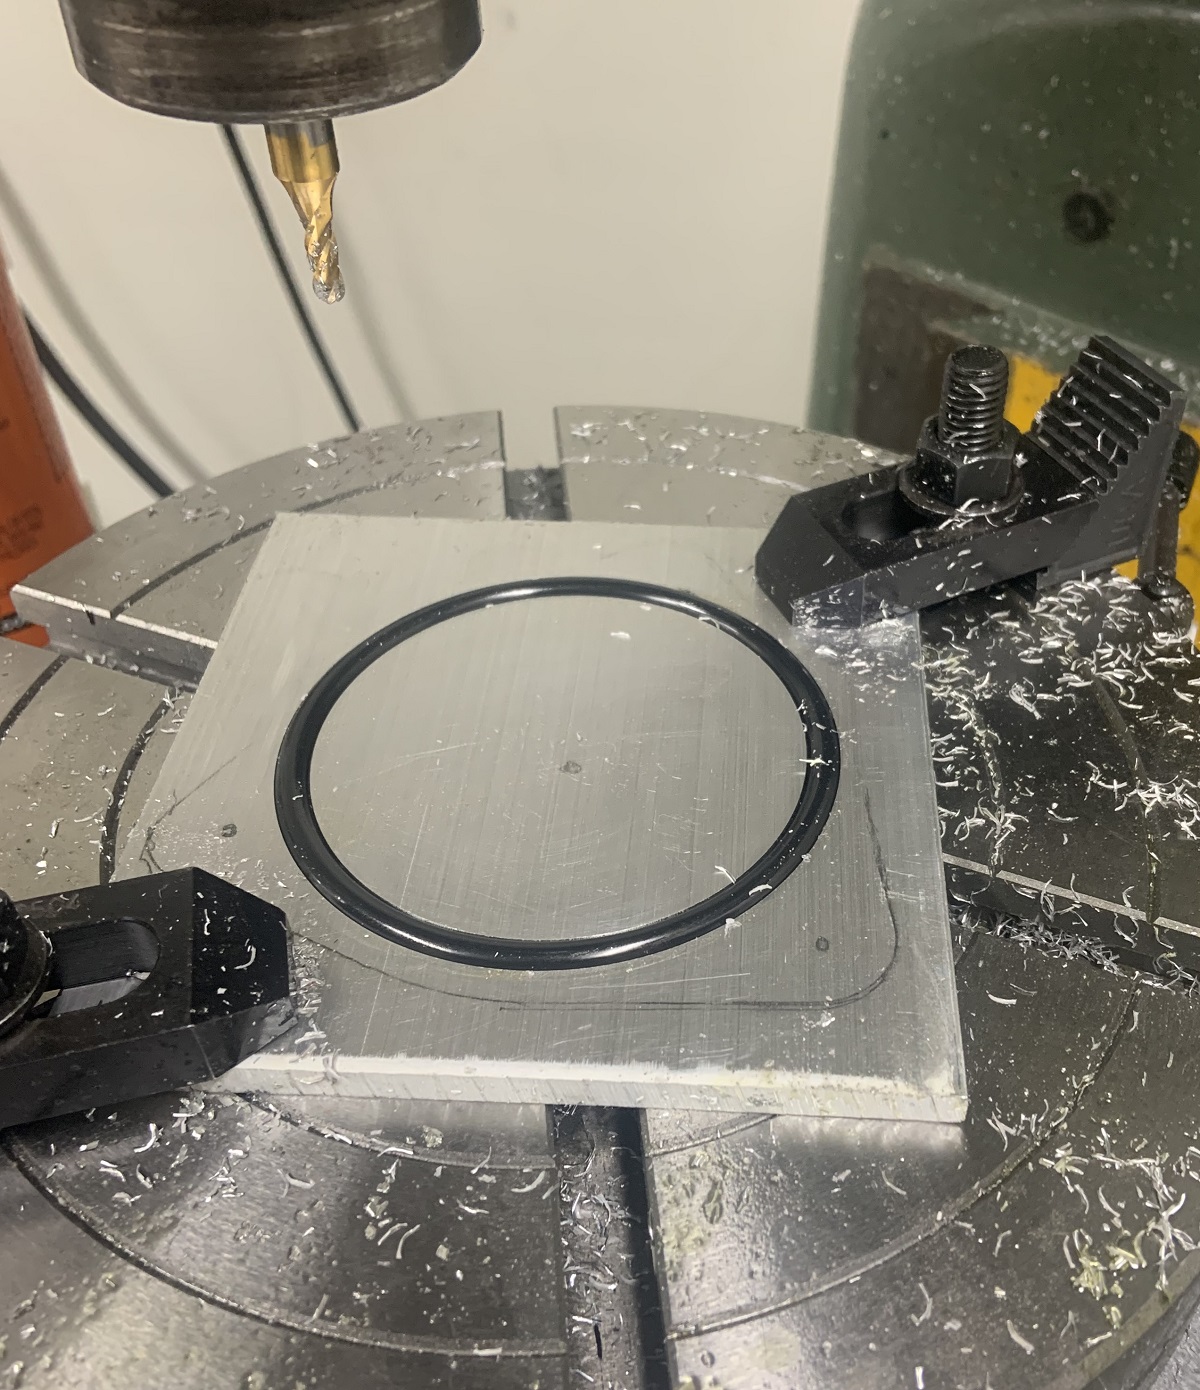
I was then able to install a valve cover on that head. I decided to switch the valve covers so the oil fill was on the rear valve cover as it was partially hidden under the rear window ledge. The oil dipstick was also inaccessible due to exiting under the rear window ledge. This stopped the coil pack bracket from fitting properly so I chopped one of the mounting arms off and ground some reliefs to allow it to fit next to the oil fill. I had to drill and tap four new mounting holes that were offset on the bracket away from the oil fill to mount the coil pack to so that everything fit. I also got my brother working on the coolant fill cover and VVT cover on the timing cover. I got the timing cover started by machining an O ring groove in a piece of aluminum.
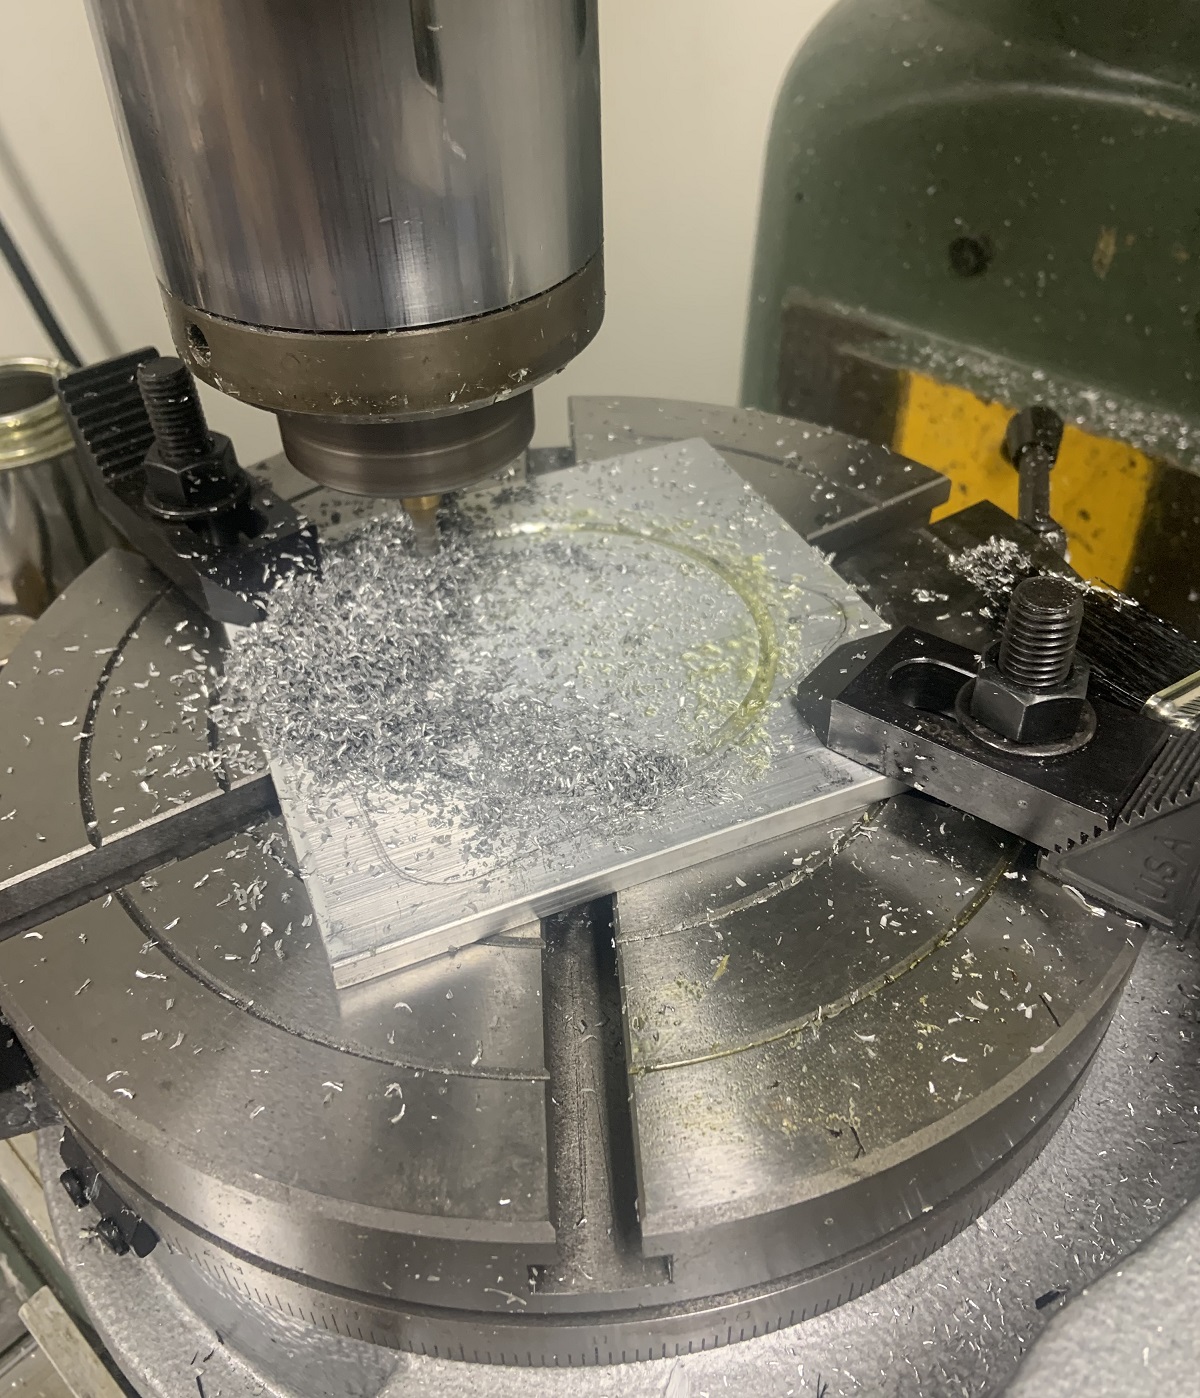
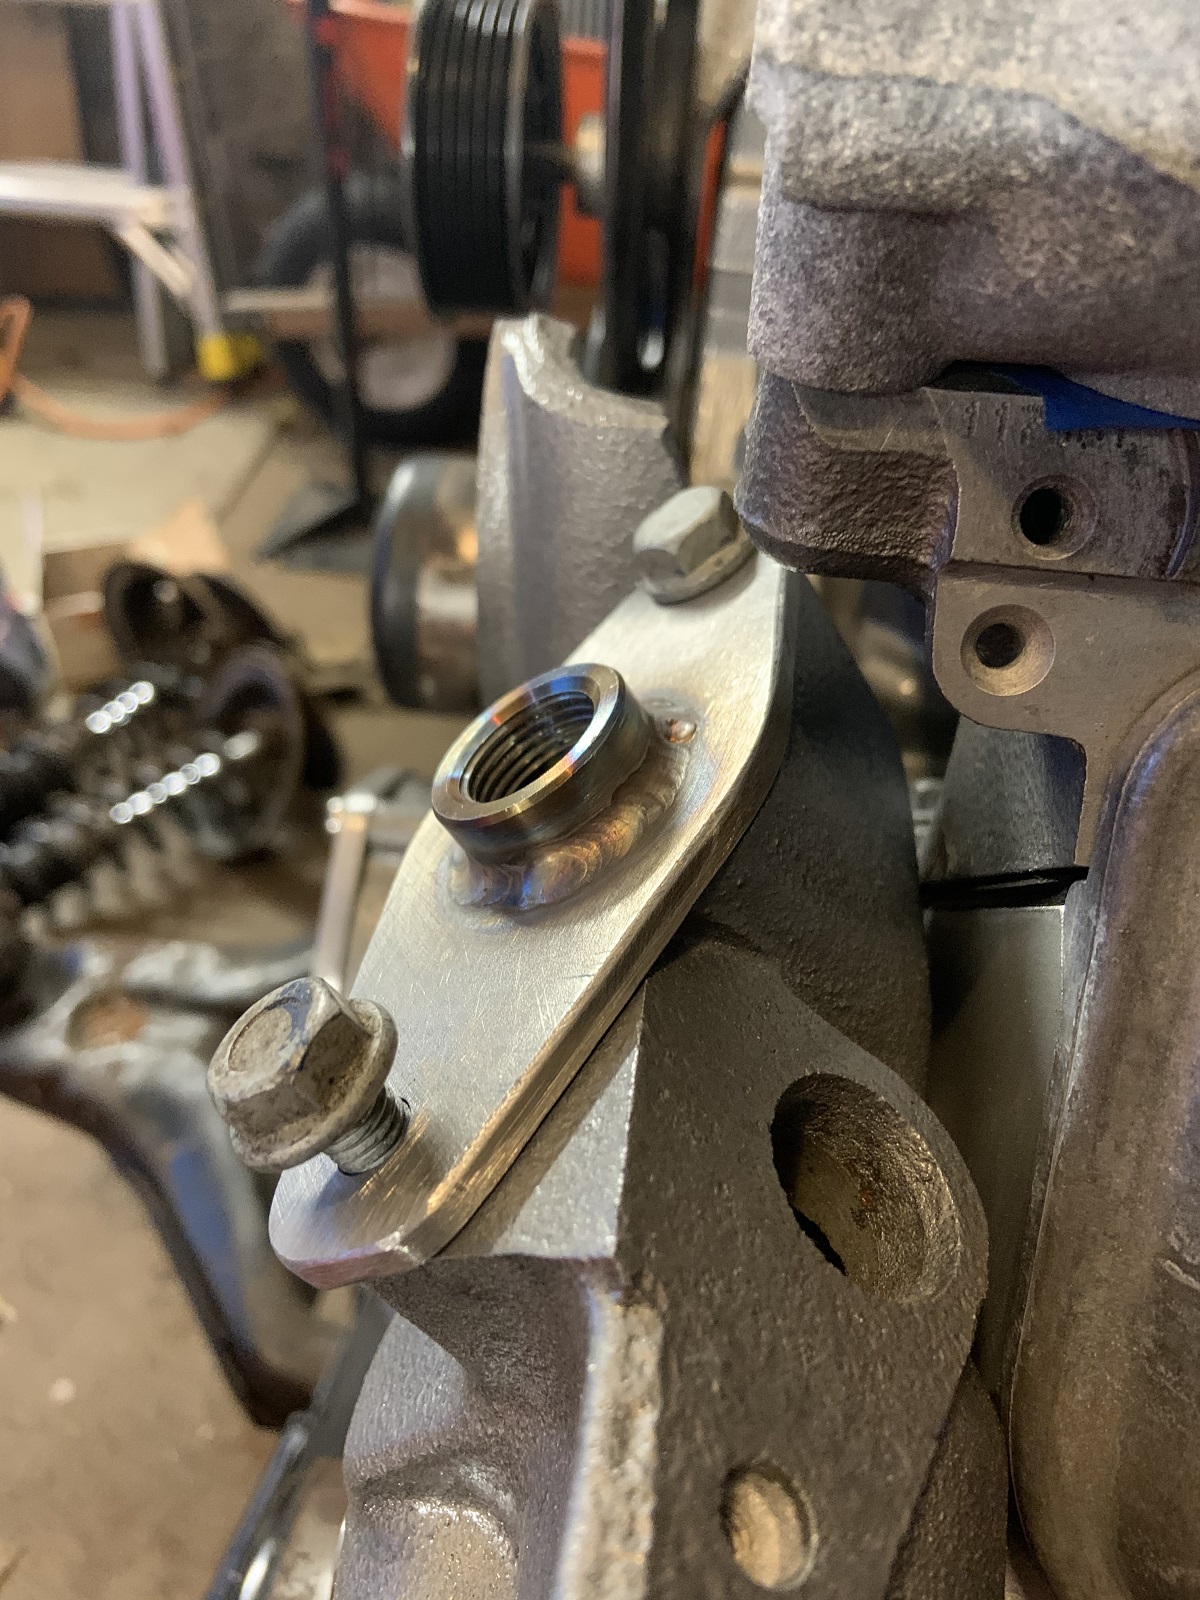
I modified the lift point too by cutting it shorter and making a new oval hole.

Coolant fill plate my brother made and I tig welded an O2 sensor bung to it to use as a fill port. In the plug I will drill a hole and weld an M6 nut on and screw a 3400 bleed screw into that to help bleed the cooling system.
Heated up and bent the dipstick tube so it is not inaccessible when installed. Painted the dipstick tube black and installed with new O rings.
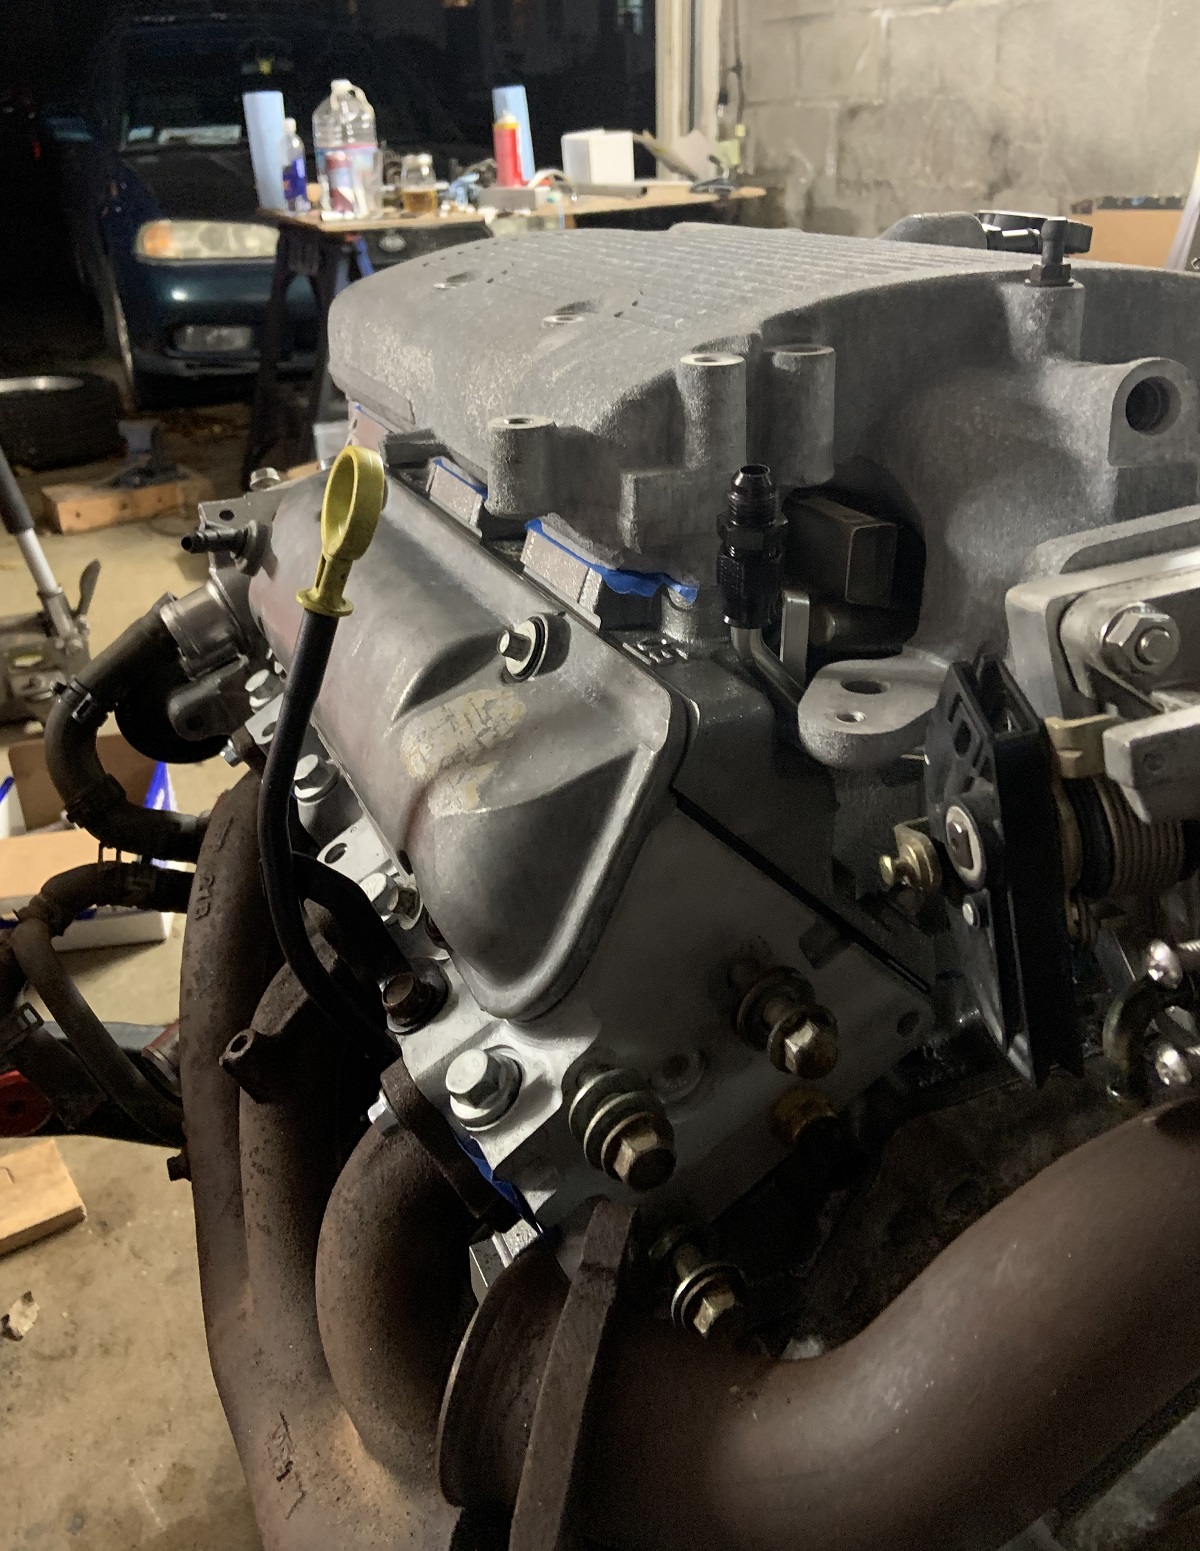
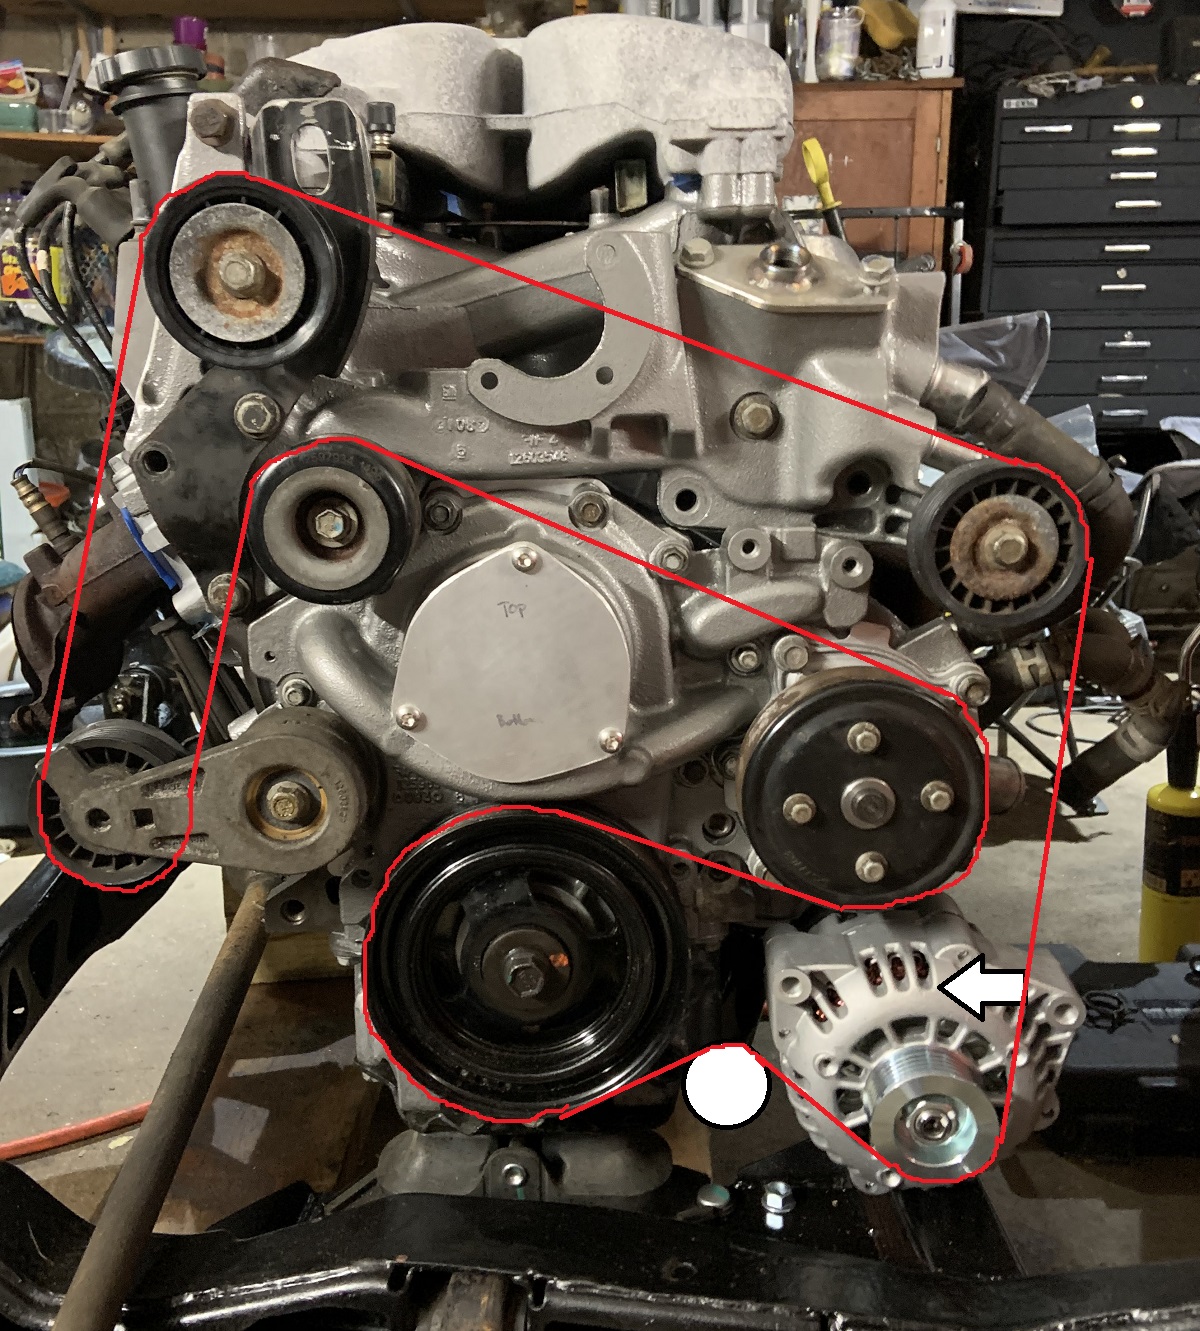
My belt routing plan plus seeing VVT Cover and Coolant Fill Plate. Arrow is there to show that the alternator would actually be rotated counter clockwise a bit. Belt routing is wasteful and excessive blah blah I can make it better later.
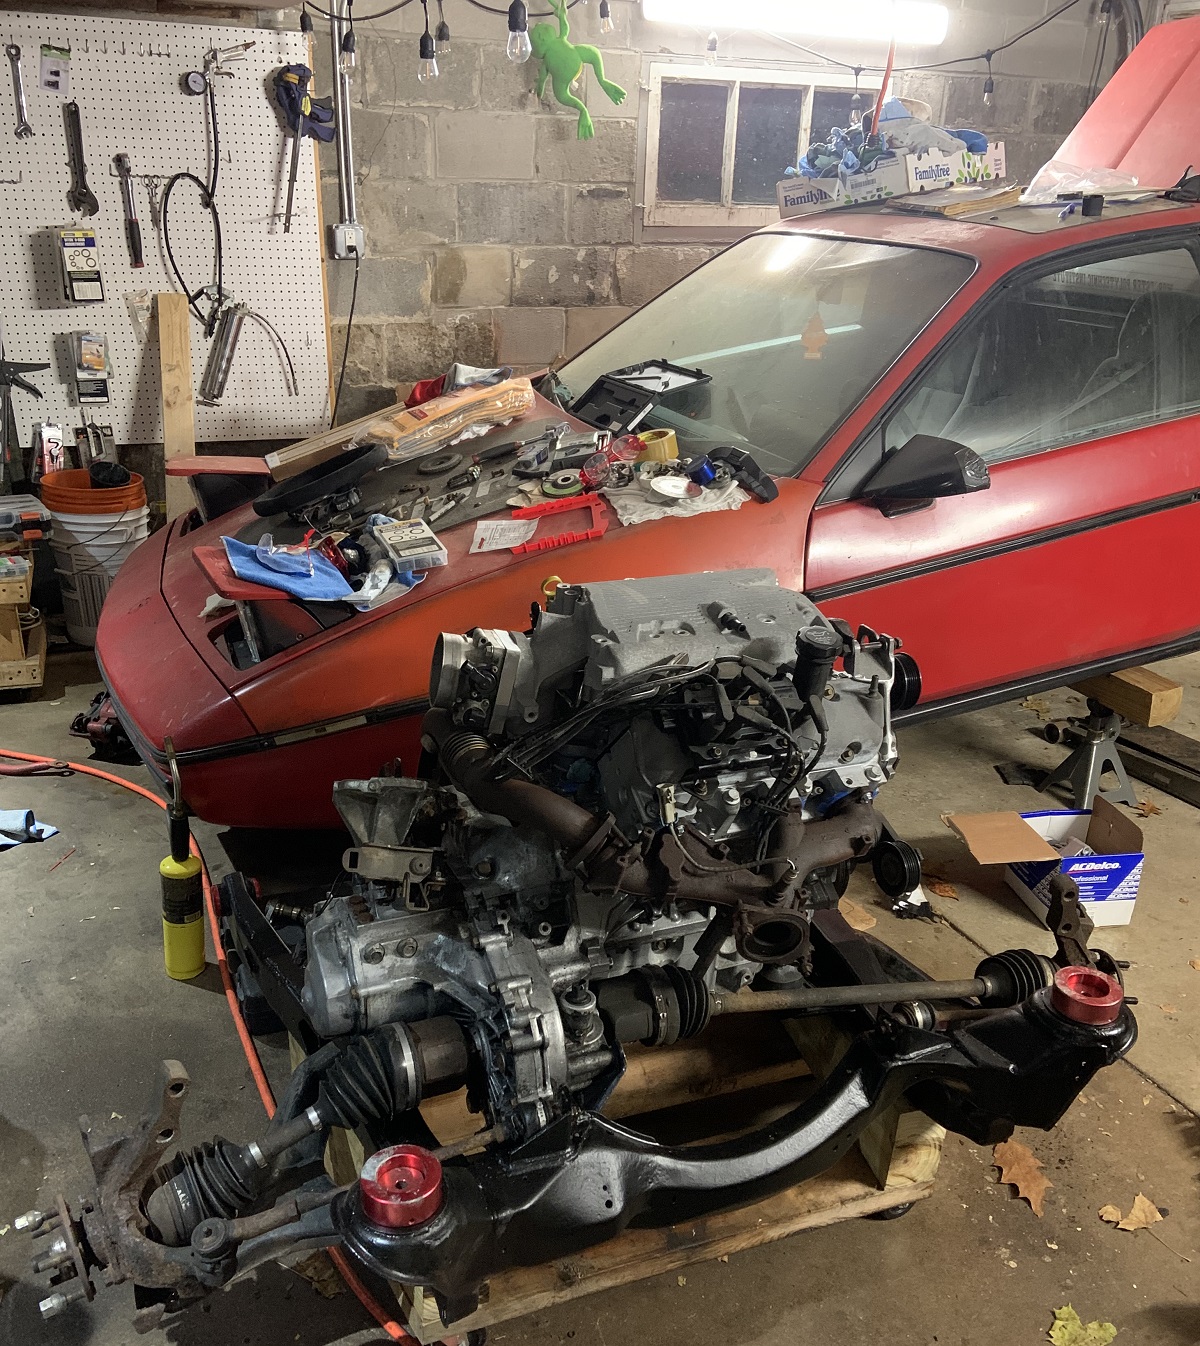
Axles and control arms and what not installed.
I made some aluminum fuel lines with AN fittings on them but took no pictures.
Still have to make the exhaust fit, the cross over does not fit with Isuzu trans. May move slave cylinder, may chop up exhaust crossover, not sure. Got a bunch to do still, I wrote a 54 item checklist. Biggest items include the alternator bracket, making a dog bone, making exhaust bolt up to my current exhaust, making a throttle cable bracket. Then a bunch of little things and then wiring and tuning. I bought a PCV valve for a 2003 Pontiac Vibe base model because I believe it will be a 3/8" NPT which will screw into the LZ4 intake manifold where the large hose fitting is screwed in currently. I will run a conventional PCV system for now. It will be a future project to make a catch can.
I am very pleased with how easy everything will be to work on. I wish the WRX lasted a little longer before the valve went, I was planning to do the valves once the Fiero was running. I would have gotten a decent amount more done on Fiero if not for that. Oh well. It went over 120K with 0 issues since last valve melted lol.[This message has been edited by zkhennings (edited 11-15-2021).]
|
|
|
|
zkhennings
|
NOV 18, 04:00 PM
|
|
I am on a work trip currently and I am not sure how much more I will get to do to my Fiero before winter. It will definitely be a rolling assembly at a minimum.
I have ordered some odds and ends to finish up the details.
3/8" NPT elbow fitting to 3/8" nipple for the brake booster vacuum line. I will tap the original PCV location that is above the throttle body on the intake manifold.
1/8" NPT elbow fitting to 3/16" nipple for the vacuum line to the Aeromotive fuel pressure regulator, I will drill and tap the 3/8 NPT fitting above for the brake booster to Tee this fitting into it. The Aeromotive nipple is 5/32", but 3/16 is a more common size and not too far off.
3/4 NPT elbow fitting to 3/4" nipple for the 3/4" heater hose line, I will tap the original hole that the original 3/4" line was press fit into on the coolant crossover (next to the coolant fill/bleed)
3/8 NPT plugs to seal off where the MAP sensor went originally on top of the intake manifold above the runner for cylinder 6. I want to put it in a more neutral spot that is out of the way, so I am going to put it in the hole for the PCV Solenoid Valve that is to the left of the throttle body, and I will make a little hold down bracket that ties into the single threaded hole that mounted the PCV Solenoid.
3/8 NPT PCV valve from a 2003 Pontiac Vibe BASE MODEL, the GT got a M16 thread on the PCV valve. There is a lot of crossover with the Toyota 1.8 motor so maybe it was a collab?
The above parts will finish off the UIM and allow me to paint it, and the valve covers too (paint is 2 part so I have to use the whole can once I activate it)
I ordered some 4mm Silicone vacuum line for the fuel pressure regulator, and some 8mm silicone hose for the brake booster and the PCV lines. I am not sure how well it will hold up to the PCV system as there will be oil vapor, but they are easy to swap pout with 3/8" PCV hose in the event that the silicone deteriorates. That should cover all of my vacuum lines and PCV lines. I may use the hose for the fuel tank vent too, I deleted the charcoal canister and routed the vent line directly to the air canister with the air filter for the 2.8 in the past and it never caused me any issues, and the car never smelled like gas or anything. If anyone has a better way to do it, let me know, I am all ears.
I have decided that routing the massive cone filter I bought directly into the fender will be annoying and only make the filter get dirtier faster. I instead plan to build a box around the cone filter where the 2.8 had it's filter canister, and maybe have a tube going from the box to the air inlet on the side panel. I bought the Fierostore scoop for the air inlet to improve airflow there. The filter will reside inside said box, and it will have a 4" aluminum tube coming out of it that will go directly to the throttle body, with a 60* bent 4" silicone coupler.
I have ordered the 2' of 4" aluminum tubing and 60* elbow for this. I am unsure if I should try aluminum welding a bung for the IAT to the aluminum tubing, or use the sandwich fitting I bought on the silicone elbow. We will see what makes sense. I want it to get as true of a reading as possible aka not heat up the sensor itselt. I bought the IAT from Ballenger where I got all my connectors and pins from, it is the GM style but it is super fast reacting unlike the standard ones, looks exactly like the stock Fiero one. My whole build is somewhat futureproofed for if I want to turbo the car in the future, so I have a few odds and ends like that.
I ordered another 90* 6AN hose end for my nylon braided fuel line and I got a 45* 6AN female to male swivel fitting to help the fuel line clear the upper intake manifold because where the fitting is installed on the existing fuel line is a little bit low. I got a 90* 6AN female to male swivel for making a tight turn off of the fuel pressure regulator for the feed line. The line going to the rail has a 90* fitting on it too, and the return line exits out the bottom so packaging is a non-issue. I want the regulator on the firewall next to the battery, protected by the hinge box and rear window overhang while visible from outside the car when the corner vent is removed in case I ever want to set a GoPro up to watch the pressure gauge as I drive. I should be able to finalize the fuel system with these remaining parts.
I also got a marine battery strap for a battery hold down, should be good at getting wet without degrading (hopefully)
Ordered a kit of corrugated wire loom tubing stuff that has 10' of 4 different sizes. Should be plenty. I was going to do the braided loom because it looks so nice, but it seems like a hassle to trouble shoot with it installed, and I imagine the corrugated stuff has better thermal protection since it has an airgap between itself and the wires.
Ordered a kit of cushion clamps too in a variety of sizes for securing wiring and tubing and other odds and ends. Fuel lines will be secured with custom nylon clamps.
Ordered some poly mounting bushings for the front sway bar and a second set for the rear swaybar which is a front one as well. Endlinks are poly already but I may upgrade to heim joints and fab something up.
Still have to fab the alternator bracket and dog bone mount, may need to order some bits for these, but otherwise I think the end is in sight. May need a fuse and relay box as well, not quite sure yet.
Next step is to shave the engine bay, finish the fuel line routing and add in mounting points for the various bits that will be in there, shoot some paint and then install everything for the final time. Finish alternator bracket and belt routing first before installing into car. Will do final install of coolant crossover while motor is in car in case I need to make any modifications for the dog bone mounting.
Then it is time to wire it up once everything has a home. I really hope to at least get started on the wiring before I am kicked out of the garage for the winter. This also reminds me to buy a new car cover ASAP, anyone got any recommendations for one that can hold up to a New England winter?
Edit to say I have to unbolt and rotate the the clutch fork external arm and weld a new bracket for the slave cylinder. I was going to chop and modify the exhaust crossover, but it would still be close to slave cylinder and it was going to be tricky unwanted modification to a part that I plan to replace anyways, and when I replace it, it may be up to a 3" tube anyways and need even more space, so might as well just make that space now. I also think it will be an easy mod, with the caveat that when I bleed the slave I will probably have to unbolt it. However I may get away with bleeding it while it is fully compressed and not have to remove it.[This message has been edited by zkhennings (edited 11-19-2021).]
|
|
|
|
ignorant prodigy
|
NOV 19, 12:34 PM
|
|
I didn't bother with the airbox - but my swaps a bit of a mess so. Just figured I wouldn't really be driving it enough to worry about the filter getting dirty, and if it did - I could just clean it because it's super easy to get to.

Sucks you're going to lose the garage. I feel that pain. Mine is a T-Top and the seals were leaking.
So last year my wife bought me a car cover as a gift from motor trend and I've used it all year round. It's actually held up really well, and we've had some pretty crazy weather.

|
|
|
|
zkhennings
|
DEC 01, 03:51 PM
|
|
Thanks for the suggestion!
I haven't been able to work on the Fiero since the WRX died on me.
The WRX motor is almost ready to go, just waiting on the buckets (valve shims) that I ordered to come in. I tried machining the shims because it is relatively simple to do, but they are so hardened that the high speed steel bits that I typically use got dulled almost immediately when trying to skim 0.007" off.
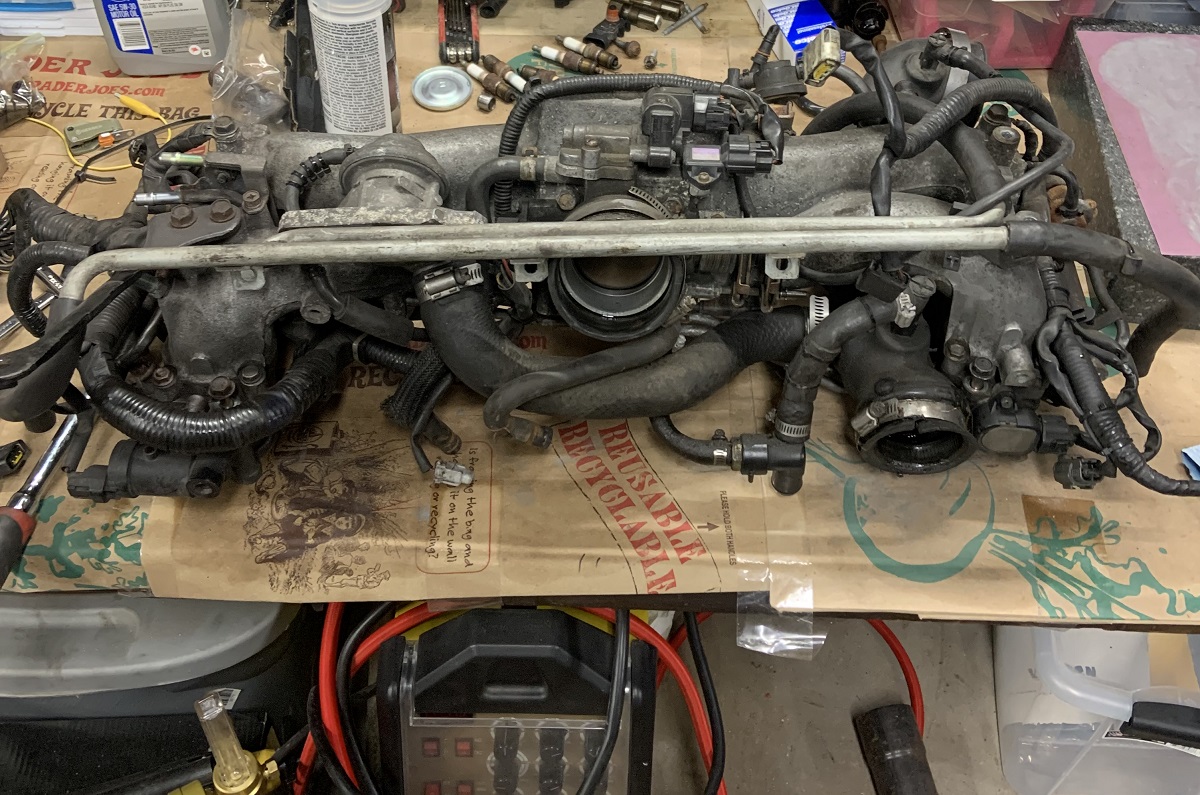
I deleted the TGV valves which are partial butterflies in every intake runner designed to direct all the air into a narrow passage next to the injectors during cold starts for emissions. I tapped the holes that the shaft passed through to M8 and used some random Subaru bolts to plug them with some triple bond. This may throw me into limp mode (which would be stupid) but I have a tuning cable I can use to delete the TGV codes from ever coming up.
I used pressurized carb and choke cleaner in a fuel rail to blast through the injectors and clean them out. They all sprayed really well. Replaced all the injector seals, and replaced the 4 sections of rubber fuel hose that connect the hard lines that run under the intake manifold. I replaced them all like 120,000 miles ago so it seemed like a good time to do them again as they are known failure points along with the injector seals.
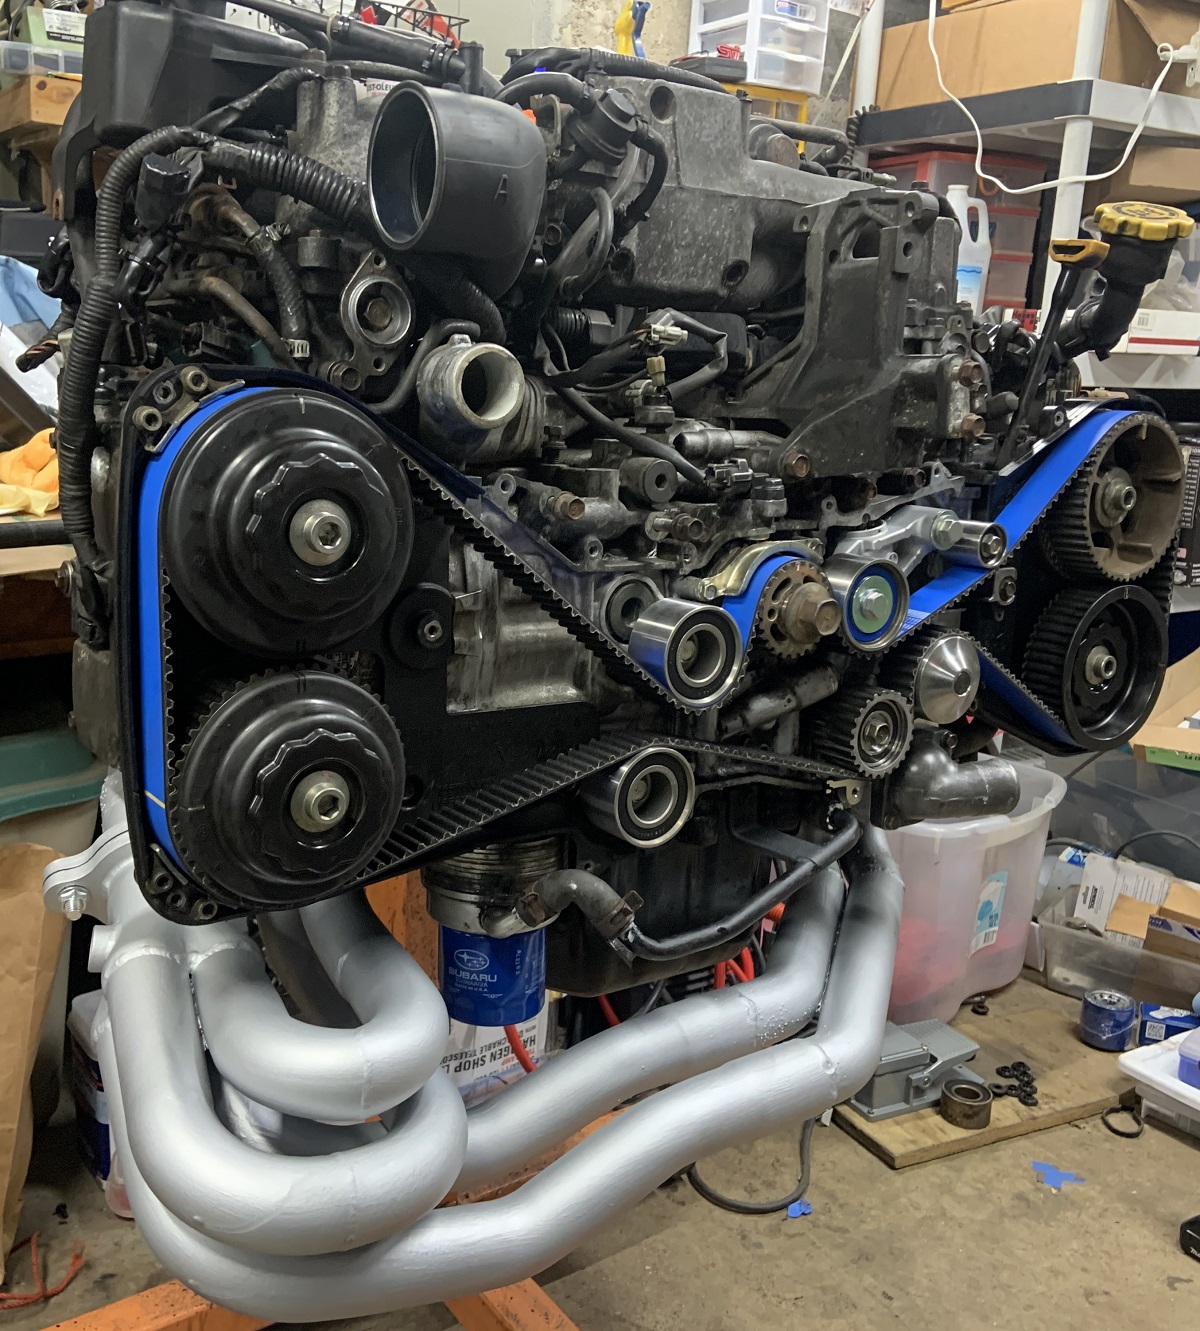
Installed a new water pump while I was at it. Cleaned all the valves that weren't getting replaced and lapped all 16 valves. Rechecked the clearances. Installed new valve stem seals.
I used my calibrated granite block with some sandpaper to flatten the heads and the block surface itself. I had to remove a little chunk of the new water pump I installed to give the block clearance to slide back and forth. Heads were installed with new head bolts using the special Subaru ritual.
I swapped oil pans with the bottom end that came out of the car as it is my undented one. Everything looked good inside and the pickup tube was nice and clean.
I installed the intake manifold with a new turbo inlet which is a tube that runs under the manifold and connects the turbo inlet to the air filter. I had to tap a port on the inlet with a 3/8" NPT tap and used the 3/8" NPT fitting from the LZ4 intake in it. This allowed it to work with my custom PCV system.
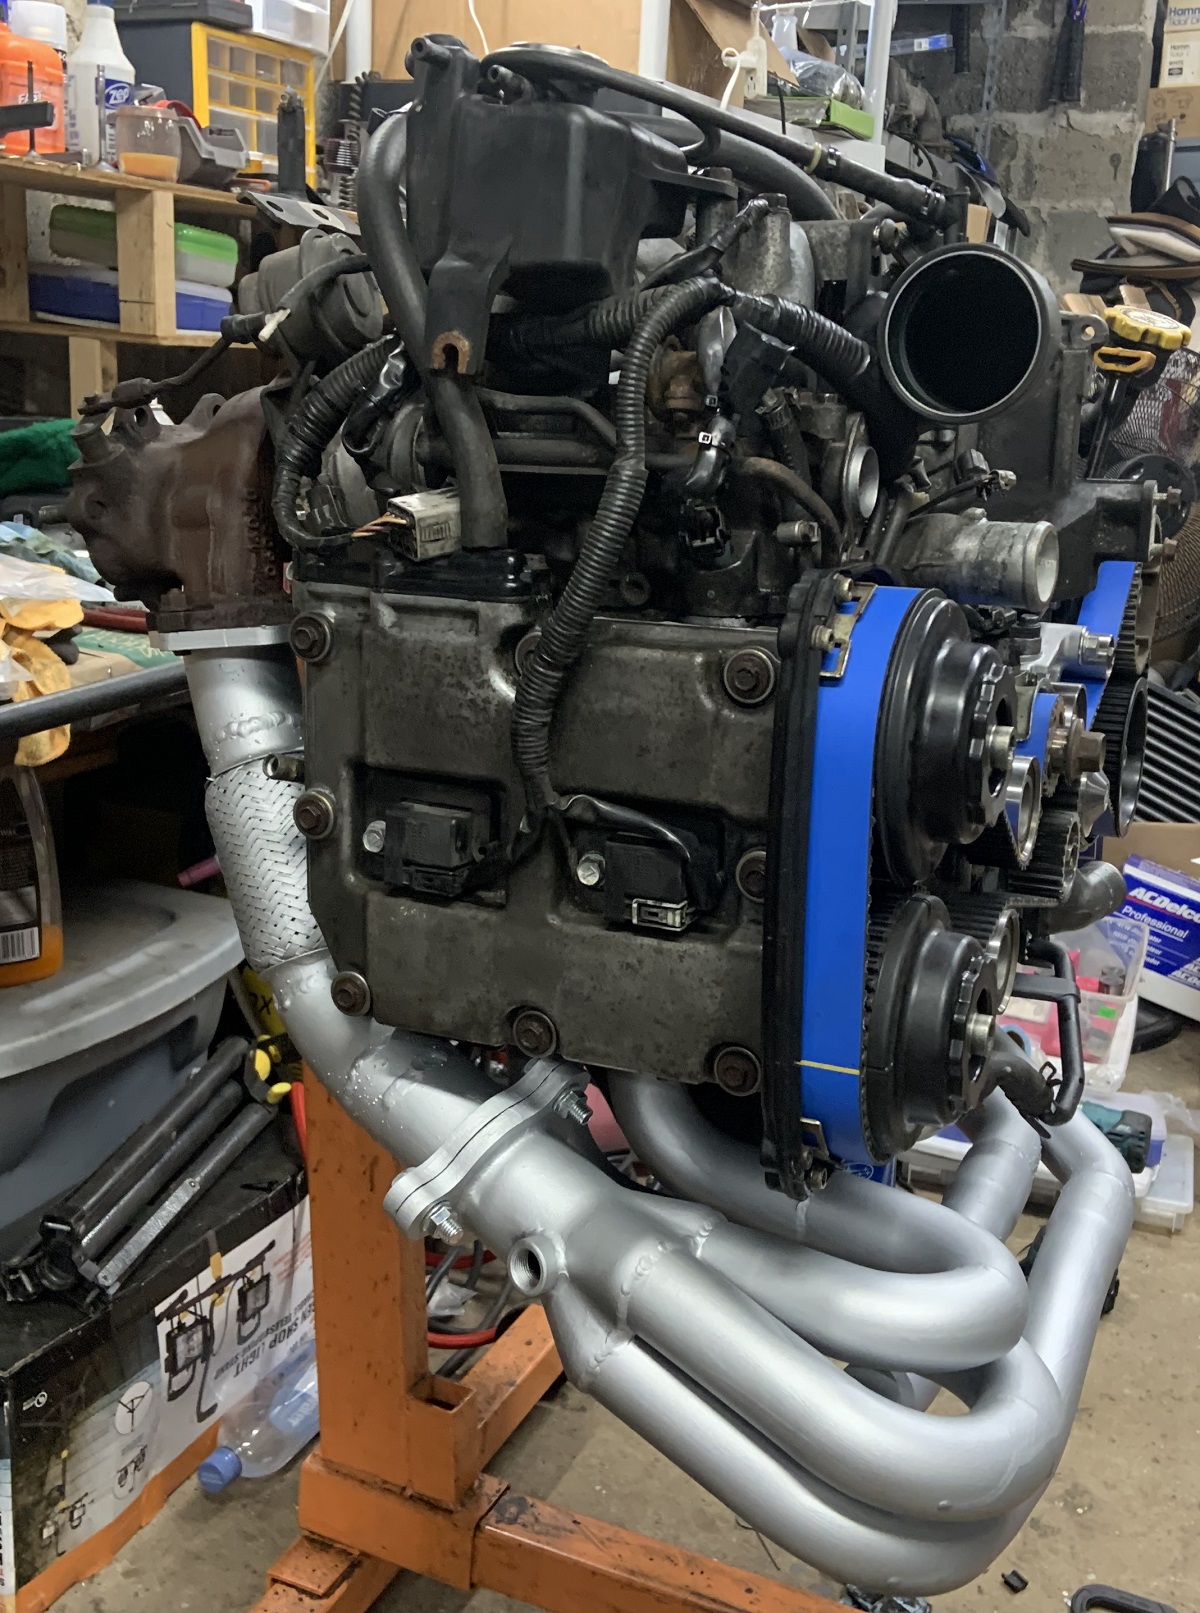
I also chopped up the cheap $100 long tube ebay headers and rewelded them to make them fit. They hit the oil pan and the flanges were nowhere close to parallel nor the correct width. The up-pipe that goes to the turbo fouled on the block so I had to chop that apart and modify it as well, I welded in a flex section to allow things to expand a bit and to allow the turbo to float a bit. It was a huge pain to make all these modifications, and I could not get the Tig welding nicely so I said screw it and migged it with mild steel wire. I was so over it by this point. I did get a POR-15 product designed for headers specifically and painted the headers with this, if it holds up good it would be great as none of the other exhaust paints I have used have lasted very long. I brushed the paint on to make it extra thick, and did two coats 24 hours apart as specified.
Replaced the fuel filter, an o-ring in the power steering, the power steering inlet hose, and upper radiator hose as well. Cannot find Rotella T6 5w40 anywhere, guess there is a shortage of an ingredient necessary for their special sauce. Using Amsoil instead, not cheap.
Cleaned up and painted some various metal coolant lines and replaced clamps and checked all the little hoses. Everything seems good. Might get new heater hoses as those would be a nightmare to change with the motor in the car and I don't want to take it out again for a while.
I got a nice Delrin shift knob and new grommet to hold the hood prop stick too. Oh and a new main seal.
Thus ends my sob story about the WRX for now. Once the shims come in I can put the cams in, valve covers on, cam seals, timing covers, cam pulleys, and do the timing and button up the timing cover. Then it's ready to go in and hopefully my exhaust doesn't hit the subframe/and or leak. It has been way more work than I anticipated but I kept remembering more and more things I should do so I don't have to pull the motor out any time soon. Hopefully it is fast again and gets better gas mileage, this bottom end has way more compression than the one that came out of it.
I did get to try the PCV valve from the 03 Pontiac Vibe base model and it is indeed 3/8" NPT and screws right into the intake manifold.... But the valve is the wrong direction, it is designed to be installed in the valve cover itself. I may drill and tap the valve cover for 3/8" NPT, or I may make a catch can and install the PCV valve in the catch can which would be cool because it would stay a lot cleaner. I checked out the fuel system fittings and things and some of the elbows I bought too for the various vacuum things.
Then I stood there and stared at the pretty cradle assembly for a while feeling bad that I was going to put the motor outdoors all winter, and decided to pull it off the cradle and install the cradle back in the car without the motor. Removed the new throwout bearing, re-installed the brake calipers, etc etc. But I am happy with this decision as it opens up the possibility of working on finalizing the engine things during the winter instead of doing nothing to it. I can finish coolant crossover mods, I took measurements so I can fab an alternator bracket, I can get the vacuum lines and throttle cable bracket made, I have tons of stuff I can continue to do so that come spring time I can focus on getting the car running and driving and not getting lost in all these minor but necessary details. And hey maybe I will have time to fab some headers while I am at it.
Will update again soon with some pics and stuff, I have been existing in pure chaos deep work state for a while now trying to get everything done but I am returning to classic existence now where I get to enjoy things and sleep at night.[This message has been edited by zkhennings (edited 12-01-2021).]
|
|
|
|
pmbrunelle
|
DEC 01, 11:26 PM
|
|
Yeah I dunno about POR-20 on headers, especially on a turbo car.
Since I put a turbo on my Fiero, the exhaust manifolds seem to run hotter than they usually do on Fieros. It's like the turbine creates a bottleneck in the exhaust, increasing pressure and temperature of the exhaust gas upstream of the bottleneck, making the pipes run hotter. I'm not really sure.
Anyway, I am curious to know how that paint holds up. For science!
|
|
|
|
zkhennings
|
DEC 02, 01:56 PM
|
|
Yes I agree I am not sure how it will turn out, the POR-20 is rated to 1200* F which is right around what I imagine the headers will get to on their external surface. I think it would work perfect for the stock LZ9 manifolds which is more what I had bought it for. If it can last a year or two I will be satisfied. I believe the additional pressure and therefore denser gas pre-turbo has more mass which can hold more energy in the form of heat contributes to the higher temps with a turbo install. I will make sure to report back on its performance.
Should get the WRX buttoned up this weekend as the shims arrive Friday. I will get the Fiero rolling on the cradle and maybe moved to the other driveway/covered. LZ9 will get mounted on the engine stand where it will live for the winter, and hopefully see some action.
|
|
|
|
zkhennings
|
DEC 08, 05:06 PM
|
|
Well Subaru is running again, O2 sensor got a little damaged during install as the headers are much larger than the stock ones, I actually can no longer run the stock U-Brace up front which is a crash safety addition that the previous models did not have. I will probably find a way to run a subframe brace I fab at some point. The damaged O2 sensor made it run crappy, it had a lot of hesitation and stumble, a new one is on the way. I have it unplugged right now and I am running in closed loop only, it is running very decent for no O2 sensor.
Good shot of exhaust, turbo Subarus have some wild exhausts.

I don't want to post too many non Fiero pics, but the WRX dying in the middle of my car-cation has forced itself into my Fiero story.
|
|
|
|