|
| 85 Notchie Build (Page 19/23) |

|
pmbrunelle
|
OCT 15, 06:32 PM
|
|
How would moisture work its way into a sealed tube?
Anyway, besides water, oxygen is also needed for rust.
In the context of a steel tube structure, I once asked myself what would happen if all the oxygen atoms enclosed in the tubes were to combine with iron atoms in the steel tubes? How much wall thickness would be lost?
It turned out to be negligible, though I invite you to do the exercise for yourself.
********************************************************************************
Also note that the stock cradle isn't fully enclosed...
********************************************************************************
Probably the best thing you can do for rust is to sandblast whatever you can. Paint doesn't stick well to mill scale. Paint makes fish eyes around the silicon islands of your welds, so get rid of the islands.
Also sand/break sharp edges. Paint doesn't keep a constant film thickness around sharp convex edges. Surface tension pulls the paint away from sharp edges while the paint is still wet.
|
|
|
|
ericjon262
|
OCT 17, 03:53 AM
|
|
Maybe I missed it, was there a reason in particular that you wanted to cut out the front crossmember? I cut and moved mine in a similar manner, and kinda wish I hadn't, as now I'm about to cut it out again and put it closer to the stock location to provide more room for an intercooler.
FWIW, Ford Coyote ARP flywheel bolts have the same pitch and diameter as 60V6 bolts, but, they have MASSIVE heads on them, if you run an aluminum flywheel, I would recommend running those bolts instead of the SR20 bolts, because they will help mitigate potential creep problems. the downside is that they are about .075" too long, and need to be shortened.
Pictured here are stock LX9 bolts, WOT Tech ARP bolts, and Ford Coyote ARP bolts on a Fidanza flywheel. the pictures showing thread protrusion include a .075" washer under the bolt head, with the washer, the Ford bolts hit the clutch disc.

 ------------------
"I am not what you so glibly call to be a civilized man. I have broken with society for reasons which I alone am able to appreciate. I am therefore not subject to it's stupid laws, and I ask you to never allude to them in my presence again."
cognita semper
|
|
|
|
zkhennings
|
OCT 18, 10:35 AM
|
|
Thanks Eric, good to know about the Ford bolts if I go with an aluminum flywheel, I have been considering that as an upgrade if I go to F23 along with a new clutch.
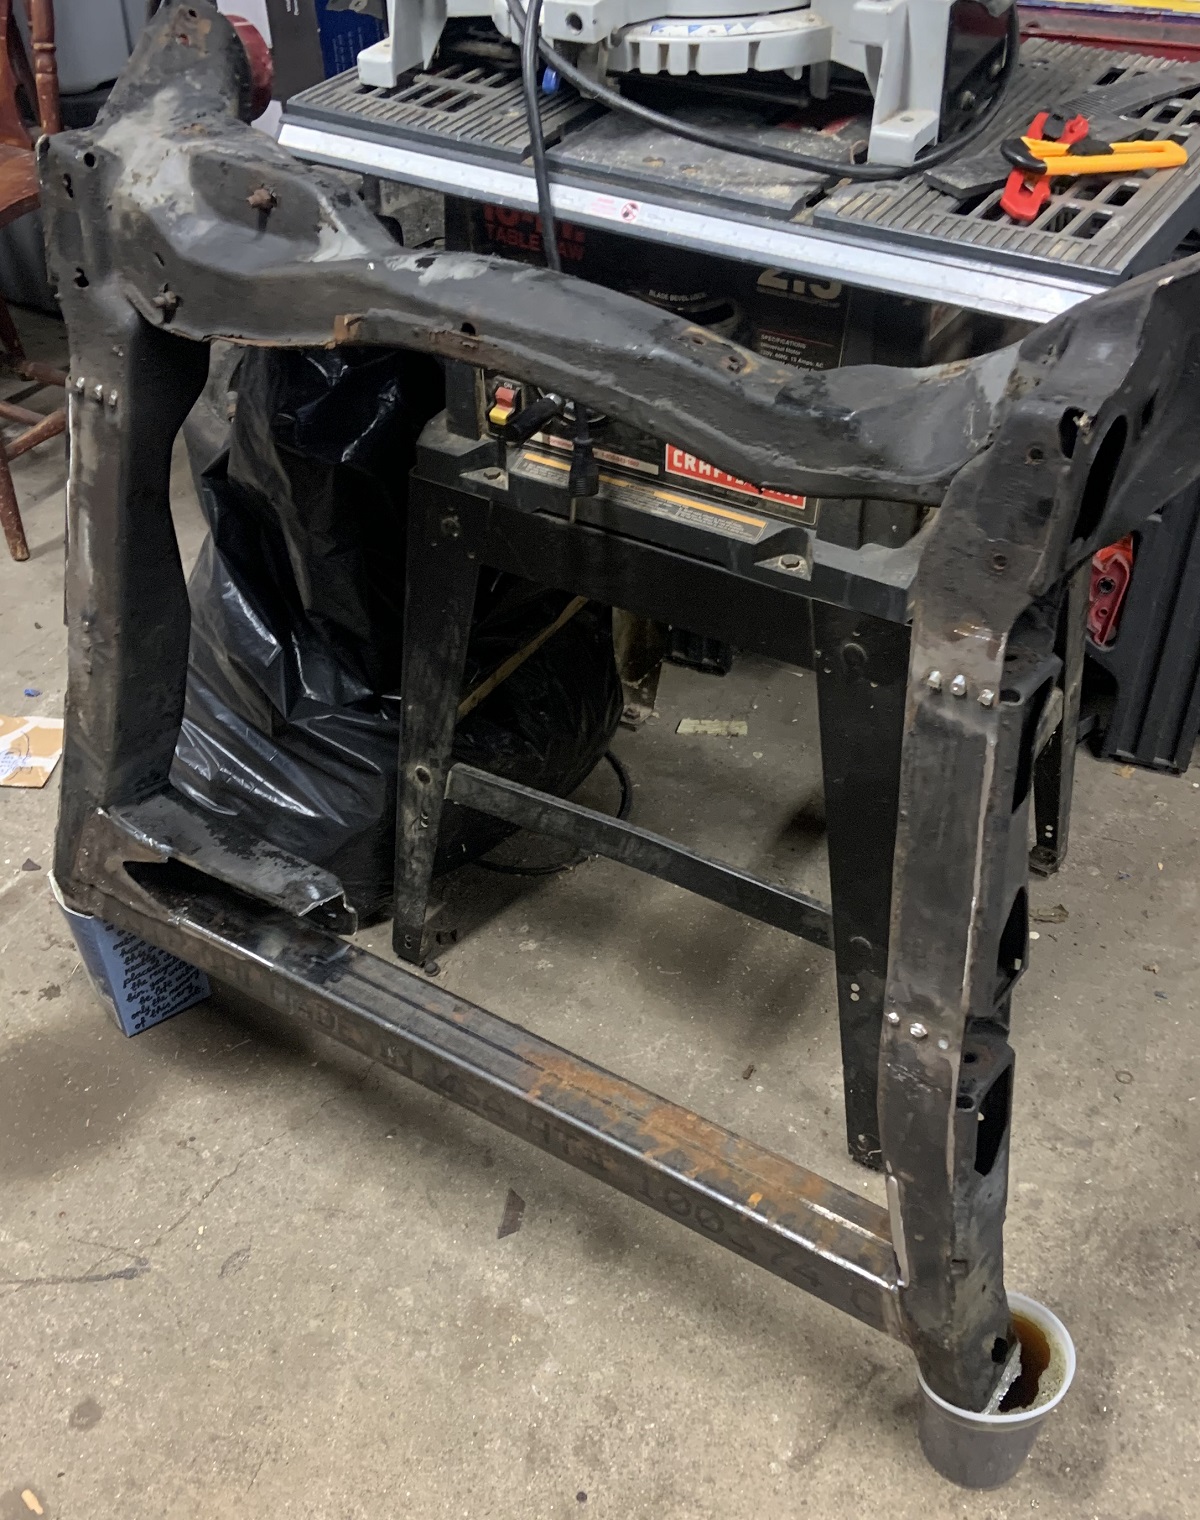
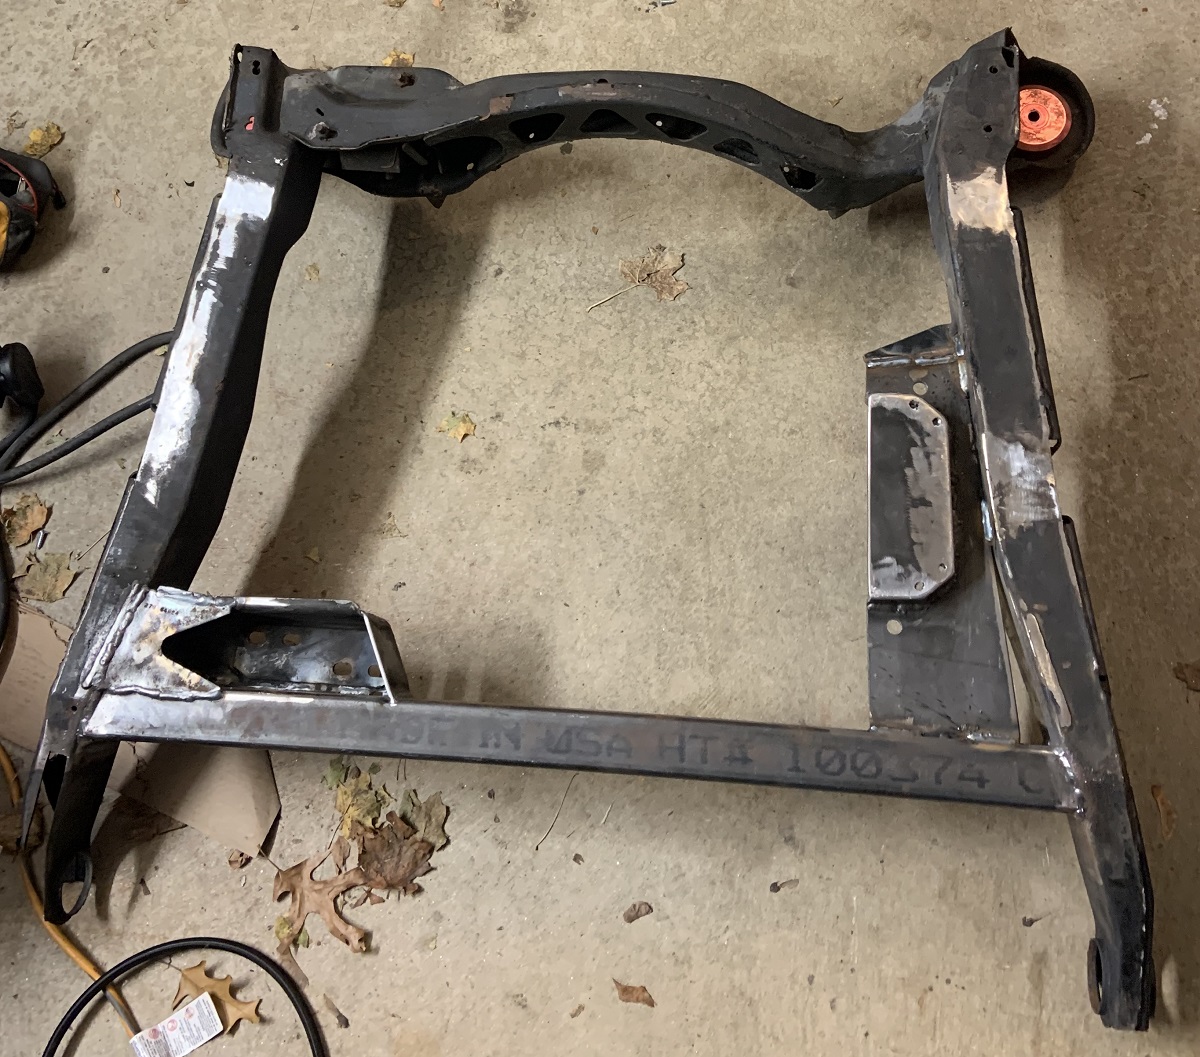
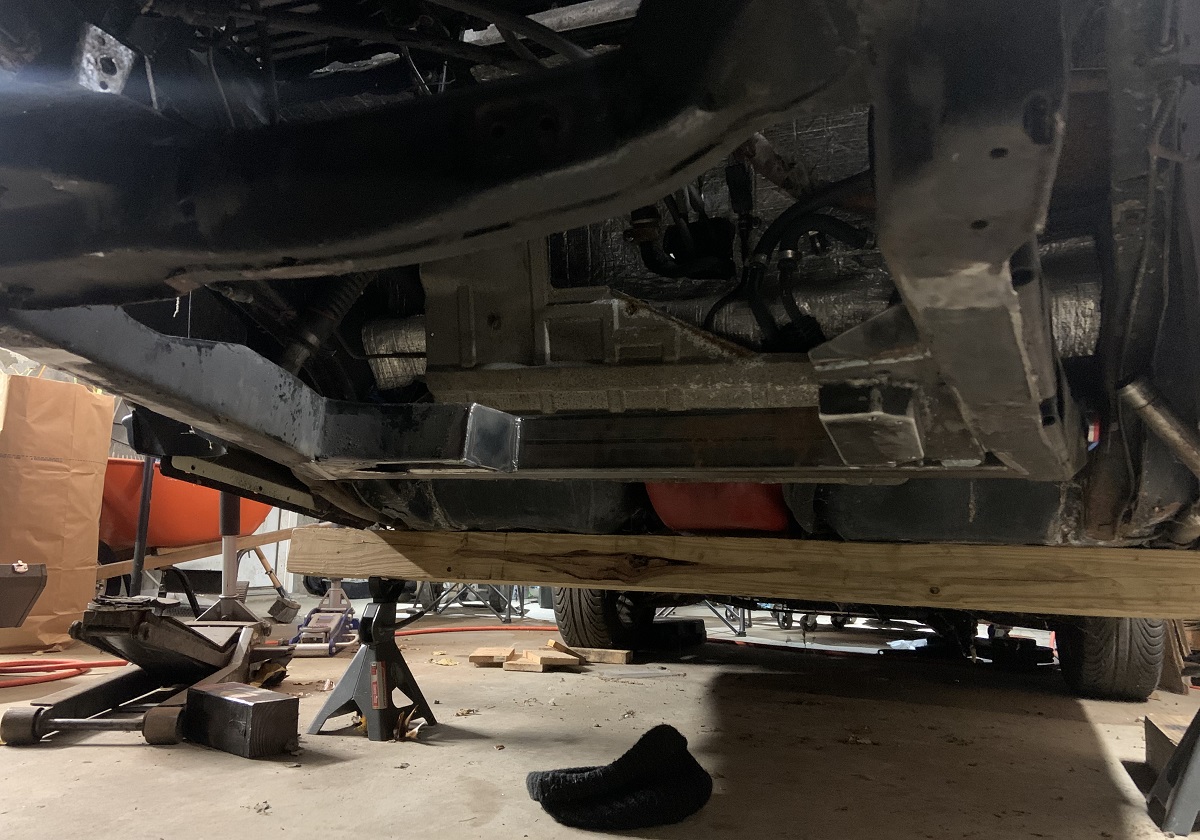
I chose to move the crossmember because it is in the way of the oil filter, I know there are other solutions to solve this but I had some other considerations I took into account. I will have better access to the starter as well as a side benefit. The hump in the stock crossmember is close to where I want to put an alternator/where AC would go if I had it and may make that an issue. Oil pan will come off easier in car as well.
For reference:
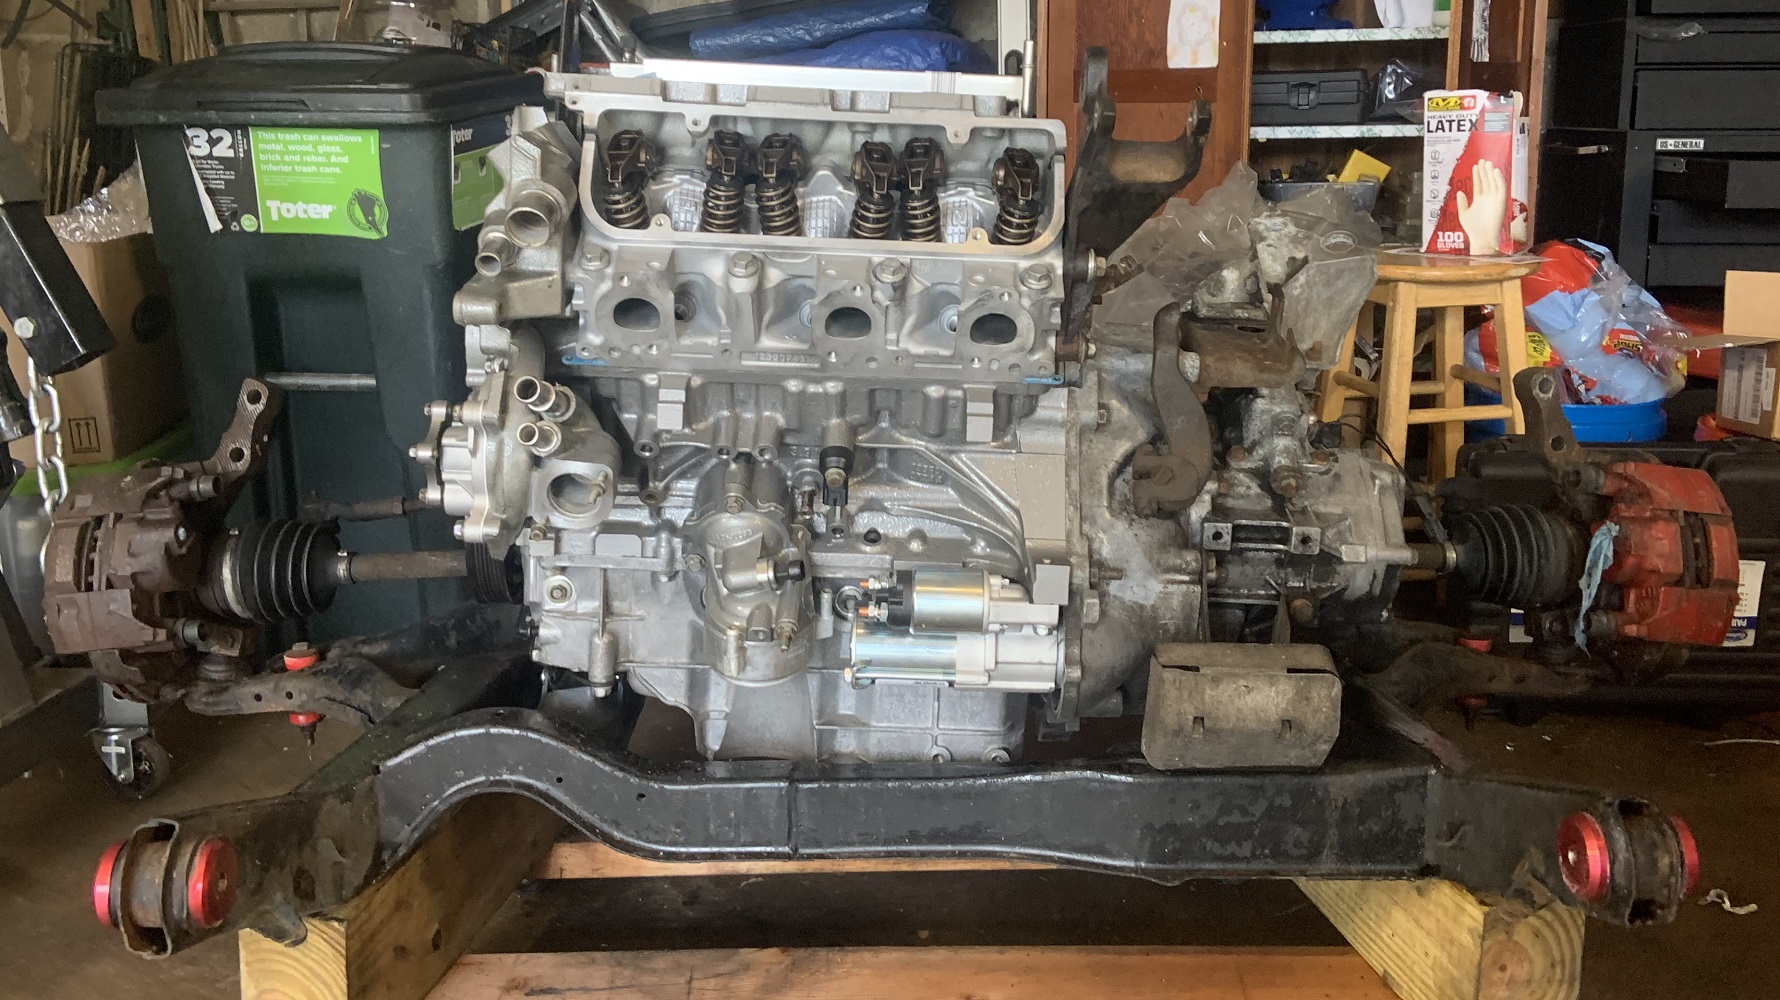
The stock crossmember is pretty flimsy, I wanted a beefier member in the cradle to help take the additional forces of the new motor. I wanted additional support for the trans mounting location as well. And I wanted a strong member to tie the motor mounting plate to, it will stiffen the whole cradle up to tie the motor mount into the new crossmember.
In regards to corrosion, I am not sure how moisture would get into a sealed tube, but moisture seems to find a way. It would be nice to lighten the crossmember up a little bit and maybe give some access to thoroughly paint it inside. But it is also nice and strong right now so I may just leave it. And I will make sure to sand everything well and take down corners prior to painting. I like to save old flap wheels for the angle grinder for paint prep as they don't remove a ton of material. I have some Eastwood DTM epoxy primer and some Eastwood Chassis paint I was going to paint the cradle with, I will probably POR-15 anywhere where I clean up some rust.
Waiting on the cradle bushings and sleeves and I will get back at it. I may go prop the cradle up with the front bushing mount ends in cups of Evaporust to clean them up in the meantime to minimize how much work I need to do. I still have more phosphoric acid I could use too.[This message has been edited by zkhennings (edited 10-18-2021).]
|
|
|
|
La fiera
|
OCT 18, 10:10 PM
|
|
| quote | Originally posted by ericjon262:
the Ford bolts hit the clutch disc.
|
|
I have the Ford bolts and they don't hit my disc. I run a solid disc.
|
|
|
|
ericjon262
|
OCT 18, 11:16 PM
|
|
| quote | Originally posted by zkhennings:
Thanks Eric, good to know about the Ford bolts if I go with an aluminum flywheel, I have been considering that as an upgrade if I go to F23 along with a new clutch.
I chose to move the crossmember because it is in the way of the oil filter, I know there are other solutions to solve this but I had some other considerations I took into account. I will have better access to the starter as well as a side benefit. The hump in the stock crossmember is close to where I want to put an alternator/where AC would go if I had it and may make that an issue. Oil pan will come off easier in car as well.
The stock crossmember is pretty flimsy, I wanted a beefier member in the cradle to help take the additional forces of the new motor. I wanted additional support for the trans mounting location as well. And I wanted a strong member to tie the motor mounting plate to, it will stiffen the whole cradle up to tie the motor mount into the new crossmember.
|
|
all good reasons to move/replace the crossmember, I moved mine to facilitate better mounting of the powertrain, in some ways, it was a significant gain, in others, not so much. I'm currently rebuilding my front crossmember to make more room for a intercooler. I would consider dog legging the crossmember by the transmission to open up a little more room up there.

| quote | Originally posted by La fiera:
I have the Ford bolts and they don't hit my disc. I run a solid disc.
|
|
| quote | Originally posted by ericjon262:
the pictures showing thread protrusion include a .075" washer under the bolt head, with the washer, the Ford bolts hit the clutch disc.
|
|
Additionally, most people run a sprung hub.
------------------
"I am not what you so glibly call to be a civilized man. I have broken with society for reasons which I alone am able to appreciate. I am therefore not subject to it's stupid laws, and I ask you to never allude to them in my presence again."
cognita semper
|
|
|
|
zkhennings
|
OCT 19, 02:35 PM
|
|
Yes, I intend to cut it at an angle before boxing it off to gain additional clearance, and it should make the trans mount stronger as well. I may get to this today and finish that off.
I am still waiting on the weld in sleeves so I think today I will clean up and organize my working area and get the cradle ends into some cups of Evaporust and leave them there for a while. The Evaporust is good at not removing extra metal, but it takes longer to work, so it is a good candidate for rust removal if you have the time to leave it soaking.
I may also get the motor mount tacked in today if my brother is around to help me reassemble everything. Everything will still have to be removed for welding and paint, but then I look forward for the final installation of motor and trans onto the cradle, it has been a real hassle with space having everything scattered in the garage.
I have a few odds and ends to finish with the motor, I need to paint the valve covers and intake and install the valve covers, make a block off plate where the VVT actuator was installed in the timing cover, Make a coolant fill point to replace where the plastic fill neck was as I believe it will interfere, modify the rear exhaust manifold to flow better and maybe move where the O2 sensor goes, install the exhaust manifolds, install the coolant crossover with gaskets, figure out the press fit heater line coming out of the coolant crossover, and install the thermostat.
Then I can test fit the motor into the bay and figure out where I want to run fuel lines, coolant hoses, and the wiring.
Still have to make a new battery tray, drop the tank and install the fuel pump, and figure out the alternator position and belt routing. I may order a few LZ9 idler pulleys to play around with.
I intend to take Nov 6th thru 13th to do nothing but get s*** done with the Fiero, I hope I am able to get that to happen with my work schedule. Before then I would like to have the cradle modifications finished and painted, and have everything installed on the motor. I think I will be able to bust the majority of remaining items out during this time and get the wiring all done.
I am not sure if the car will start this year or not, but that is the goal. Then put it away before winter because my parents will use the garage and get it driving nicely in the spring so I can enjoy it next year. I have a lot of work to do on the bus too so we will see what happens.
|
|
|
|
zkhennings
|
OCT 25, 02:30 PM
|
|
|
|
|
zkhennings
|
NOV 02, 10:59 AM
|
|
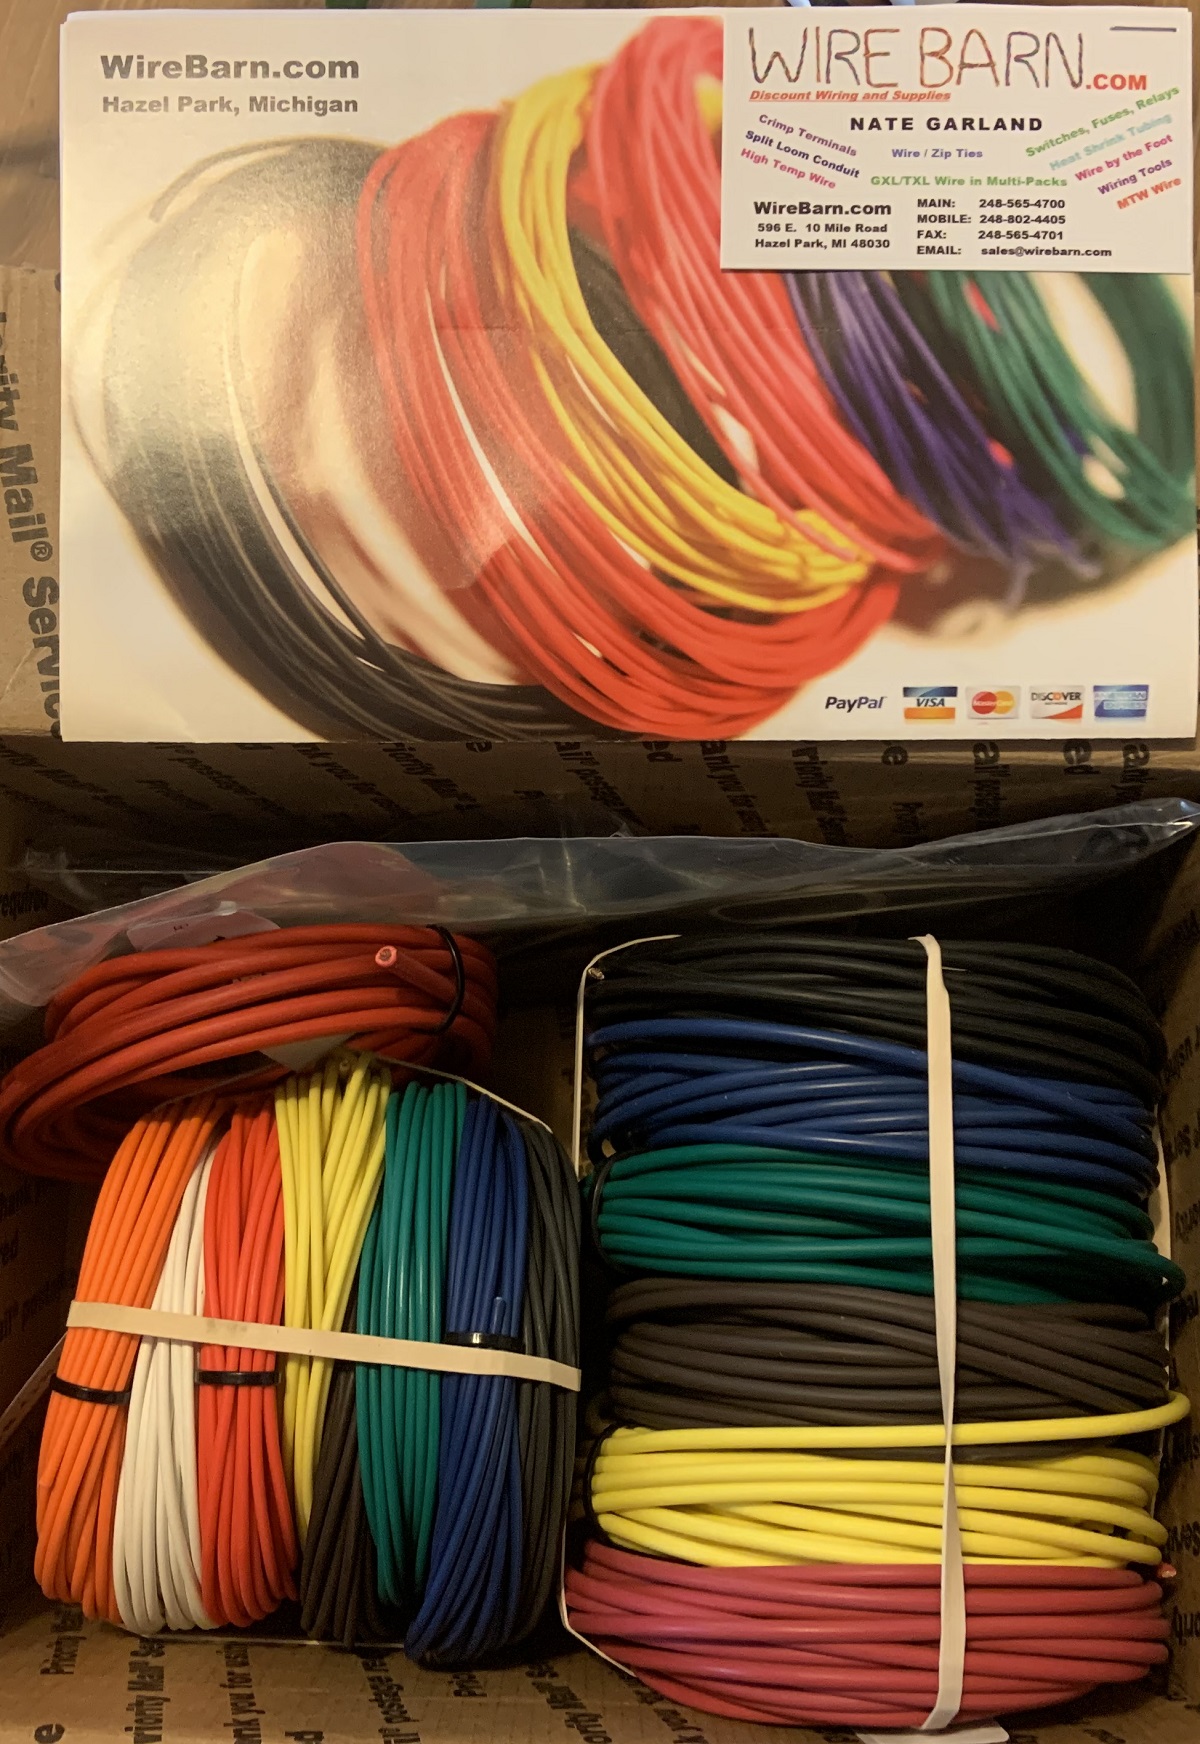
Have not gotten a chance to work on the car more, but in preparation for my car-cation I have ordered a bunch of GXL wire in 18 gauge and 12 gauge, 8 different colors of 25' of 18 gauge and 6 different colors of 25' of 12 gauge, also one 10' section of 10 gauge. I imagine I will mostly be using the 18 gauge wire but got some extra thicker stuff just in case.
I also bought a bunch of the LZ9 idler pulleys from Rockauto to play around with belt routing for the alternator, I bought cheap ones that I will replace as I imagine they will not last extremely long.
I also ordered a bunch of hardware for affixing things in the engine bay and routing fuel lines and whatnot.
Hopefully a lack of materials will not be the cause of hindering any progress I can make.
My plan is to splice into factory harness for power for things such as the ECU, the injectors, and the ignition coils, that way the relays and fuses are all ready to go. I may go to an engine harness fuse and relay box if I find the stock one problematic, but this is how I will start.
I still need to figure out what resistor I will need for the crank sensor wiring, but other than that I think I have my wiring plan decently figured out. For now I will splice into the C500 wires that exist already for the alternator, but at some point I would like to get the correct contacts and run new wires for those. That is an easy mod with the car assembled so it is low priority.
Updates to come.
|
|
|
|
zkhennings
|
NOV 07, 11:52 PM
|
|
Didn't get to work on the car prior to the start of my car-cation, but got in a bunch of bits I need to do some of the stuff I plan to do this week.
Found this source for automotive wire, I got GXL, 18 gauge assortment and a smaller 12 gauge assortment. Also one piece of 10 gauge wire.
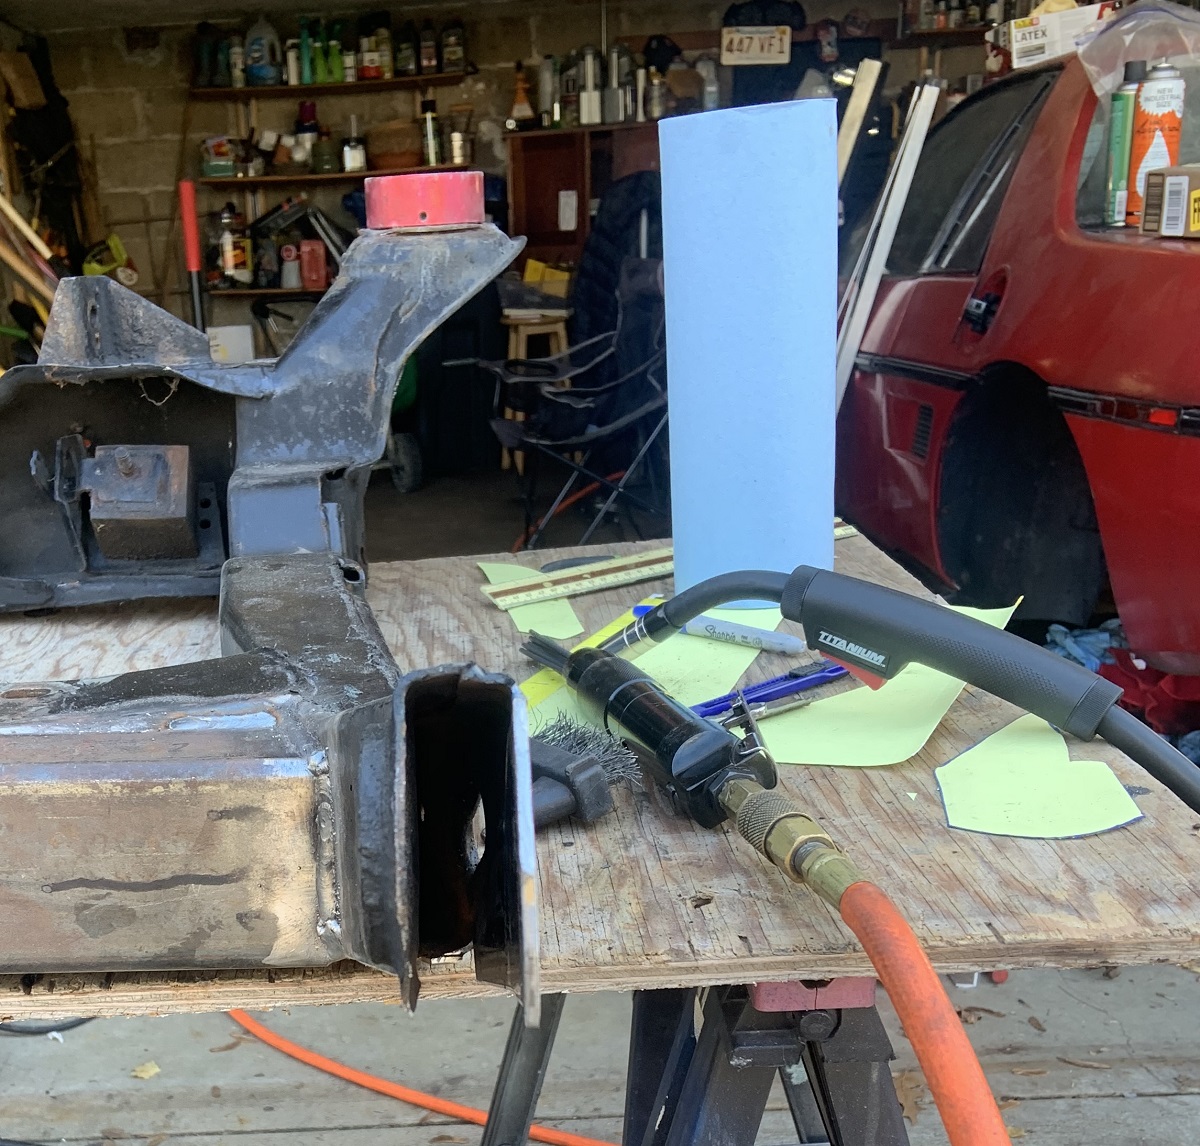
Spent a few hours test fitting and tacking, cutting, and adjusting the motor mount to get it flat and straight. Made a jig with some aluminum angle to get measurements.
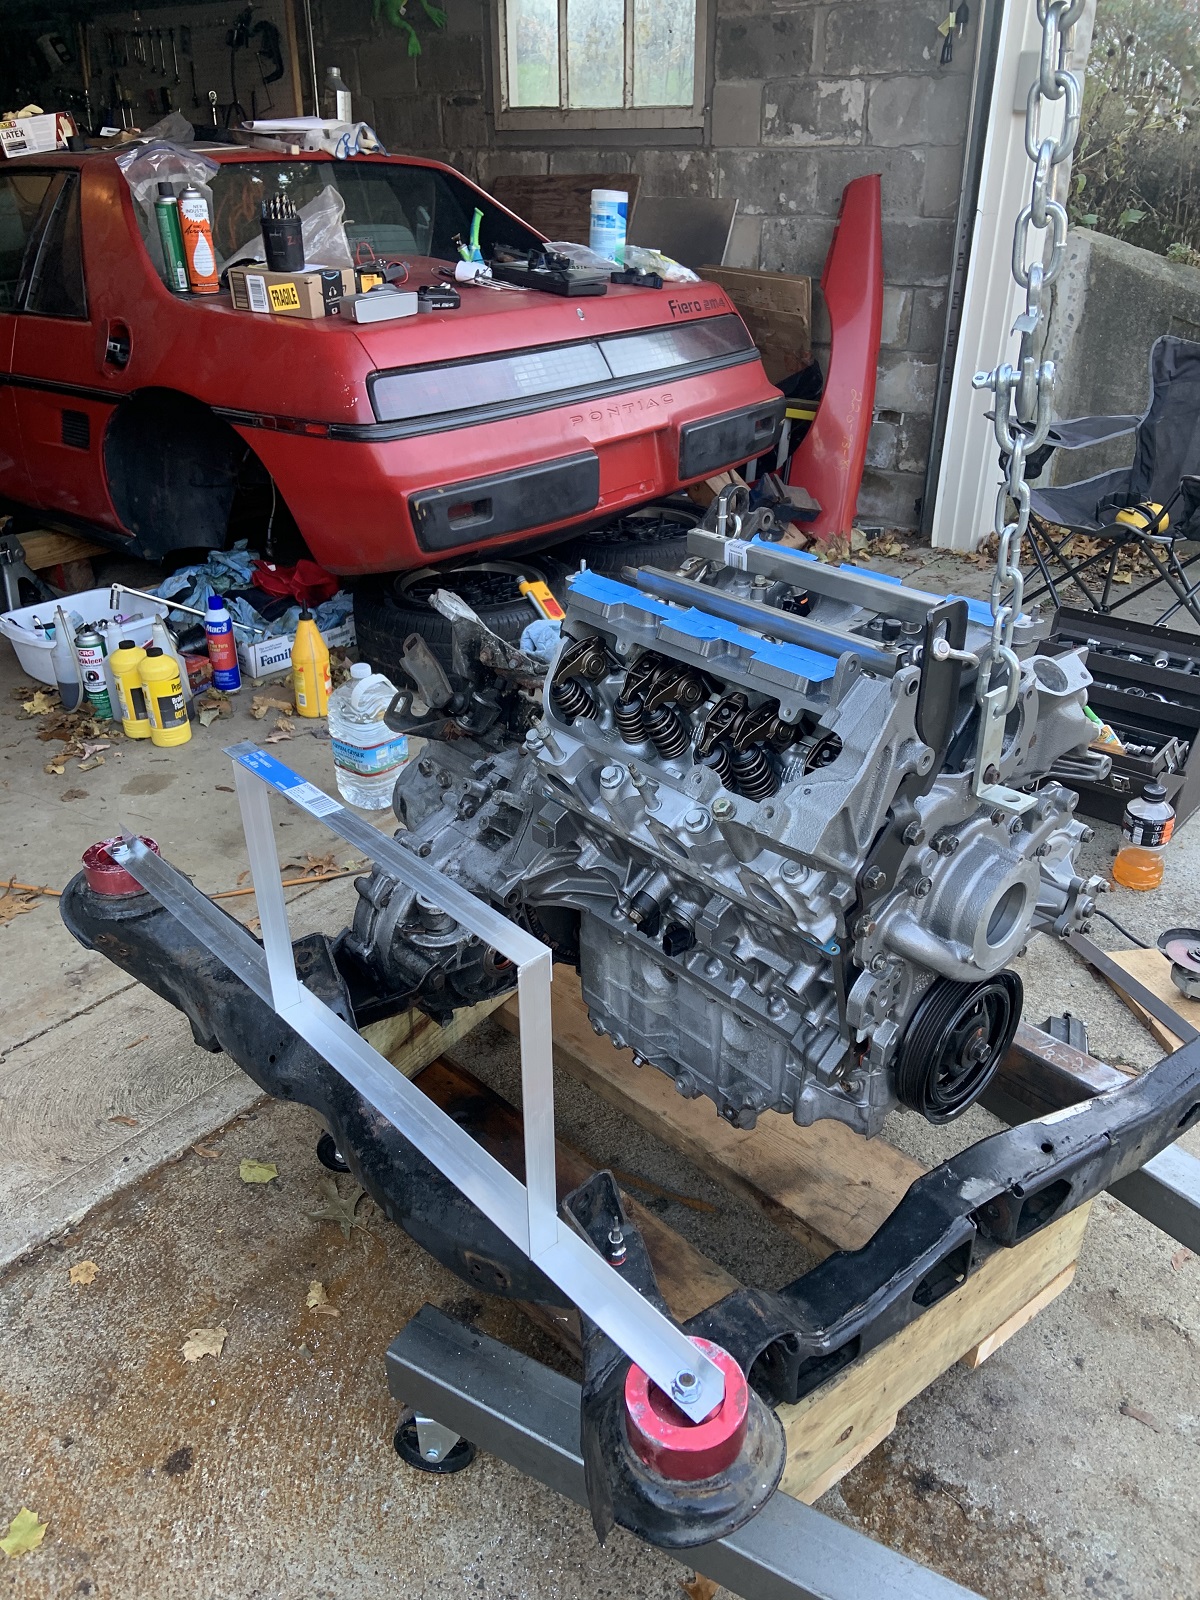
This attempt was almost flat.

Tacked the mount in place and started to weld it in permanently.
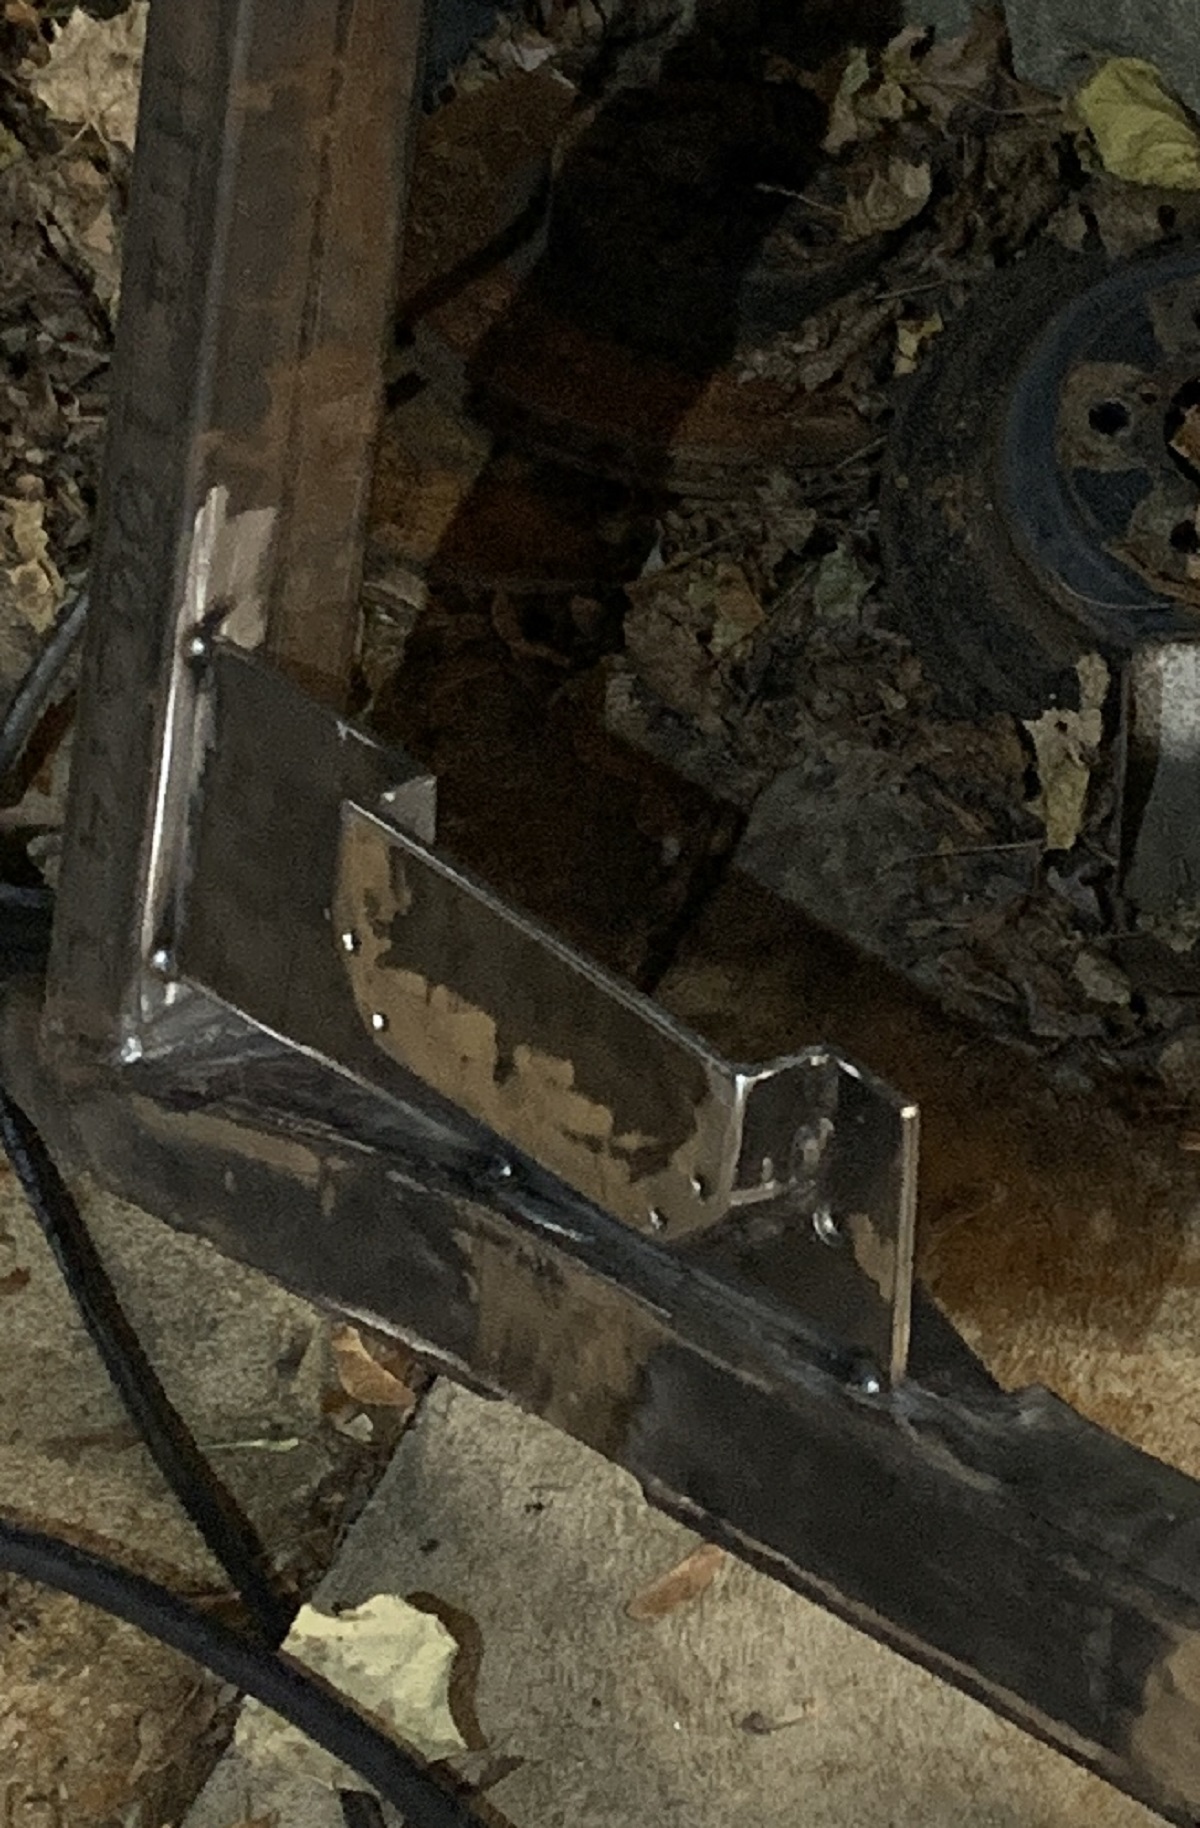
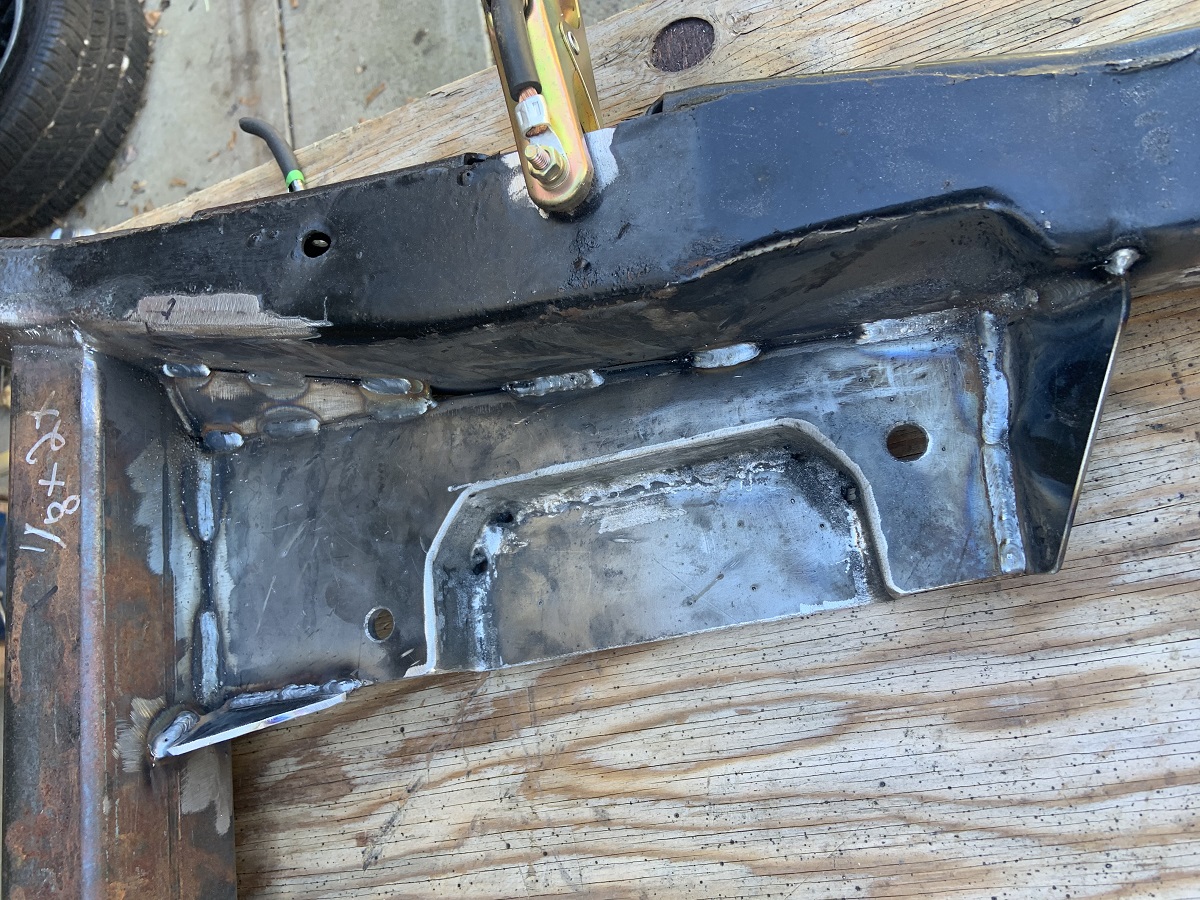
Made a whole bunch of gussets.

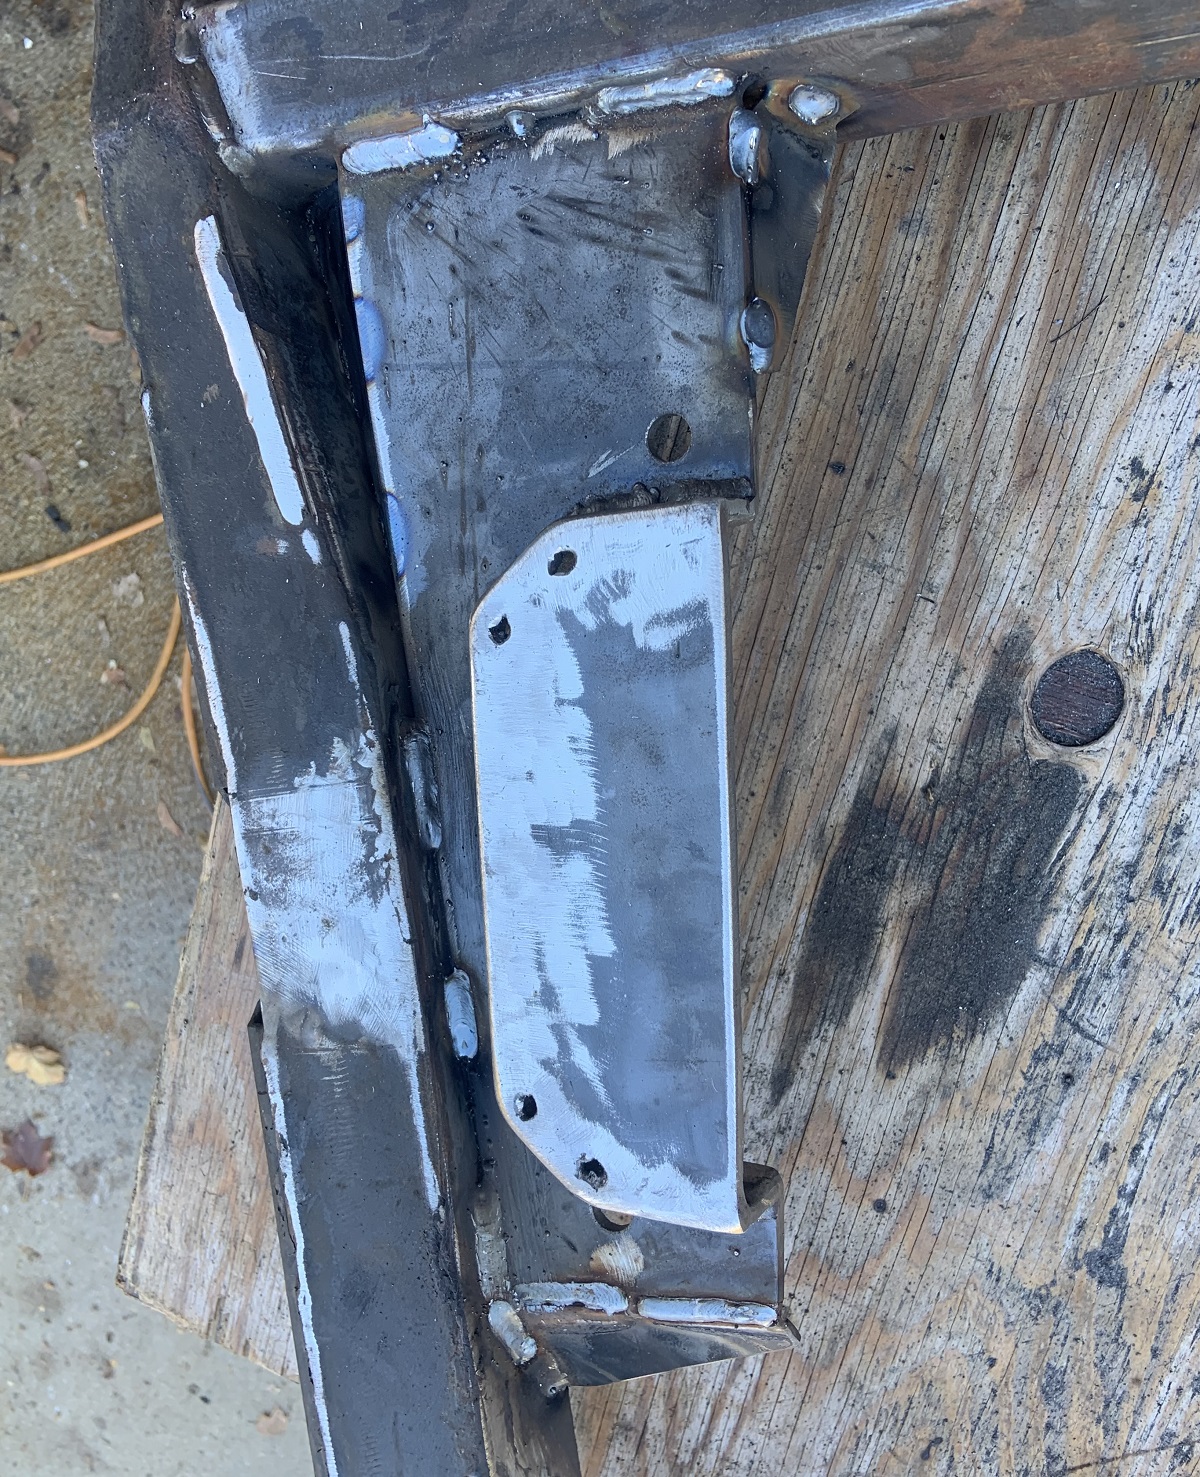
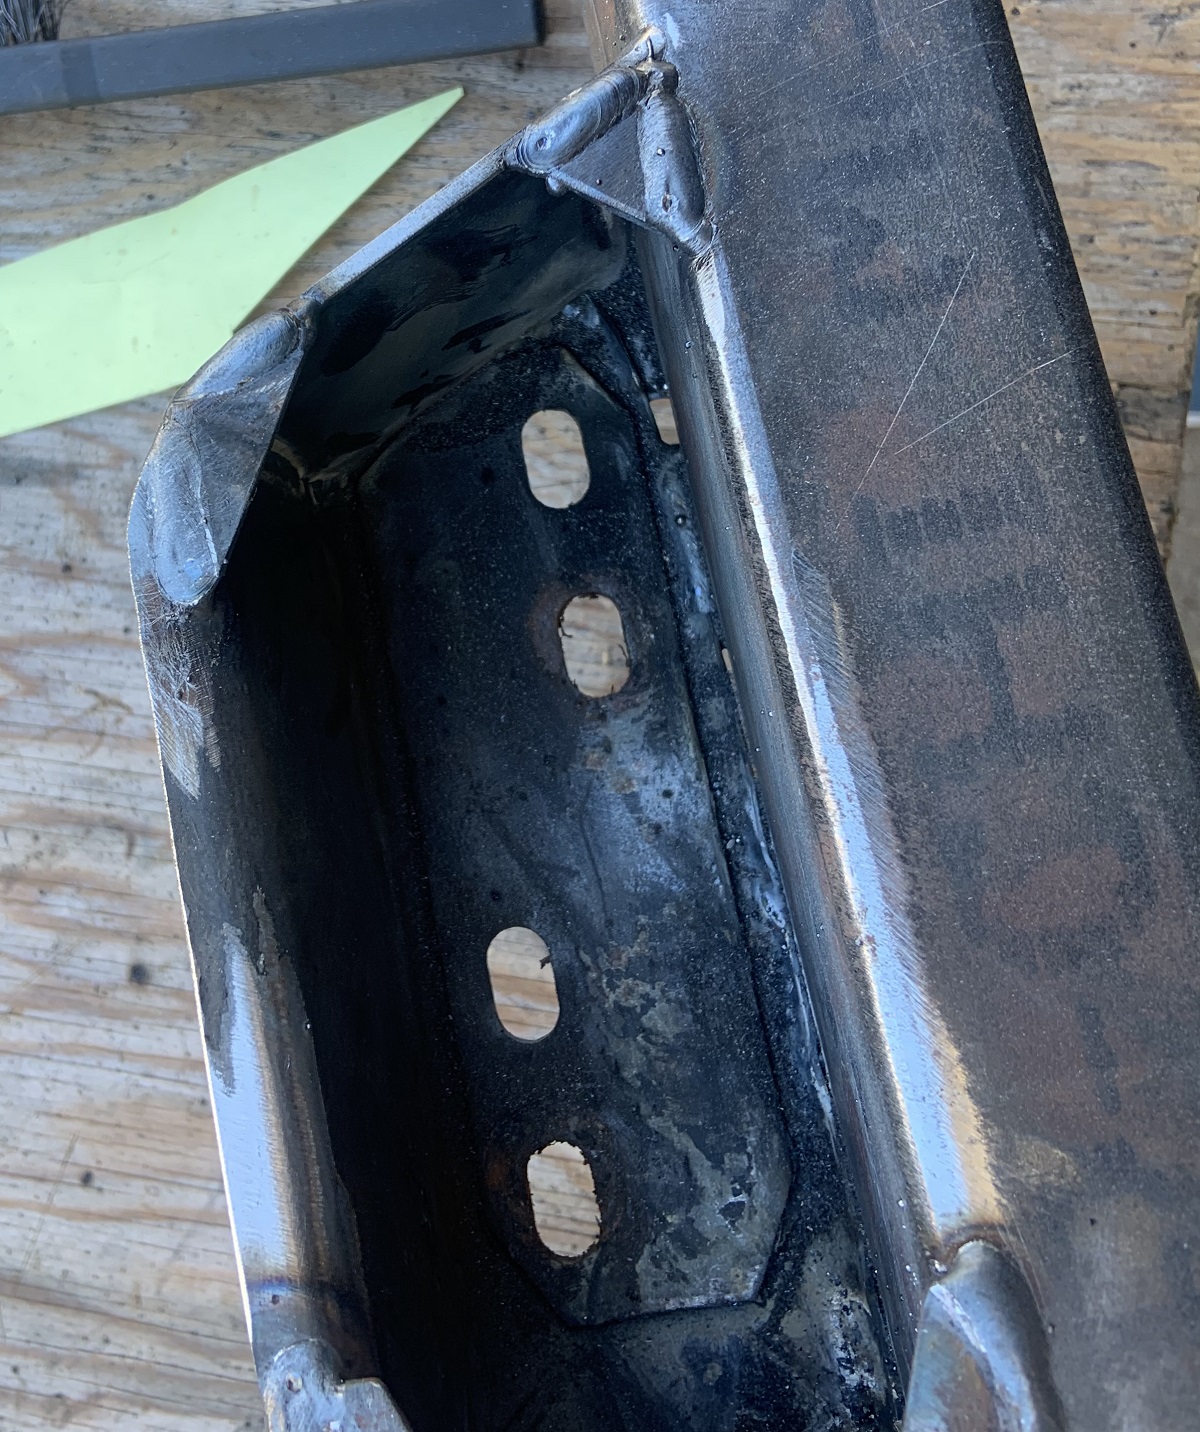
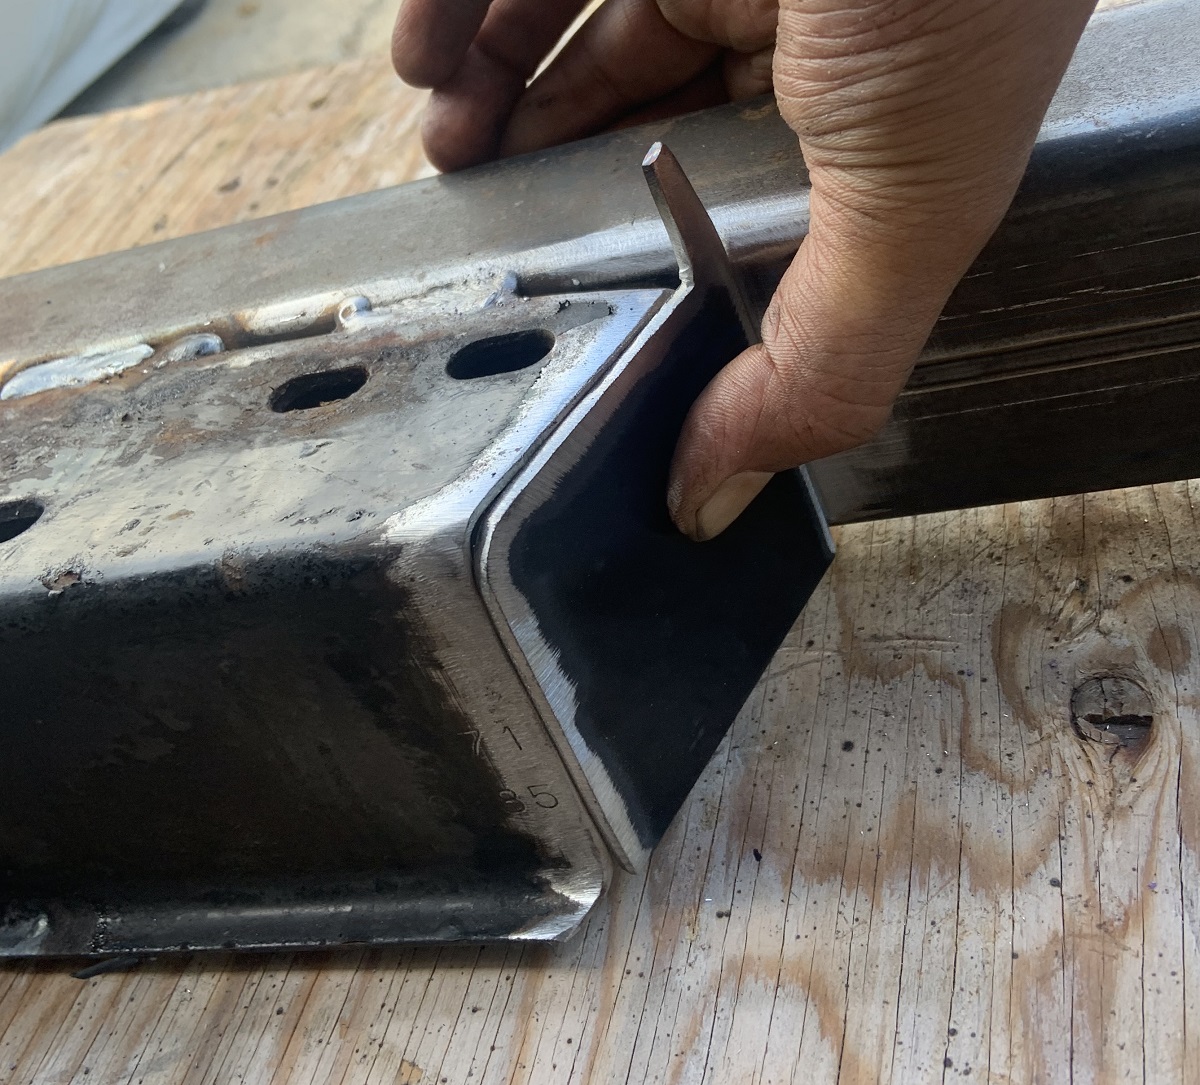
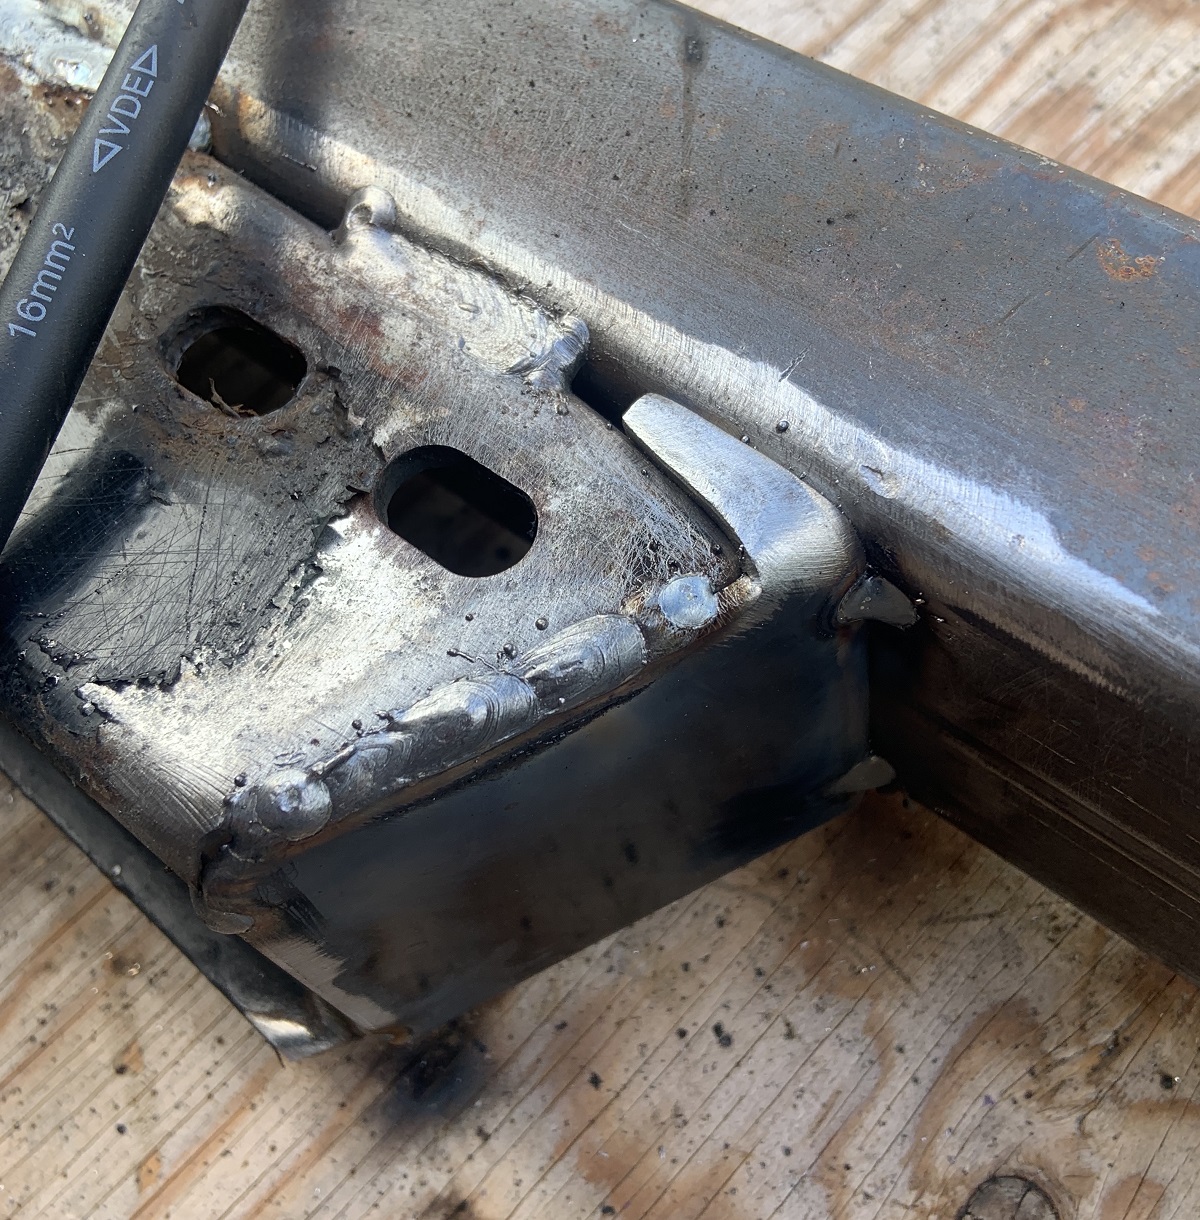
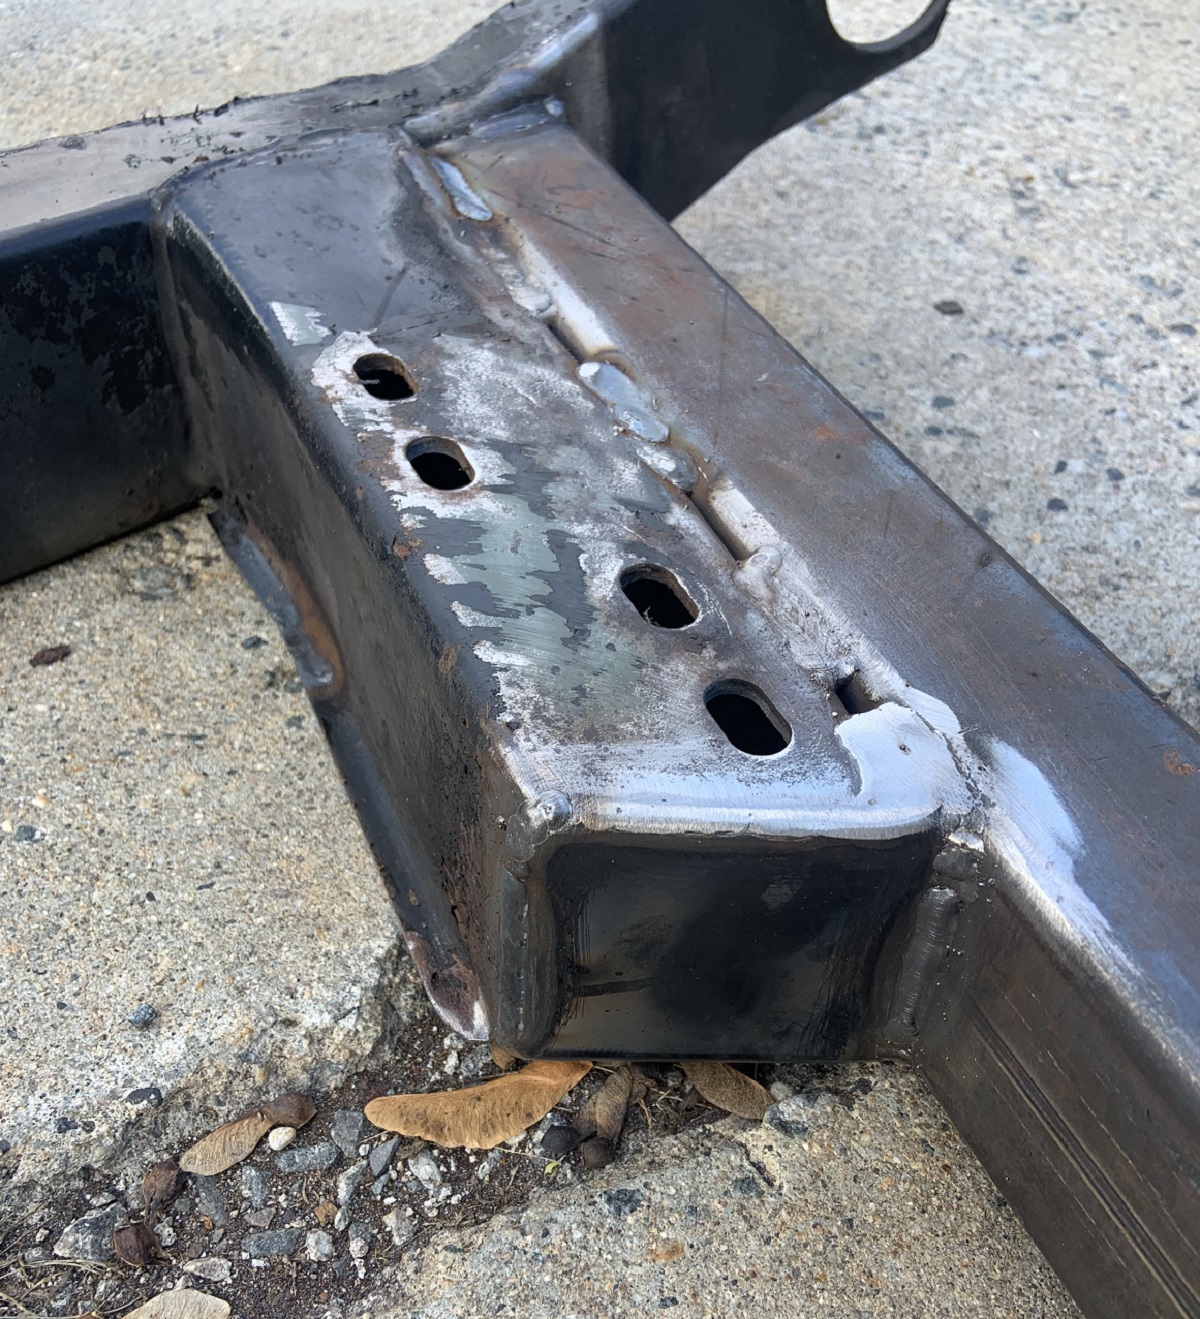
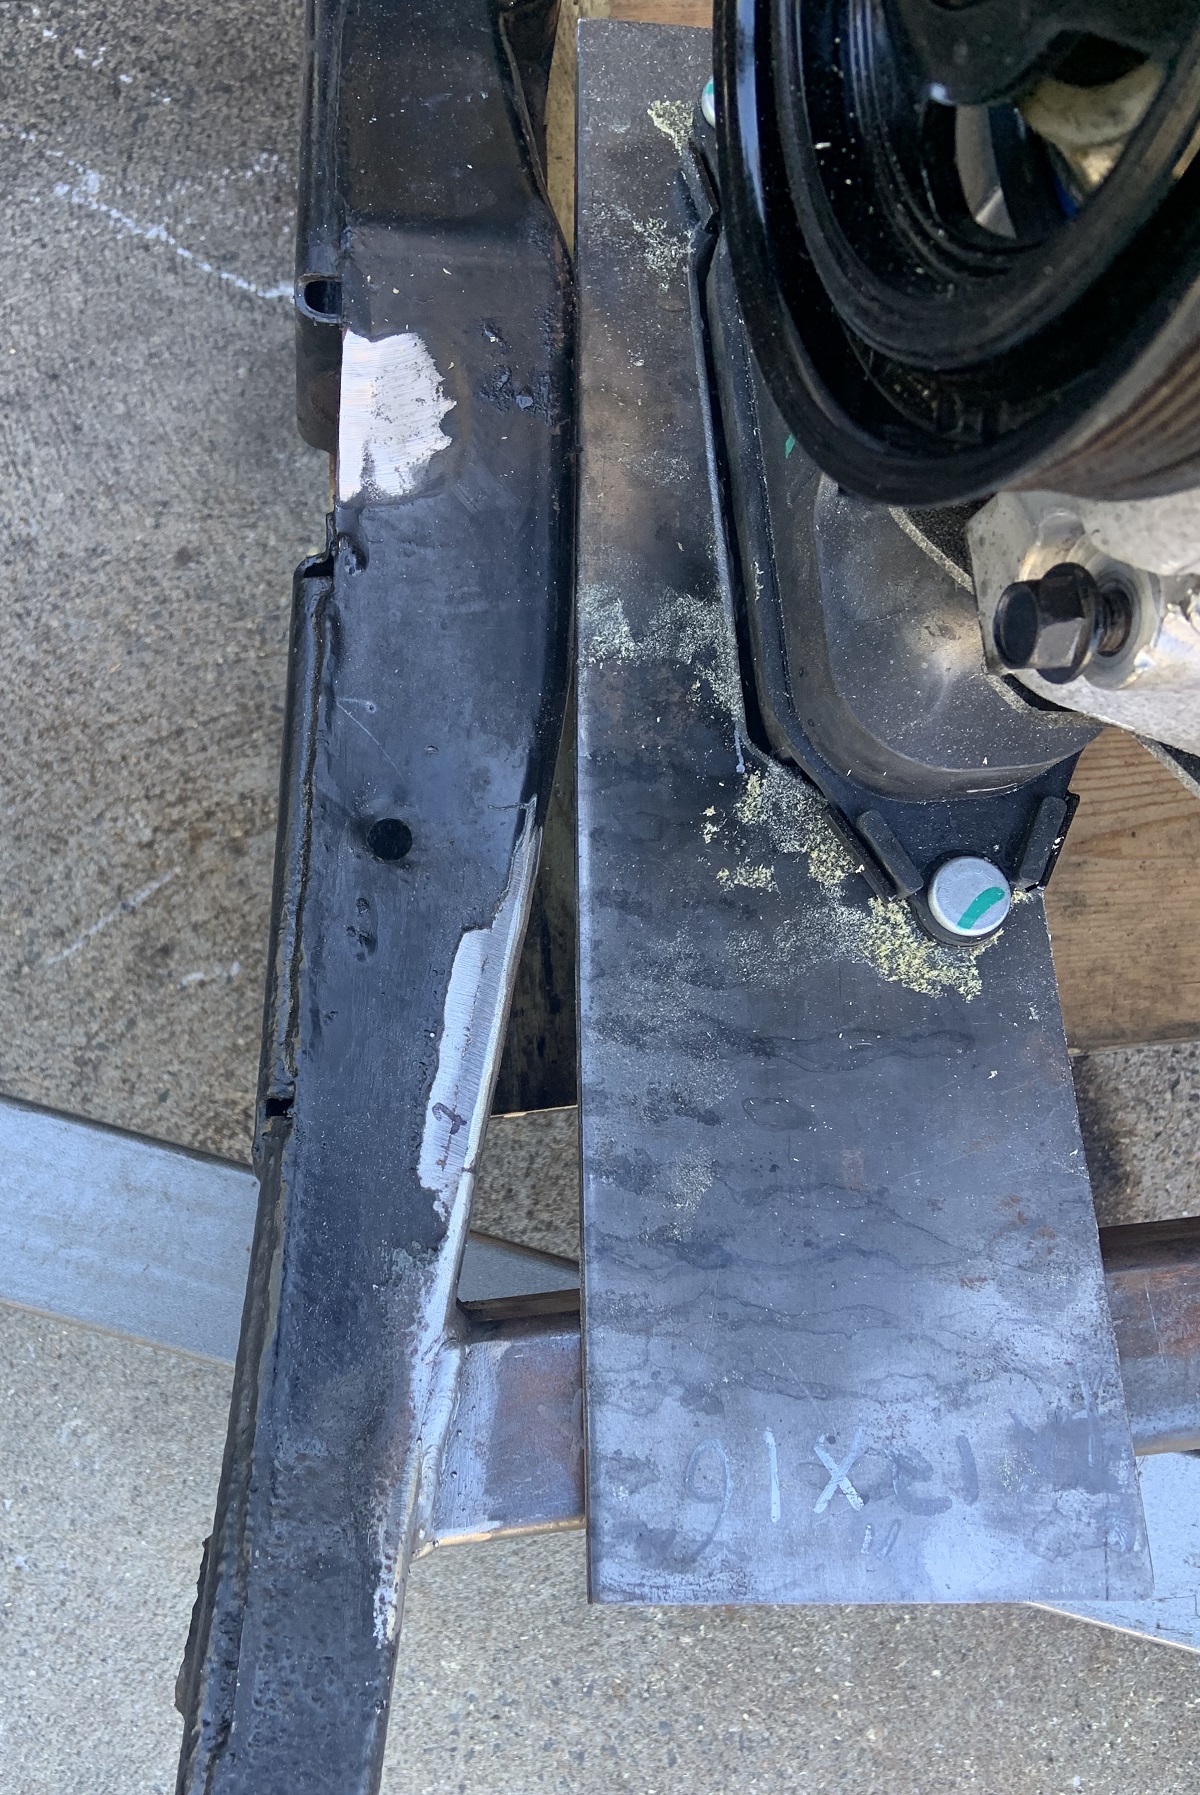
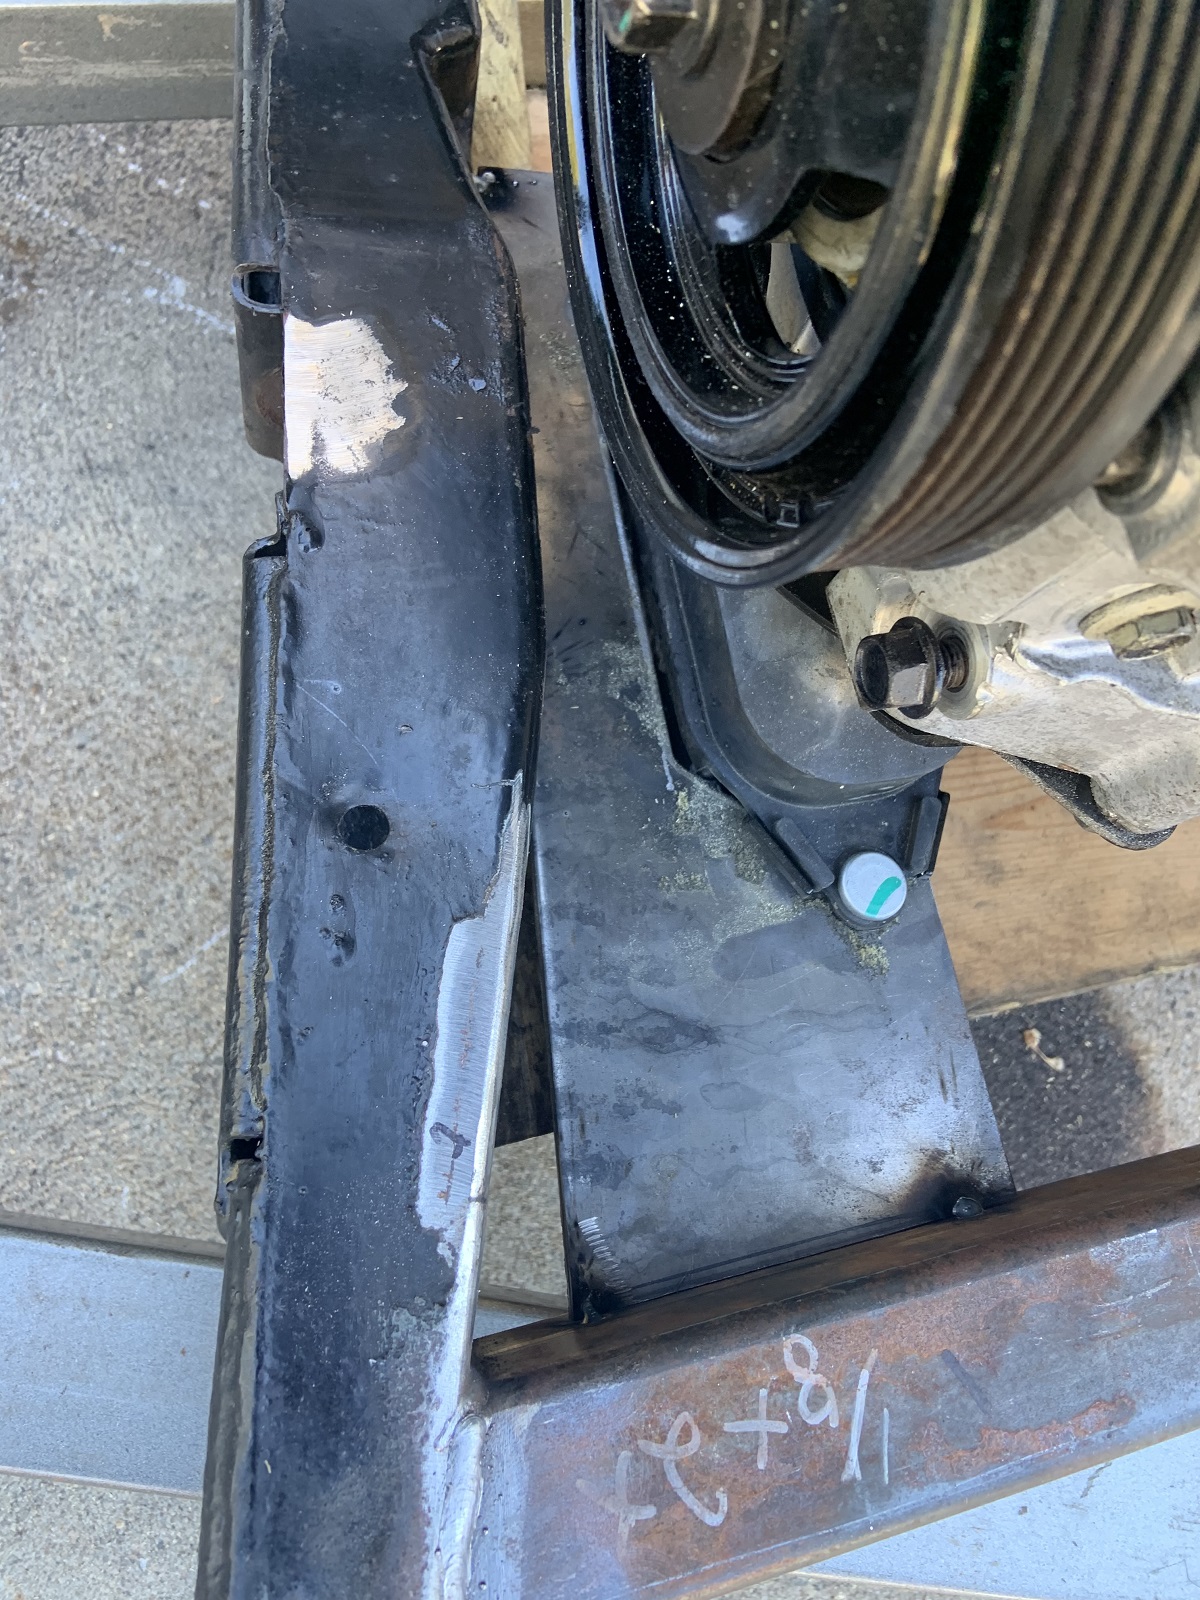
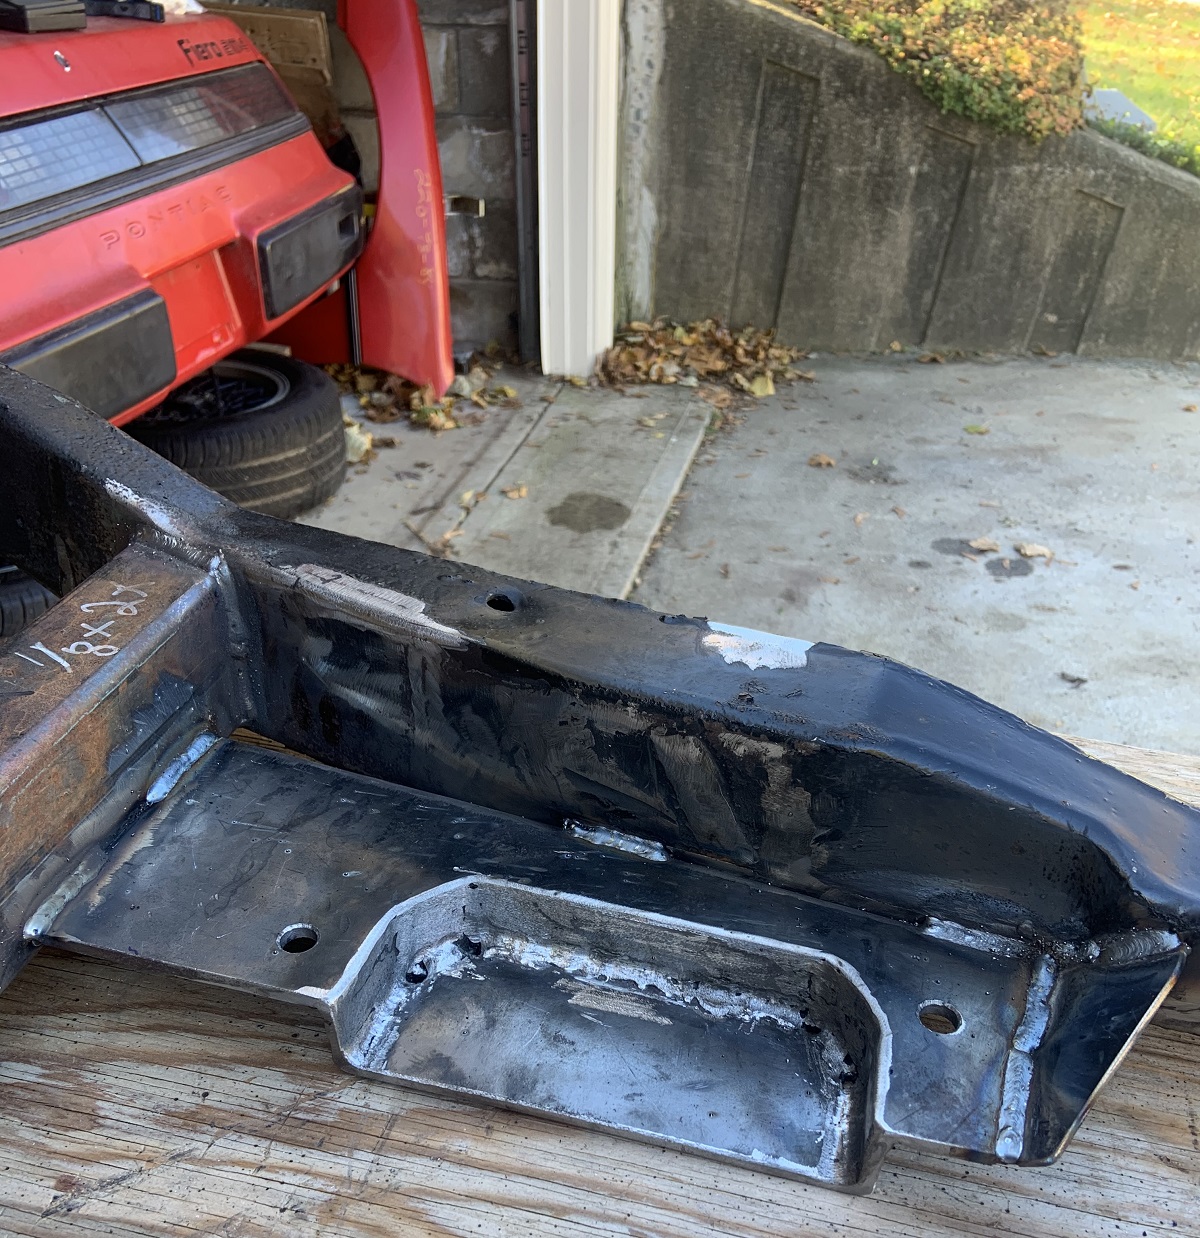
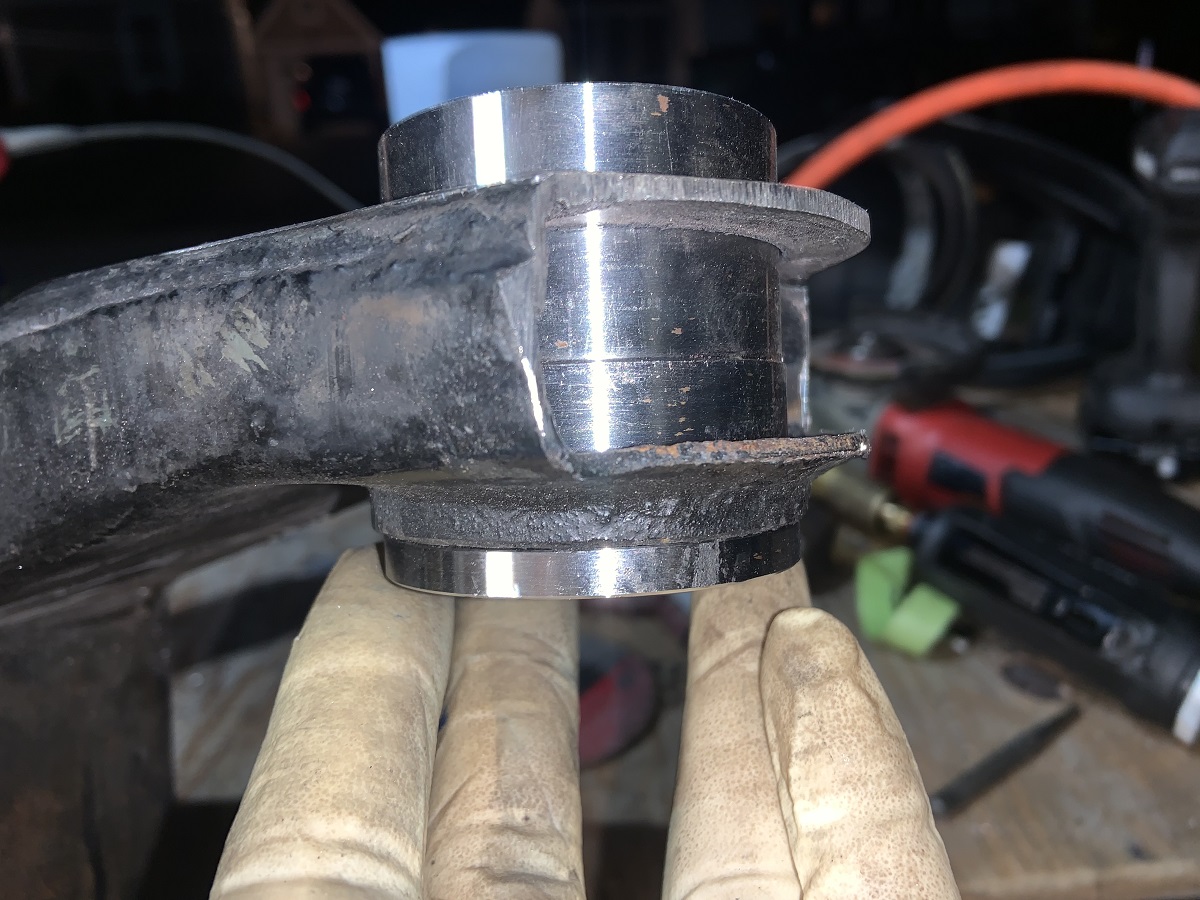
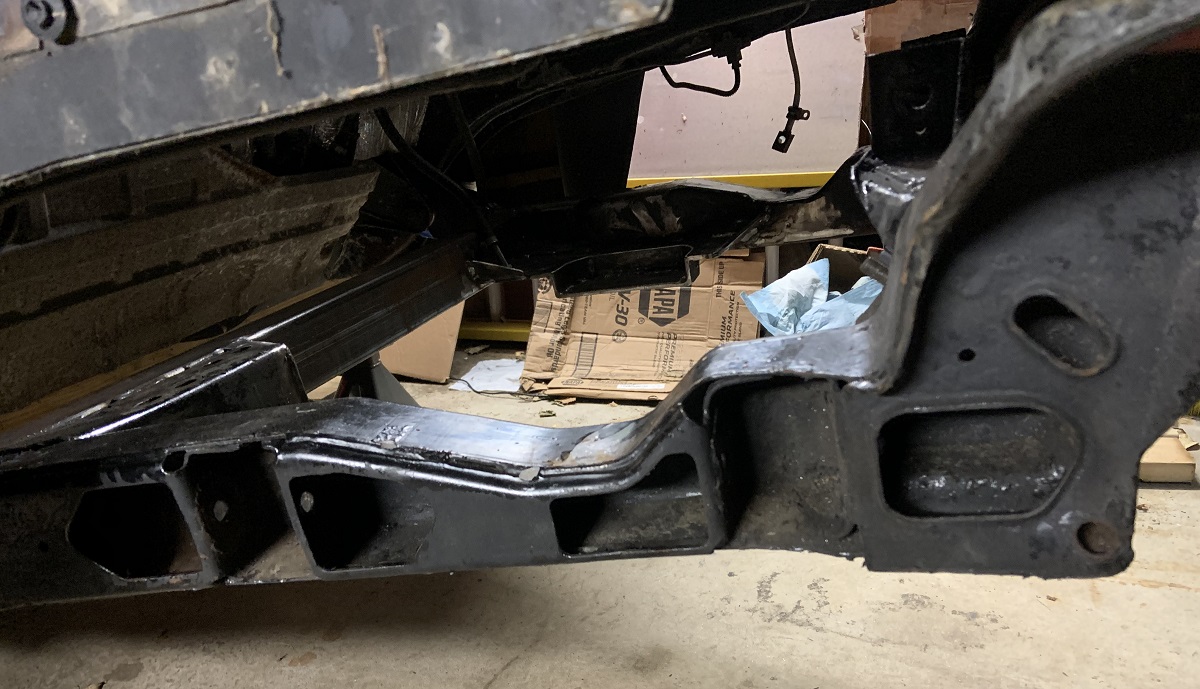
Time to repair the cradle "leg". I used the long corner that I kept when I removed the rusty metal to guide the shape of the new parts, then I cut it off and built a new corner.
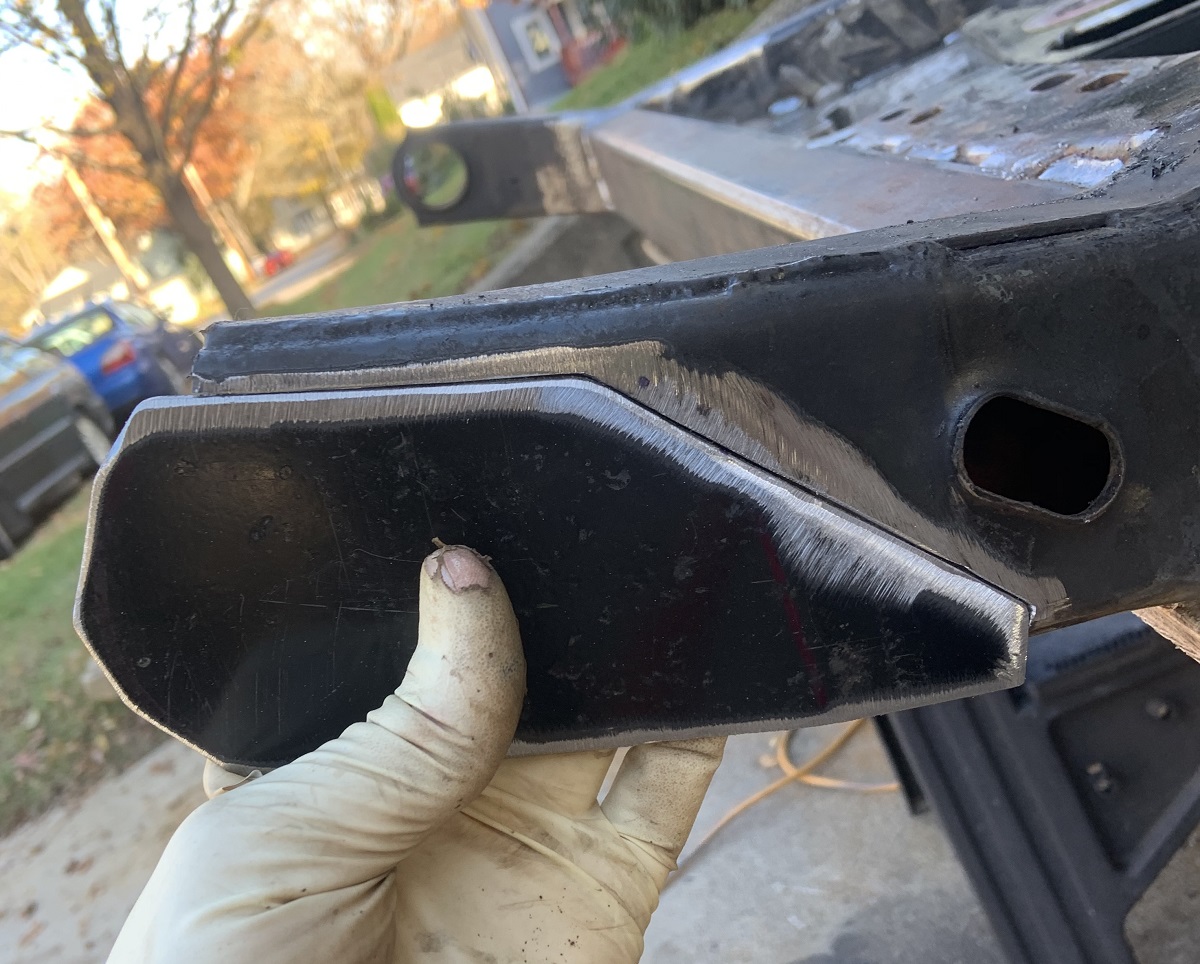
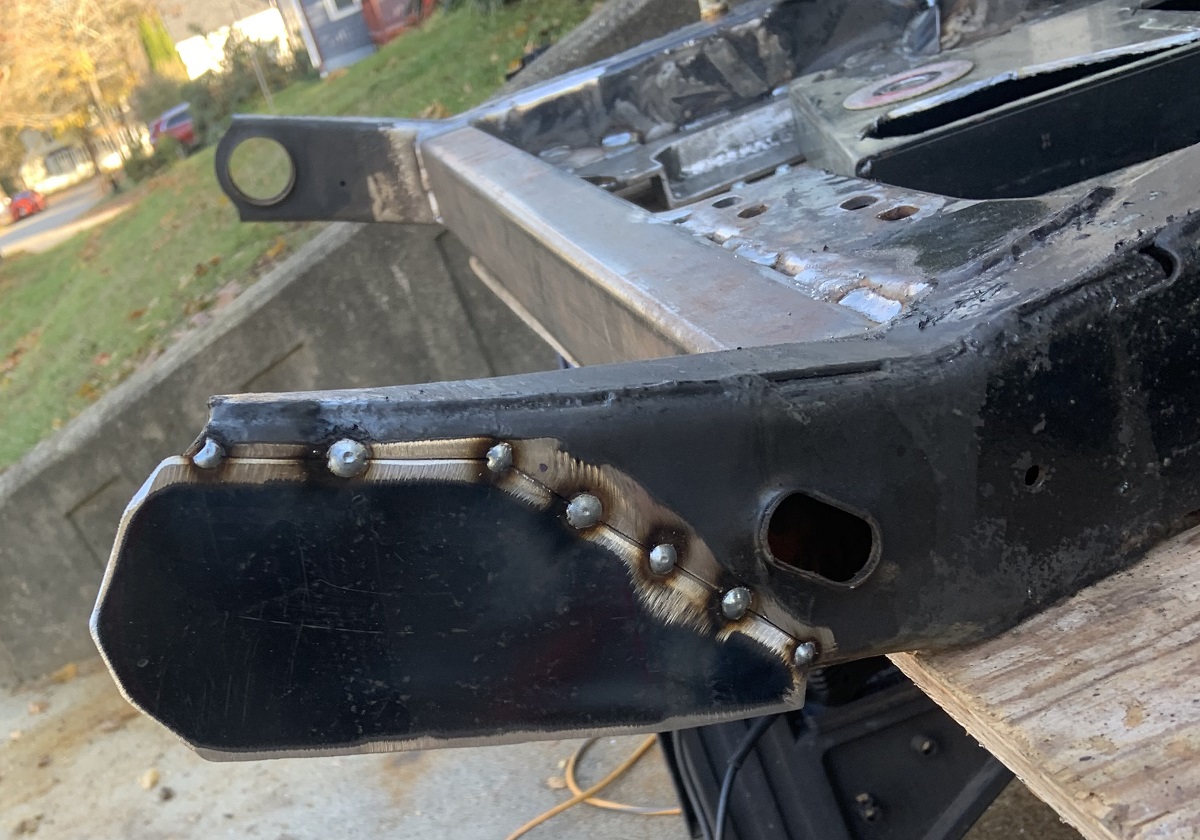
I shaved it down to match the profile of the existing side. That left this to patch.
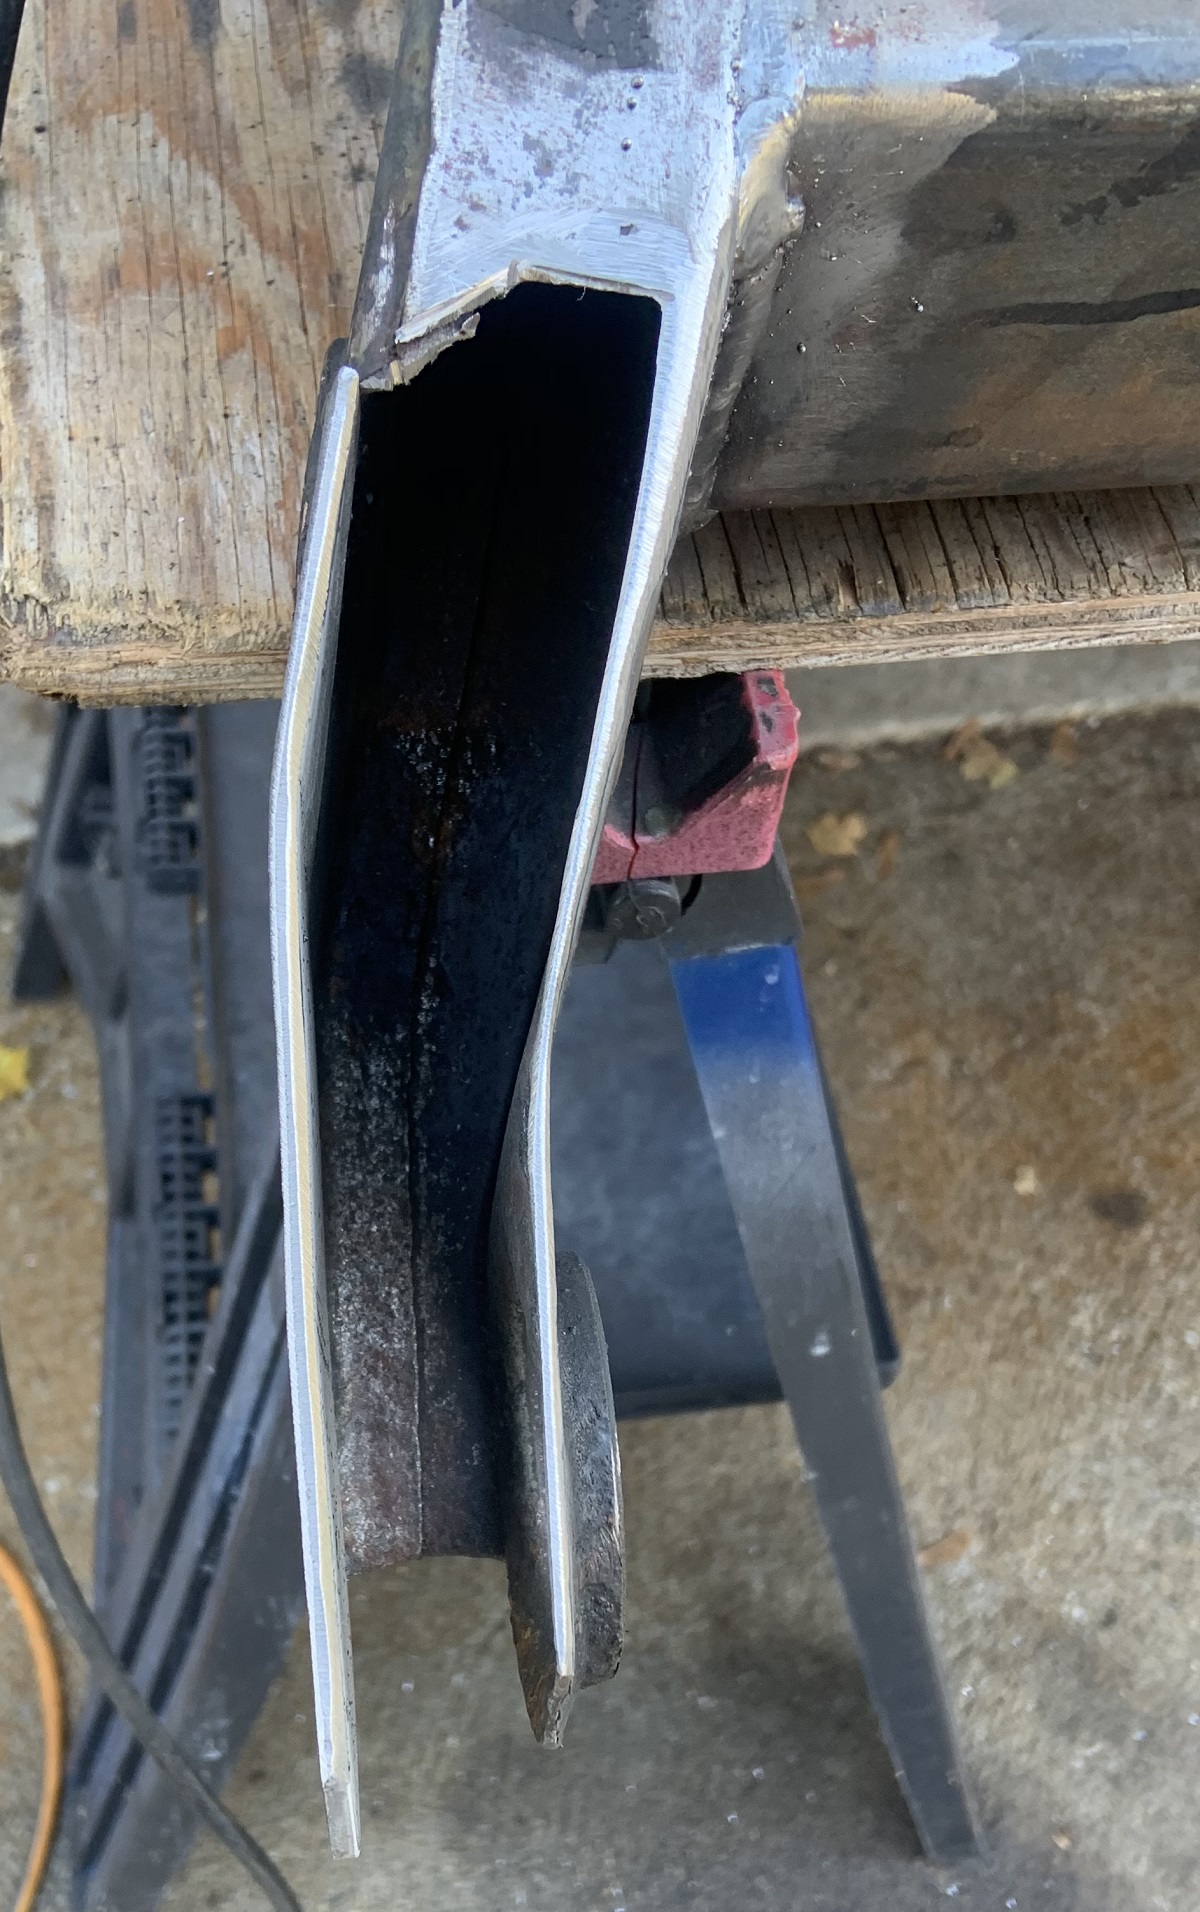
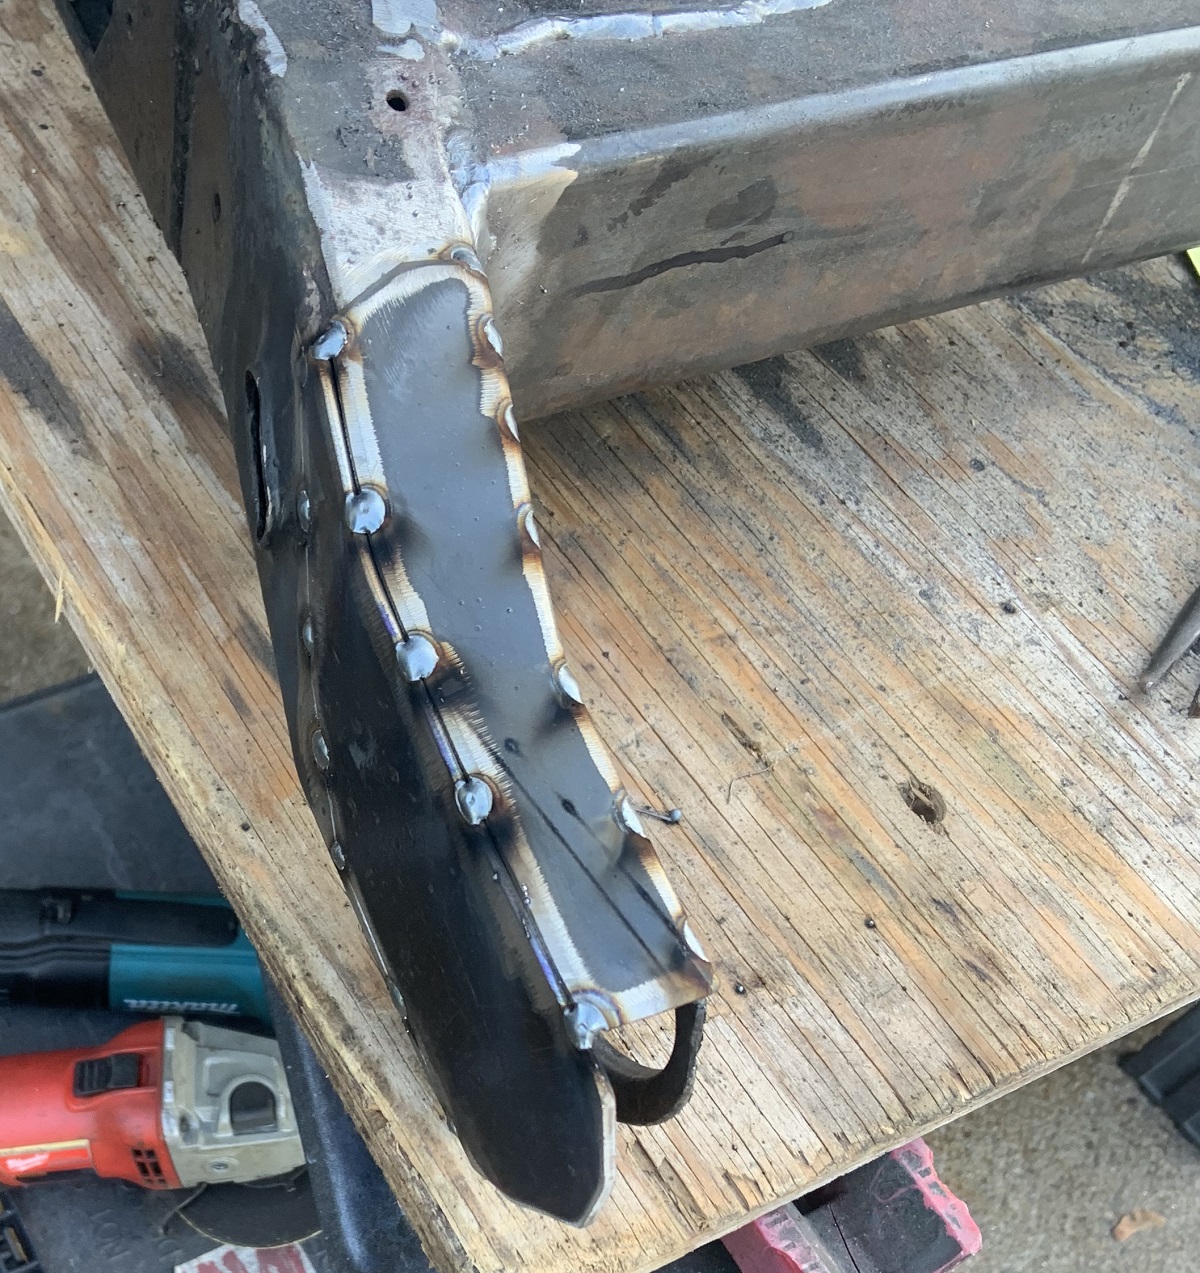
I was concerned that heat from the welding could really mess up this front leg and make the cradle no longer fit the car. I chose to stack beads for welding this front leg together to prevent warpage. It took a while but no warping occured.
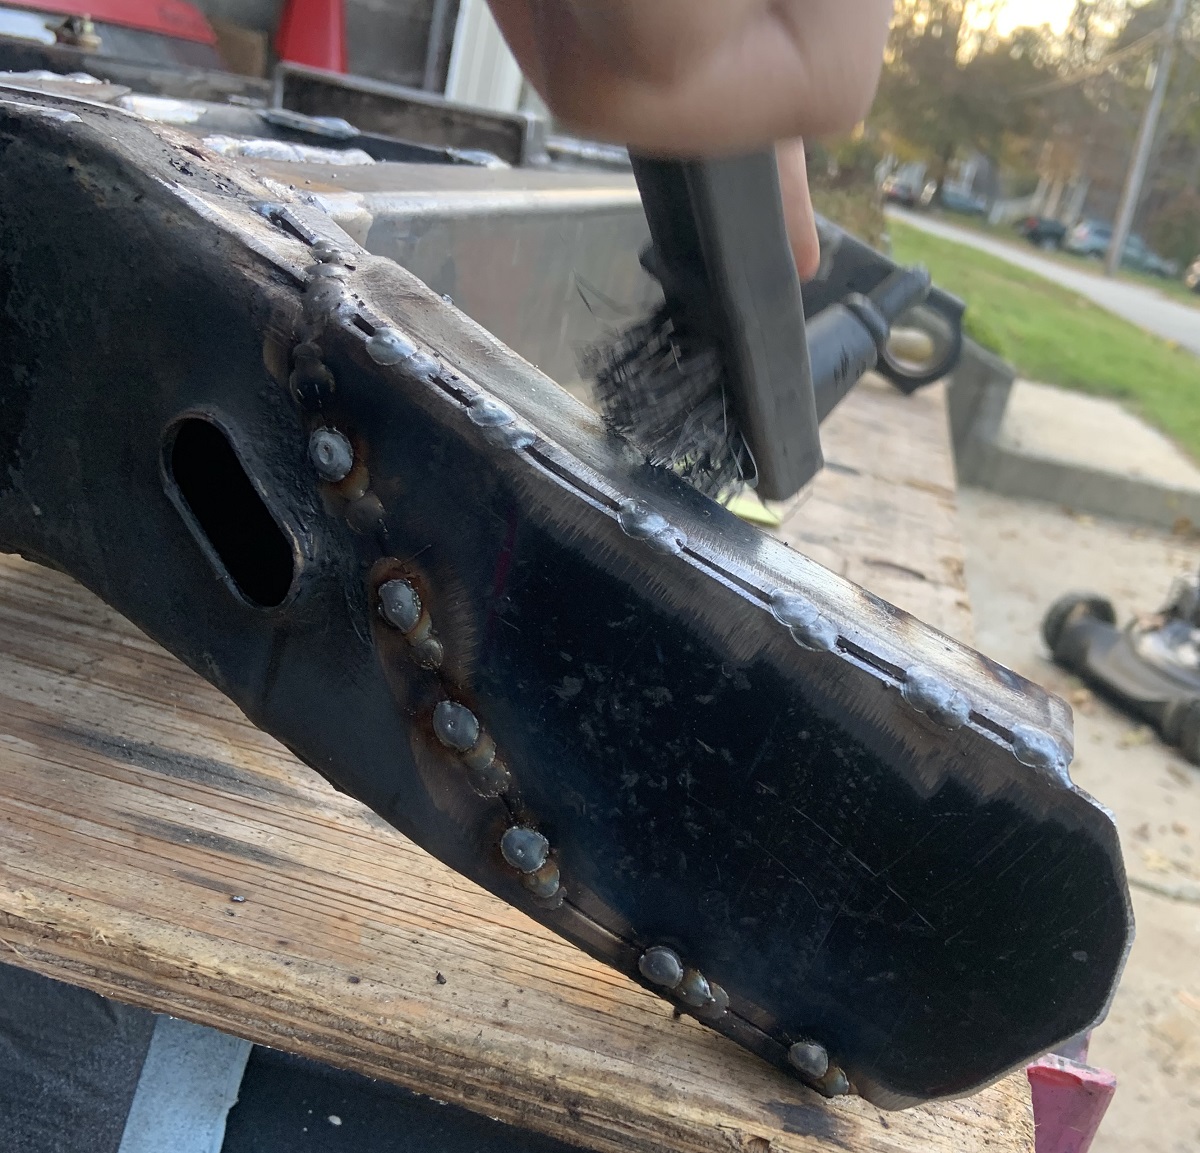
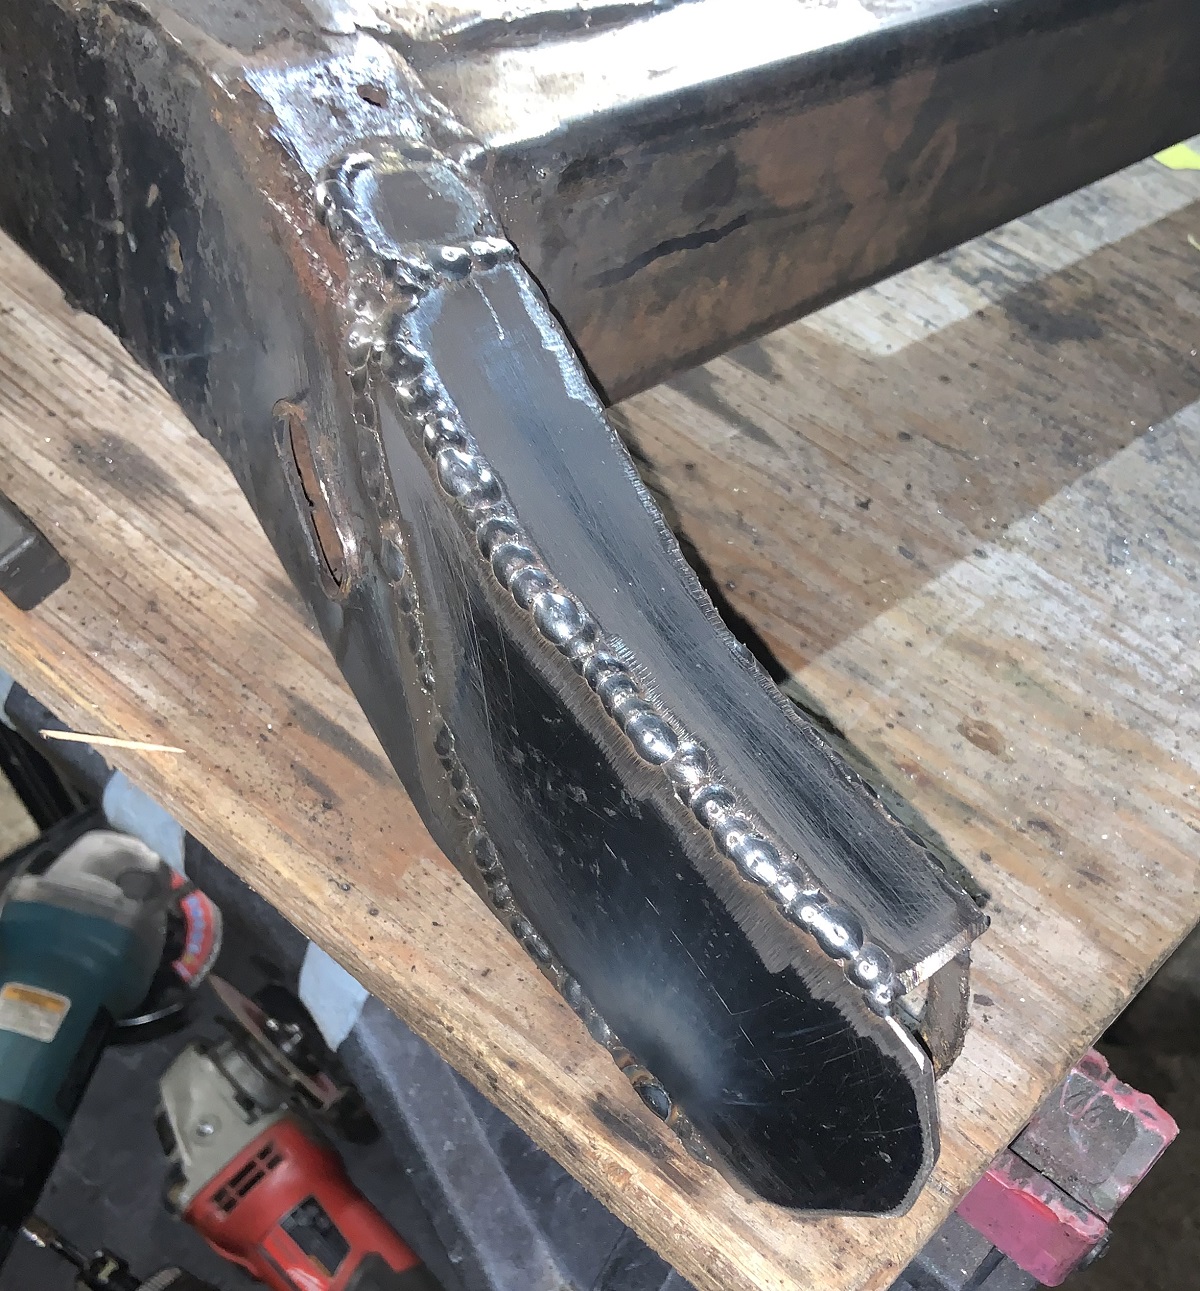
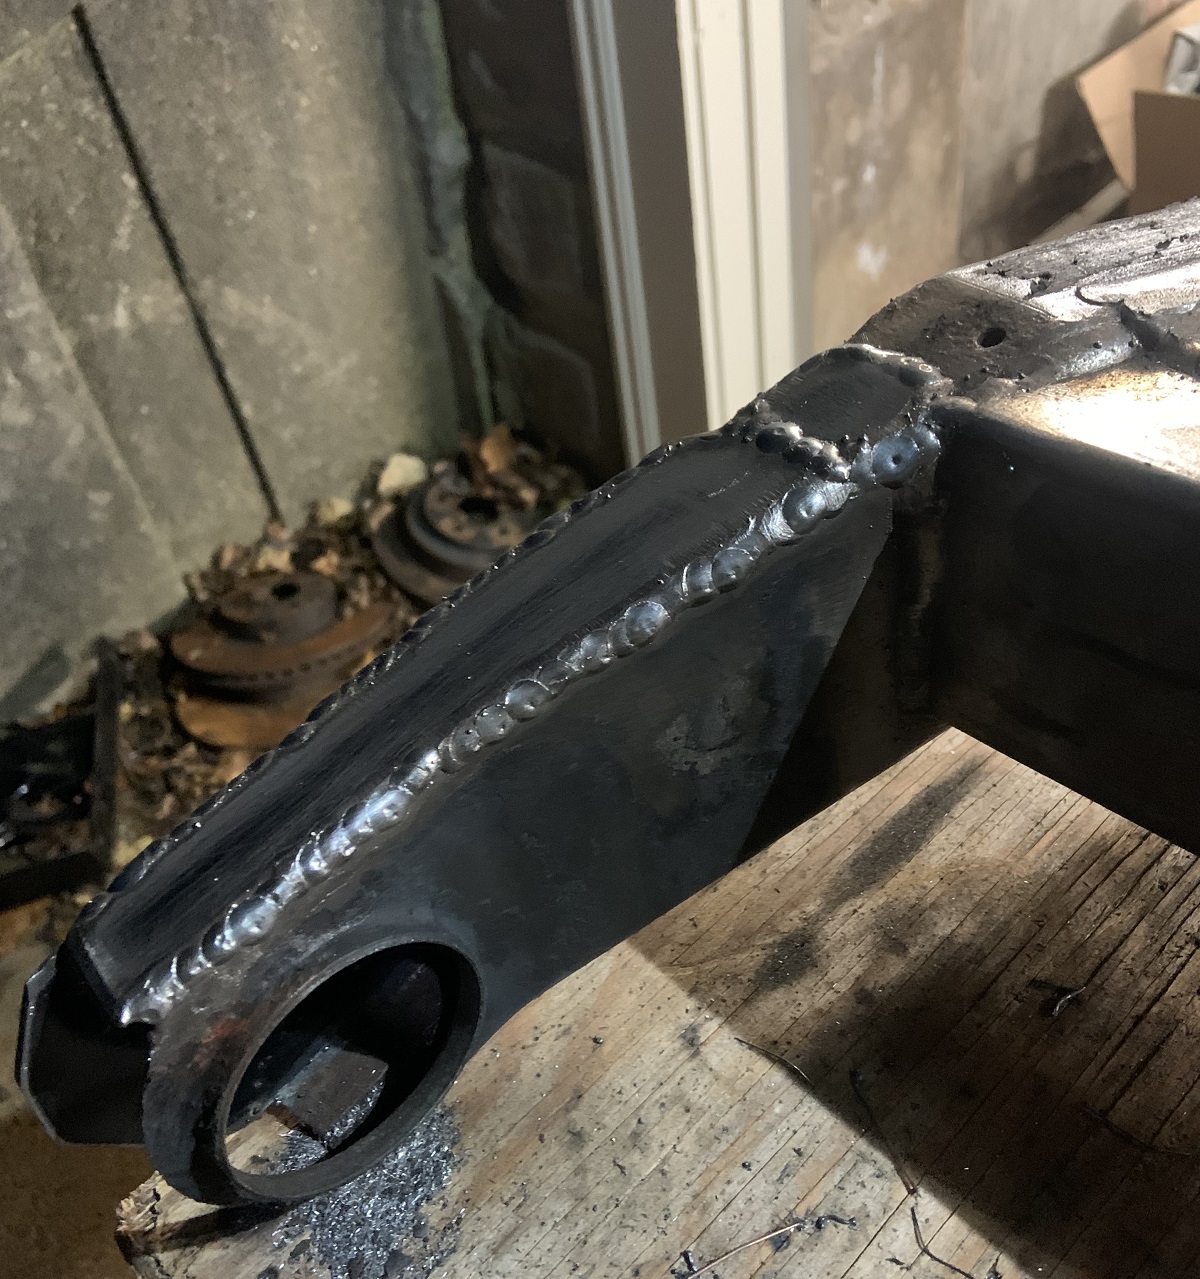
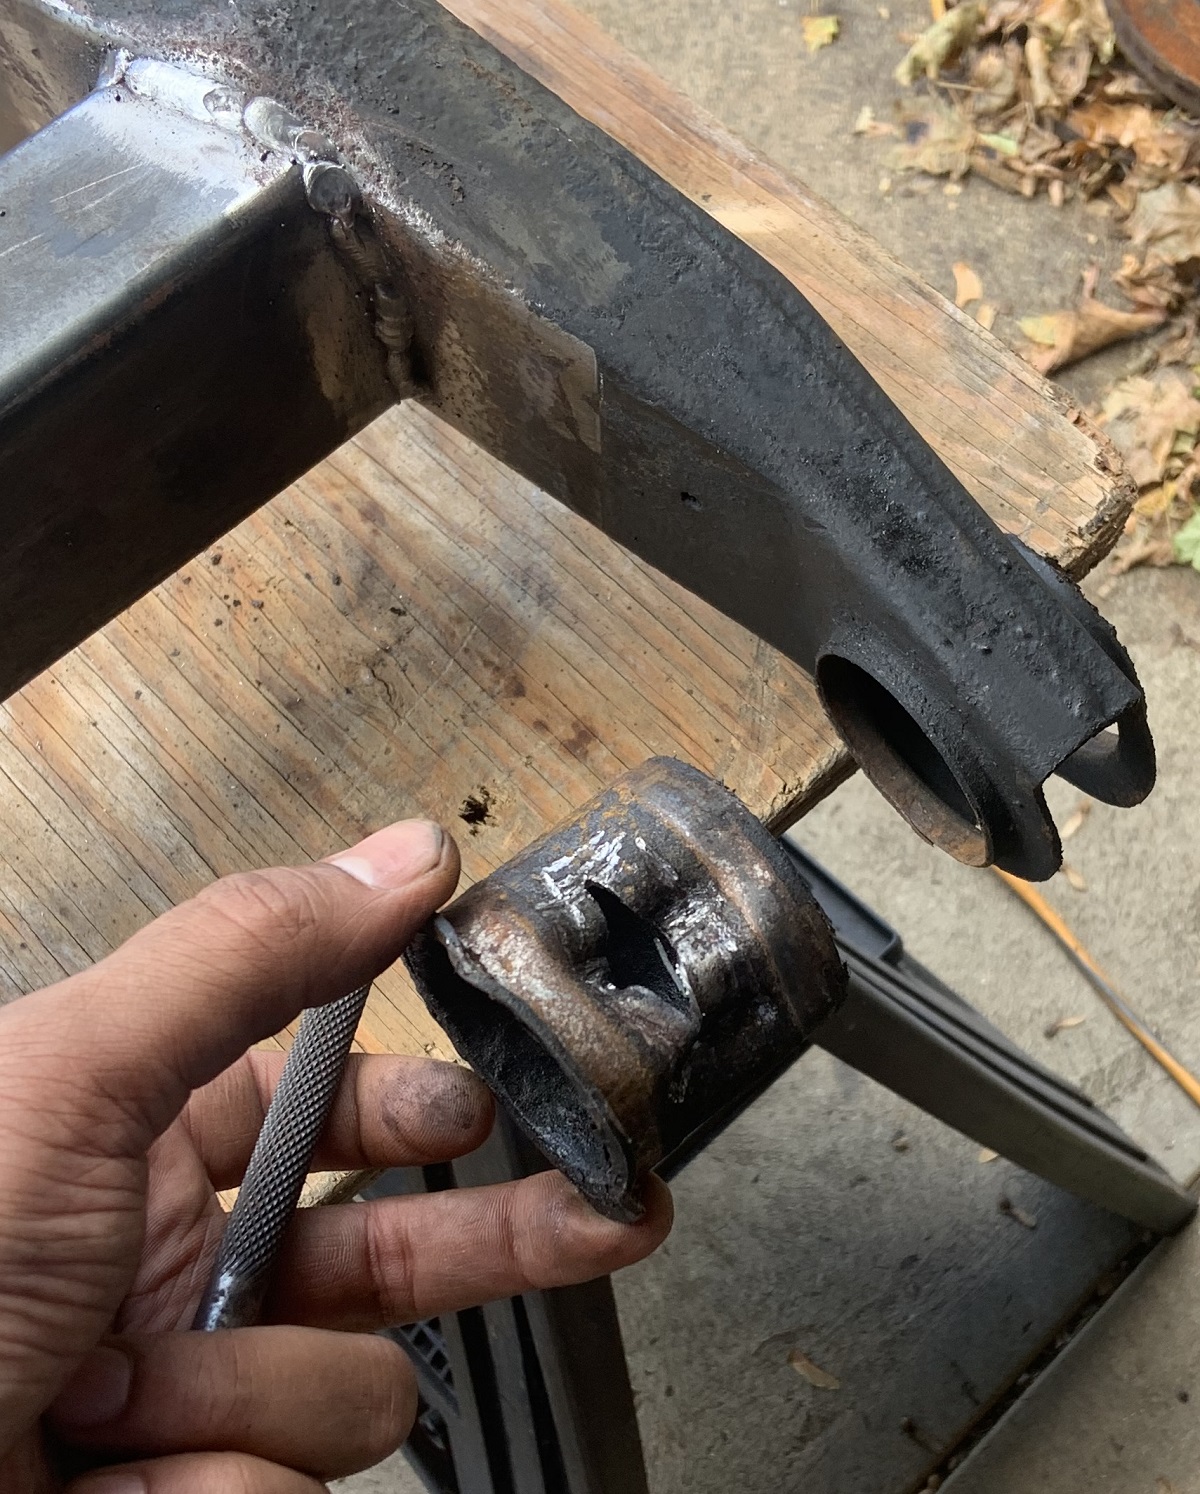
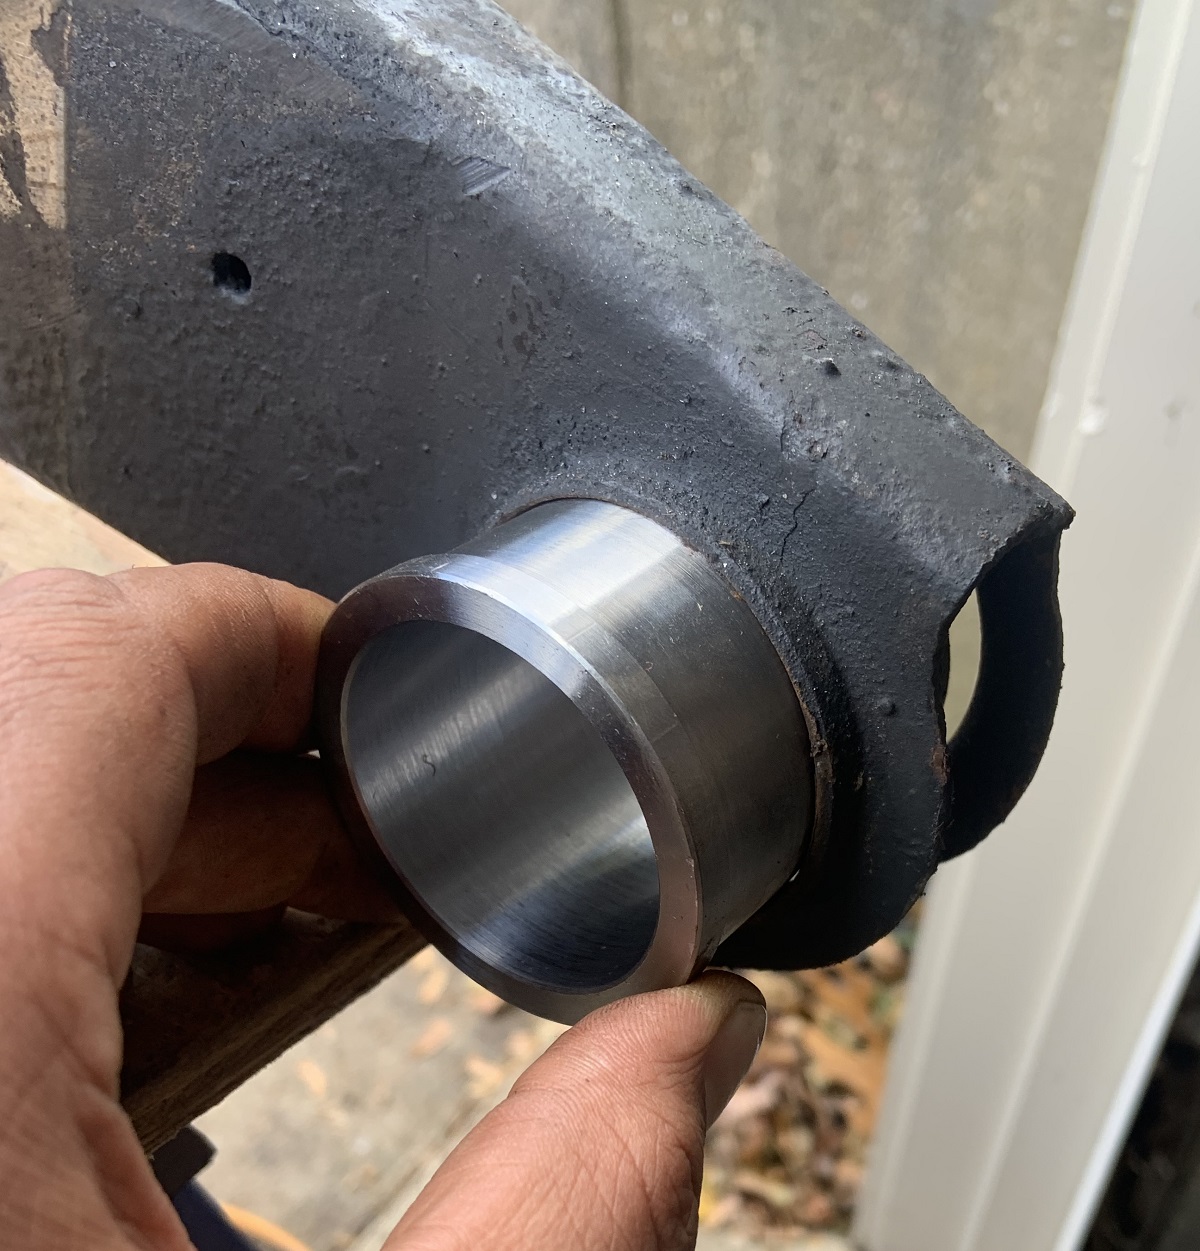
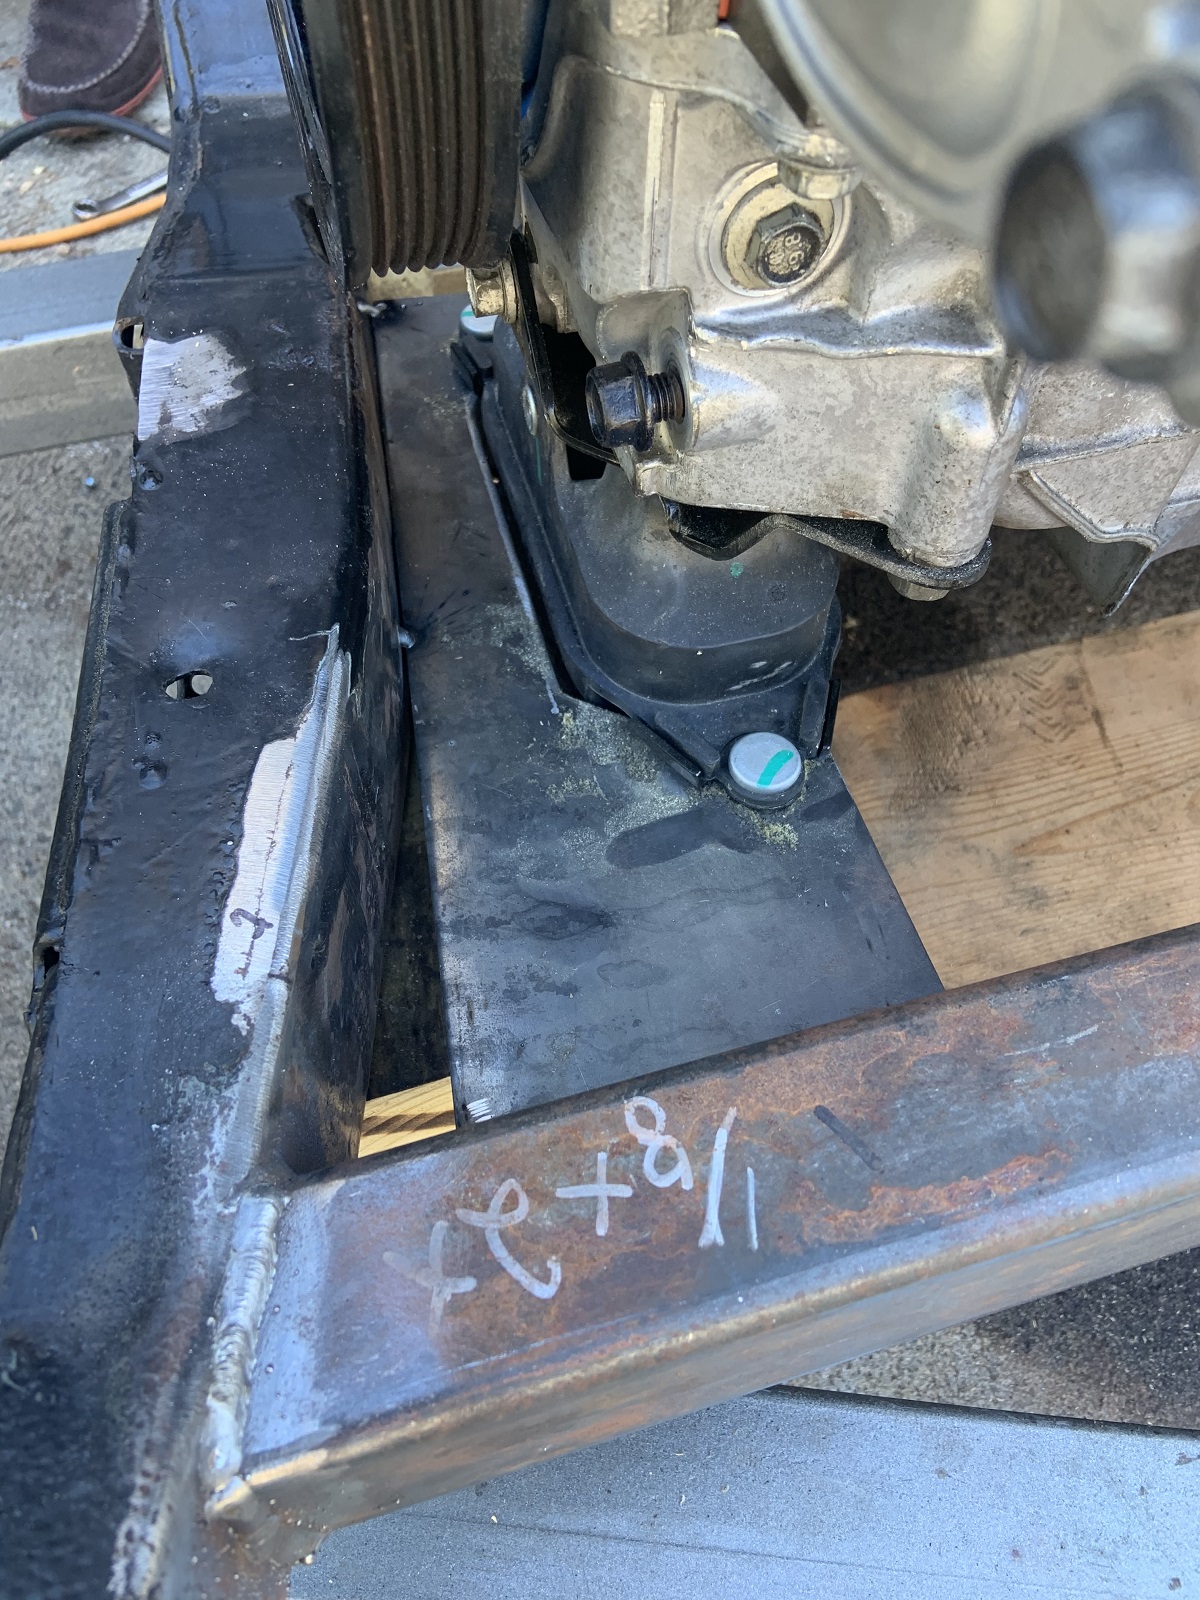
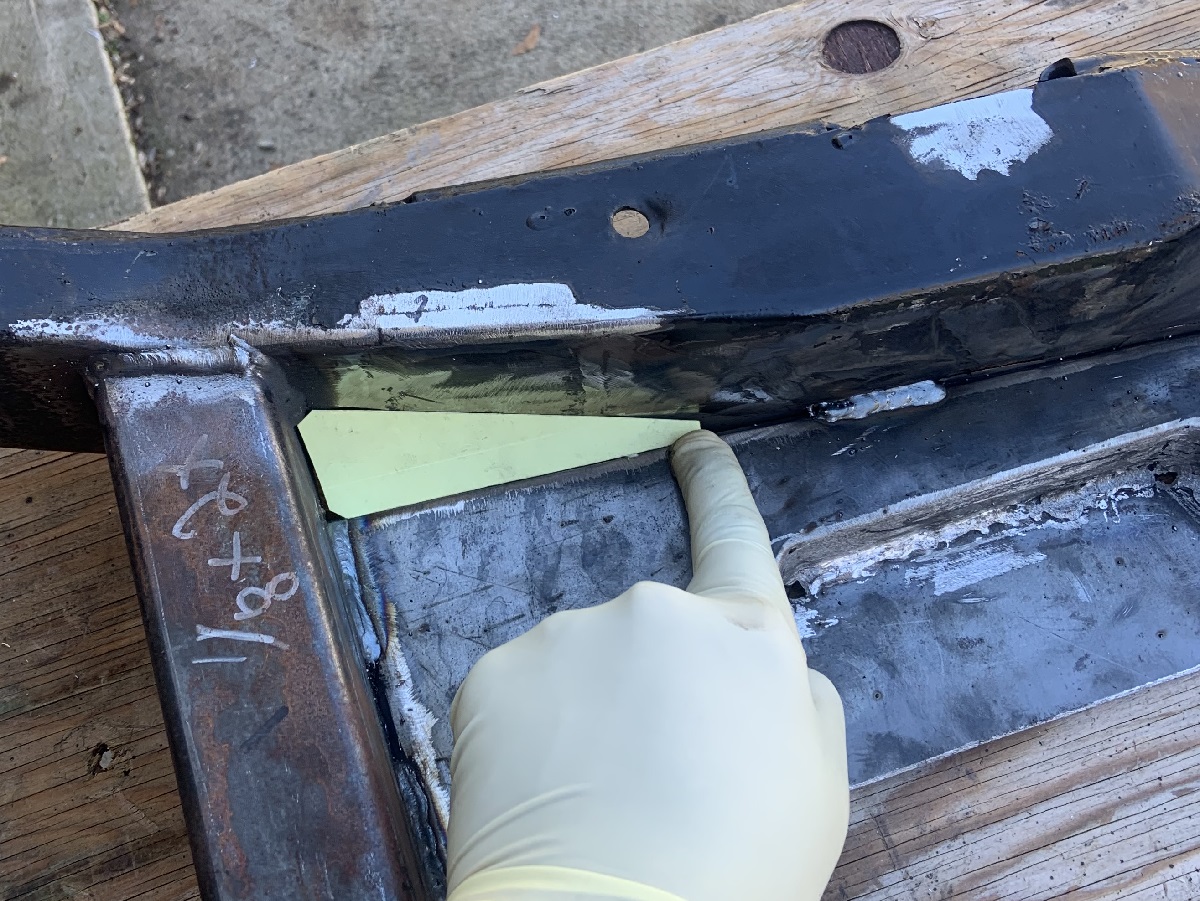
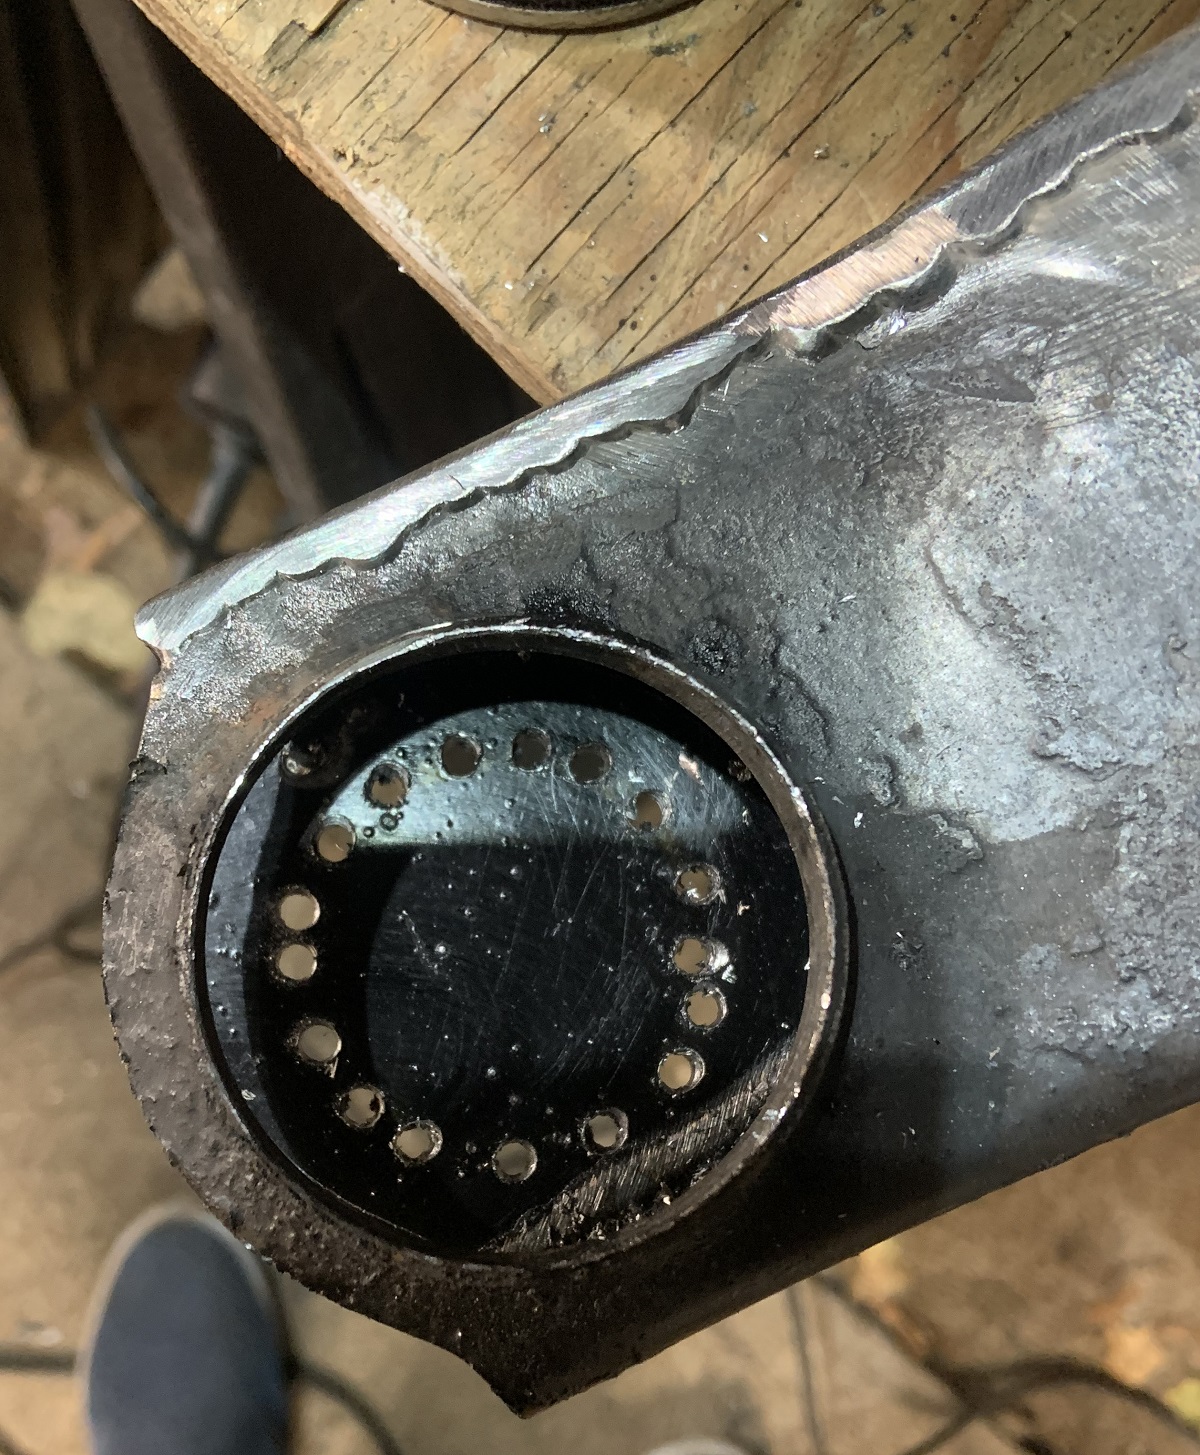
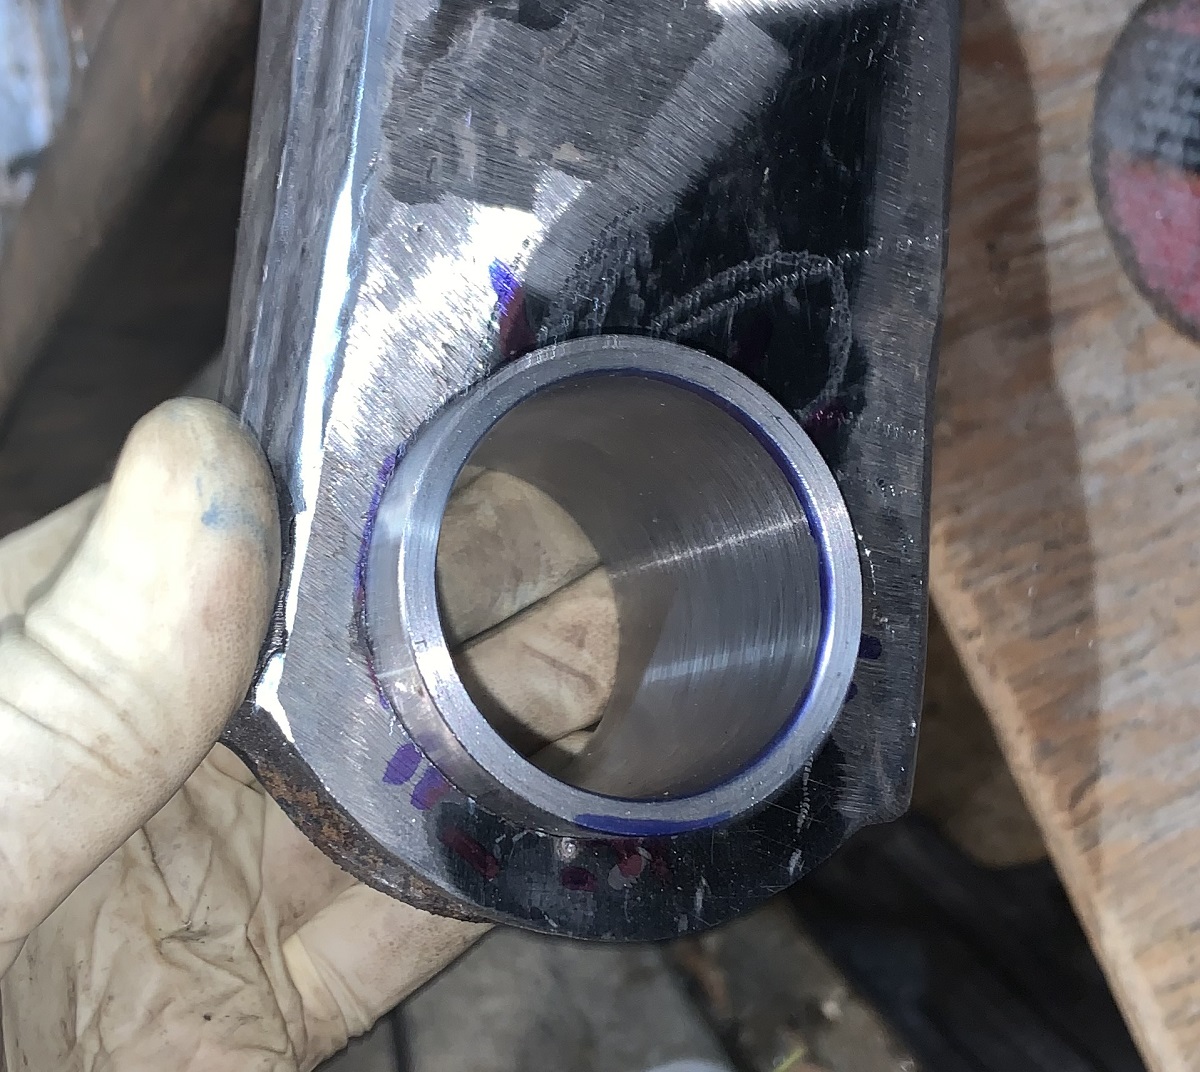
I shaped the new metal to match the other side and ground all the welds down. Put the bushing sleeve in place and traced the ID. Drilled holes along the ID that opened it up to near the OD. Used a combination of angle grinder and die grinder to open and shape the hole for the sleeve.
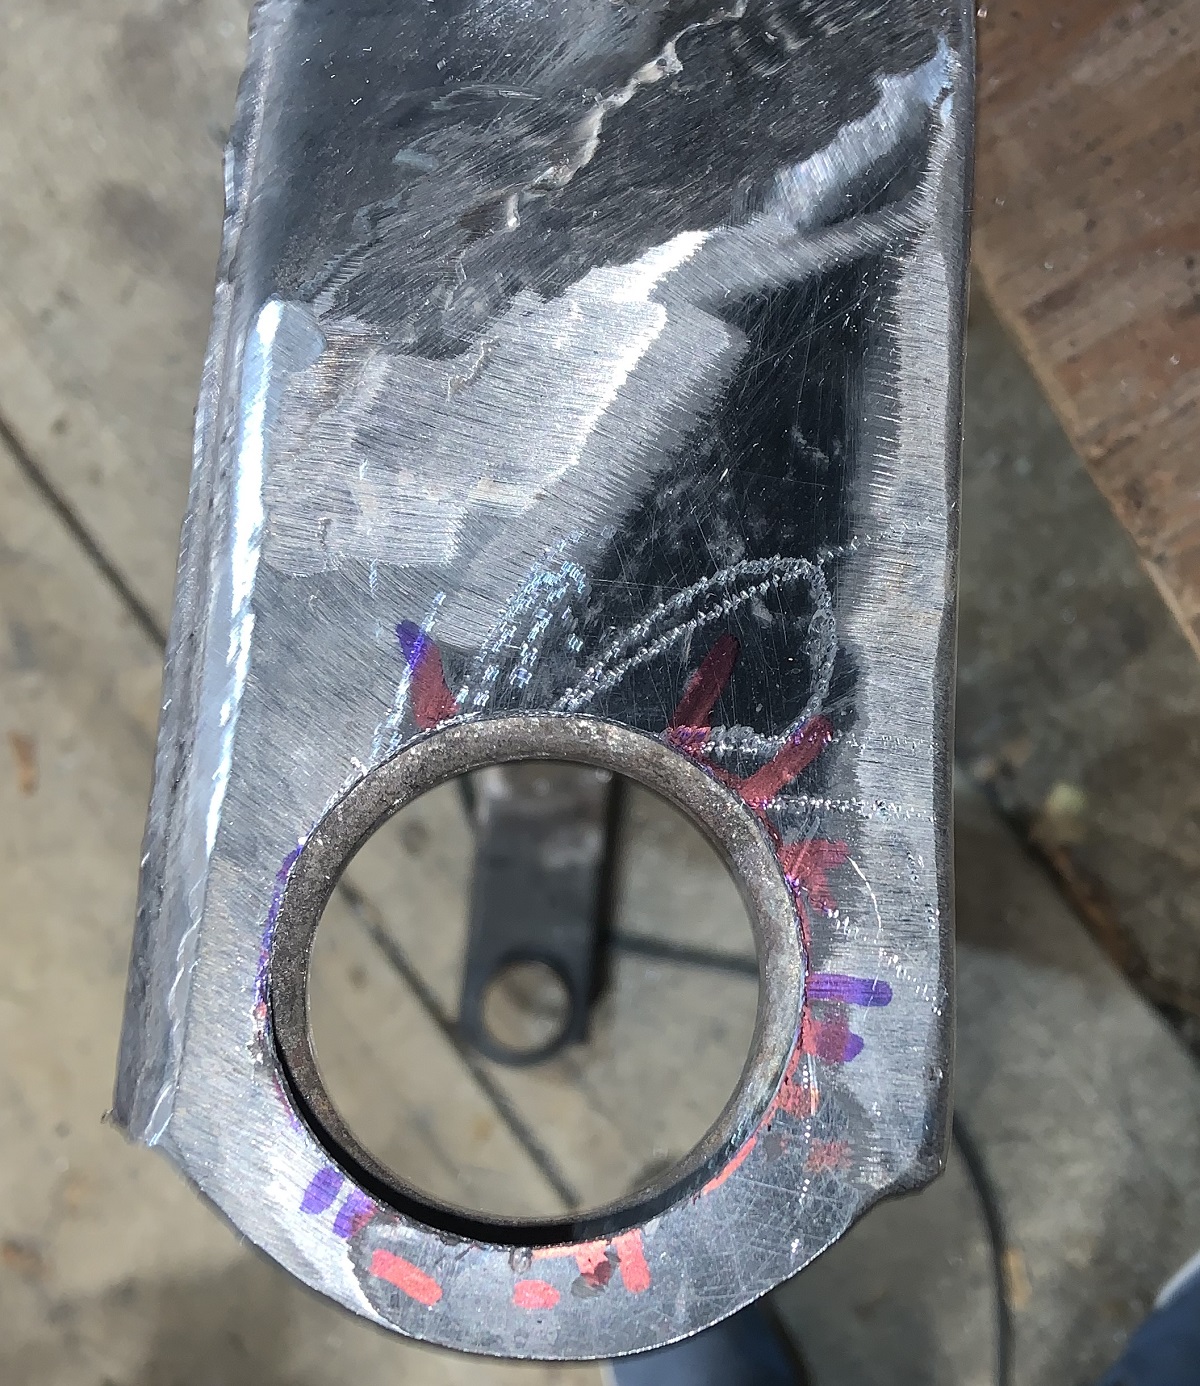
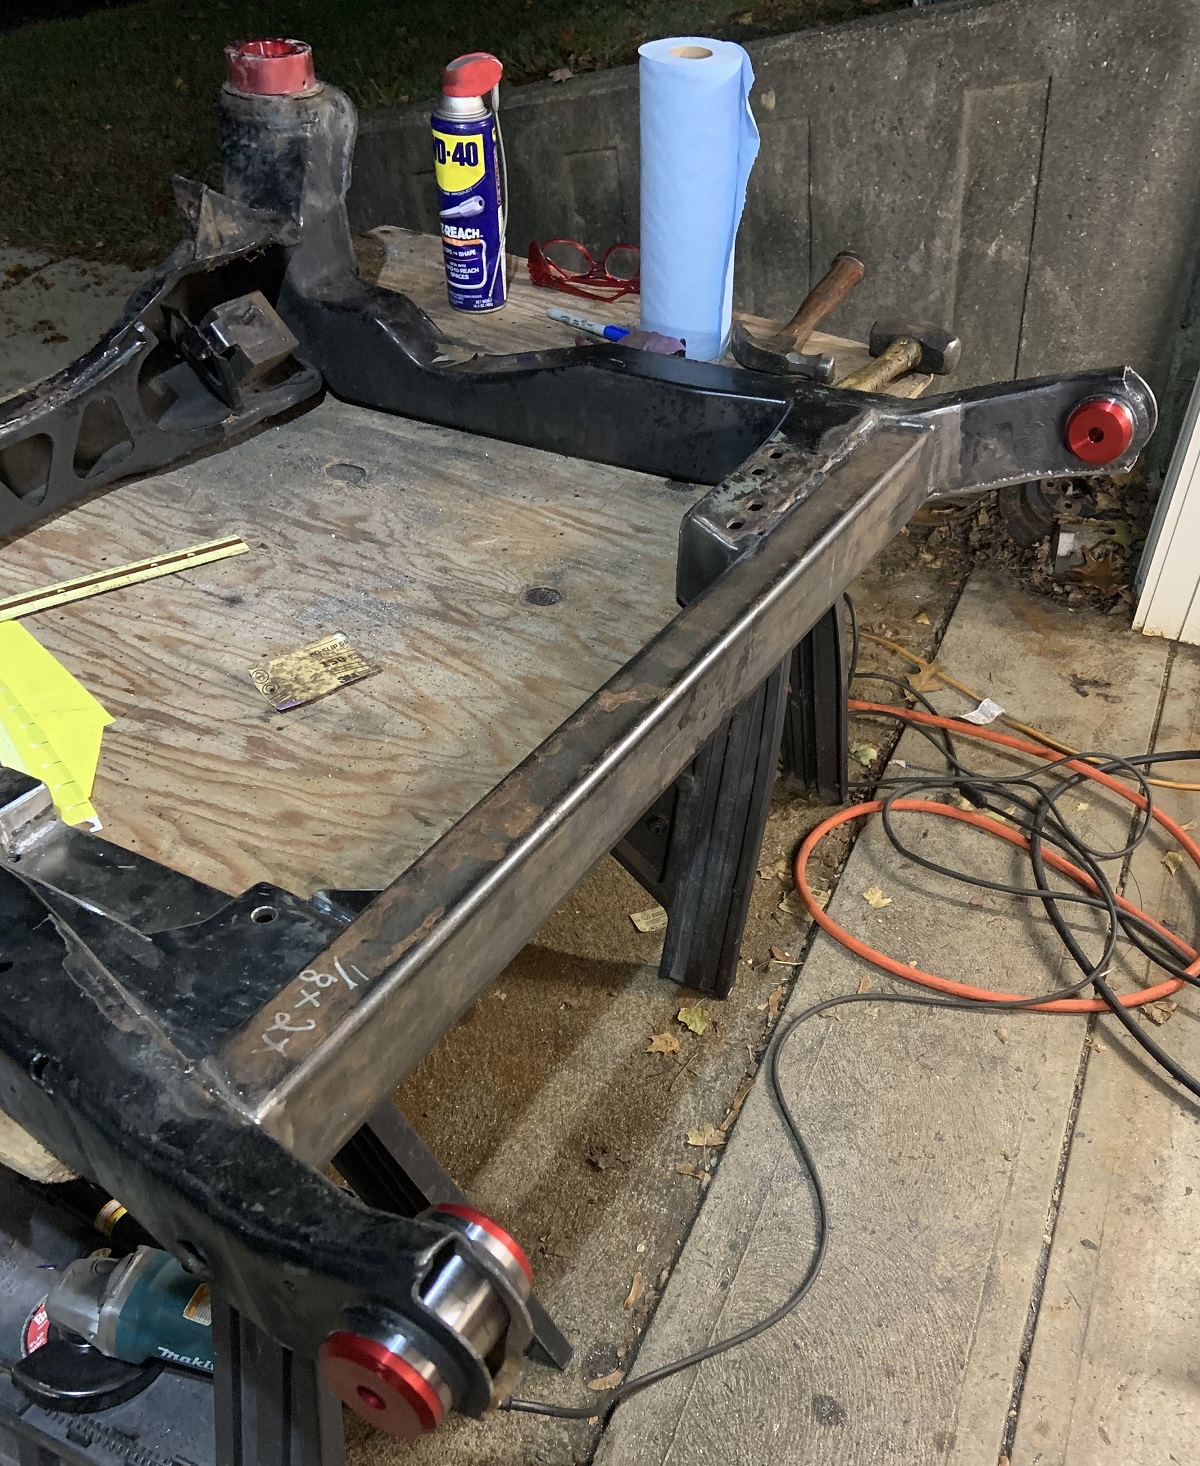
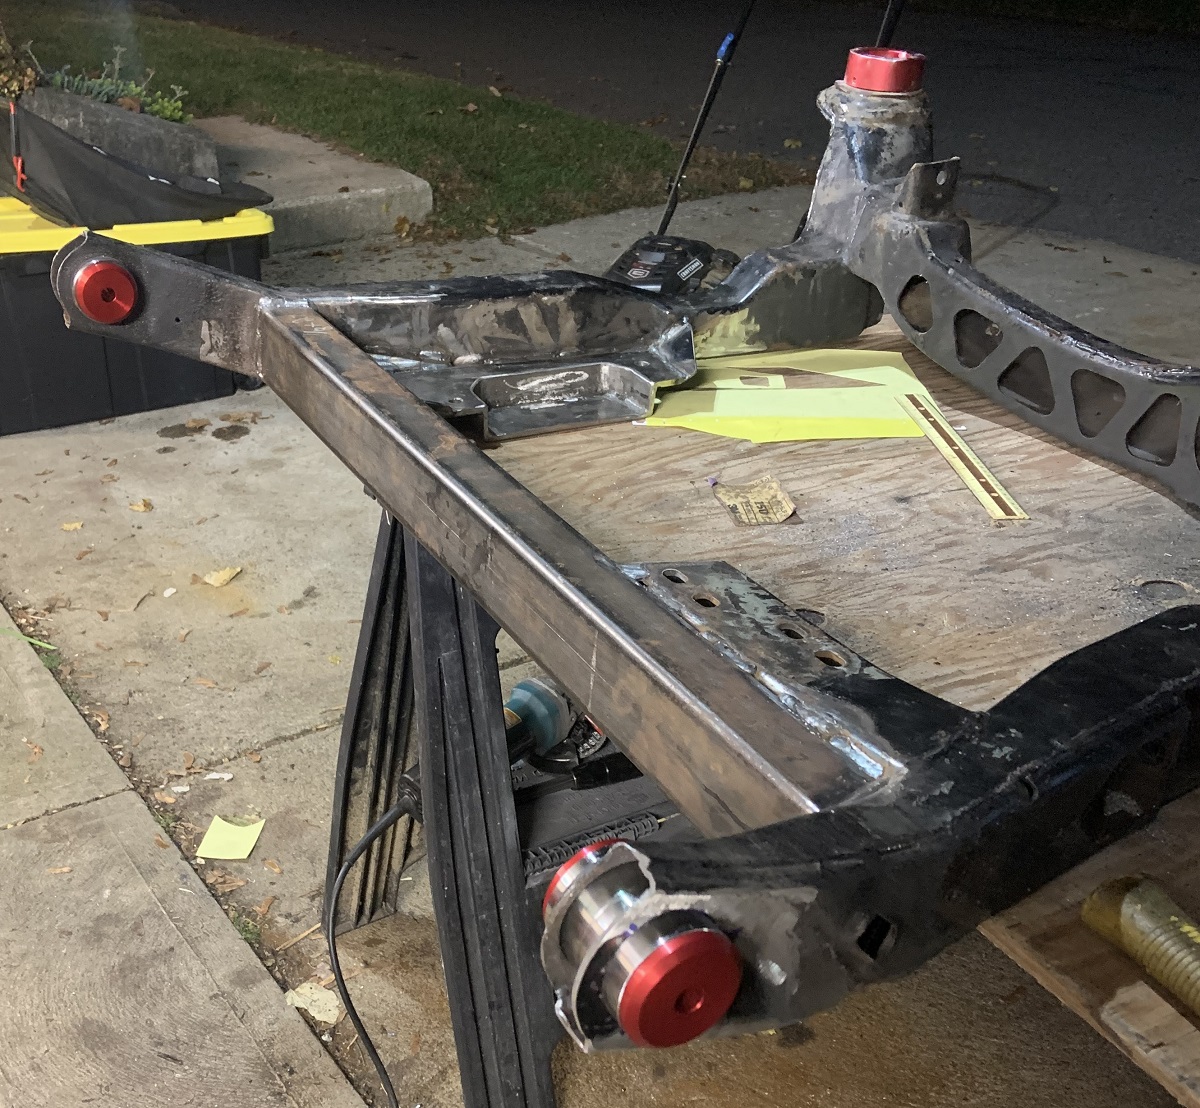
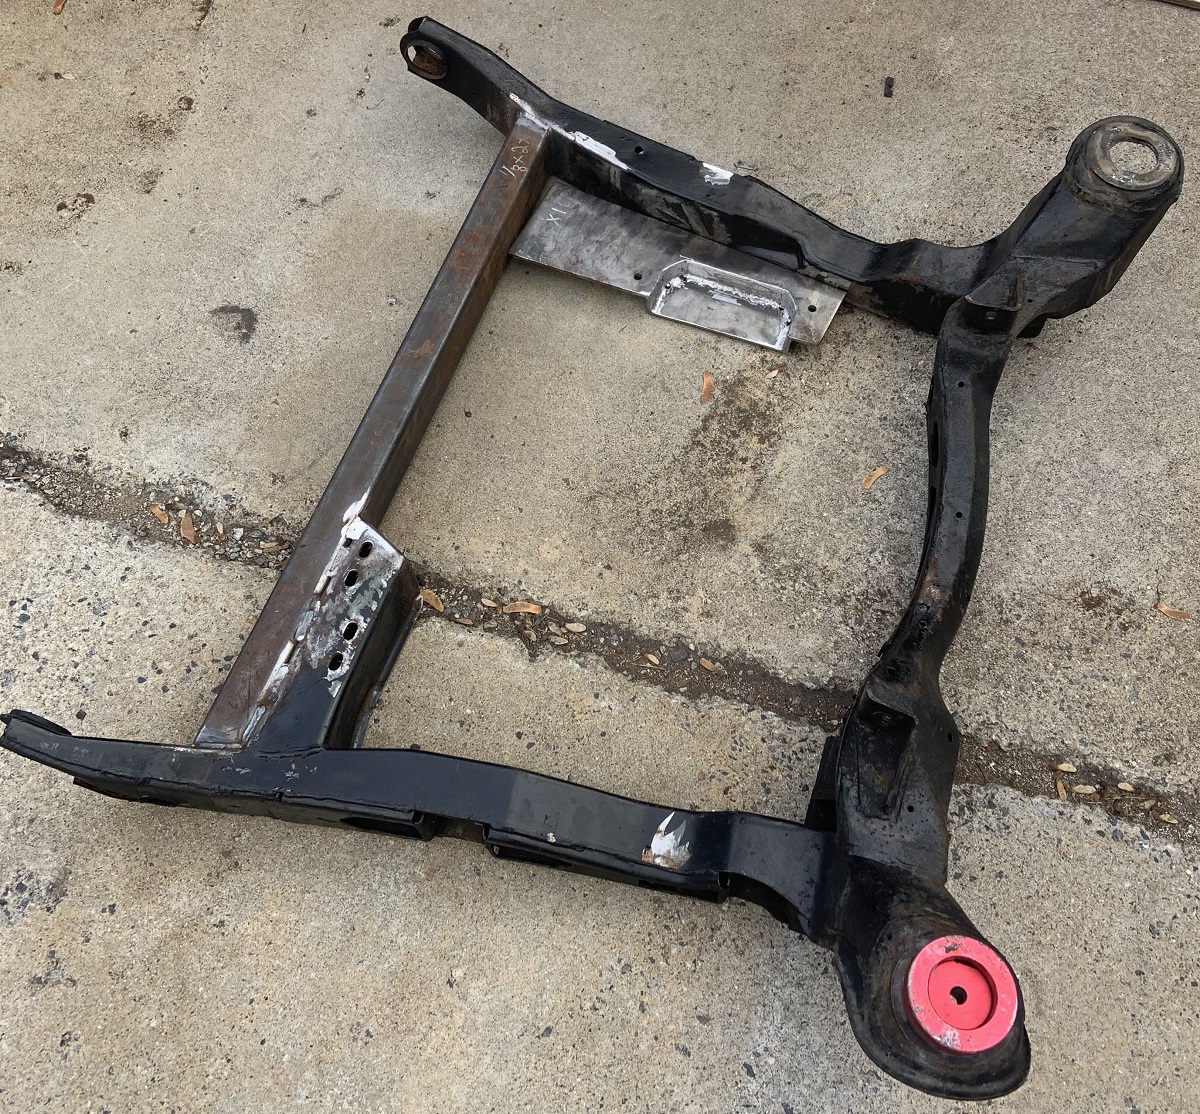
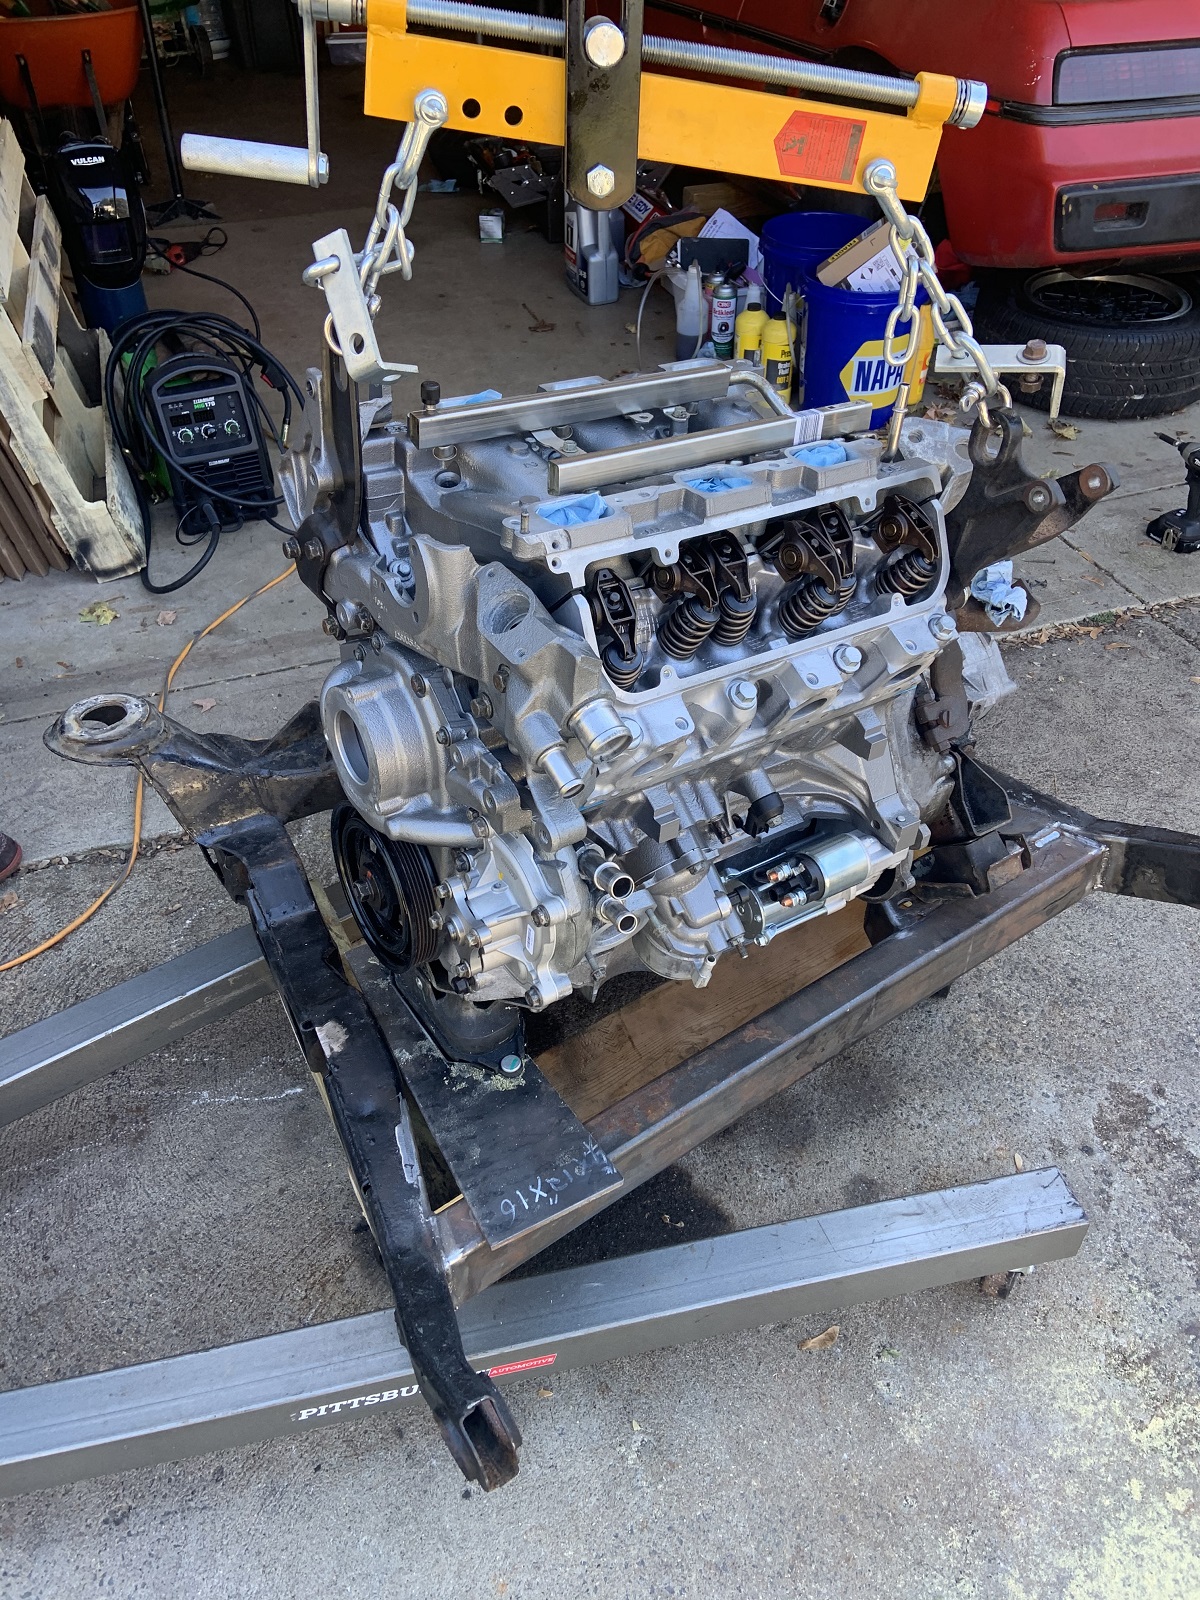
Test fit the cradle into the car, it fit perfectly. No issues of things not lining up.
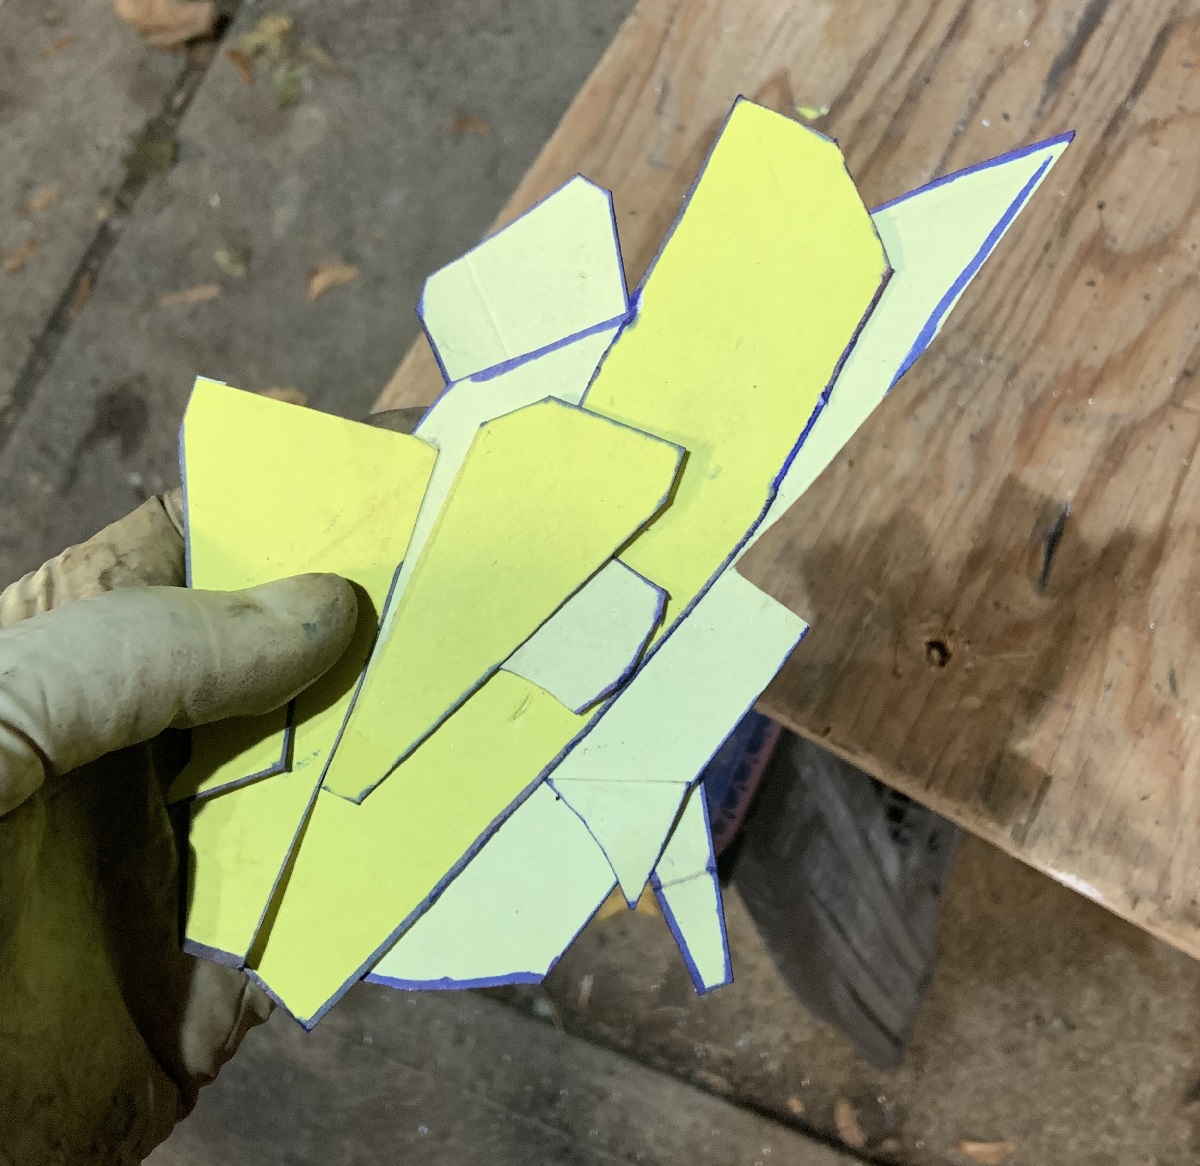
The assortment of card stock templates from throughout the day.
This was a good milestone as I can finally put the drivetrain into the car. Tomorrow I will prep and paint the cradle and try to get everything assembled into the car. I have a direct to metal epoxy primer and a satin black chassis paint that I want to paint it with. Before removing the cradle to prep it, I will pull the gas tank out to do the fuel pump and fuel lines. Might be a good time to give it a repainting as well.
|
|
|
|
ericjon262
|
NOV 09, 12:04 AM
|
|
|
Nice work, The cradle repairs and engine mounts look nice and solid. are any of the engine mount bolts going to be below the cradle? May want to add a collar around where the heads will be to help protect them from impace damage. ------------------
"I am not what you so glibly call to be a civilized man. I have broken with society for reasons which I alone am able to appreciate. I am therefore not subject to it's stupid laws, and I ask you to never allude to them in my presence again."
cognita semper
|
|
|
|