
 
     |
| 85 Notchie Build (Page 18/23) |

|
La fiera
|
AUG 10, 09:43 PM
|
|
|
Those collectors are too short. What'st the primaries diameter?
|
|
|
|
zkhennings
|
AUG 11, 11:32 AM
|
|
|
Collector is 5" long as depicted here, primaries are 1.75", collector output is 3". I have to sacrifice a little performance for packaging.
|
|
|
|
La fiera
|
AUG 11, 08:36 PM
|
|
| quote | Originally posted by zkhennings:
Collector is 5" long as depicted here, primaries are 1.75", collector output is 3". I have to sacrifice a little performance for packaging. |
|
Whoa Zack! They are pretty big and the collector being so short wont help either. But then again, space is your concern. Can't wait to hear it roar![This message has been edited by La fiera (edited 08-11-2021).]
|
|
|
|
zkhennings
|
AUG 12, 11:09 AM
|
|
I have been doing some research on collector length and it is all over the place. Engine Masters found longer collectors makes more power but they weren't running a full exhaust. It is also confusing what collector length refers to, is it the length of tube in transition? AKA where the pipes merge to where the exhaust opens back up to final size? That is what I have been measuring as collector length when I say 5". Does the Y pipe I will be implementing have no effect on this? I planned to do the Y pipe with 3" tubing and have it merge into a 3" exhaust, but I could have the headers exit into 2.5" tubing that I open up into 3" tubing within the Y pipe. Would this create a longer collector effect? I wanted to keep it simple with a full 3" setup, and the 1.75" primaries blend into 3" tubing nicely.
I still have time to tweak my exhaust design before producing it so any input is welcome.
|
|
|
|
ericjon262
|
AUG 13, 10:09 PM
|
|
|
I think the collector length should be fine. have you looked into anti reversion devices? they're basically small expansion volumes just after the collector, from the limited reading I have done, they appear to pick up power and torque across the board. ------------------
"I am not what you so glibly call to be a civilized man. I have broken with society for reasons which I alone am able to appreciate. I am therefore not subject to it's stupid laws, and I ask you to never allude to them in my presence again."
cognita semper
|
|
|
|
zkhennings
|
SEP 03, 02:26 PM
|
|
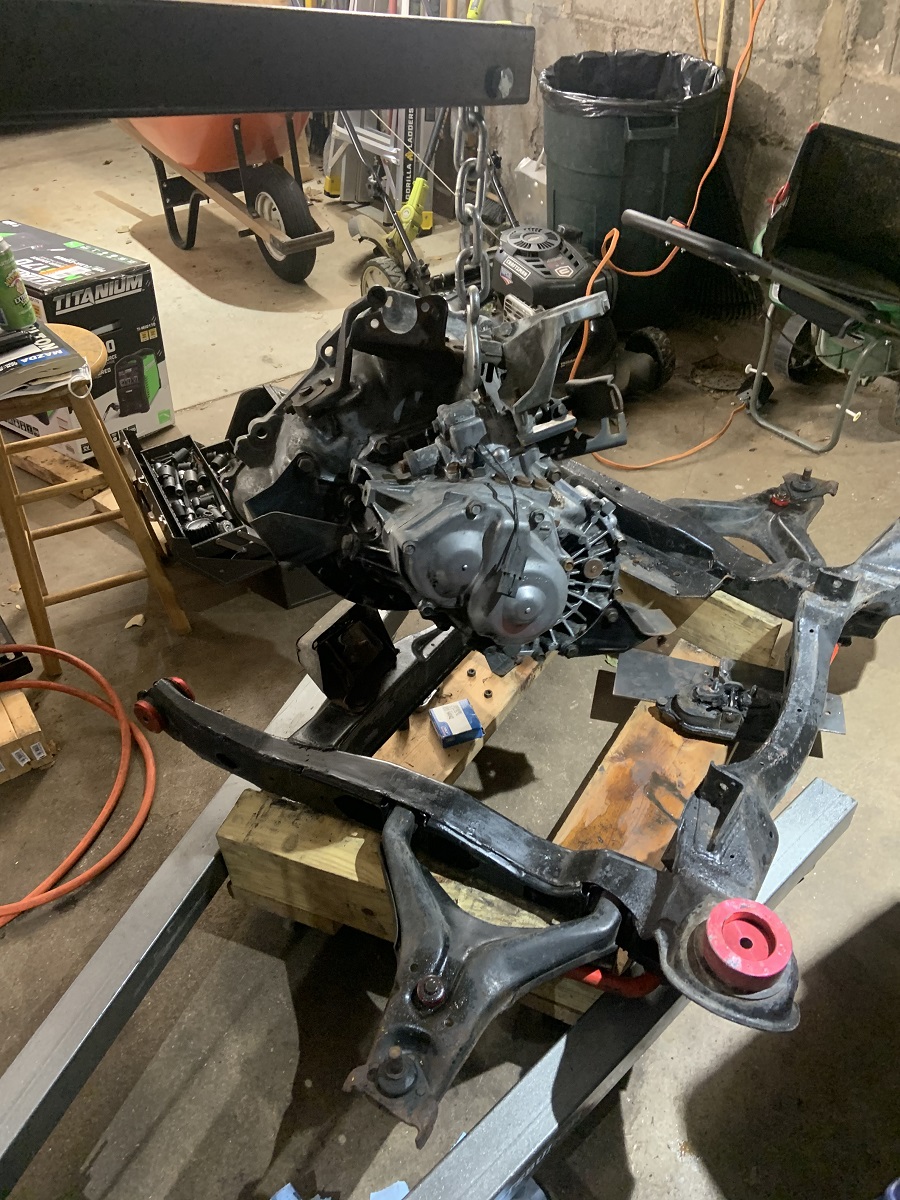
I had a long vacation scheduled for end of August and had a ton of work to finish up prior to leaving so I haven't had a ton of time to work on the Fiero, but here is what I had managed to get done.
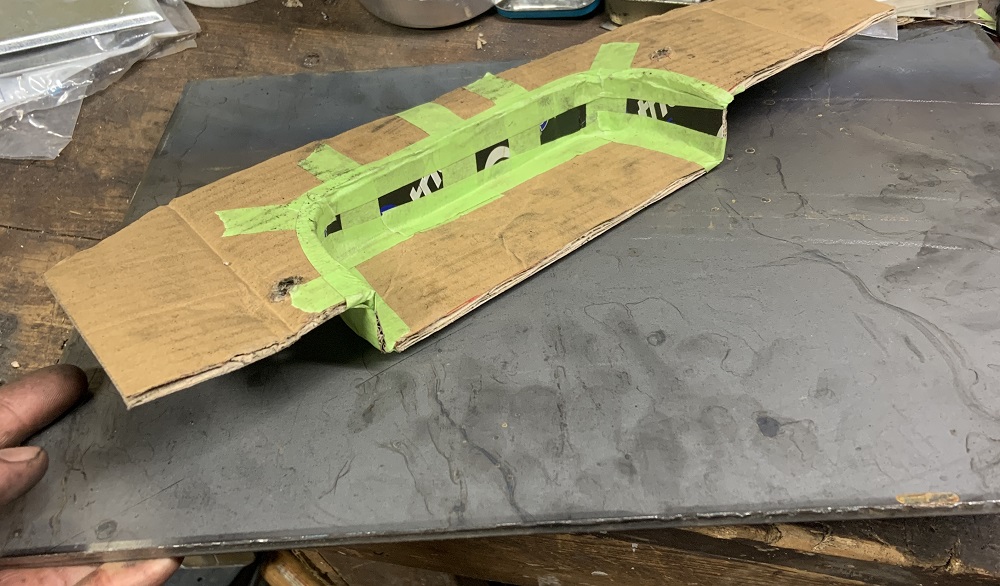
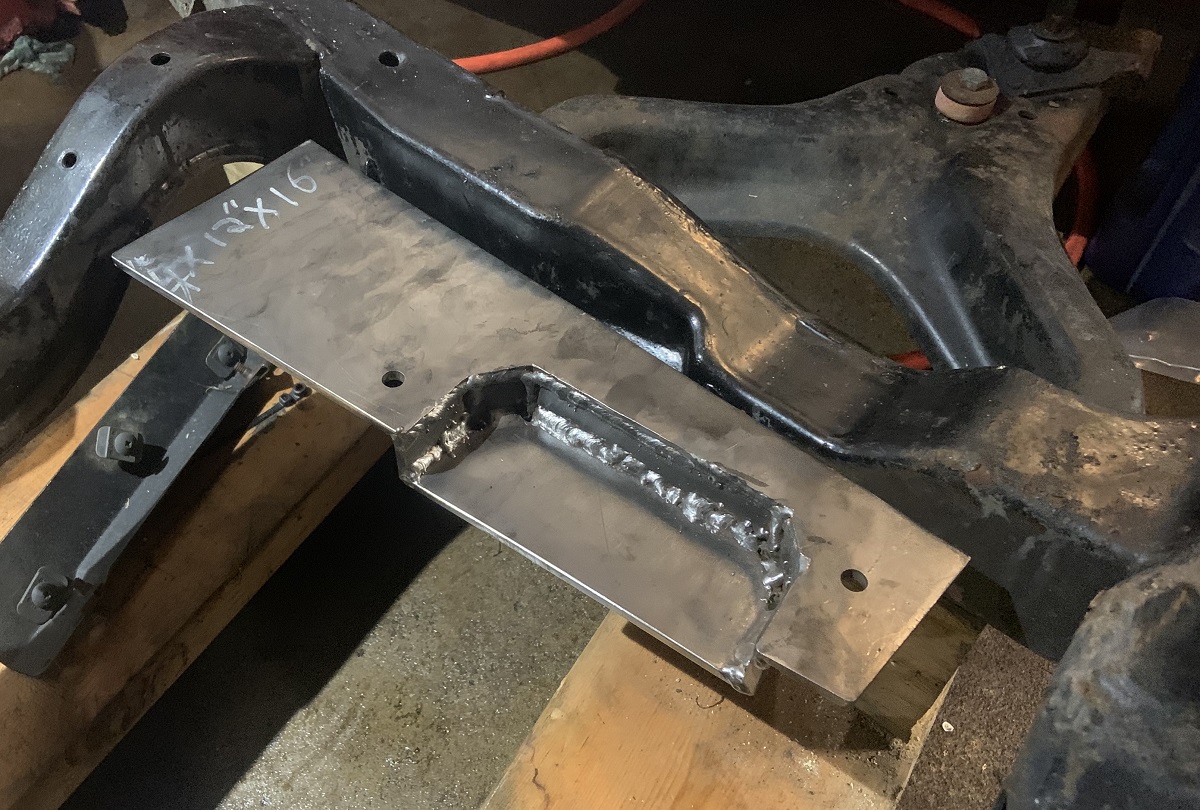
I started with some good old "CAD" creating a mount with cardboard that lines up with the cradle properly.
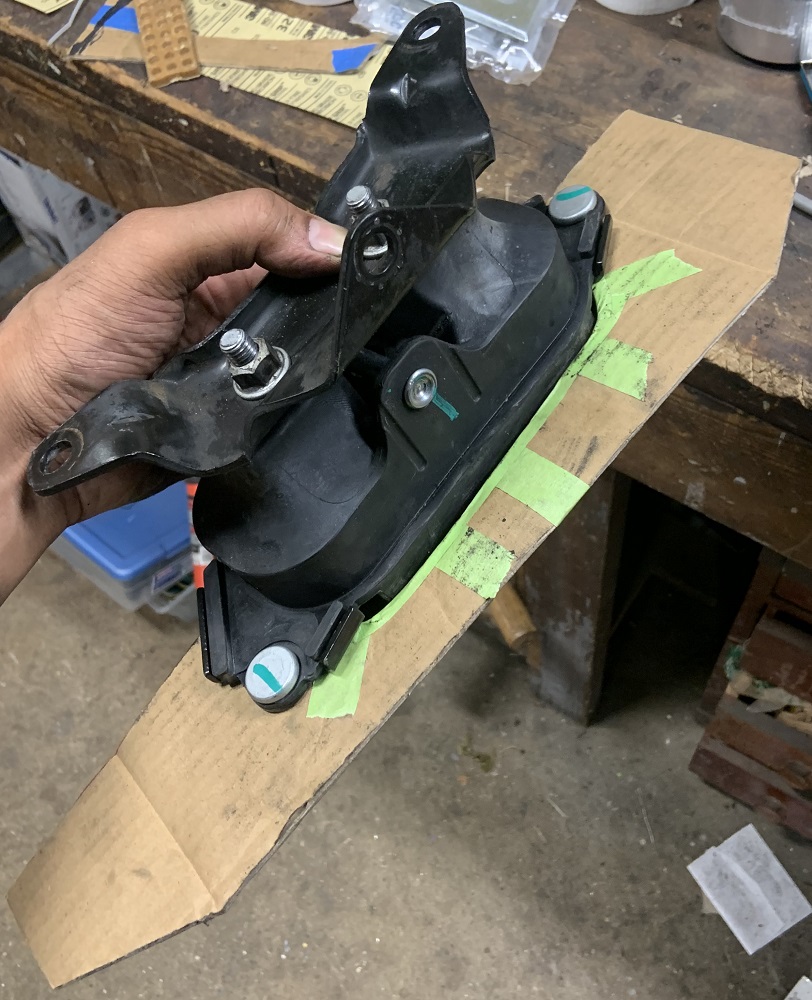
Here it is semi in place while attached to motor.
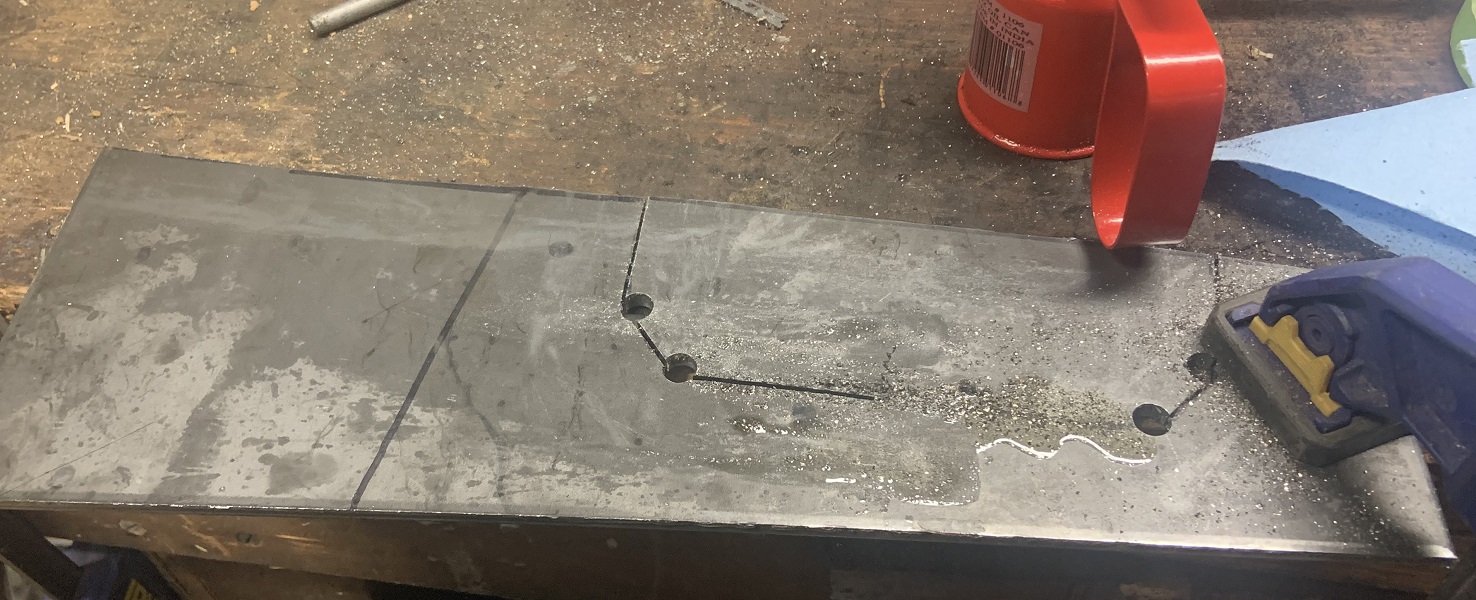
Got a 1/4" thick piece of mild steel plate to make this with, probably a little overkill but I don't intend to keep the stock cradle forever.
Started to cut out the metal, I tried using a jigsaw with metal cutting blades, but an angle grinder is much faster.
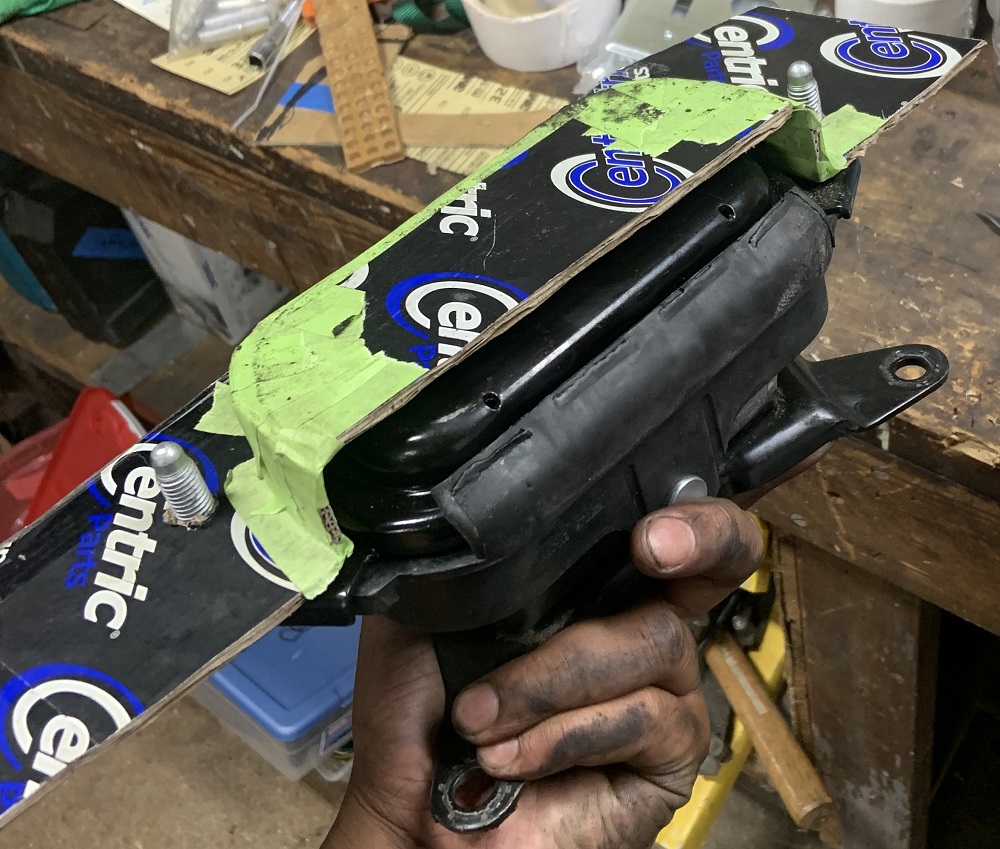
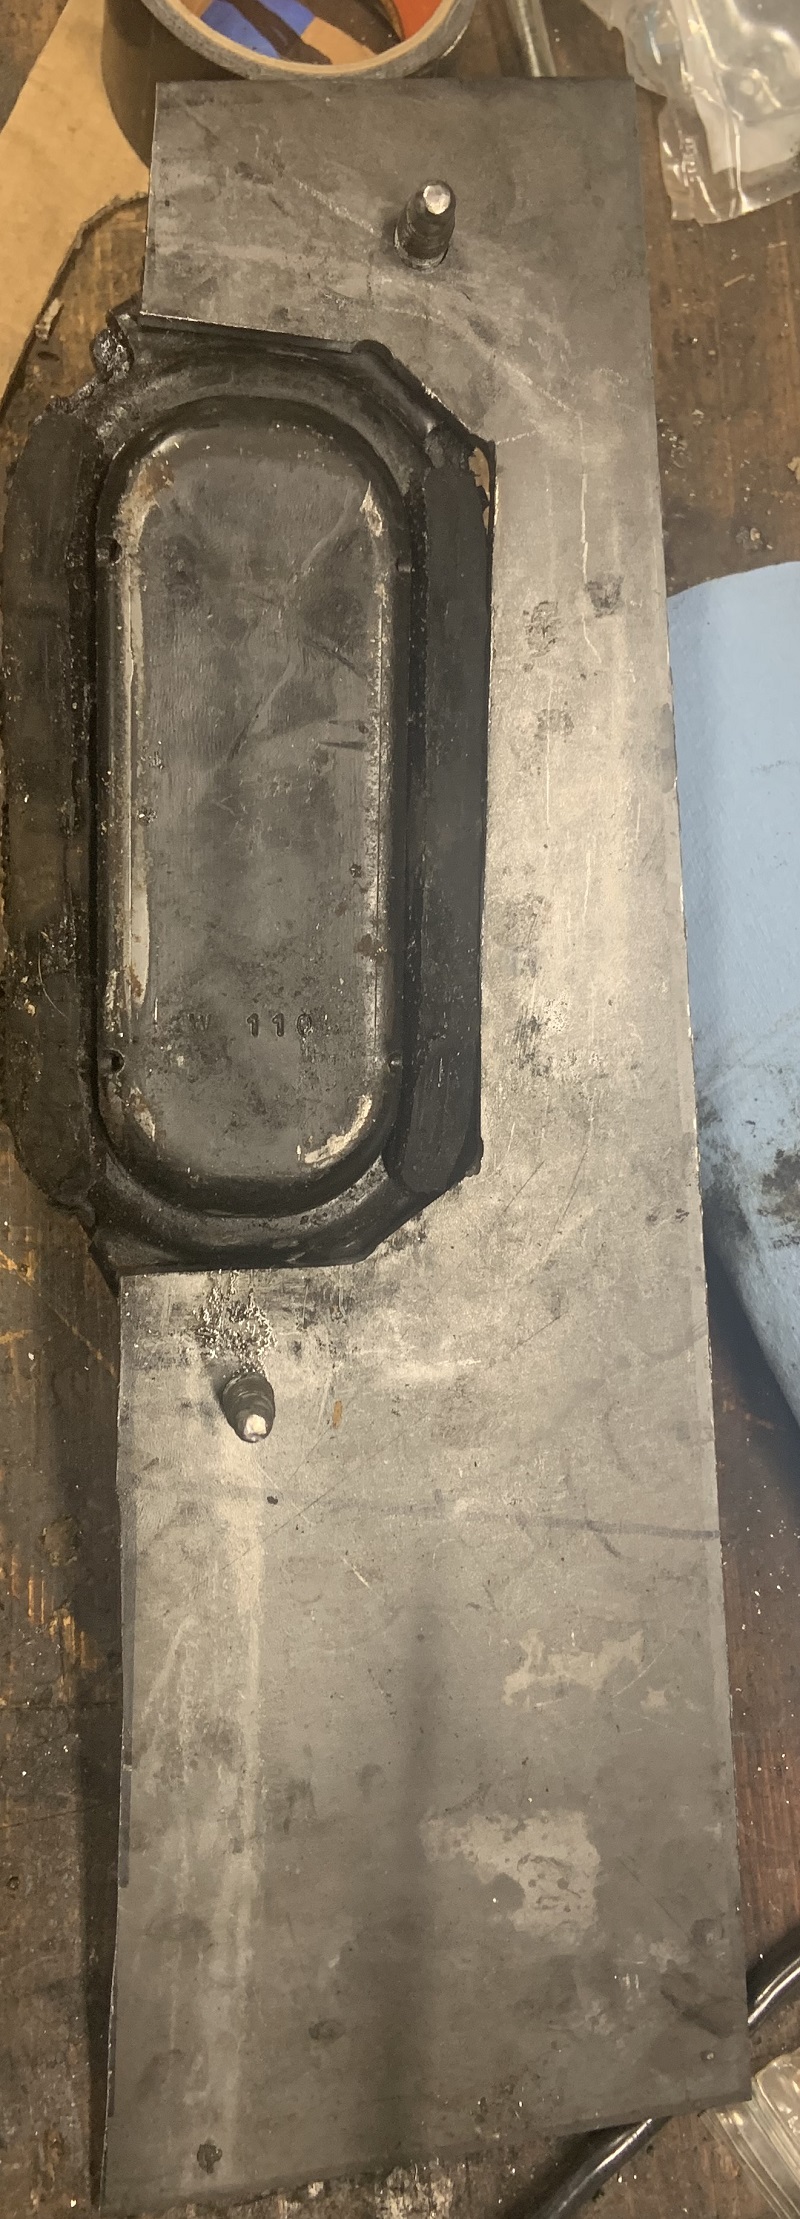
Test fitting the cut and drilled holes to the rubber mount.
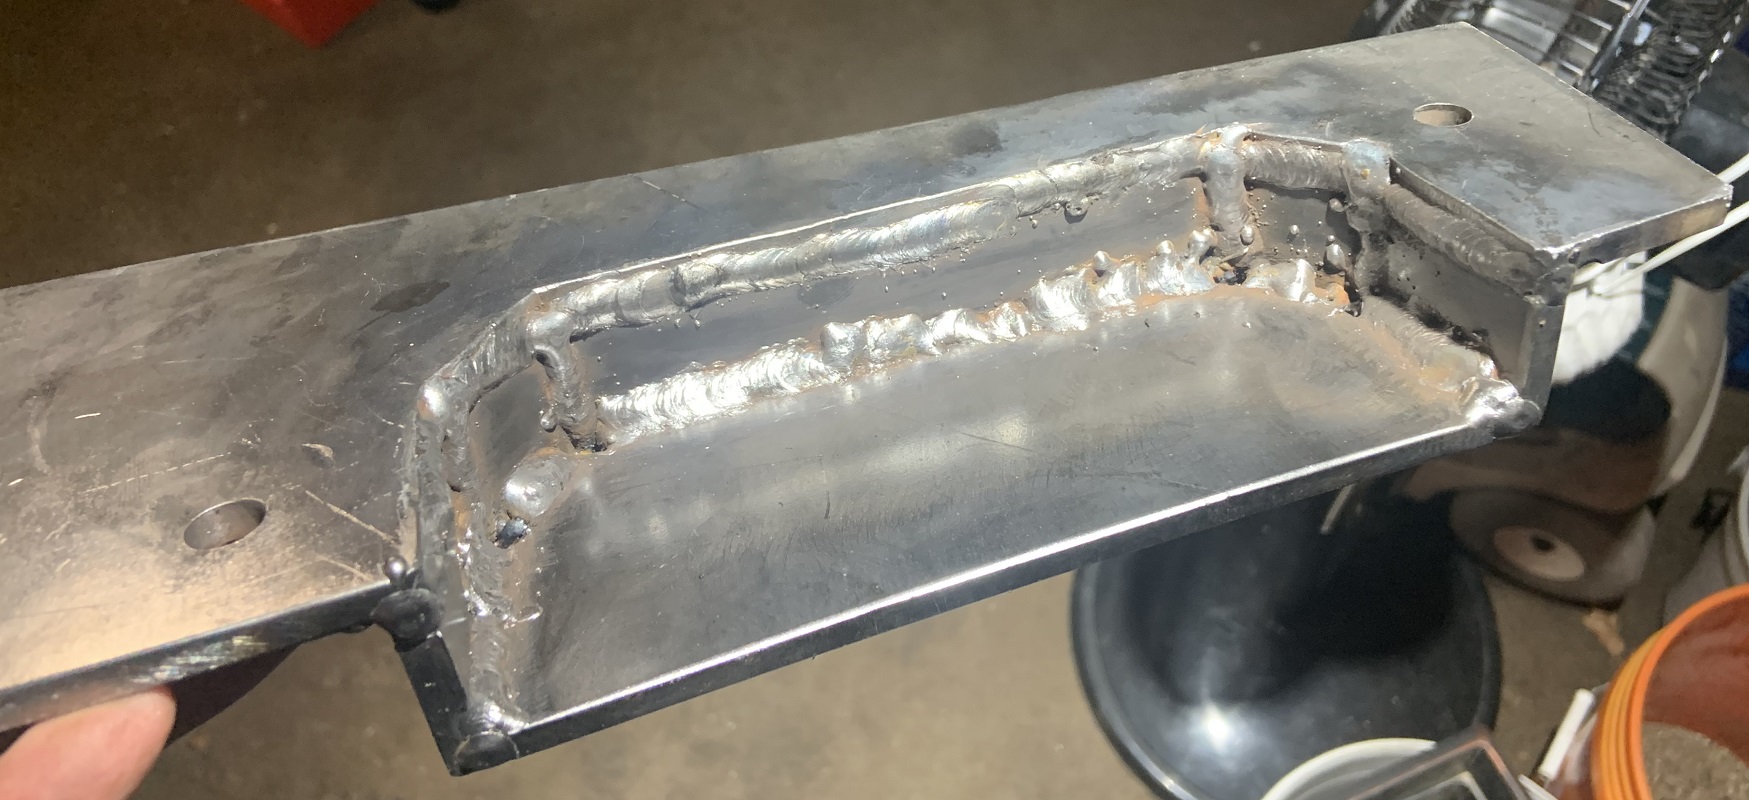
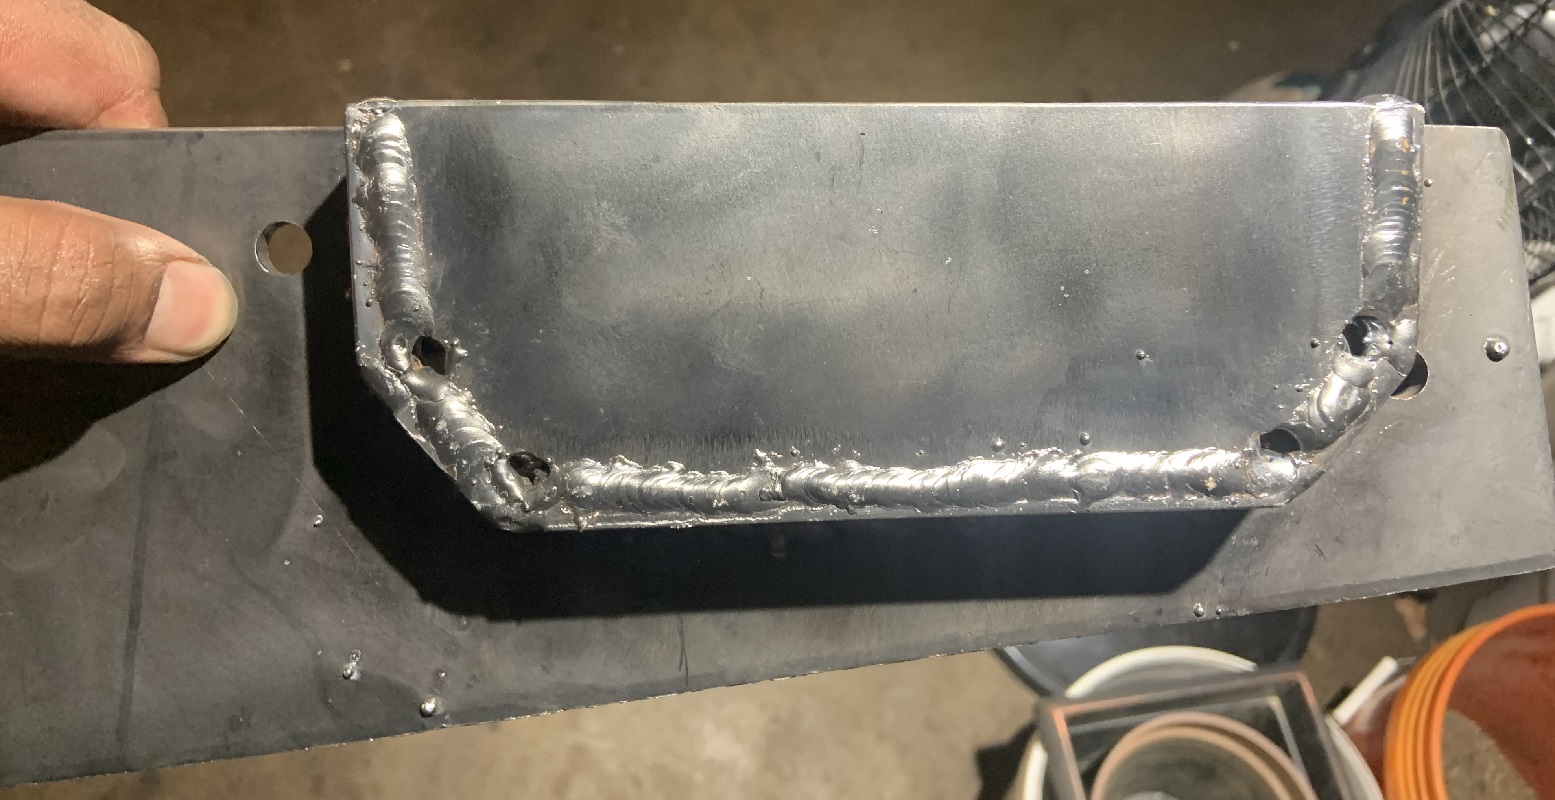
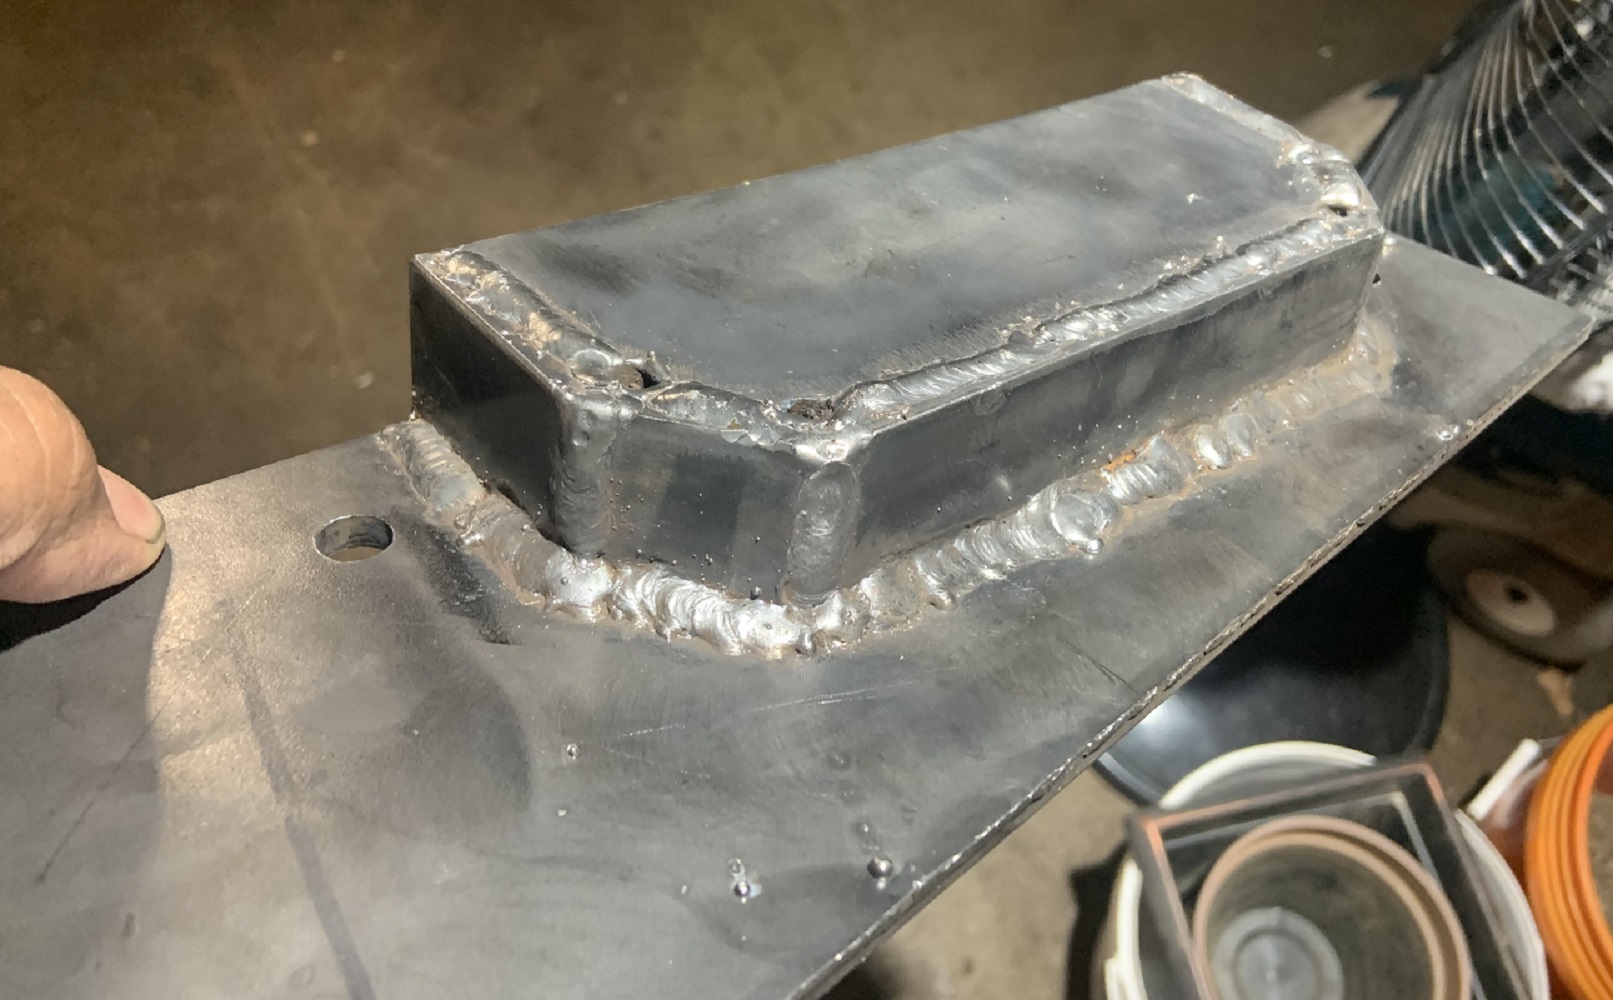
Cut and prepped all the metal pieces for welding.
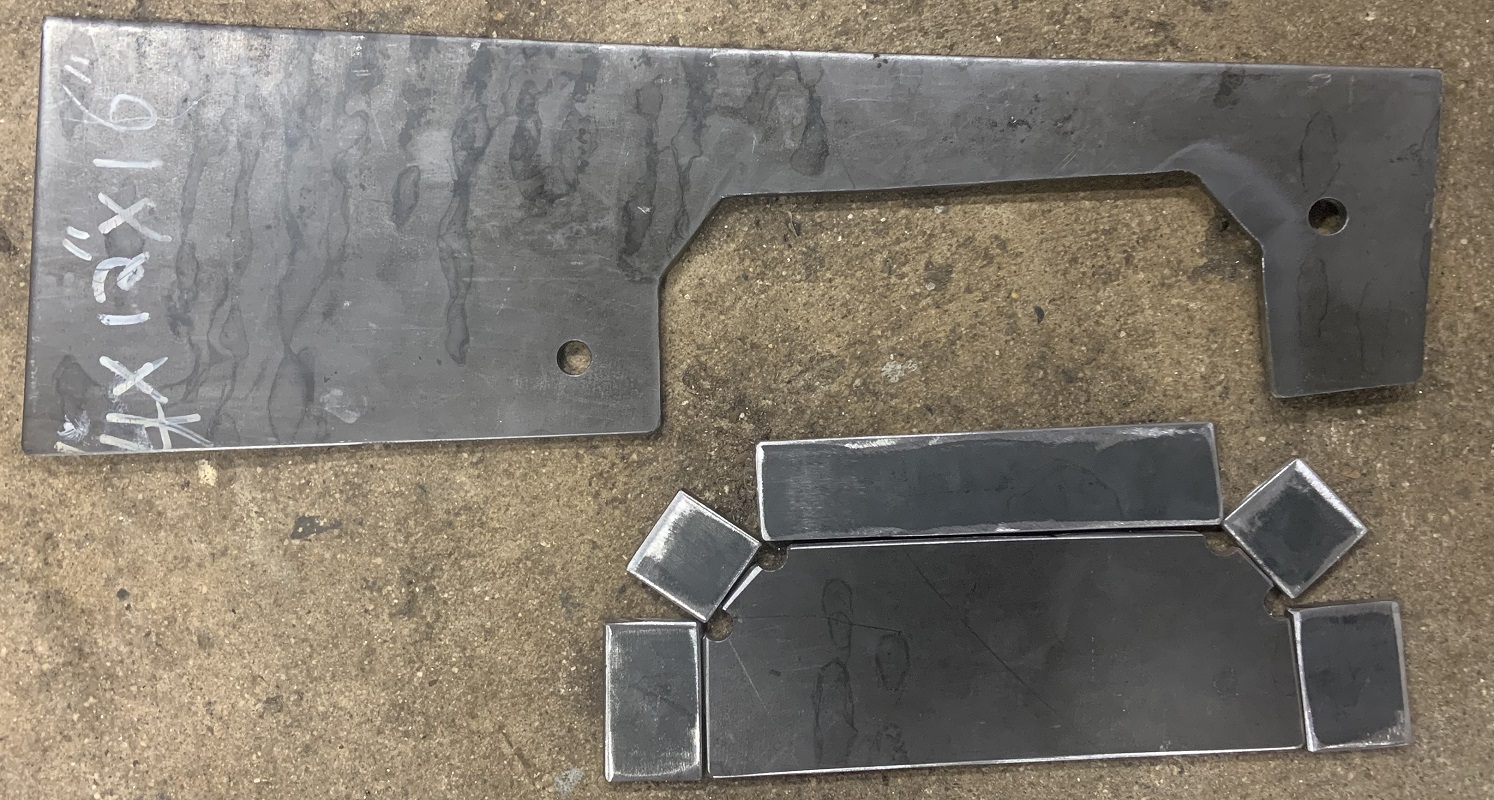
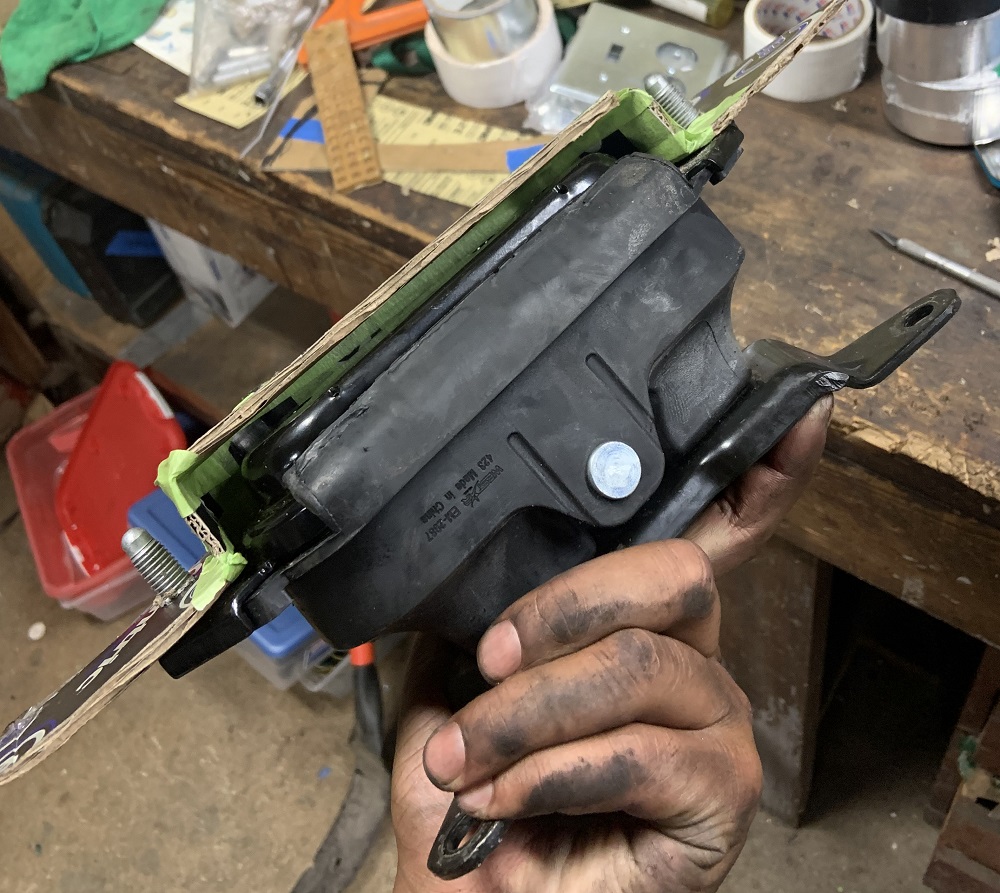
Started tacking it together.

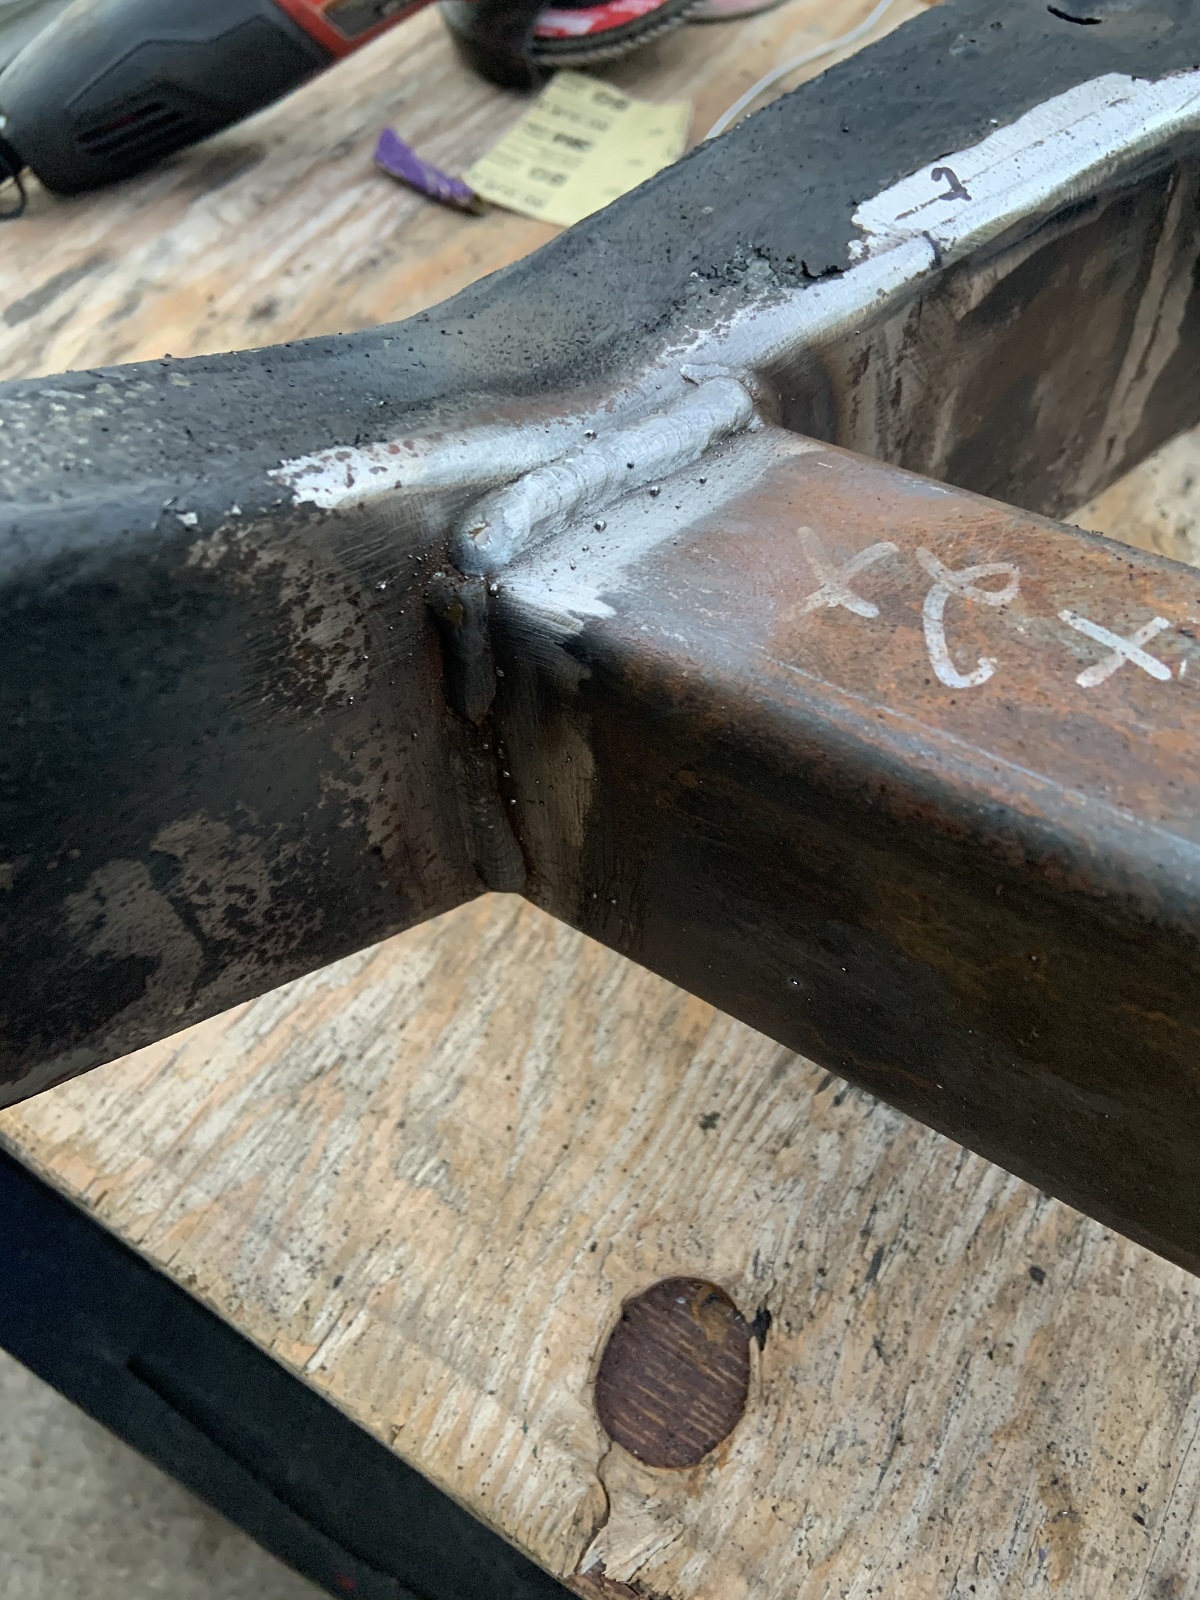
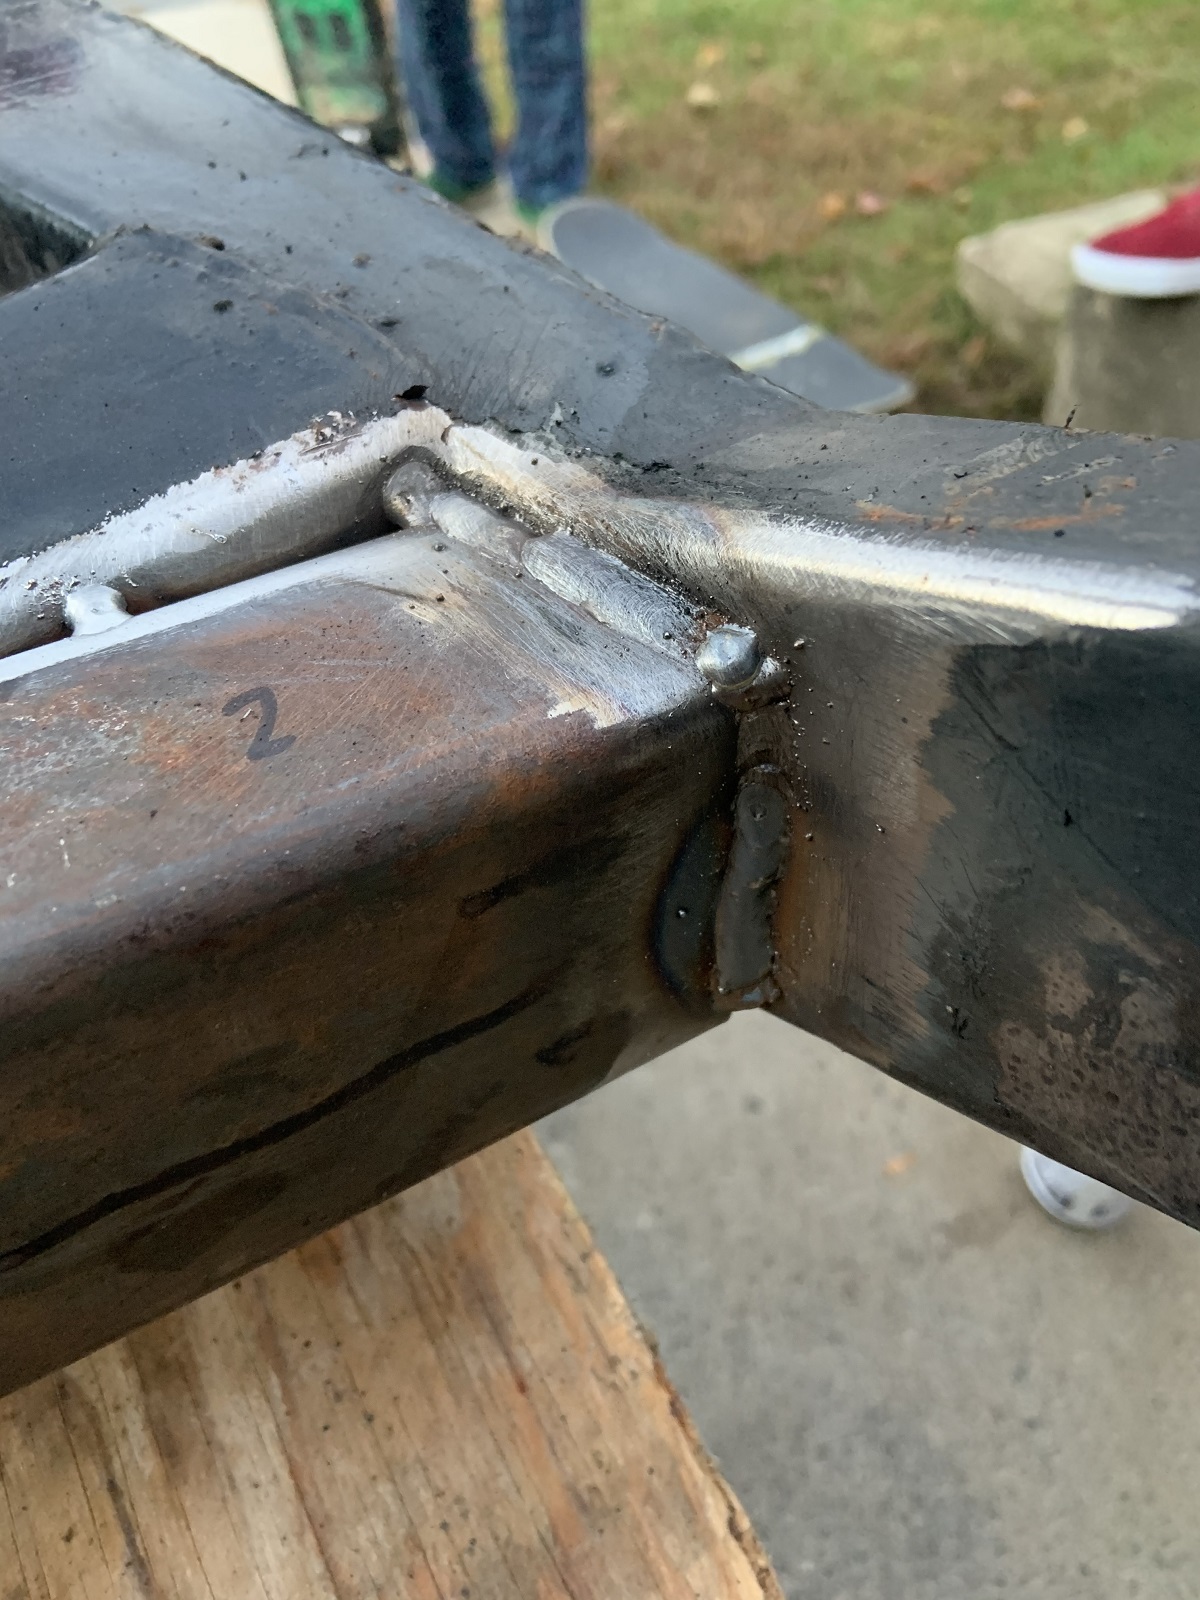
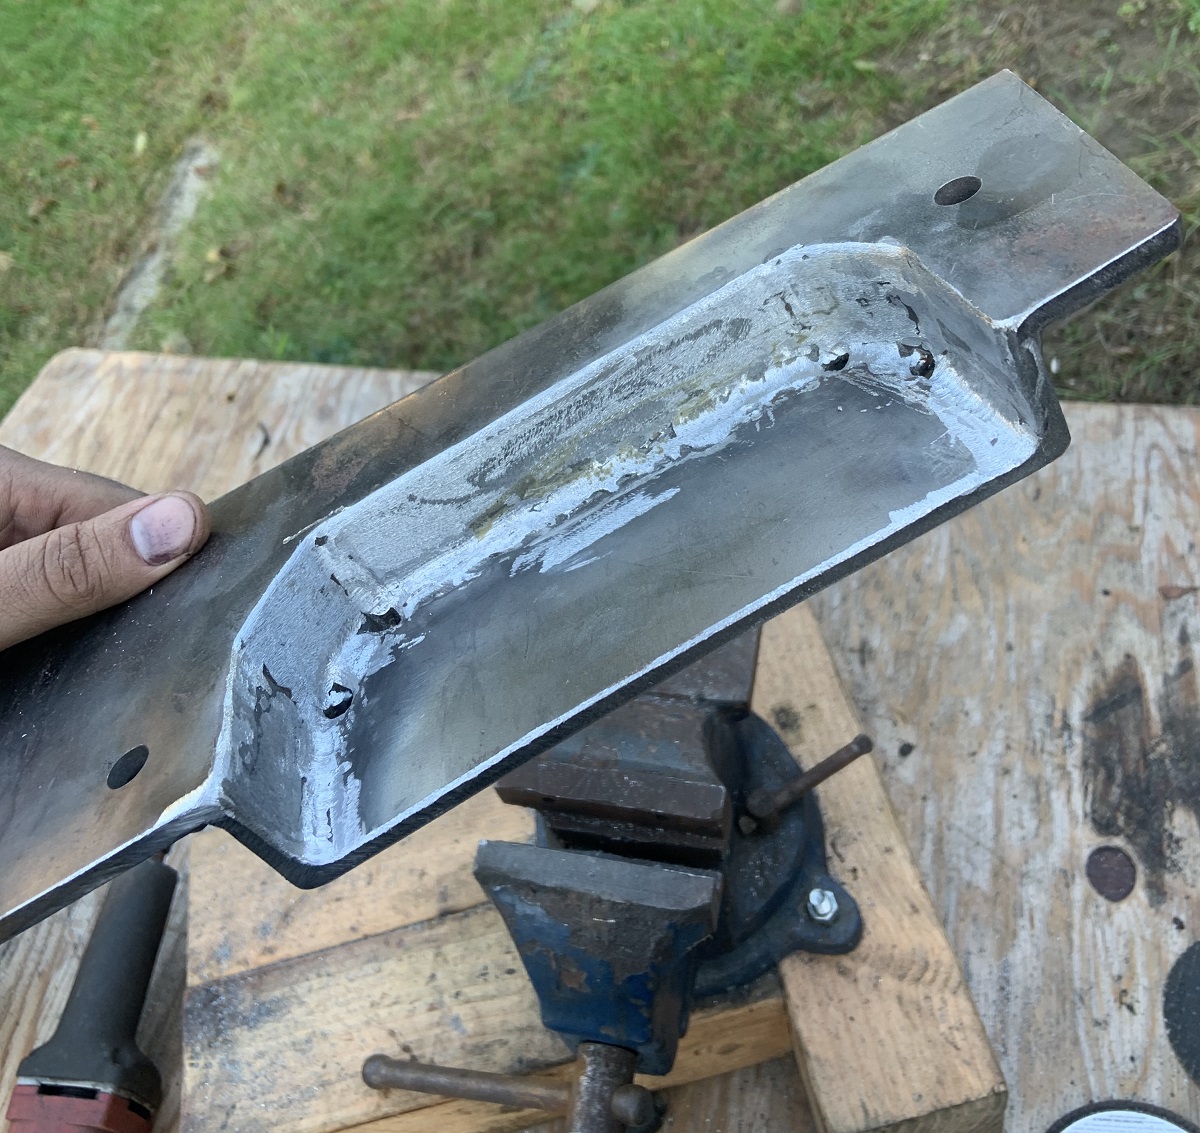
And then I welded it with my mig. My mig could not handle the thickness of the metal very well, I was welding at full power and got a wicked sunburn. I made the mistake of not chamfering the pieces enough, but it will work. However I am going to pick up a new welder in the very new future, as I got to do a bunch of welding on the bus too pretty soon. The 90* inside welds were the worst, the welder needed a lot of time to penetrate properly, I had the wire feed speed set as low as possible.
So yea, it came out kinda ugly, but I will grind them all down.
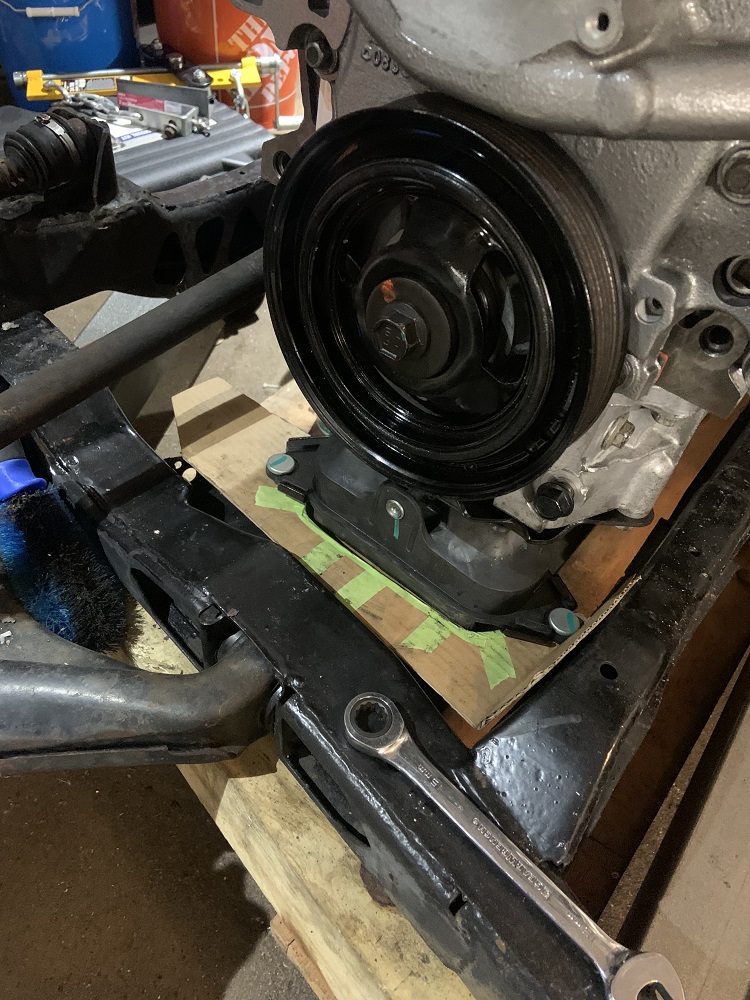
In place kinda, the crossmember needs to be removed, I left it long for the mount to weld up to the new crossmember I will be welding in. I got a piece of 3x2" 11 gauge steel tubing for the new crossmember. I got some scrap metal from the bus to weld to the cradle to keep its shape when I cut the crossmember out to weld in the new one.
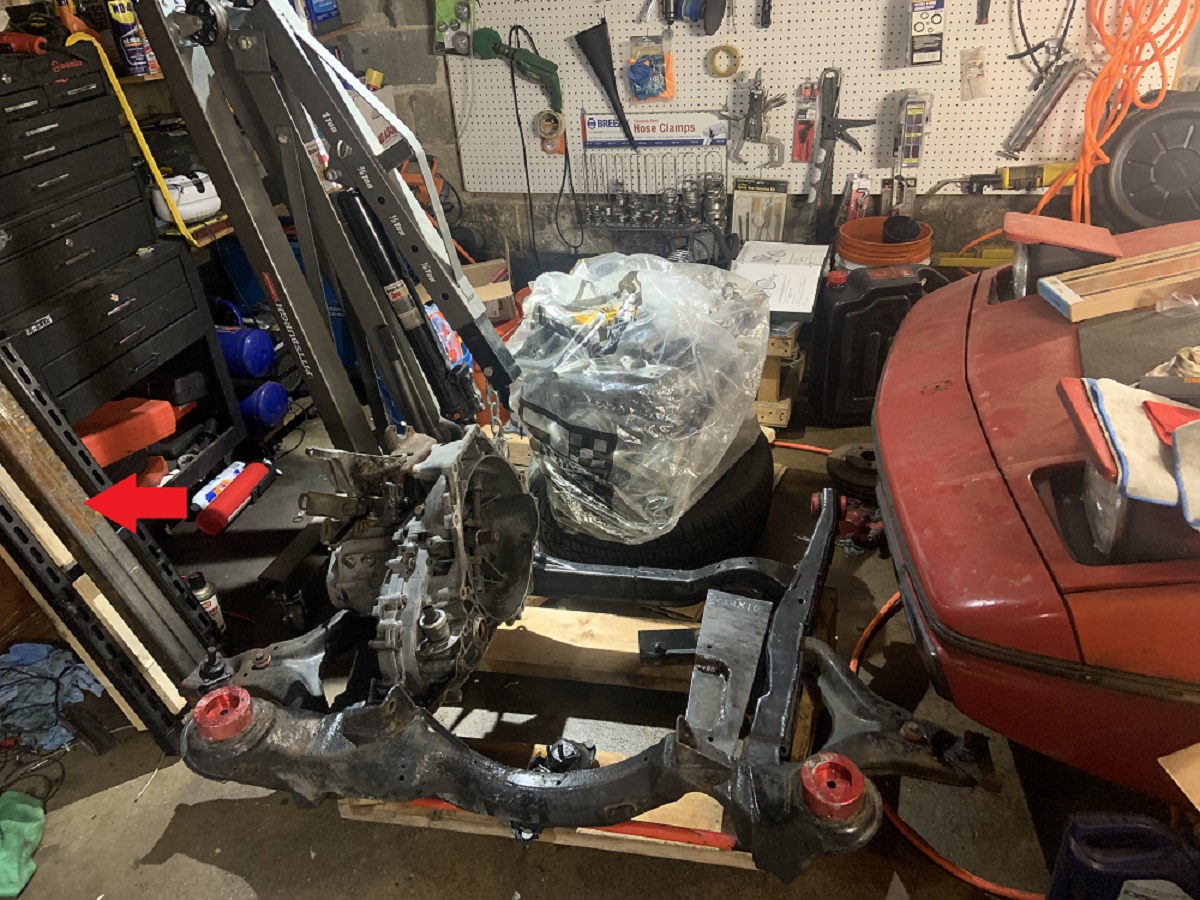
Still gotta pull the trans off but the cradle has been stripped down and ready to start cutting and welding. Arrow pointing at the new crossmember to be.
I have to go fill my argon tank and get a new welder and I will be back at it this weekend.
|
|
|
|
ericjon262
|
SEP 03, 06:53 PM
|
|
|
I saw a TIG torch in one of your pictures, why didn't you just use that? Honestly, I've taking a liking to TIG, I'm not great at it, but I enjoy the enormous amount of control it offers. ------------------
"I am not what you so glibly call to be a civilized man. I have broken with society for reasons which I alone am able to appreciate. I am therefore not subject to it's stupid laws, and I ask you to never allude to them in my presence again."
cognita semper
|
|
|
|
ignorant prodigy
|
SEP 24, 08:15 AM
|
|
|
|
|
zkhennings
|
OCT 08, 10:37 AM
|
|
Eric I needed a new MIG anyways, the wire feed setup on mine is faulty, its old and large and not very adjustable. And I have a need for a welder that can weld on 110V to be able to do the frame repair on the bus at my apartment.
I do want to practice more with the TIG but I am much more comfortable welding structural stuff with a MIG, I have a few heavier duty projects I can practice the TIG on.
In terms of update I have had a ton of work, tried to get ahead of a bunch of it at the end of August before going on vacation, went on a ten day vacation, came back and got the Rona, quarantined, had a ton of work to catch up on after that, then had a friend's wedding where I was best man and also the officiant. WRX needed some TLC, my friend's E39 540i destroyed the timing guides and I helped him do his timing chain, and I have been getting going on the bus because I really want to use it this winter. I turned 30 (ugh) and took Bday money and bought a new welder and I have finally gotten back to working on Fiero. My crazy work push is almost coming to an end and I will use some PTO to take a bunch of days off to chug through Fiero work. Also my knee is significantly better which has been really nice.
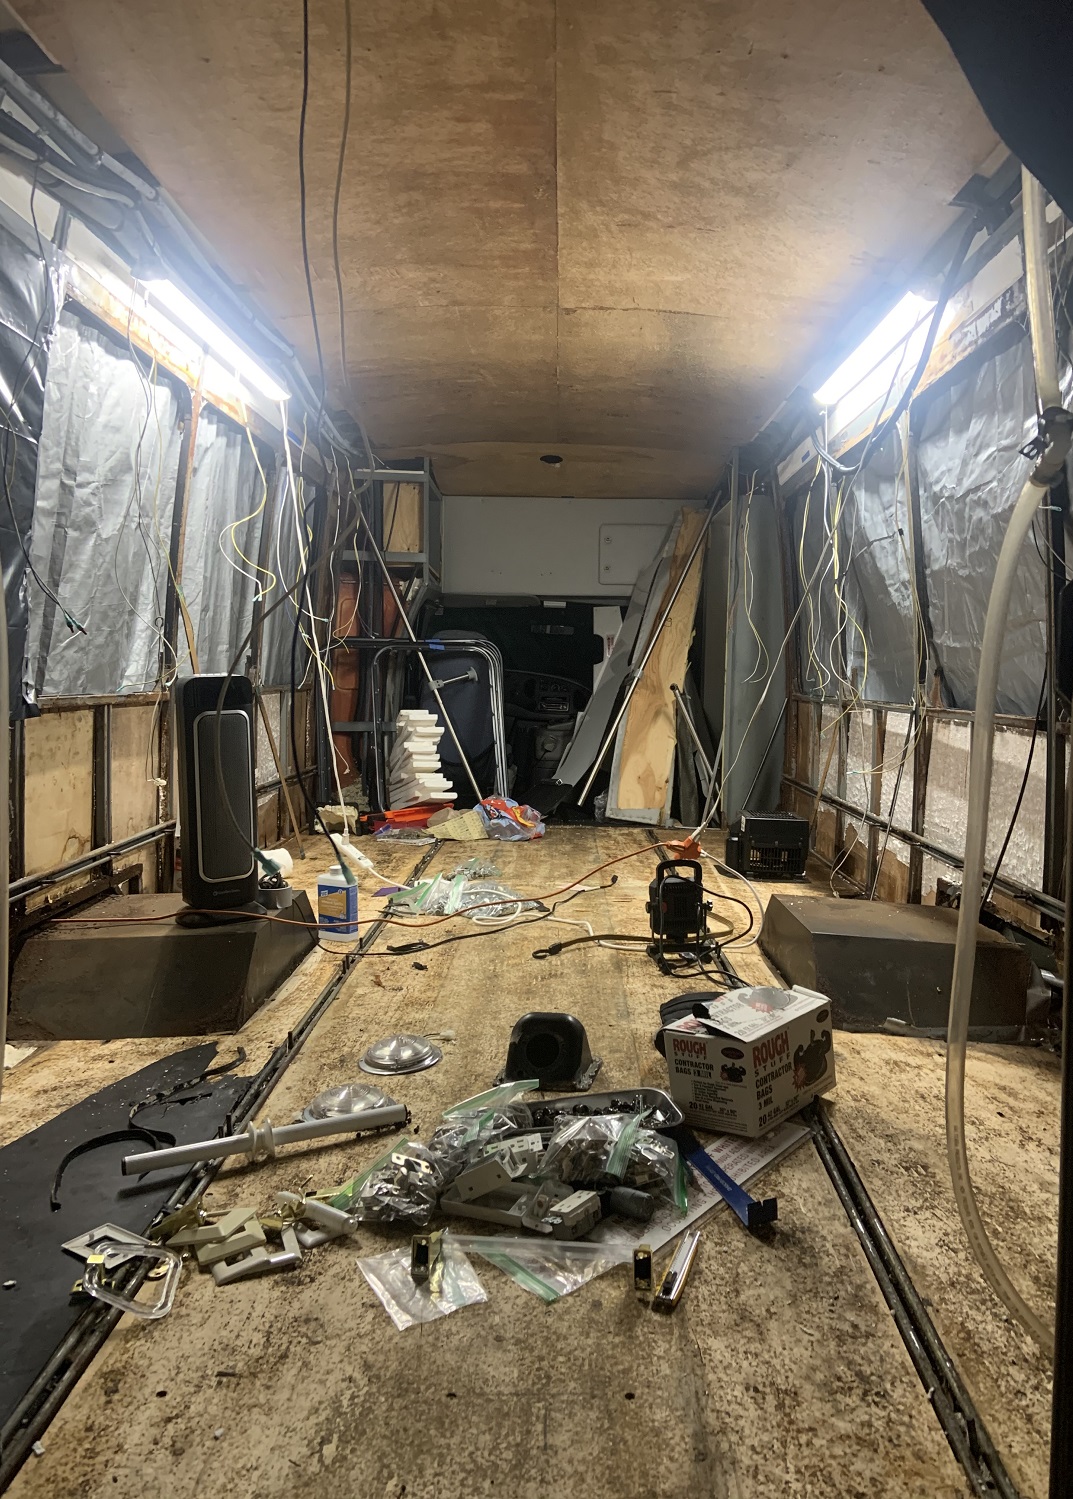
I removed all the trim from the bus and pulled off the fenders and lower skirts to access the frame easier. I removed all the windows and separated all the outer fiberglass panels from the metal skeleton. I need to pull the rear cap off of the bus to fully remove the fiberglass sides, and remove the wood flooring and I will be able to do a thorough frame repair. I also discovered that the seat frames that came out of the bus are close to the perfect height to support the sides of the bus when I remove all the floor cross braces. I am also considering getting a wet sandblasting kit to use with my pressure washer to de-rust the frame.
Windows removed.
Friend's E39 540i, the amount of work required to do the timing chain is insane. But a very well engineered machine.
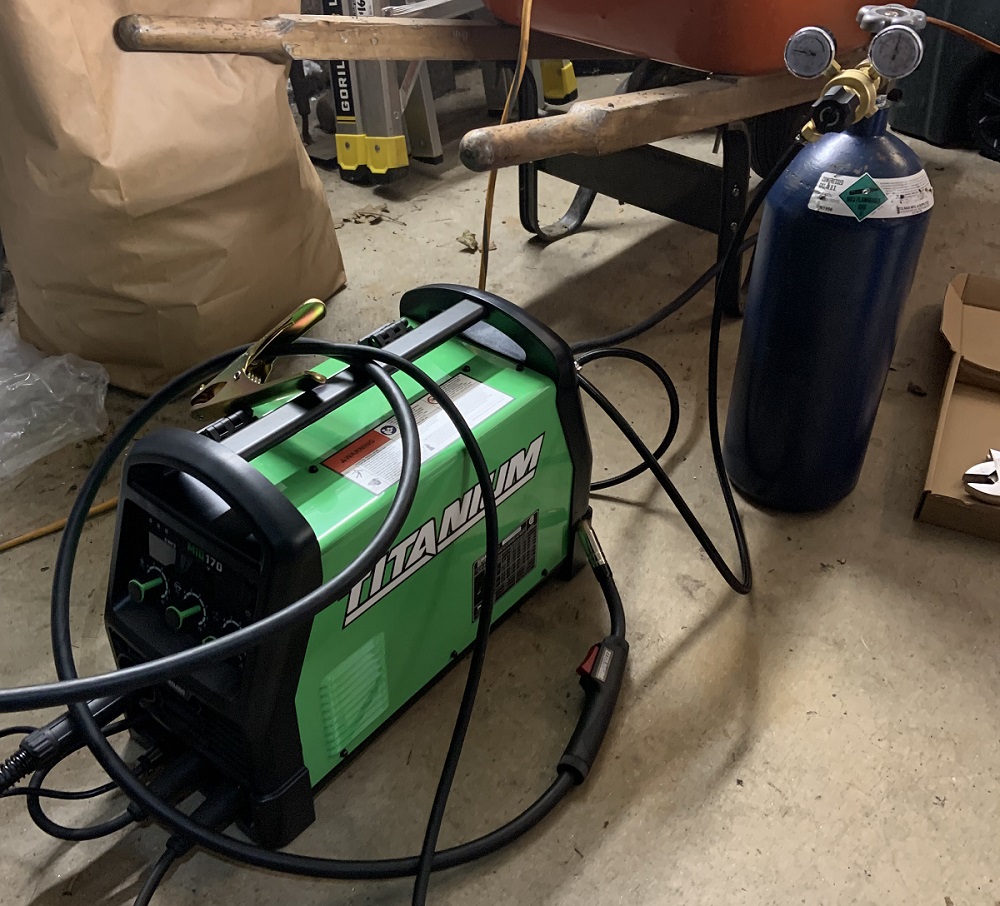
I bought a Harbor Freight Titanium 170, I did a lot of research before buying, I wanted to get a used Miller but there were very few available. This welder is sweet though, it can use a spool gun attachment to do Aluminum too. It is an inverter based welder so it sounds funny when it welds, but it seems to weld really well. It runs off 110V or 220V which was big for me, it can weld well over 1/4" steel on 220V and it comfortably welds 1/8" steel on 110V, and the bus is primarily 1/8" or thinner so it should be perfect. The knobs are infinitely adjustable which is nice, it has a delay on the feed speed so you have time to form a puddle before the feed goes to full speed, it has post flow, and it has some inductance setting I think? The feed mechanism is really nice, everything is tool-less, and the quality of everything seems really high with the exception of the gas hose which feels super cheap. It cost just under $600, and it only weighs 25lbs! It is incredibly tiny and portable and I might start pulling in some additional income doing small welding jobs for people. So far so good!
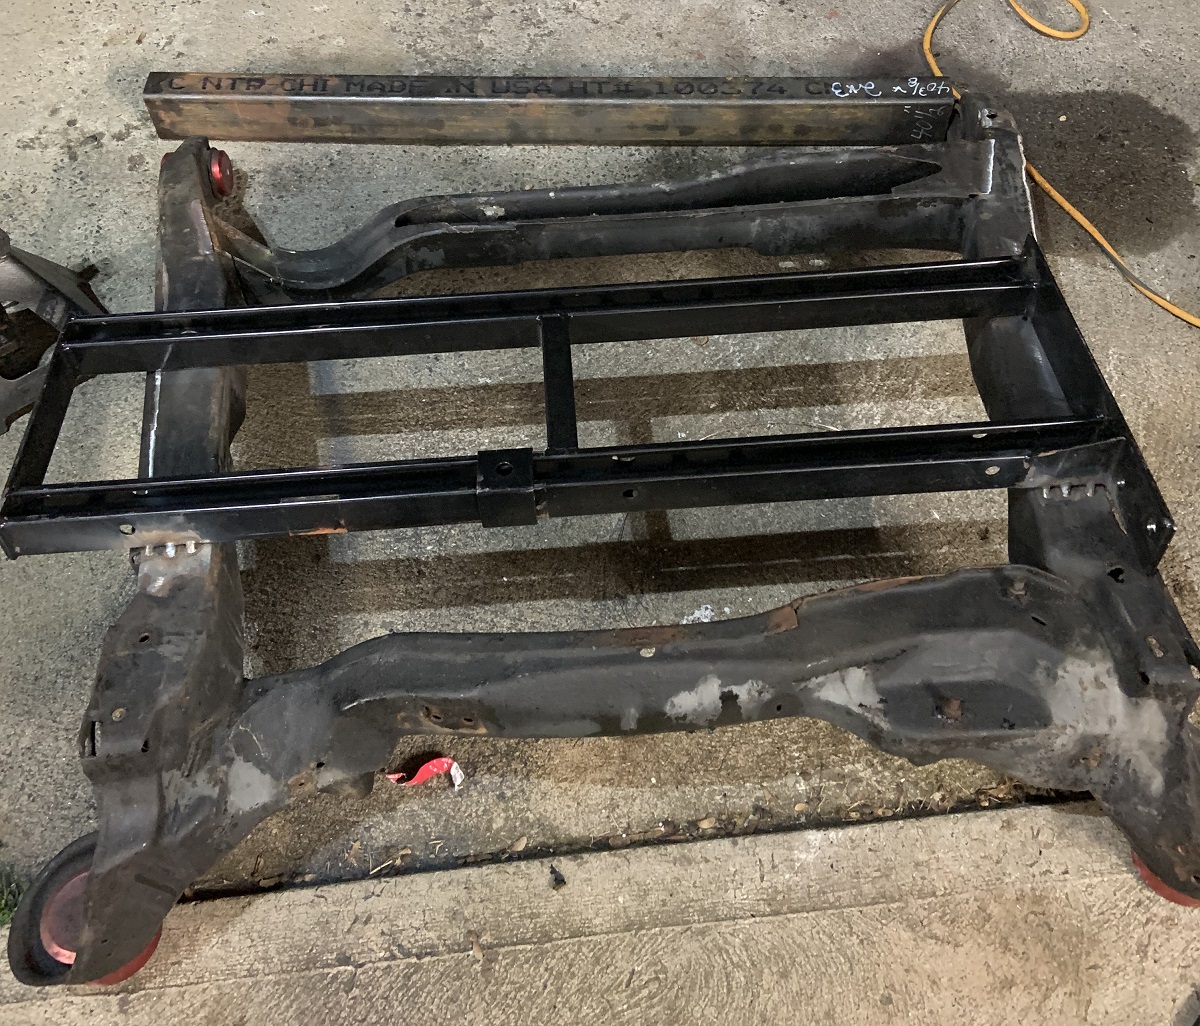
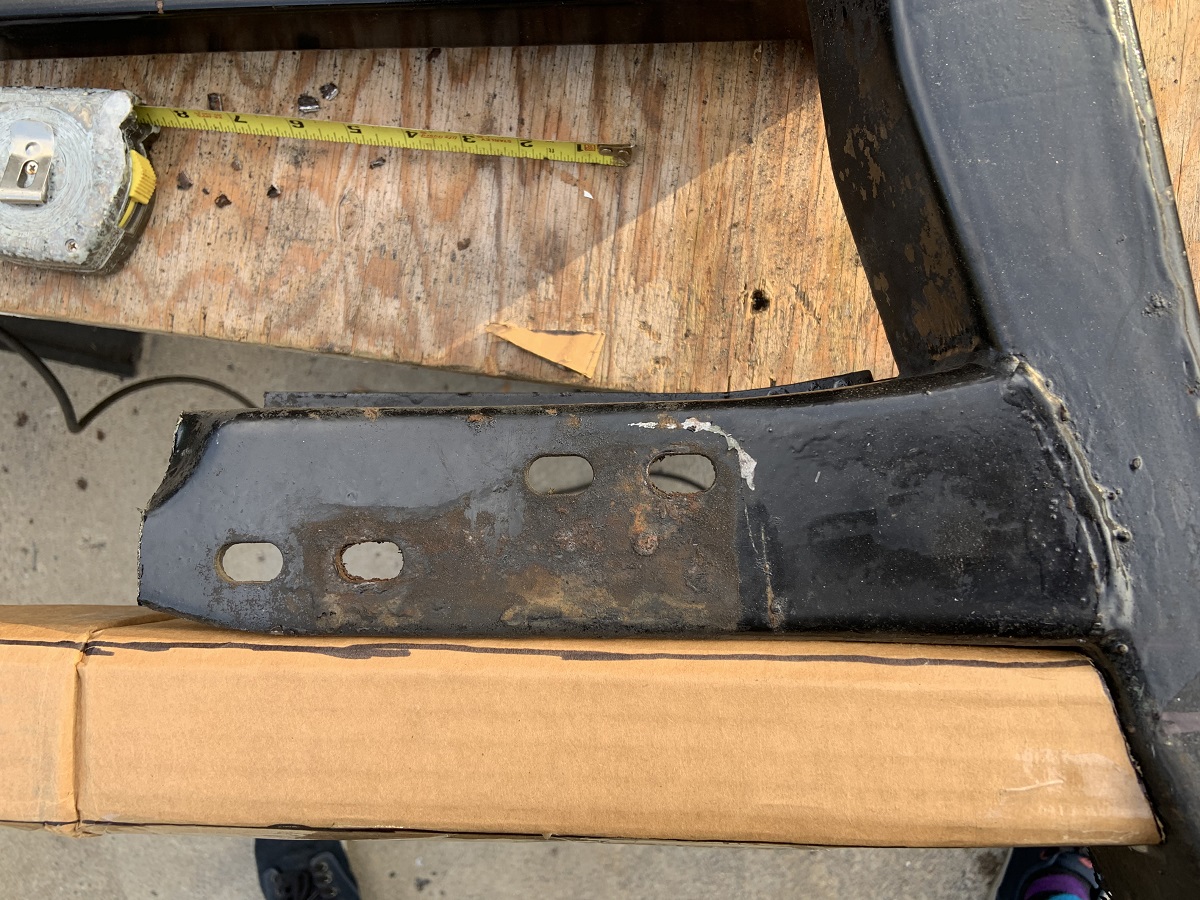
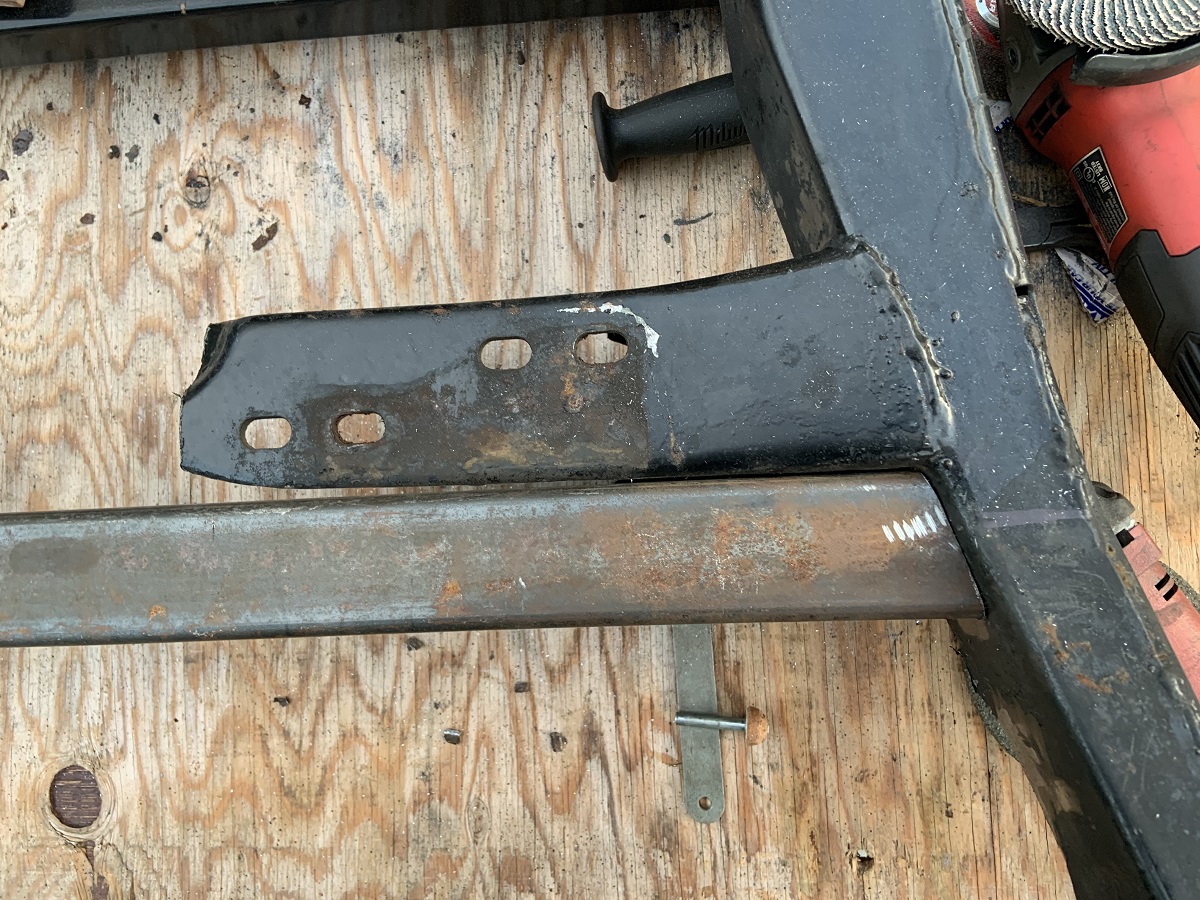
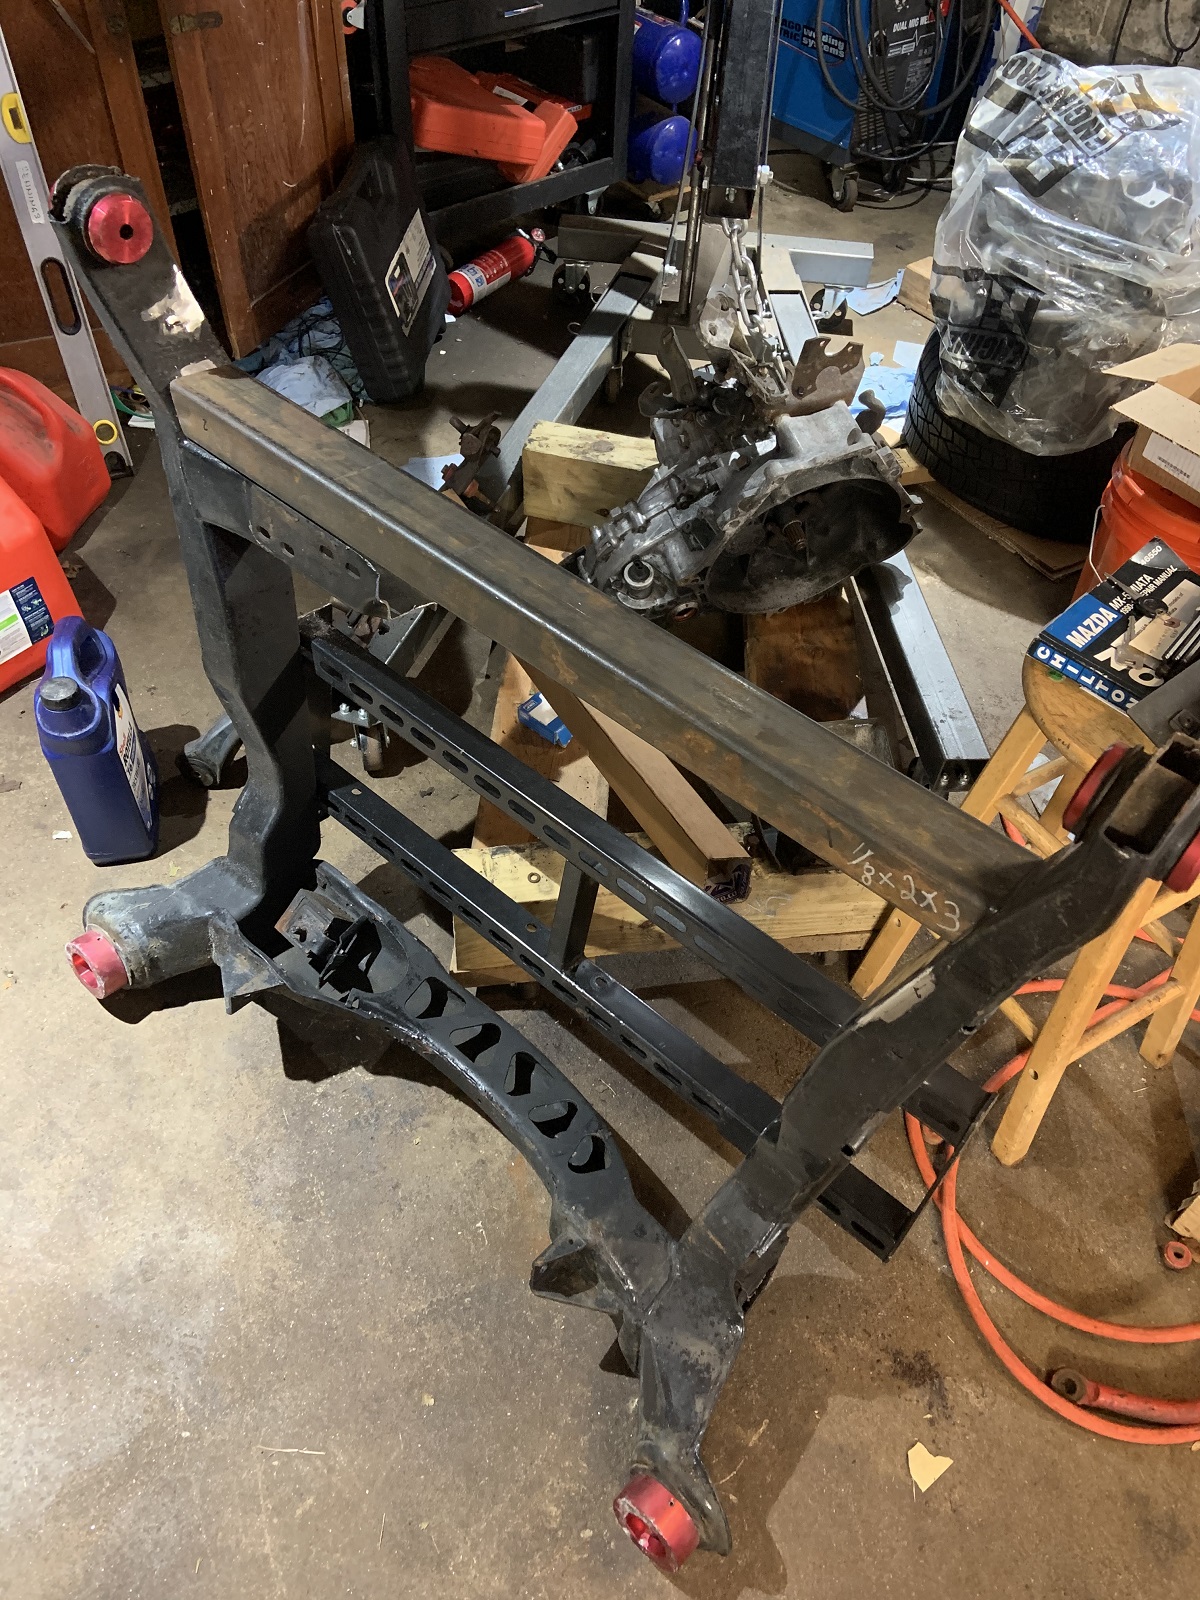
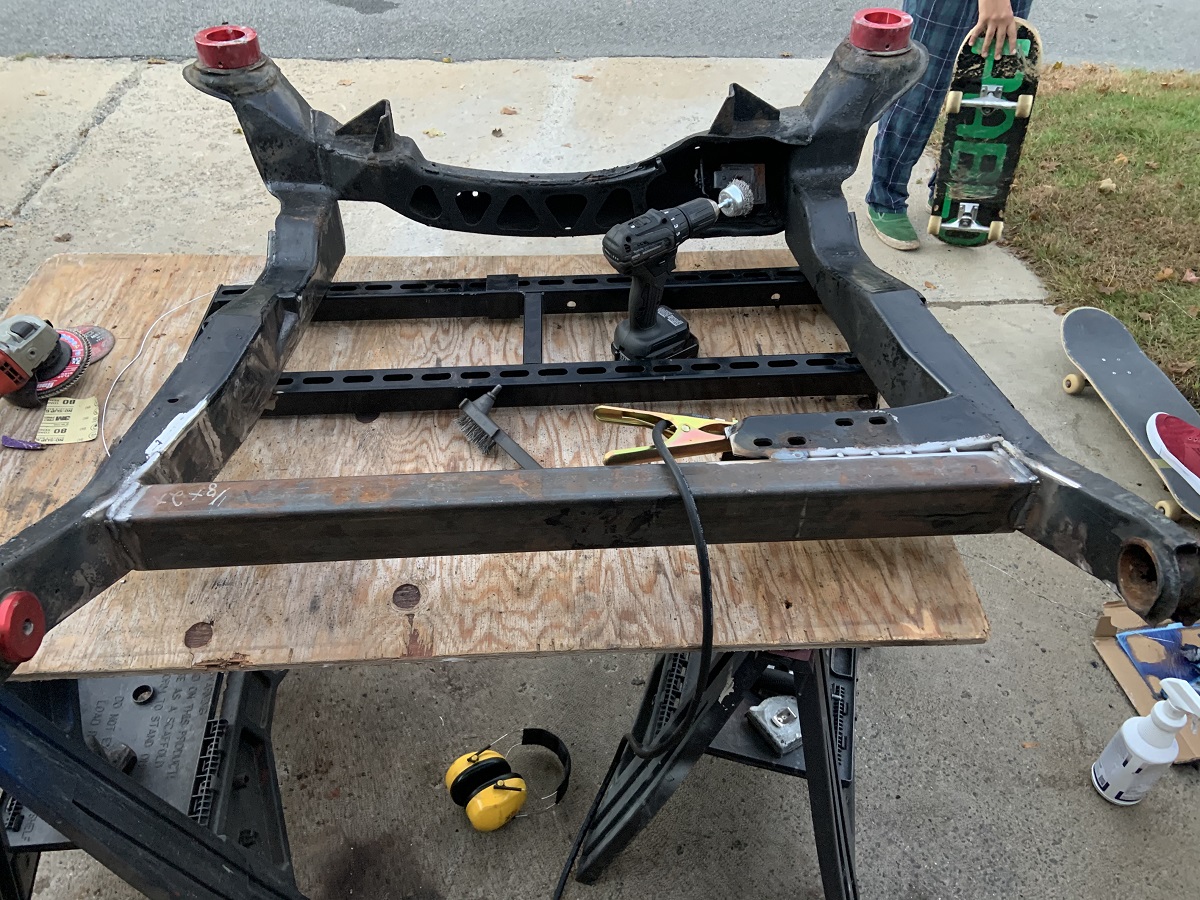
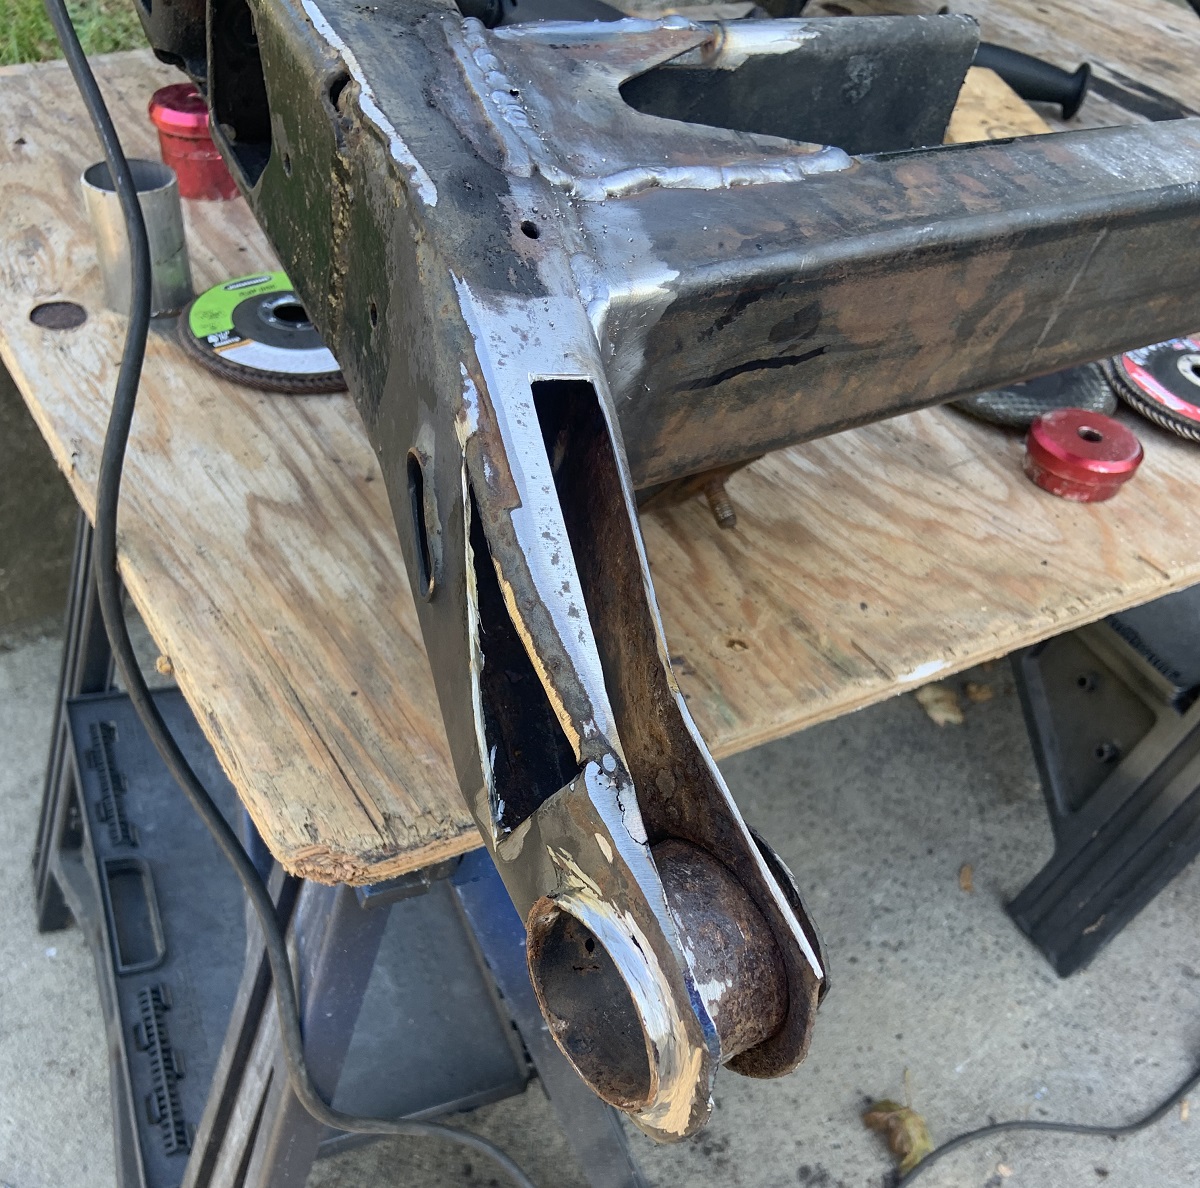
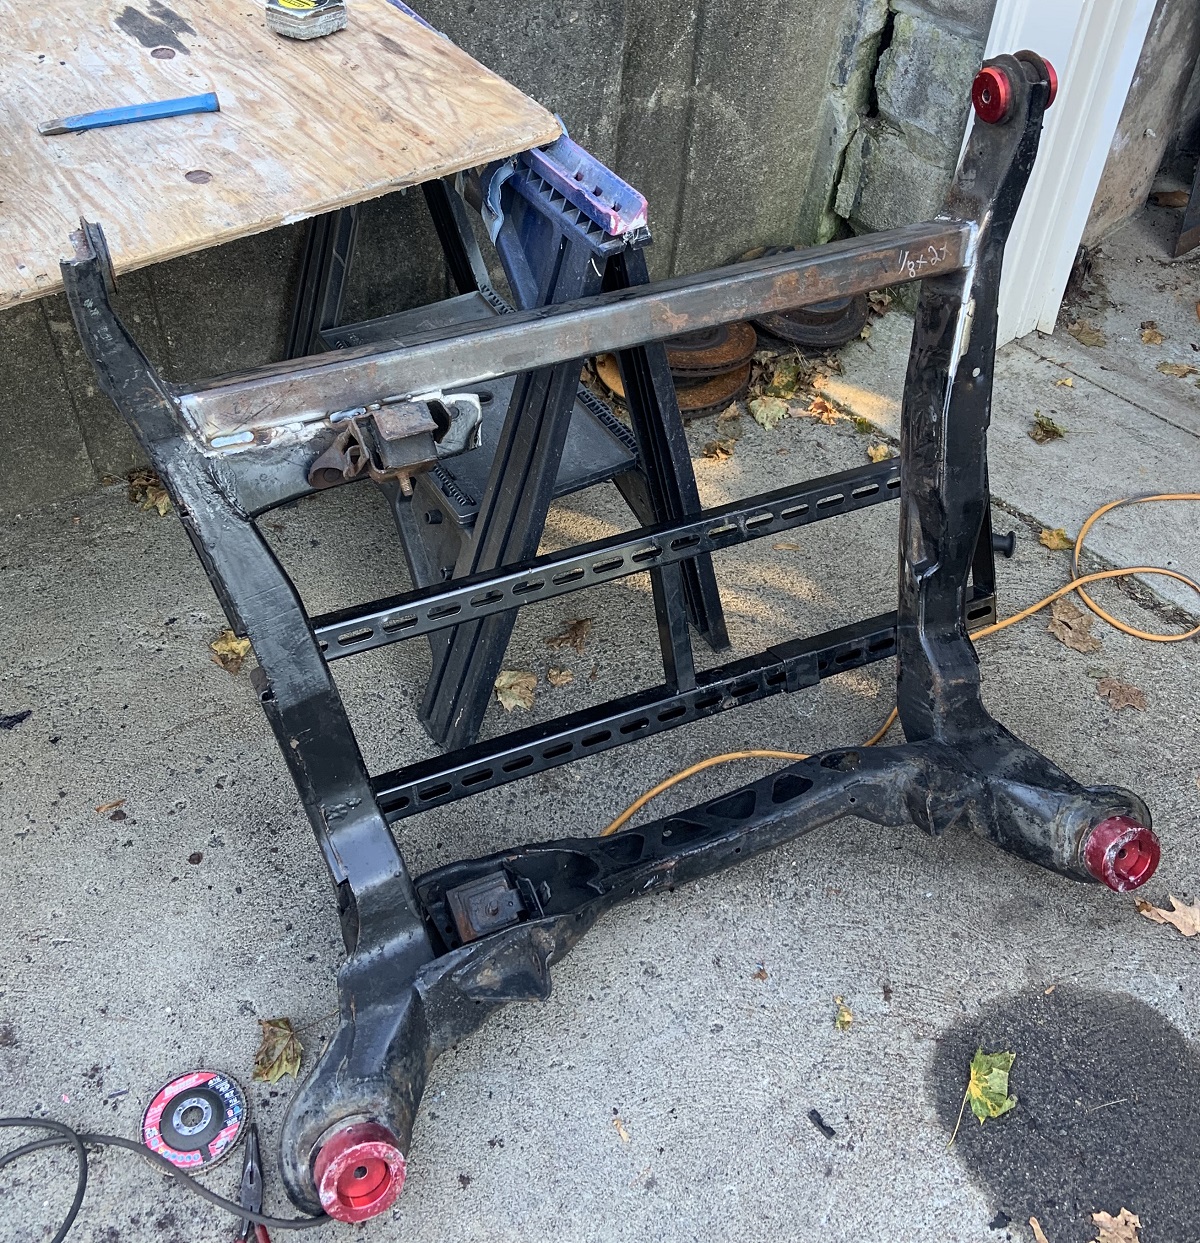
I stripped the cradle, removed the transmission and mounts, removed the sway bar and control arms.
I cut the motor mount off and ground it flush, shaved off the ears that hold the springs that support the exhaust on the firewall side of the cradle as they interfere with the new crossmember, and I cleaned up areas where I will weld bracing to the cradle before removing the original front crossmember. The bracing I am using is one of the seat frames from the bus, it is straight, strong, and pretty thick steel. I cut some extra metal off of it and ground the paint off where I will weld it to the cradle. I also started to cut the crossmember off but only cut it off halfway where the bracing may make it harder for me to access the crossmember with the angle grinder. Then I welded it with 3 strong tacks per corner.
That's all for now but progress has kicked back off and I'm itching to get this done. I have decided no headers for now, it will add too much time and cost for my timeline and budget, but will be a cool future project. I will use the stock manifolds for now and help them flow better with any modifications I can make, and I will probably modify the old exhaust to work with it. It is 2.5", so I may decide to rebuild it with 3" stainless, especially as it is so short, but we will see when we get there.
|
|
|
|
zkhennings
|
OCT 14, 10:48 AM
|
|
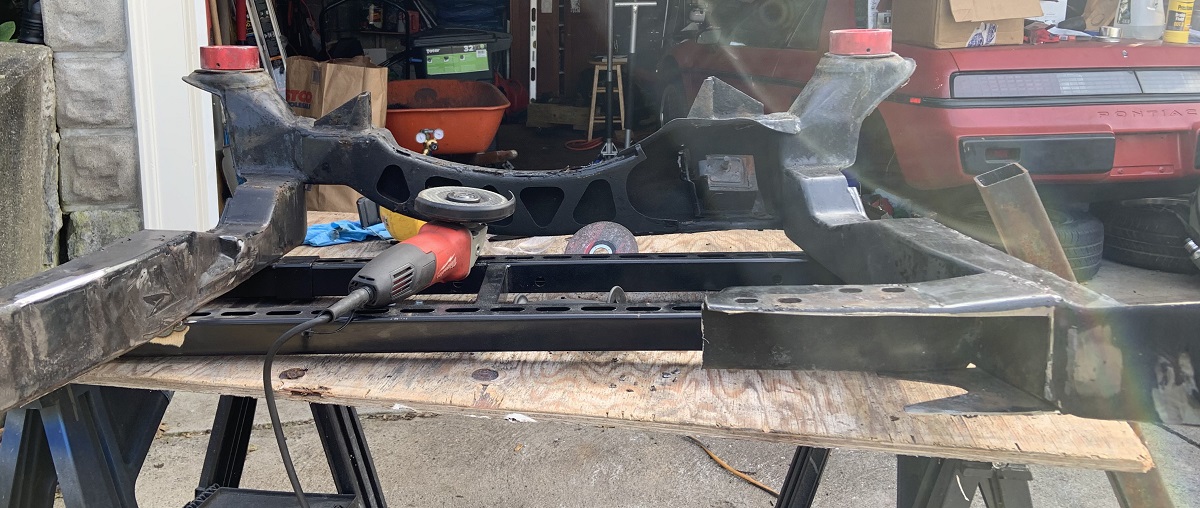
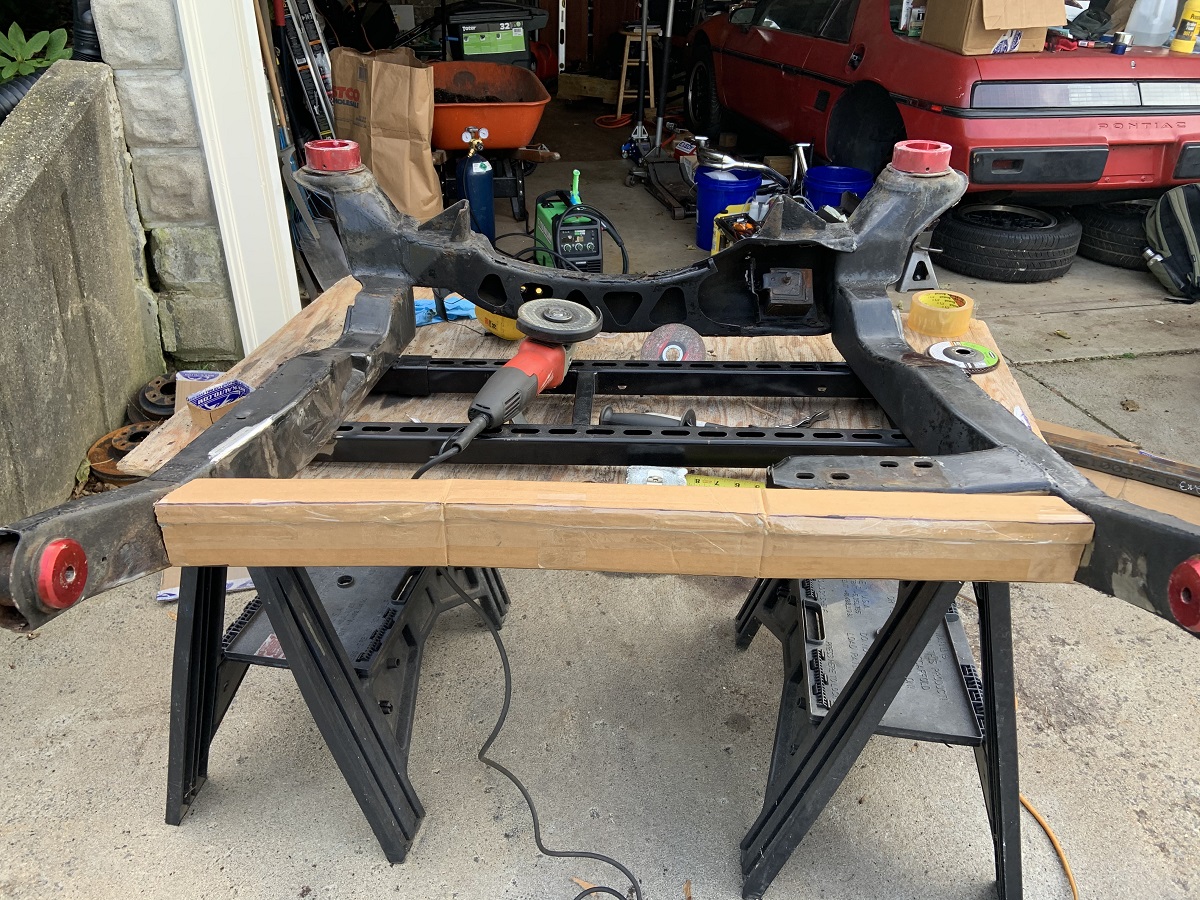
Had a few hours here and there this week after work to keep working on things.
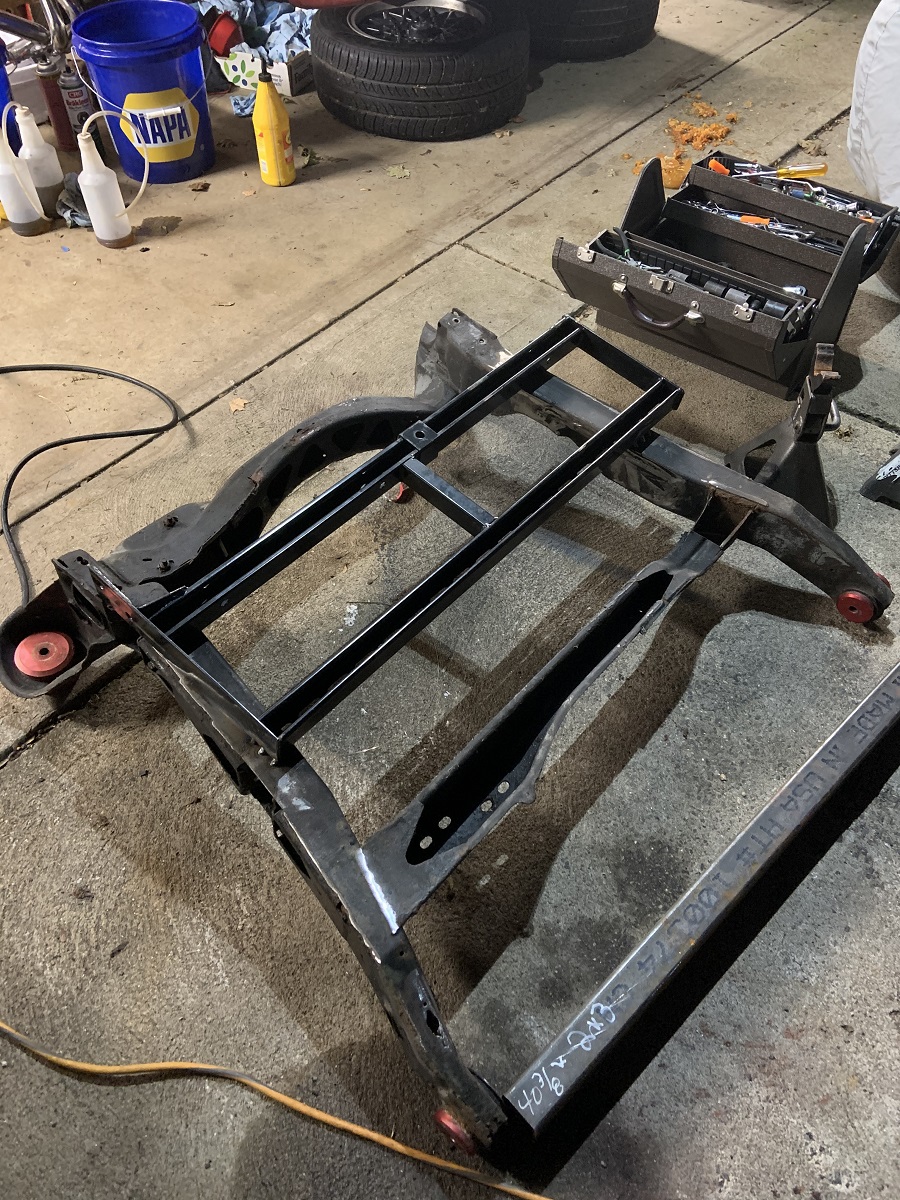
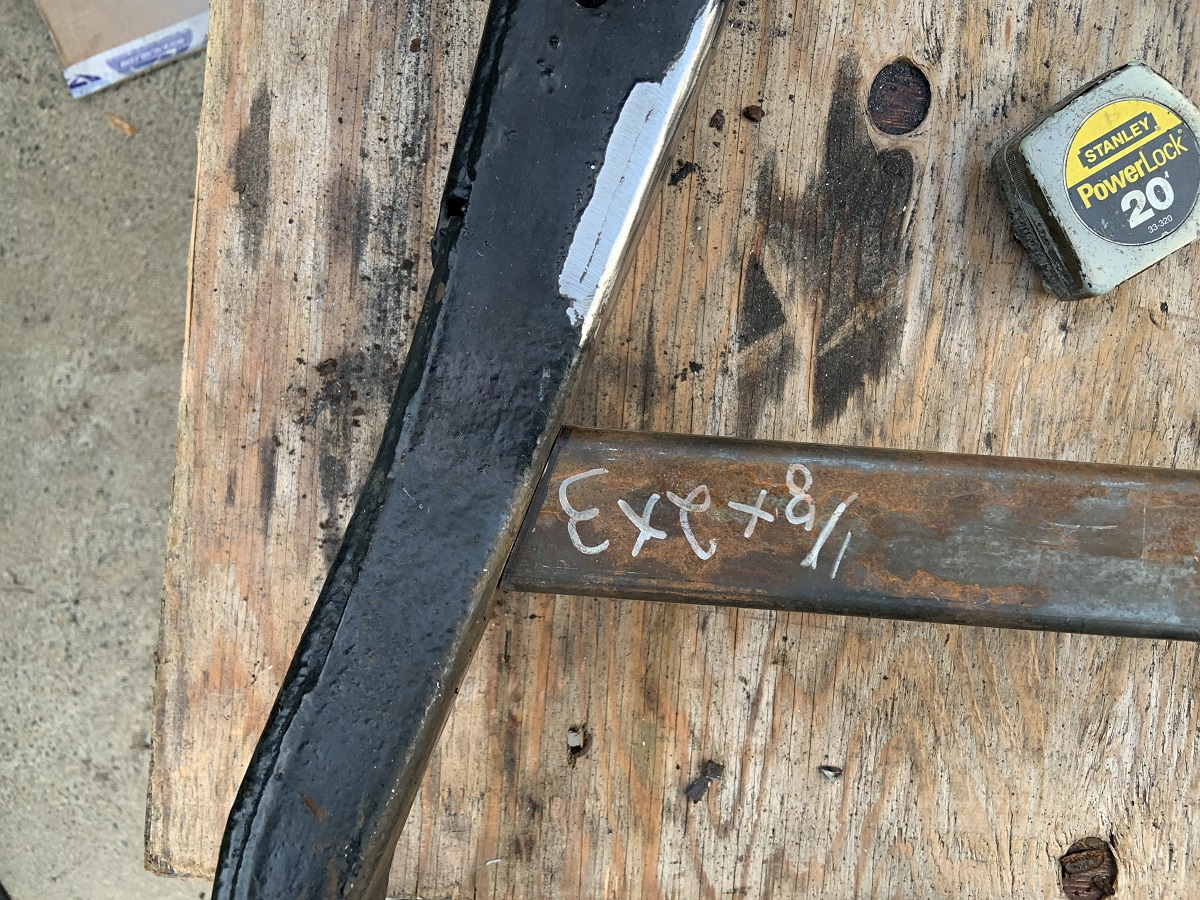
I cut out the crossmember after the transmission mount.
Then I cut out the front facing wall of the remaining crossmember in a rectangular cutout so that I can butt the new crossmember up to it.
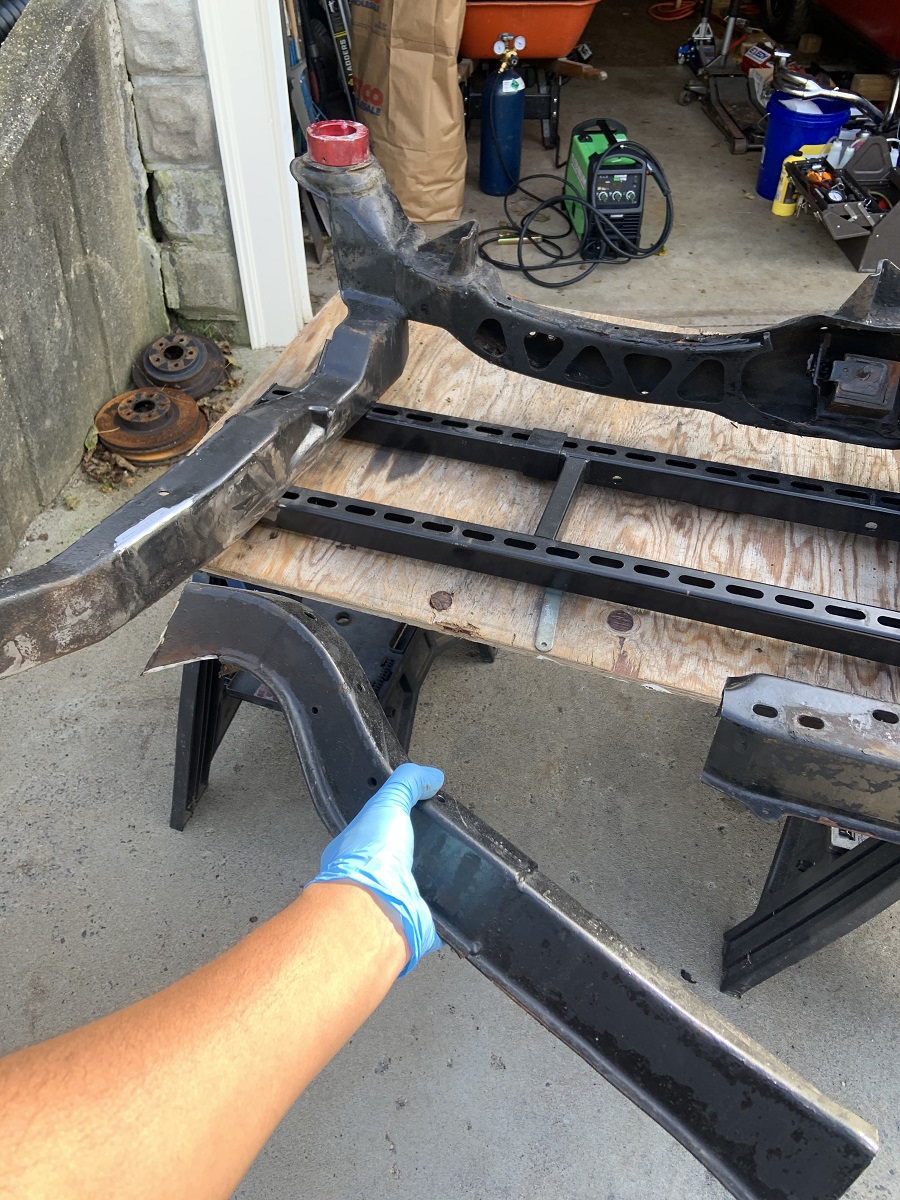
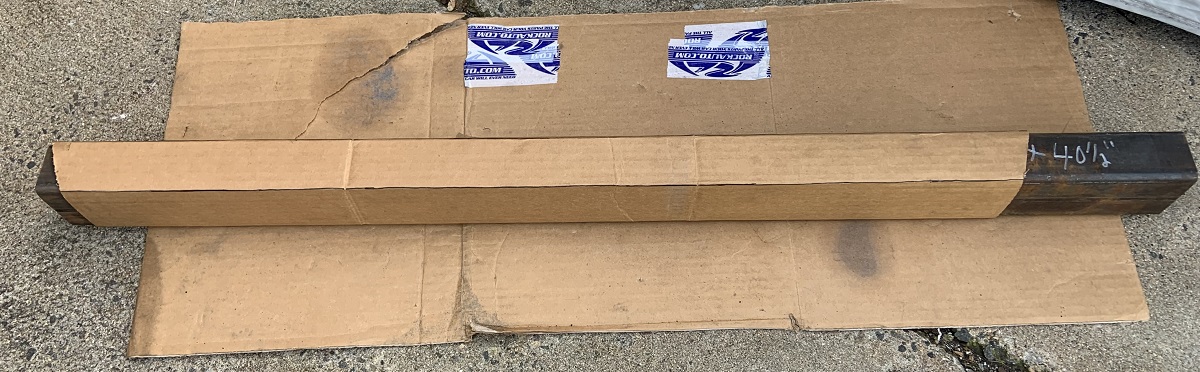
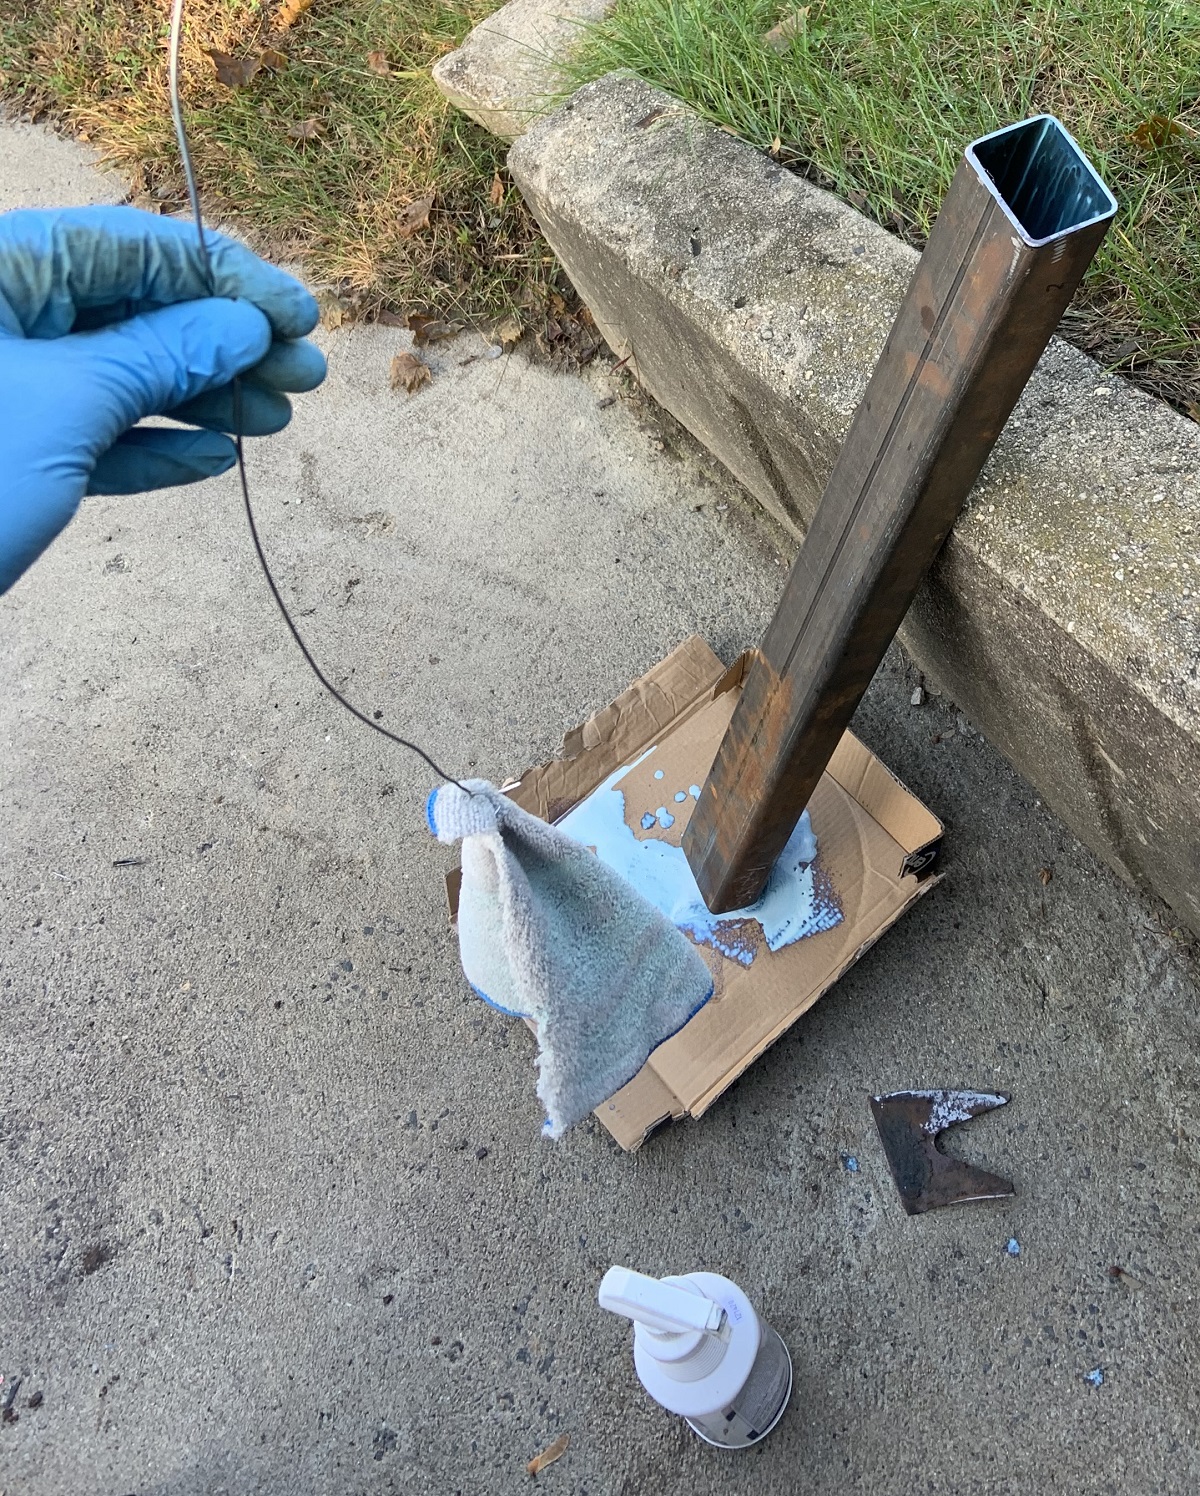
Time for some CAD, first made a cardboard tube by wrapping cardboard around the 3"x2" steel tubing. I used sharpie to draw in the corners to help me keep its shape.
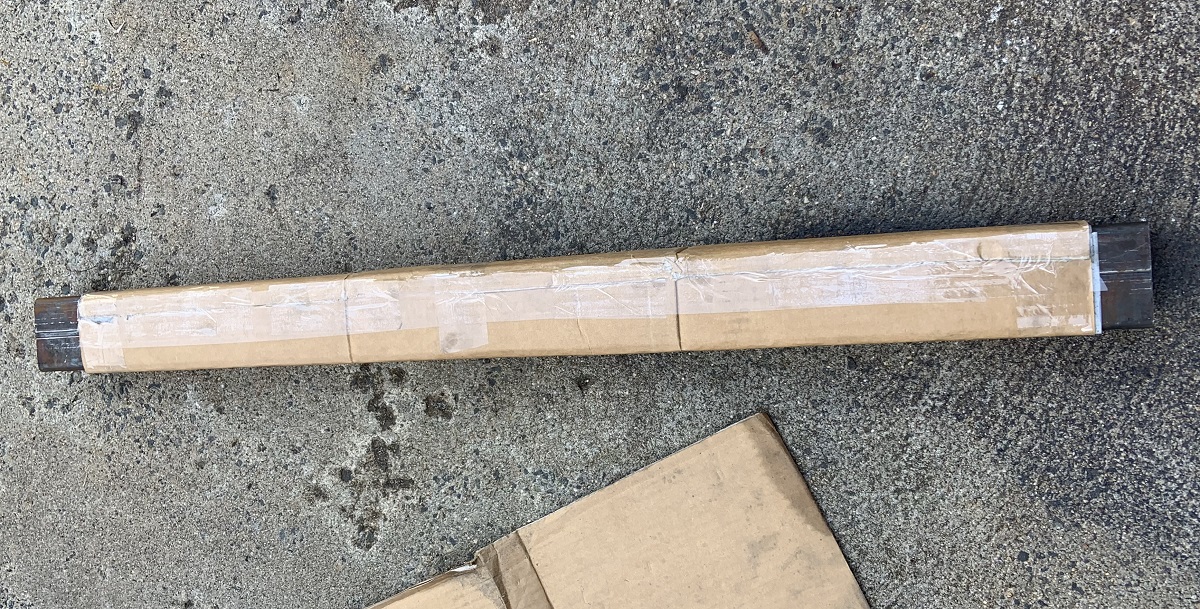
I slid the CAD off the tube and trimmed it until it fit nicely.
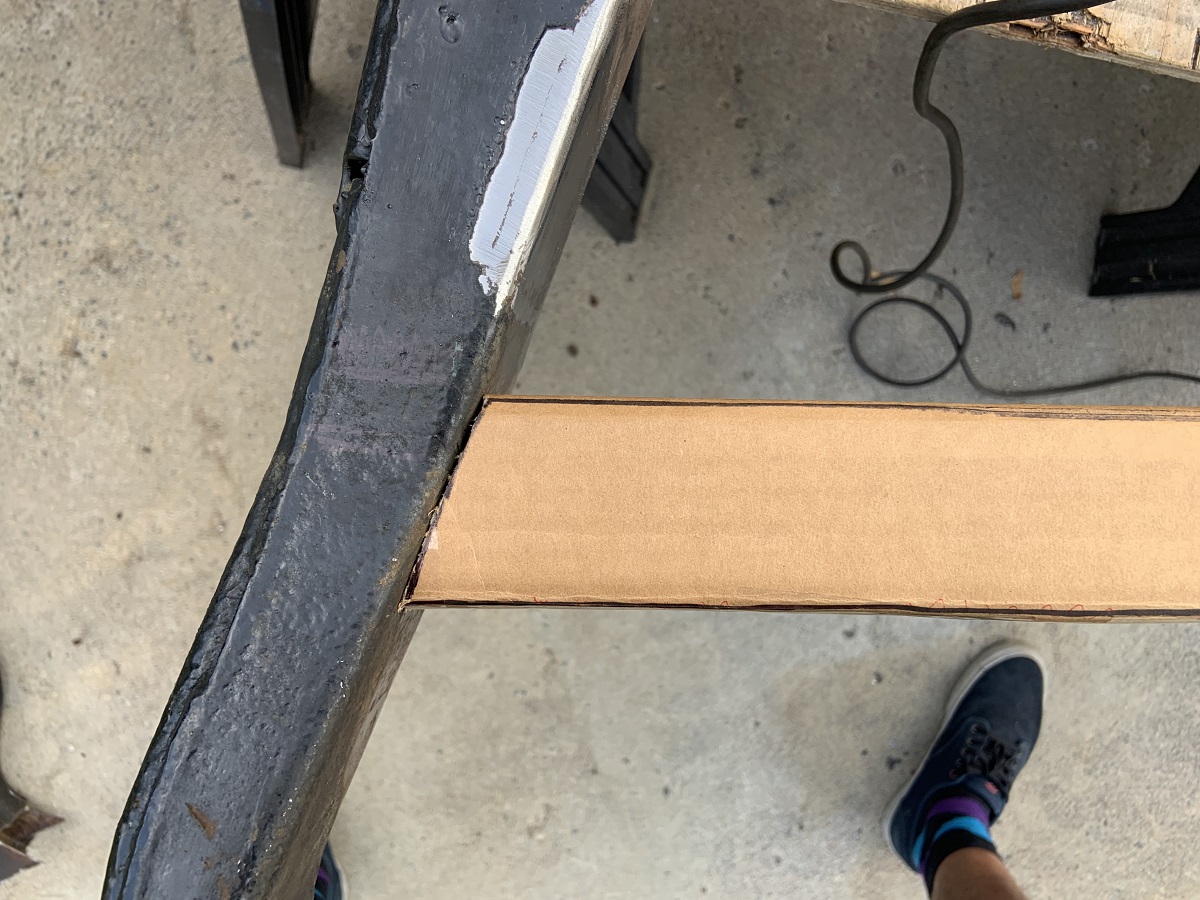
I slid the CAD back onto the tubing and marked it with sharpie and cut it out with the angle grinder. I left some extra material so I could trim it down to the perfect fitment. Once it was very close I used the belt sander to get it nice and flat.
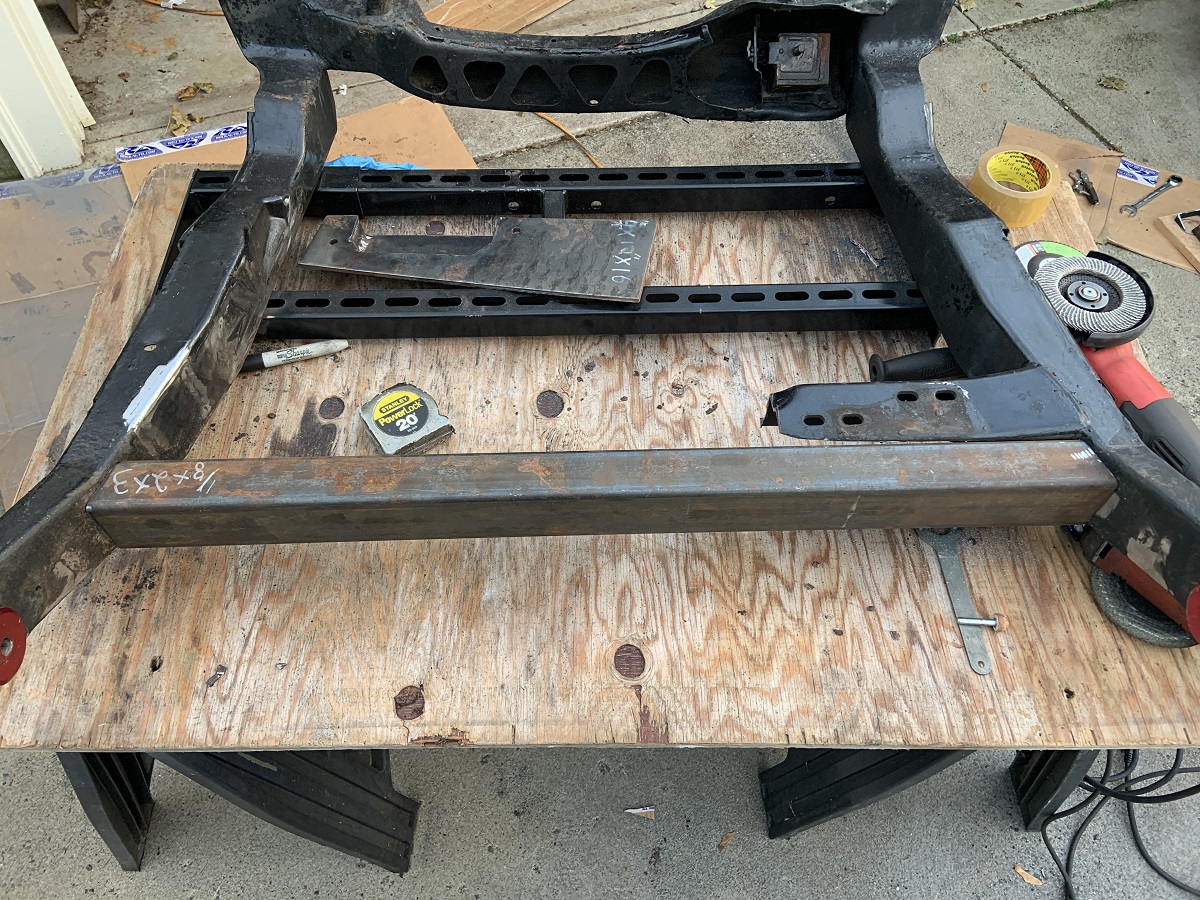
It fit really well so I prepped everything for welding, painted the inside with a rust reformer after cleaning it all up, and welded it up. I took my time and moved all around doing beads to keep things from warping. I wasn't worried about things twisting because the seat frame is very stiff, but I was worried about the front bushings warping closer to each other, so I periodically checked the distance between them. They stayed the same the entire time I welded in the new crossmember.
I painted the inside with half a microfiber towel on a wire I pulled through the tube a few times while it was saturated with rust reformer.
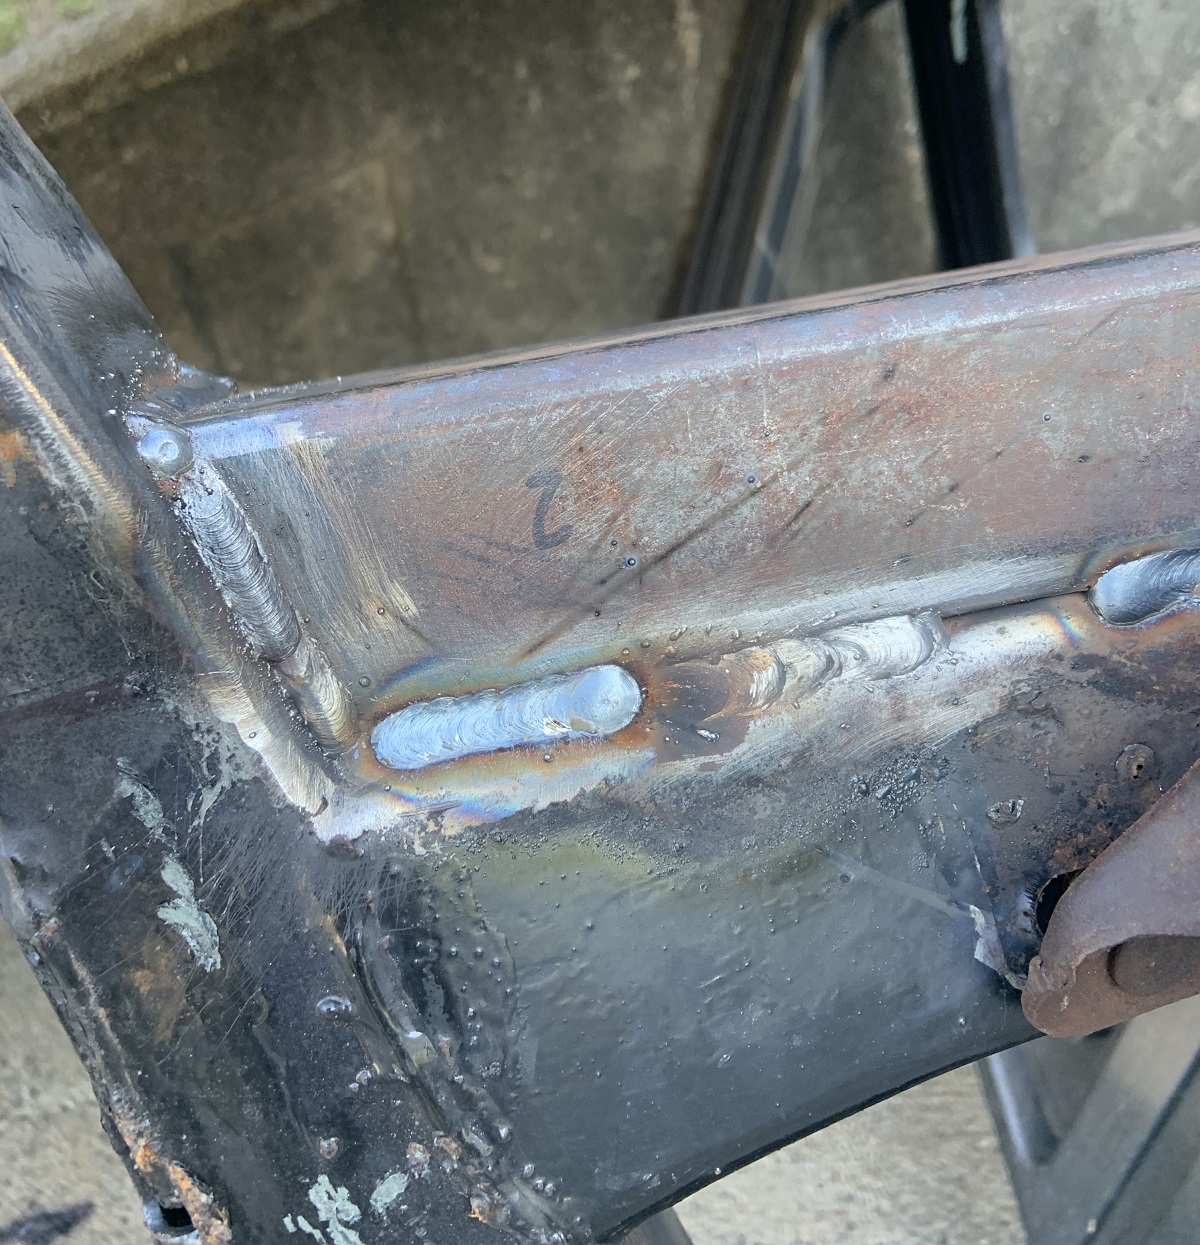
Then I cleaned up all the welding areas and got to welding. Welds came out decent, I realized near the end that I rush and will weld in weird positions where I cannot watch the bead sometimes, and those welds come out consistently worse than when I set up properly and can watch the weld. Things to change moving forwards.
I then welded the brace that was originally on the bottom of the crossmember back in. I figured that since it hadn't warped and the tube was welded in fully that I didn't have to worry about it anymore and I welded it on fast. Well the heat caused the bushings to move 1/16" closer together after that, I don't think it will cause me any issues but a good reminder that you really have to take your time if you can't move around as much with your welding. I also found some more rust and started doing some rust exploration.
I did not like what I saw, not pictured here but there were massive parts of the sleeve missing that were rusted out. I looked online and saw Rodney offered new weld in sleeves so I bought some and cut/hammered the old sleeves out.
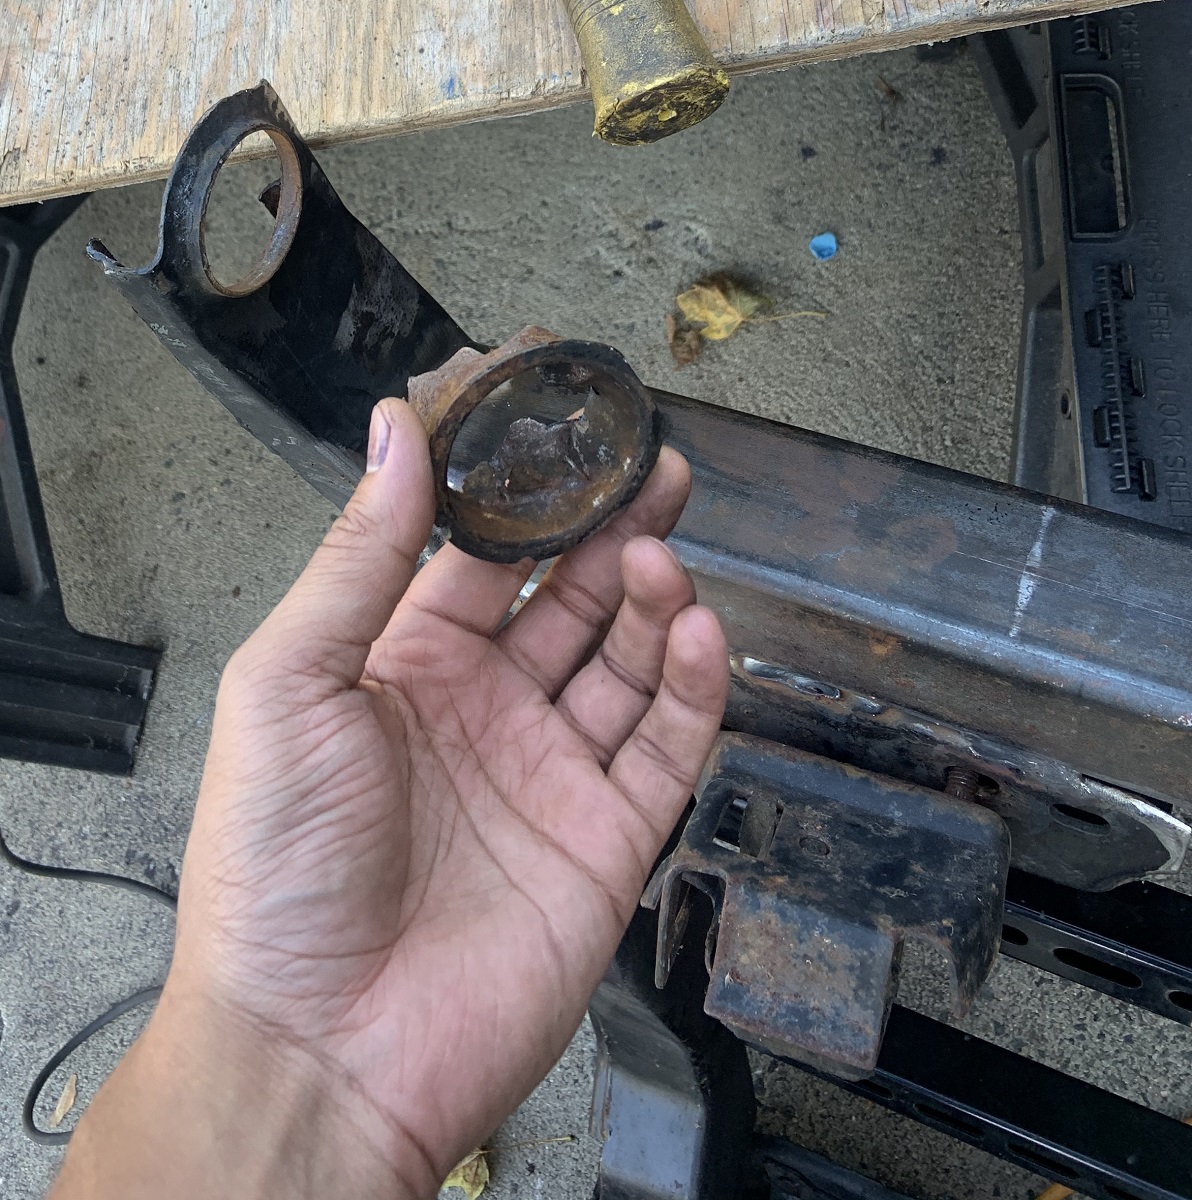
I will fix all the rust in there, weld in new metal, and weld the new sleeves in when they arrive. Here you can mostly see the extent of what I removed.
And finally I spent time with the die grinder and some carbide bits to clean up the motor mount I welded, my arms are full of steel splinters right now.
Still have to box off the remaining original crossmember. I wanted to have the cradle all finished before posting but pics were backing up. More to come soon.
Also a question, should I leave the square tubing sealed off or add lightness to it by using a hole saw to cut some metal out of either the bottom or the sides? I don't want it to rust, and I am worried that if I leave it sealed that moisture will work its way in and rust it from the inside out.[This message has been edited by zkhennings (edited 10-14-2021).]
|
|
|
|